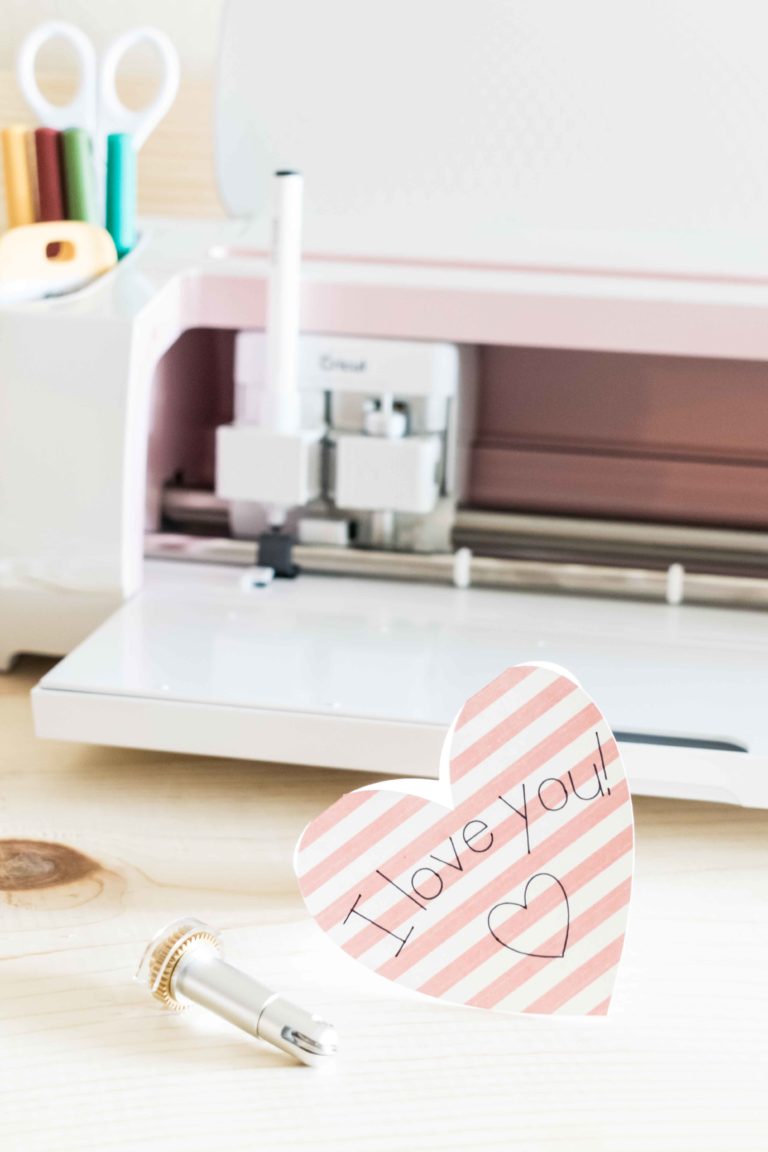
Hello Daydreamers!
Get ready because today’s tutorial is full of juicy tricks. You’ll learn how to “Print and NOT Cut” with your Cricut machine.
I’ve been thinking about this tutorial/hack since I got my machine (three years ago), and finally, an idea light turned on.
This tutorial will be divided into three different sections.
- “Print and NOT Cut” text with Cricut; is a common error when beginners start and can’t understand why their machine is cutting the letters inside their project. They only want to cut the outline of it.
- The second section will cover how to “Print and NOT Cut” certain areas inside your project. Let’s say you want to add a title to a sticker sheet but don’t want to cut it.
- To top it off, I’ll also present you with a case on how to “Print and NOT Cut” the background of a project plus will show you how to cut out the dreaded black box, so your sticker sheet comes right off the mat without any additional trimming.

Before we get started, I would like to mention that this tutorial requires some understanding of Cricut Design Space. It’s not a beginner tutorial, but don’t knock it until you try.
Here are other tutorials that you may refer to in case you get a little lost, or the cuts aren’t aligned as they should:
- How Print Then Cut with Cricut
- How to make stickers with your Cricut machine
- Weld, Attach and Group in Cricut Design Space
- How to calibrate your device for Print then Cut
Tip: This tutorial builds upon the skills I teach in every step. If you’re just starting with your machine, I suggest you read and follow each step.
How to Print and NOT Cut text on Cricut
Take a look at the following screenshot.

On the canvas, they look identical.
You would most likely expect this project to cut around the white rectangle containing the text.
Right?
However, look how different they look on the layers panel.
One of the “You got this” is flattened, meaning I selected both layers and clicked “Flatten” at the bottom of the layers panel.
The second “You got this” is attached, and each layer has the “Print Then Cut” operation.
Let’s see what happens when we cut this project.

Click “Make it” and “Continue” to print and select material.

After printing, I set the material to “Copy Paper,” installed fine point blade, and loaded the mat to the machine.

Here are some real-life pics.


As you can see, both designs look identical, but after the machine is done cutting the rectangle that was “Flattened,” it performed only one cut, the outside of the rectangle. On the other hand, the ” Attached ” design cut the rectangle and the letters inside it.
Each technique has its place (I will show you later on); therefore, use the one you need for your project.
When making a “Print then Cut” project, you’ll need to “Flatten” most of the time. On rare and advanced occasions, you may use “Attach.”
How to Print and NOT Cut Text and Shapes on Sticker Sheets
If you’ve ever made stickers with your Cricut, I’m almost sure you’ve wanted to know if there’s a way not to cut some aspects on your sticker sheet.
Maybe you want to add a title or tiny elements to decorate your project. Some of the most astonishing sticker sheets I’ve seen have all sorts of details outside the stickers.
Step 1 – Making a Print Layer
To follow along, you can open this project in Design Space.
In this project, you’ll find some hearts, stars, shapes, arrows, and a title. I plan to make a sticker sheet with all of them, but I don’t want to cut the arrows or the title.
The key to accomplishing this is to make a “Print” and a “Cut” layer.

Let’s work on the “Print” layer first.
Add a square to the canvas from the “Shapes” icon, and change the size to the max size we can with a letter-sized paper (6.75 x 9.25 in). Don’t forget to click on the little lock to unlock the square’s proportions.
Change the color to white from the color box next to “Operation,” then right-click on the rectangle and select “Send to Back.”

Select all the illustrations and the title and click “Group” on top of the layers panel.
After grouping, select the rectangle and the group, click on “Align” on the top menu, and select the option “Center.”

Once you align the stickers and the rectangle, keep the selection, click “Duplicate” on top of the layers panel, and move the copy to the right.
Critical: Spacing on both layers must remain identical. Don’t move the stickers or rectangle anymore; otherwise, the cut will be misaligned.
Step 2 – Making a Cut Layer

The left (original) copy will be the “Print” layer, and the right (duplicate) copy will be our “Cut” layer.
Select the sticker group on the “Cut” layer, and delete the elements you don’t want to cut from the layers panel.
Learning Tip: You can delete a particular detail from a group from the layers panel but not from the canvas.
I deleted the arrows and the title.

You could be done at this point by flattening the rectangle and illustrations of the “Print Layer,” changing the operation of the rectangle and stickers to “Print then Cut,” and attaching both layers, therefore creating the “Cut Layer.”

Step 3 – Add a Bleeding Effect (Optional)
If you like a “bleeding” effect on your stickers, let me show you how to proceed. If not, you can skip to the next step.
Before changing any operation or flattening, select the group on the “Cut Layer” and click on “Weld” at the bottom of the layers panel to have a simple layer.
Select the “Weld Result” and click on “Offset” on the top menu and add a negative offset anywhere between -0.015 and -0.02.
Select the “Square” option to keep the angles sharp and click “Apply.”


Keep the new layer and delete the other one.
Important: You may lose some little details on the stickers if you decide to create a “bleed effect.” Therefore, make sure this step makes sense for your project.

Before we move on, go ahead and select the rectangle and stickers on the left copy and click on “Flatten” to complete the “Print Layer;” then, change the operation of the two layers that make the “Cut Layer” and “Attach” them.
Click on “Make it” to continue.
Step 4 – Printing & Cutting Process
Here’s the mat preview.
There are two different mats to cut. We will print the first and cut the stickers on the other. Don’t move anything on your mat. Everything has to remain in the exact location.
Click on “Continue.”

Send the “Print Layer” to the printer. I turned off the bleed, but it doesn’t matter because the edge of this design is white.

Important: After printing, tap on the “Cut Layer” on the left panel.

We’re not going to print that layer; however, you need to click on “I’ve already printed” so you can move forward.
The sticker paper I’m using is relatively thin, so I selected the option “Copy Paper – 20 lb” and set the pressure for more.
If your sticker paper is thicker or you don’t know what material to select, check my tutorial on how to add a custom material in Design Space.
Now, let’s move to some real-life pics!


Place the sticker sheet on the mat, load it to your machine and press the flashing go button to start the cut.
When the cut is done, unload the mat, remove the project, and with a paper trimmer, cut the black frame so you have a nice-looking sticker sheet.
Look at these results!


With the bleed effect, you won’t have any white marks on the paper; without the bleed effect, you may have some white edges on the stickers.
No matter how calibrated your machine is. There’s always going to be a little marge or error.
Do you notice how the title and the arrow stay on the sheet?
Print and NOT Cut Background and get rid of Back Frame in Design Space
There are many scenarios when you design, and as you go and practice, your brain will come up with a new idea.
For instance, have you seen sticker sheets with a cool background, and the stickers are on top? I’ve wondered how to make cool stickers with some of Cricut’s patterns.
I always used “Flatten”; therefore, I couldn’t do stickers with the background because Cricut would’ve cut a rectangle.
In this case, we don’t need a “Print” or “Cut” layer; we need two separate layers.
Check out the project in Design Space.
The first layer is a rectangle with a “Print then Cut” operation and pattern as a “Print type.” The second layer is a “Flatten” layer of my stickers.

Do you remember we used a paper trimmer to remove the black frame that serves as a sensor mark?
Well, how about we cut that step?
Duplicate the background and send it to the back, then click “Align” and select center.
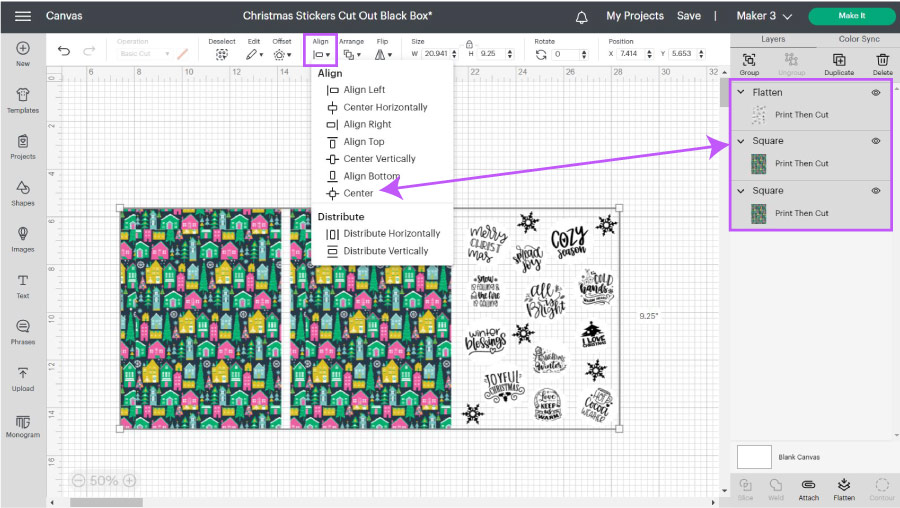
Keeping the selection, click “Attach” so everything is together on the mat.
Since we have two background layers, Cricut will make two passes on the rectangle and only one on the stickers. Since my sticker paper is so thin, two passes will be enough to make a full die cut on the rectangle.
Tip: If your sticker paper is thick, you may need to add a third or fourth copy of the background, or better yet, make a test cut to see how many passes it takes to die cut it instead of kiss cut.

Click on “Make it.”
If everything seems right, click on “Continue.”

Send your project to the printer and select the material, I did copy paper with more pressure.

Place your project on the mat, load it to your machine and start the cut.


Do you see how the sticker sheet leaves the ugly frame behind?
I absolutely love these stickers.


Sooooo helpful and very much appreciated! I didn’t find the answer to my exact question but learned a ton of other things while reading this post that will come in handy.
Thank you so much Catalina! I am new to Cricut and was wracking my brain trying to figure out how to print and not cut everything that I printed. Your example number two answered my question. And just for fun, I tried example number three and that worked as well. Your examples belong on the official Cricut YouTube page. Thanks again!
You’re very welcome 🙂
Thank you SO MUCH for posting How to Print and NOT Cut shapes! The people at Cricut couldn’t even answer this!
Yay! Glad it worked for you 🙂
I would like to get rid of the black lines that Cricut needs to cut sometimes. Then I could print and cut myself. 🙁
The lines are what tell the cricut where to cut. But with the tips on the tutorial you can get rid of the box by doing an extra cut.
Thank you, thank you, thank you! I was just able to figure out how to print and NOT cut shapes on sticker sheets. Made my day. (I never would have figured it out on my own!) I am just wishing I had read this before I put together my sticker page. I did them in a square (6.75 x 6.75), so I am wasting a lot of expensive sticker sheet real estate. But the result is still beautiful and satisfying.
Yay! I’m happy to hear 🙂
Hello! Thank you so much for your blog that save me time & well explained.
I can finally create my stickers as I wanted !