Hello Daydreamers!
Today’s tutorial will teach you how to add a custom material to Cricut Design Space.
In your crafting journey, there may be a point you may want to cut something that isn’t listed on Cricut’s materials. Or there may be a point where Cricut’s settings may not work with a type of vinyl or paper you have on hand.
Cricut does a pretty good job listing all sorts of materials when you want to cut a project. However, most of those settings apply to Cricut materials.
I’ve bought all sorts of glitter cardstock, sticker paper, faux leather, etc., that differ in thickness. Had I not added a custom material and tested a cut before cutting an entire project, I would’ve wasted a lot of material.
Ready to learn how to add a custom material?
Step 1 – Analyse your Material
You see, adding material is the easy part. The hard part is testing to see if that setting works or not. I always recommend you start with a setting that’s similar to the material you’re working with.
For instance, let’s say you want to cut “sticker paper.”
Do you know how many brands of sticker paper are out there?
You can try to use Cricut’s settings, which I’ve done in the past, and they work for me (when I select “sticker removable”).
However, they may not work for you. And if that’s the case, you need to add a custom material.
Let’s continue using sticker paper as a reference for this tutorial.
Sticker paper has a carrier sheet and the sticker paper itself.
Now, ask yourself.
- Do you want to cut through the carrier sheet and make die-cut stickers, or do you want to make kiss-cut stickers where you can bring the sticker sheet with you and peel off as you go?
- Does your sticker paper feel thick or thin?
- Is the carrier sheet thick or thin?
Let’s suppose that the sticker paper is very thin, but the carrier sheet feels thicker, and you want to add custom settings for die and kiss-cut stickers.
We need to add two new custom materials, and the best way to start is by looking at materials just like your sticker paper as a reference.
Step 2 – Manage Custom Materials
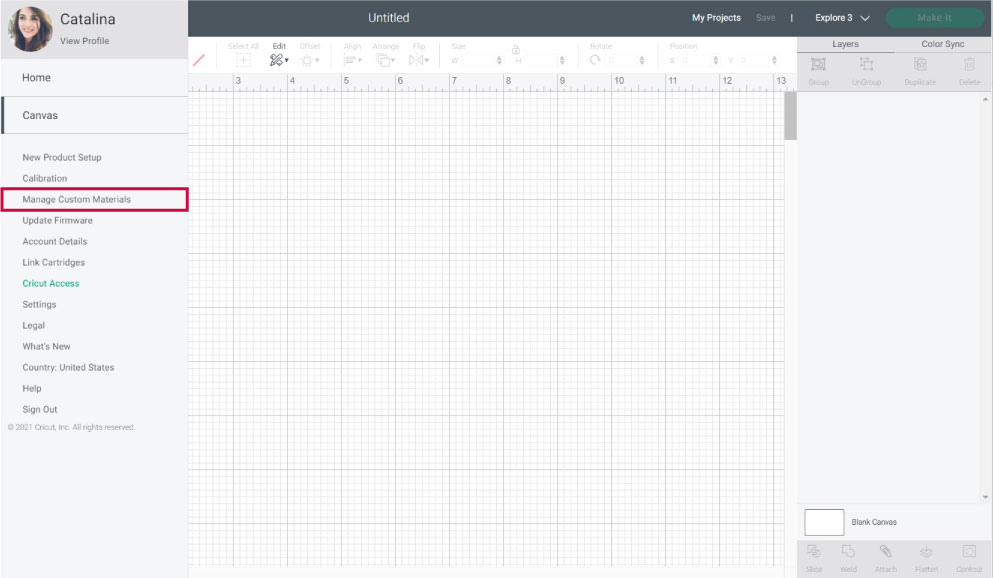
To add new materials, click on the toggle menu on the upper left corner in Design Space (from the “Home” or “Canvas” interface) and select “Manage Custom Materials.”
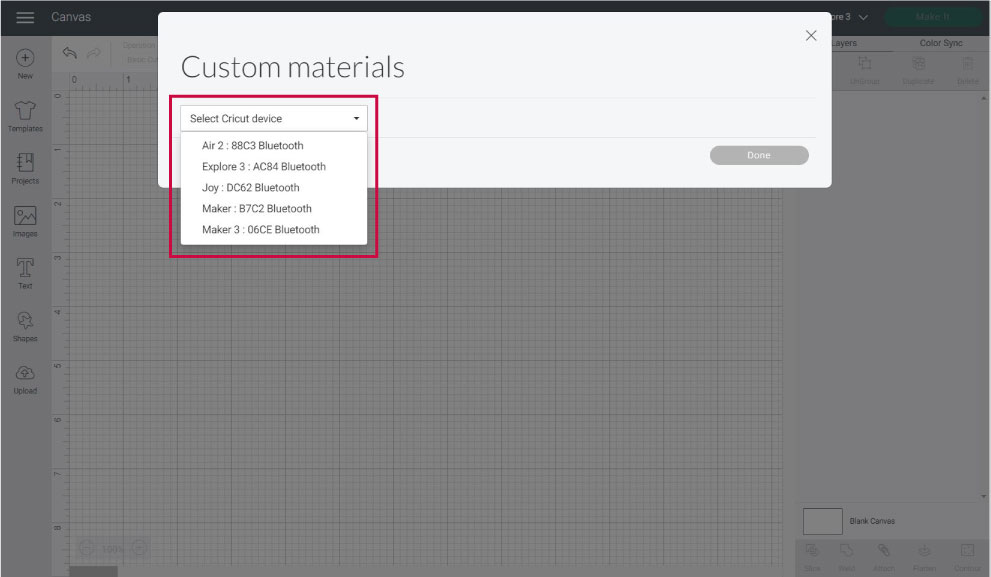
A small window will pop up asking you to select your machine.
To continue, your machine needs to be connected to your PC and Design Space.
Related: Learn how to pair your Cricut machine to your PC.
Important: Custom Materials work on a machine basis. This is no problem if you only have one machine. However, if you own more than one machine, you need to add your new materials to each one of them.
If you ever change your machine, your Custom Materials will disappear. I didn’t know this, and when I changed one of my machines, I lost a couple of materials I worked really hard to get right.
So, keep a little notebook with your settings if you plan on changing machines anytime soon.
Also, don’t think that because one setting works on the Explore Air 2, it will also work on the “Maker.”
It’s a back and forth process.
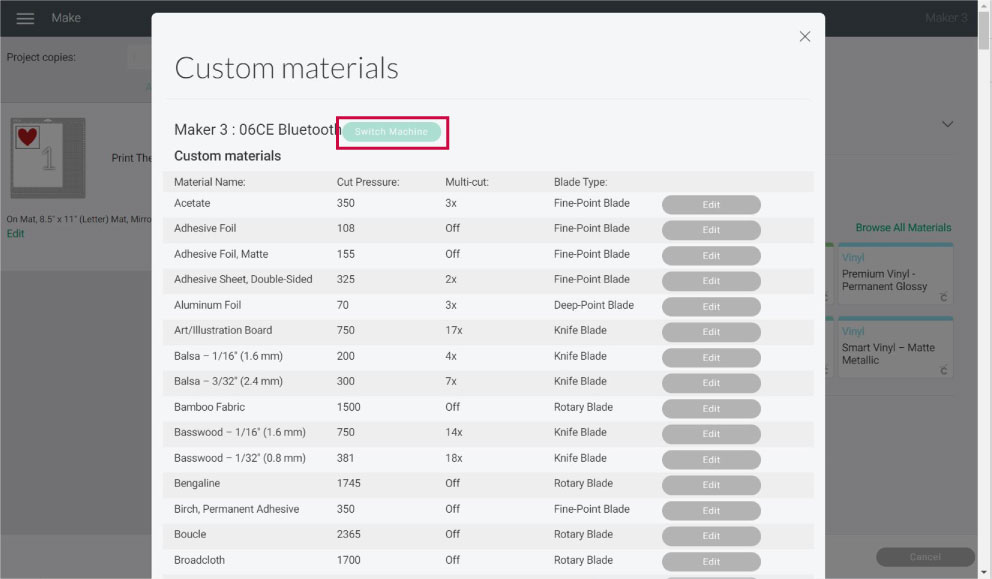
Once your machine pairs with the system, you’ll see all the materials the software has been programmed to cut.
On the “Custom Material” window, you’ll see five columns.
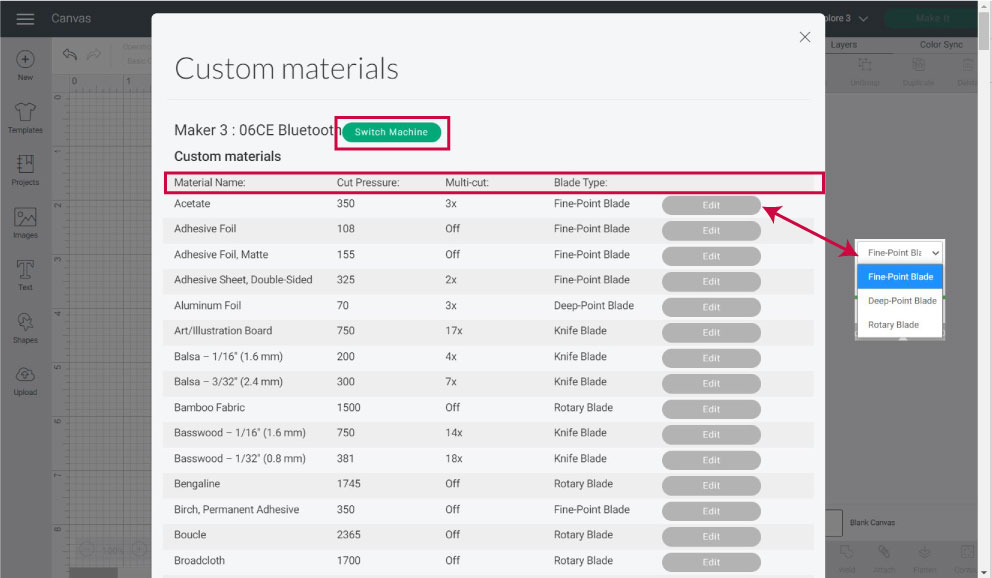
Material Name: you’ll notice they are explicit because they have the same name but different thicknesses like cardstock (light, medium, heavy).
Cut Pressure: it’s the force that the blade applies to a material to cut it. The thicker the material, the higher the pressure.
Multi-Cut: number of passes your Cricut will make to complete a cut. Some materials like “Cardstock for intricate cuts,” “Magnetic Sheets,” “Matboard,” etc., require multiple passes.
Blade Type: The standard blade Cricut uses for a particular material. You can only add new materials that use the “Fine Point Blade,” “Deep Point Blade,” and “Rotary blade.” The rotary blade is only available when you have a Cricut Maker.
Edit: It allows you to modify the settings of existing materials. You can’t edit materials that use the “Knife Blade.”
Step 3 – Add a New Material
When you scroll all the way to the bottom, there’s a text box that will allow you to add a new material. Let’s go back to our example and set up our “imaginary” sticker paper settings.
Let’s start with the “Die Cut” stickers, and in this scenario, the backing sheet is thick, like cardstock.
First, look at a material that feels the same in your hands:
Could it be cardstock? Now you have a starting point.
Scroll all the way down to add a “New Custom Material” and type in the name of the material. I like to put the regular name and then a little description.
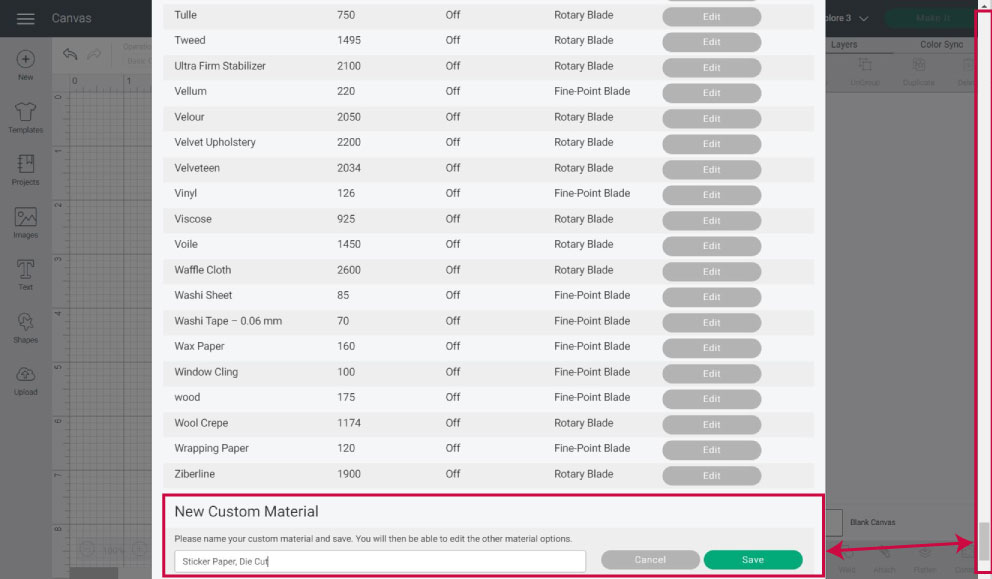
Sticker Paper, Die Cut, and click on “Save.”

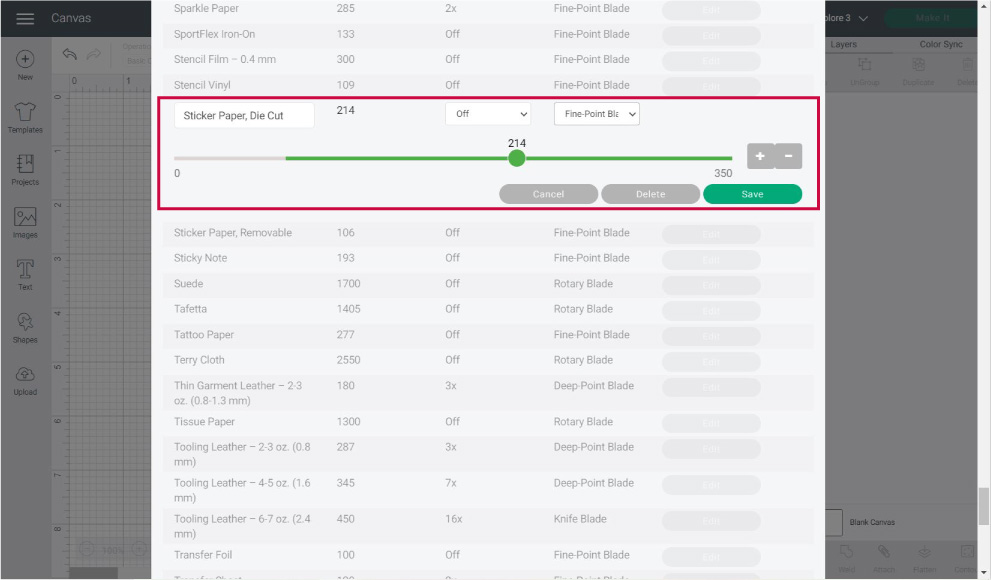
At that moment, Design Space will bring you to the material to adjust the settings. And now you can use “Light Cardstock as a reference.”
Does this mean that your stickers will cut just how you wanted them to cut?
Maybe!
However, you may need to tweak your settings back and forth before committing to a full project with your new settings. You have to do a test cut.
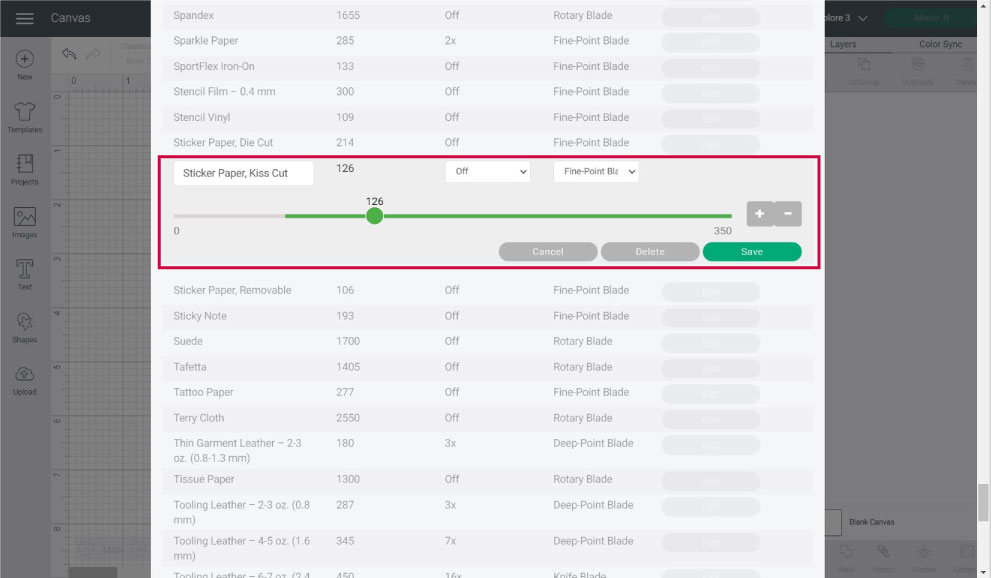
Let’s add the second material to do a kiss-cut sticker, using copy paper as a reference.

Type in Sticker Paper, Kiss Cut, and click on “Save” to edit the settings.
Step 4 – Another Way to Add a Material
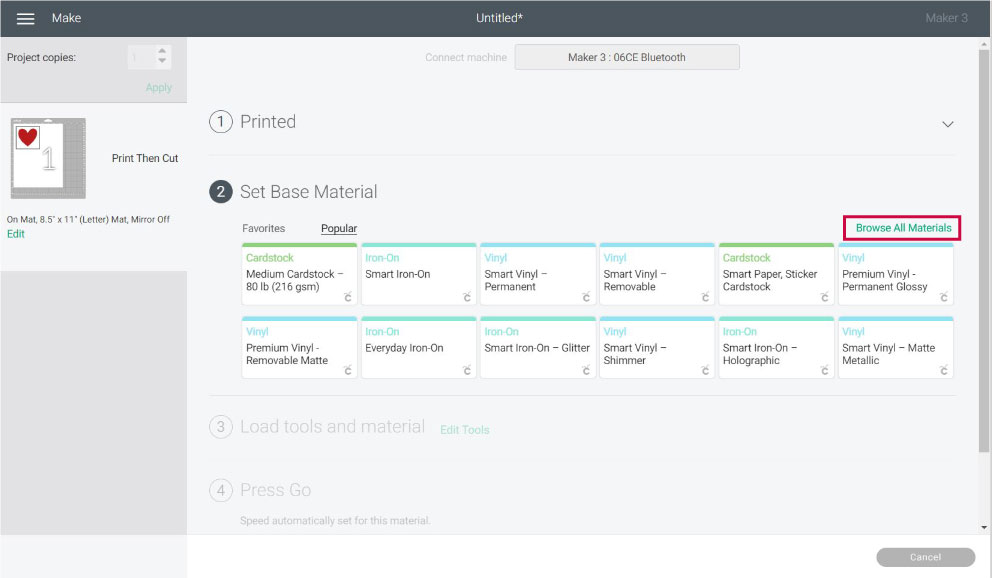
You can also add a new custom material from the “Make it” interface.
When finding the perfect pressure, I prefer editing materials from the “Make it” interface because I can repeat a test cut over and over until everything cuts to perfection.
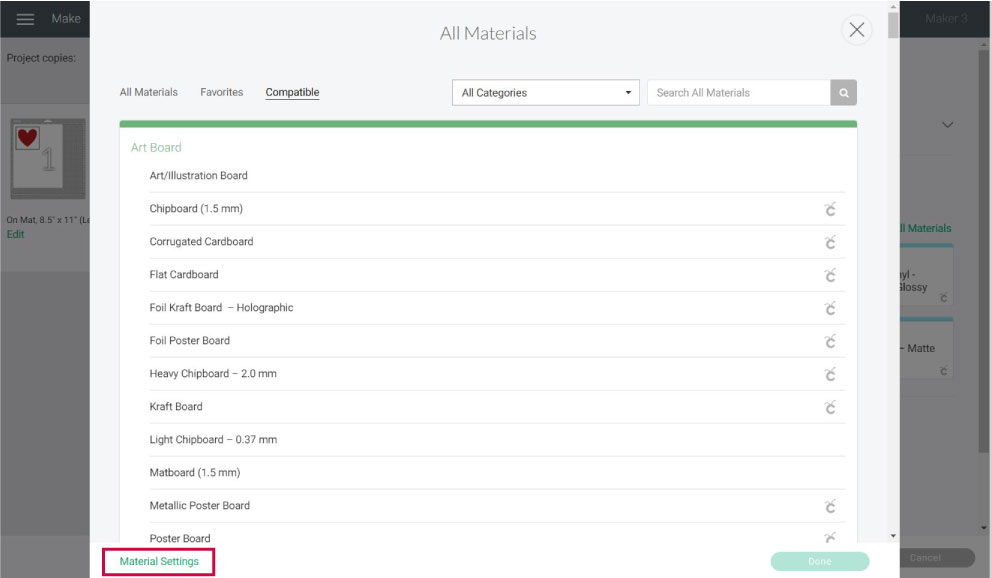
When you’re done editing your project, send it to cut, and on the “Material Selection,” click on “Browse All Material.”
A window will pop up open with all the existent materials. Go to “Material Settings.”
This time your machine is connected, and you can’t switch it for another one. Other than that, everything else is identical to the previews steps.
Note: Once you add a custom material, you can select it from your PC or phone app. Remember that the material will only be available to that machine.
Add a Custom Material from Cricut App
If you like working from your phone, or iPad do a happy dance because you can also add custom materials from the Cricut App.
The steps are pretty much identical. The only difference is the way things are displayed.
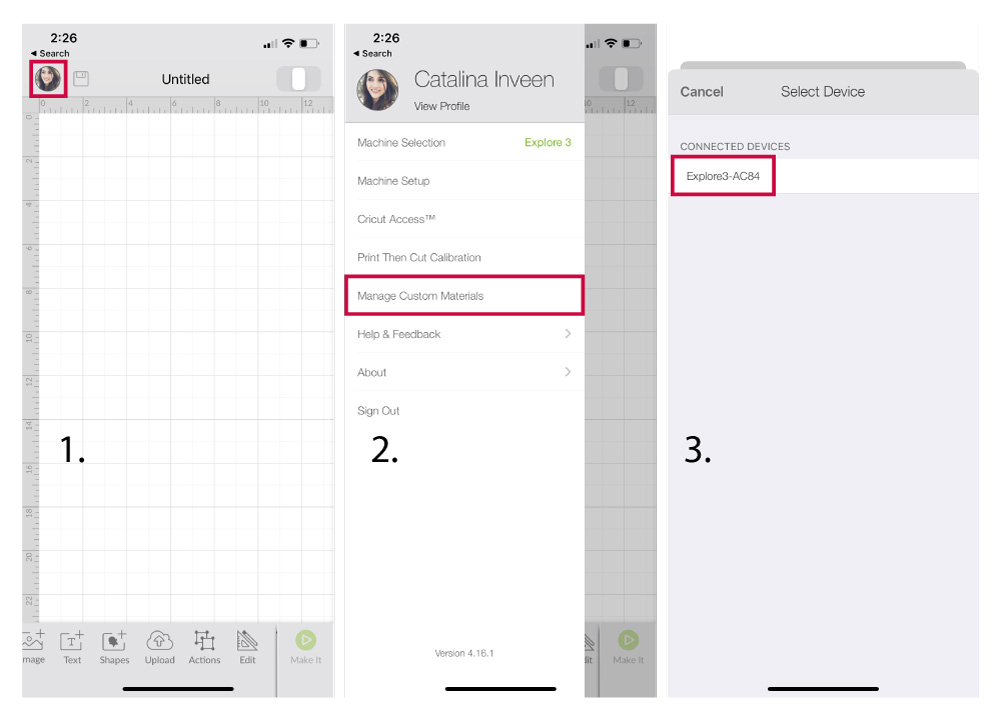
- Go to the “Canvas” or “Home” area, and tap on your profile picture on the upper-left corner of the app.
- Tap on “Manage Custom Materials”
- Select your machine
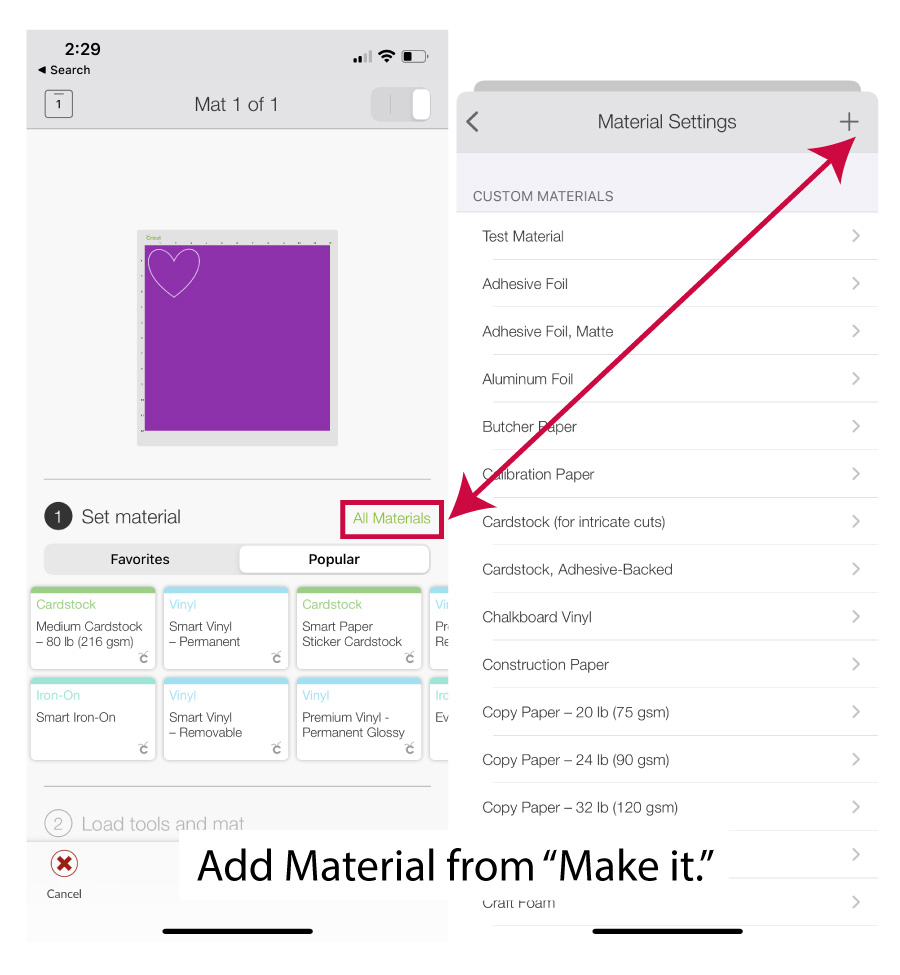
- Click on the “+” sign and name your material
- Select the blade you want to use
- Edit the settings of the new materail

Important: If your machine isn’t paired via Bluetooth first, you will get an error that says “Select Device,” and it will be empty. It’s super annoying, but if you get it. Close the app, connect the machine, and add the material.
You can also add a custom material from the app when you are on the “Make it” interface when you are prompted to select your materials.
Share it
Do you know it takes me over 25 hours to complete a single Cricut article? I know it’s wild, but I want to make sure you understand everything!
I would appreciate your support on Instagram , Pinterest , and YouTube as I try to grow my audience and continue producing great content!
Oh!
Just so you know, I also have a library full of free SVG files and Printables for all my subscribers, a.k.a. Daydreamers. You can see a preview right here or get access by filling out this form.
Do you have a written document for this I can use as I am working?
I used to have an ebook, but I couldn’t keep updating it. Do you want a copy?
This article was so very helpful with cutting 2sided tape! I wish i had known I could do this it would have saved me a few hours of frustration. Now I get to do it again with a successful cut!
Good to hear 🙂