Hello Daydreamers!
Today’s tutorial will teach you how to make beautiful business cards with your Cricut Machine.
There are many ways you can make business cards with your machine. However, for this tutorial, I decided to use Print then Cut. Because I think considering all options, it’s the most affordable and the least time-consuming.
With the exemption of the Cricut Joy, this project is compatible with all Cricut Machines.
Not only will I show you a step-by-step tutorial on how to make them from scratch in Design Space, but I will also provide you with Free SVG and JPEG templates to make your own business cards as well.
If you’ve never used Print then Cut before, I highly suggest you read my step-by-step tutorial.
Tip: This tutorial builds upon the skills I teach in every step. If you’re just starting with your machine, I suggest you read and follow each step.
Should you Make or Buy your Business Cards
Before you make this project, I wanted to invite you to consider whether you should make or buy your business cards.
As a business owner, you need to make sure that you spend time on areas that really make sense. Business Cards are quite easy to make, but you still need to spend time designing, printing, and cutting.
Sometimes you can order 100 business cards for under 20 dollars, and you can also design them. Here’s an example.
If you have the time, I would personally do it this way.
Although it’s cheaper to order online, sometimes we leave things to the very end, and with your Cricut, you can make some business cards in a matter of 10 to 30 minutes.
Also, if you just changed your personal info, you can make a small batch of business cards to hand out while you get new ones.
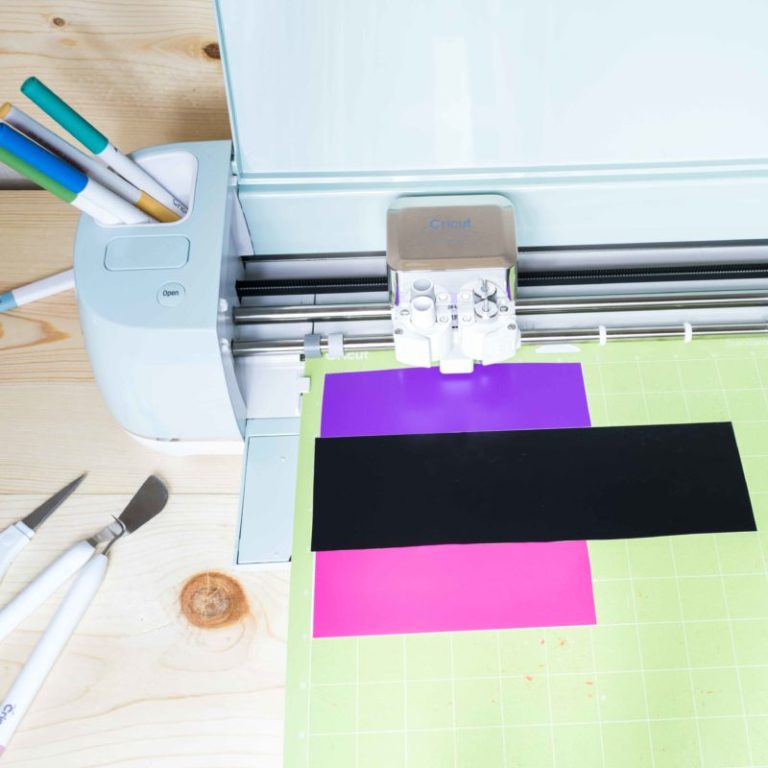
Tools & Materials
- Cricut Machine (Maker Family, Explore Family)
- Fine Point Blade
- Printer
- Light or Standard Grip Mat
- High Quality Cardstock*
* When making business cards, you want to use the highest quality of cardstock you can find. Don’t go cheap on it, because your cards will also look cheap.
Step 1 – Make Business Cards in Cricut Design Space
Making Business Cards in Design Space is very easy. The hardest part is coming up with ideas. I recommend you google “business cards examples” and get some inspiration if you feel stuck.
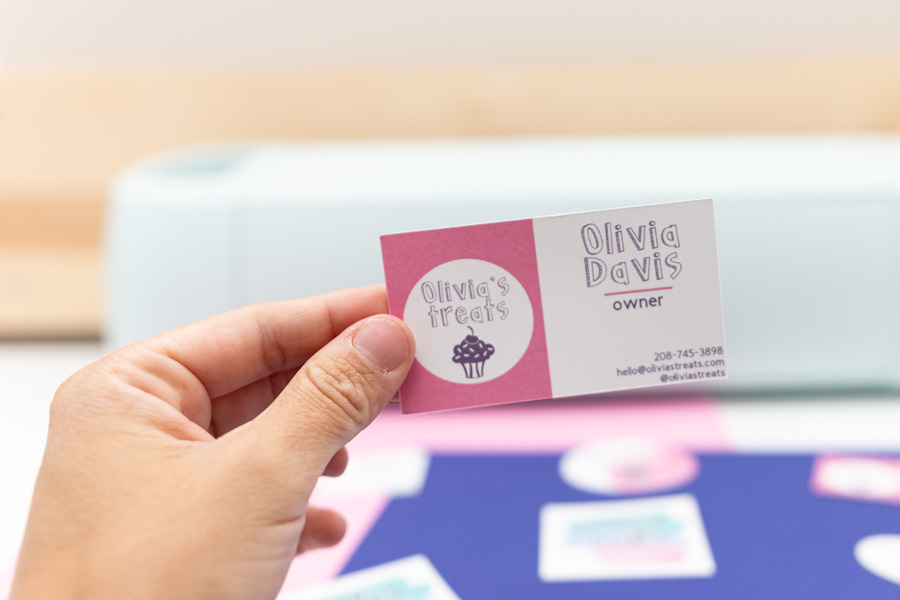
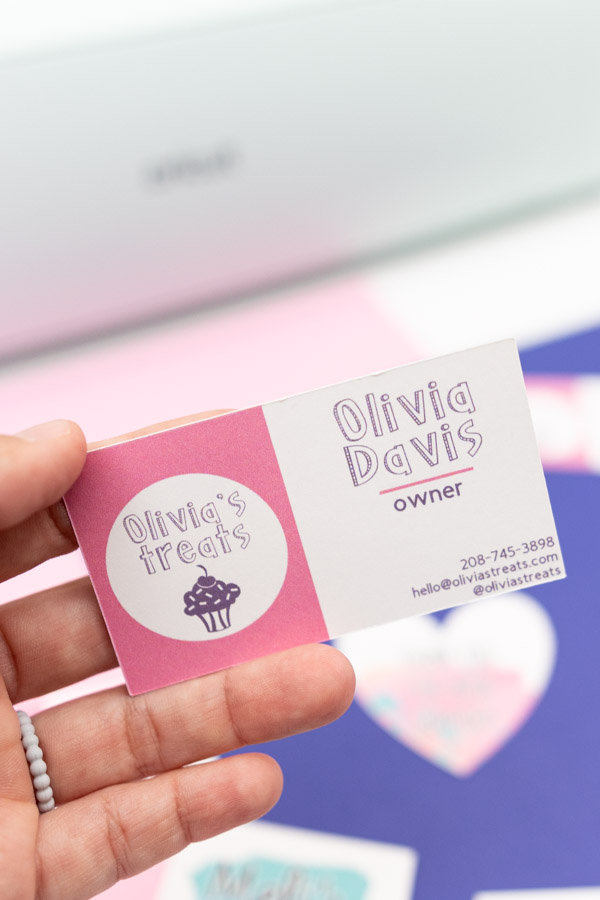
For this tutorial, I decided to make a business card for someone that bakes treats, and her name is “Olivia.”
This example is imaginary, and any similarity to existing persons, companies, email addresses, or URLs is purely coincidental.
Add Card
Let’s start by making a simple business card.
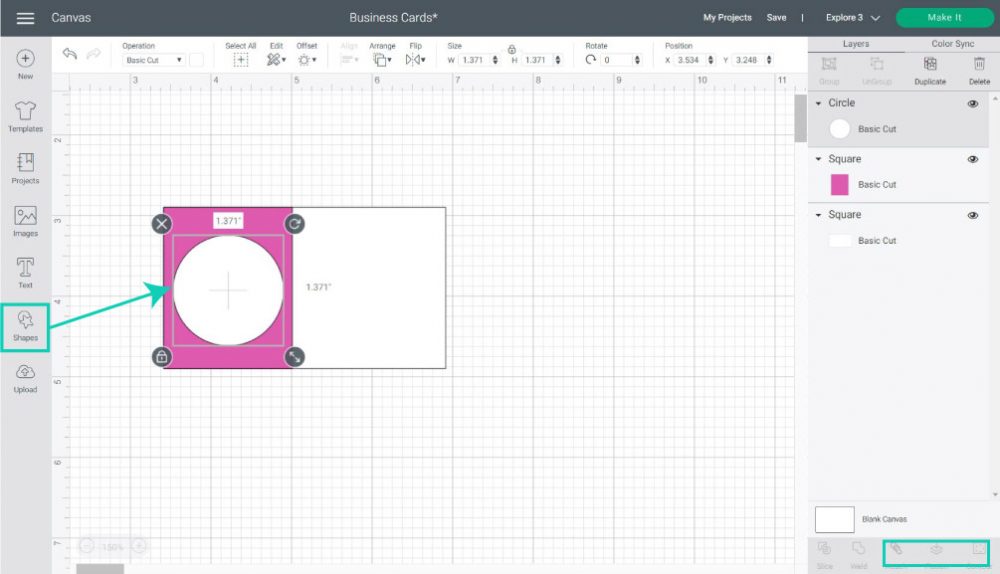
Click on the “Shapes” icon on the left panel and drop a square on the canvas area. Initially, the square will be grey. Click on it, and on the top menu, unlock the proportions and resize the card.
The standard size for a business card is 3.5 x 2 inches. However, if you use Print then Cut, you’ll only be able to make 4 cards per page, and that, to me it’s a waste of paper.
I resized the square to 3.3 x 1.8 inches so I could make 8 cards. They are a bit bigger, but they still waste some paper. If you want to maximize space and make 10 cards, the size should be 3.2 x 1.75 inches.
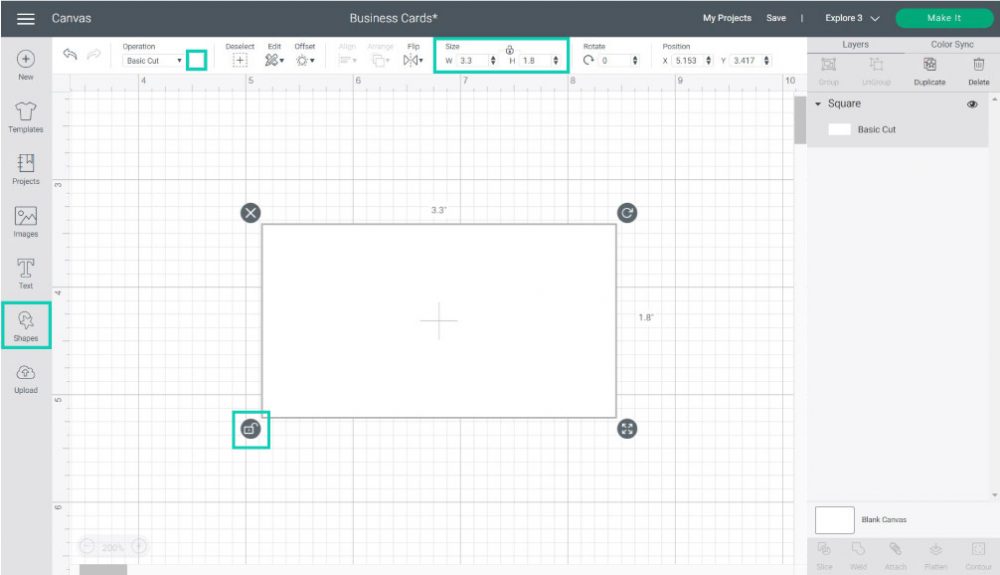
Once you resize, change the color of the card by click on the color box next to “Operation” on the top menu. I used white, but you can also use other colors as well.
Add Extra Shapes to Make Contrast
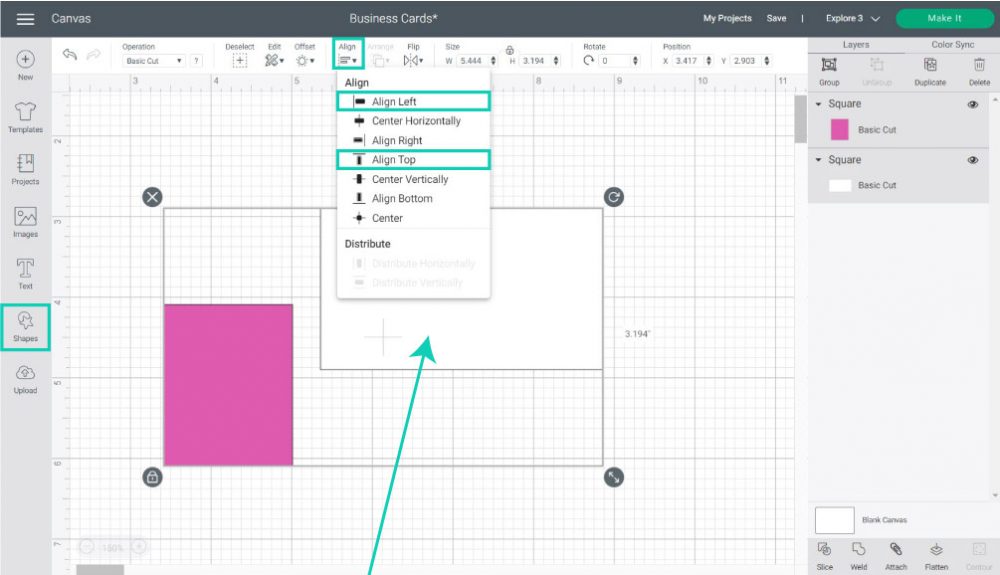
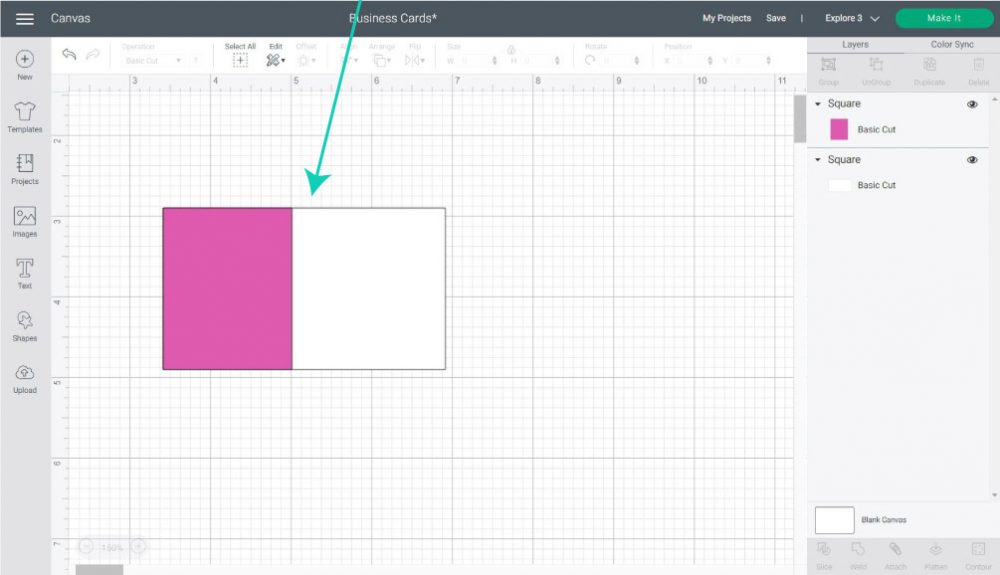
Many business cards have two colors to create a contrast between the logo and a person’s contact information.
Drop a second square and resize it to fit your business card. The height must be identical (1.8 inches for this case), but the width can be flexible.
Now you need to align the card to perfection.
The best way to do this is by selecting both shapes, clicking on “Align” on the top menu, and selecting “Align Left.” Repeat the same process and no select the option “Align Top.”
Add a small circle to your business cards where you can place your business’ logo.
Don’t be limited, though!
Experiment with other shapes like hearts, stars, diamonds, hexagons, etc.
Add Images & Text
It’s time to add the Business Card information!
If you have a logo, you should use it!
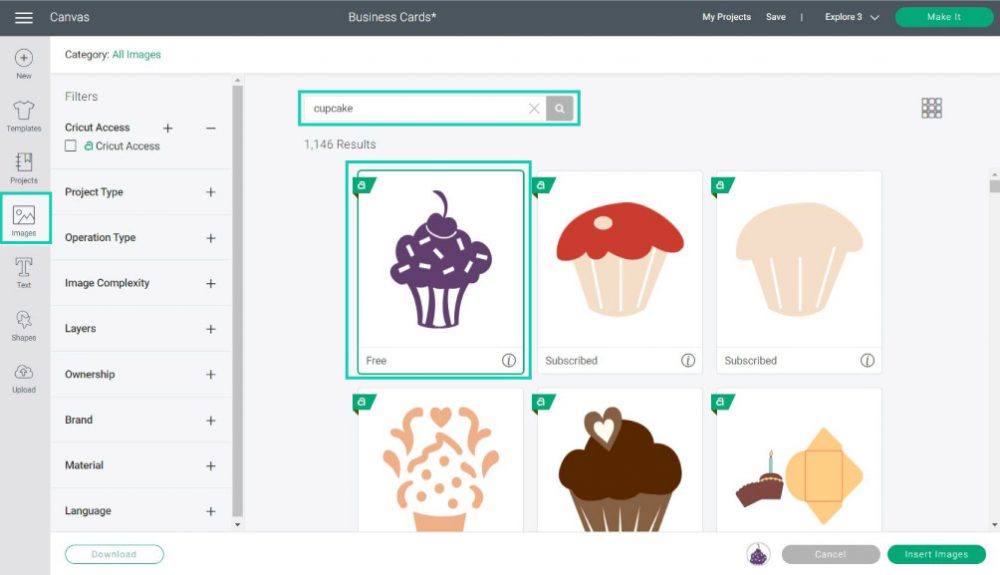
If you don’t, you can use images to illustrate what your business is all about. Since I am making a business card for a baker, I searched for cupcake images.
What is your profession?
- Musician? How about adding a little guitar.
- Wedding planner? How about adding a cute little ring, or a wedding dress.
- Photographer? What about adding a cute little camera
Click on the images icon, and search by keyword to find an image that aligns the best with your business.
Cricut has free images; however, you need Cricut Access or pay individually to access most of them. You can buy illustrations on websites like creativefabrica.com or fontbundles.com.
If you decide to get an image from the web, read their license to see if you can use it for commercial purposes.
To add text, click on the text icon on the left panel. For the business name, I used the font “DJ Jer,” and for the other text, I used “Cricut Sans.”
Check out the exact settings on the following screenshot.
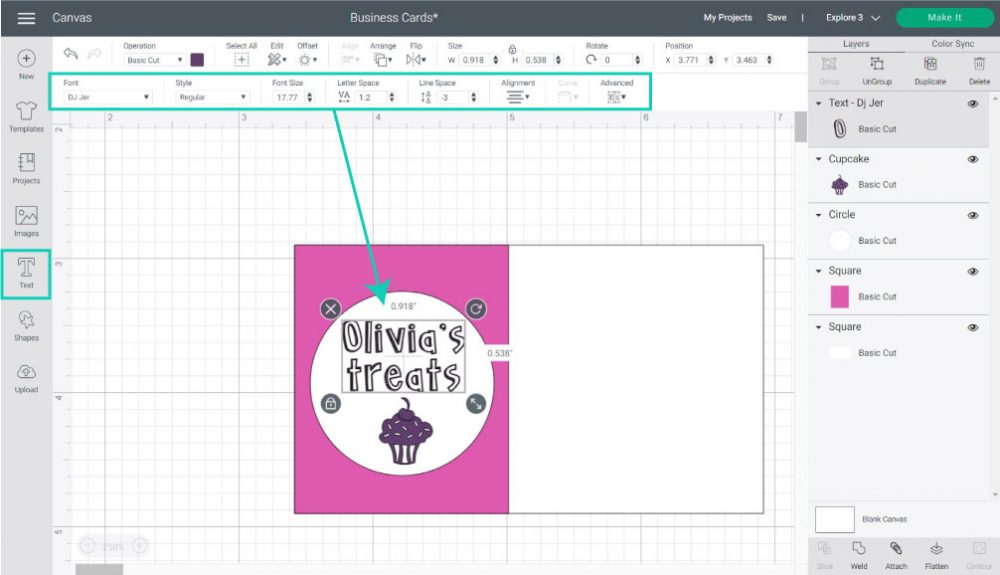
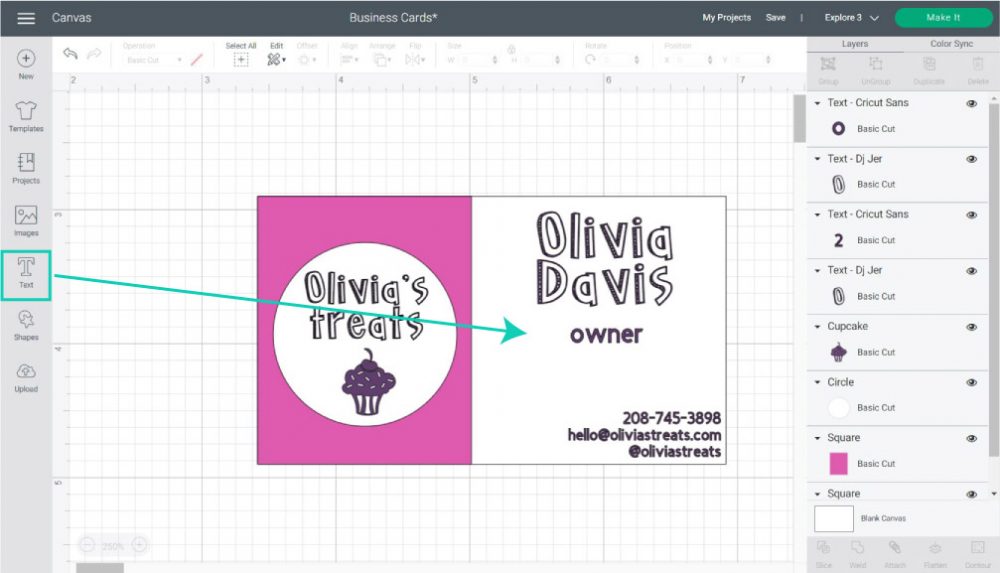
On the other side of the card, I typed in the name, position in the business, and contact information.
You can also add your social media accounts, physical address, etc.
If you don’t know how to work with text in Design Space. Check out my step-by-step tutorial.
Add Extra Details & Flatten
The right side of the card looked like it needed a little extra love.
I added another square, unlocked its proportions, and made a very thin rectangle to create a division between the “name” and the “business position.”
When you’re done designing, select all the layers on the canvas and click on the “Flatten” icon at the bottom of the layers panel.
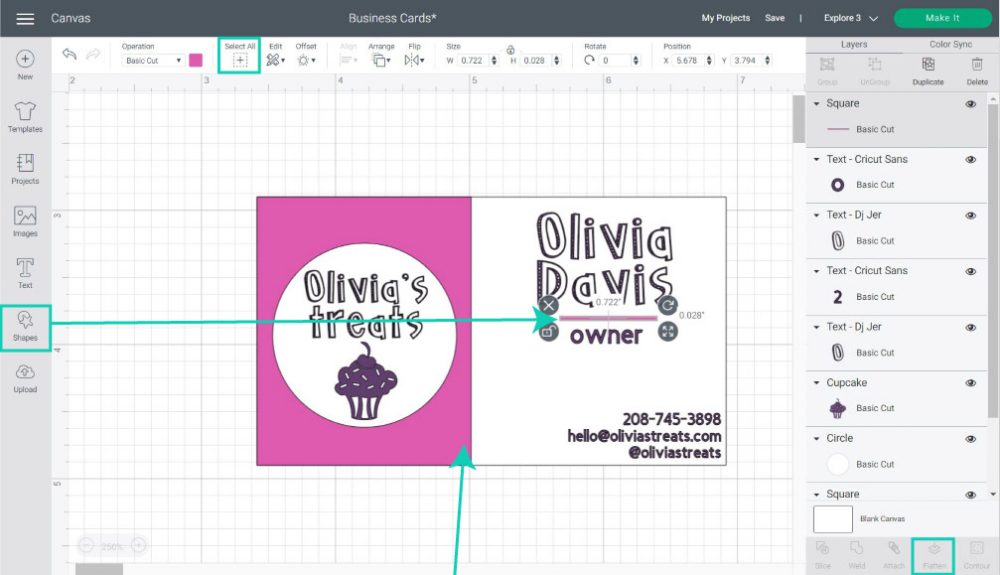
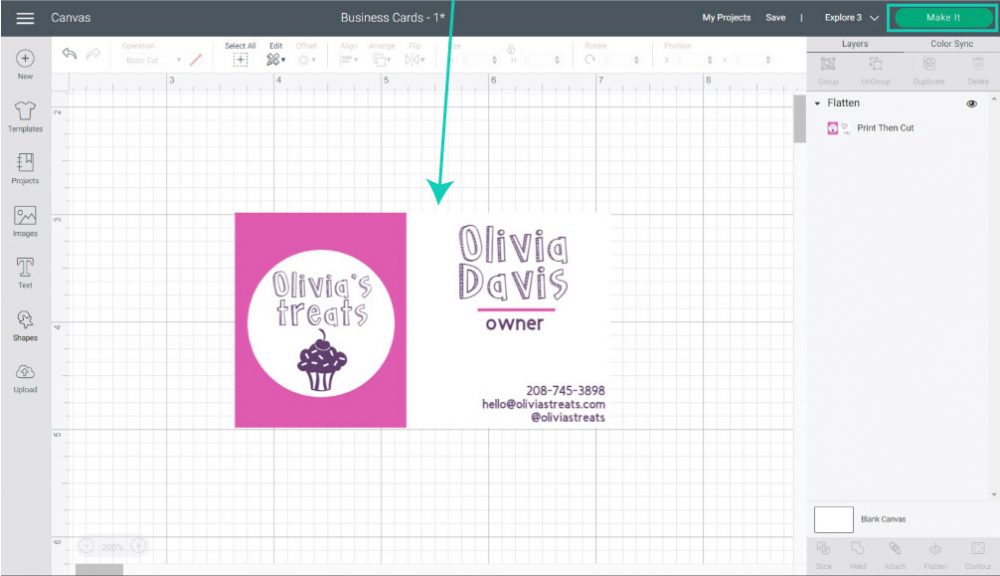
All the elements that make the entire card are compressed into a single layer. When you use “Flatten,” you tell your machine to print first and then cut around the edges.
Step 2 – Mat Preview and Material Selection
After flattening your card, go ahead and click on “Make it” in the upper-right corner of the program.
Add Extra Copies
Something very cool about the “Mat Preview and Material Selection” interfaces is that you can create multiple copies.
It’s better to add the copies here and not in the canvas because you may want to print then cut 20 cards one time—another time just 15 cards etc.
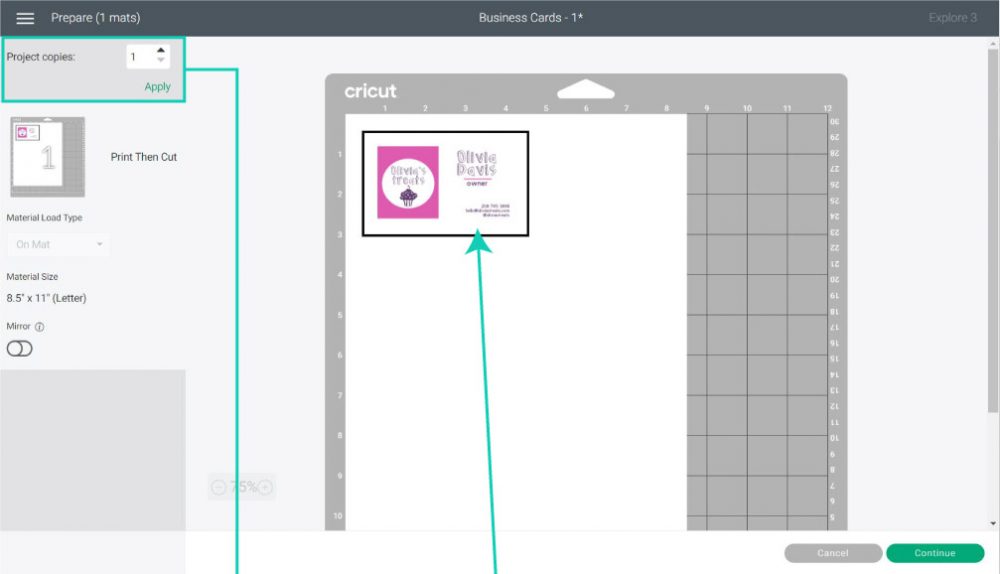
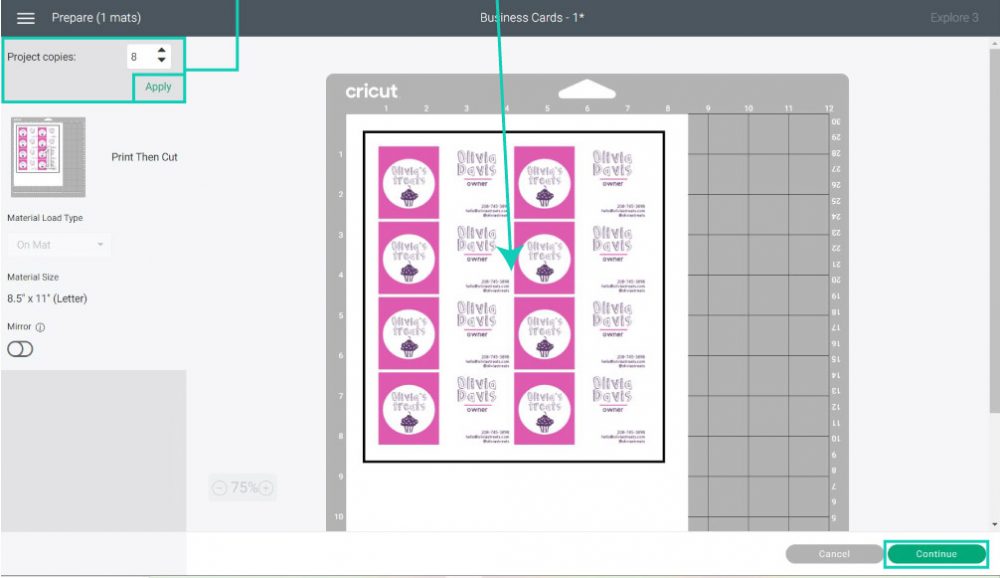
Type the number of cards you want on “Project copies” and click on “Apply” for the changes to take effect.
Click on “Continue” to print and select materials.
After leaving the “Mat Preview,” you will be given step-by-step instructions to cut your project.
The first option is “Print,” It has a button that says “Send to Printer.” Go ahead and click there.
A little window named “Print Setup” will open. From this window, you will be able to choose your printer, add extra copies to your project, turn on bleed, and/or use your system dialog box.
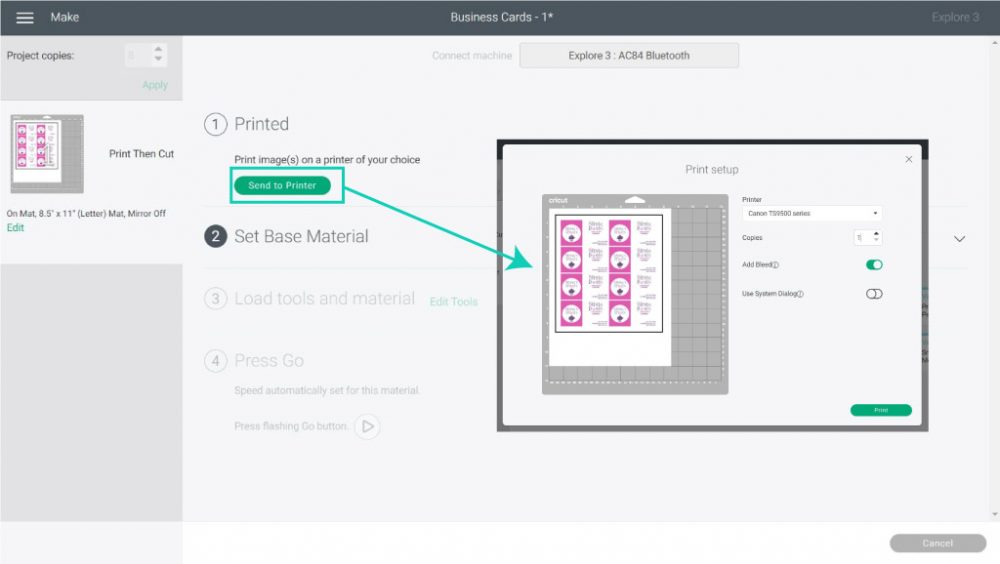
The “System Dialog” is useful if you need to find your printer, change the type of paper you are using to print with different settings, or want to save your project as a PDF and print it in a different location.
I usually have “Bleed” on and “System Dialog” off.
Although, for business cards, you may want to tweak the settings, so they look perfect.
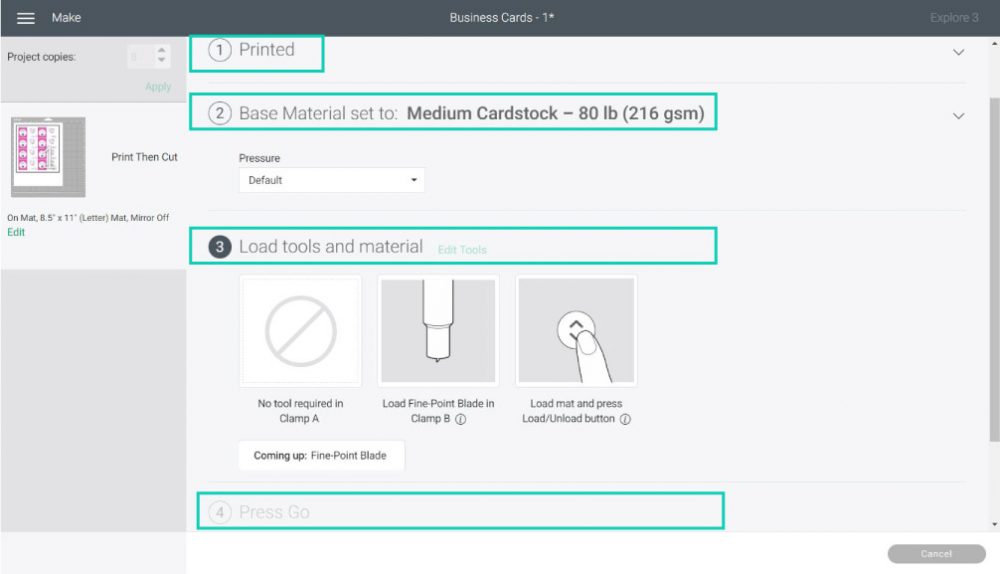
Select Material
It’s time to select your materials.
If you have a machine with a smart dial, move it to custom and select material from Design Space to follow along.
Select the type of cardstock you’re using. I chose Medium Cardstock 80 lb.
Let’s move to real-life pics for the next part.
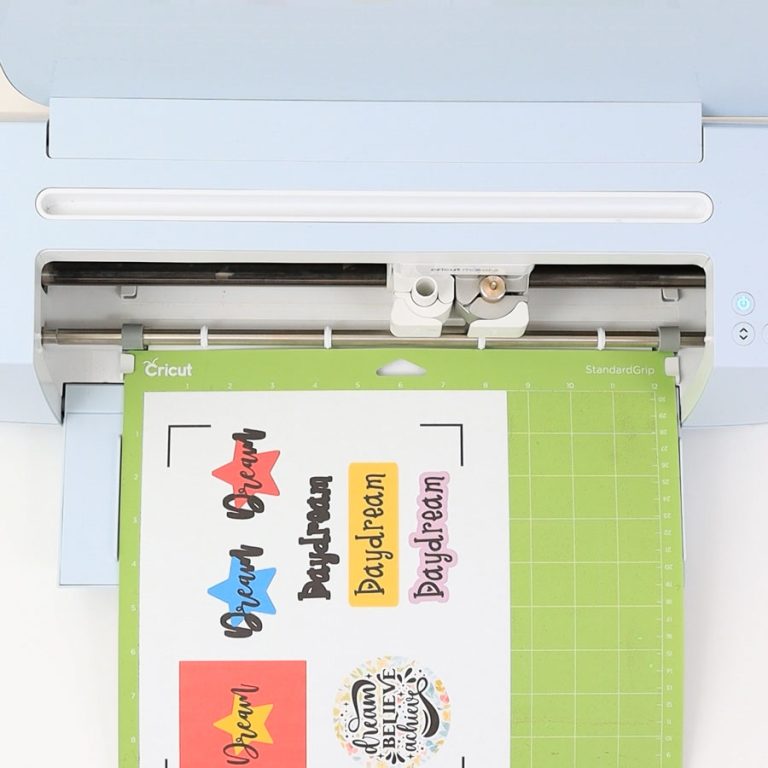
Step 3 – Prepare Mat & Cut
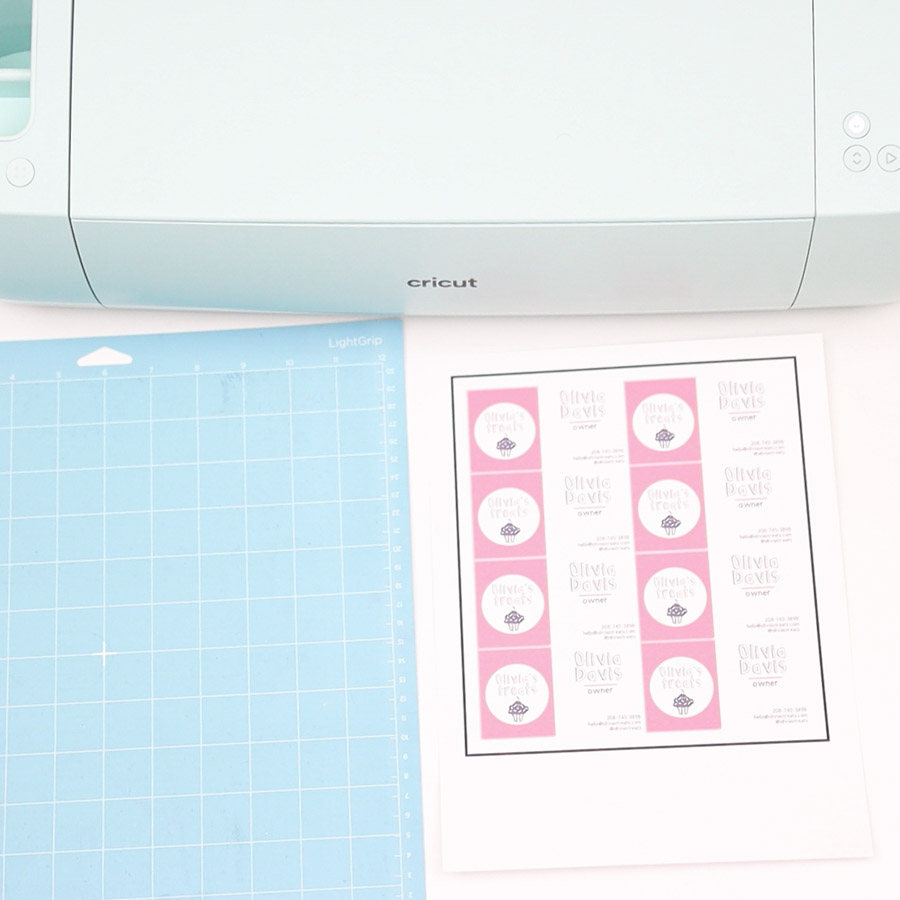
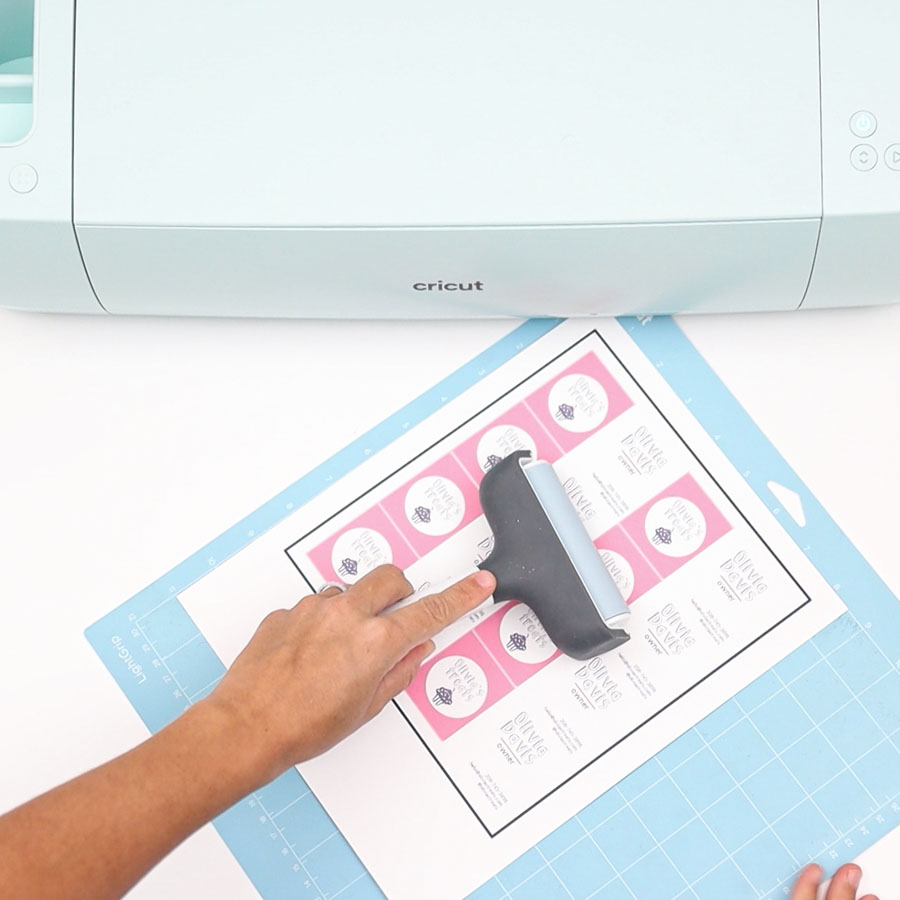
Place the printed copy on your Cricut mat.
You can use a brayer (my favorite tool ever) to stick the project to the mat. Don’t do it too hard because it could be hard to remove later on.
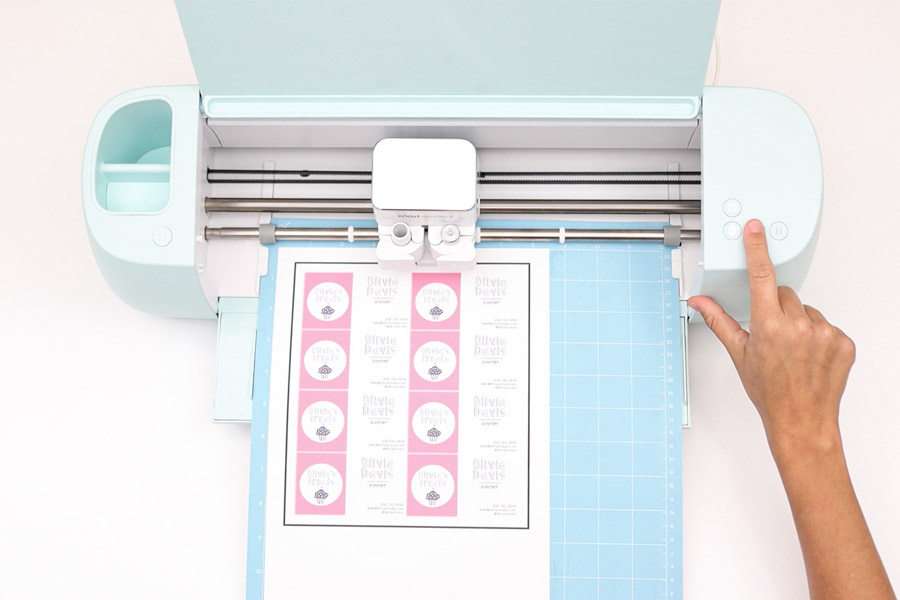
Install fine point blade, place the printed project on the mat and load it to the Cricut Machine. Press the flashing go button to start the cut.
First, your Cricut will start reading the black frame on the project, and once it’s done, it will cut your business cards.
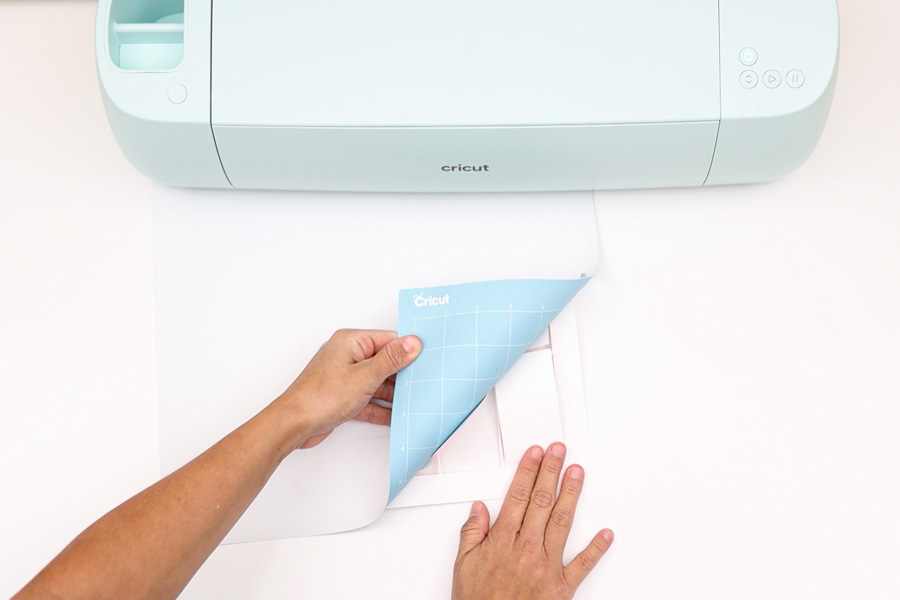
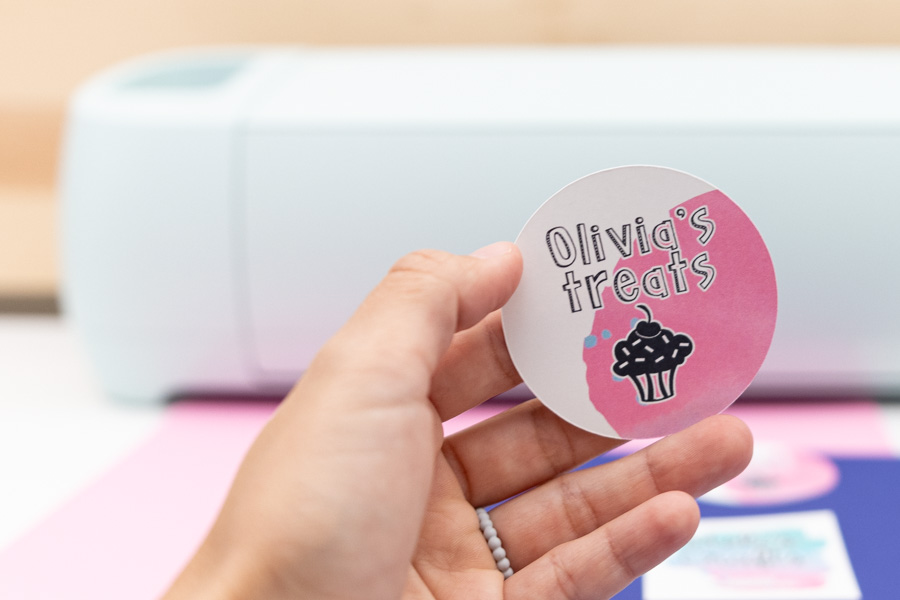
When your machine is done cutting, unload the mat and bend it to release your business cards.
Isn’t this a cute business card?
Free SVG and JPEG Templates for Business Cards
As I mentioned at the beginning of this tutorial, here are some resources for making your own business cards (not for making other commercial crafts for sale). You can also use any of the files in this article to make any craft for personal use only.
To download the file(s), you need to be on a desktop or laptop and click on the button to trigger a download file on your PC. However, I’ve noticed that I can also download them from my iPhone.
Depending on your browser settings, your PC sometimes asks where to save the file, although most files will be in your download folder.
If the image opens in a new window (this may happen because of your browser settings), right-click on it, select the option “Save Image As,” and choose where you want to save the file.
SVG files look like web page files when you download them.
Oh!
Just so you know, I also have a library full of free SVG files and Printables for all my subscribers, a.k.a. Daydreamers. You can see a preview right here or get access by filling out this form.


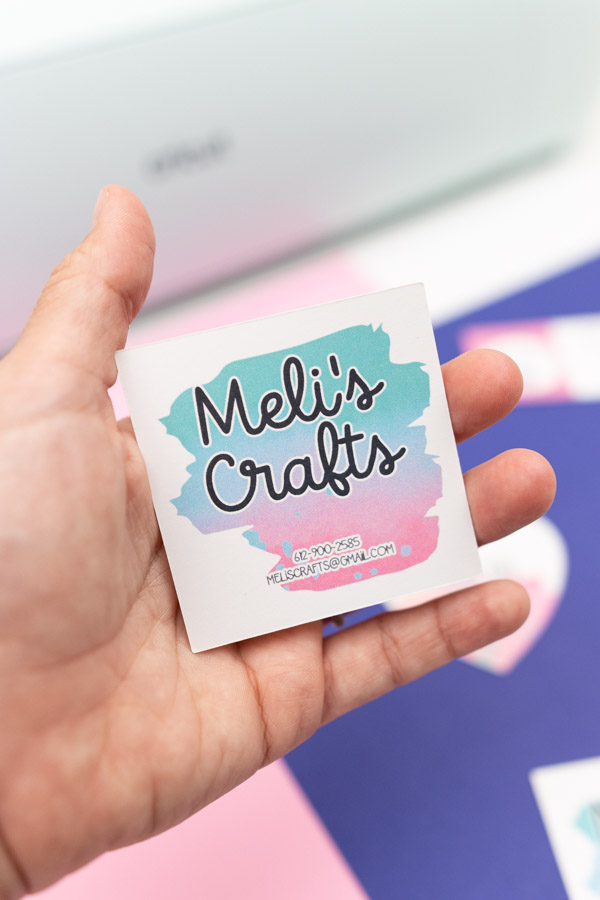
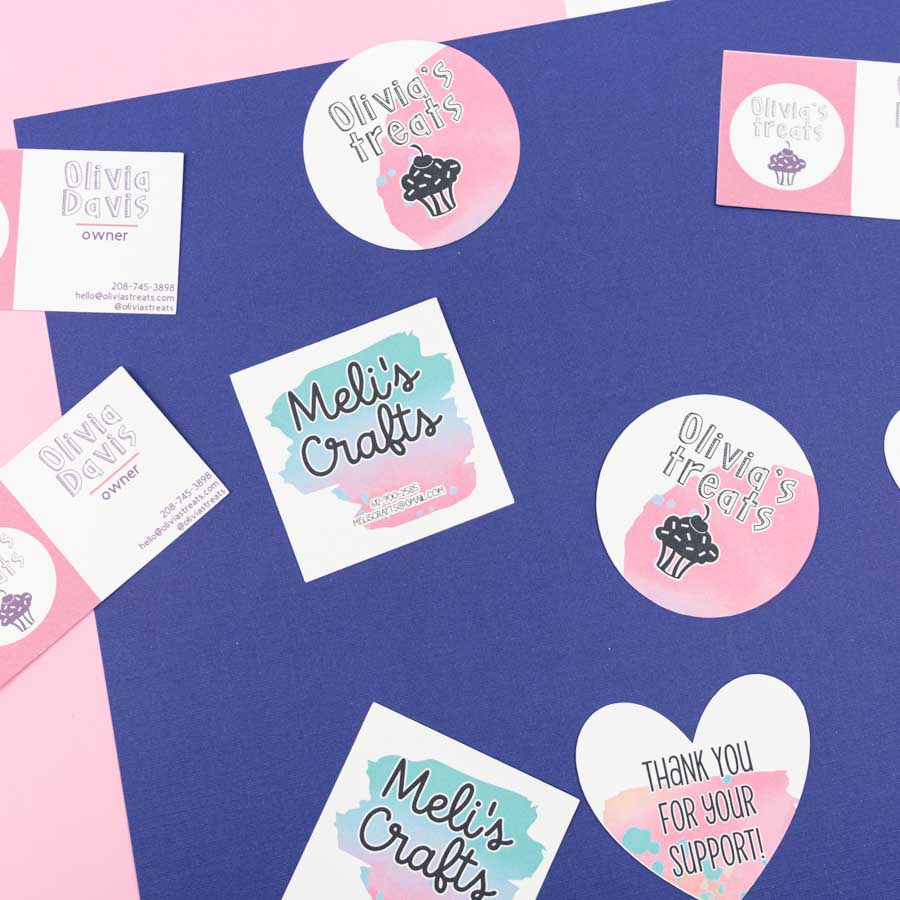
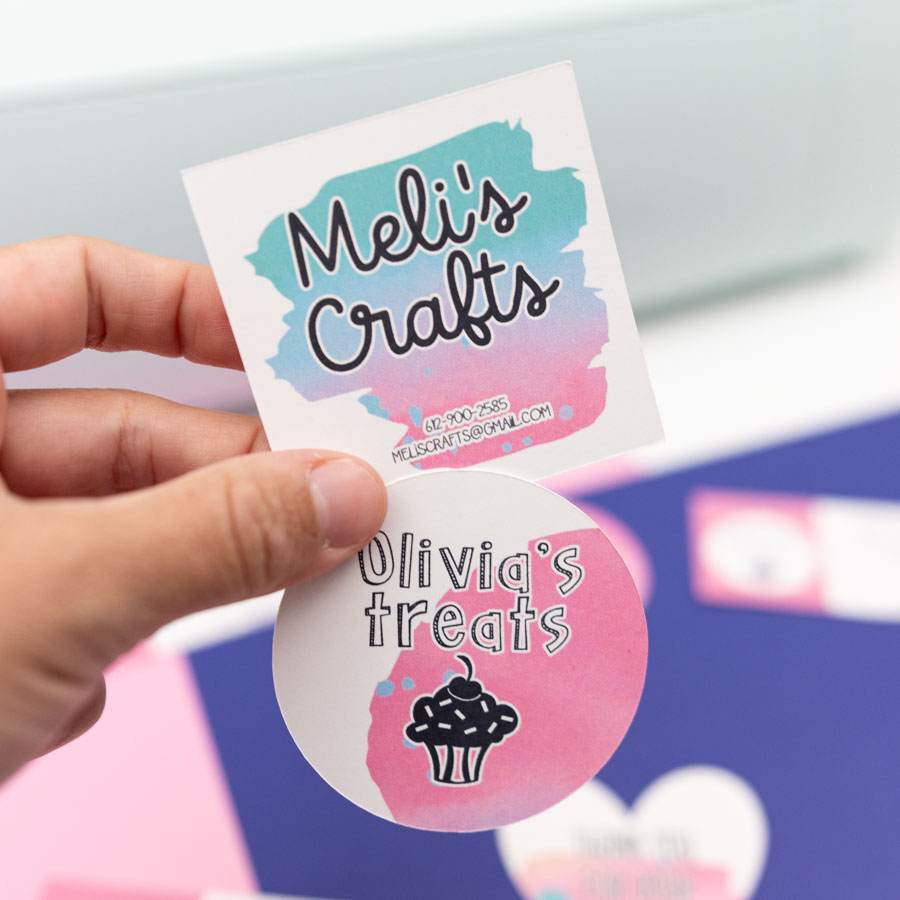
Business Cards with Uploaded Templates
This is an example of the business cards you can make using the templates I just provided you with.
Let me show you how to make them!
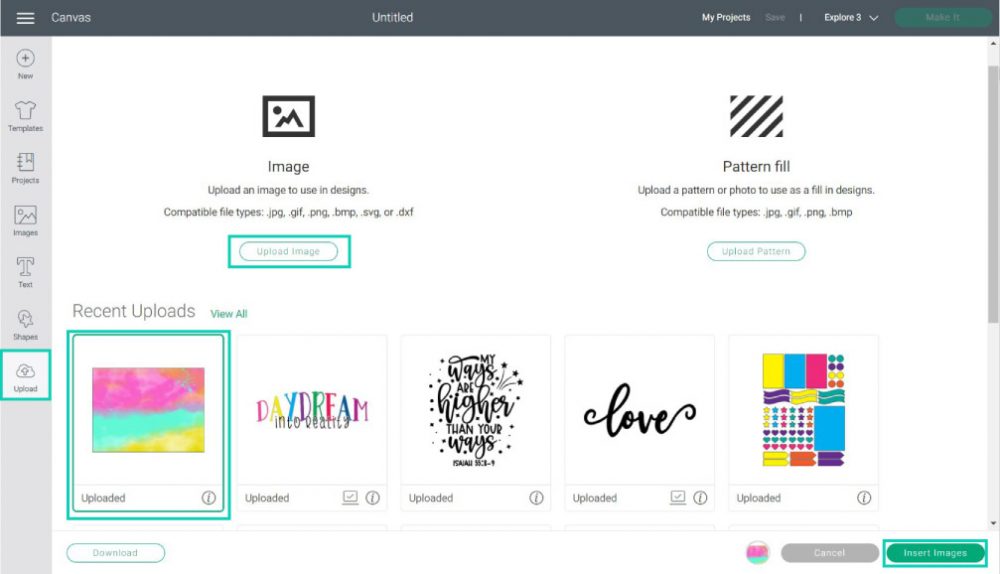
Step 1 – Upload Files
Click on the “Upload” icon, then go to “Upload Image” and upload one of the watercolor images and the brush strokes.
Follow the prompts, select the files from the “Recently uploaded images,” and click on “Insert Images.”
Step 2 – Ungroup and Slice
Ungroup the brush strokes file and use the shape you want to use on your business card.
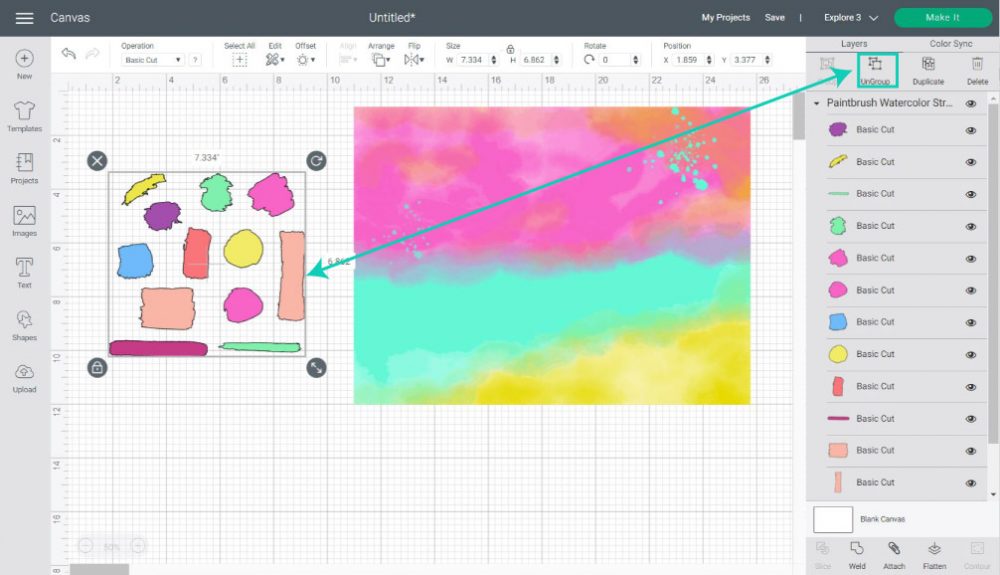
Place one of the brush strokes on the area of the watercolor sheet you want to cut out; then select the brush stroke and watercolor sheet and click on “Slice” at the bottom of the layers panel.

Now you have a small piece of the watercolor sheet in a brushstroke form.
Isn’t that neat?
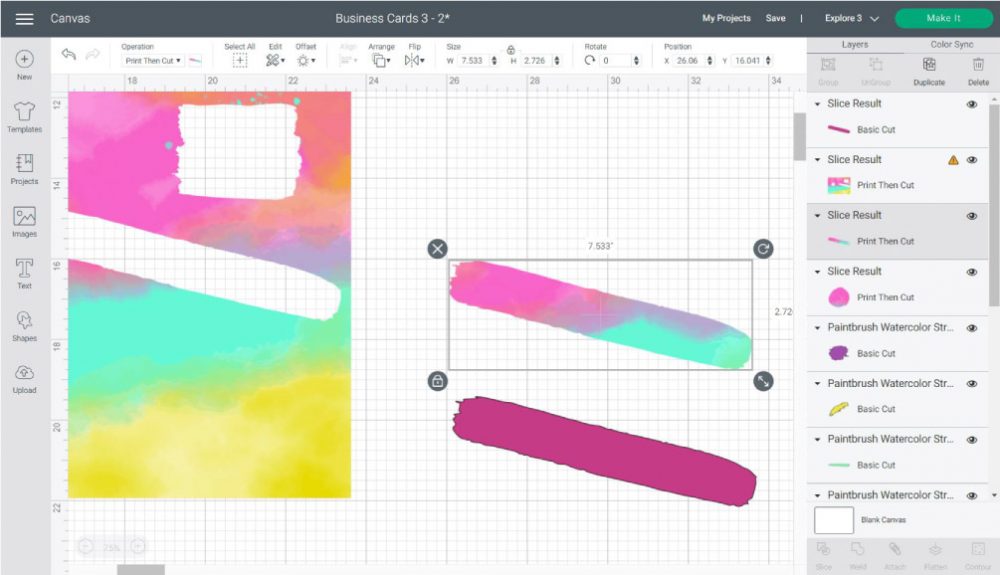
Step 3 – Slice to Form Watercolor Shape
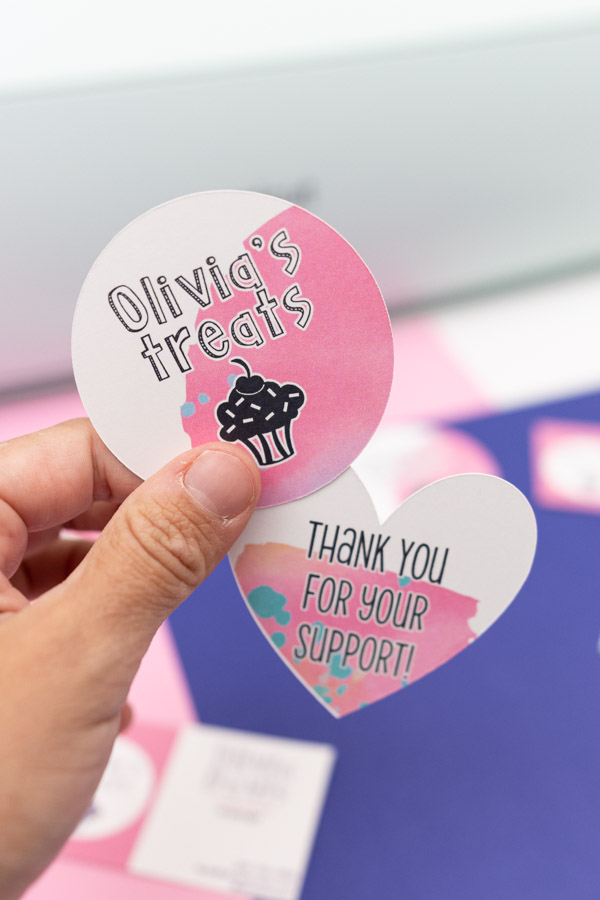
I used a square, a circle, and a heart for these business cards.
You can create copies of the business cards to make a cut-out that fits perfectly inside your project.
The brush stroke on the square fit perfectly, so I left it intact. However, for the circle and the heart, I wanted something more smooth.
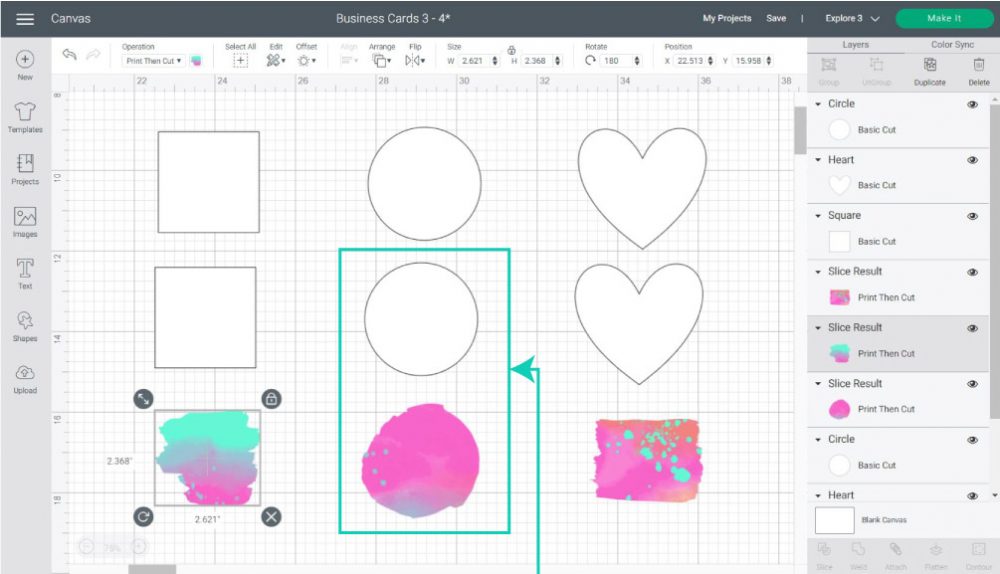
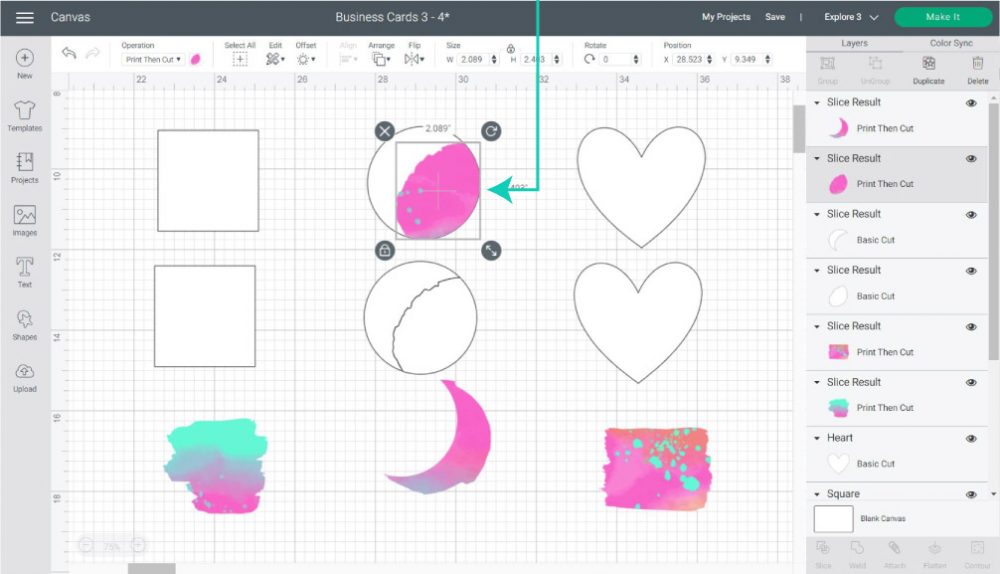
Place the watercolor stroke on one of the copies of the shapes and use “Slice” again to make a cut-out that will fit your business cards perfectly.
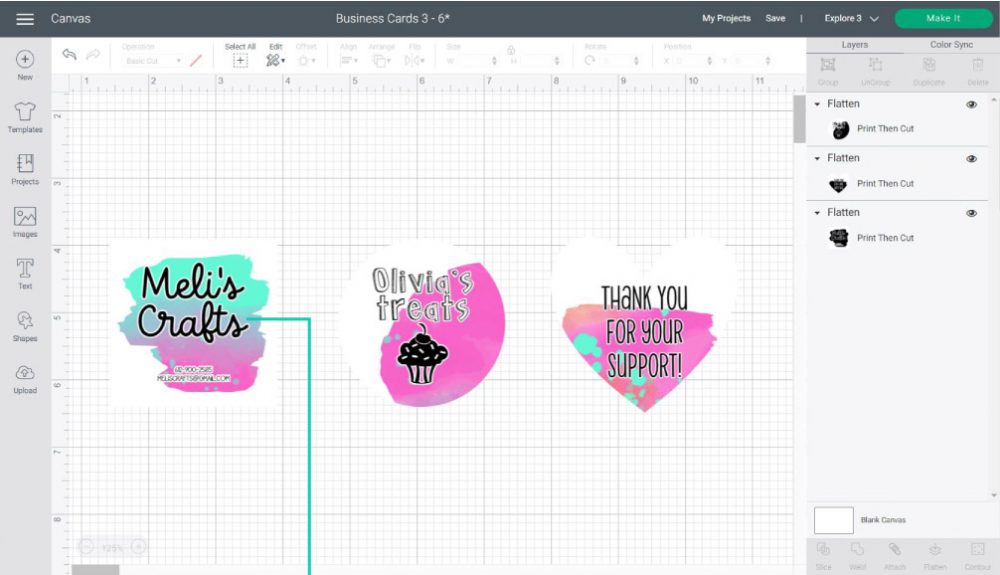
Step 4 – Add Text and Offset
Add text to the cards.
Go beyond contact information as well. You can make a small “thank you” card that you slip inside a customer order.
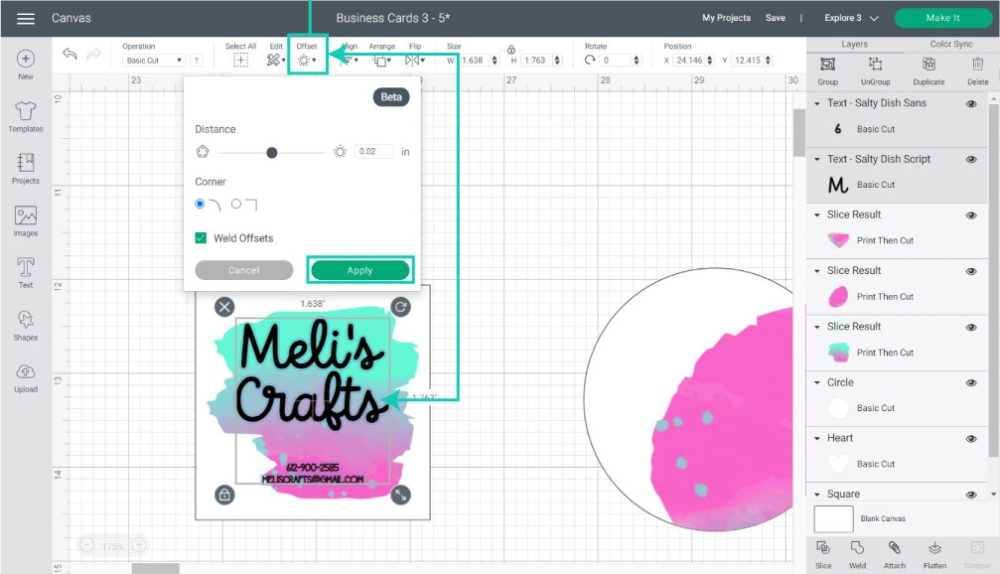
Tip: Use the offset tool to create contrast between the watercolor stroke and the text.
Don’t know how to use the offset tool? Read my step-by-step tutorial.
Don’t forget to flatten before you click on “Make it.”
Final Look
I don’t know about you, but I absolutely love how all the business cards look.
They look elegant, simple, and stylish.
Don’t you think?
Share it!
Do you know it takes me over 25 hours to complete a single Cricut article? I know it’s wild, but I want to make sure you understand everything!
I would appreciate your support on Instagram , Pinterest , and YouTube as I try to grow my audience and continue producing great content!


Thanks so much for this tutorial, it really helped me out when I was in a pinch!
Happy to hear!
please could i have the free svg templates for the buisness cards thankyou so much
The step by step instruction is amazing.it is really useful.Thank you