Hello Daydreamers!
Has it ever happened to you that the cuts seem a little off when you try to Print then Cut with your Cricut machine?
If that’s the case, don’t worry… Because, in today’s article, I will teach you how to calibrate your Cricut machine so every cut you make lives up to your expectations.
If you’re new to your machine, you may not know what Print then Cut is.
Print then Cut is an option that allows you to print your designs and then cut around them. When you have an element or design set to “Print then cut,” Design Space will send it to your home printer first, and then it will cut it.
Make sure to read my Print then Cut tutorial to master this fantastic setting.
Note: Cricut Joy doesn’t support Print then Cut.

Before we dive in, let me show you the points I will be covering in this simple guide.
- How to determine you need to calibrate your machine
- Step by step tutorial for Print then Cut on Desktop
- Finding Print then Cut calibration settings on Cricut App
Are you ready?
Let’s get on it!
Youtube Video on How to Calibrate Print then Cut!
Do I need to Calibrate your Machine for Print then Cut?
When you first get your machine, the last thing that goes through your mind is calibrating it.
I’ve owned multiple machines, and I didn’t calibrate the first ones because the cuts seemed fine. However, when I got the Maker 3 and Explore 3, I noticed that the cuts were extremely off.
Before you send your project to your home printer, Cricut will ask you whether you want the setting “Bleed” on or off.
The official definition of bleed is “Bleed extends ink slightly beyond the image border to eliminate a white margin once the image is cut.”
Whenever you have “Bleed on,” most of your cuts will look good even if Print then Cut isn’t calibrated. However, when you have “Bleed off,” your cuts will have a greater margin of error.
Check out the following pictures to have a better idea of what I am trying to explain.

A. Bleed on B. Bleed Off 
Before Calibrating – Bleed Off Left and Bleed On Right.


A. Bleed on: If you zoom in on the picture, you can see the star looks great when cut. But the cut left behind shows that the cut wasn’t quite centered.
B. Bleed off: Some sides of the star have a white border. Some projects require great precision and this margin of error looks quite big, and you want your projects to look professional.
Now, check out the following two pictures to see how different it looks once you calibrate your machine.
Bleed On Left (After Calibration) Right (Before Calibration) Bleed Off Left (Before Calibration) Right (After Calibration)


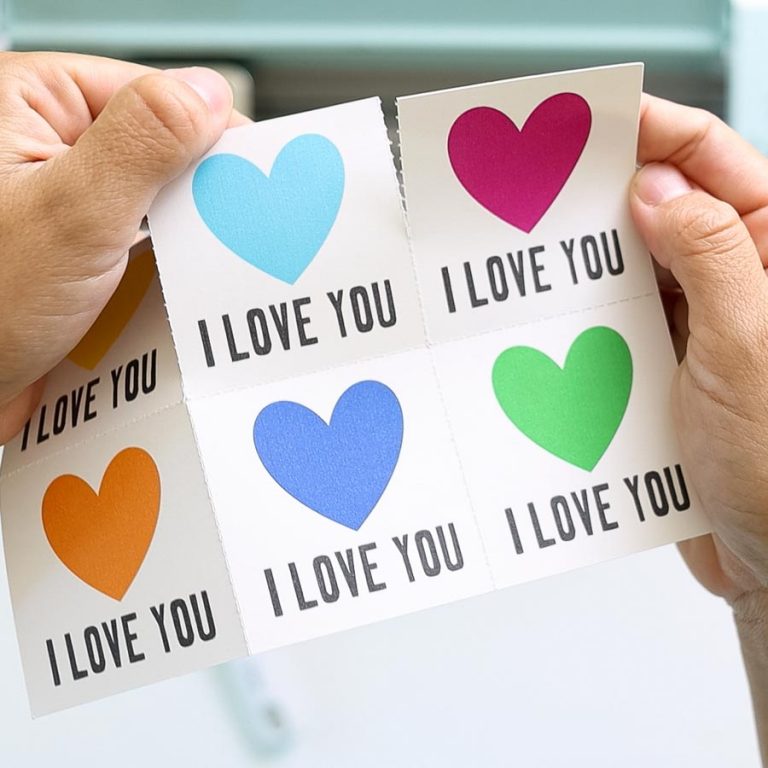
With “Bleed On,” the cut was more centered. I like making stickers sheets a lot (read tutorial), and it bothers me if the cuts don’t look all cute and centered on the carrier sheet.
With “Bleed Off,” the improvement is amazing. There’s still a tiny margin of error, but nowhere near it was before.
Do your cuts look similar to what I just showed you?
If that’s the case, I recommend you calibrate your machine.
Cricut Design Space – Print Then Cut Calibration
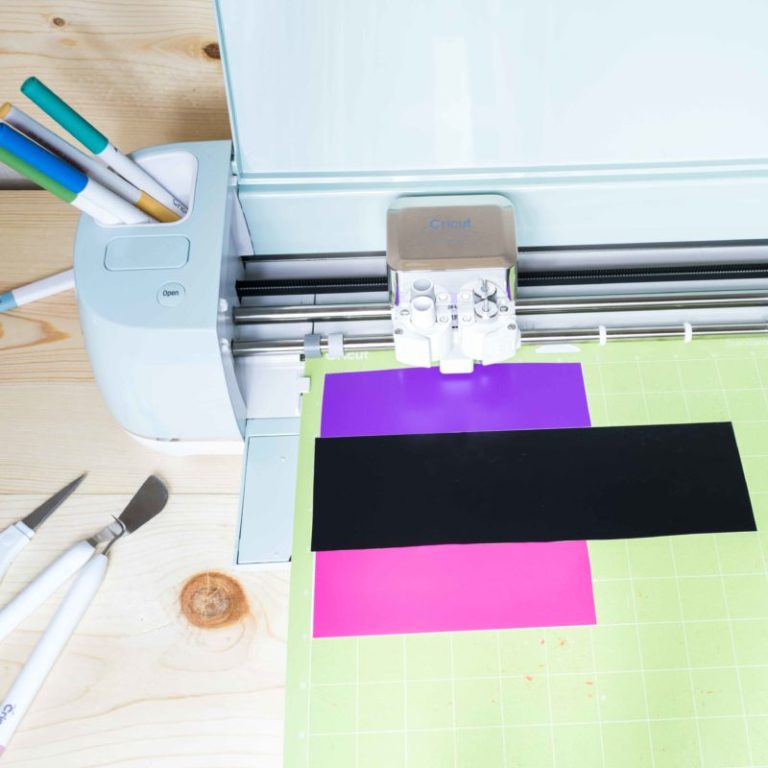
Calibrating your machine is quite easy. Before starting, ensure your printer is on and your machine is connected via Bluetooth or USB cable.
Step 1: Click on the toggle menu on the upper-left corner in Design Space (from the Home or Canvas
interface), and click on “Calibration.”

Step 2: If you have any Explore machines, Cricut will only give you one option. However, if you have a Maker, you will have two other options, “Rotary Blade” and “Knife Blade.” Of course, Select “Print then Cut.”

Step 3: To calibrate your machine, Design Space needs to print a calibration sheet. Turn on your home printer, select it from the drop-down menu and click on “Print.”
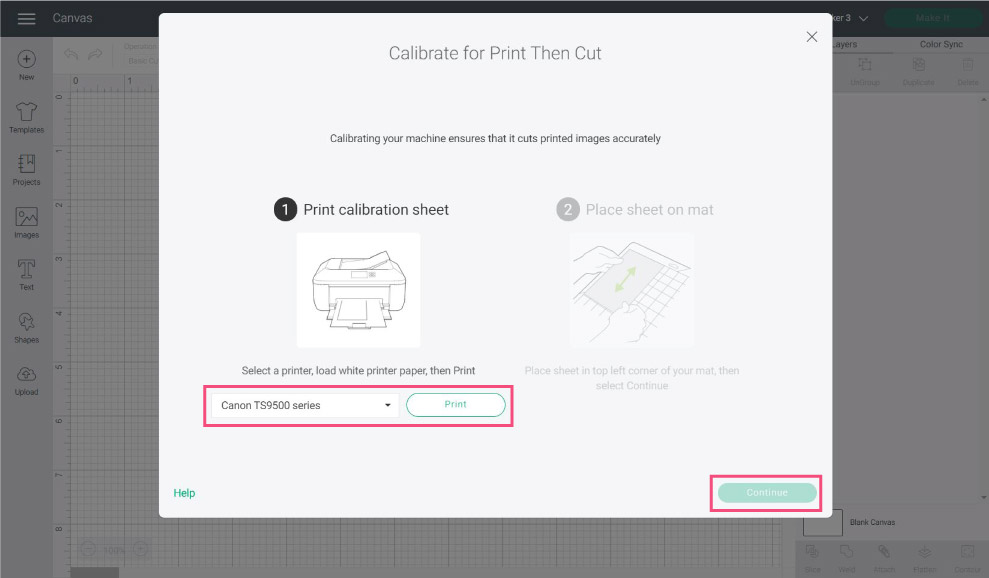
The calibration sheet has five different areas that Cricut will test to align your cuts.
- Big rectangle: Print then Cut sensor will read to start the cut
- Numbers: To align vertical cut
- Letters: To align horizontal cuts
- Small Square: First cut to determine how aligned your machine is
- Medium Rectangle: Final cut to see if the calibration was satisfactory


Step 4: Place the calibration sheet on the Cricut Mat and load it to your machine. You need to place the sheet in the same direction as Design Space on the little mat thumbnail.
Once you load the mat, tap the flashing go button.

Step 5: Cricut will attempt to cut the small square on the calibration sheet. Without unloading the mat, check the cut lines. Are they in the center of the square like they are supposed to be?
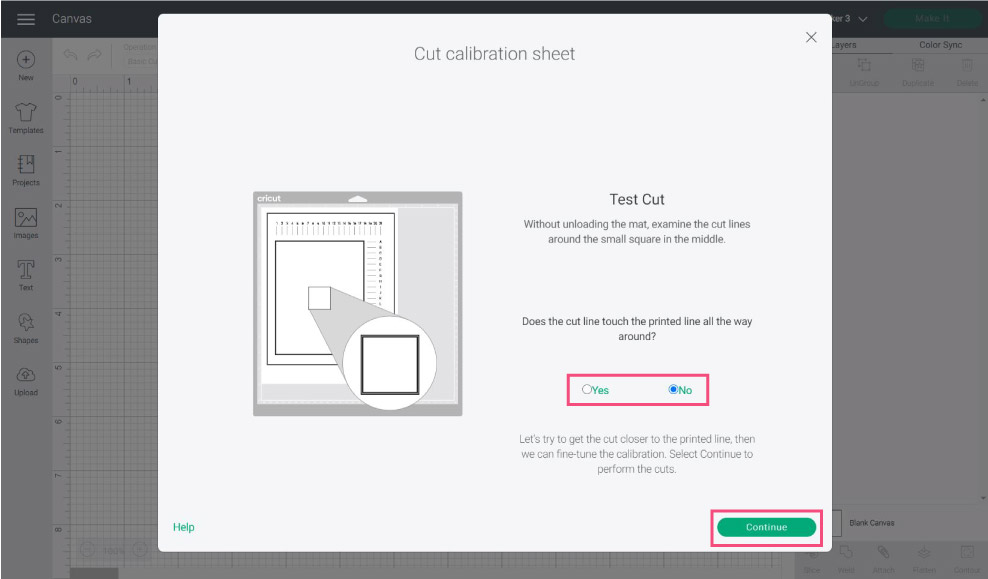
I calibrated a new machine (Cricut Explore 3), and the cut was completely off. If this happens to you, you need to check “No” and click on “Continue.”
Step 6: Cricut will make cuts on all the little lines on the calibration sheet.
Without unloading the mat, check which line from the top numbers and on the right letters was closest to the center.

This may be different for you. But, in my case, the most centered cuts were on line “12” and line “L.”
Click on “Continue.”

Design Space will prompt you to unload your mat. Once you unload it, it will return you to “Step 1” to retest the new settings. Go ahead and repeat the same steps until the first cut is completely aligned.

Check out the small square before and after calibration!

Can you tell the difference?
Can I calibrate Print then Cut from the Cricut App
The answer is yes!
You can calibrate your machine from your phone. Before starting calibration, make sure that your Cricut and printer are paired to your phone.
The steps are identical, so I am only going to cover how to get there.

Step 1: Open the Cricut App and tap on the upper-left profile picture
Step 2: Tap on “Print then Cut” calibration.
Step 3: Send the sheet to the printer and follow the prompts explained right above.
Hi ya,
I’ve done the calibration (yesterday) and my blade doesn’t actually cut the paper at all although today it cut vinyl. Not only that but my machine won’t read any print and cut images and displays the “detection failure” message every time I try print and cut (that’s what lead me to do the calibration in the first place). I am so confused as I’ve never actually used print and cut before and have had my machine (explore air 2) since last June. I’ve tried little tips others have given me, such as closing the lid or holding a mat over the machine so it darkens the area (their machines seem to work better that way) and nothing has worked. I’ve contacted cricut and not heard anything back.
It’s driving me crazy! I was hoping you might know how I can fix this issue or if you know what I’m doing wrong.
I’m in the UK.
Many thanks
What paper color are you using? Is it reflective? Are you using a laser printer? You must use white paper, matte and regular ink with an Explore Air 2
@Laura, I have the same problem! It’s not detecting my lines to cut. I’m using white paper no glossy. I cleaned the sensor area, tried different lighting etc. no luck.
I am having trouble with my calibration recognizing any of my printers, however recognizes them to print to for the steps for print and cut. Any suggestions
try restarting Design Space. Sometimes calibrating is a little glitchy :/
After the large cut, I get a prompt to unload the mat FIRST and am asked was the cut satisfactory. When I unload the mat the calibration goes back to the original screen without allowing the input if the cut was satisfactory. This is an endless loop. I have tried several cycles. Any advice?
Print then Cut was a little glitchy a while ago for me as well. I think the problem has been resolved.
@David Sides, Dii am having the same issue, did you get a solution?
@David Sides,
I have the exact same problem since the beginning and couldn’t solve it still. If I do not unload but choose first if the cut was satisfactory, the same thing happenes.
Could you fix the problem?
Greetings
@David Sides, I am having the same issue in February 2022, so the glitch still has not been addressed.
Thank you so much for this information sometimes when we are lost and don’t know what to do God sends folks like you to explain it . Thanks again for sharing your awesome. Have a blessed day.