

Hello Daydreamers!
In today’s tutorial, I will teach you how to make a stunning Christmas Advent Calendar with your Cricut machine!
My dad and I worked for about 100 hours to conceptualize, test, and finally produce a beautiful project that you can display with satisfaction in your home.
Thank you, Dad, for making this project possible!
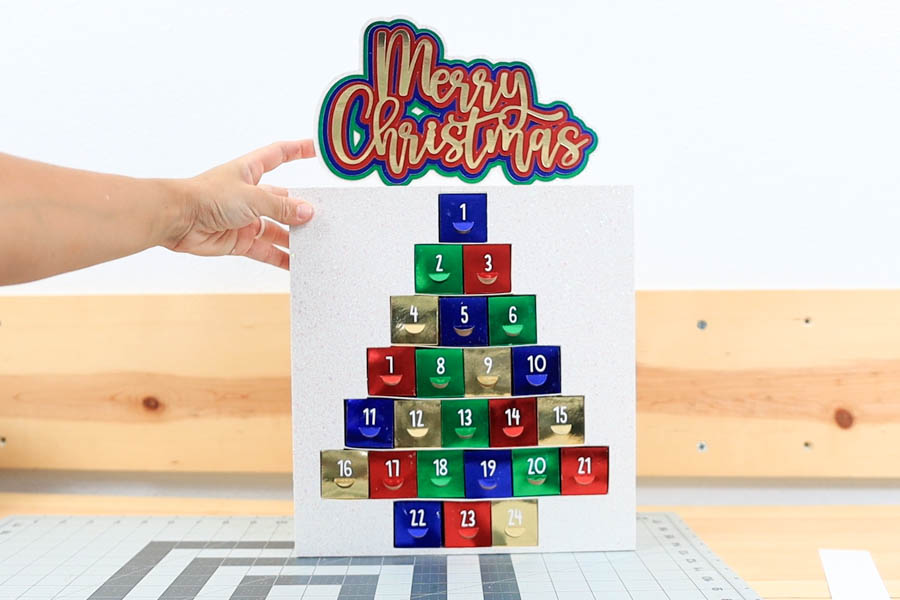
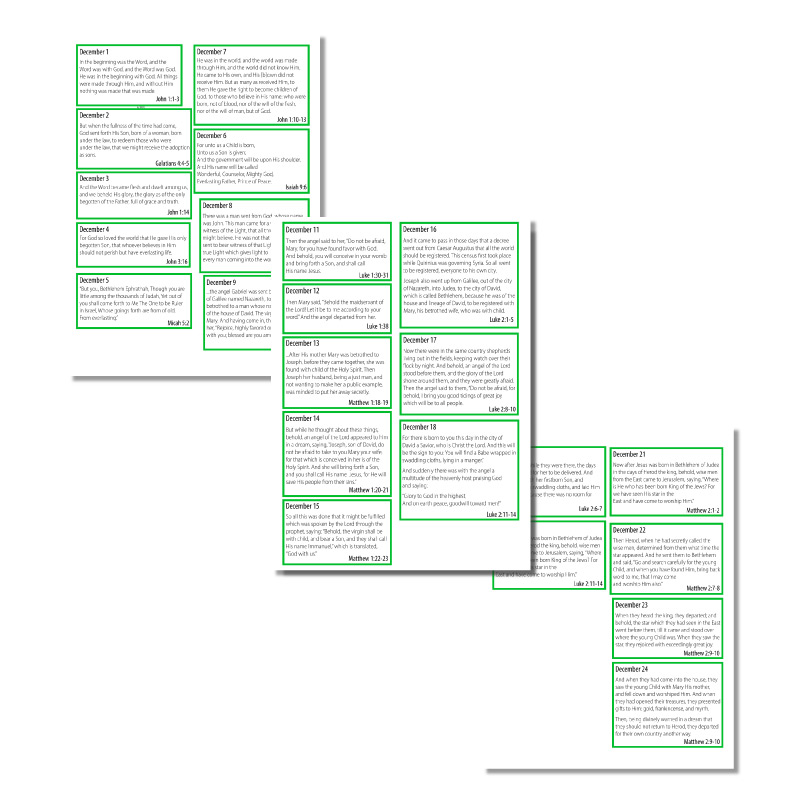
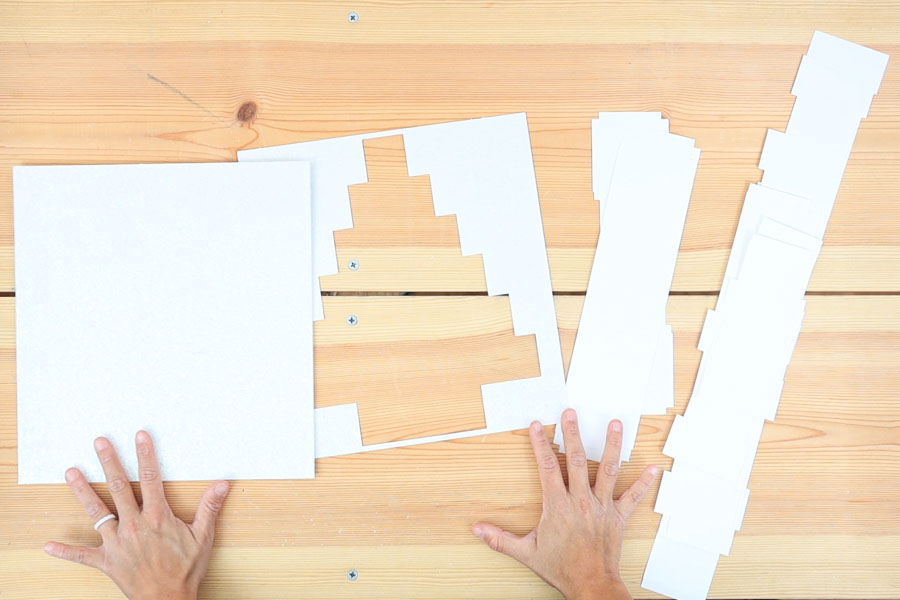
What I like the most about this advent calendar is the little drawers for each day. You can put some small pieces of candy inside them, and I’ve also included some scripture verses about the nativity for each day.
This project is compatible with any Cricut Maker or Explore machine, and although I cover and explain everything in detail, it requires patience. Therefore, I wouldn’t make this calendar my first Cricut project unless you have a good attention span and attention to detail.
Tip: This tutorial builds upon the skills I teach in every step. If you’re just starting with your machine, I suggest you read and follow each step.

Are you ready?
Let’s daydream into reality!
Advent Calendar – Free SVG Template
Usually, all my files have a download button on each thumbnail. Since this project is big, I decided to include everything in a zipped folder.


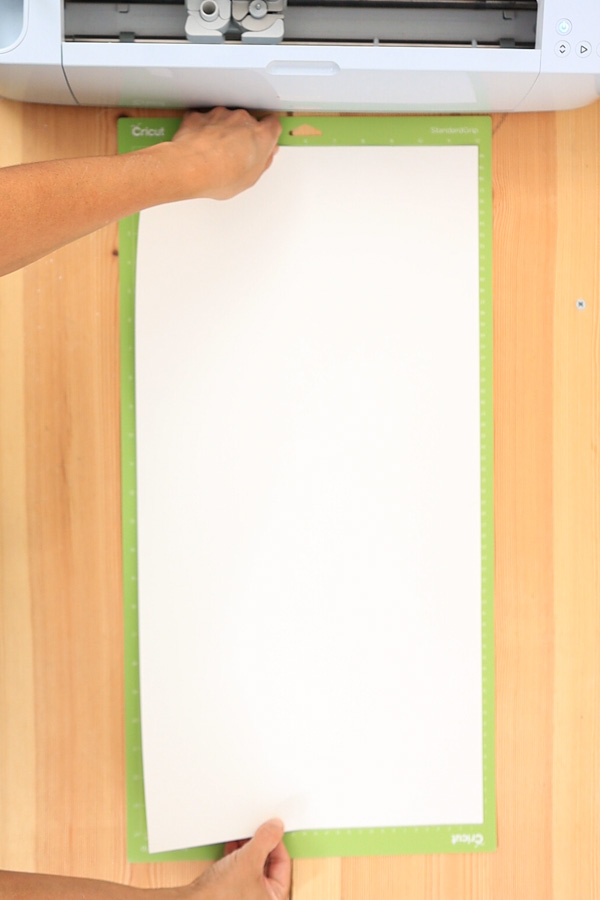
Save to your computer and extract the files to upload to Design Space.
Before we move to Design Space, download the file and look at the calendar to understand how it works.
Advent Calendar – Youtube Video
Understanding the Advent Calendar Template
The calendar will be divided into three different projects.
- Calendar structure: the front, back, lateral covers, and drawer holders.
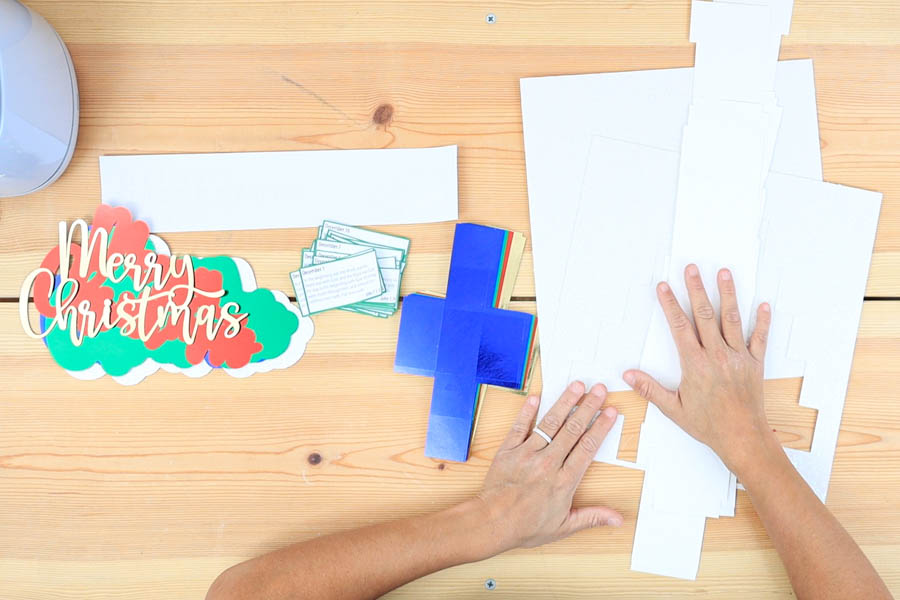
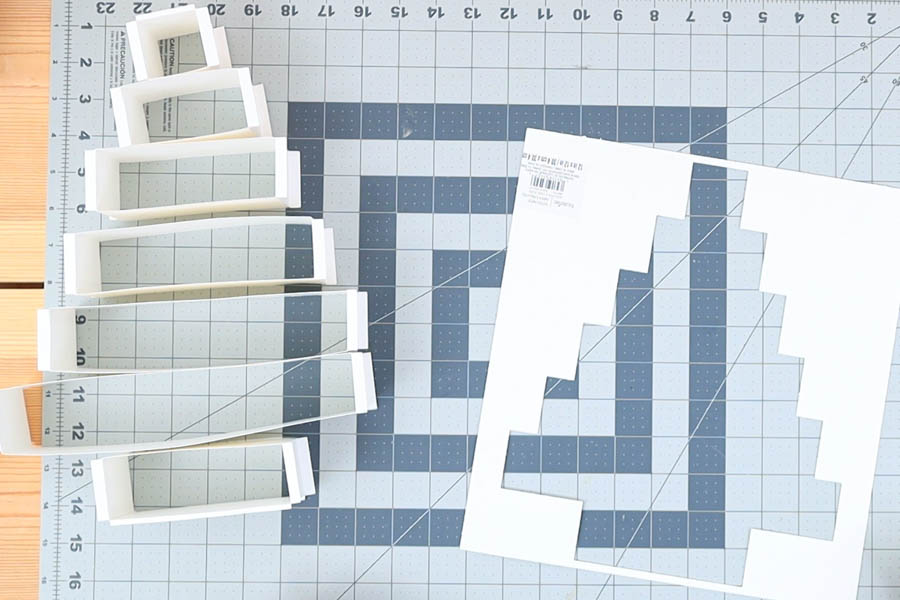
- Drawers: we need 24 drawers. I have three different files to accommodate the paper size you have on hand.
If using letter-sized paper (11 “x 8.5″), you can fit two drawers on a sheet; and if using 12″ x 12” paper, you can make three drawers on a single sheet.
If using a patterned paper where the orientation of the box matters, then use the single template box. And copy-paste if you can fit more copies on a single sheet.
If I could go back in time, I would use 12″ x 12″ paper sheets because the cuts go fast, especially on a 12″ x 24″ mat. You can cut all your drawers on four mats.
Since I used letter-sized paper, I had to do six cuts. - Decoration: consists of the numbers on the drawers, bible verses that contain the nativity story, and the “Merry Christmas” title.
Now that you have a concept of how the template works let’s look at the tools and materials you’ll need to complete this project.
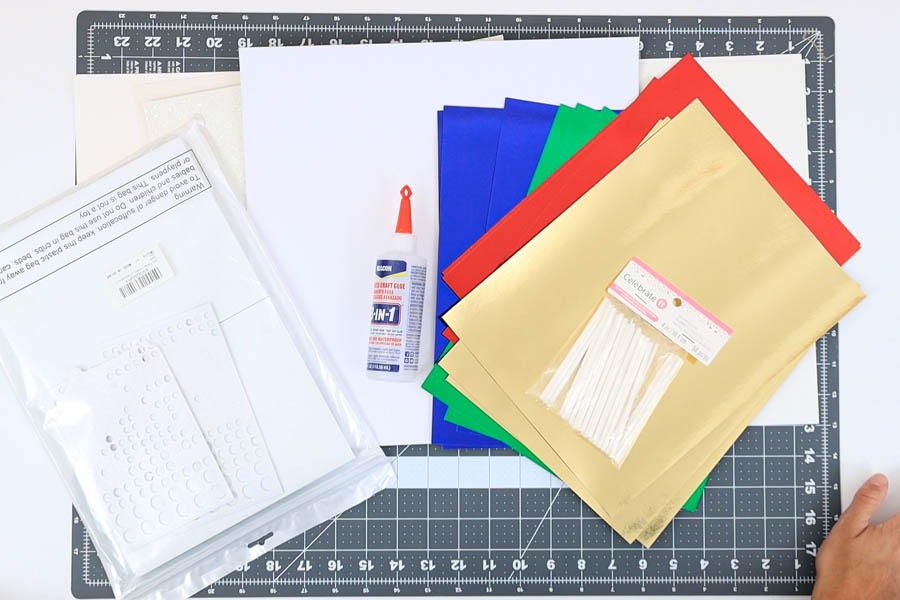
Tools & Materials
- Cricut machine (Maker or Explore)
- Fine Point Blade
- Scoring wheel or scoring stylus
- 12 x 24 green mat¹
- 12 x 12 green mat (optional)
- Tweezers
- Weeding tool
- 2 12″ x 12″ glitter cardstock or heavy cardstock for the front and back of the tree²
- 3 12″ x 24″ cardstock sheets for drawer holders and lateral covers of the structure³
- 12 11″ x 8.5″ or 8 12″ x 12″ paper sheets for the drawers⁴
- Sticky cardstock paper for the numbers on drawers⁵
- For the “Merry Christmas,” add an extra five sheets of paper⁶
- Two cupcake topper sticks
- High-quality glue⁷
- Double-sided foam dots (optional)⁸
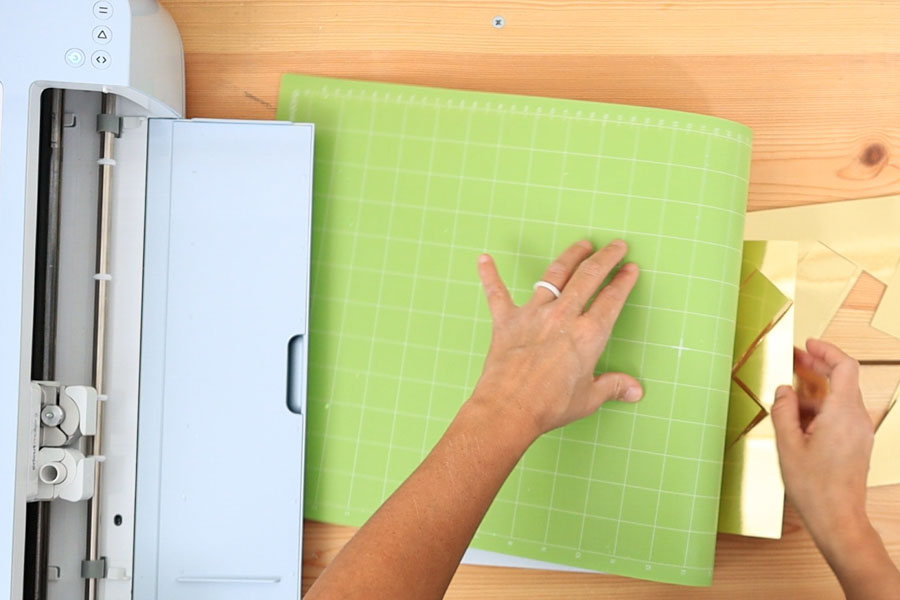
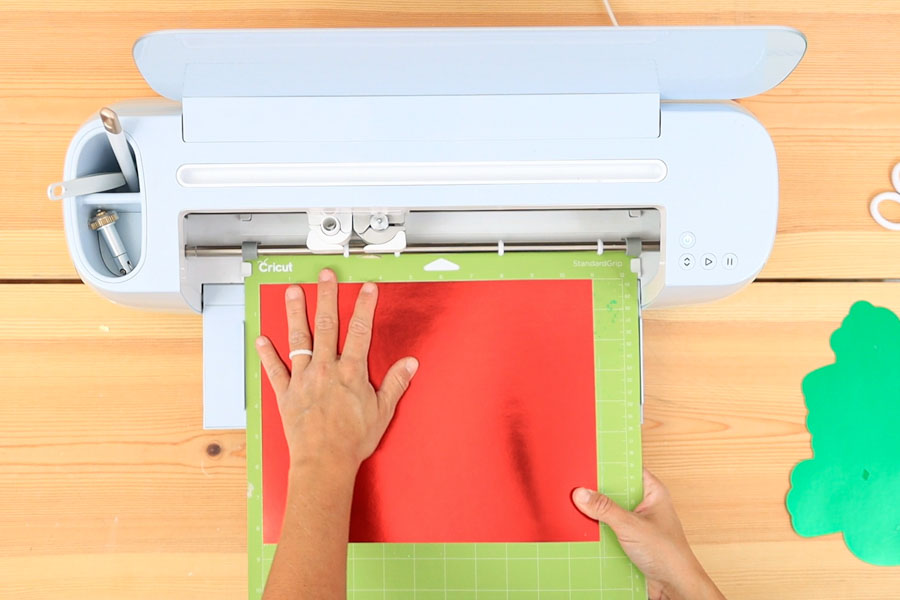
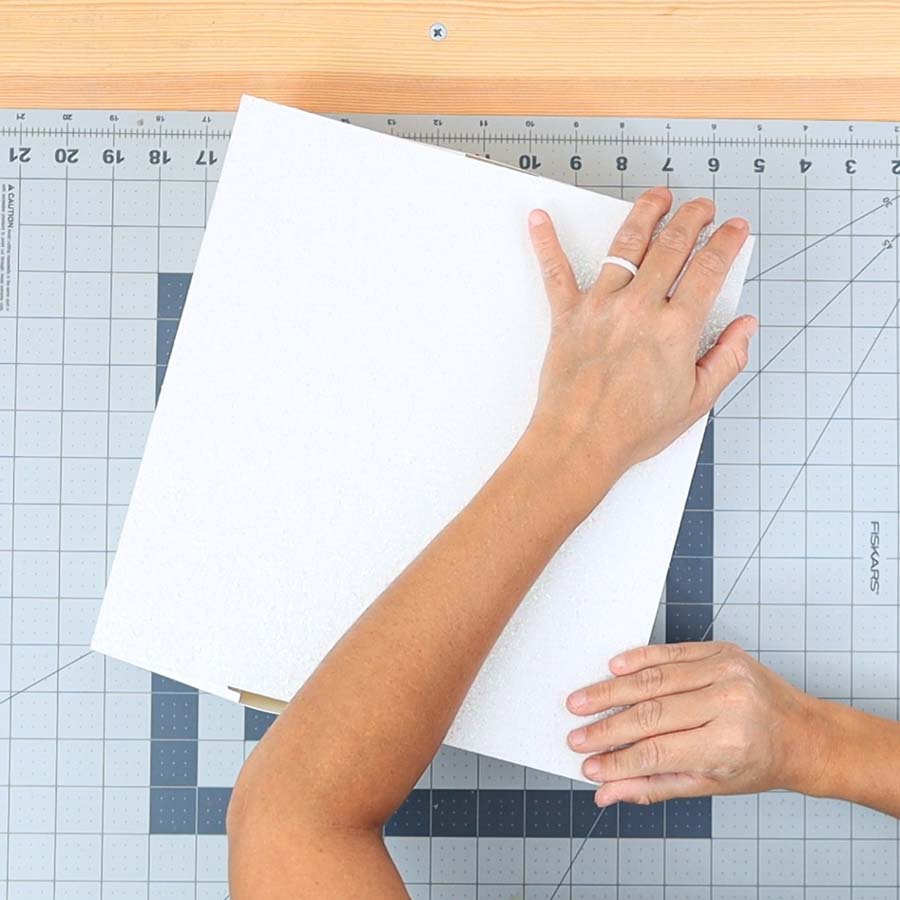
1. The lateral sides of the calendar and the drawer holders require a 12″ x 24″ mat. The rest of the cuts can be made on a 12″ x 12″ mat, but I still recommend using a 12″ x 24″ for most of the cuts.
2. I used heavy glitter cardstock for the front and back of the calendar. Take your time choosing the color.
3. Did you know you can buy 12″ x 24″ paper sheets at Michael’s? They can be pretty expensive, especially if you only need three. If you want to save money, go to the school section, get some poster boards, and trim them to fit the large Cricut mat.
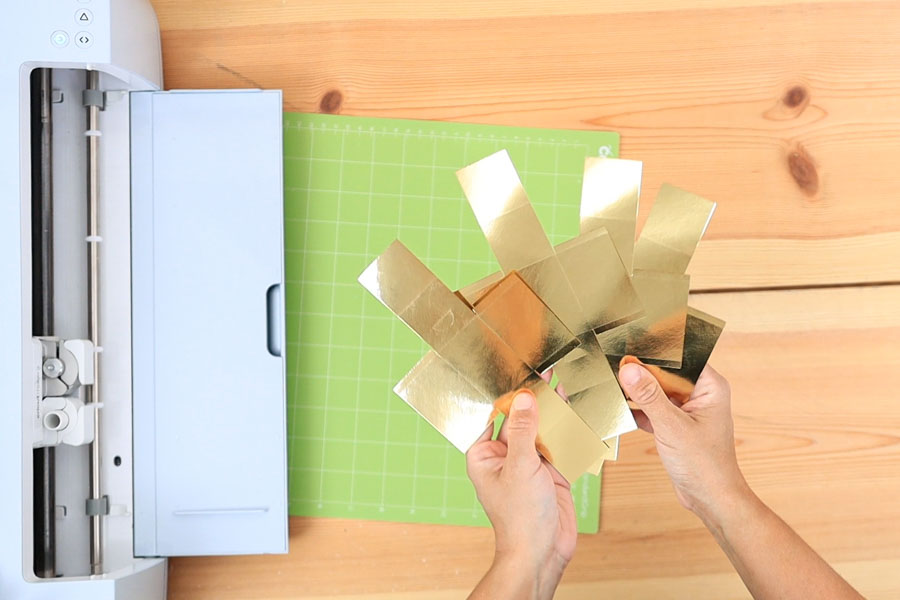
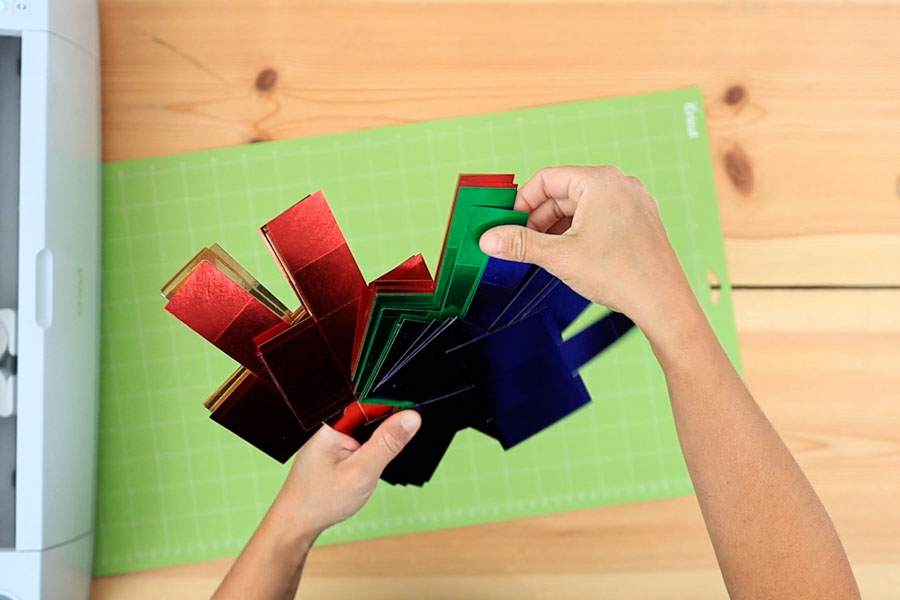
4. I picked four colors for the drawers and used foil cardstock. The paper itself is gorgeous, but if I could go back in time, I would use a regular cardstock paper because the glue I used didn’t react very well with the foil.
Also, use 12″ x 12″ sheets if possible because you’ll cut the drawers faster!
5. I used my Maker 3; therefore, I didn’t need a mat for the sticky cardstock. If you don’t have a Maker 3 or Explore 3, you can place the sticky cardstock on your mat.
6. The “Merry Christmas” is optional, but I like it because it adds an extra touch. I used the same paper I used for my drawers and the glitter cardstock I used for the calendar structure. You need to play with the color combination. Take your time to decide what colors you want.
Maybe you prefer the same color for the drawers, of just two. It comes down to your taste.
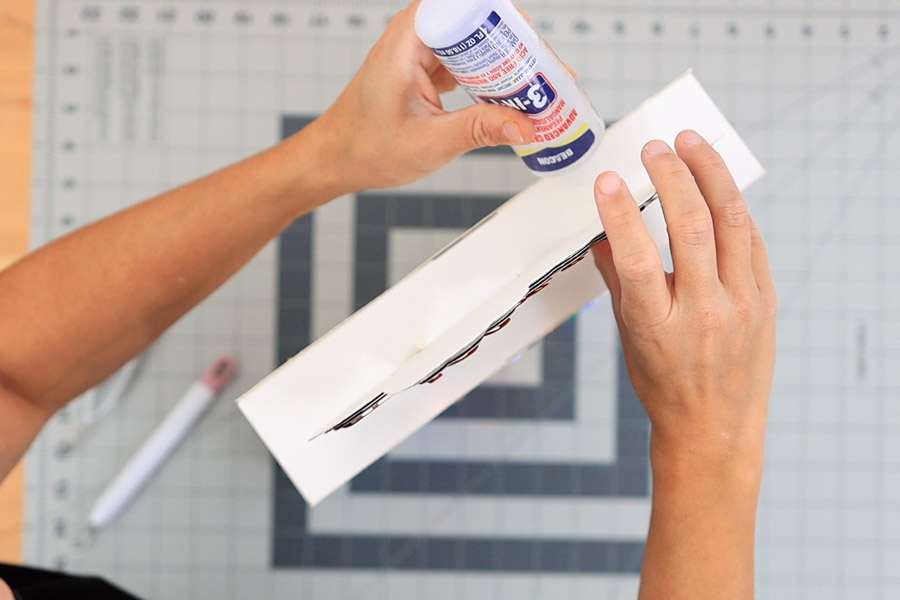
7. Always use high-quality glue when making cards or a professional project. Kids’ glue will make your paper wet and bubbly once it dries. I always recommend Beacon 3-in-1.
8. Foam dots will add a pop-up effect to your project that you don’t want to miss!
1. Advent Calendar Structure
As I mentioned above, this calendar will be divided into three different projects, so it’s easier to explain and manage the project as it contains many pieces.
Important: In this step, I will cover concepts like “Uploading” and extra details that I won’t cover in the following steps because I don’t want to be repetitive.
Step 1 – Upload Structure
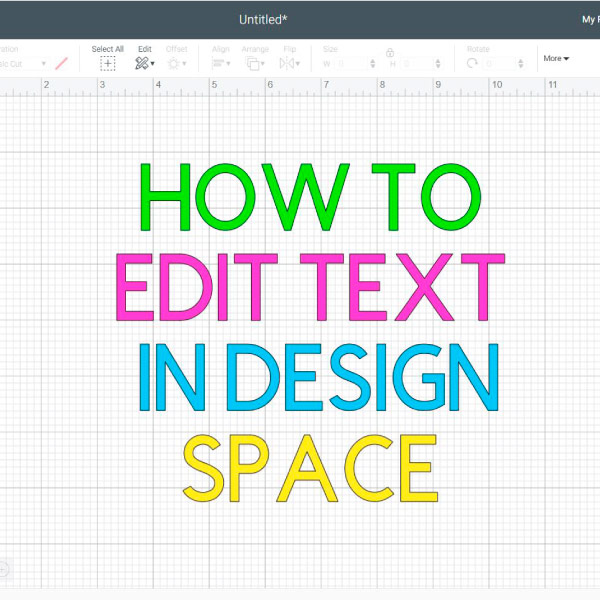
Once you download the zipped file to your computer, unzip it and upload the “Christmas Advent Calendar” file to Design Space by clicking on the “Upload” icon on the left panel of the canvas and following the prompts.
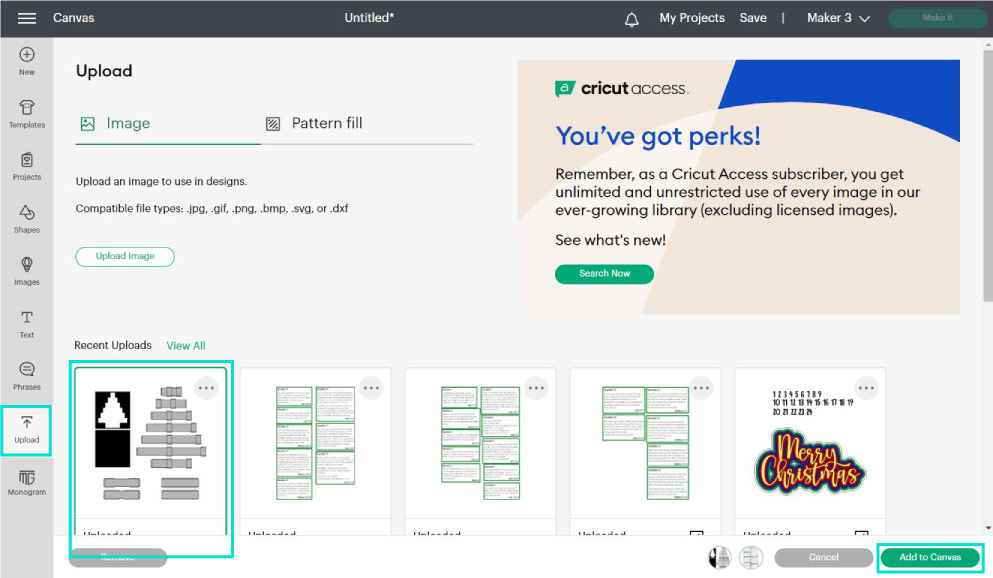
After uploading, select the file from “Recent Uploads” and click “Add to Canvas.”
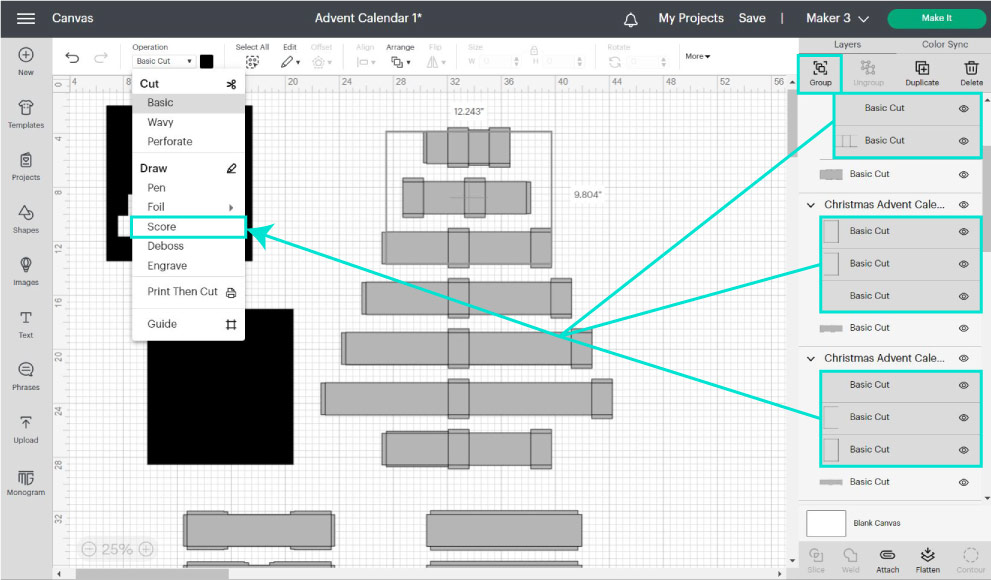
Step 2 – Add Score Lines
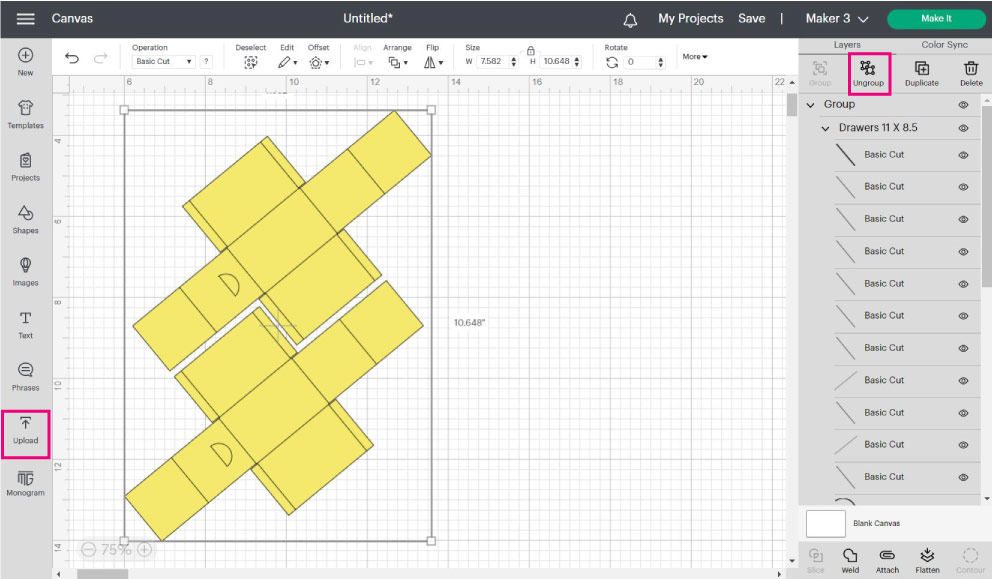
Initially, the file will be grouped; inside the leading group, there are multiple groups.
Go ahead and “Ungroup” the entire file, leaving the other groups intact.
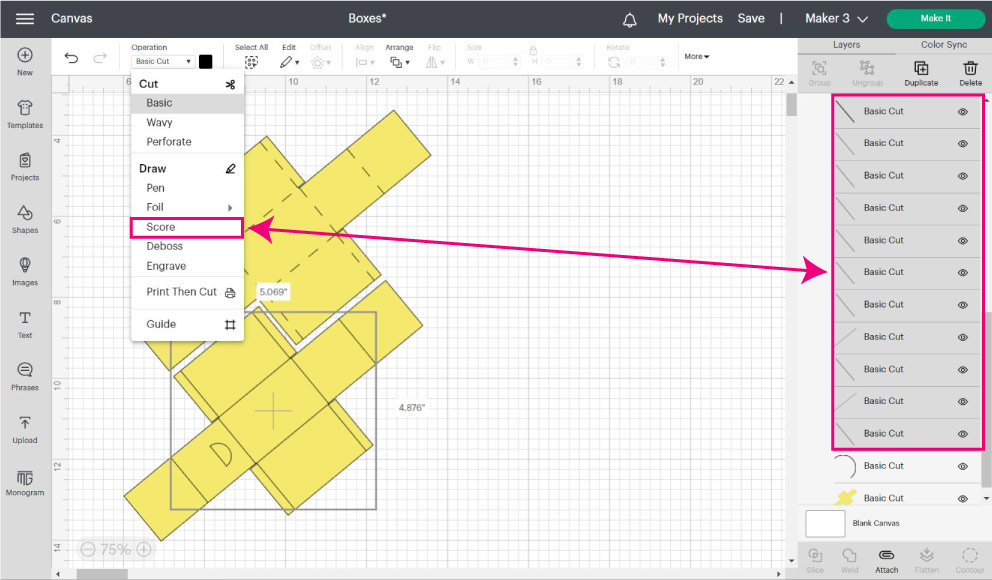
Select all the cut lines from the layers panel on top of the grey layers. You can select them one at a time by pressing ctrl or cmd at all times.
I select them in batches because Design Space can be glitchy sometimes. Once you select them, click on the “Operation” drop-down menu and select “Score.”
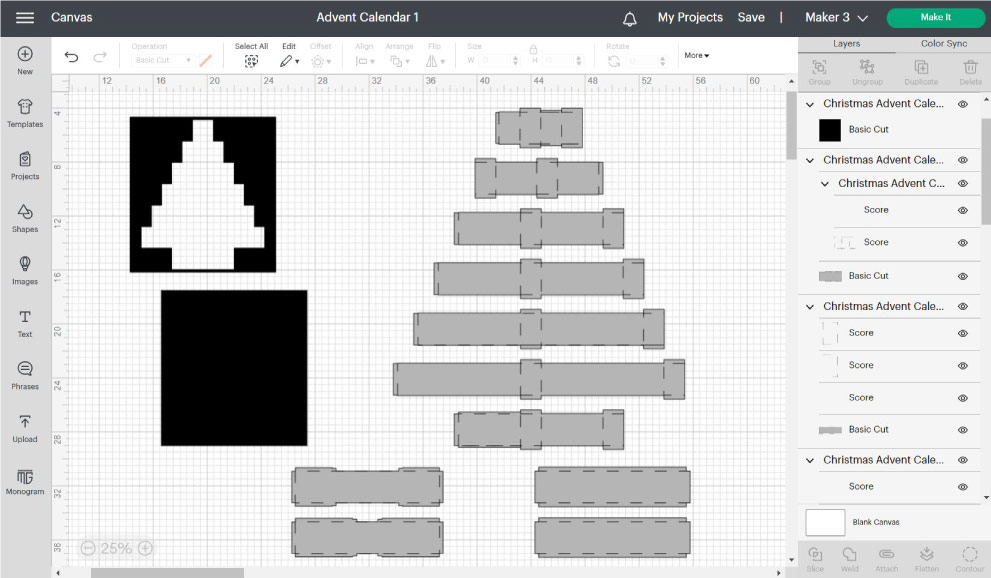
This is how the file should look after changing the operation to “Score.”
Step 3 – Attach
We need to tell our machine where to score the fold; therefore, you need to attach every drawer holder and the lateral covers to their respective score lines.
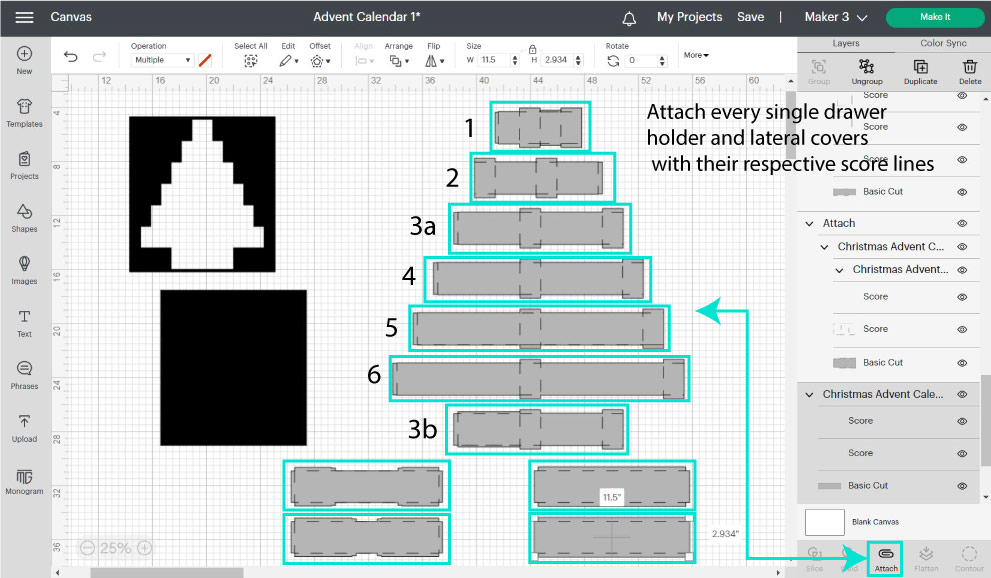
That’s where all the groups we left intact come in handy. Select each group from the canvas or layers panel and click “Attach.”
Important: Notice the difference between the 3a and 3b drawer holders. Don’t confuse them! The 3b has extra score lines and tabs that are very important for putting the calendar together.
If you feel lost, I decided to include the link to the project in Design Space; please don’t make it public. Instead, share the URL of this article.
Plus, you need the instructions and tips to assemble it!
After attaching, click on “Make it” in the upper-right corner of Design Space.
Step 4 – Cutting Process
Depending on the machine you own, you’ll be prompted to select how you want to load your materials to your device.
Select “On Mat” and click “Continue.”
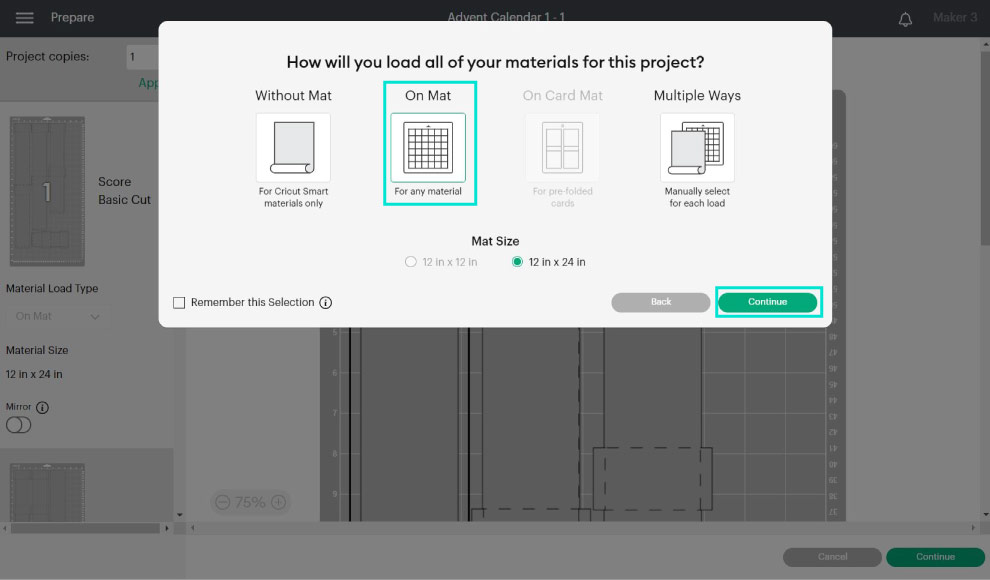
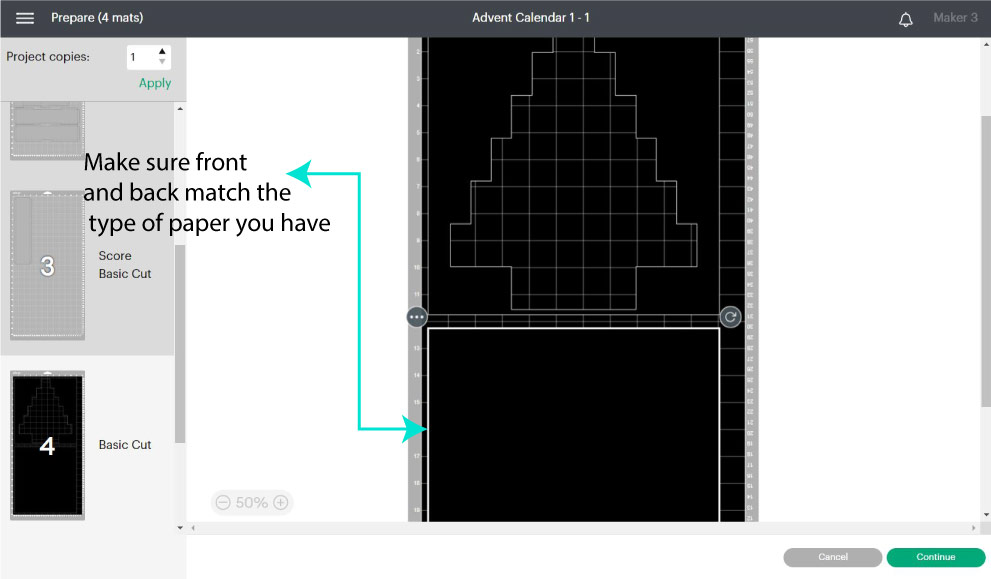
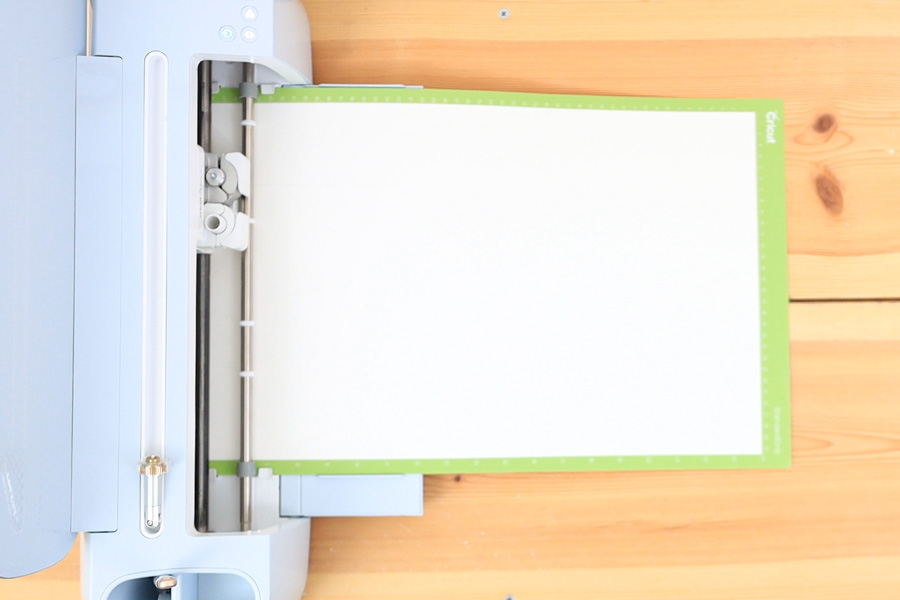
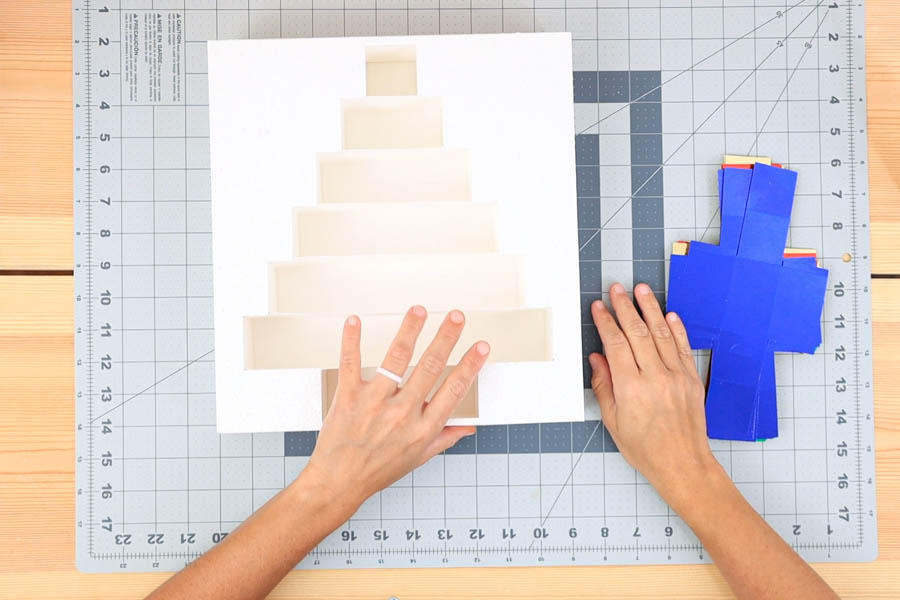
The tree structure requires four mats.
Before you move forward, check the front and back of the structure mat.
SUPER HYPER MEGA IMPORTANT: Cricut will have both layers pretty much together. However, if you’re using 12″ x 12″ paper, you need to move one of the objects down so the cuts don’t overlap when you place the paper on the mat.
Click on “Continue” to select your materials.
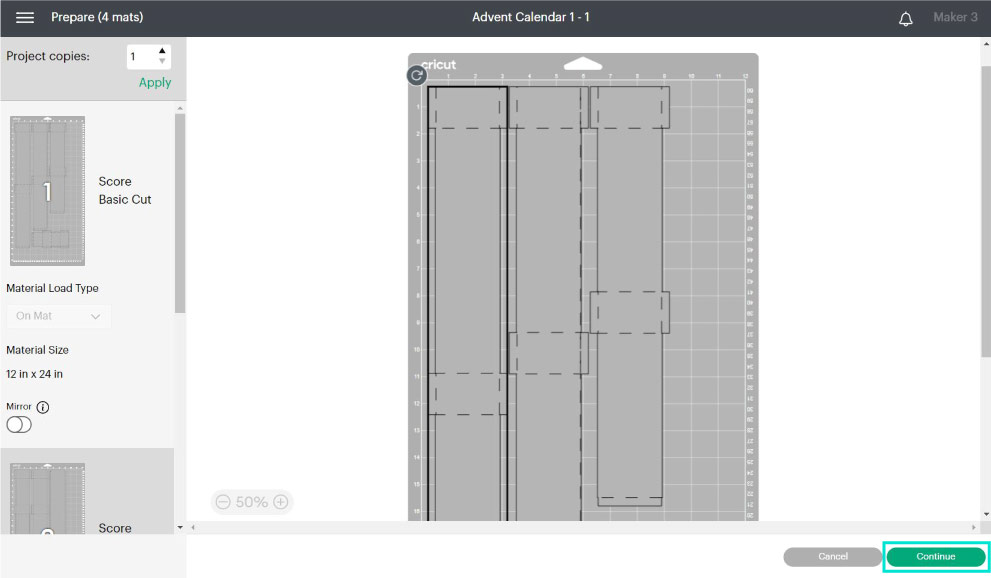
Note: For smart-set dials machines, move to “Custom” to select material from Design Space and follow along.
For the materials, most likely, the lateral covers and drawer holders will be different than the front and the back of the calendar structure.
I’ve noticed that the “Remember Material Settings” works very well with the new machines. But with older machines, the setting is glitchy. It’s essential to check what mat you’re loading to Design Space and what material you choose.
If you have an Explore machine, you will be prompted to use the scoring stylus; however, if you have a Maker, you’ll be prompted to use the “Wheel.”
If you don’t have the scoring wheel, click on “Edit Tools” and select the stylus.
If you have a Maker machine, invest and get the wheel!
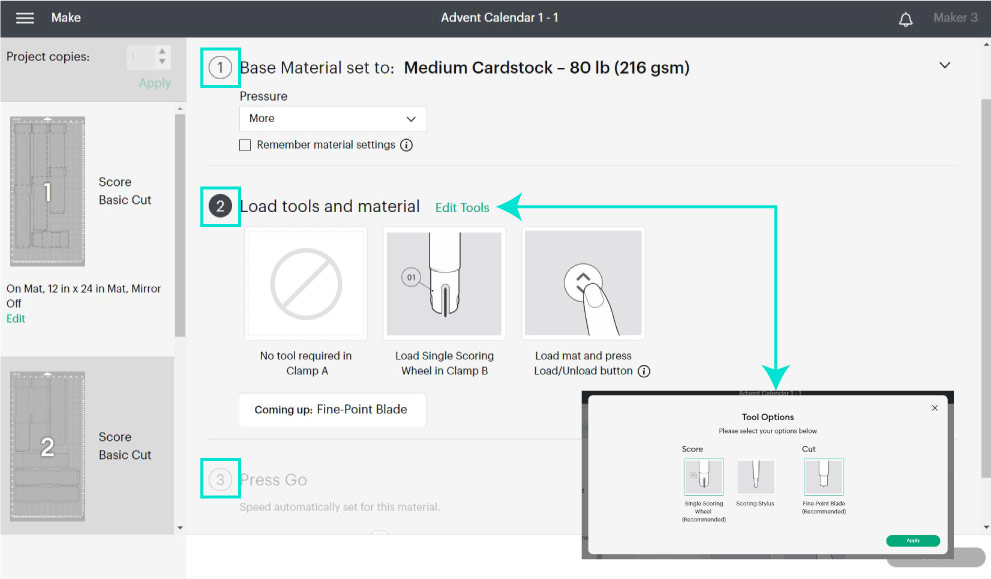
Place the paper on the mat and smooth it with your hands or a brayer to prevent bubbles. If using the scoring stylus, install it on clamp “A” and the blade on clamp “B.”
If using the wheel on the Maker, install it on clamp “B.” Load the mat to your machine.

First, your machine will score, and then it will cut.
If you’re using the wheel, Design Space will notify you to install the fine-point blade. Install the blade and press the flashing go button to continue the cut.

When your machine is done cutting, unload the mat and bend it to release the material from it.
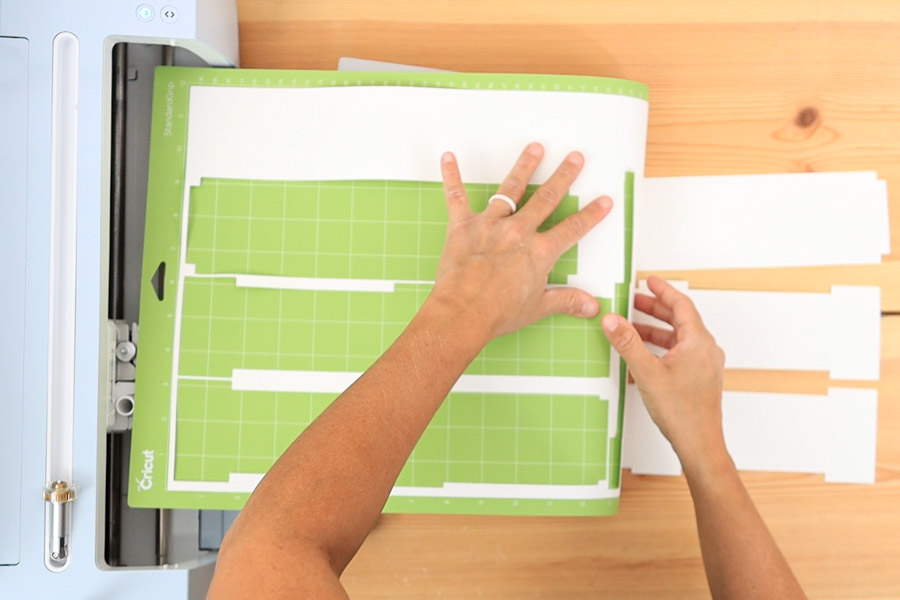
Continue the same process until you cut all four mats.
Remember to change your material settings if you’re using a different paper for the front and back of the calendar.
I used glitter cardstock.
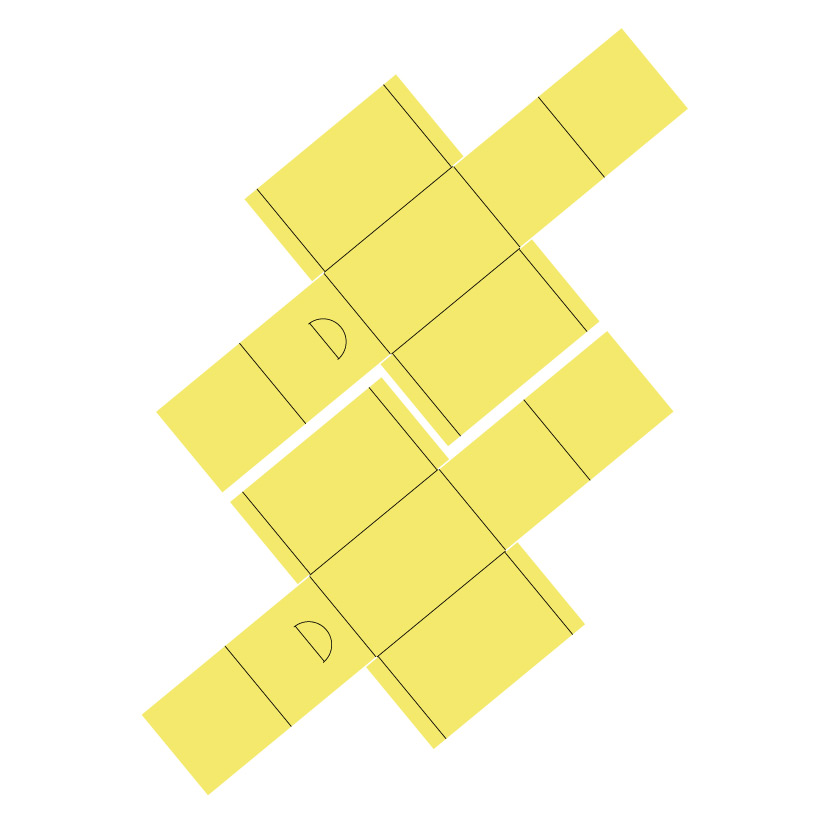
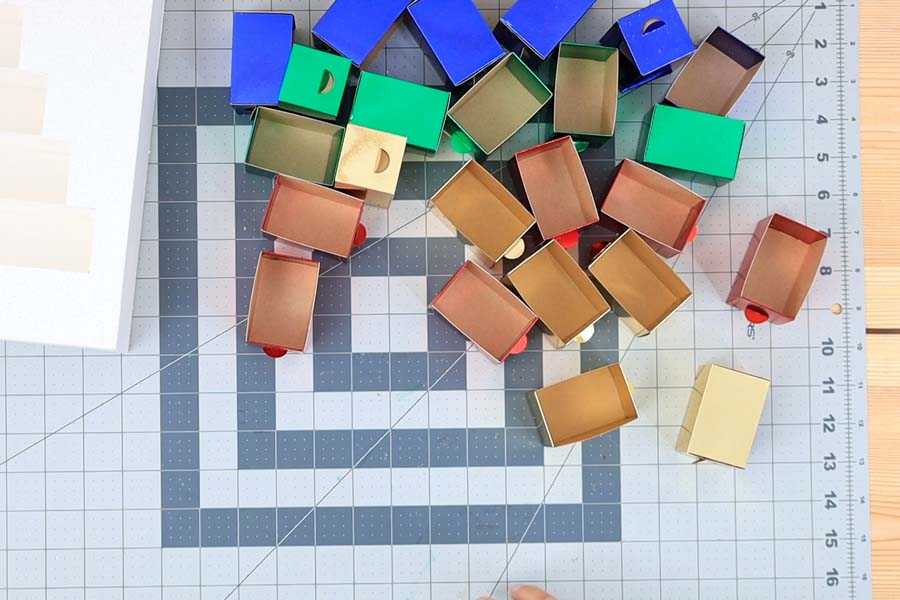
Advent Calendar Drawers
It’s time to work on the drawers for the advent calendar.
I used letter-sized paper (11″ x 8.5″); therefore, I uploaded the template that fits two boxes.
Step 1 – Upload and Add Score Lines
DON’T ungroup this file!
Select all the cut lines from the layers panel except the little curvy line and change the “Operation” to “Score.”
Note: the curved line is the small tab to pull the drawer out of the calendar.
Step 2 – Add Duplicate (Optional) & Attach
I recommend you cut all your drawers on a 12″ x 24″ mat. It truly makes the process shorter!
When you use 12″ x 12″ paper is easier to move around the mat. However, when you use letter-sized paper, it can be tricky to manage the space because your machine has a 0.25″ margin on each side of the mat.
I like to be the most efficient while minimizing any possible errors.
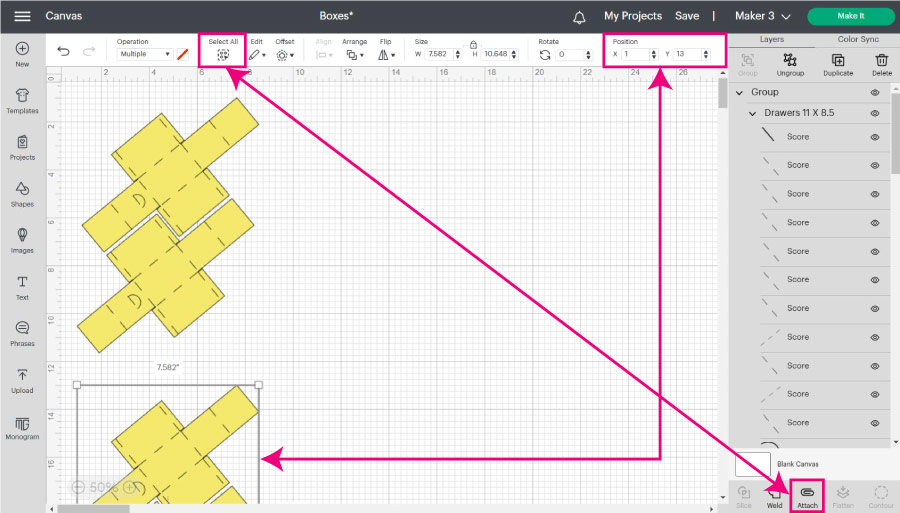
If you plan on using a 12 x 12 mat, you can “Attach” all layers on the canvas. However, if you plan on using a 12″ x 24″, make a “Duplicate” of both boxes from the top of the layers panel and do the following.
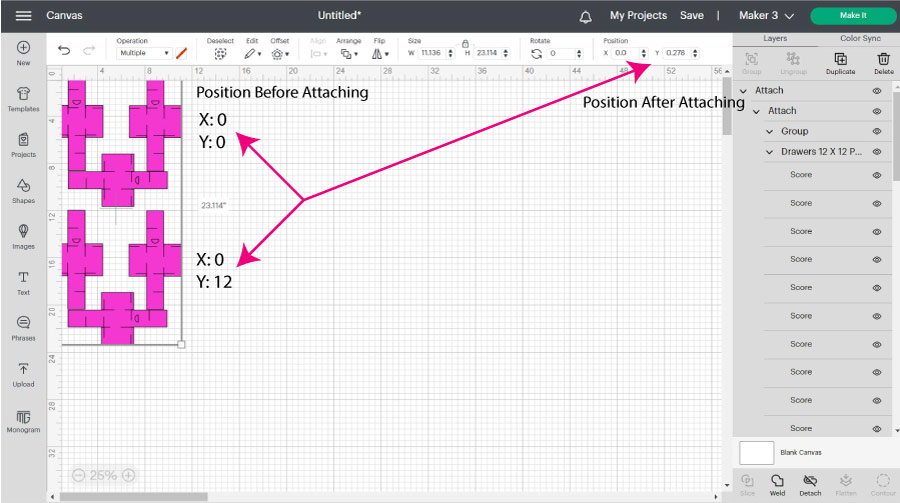
For the original copy, go to the position tool on the top many and type 1 and 1 on the “X” and “Y” positions.
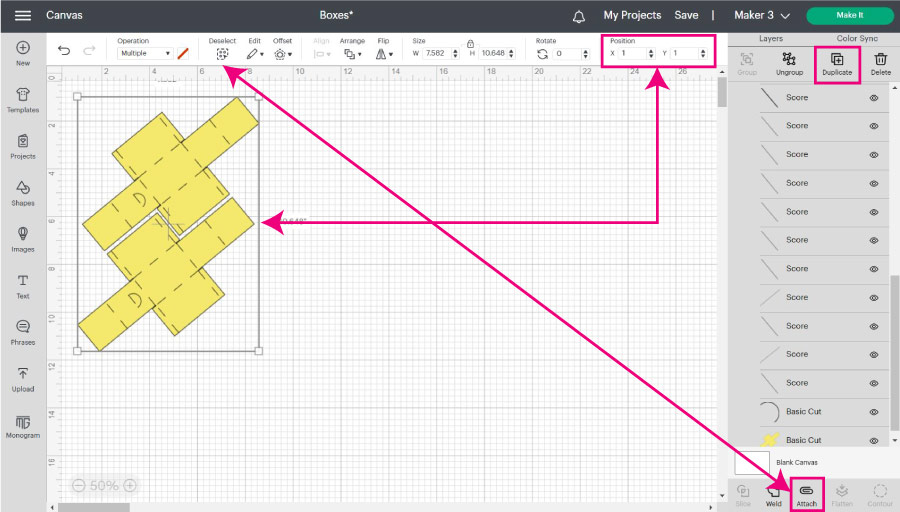
Select the copy, and type 1 on X and 13 on Y on the “Position” tool.
Now “Select All” on the canvas and click “Attach.”
If using 12″ x 12″ paper as I wanted to, the process would be identical, except for the position values. Here’s a screenshot.
Feeling lost?
Here are the links for the projects in Design Space
After attaching all the score lines and boxes, click “Make it” to send your project to cut.
Step 3 – Cutting Process
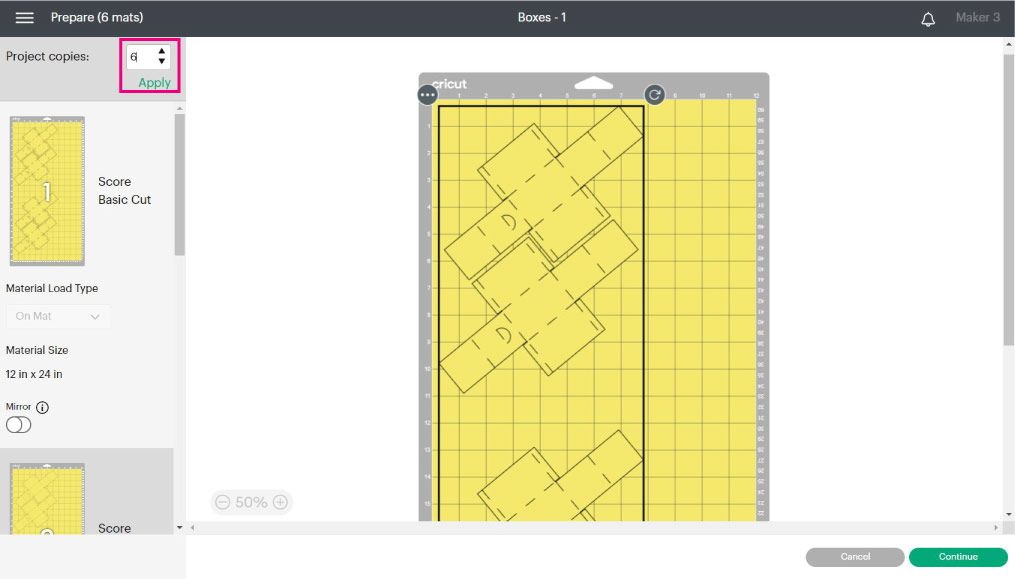
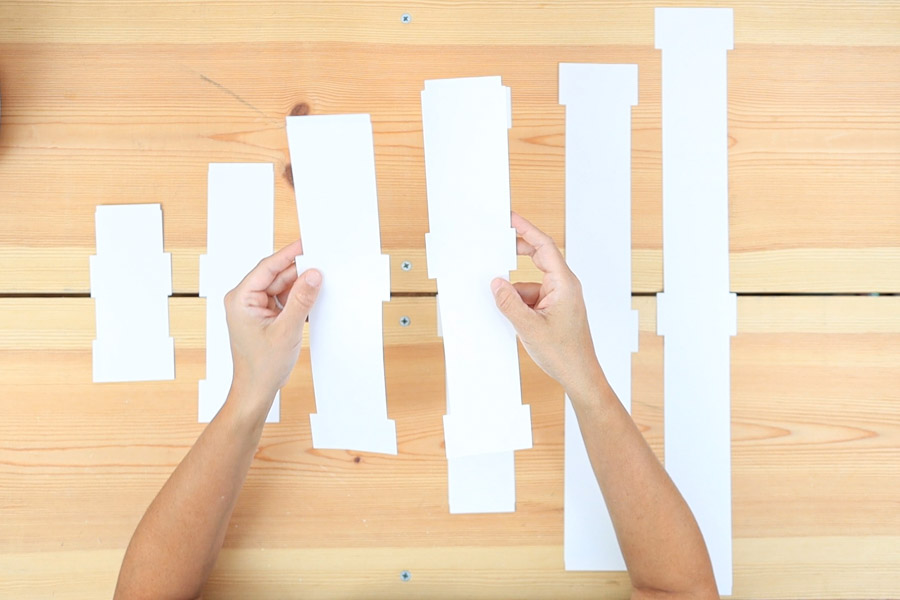
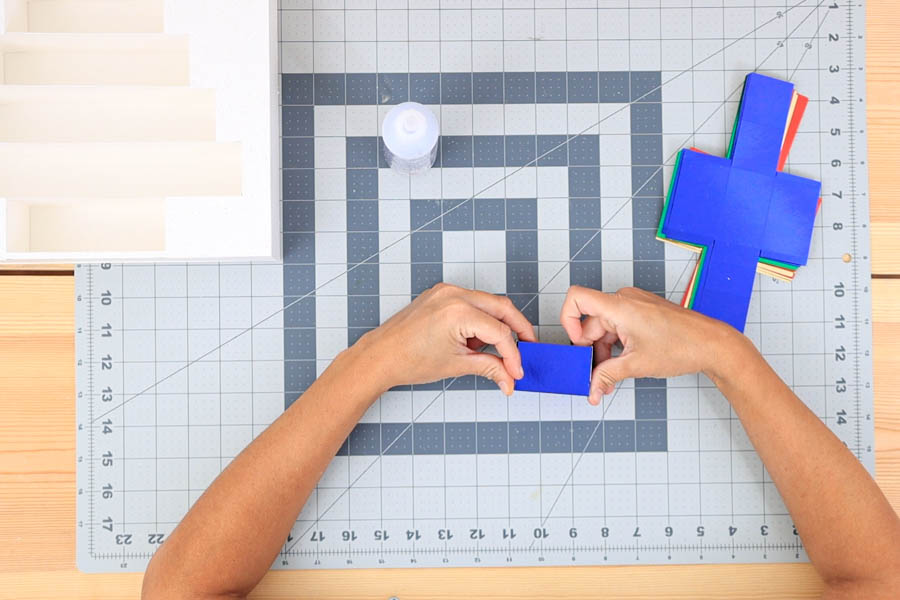
We need 24 drawers!
Since I’m cutting four boxes per mat, I need six copies. You’d need four copies for 12″ x 12″ paper on a 12″ x 24″ mat.
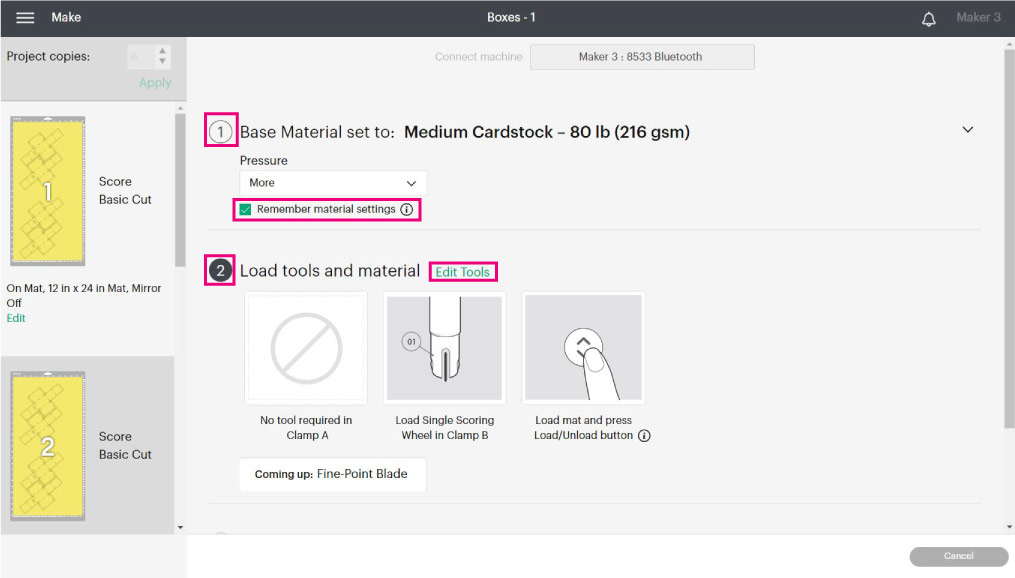
Type 6 on “Project copies” and click “Apply.”
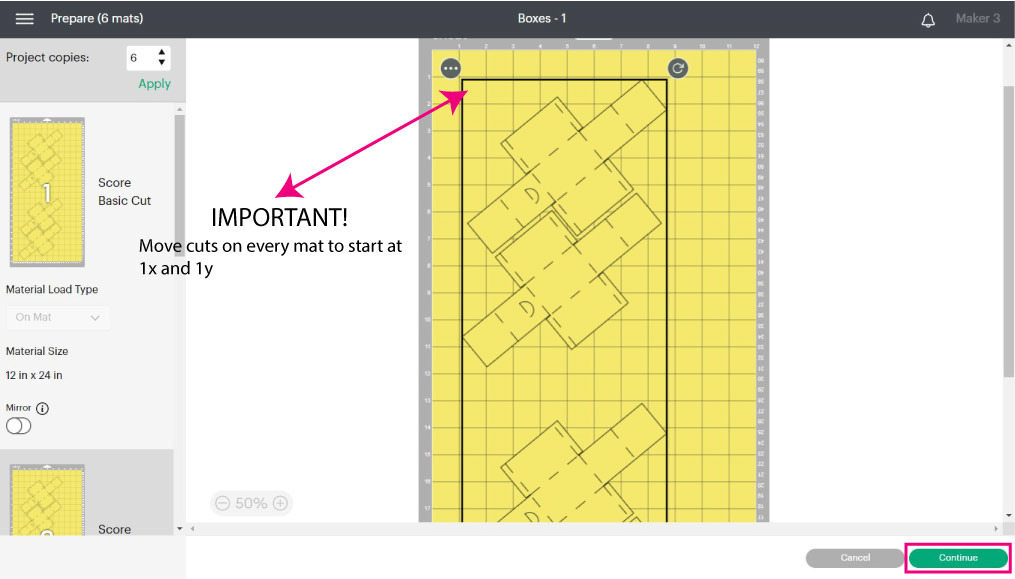
SUPER HYPER MEGA IMPORTANT: For each mat, move the cut to start on 1X and 1Y. This will help you place your paper on the mat with more ease.
Again, you need to move the object six times, one for each mat.
Click on “Continue” to select materials.
On machines with a smart-dial move to custom.
I used “Medium Cardstock” for all my boxes, so I checked the “Remember material setting” box. If you’re using different materials, you need to change the material when it makes sense.
Remember that you can use the scoring stylus or wheel if you have a Maker and only the stylus if you have an Explore machine.
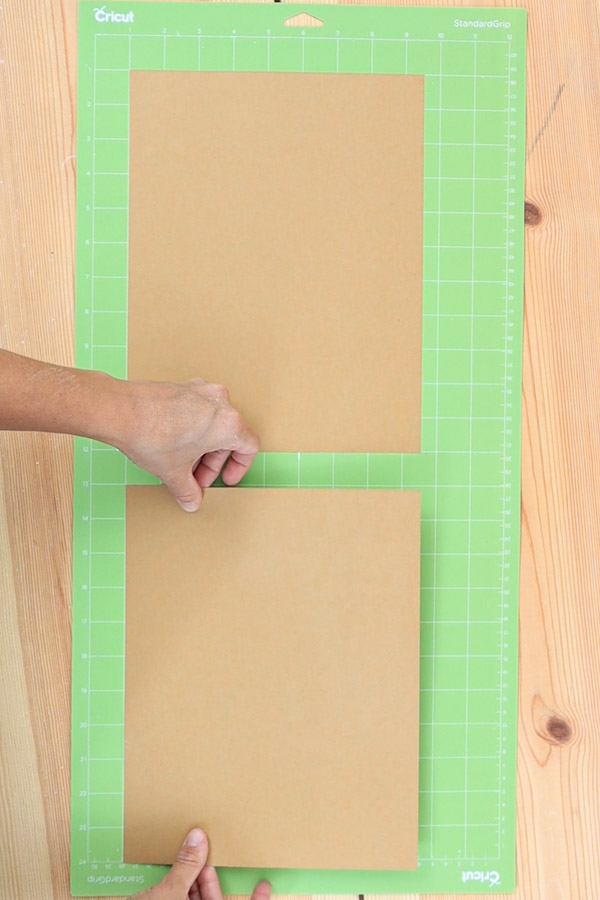
Important: If you use double-sided colored paper (like me), you MUST place the paper pretty side down every time you score.
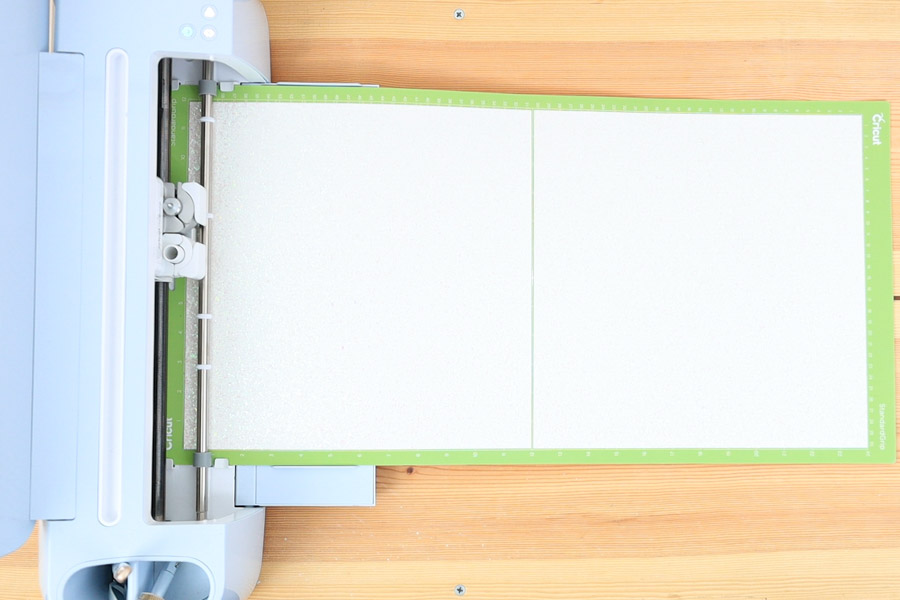
Look how I place the paper on the mat. I matched the positions I used in Design Space.
The first sheet is on 1X and 1Y, and the second is on 1X and 13Y.
It’s much easier to work like this when the measurements aren’t exact because you know your cuts will be in the right spot!
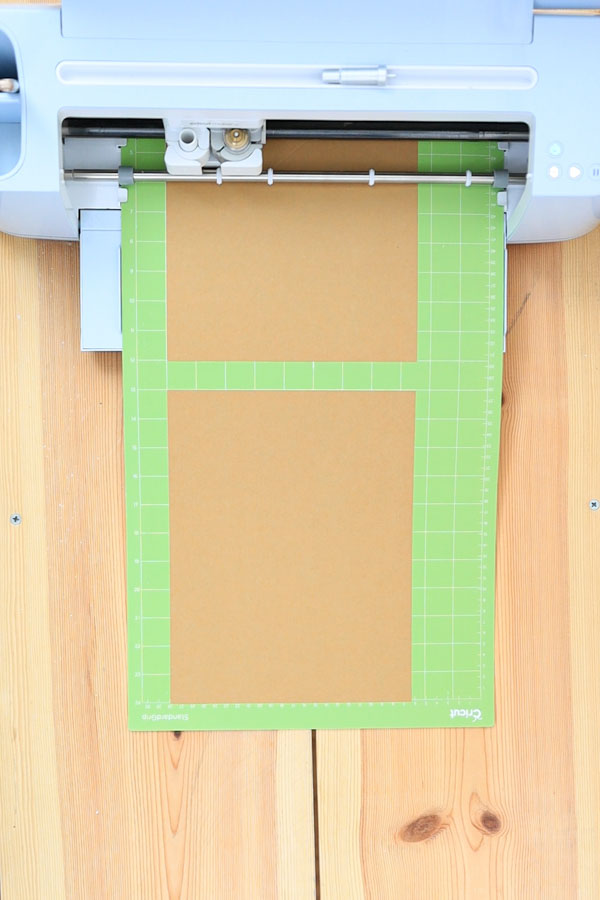
Place the paper on the mat and smooth it with your hands or a brayer, so there are no bubbles. If using the scoring stylus, install it on clamp “A” and the blade on clamp “B.”
If using the wheel on the Maker, install it on clamp “B.” Load the mat to your machine.
If using the wheel on the Maker, install it on clamp “B.” Load the mat to your machine.
First, your machine will score, and then it will cut.
Design Space will notify you to install the fine point blade if you’re using the wheel. Install the blade and press the flashing go button to continue the cut.
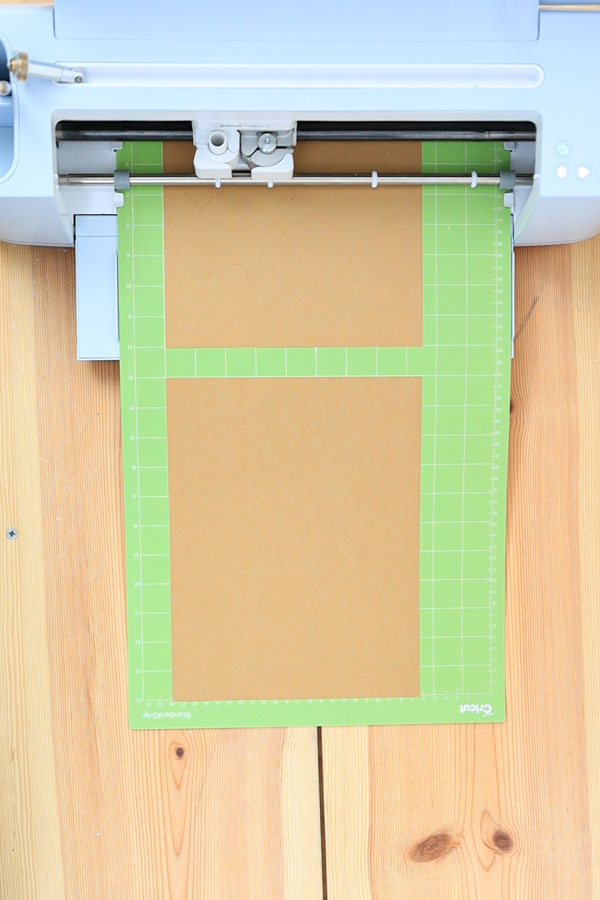
When your machine is done cutting, unload the mat and bend it to release the material from it.
Continue the same process until you finish cutting all 24 boxes.
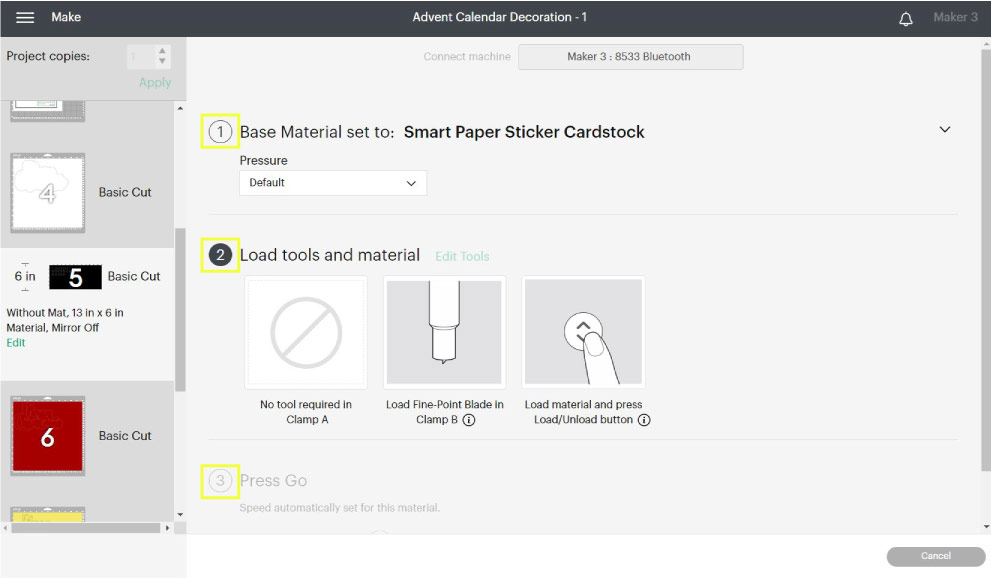
Advent Calendar Decoration
We are on our last sub-project!
Load the “Decoration” files to design space and ungroup the file.
When uploading the bible verses, choose the option “Complex” and upload as a “Print then Cut Image.”
If you don’t know how PTC works, check out my tutorial.
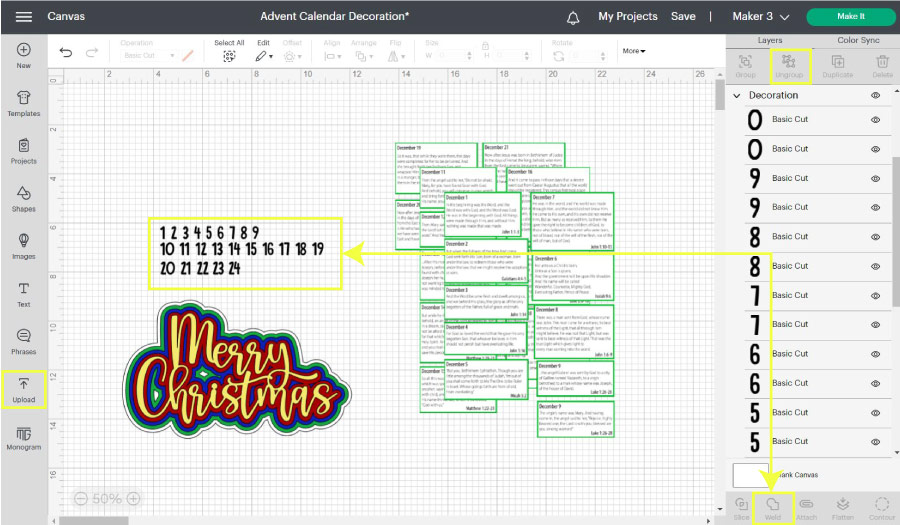
Select all numbers and click “Weld” or “Attach” so everything stays together on the mat.
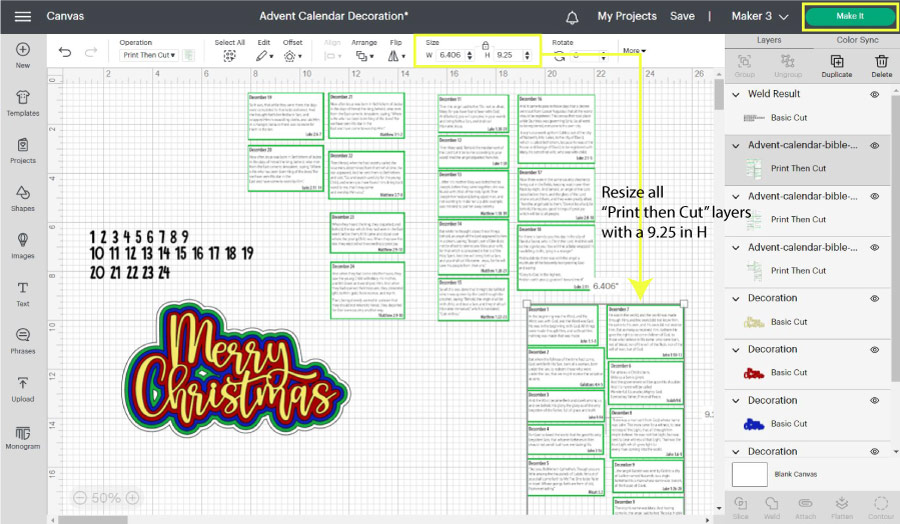
The bible verses are the only things we need to resize on the entire project.
Select each layer, and from the top menu with the little locker on the locked position, type in 9.25 on the “H” box and let Design Space complete the other side.
After resizing, click on “Make it” to start the cut.
I chose to cut on “Mat,” and since these were smaller cuts, I decided to use a 12″ x 12″ mat.
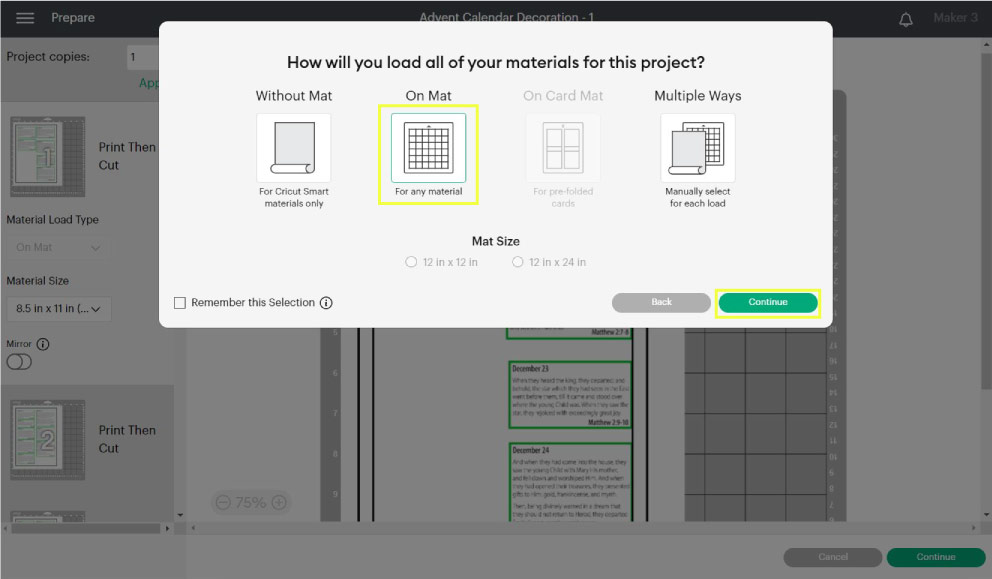
Since you have a Print then Cut project, Cricut won’t let you choose the 12 x 24 mat. But you can still load the copy on that mat. Only you have to do one cut at a time.
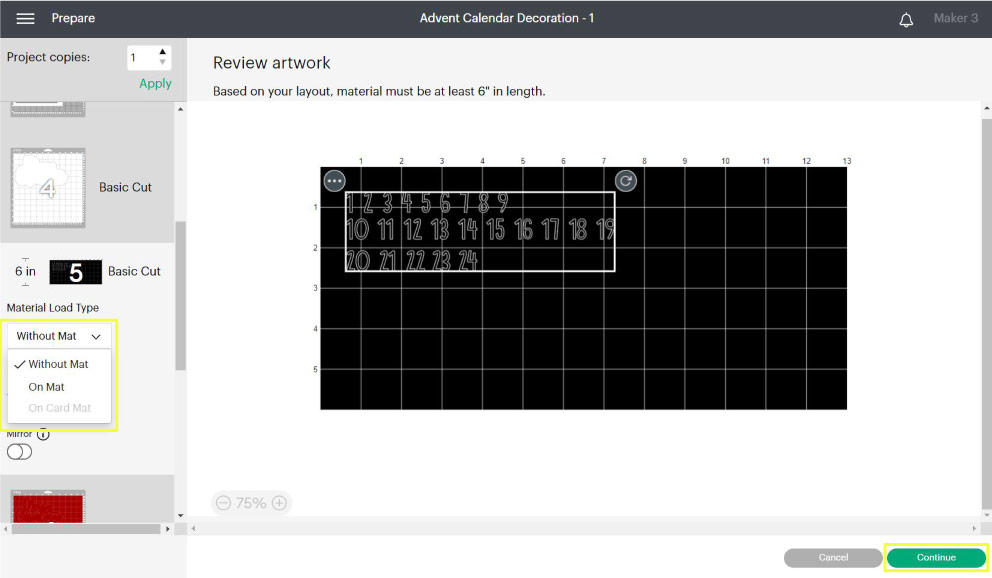
If you have a 3-series machine, you can cut Cricut’s sticky cardstock without a mat. Before selecting the material, change the “Material Load Type” to “Without Mat.”
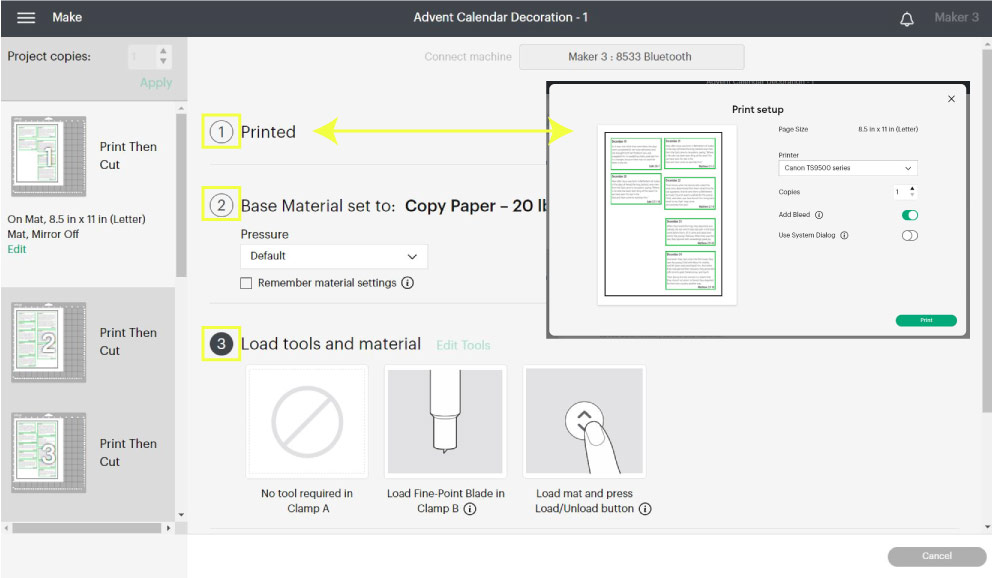
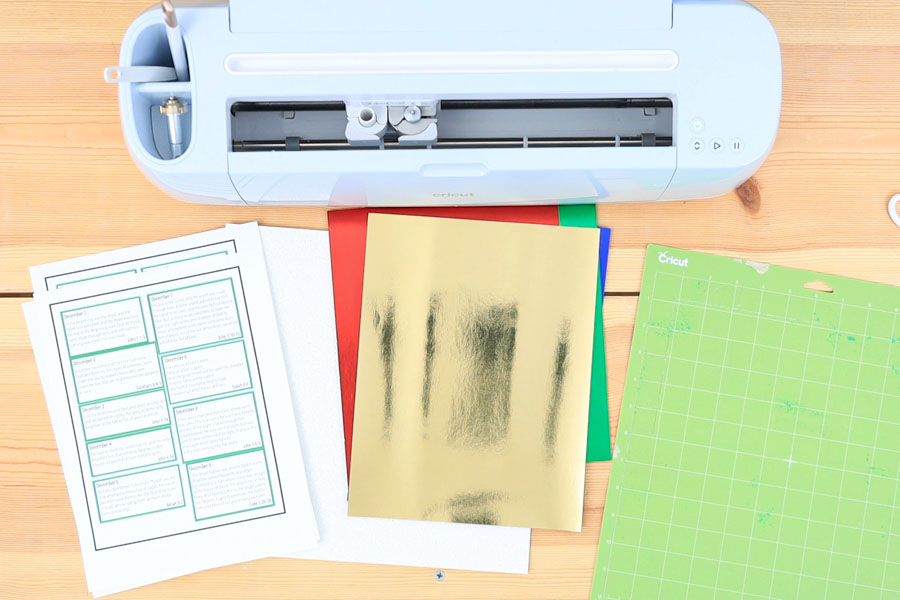
I decided to print everything first, and I used regular copy paper.
I had to change the materials every time because I used:
- Copy paper for the bible verses
- Medium cardstock and glitter cardstock for the “Merry Christmas.”
- Sticker Cardstock for the numbers. If cutting on the mat, select “Cardstock, Adhesive” with more pressure.
Here’s everything I need to cut all my advent calendar decor!
If you print all copies first, remember to match the one you’re cutting with the one you’re loading to the machine because they look quite alike!
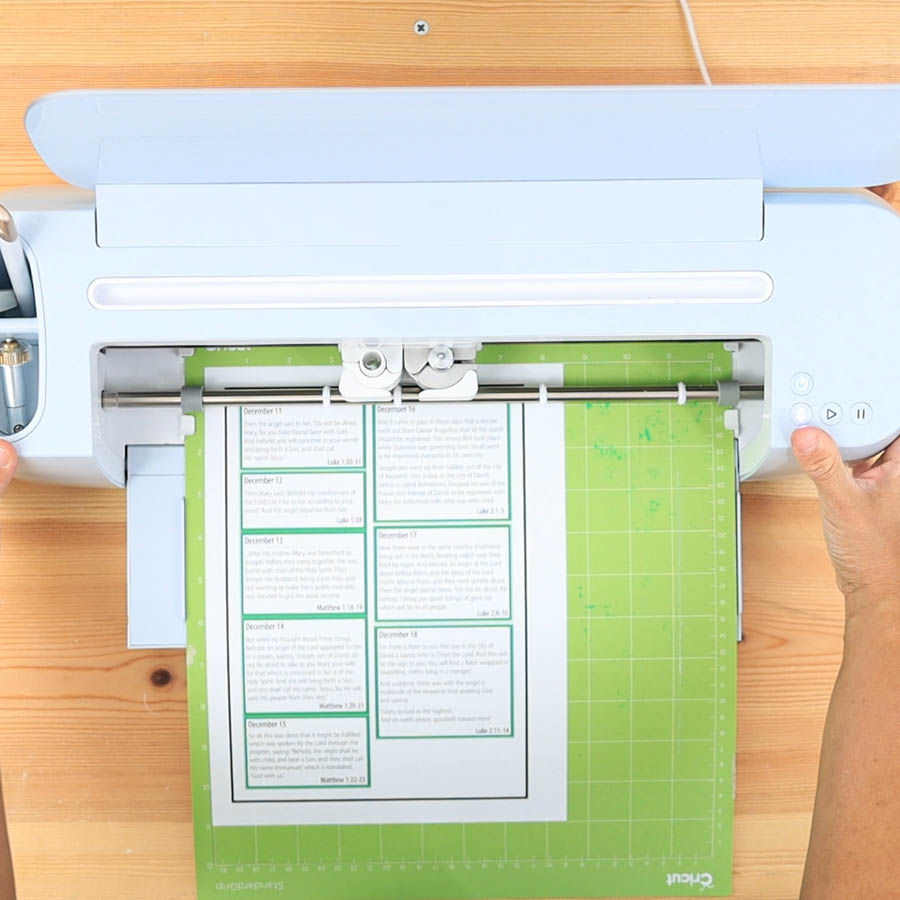
Continue cutting all layers until you complete all the cuts!
Assemble Christmas Advent Calendar
Go ahead and do a happy dance!
You’ve finished cutting all the pieces needed for the Christmas Advent Calendar.
The cutting process takes the longest, but the assembly process is the most crucial, and you need a fresh mind. So if you feel tired, go ahead and take a little break.
Putting Together the Calendar Structure
If it helps, open the Design Space project to conceptualize the order of assembly.
Remember that the 3a and 3b?
3a goes right after drawer holder #2, and 3b goes after drawer holder #6.
Each drawer holder has tabs that fold against the scoring line (I’m breaking the rules) and folds that go toward the scoring lines.
There’s also a lateral tab that joins each holder.
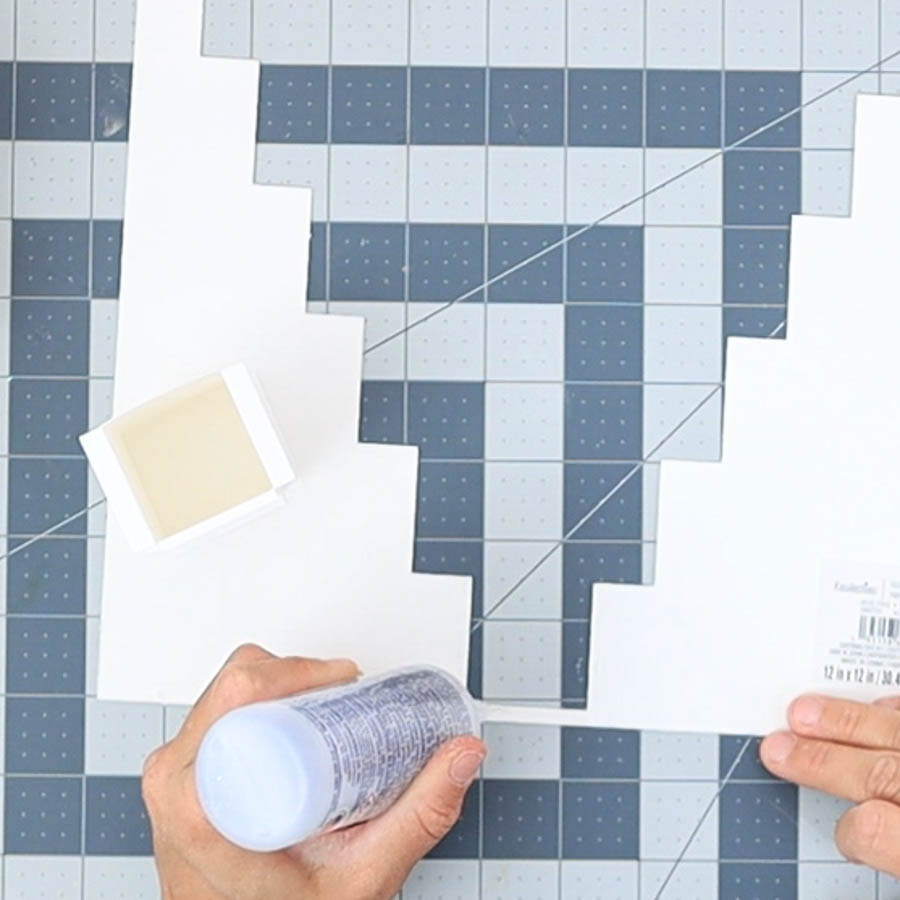
- Starting from drawer holder #1, fold all inner scores to form some sort of a little box. You want all the folds to be crisp.
- Then, glue the lateral tab outside the drawer holder and fold the other tabs outwards.
- Repeat the same process with the rest of the drawer holders.
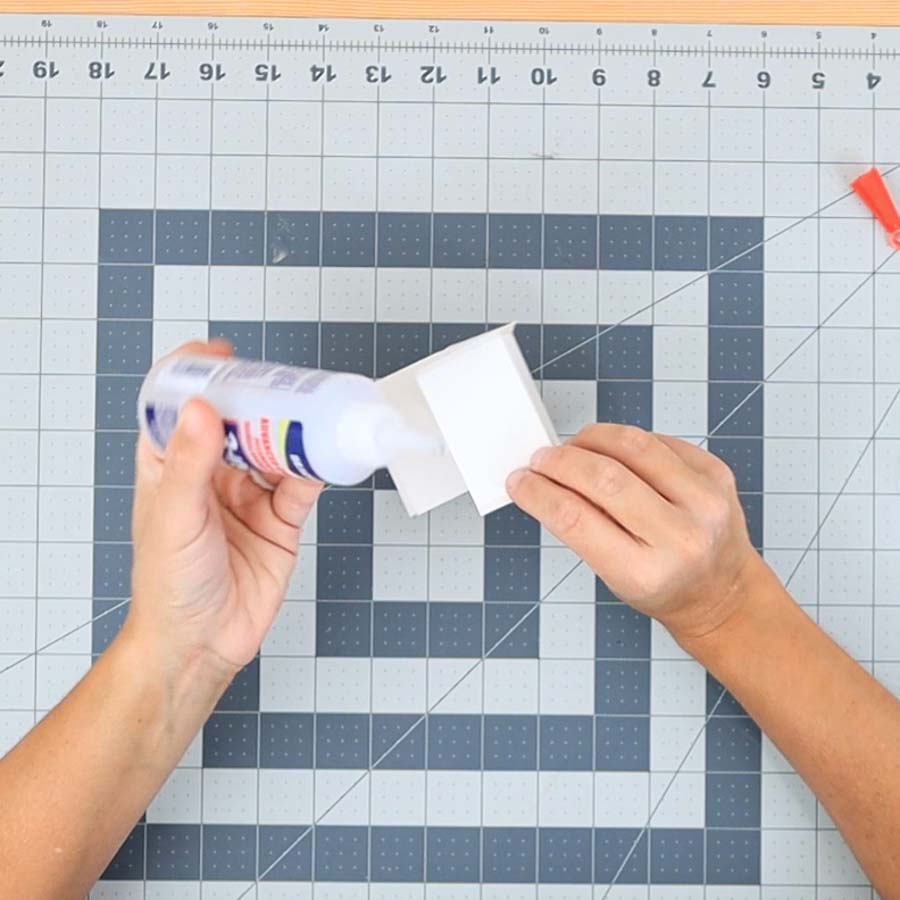

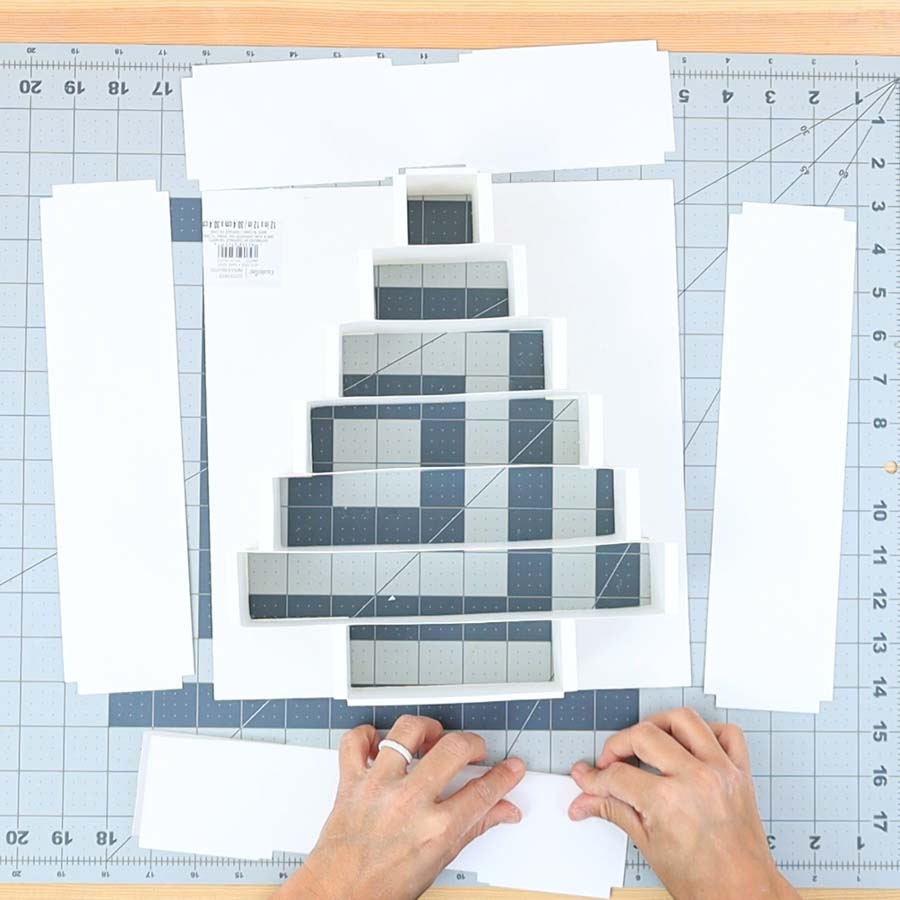
It’s time to glue the drawers to the front cover of the advent calendar!
Glue Drawer Holders
THIS IS THE MOST IMPORTANT PART!
Flip the front of the calendar, and start with drawer #1 facing you (it’s easier).
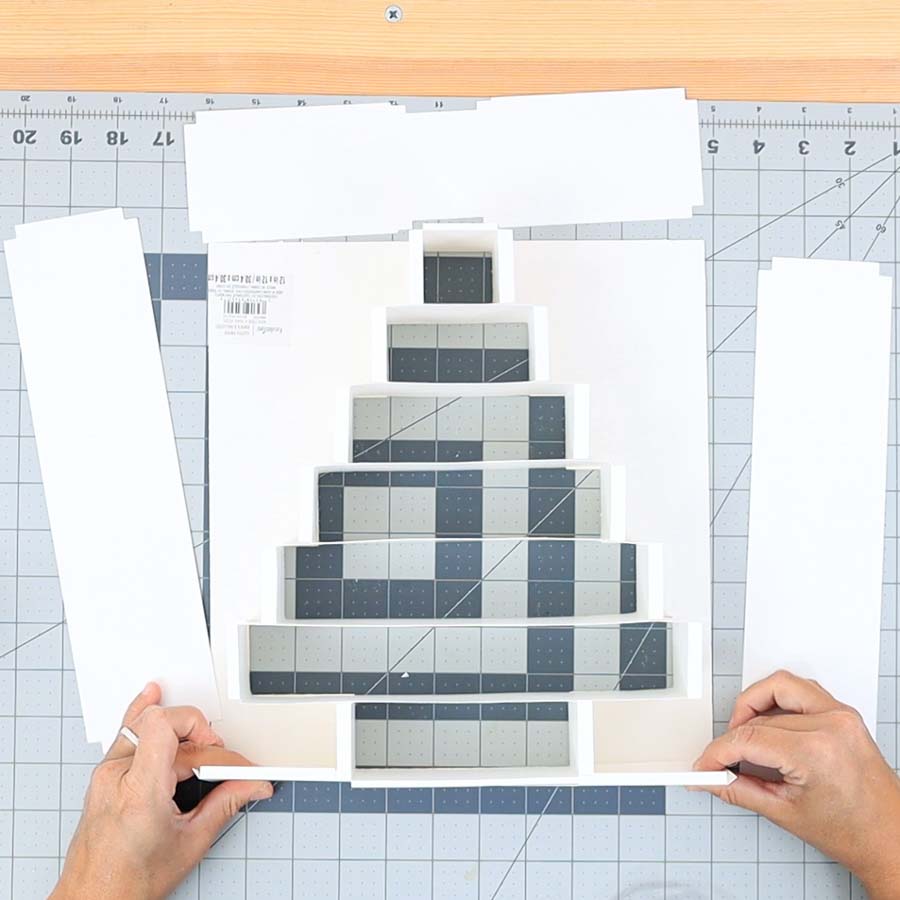
The principle is to add glue when there’s a tab and when you’re stacking the drawer holders.
You’ll see tabs on the top and sides for the first drawer holder. Make sure you glue it the right way. You’ll see a small gap between the lateral and top tabs. YOU MUST GLUE the lateral tap right where drawer holder #2 is about to start.
Try to stretch out the lateral tabs to avoid any sagging, but always check that everything is aligned.
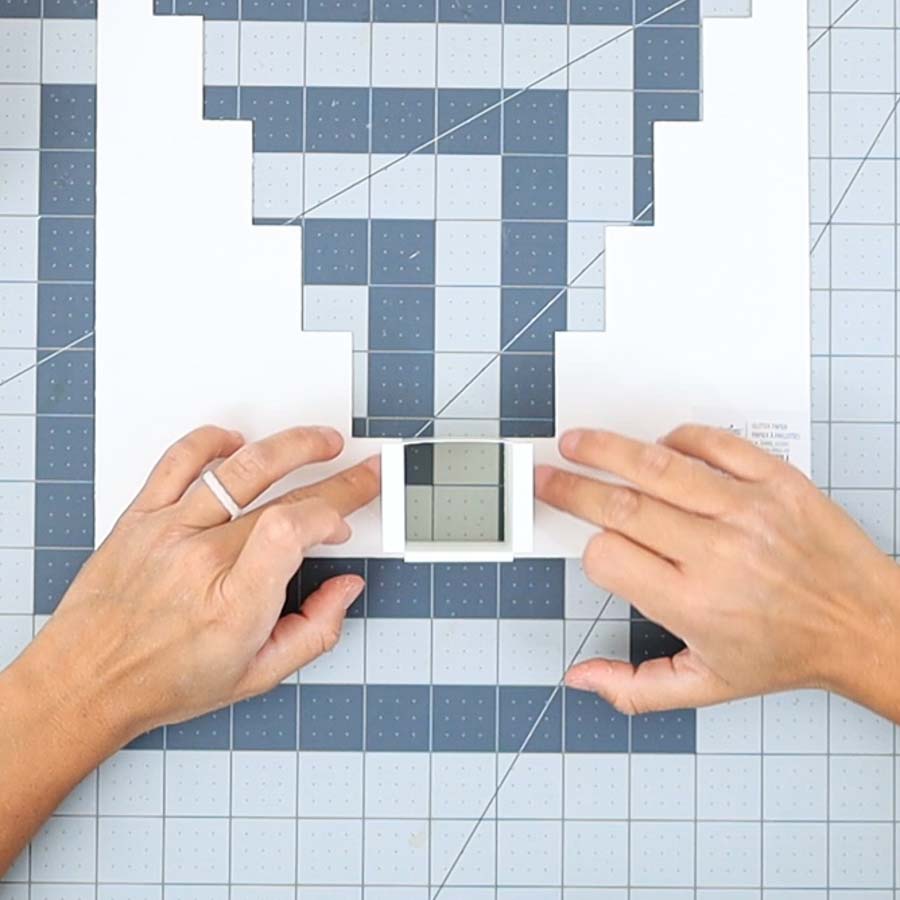

It’s time to stack drawer #2.
You must add glue on the side where each tab goes and underneath drawer #1.
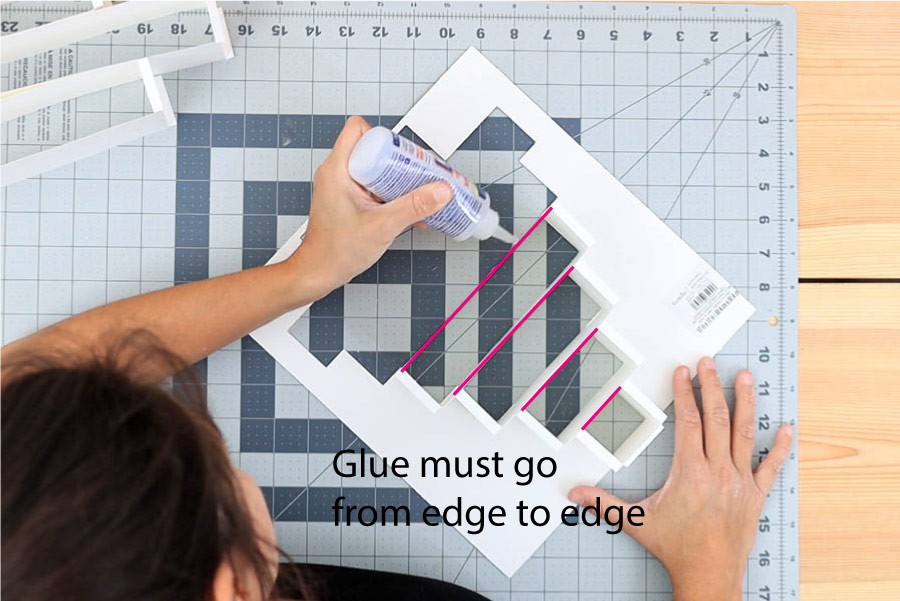
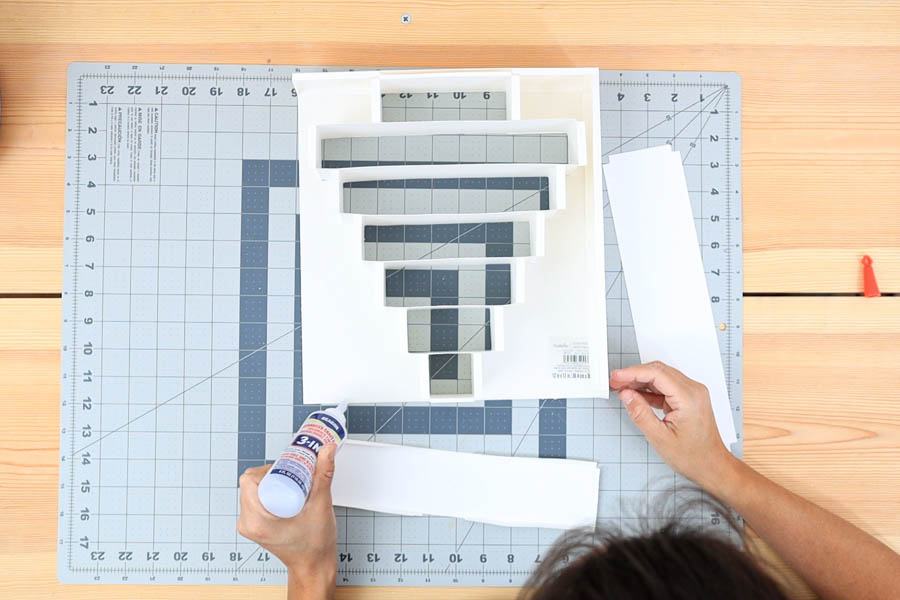
When you stack the drawer holders, you need to add glue from edge to edge (corner to corner) on the one that’s already glued. And the lateral tabs must be glued right where the next drawer holder is about to start—always stretching out the lateral tabs to avoid any sagging.
It takes patience and attention to detail!
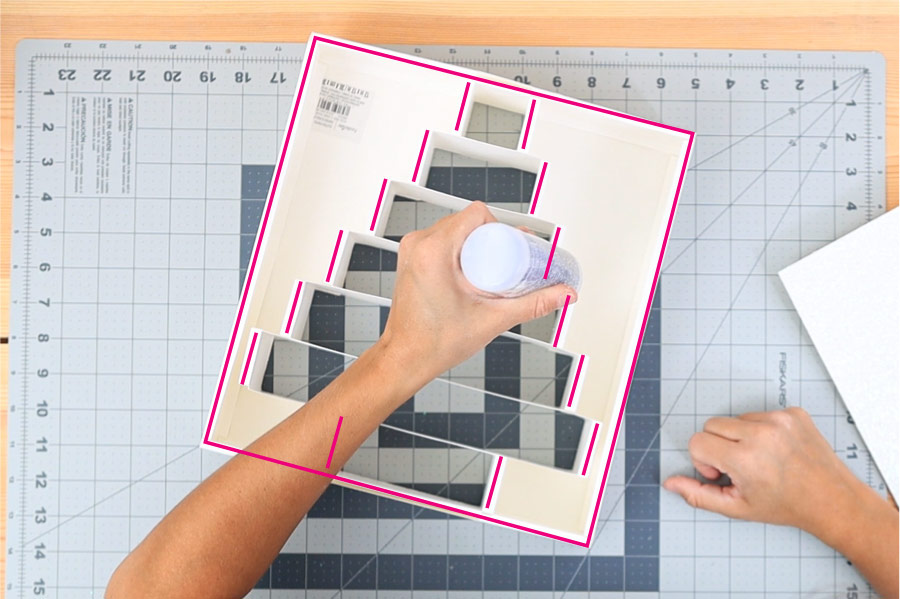
Check out how I keep stacking the drawer holders. The pink lines show where I added glue; they don’t offer any depth, but I zigged zagged from edge to edge.
Repeat the same process until you reach the last drawer holder (3b).
The last holder also has extra tabs; unlike drawer holder #1, these tabs must face down.
Add Calendar Covers
Two identical lateral covers go on the left and right sides of the calendar structure. There are also two different covers, one on top and the other at the bottom.
The one at the top matches drawer holder #1, and the one at the bottom matches drawer holder #3b.
All folds go toward the score lines.
Star by gluing either the top or bottom cover. Then, glue one of the lateral covers. There are folded tabs on the sides of the top and bottom covers, but there are no folds on the lateral sides.
The lateral sides must go on top of the top and bottom covers. Don’t forget to add glue to the tabs, joining the top and bottom covers with the lateral sides.
Close Advent Calendar & Correct Sagging (Optional)
It’s time to glue the back cover to the calendar!
The pink lines on the following picture show where I put glue.
Avoid these mistakes when gluing.
Please take a look at my final project and learn from my mistakes so that yours will look perfect when gluing the drawer holders.
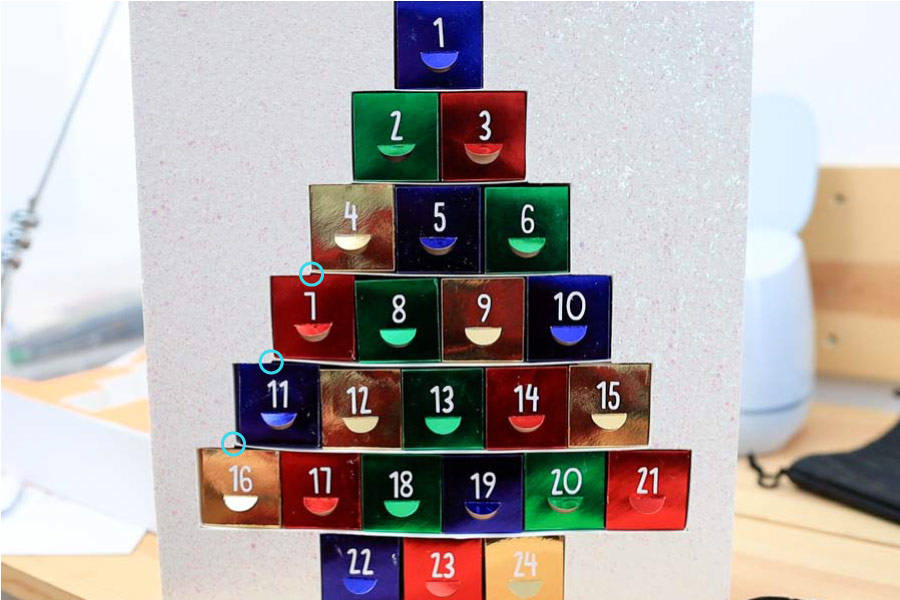
If you pay close attention to the small blue circles, you can see that I didn’t match the drawer holders right where they should have.
Some of the drawers will look crooked when you glue them incorrectly.
So pay close attention!
Glue Drawers
Time to assemble the drawers.
Gluing all 24 drawers takes a lot of time, at least for me. Have someone help you or take breaks here and there.
All folds go towards the score lines except for the small tab in front of the drawer. That one folds against the score line.
As you fold the box, you’ll know intuitively where to add glue!


Repeat the process until all boxes are glued!
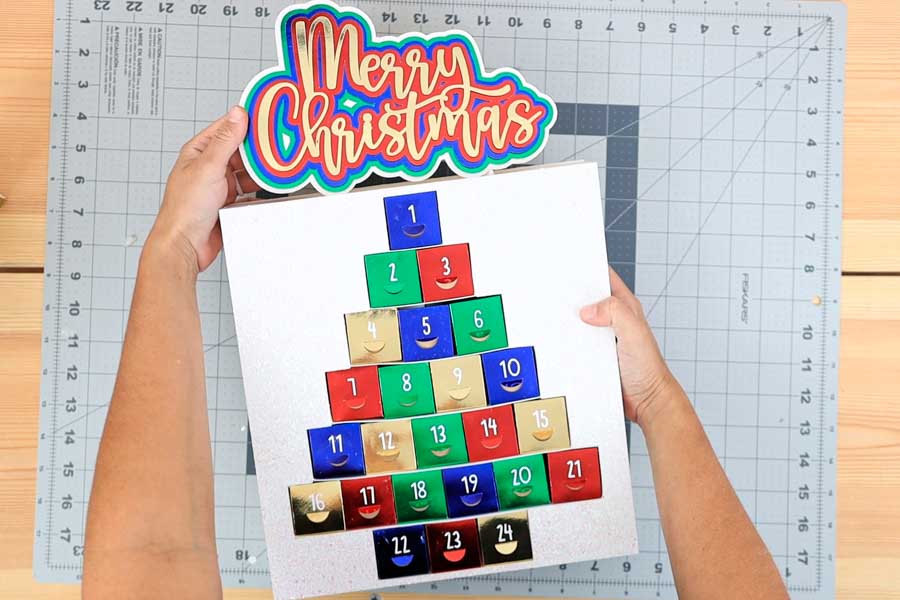
Add Decorations and Goodies to the Calendar!
Ready for the best part of all?
Put some small pieces of candy (I did 3-4) and the bible verses in order (you’ll need to fold the bible verses).
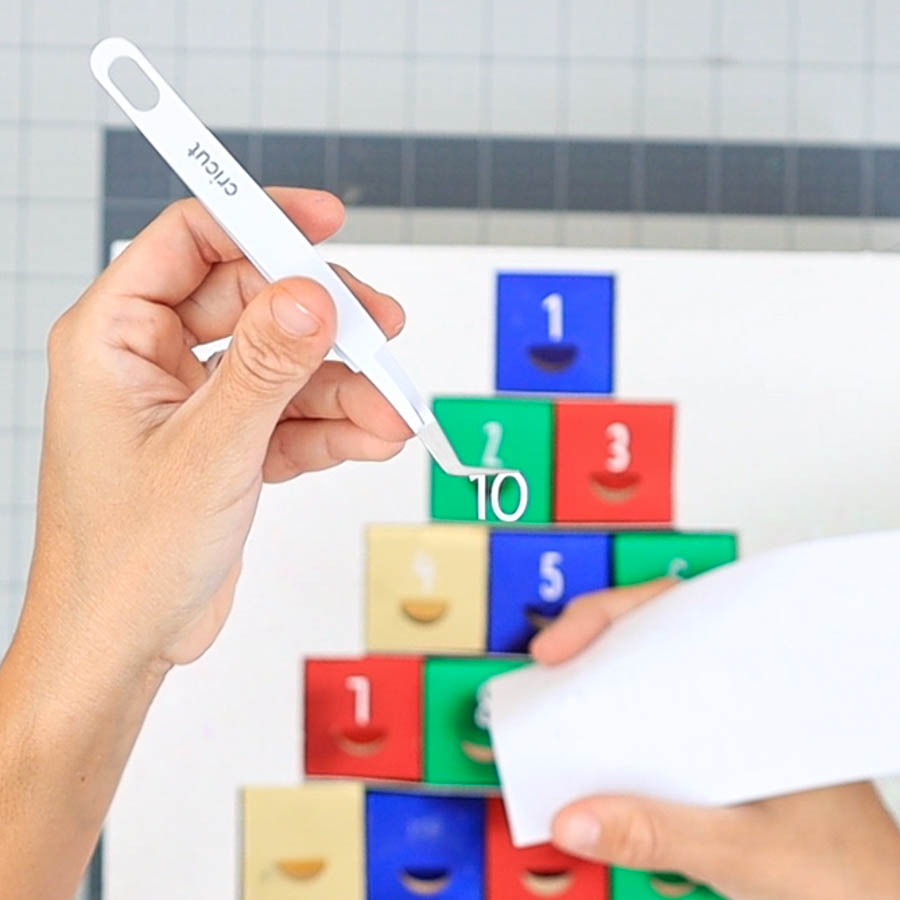
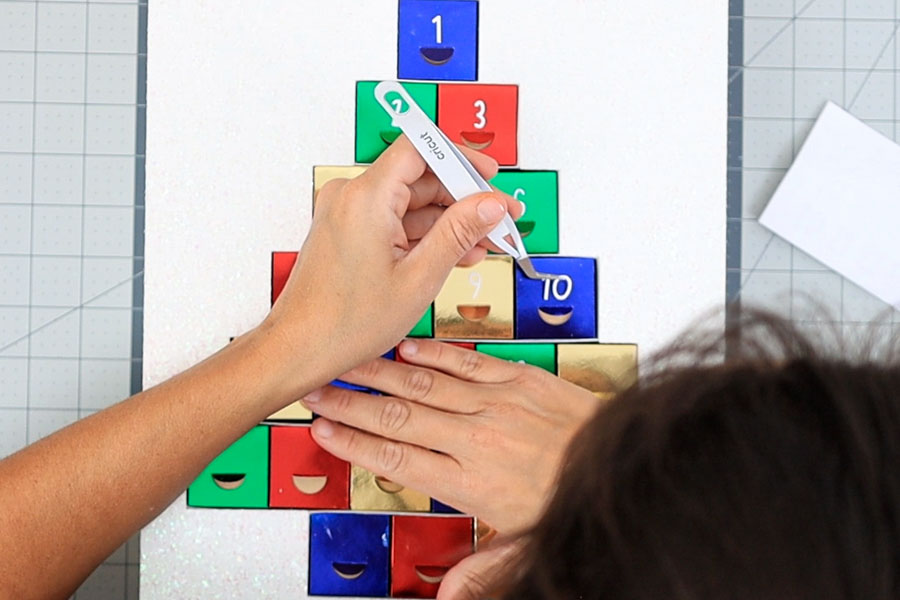
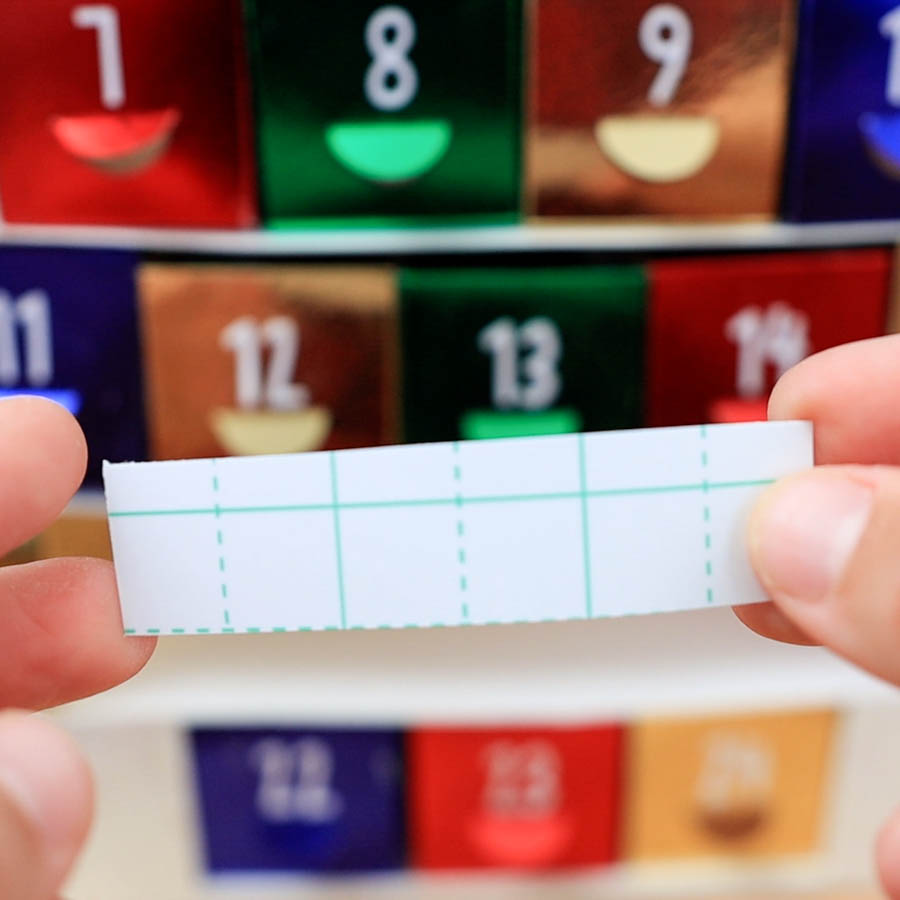
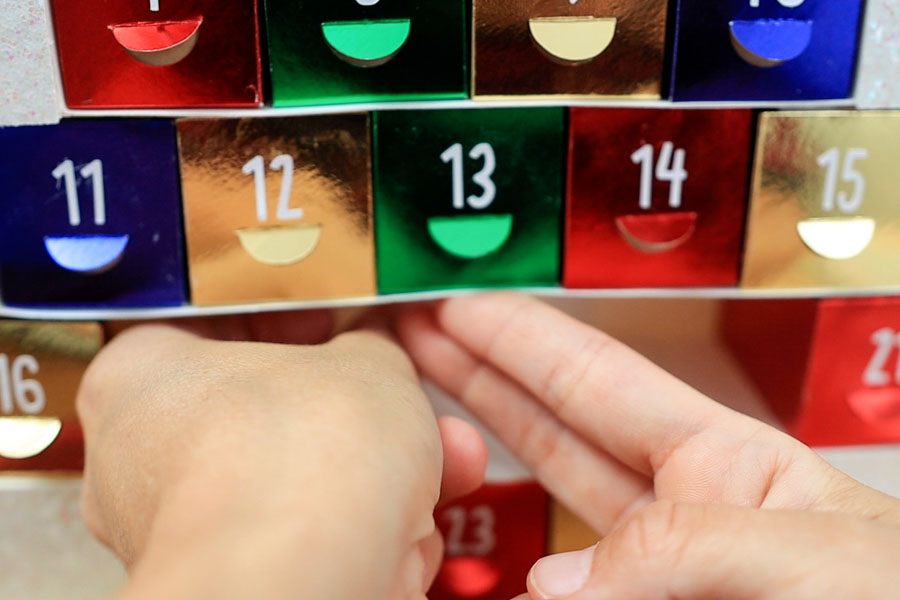
After filling the drawers and placing them on the calendar structure, grab the sticky cardstock and, with some tweezers, place the numbers above the pulling tab.
Tip: You can grab double-digit numbers simultaneously with the tweezers.

Now it’s time to put together the “Merry Christmas.”
I used foam dots to glue all the colored layers; however, I used glue for the last one.


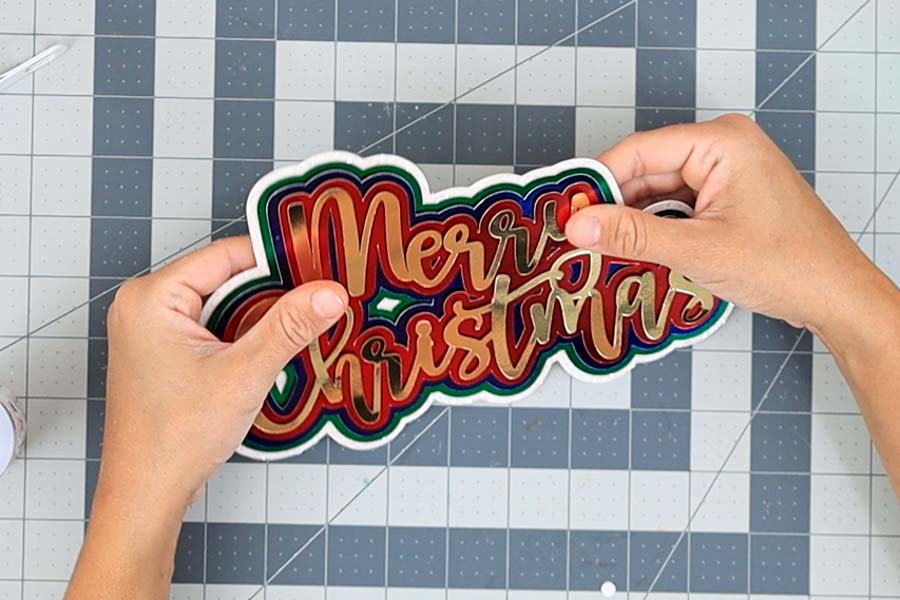
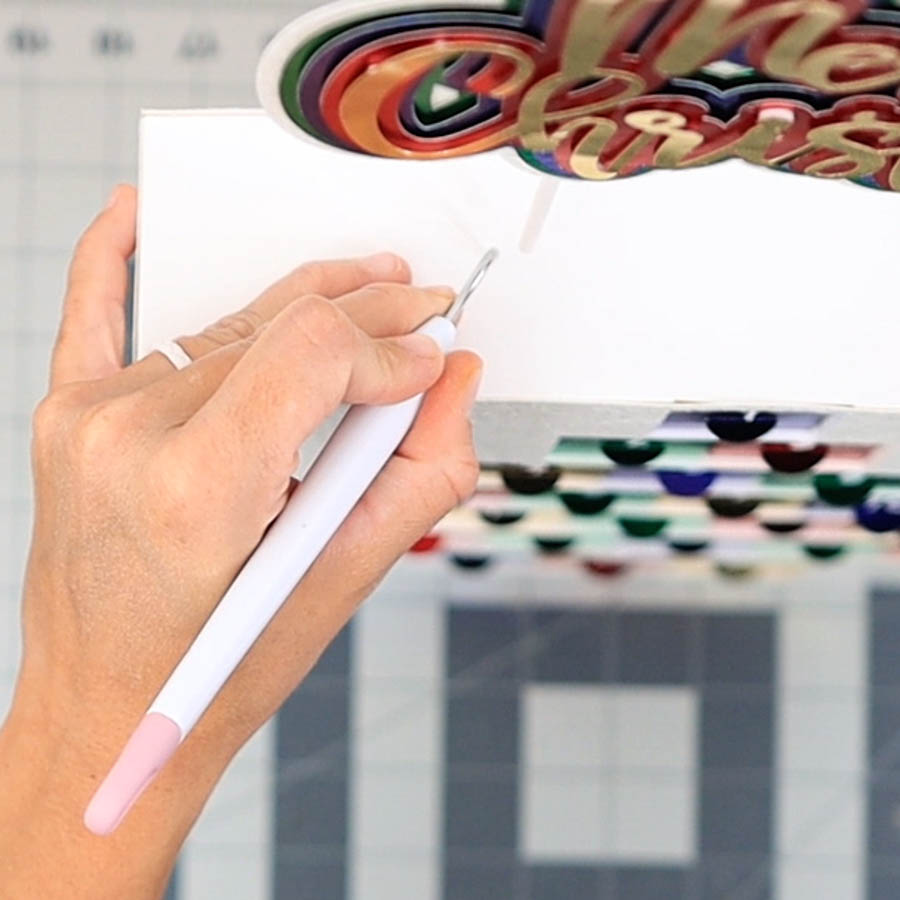
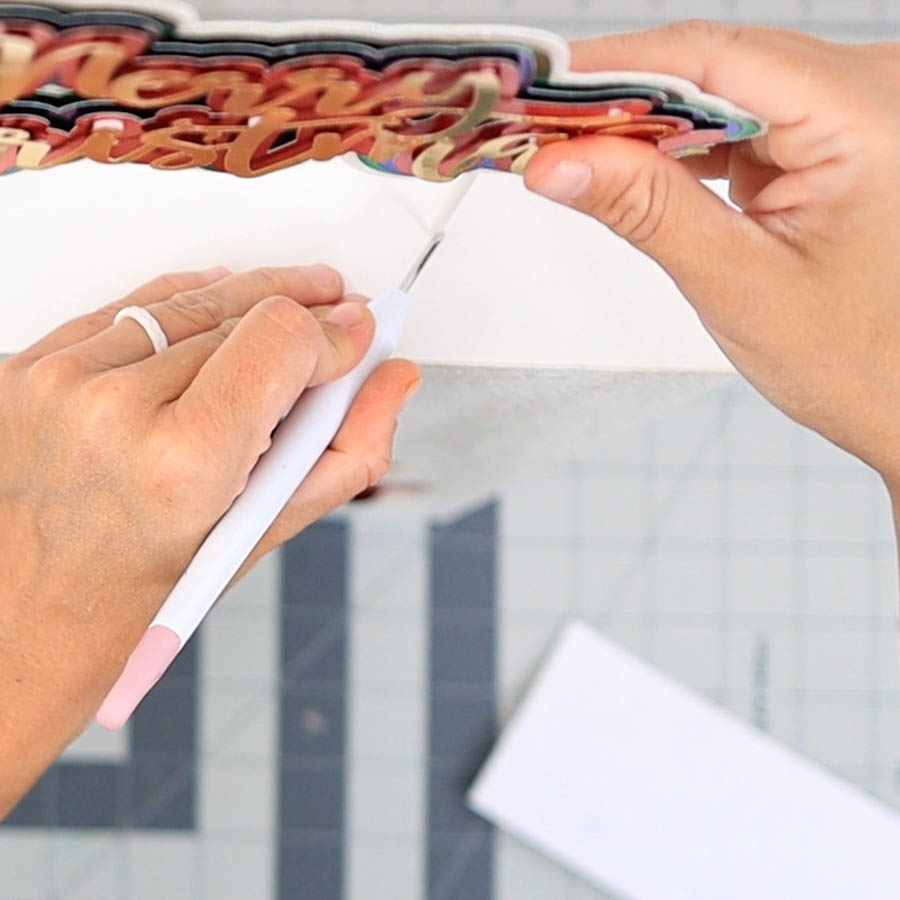
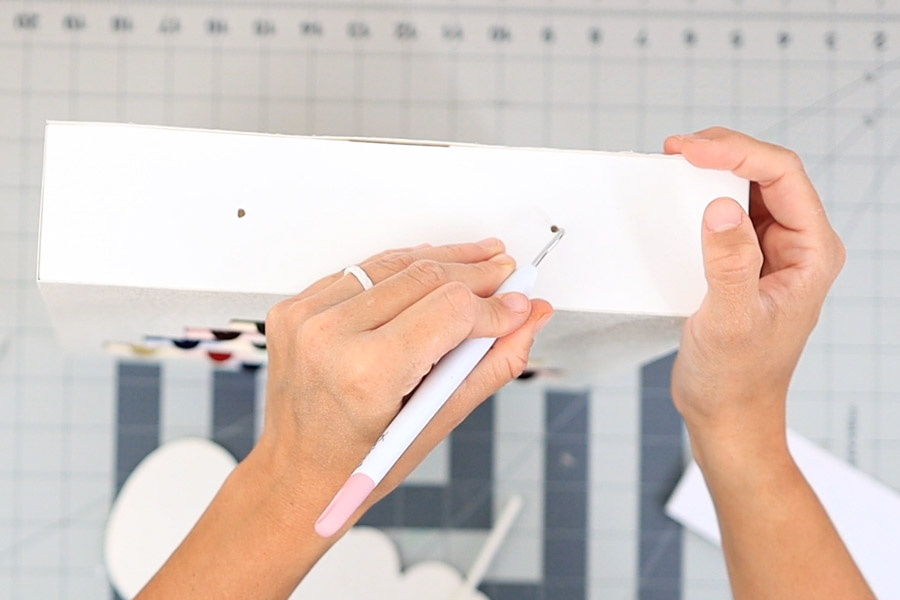
Once the sign dries, glue the two small cupcake toppers to the back of it, and with a weeder tool, make a small mark where to make two small holes.
Insert “Merry Christmas” all the way to the bottom, put glue around the entire hole, and let it dry.
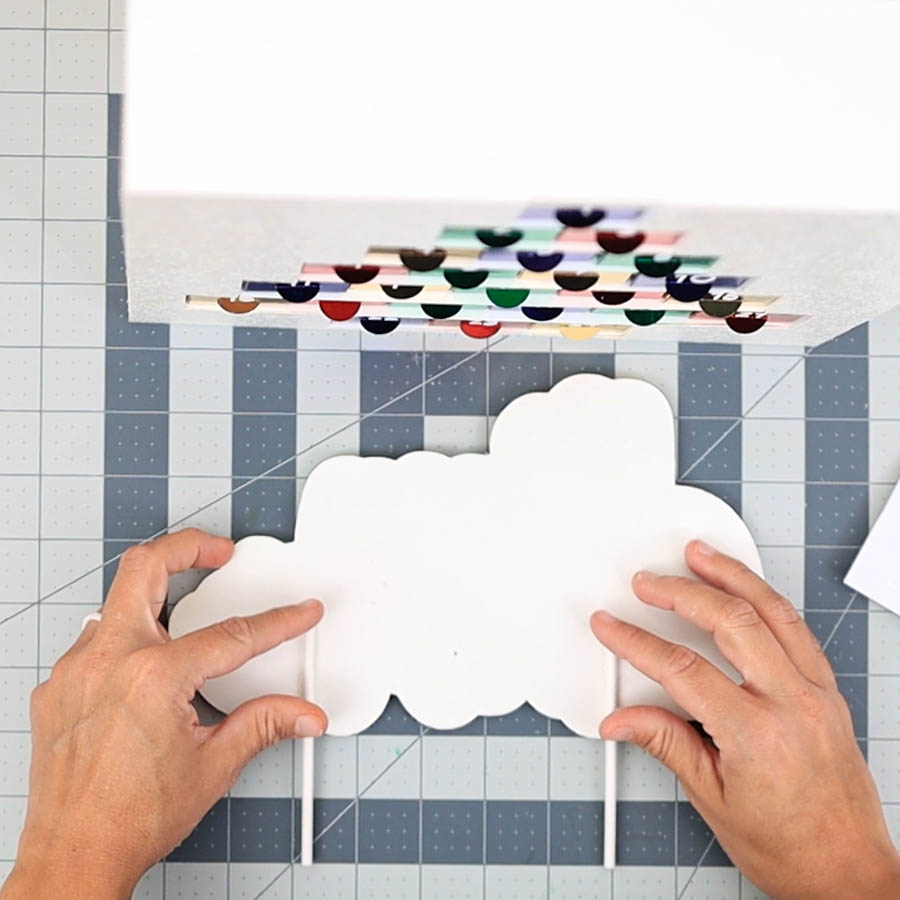
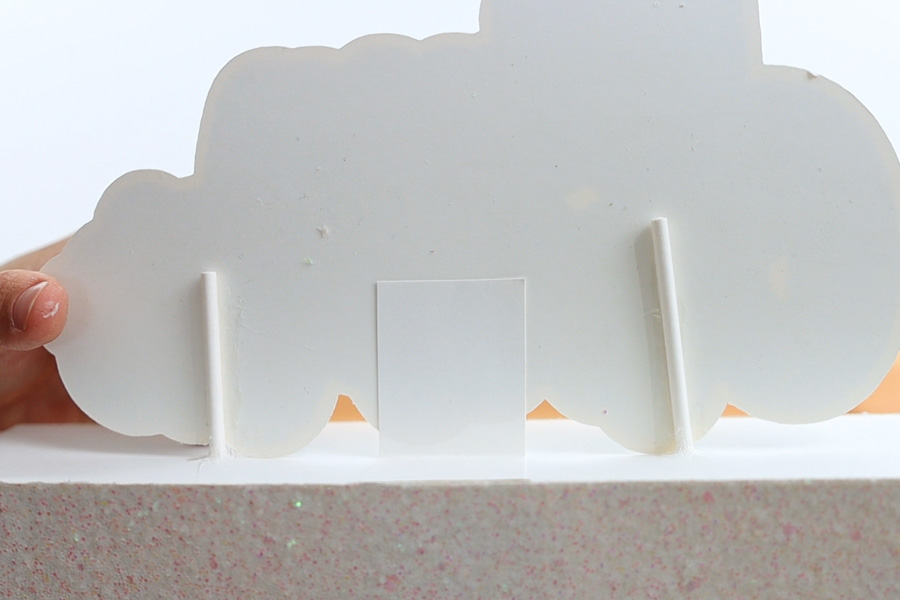
Optional: if the topper seems flimsy, add extra cardstock tabs on the back to add stability.
Fix Any Sagging!
After adding the candy and other goodies, there may be some sagging.
Here’s a way to fix the sagging.
Lift up the calendar and leave the drawers inside.
Now, look at the areas you may want to fix. Let me show you how I fixed drawers #12, 13, and 14.
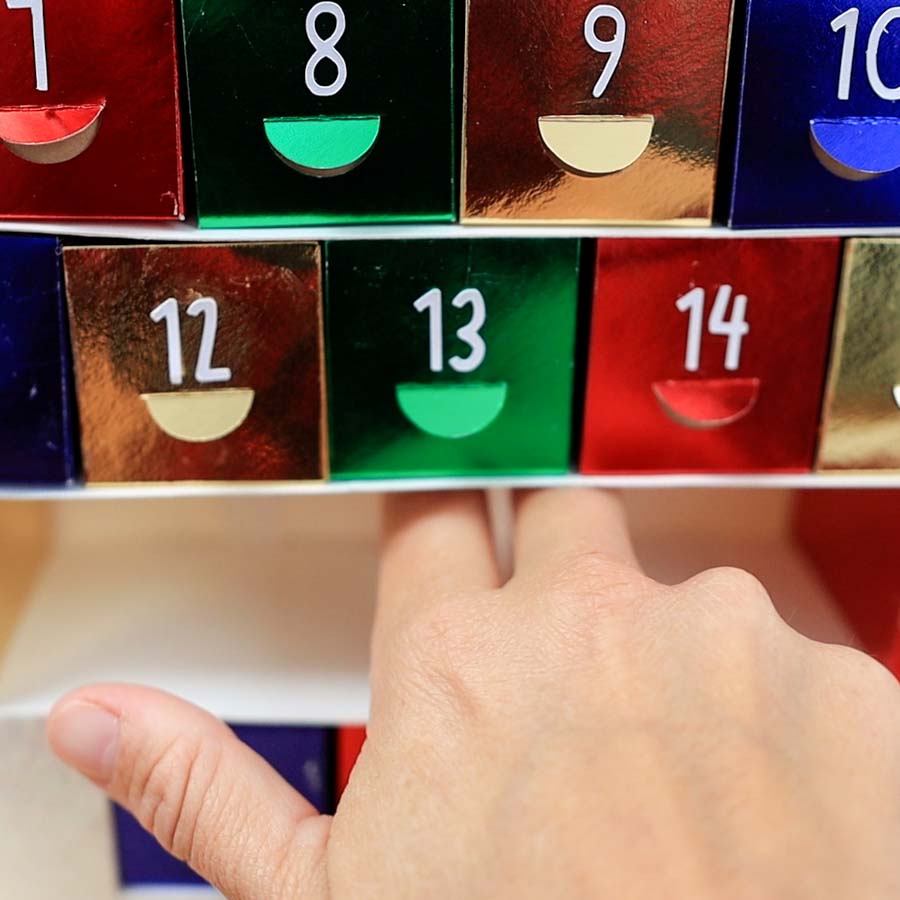

- Remove drawers right underneath.
- Cut a small piece of sticker cardstock (3″ x 3/4″)
- Fold it in half and remove the backing from the cardstock.
- Stick one of the sides right on the top and lift the drawer holder a little bit to remove the sagging, then stick the other side to the back of the calendar structure.
Doesn’t it look better?
You can do this in multiple spots on the drawer holder.
That’s it, my friend!
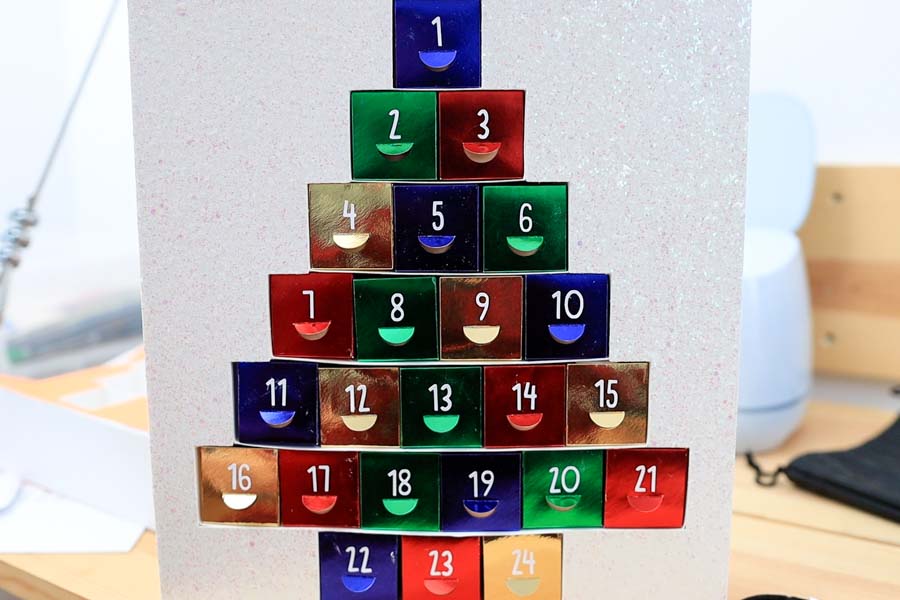
You’ve completed your Christmas Advent Calendar!
Do you like it?
Let me know in the comments down below.


Wow, this is a lot of work. Do you have a PDF file of these directions with pictures? My computer keeps stopping the directions just as it gets to gluing the drawer supports in. I can’t wait to see what it will look like when its done. Thank you for such a wonderful project.
I don’t have a PDF 🙁 I hope everything loads for you now!