Hello Daydreamers!
In today’s article, I will teach you how to make beautiful Father’s Day Cards with your Cricut Maker or Cricut Explore Machine.
I’ve also included Six Free Father’s Day SVG Card Templates for you to give to your dad. Seriously, they are so beautiful that you won’t have the desire to buy a store card ever again.
Plus…
That’s one of the reasons you got a Cricut, right?
For this tutorial, I am using one of the templates I included in this post; however, if you feel like doing a card from scratch, make sure to check out my card-making tutorial with your Cricut.
If you have a Cricut Joy, you could adapt some of these templates (the cards with cut-outs) using the “Contour Tool” and following my Card Joy Tutorial.

In a nutshell, these are topics I will be covering in today’s tutorial:
- Tools and Materials
- Overview of the card we will be making
- Cricut Design Space (organizing and cutting process)
- Card assemble
- Free Father’s Day SVG card templates
- More pictures and ideas using the files I included in this article.
Tip: This tutorial builds upon the skills I teach in every step. If you’re just starting with your machine, I suggest you read and follow each step.
Are you ready?
Let’s Daydream Into Reality!
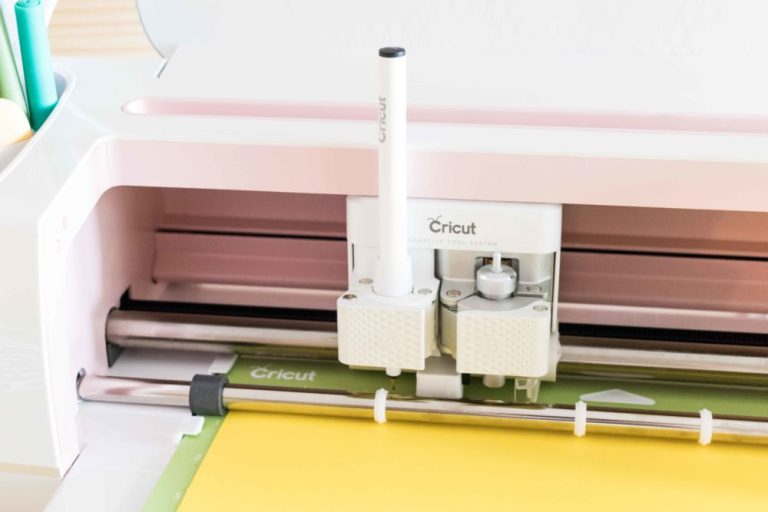
Tools & Materials
- Cricut Machine (Maker, Explore)
- Green Mat
- Fine Point Blade
- Scoring Stylus or Scoring Wheel (Maker only).
- Brayer or Scraper
- High-quality glue*
- Black Cricut Pen
- Cardstock (3 different colors that look good together)**
- Practice File (Youcan download it at the end of this tutorial, along with the other SVG files)

* Always use high-quality glue when making cards or a professional project. Kids’ glue will make your paper wet and bubbly once it dries. I always recommend beacon 3-in-1, but since I ran out, I used a glue pen that works great too.
Some people also use crafter’s tape, and it may be even easier! I just ordered some and I can’t wait to try it!
** Repeat after me. I will only use high-quality paper. Cheap paper will make cheap-looking projects. Michael’s has a great selection of beautiful papers, and they also go on sale, so make sure to keep an eye out for those good deals.
Card Overview
Please take a look at the card we will be making today. When making a new project with your Cricut, I recommend, sometimes, starting with the end in mind.
This card has two folds; on the inside, there’s a rectangle where we will be adding text. Finally, to close the card, we will be using a circle where we will glue the words “Super Dad.”

Cricut Design Space Steps
Open Cricut Design Space and click on “New Project” to open the canvas area. Make sure to save your project because Cricut doesn’t have autosave.
Step 1 – Upload
Download the practice file to your pc, then click on the “Upload” button on the left panel of the canvas and go to “Upload Image” follow the prompts and select the image from the “Recent Uploads” view, and click on “Insert Images.”

Step 2 – Resize and Organize File
There are a couple of things we need to do before we continue with our project.
First, select the entire file from the canvas area, resize your card using the lower right corner of the selection or the top menu.
Since I wanted an exact measure, I changed the size from the top menu. I used the width as a reference (keep the proportions locked) because the lines are a little bit larger than the card.
The size W is 8 inches because I wanted my card to be 4 inches wide once folded.

After resizing, ungroup (top of layers panel) the file and weld the layers with text to form “Super Dad.”
Step 3 – Add Score Lines
When you first add the card, the lines are set to “Cut.” It’s essential to change the operation to “Score.” Otherwise, your Cricut will cut right through your card.
Important: Don’t move the lines as they are aligned to perfection.

Step 4 – Optional Extra Scoring Lines
Ready to learn a cool tip?
Sometimes, score lines made with the scoring stylus are hard to fold. To fix this problem, select the score lines from the canvas, and click on “Duplicate” on top of the layers panel.
If you have a Cricut Maker and plan on using the scoring wheel, you can skip this tip, although I still use it sometimes.
The tricky part with this card is that we have two score lines, and they are set on the exact spot, and when you copy-paste, the location of the new lines is not in the right spot.

Introducing, the “Position” tool!
Click on the original score lines, then, on the “top menu” of the canvas, check out the exact positions of the lines, then click on one of the copies and type in the position to move the lines to the right spot. Do this, one line at a time.
Step 5 – Attach Score Lines
Once you score, duplicate and reposition lines (optional), select the lines along with the blue card, and click on “Attach” at the bottom of the Layers panel.

Step 6 – Add Text and Attach it
If you have a Cricut, I’m almost 100% sure you’ll want to write inside your card!
Click on the “Text” icon located on the canvas’s left panel and type in the text you want to write. Initially, your text will look huge in proportion to your card, and the operation will be “Basic Cut.” After typing, resize your text to fit the yellow rectangle.
Now, let’s talk about the right fonts you should use for making cards.
In Cricut Design Space, you have your system fonts and Cricut Fonts. Your system fonts won’t do a writing effect; instead, they will look outlined if you choose to use your Cricut Pens.
However, many Cricut fonts DO have the option for “Writing;” they were designed with that purpose in mind. So if you want to write like the screenshot below, you must use Cricut Fonts.
Here’s the problem, normally they Cost money. You can either buy them individually, or they come with Cricut Access.
I have a useful article that will help you find fonts to recreate “writing fonts” for Cricut.

For this particular card, I used the font “Pajamas” and I selected “Writing” for the style.
If you use a system font, make sure that you change the operation from “Basic Cut” to “Draw – Pen.”
Once you’re happy with your text and how it looks, select it along with the rectangle and click on “Attach” at the bottom of the Layers panel.
Step 7 – Make it
This is how the final project should look. There are two attachments the score lines with the card and the text with the inner rectangle.
To send your project to your machine click on “Make it”

Cutting Process
This is the “Mat preview” window. Each color on your project will be represented by a mat color. Each mat will require you to install different tools.
The order of the mats is random, so they may be in different order for you.

Important: any time you make a card, it’s always a good idea to score on the inside. Therefore, to have an easier time folding, mirror the mat with the score line. Also, if you’re using one-sided color material, ensure you place it pretty side down on the mat.
Click on “Continue” to select materials.
If you have an Explore machine, move the smart set dial to custom, and leave it there always to select material from Design Space. For the Cricut Maker, always select your material from Design Space.
Cutting Mat 1
Select the type of cardstock you’re using. The tools you need for the first mat are a black 0.4 fine pen and the fine point blade.

Place the paper on the mat and with a brayer or scraper smooth out the paper so there are no bubbles and the material is well adhered to the mat.


Install pen on clamp “A” and blade on clamp “B.”
Load mat to Cricut and press the flashing button to start the cut. Once finished, unload the mat and remove the paper by bending your mat.
Set cuts aside, and be careful to not lose the letters!
Cutting Mat 2
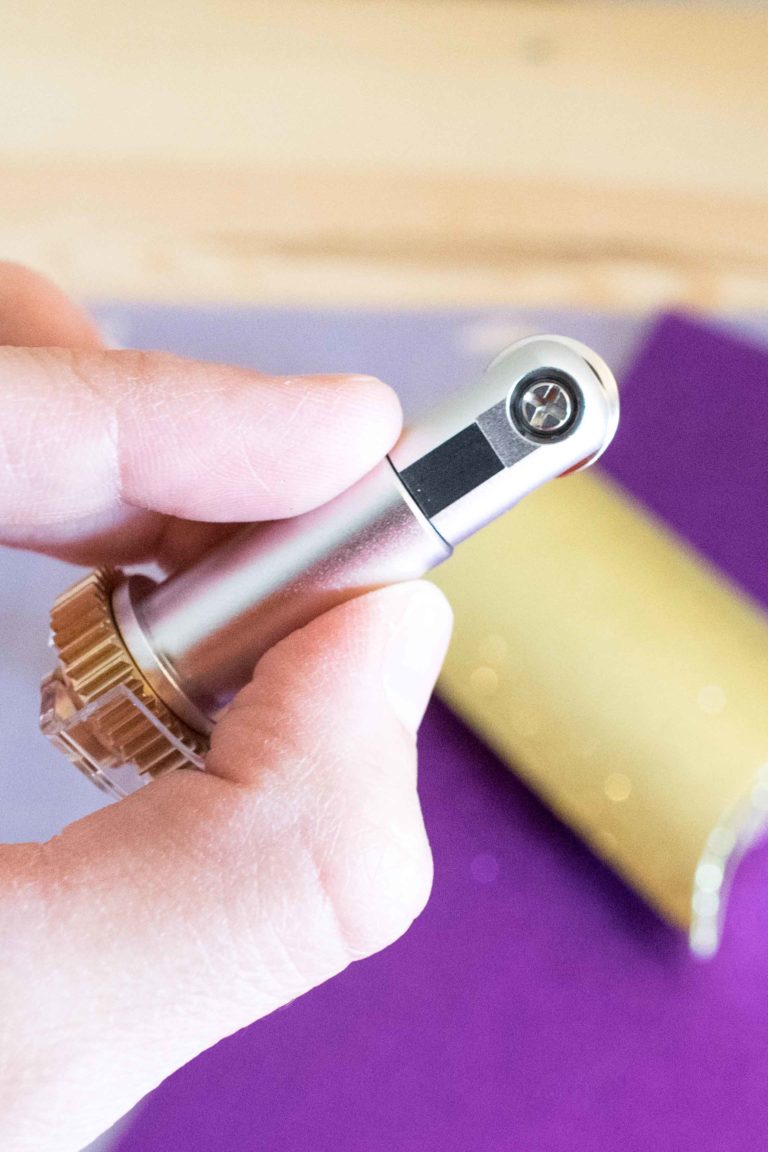
For the second mat, you need a scoring tool and the fine point blade.
If you have a Cricut Maker, the scoring wheel will be the default option; if you want to change it for the “scoring stylus” (as I did), click on “Edit tools” to select it.
Important when Using the Wheel & Cricut Maker: You need to install it in clamp “B” and score first. When Design Space brings notification to change tool, install fine point blade.

For this tutorial, I used the Scoring Stylus, go ahead and install it on clamp “A” and the fine point blade on clamp “B.”


Prepare the mat with cardstock, load it and press the “Go” button.
After cutting and scoring bend the mat to release the paper and set it aside.
Cutting Mat 3
Finally, it’s time to cut the last piece for our card.

On this mat you only need the fine point blade.
Oops! I forgot to uninstall the stylus from the Cricut! It’s ok, nothing bad will happen.


Load mat to your machine, start the cut, and remove material from the mat.
Assemble Card
It’s time to assemble the card! Gather all the pieces you cut with your machine and the glue.
Remember our previews talk, no kids glue!
I am watching…
Just kidding 🙂


Start by folding the card. Always fold towards the score lines. Glue the yellow square with text on the inside of the card, and the yellow letters on the red circle.
To close the card, glue the red circle to it; alternately, you can also use double-sided tape so the card doesn’t tear when your dad opens it because he may want to keep it!
That’s it!
You just made a beautiful father’s day card!


Do you think he’s going to like it?
Free Father’s Day SVG Card Templates
As I promised here are the SVG files to make the Father’s Day Cards!
To download the file(s), you need to be on a desktop or laptop and click on the button to trigger a download file on your PC. However, I’ve noticed that I can also download them from my iPhone.
Depending on your browser settings, your PC sometimes asks where to save the file, although most files will be in your download folder.
If the image opens in a new window (this may happen because of your browser settings), right-click on it, select the option “Save Image As,” and choose where you want to save the file.
SVG files look like web page files when you download them.


Oh!
Just so you know, I also have a library full of free SVG files and Printables for all my subscribers, a.k.a. Daydreamers. You can see a preview right here or get access by filling out this form.
More Cool Father’s Day Cards
Here are more cards!
I made them using the templates I have for this article.
You can make, big and small cards. I love the power tools one. Because most dads are always fixing stuff around the house.
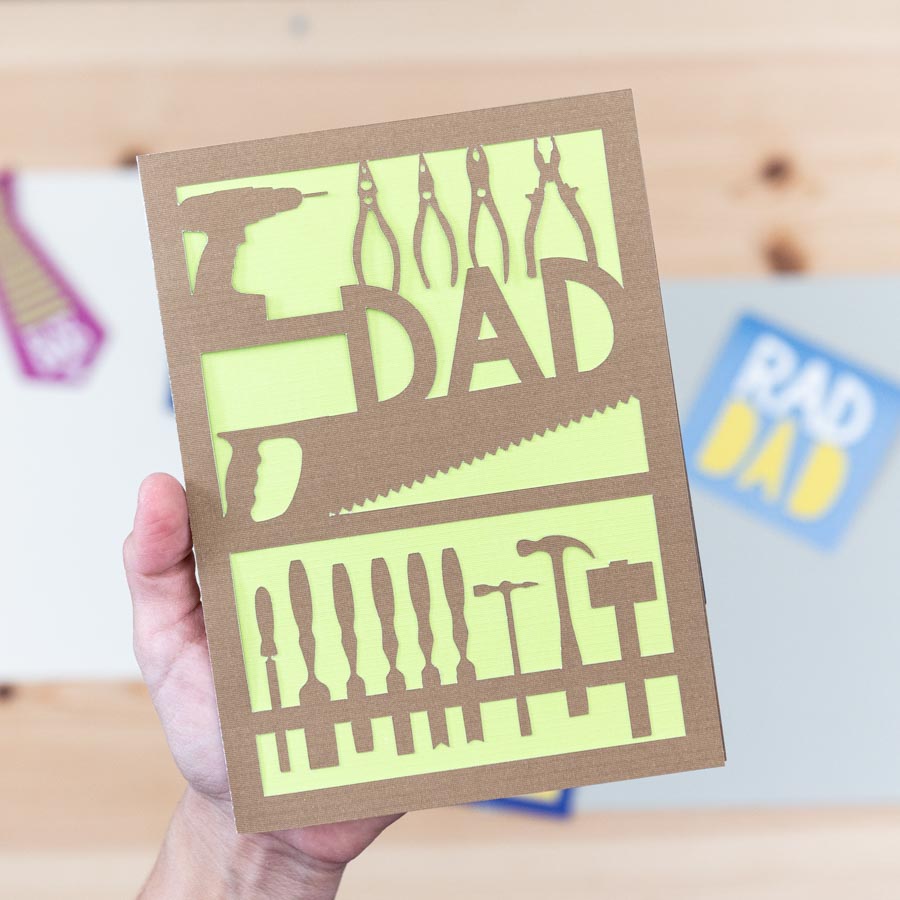


Thank God for fathers, right?
And look at this “Best Dad Ever” card!
I made a card just like that one for Mother’s Day, check out a step-by-step tutorial and get more Free SVG files!


I loved this “Rad Dad” card too!
I used dual adhesive foam dots to add a 3D effect to the text. And the paper for the card itself was so beautiful.


Last but not least!
Isn’t this little tie card adorable?

Which card do you like the best?
Let me know in the comments down below.
Please Share It!
Do you know it takes me over 25 hours to complete a single Cricut article? I know it’s wild, but I want to make sure you understand everything!
I would appreciate your support on Instagram , Pinterest , and YouTube as I try to grow my audience and continue producing great content!

Thanks so much for the tip on the scoring tip. I need to buy a scoring wheel because the scoring tip doesn’t work as well. Hopefully your tip of duplicating the scoring line will help until I can purchase a wheel.
That tip works really well! I am glad I could help 🙂
Hi This card is adorable and I can’t wait to make it! I’m done with step 2. I’m trying to attach the score lines to the large rectangle but the circle, two rectangles, and score lines are acting like they are attached when they are not. Is there a step I am missing to separate the cut shapes before attaching the score lines?
Thanks so much for you’re help! I’m still a beginner:)
Maybe they are still grouped?
Yes! That worked, thanks so much
Thanks! I used the tool one to create a card for my Dad!
I hope he liked it!
Hi Greatly Appreciate you
Just Wondering Can The Words Be Changed To Pop & Uncle Instead Of Dad?
I raise My Granddaughter And Niece So I’m Looking To Make Cards For Them
If So How Could I Do That?
Thank You
I will add to my list of SVG files to do!
Hello i am trying to subscribe to you and get access to the library your fathers day cards that i have seen are amazing. Im new to this only a week in i have brought a Cricut Maker machine and i love it.
Happy crafting
Talk soon Carren (Australia)
Thank you for wanting to subscribe! Fill out this form to get access.