Hello Daydreamers!
Personalizing all things is one of the greatest reasons someone buys a Cricut!
Today’s tutorial will teach you how to make beautiful vinyl labels with your Cricut machine using vinyl.
You can make labels with any Cricut Machine. I used a Cricut Maker, but I will give instructions to make labels with other machines.
Tip: This tutorial builds upon the skills I teach in every step. If you’re just starting with your machine, I suggest you read and follow each step.
There are many ways you can make labels with your cutting machine. You can write on printable vinyl with Cricut Pens, using infusible ink if you use light polyester surfaces, etc.
I decided to use adhesive and heat transfer vinyl for this tutorial because you can personalize pretty much anything with these materials.
This article is full of golden nuggets, and since I don’t want you to get lost, these are the topics I am going to be covering:
- When to use adhesive and when to use heat transfer vinyl.
- Safety precautions
- Prep Work
- Materials
- Cricut Design Space steps
- Cutting, Weeding, and Trasnfer process.

Are you ready?
Let’s Daydream Into Reality!
Adhesive vs. Heat Transfer Vinyl, What’s Better for Labels?
There are two significant types of vinyl, “Adhesive” and “Heat Transfer Vinyl” (HTV).
Adhesive vinyl has a sticky surface to it, and because of that, you can transfer it on different surfaces such as glass, mugs, paper, metal, plastic, windows, etc.
Heat Transfer Vinyl (HTV), also known as Iron-On, requires heat for you to transfer it. Most people use HTV on fabric, but you can also use it on wood, paper, etc.
There’s no right or wrong answer.
If the surface you want to add a label is hard as plastic, glass, ceramic, etc., use adhesive vinyl. And if you’re going to add labels to fabric, use iron-on.
If you want to add labels to wooden materials, you can use either adhesive or HTV if the surface is nice and smooth.
Safety Precautions
Sometimes when we craft, we forget that we live in a world that can be ruthless 🙁
Anytime you make labels consider where you’re going to place them and who is going to read them. For instance, if you’re personalizing your kids’ backpacks, avoid putting their names for everyone to see and read because you are giving your child’s name to strangers.
Also, if making a label or pretty sticker for your car, avoid putting information that may reveal too much about you and your family.
It’s better always to play safe!
Prep Work
I decided to make labels for my kids’ crafts.
It’s very tempting to make random labels for what you think you’re going to need, but it’s always a good idea to organize and declutter first before you make tons of vinyl labels.

Divide by category and get rid of things you don’t think you’ll use. Buy new storage if needed, and put everything away to see if everything is going to fit.


I know it seems like an extra step, but the idea of making labels is also to get somewhat organized.
Tools & Materials
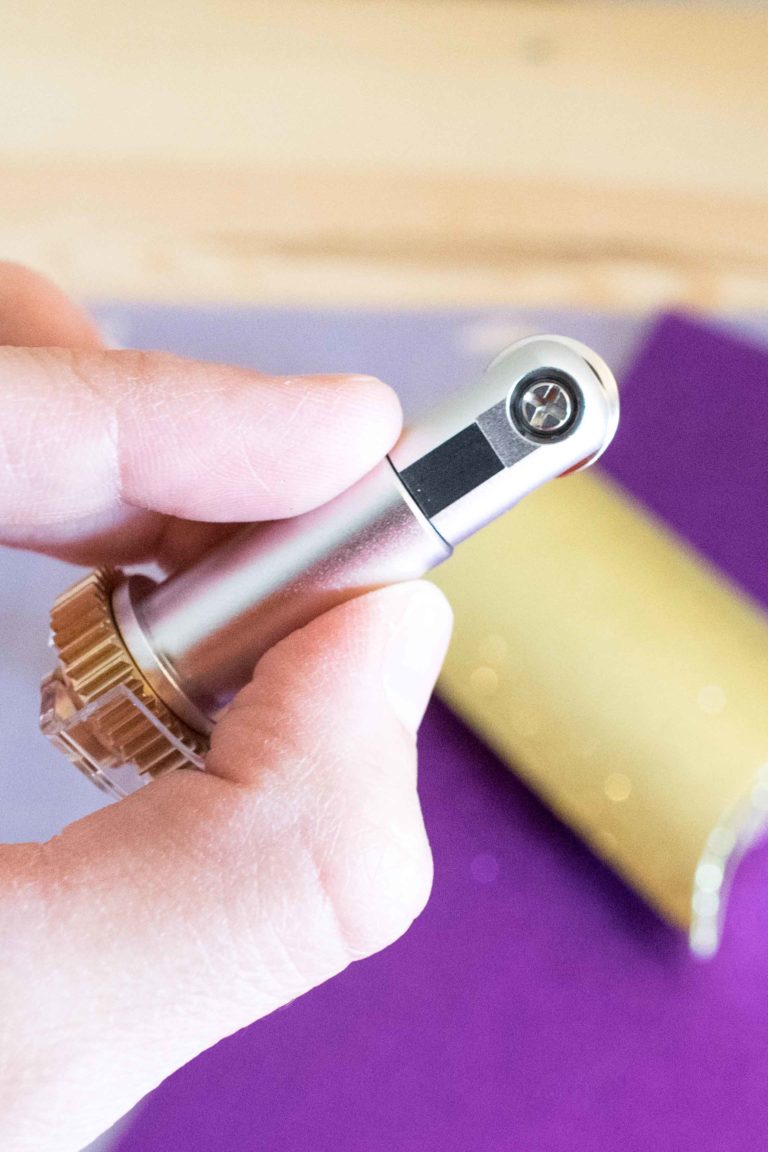
- Cricut Machine*
- Standard Green Mat
- Fine Point Blade
- Blanks (I used large plastic containers, metal dividers, zipper pouches, and a cube bin made out polyester).
Materials for adhesive vinyl labels
- Vinyl single or different colors**
- Weeder
- Transfer tape***
- scraper or squeege
- Alcohol wipes or spray
Materials for iron-on labels
- Iron-on or HTV sheets. You can use different colors.
- Weeder
- Iron or Easypress Mini
- Easypress Mat or Towel
* Any machine will work for this project. However, if you have a Cricut Joy, keep in consideration the size of your labels.
**I used permanent vinyl because I wanted my design to stick well to my surface. It’s very common to use removable vinyl for indoor projects and permanent vinyl for outdoors.
Make Vinyl Labels in Cricut Design Space
If you did the prep work and know all the categories and surfaces of the things you want to personalize, then making labels in Design Space is a walk in the park!
Step 1 – Type Text
Start by clicking on the text icon on the left panel on the canvas and type in all the labels you plan to use. I always type a single box of text.
Some labels like “Coloring Books” I typed in two lines, and other labels like “Paint and Brushes” I typed on the same line. I wanted them to be this way because it made sense with the surfaces I was going to use.
Once you’re done typing all your words, go ahead and change your font. I used a Premium Font called Alimentary (affiliate link), but you can also use your system fonts or Cricut fonts if you’re part of Cricut Access.
Most likely, you need to manipulate each label. For instance, I had different surfaces, and I had to resize them. However, everything is in one single text box.
To manipulate each word, select the text, click on “Advanced” on the top menu and click on “Ungroup to Lines.”

Now each line of text is on its own layer.
Step 2 – Resize Labels
Since you’re working with fonts, you can resize from “Font Size,” you can also increase or decrease the label size from the lower-right corner of the selection, and you can also resize from “Size” on the top menu.

Resizing your labels depends on your surface. Go to your blanks and see where you want your labels to be and what measurements you need.
As you can see in the picture below, I used different surfaces; therefore, I had to measure to make sure my labels would look good.

Step 3 – Change Colors & Send to Cut
After resizing, I changed the label colors. For the iron-on labels, I used yellow, and for the adhesive vinyl labels, I used green.
I also welded the labels that had two or more words like “Coloring Books,” “Popsicle Sticks,” “Paint & Brushes,” etc. Align the words, select them and click on “Weld” at the bottom of the layer’s panel.
Before sending your project to cut, make sure you save all your changes because if Design Space crashes, you’ll have to start from the beginning.

Important: When working with two different materials on the same project, always make sure you know what you’re cutting with each material. If you decide on a single color, I suggest you choose two different hues (one per material), so Design Space can divide the labels on different mats.
Once you’re ready to cut, click on “Make it” in the upper-right corner of Design Space.
Step 4 – Move Objects to Organize Mat (Optional)
Depending on the machine you have, you may be prompted to cut without a Mat, on the Mat, or CardMat. You can choose to cut as you see fit.
If you’re using a single color for your labels, you can cut without a mat very quickly if you have a Joy, Maker 3, Explore 3. I used a Maker for this project, and I wanted my labels to be very colorful; and since I was working with the same brand and type of iron-on and adhesive vinyl, I organized the mat in Design Space to cut in different colors.
Important: If you use different brands and types of iron-on or adhesive vinyl, you need to cut them on a separate mat.
Check out the following two pics; the first screenshot shows how Design Space organized the labels in two different mats.
Design Space will try to find the best arrangement to minimize product waste. I usually move things around because I like to have some space between labels. I find it easier to weed and transfer this way.
When you click on a particular element, you can move it around on the mat to find the best position. The second screenshot will show how I organized the mats.


I know everything seems too spread out, but I will place different vinyl colors, and it’s easier to place the materials on the mat when I can see them clearly on the mat preview.
If you’re very new to Cricut, you may want to stick with a single color or use different colors in Design Space and cut each label individually on a mat (or matless if you have a newer machine).
There’s room for error, and projects are not meant to be cut this way, but I like teaching you little tricks on my tutorials. One of my labels got chopped up a little bit (I’ll show you later on).
Something else you have to do is turn mirror-on for the mat (yellow in this case) that will be cutting iron-on labels.
Click on continue to select materials.
The next part of this tutorial will be divided into two different sections. First, I’ll show you how to cut and transfer the adhesive vinyl labels, and then I’ll show you the same but with the iron-on labels.
If you’re using either material, go to the section you need.
Section 1: Cut and Transfer Adhesive Vinyl Labels
It’s time to select your materials.
If you have a machine with a smart dial, move it to custom and select material from Design Space to follow along.
Click on browse materials to find the type of vinyl you’re working with. There are different types of vinyl, and the pressure will vary. If you’re using a non-Cricut brand, try to do a test cut first.
I used a non-Cricut brand, and after testing, I found that “Premium Vinyl – Permanent Glossy” would work with my material.

Prepare Mat with Adhesive Vinyl
Do you remember I wanted to use different colors on the same mat?
Now it’s time to place each strip of vinyl according to where I organized each label on the mat preview. If you decide to do this, you must be very careful to place each label properly; otherwise, you’ll ruin the materials.

Mat Preview 
Real Mat 
Load & Cut


Cut & Weed
After placing vinyl on the mat, load it to your machine and tap the flashing go button to start the cut.
When you’re machine finishes cutting, unload the mat and weed the vinyl. I love weeding from the mat. I used a true control knife to divide the label from the rest of the vinyl.
Weed Remove from Mat Ready to transfer


Bend the Cricut mat to release the labels. In other words, you want to remove the mat from the materials and on the material from the mat.
Transfer Adhesive Vinyl Label to Surface
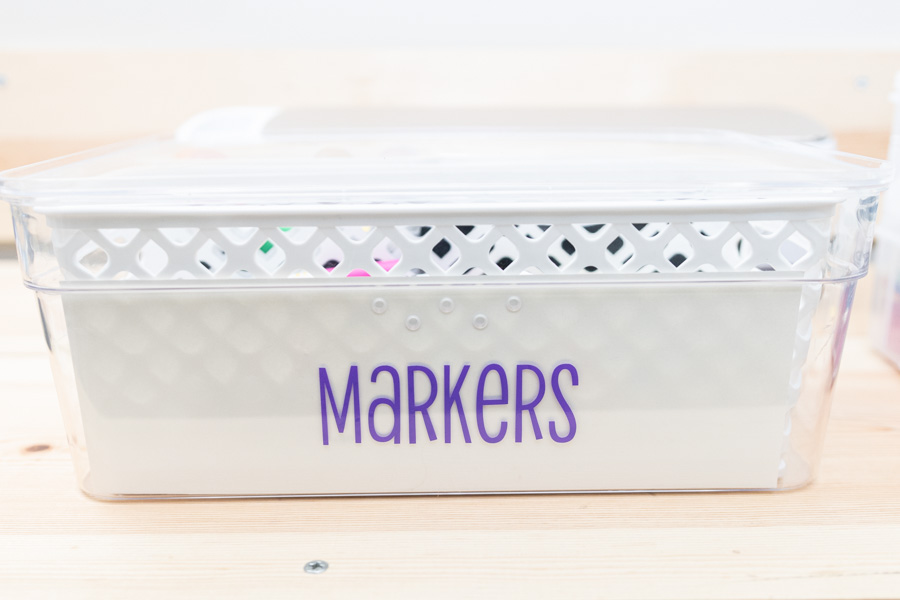
Before we transfer the vinyl label to the blank surface (plastic bin), there’s a little prep work. Wash your hands very well, so you don’t have extra oils.
Wipe the surface with an alcohol wipe, or spray alcohol a wipe clean with a cloth.
I know transferring vinyl can be intimidating. It’s like you are holding your breath and hoping everything goes right.
And sometimes, even if you measure right, it’s just hard to keep a steady hand.
Well…
Do a happy dance because the method you’re going to use will work 100%. Your vinyl labels will be perfect, no need to hold your breath.
For a perfect transfer, I like to use the hinge method.
Alcohol Wipe Wipe Clean Step 1


Step 1: Place transfer tape on the vinyl label.
Step 2: Use a scraper or squeegee to get the transfer tape to adhere to the label. I use it on the front and the back. Sometimes it’s hard for the transfer tape to pick up the vinyl.
Step 3: Find the spot where you want to place the label. I wanted to put the label in the center, so I had to find the middle of the label and the surface.
Trick: Fold from the start to the end of the label to find the exact middle. When you fold, you want to mark the carrier sheet, not the vinyl itself.
Step 2 Step 3 Step 4 Step 5 Step 6


Step 4: Use a piece of tape to secure the label (with transfer tape) on the surface. Then, lift transfer tape about a third or halfway through, ensuring vinyl is attached to it. If not, use the scraper and repeat.
Cut the backing sheet that was left over after lifting the vinyl with transfer tape.
Step 5: Remove tape, flip (hinge) label, and lift rest of backing sheet, ensuring that all the letters stay on the transfer tape. Place remaining transfer tape on the surface and use a squeegee to burnish vinyl into the blank.
Step 6: Remove transfer tape.

Doesn’t it look fantastic?
When using transparent containers, labels can be hard to read! Use white or black cardstock to create a contrast between the label and the blank.

It looks so much better!
Section 2: Cut and Transfer Iron-On (HTV) Labels
If you have a machine with a smart dial, move it to custom and select material from Design Space to follow along.
Select the type of HTV you’re working with. I used “Everyday Iron-On.”
Specialty types of vinyl like holographic, foil, glitter, etc., have different thicknesses, so selecting the correct type of material is crucial.
Don’t forget to turn the mirror on.
It’s always a good idea to make a test cut if using a non Cricut brand.

Prepare Mat with Iron-On
Do you remember I wanted to use different colors of HTV on the same mat?
Now it’s time to place each piece of iron-on according to where I organized each label on the mat preview. If you decide to do this, you must be very careful to place each label in the proper position. Otherwise, you’ll ruin the materials.
Important: Iron-on must be placed pretty or shiny side down on the mat.


Cut & Weed
Load mat to your machine and tap the flashing go button to start the cut.
When your machine finishes cutting, unload the mat and weed the iron-on labels. I love weeding from the mat. Then bend the mat to release labels from it.
Note: Notice on the second pic of the following gallery how the “C” from “Crayons Twistable” got cropped. This is because I didn’t place the material on the right spot.


Ready to transfer?
Transfer Iron-On Label to Surface
HTV’s carrier sheet is sticky, so it’s quite easy to find the right place on your surface because you can readjust the position of your label until you find the sweet spot.
Depending on how big the iron label is, I like to bend the carrier sheet of the label to find the middle and have an easier time transferring.


For this label, I used the EasyPress mini on a cube storage bin, and according to Cricut’s Heat Guide, when you use everyday iron-on and polyester, these are the steps you need to follow.
- Place iron-on material face down, liner side up.
- Secure with heat resistant tape, avoiding image area (In my experience you don’t need to secure it, but it’s recommended.)
- Place Iron-On Protective Sheet over iron-on (I didn’t use it, but you can use parchment paper to protect your fabric).
- Press while moving with Light pressure at Medium setting for 25s (Note: Overlap iron-on edges by 0.5″/1.3 cm).
- Flip Polyester over and press for 15s. (Because of the nature of my blank, I also skipped this step).
- Slowly remove liner when cool to touch.
This label took more than 25s to transfer because it was considerably bigger than the EP mini plate. I didn’t use the pressing mat because I don’t think it would’ve made a difference with this surface.
I transferred the little labels on 100% percent cotton zipper pouches. I didn’t prewash them, but you should because they tend to shrink when you apply heat to them.
I used the EP mini with Cricut’s Heat Guide as well. And the steps were almost identical.


I think the zipper pouches look very neat.
You can also use a regular iron. The key would be to isolate seams or anything that will interfere with the transfer. Check out this section on my HTV guide for beginners to see how to use a household iron.
Final Look
Making labels with your Cricut machine will make a difference. It’s been over two months since I made them, and everything is still in its place.

I ran into some trouble when trying to transfer the “Paint & Brushes” label. So it looks a little crooked. Believe it or not, it’s tricky to manage to craft and document simultaneously.
I am quite pleased with the final look and how everything looks together.


What do you think?
What kind of labels would you like to make?
Let me know in the comments down below.
Share it
Do you know it takes me over 25 hours to complete a single Cricut article? I know it’s wild, but I want to make sure you understand everything!
I would appreciate your support on Instagram , Pinterest , and YouTube as I try to grow my audience and continue producing great content!
Oh!
Just so you know, I also have a library full of free SVG files and Printables for all my subscribers, a.k.a. Daydreamers. You can see a preview right here or get access by filling out this form.


I absolutely loved this article! I am not a newbie but not advanced either. I learned several tricks! Some I thought there must be a way, but did not know how to make it do the task. Where did you get your clear containers? I love these and would make the perfect toy, craft for my grandchildren.
I got them at Walmart. They are shoe containers lol.