Hello Daydreamers!
One of the main reasons people get a Cricut is to personalize and decorate every area in their home. Today’s tutorial will teach you how to make beautiful wood signs with your Cricut machine.
No more mass-produced signs!
There are many ways you can make wooden signs with your Cricut. You can use iron-on, adhesive vinyl, stencils to paint over them, etc.
For this particular wooden sign, we will be using stencil and adhesive vinyl plus wood stain and paint.
I picked staining wood because you can see all the beautiful wooden texture of your board, and, for me, that’s the point of a wood sign. To see the wood!
This article is full of golden nuggets, and since I don’t want you to get lost, these are the topics I am going to be covering:
- Materials and safety precautions
- Steps in Cricut Design Space to make a wooden sign (Including registration marks).
- Cutting Steps for stencil and adhesive vinyl
- Staining wood
- Placing stencil on wood
- The painting process, and how to prevent bleeding
- Adhesive vinyl transfer

Tip: This tutorial builds upon the skills I teach in every step. If you’re just starting with your machine, I suggest you read and follow each step.
Making signs is a fun project, but as with any other skill, there are things that you may get right or wrong. Have fun, enjoy the process, and if your sign looks good at the end, then who cares?
Shake off your perfectionist self, and welcome the fun and eagerness to learn!
Are you ready?
Let’s Daydream Into Reality!
Tools and Materials
One of the best places to find some of the materials for a wood sign is the hardware store. Not only do you have a wide variety of options, but you also have professionals trained to know specific scenarios for your projects.
Is your project for outdoors or indoors? Do you need a protective coat or not?
Paints are water or oil-based, and you need to read the instructions on how to apply them if you decide to use a combination of water and oil-based products.
Ask the professionals in the hardware store, and they will guide you on those little details. Before you go to the store, have an idea in mind, and have them show you what you need. I personally love The Home Depot. I don’t know what they are at your location, but their people are very knowledgeable at mine.
I wish I had all the answers, but I am still learning about those painting combinations. There are countless brands, tons of options, and my background is all Cricut.
I am touching on these important tips because most articles and tutorials you read won’t go in-depth into the nitty-gritty of paint. After all, painting, it’s an entire profession.
But rest assured, I will guide you through all I learned and wished I before and after I made this project.
Tools
- Cricut Machine (Maker, Explore, Joy)
- Standard Grip Mat
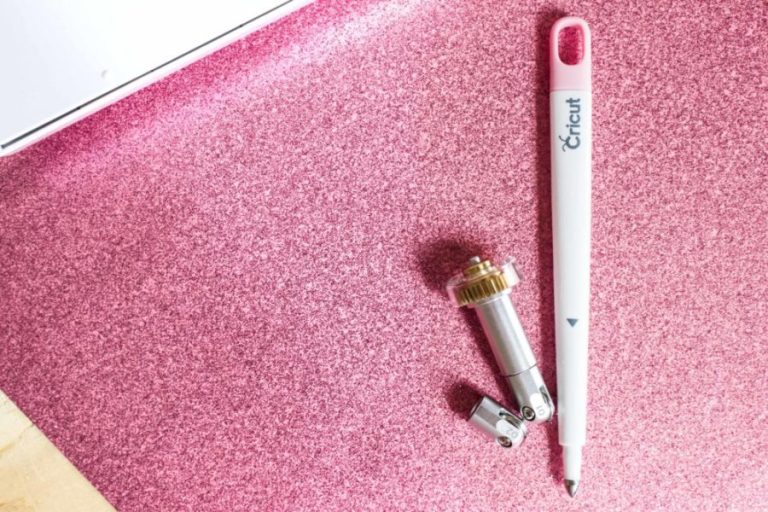
- Cricut Marker (for drawing registration marks)
- Weeder
Materials
- Unfinished Pine Board¹ (8″ x 48″ board) Mine was 7.5″ x 48.”
- Stain and Wood Conditioner².
- Protective Finish³
- For the lint-free cloth, I used a flour sack towel
- Paint⁴
- Permanent Adhesive vinyl⁵
- Transfer tape
- Stencil Film/Vinyl⁶
- Stencil brush
- Paper to protect your surface.
- The hardware store has many options, I like pine because it’s quite affordable, but there are also more expensive wood selections, choose what you would like to work with. Also, choose a board that is very smooth and sanded. Their boards are quite sanded, and, if you’re picky about choosing your board, can get away without sanding.
I didn’t sand my board, But, if you’re a super perfectionist, you can totally sand it. - Pick whether you’re going to work with water or oil-based products and stay in that realm. Some stains have “Wood Conditioner,” mine did. If yours doesn’t have it, make sure also to get it to prevent blotchy spots on your sign.
- You may want to add a protective coat to your project. I didn’t do this because I wanted more of a raw look on my sign. And since it was a sign for summer and I live in a dry area, well, I didn’t bother. If you decide to do a protective coat, make sure to choose the right finish for you (clear, semi-gloss, glossy, etc.). Also, be mindful of getting water or oil-based stains.
As I was researching to make this project and writing this article, oil-based products are more lasting and require fewer steps in between and water-based products are a little bit more tricky and best to use indoors.
In the past, I’ve used Minwax, and by just reading their website line you can learn more in-depth about staining and protecting the wood whether is for indoor or outdoor projects. - I used DecoArt patio paint. (Acrylic water-based). But had I know better, I would’ve used an outdoor oil-based paint. Good thing, it’s that know you know!
- If using adhesive vinyl, choose permanent or outdoor when working with wood. Wood must be smooth and sanded for vinyl to adhere properly.
- For my stencil, I used a stencil film I bought on Amazon, and I loved it! Easy to work with, and best of all, affordable! If you have a Smart Material compatible Cricut, you can also use adhesive vinyl for your stencil and save yourself some steps in Design Space.
Safety Precautions
Whenever you work with wood stains and solvents, you MUST be in a ventilated area and read the stain’s instructions because they may recommend a specific mask.
Stains produce vapors that are damaging to your nervous system. I didn’t have enough ventilation and had a terrible headache for 2 days.
Making a Wood Sign in Cricut Design Space
For this project, I used my Maker, but I have instructions for the other big machines.
This wood sign is quite large, I used a 12×12 mat because that’s what I had on hand, but I totally recommend you used a 12×24 mat and adapt the tutorial to that size.
If you have an Explore 3, Maker 3, or Joy, you could try using Smart Vinyl and save some steps. However, if using the stencil film I recommended, you’ll need a mat and all the steps in Design Space.
Note: This project’s not Joy compatible because the Joy can only cut up 4.5 inches in width. You could make it, but you need to resize it to fit your machine.
Step 1 – Add Wood Sign Guideline
Start by making a guideline for your wood sign.
Click on the “Shapes” icon, then select and drop a square on the canvas; the square will be grey, and the proportions will be locked. Select it, and on the top menu, unlock the proportions and type in the exact measurement of your board. For me, it was a 7.5 and 48.
You can also change the color according to your wood stain. To change colors, select the image, click on the little color box next to “Operation,” and choose the color you want.

Step 2 – Upload Image
I have a template for you. If you want to follow along, click on the button down below to save it to your PC. If it opens on a new window, right-click on the image and select the option “Save image as.”
Once you download the file, click on the “Upload” button on the left panel of the canvas and go to “Upload Image” follow the prompts and select the image from the “Recent Uploads” view. And click on “Insert Images.”

If you want to use text and don’t know how to edit or place it vertically, check out my how-to edit text tutorial for a step-by-step process.
Step 3 – Resize and Organize File
It’s time to resize your image.
Cricut’s canvas zoom-out isn’t as powerful, so you won’t be able to see 100% of the design. But, it’s ok, we’ll work with what we got.
Look how tiny the file is compared to the size of our wood sign.

For large projects is easiest to resize from the top panel and not the canvas. I wanted to leave an inch at the top and one inch at the bottom of this wood sign. So the final size was 46 inches.
Notice how the hello is out of the sign. We will fix that later.
After resizing, click on “Ungroup” so we can add a couple of extra touches to the file.

This is what I did.
First, I made the “Hello” a little bit smaller and rotated it a little extra. Then I selected the seeds of the watermelon and welded them (bottom of layers panel), so they would be on a single layer.
Now, the watermelon on its own didn’t seem that good to me!

I added a little offset to have a small outline on the watermelon.
Step 4 – Add Offset (Optional)
Select the green and red layer by pressing shift on your pc at all times. Then go click on “offset” on the top panel of the canvas and add a 0.25 distance. Check the round corner and weld offsets options as well.

And we’re done editing our project.
You can change the color of the letters for the color you’re going to paint the sign. I changed them for white.
If you’re planning on using Smart Vinyl as your stencil with your Maker 3, Explore 3 and Joy, you can weld the letters along with the outline and proceed to click on “Make it.”
Step 5 – Make Registration Marks
If you have the Maker or any of the Explore family machines, we are limited by the mat size.
Ahhggg!!!
I know, it’s frustrating. I want to pull my hair, but we won’t stop!
To cut a large project and align it to perfection, we need to make registration marks to help us put it together later on.
I like to use stars because they have multiple angles. A square works as well, don’t use a circle because circles will align no matter the angle.
This is how we do it.
Add one star from the “Shapes” icon on the left panel, then select it from the canvas and change the operation from “Basic Cut” to “Pen.”
Keep the star selected and click on “Duplicate” on top of the layers panel. Then select both stars and click on “Align” on the top menu and select the option “Center.”

Once your stars are aligned center, make multiple copies so you can place them as you need them on your sing.
The idea behind one star on top of another is to know where to join the letters when you’re placing the stencil on the wood.
You need to place registration marks considering the size of your mat.

Since my mat was only 12×12, my design couldn’t be larger than 11.5 x 11.5. If you have a 12×24 mat, then you can fit more letters.
Let me show you how I did the marks.
I started by selecting the “Hello, S, and 1 Star from the pair,” and then I checked the size of the mat, and it was 6.5 by 11.2 inches.
Perfect sizing, so I clicked on “Attach” to cut keep everything together on the mat.

Tip: Since we are working with layers on top of layers and identical registration marks that are impossible to find on the layers panel, I recommend that after you attach, you hide the layers so it’s easy to add the next marks.
After my first attachment, I had to place a pair of centered stars between each layer because my mat wasn’t big enough.
The first and last registration marks are the easiest ones. The ones in between are a little more tricky because you have to select a star on the top and bottom of each letter.
Let’s look a the watermelon outline, for example.
Select the star on the top (make sure you hide the initial attachment first, so it’s easier), the watermelon outline, and one of the stars on the bottom, and click on “Attach.”

Repeat this same concept on all stars and letters until you complete the sign.
Once you do all the attachments, bring the visibility off all layers again.
Step 6 – Send to Cut
Once you attach the letters to registration marks, hide or delete the guideline for the board and click on “Make it” to send your project to cut.

Step 7 – Mat Overview
Depending on the machine you have, you may have different prompts. Check out the following table to see what applies to you according to the machine you own.
| Mat Preview Instructions | Maker 3 Explore 3 Joy | Maker | Explore Family |
|---|---|---|---|
| Using Smart Material? | Select “Without a Mat” | N/A | N/A |
| Using other material | Select “On Mat” | N/A | N/A |
I used the Maker, so I went right into the mat preview.
If everything looks right, click on “Continue” to select materials.

Step 8 – Material Selection & Cutting Process
Newer machines will always have you choose material from Cricut Design Space. If you have a machine with a dial, move it to custom and select material from the software.
For the stencil (white letters), I am using a non-Cricut stencil material (linked on materials). I did a test beforehand, and it cut with no problem when I selected “Stencil Vinyl” with more pressure. And for the watermelon, I am using permanent vinyl.
If you’re using other brands, I invite you to do a test cut before you make the project.

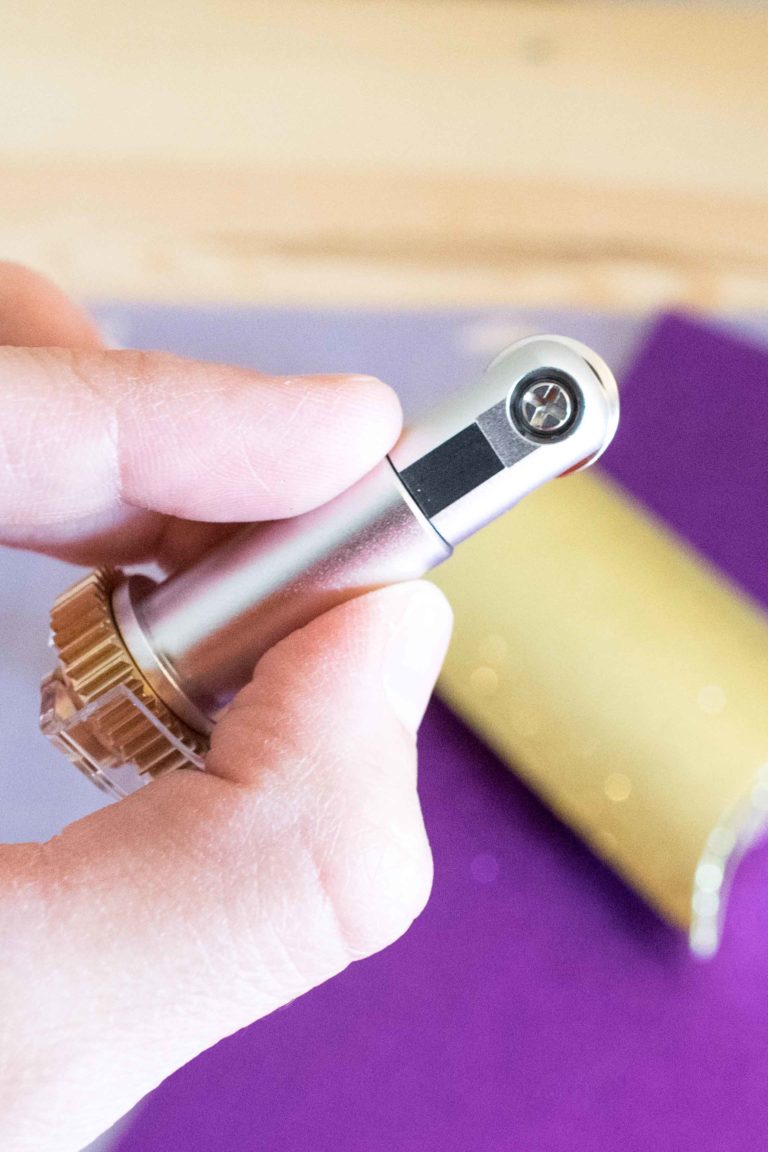
Install a Cricut marker on the Clamp A of your machine the fine point blade on Clamp B.
Place stencil film on the mat, load it to your Cricut, and press the flashing go button to start the cut. When your machine is done, unload the mat, and weed it from the mat itself (it’s easier).
Turn the mat around and bend it to release the cut from it.


Since I used a 12×12 mat, I had to prepare three mats for the stencil alone and the other three mats to cut the adhesive vinyl. Remember that you need to weed out the part where you’re going to paint when you cut a stencil.
There were 6 mats in total.
Don’t forget to change the material in Design Space once you’re done cutting the stencil if using different materials.


Once you’re done cutting and weeding your stencil and adhesive vinyl for your project, I recommend you organize it. There are two “Ms,” and they must be in the order that you added the registration marks in Design Space.


IMPORTANT: With a pair of scissors, trim the stencil to align the registration marks and ensure that the letters will stay open as you place the stencil on the wood.
Stain Wood
It’s time to stain the wood!
Go to a ventilated area and protect the surface where you’re going to stain.
My stain had wood conditioner, but if yours doesn’t, this is the time to apply it to your wood using a lint-free cloth. After you apply it, you have to stain your wood within two hours. Otherwise, it will lose its efficacy.

Shake wood stain can and open it very carefully, and use a little stick to make sure it’s completely mixed.
You have to stain with the wood grain. I tried a brush as well, but using a cloth is so much better.
Soak the cloth with a good amount of stain and spread it on the wood. The good thing about using pine wood is that it will absorb a good amount of stain.

Mix Stain Stain 
Remove Excess


Once you’re done staining, remove excess with the cloth, and let it dry according to your instructions. My stain said one hour.
Placing Stencil on Wood
Grab your stencil and have an idea of how you’re going to place it on your wood. Check out if you need to trim it a little further.
For instance, the watermelon outline would cover the “M” if I didn’t trim it.

A. To place the stencil, you will need some transfer tape. And you can use it again and again for all the letters.
A. B. C.


B. Add transfer tape to the first stencil.
C. Secure it with some masking or painter’s tape on the wood before you try to transfer it.
Transferring the stencil is the hardest part of this project because you have to make sure everything is aligned to perfection. Take your time.
D. E. F.


D. After securing the stencil, lift up transfer tape (about a third or so) with the stencil and cut the carrier sheet. Carefully transfer the “exposed” stencil to the wood.
E. Remove the masking tape from the stencil and finish removing the stencil’s carrier sheet.
F. Finish placing the stencil on wood and remove the transfer tape.
G. H. I.


G. For the next stencils, I didn’t use masking tape because my transfer tape was big enough to secure it against the other stencil.
Before removing the carrier sheet from stencil vinyl, align stars (registration marks), and secure the position with the transfer tape or masking tape.
Take your time, make sure everything around is aligned.
H. Repeat step d and peal carrier sheet off from where it makes sense on your project, keeping the project secured with the registration mark.
I. Make a good bonding using a squeegee or scraper and remove the transfer tape. Repeat steps g, h, and i until you complete transferring stencil.
J. To prevent bleeding on your stencil, add a second stain coat where you are planning to paint only. Don’t add a coat over the entire thing. The stain will sip through some of the spaces and make a barrier that will prevent paint from sipping through the stencil.
Let it dry according to your stain’s instructions before you paint over it.
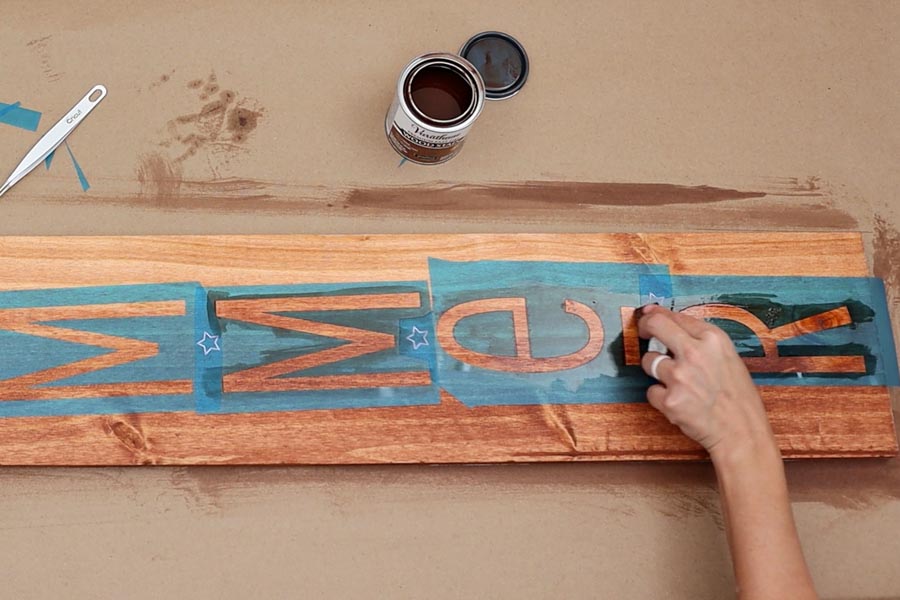
Paint Wood Sign
K. L. M.


K. Add a little bit of paint to a small container that allows you to remove excess paint from your stencil brush. (Yes, you need a stencil brush to prevent bleeding). Add paint to the end of the brush hairs only.
L. The best way to paint is by gently tapping your brush up and down, little by little. I did two coats. It’s recommended to wait two hours between coats.
N. O. 
P.


N. Remove stencil from wood. You don’t have to wait until everything is completely dry, but don’t get it off while everything is super wet, either.
O. Use tweezers to get those little intricate pieces out. Be careful not to scratch your sign or the paint and dry for a day before applying vinyl.
If you want to apply a protective coat, this is the moment to do it. First, wait 24 hours for the paint to be dried, then wait another 24 hours before applying vinyl. Protective coats recommend a little sanding before being applied. Again, read the instructions, and ask professionals at the hardware store.
Another reason I skipped it, lol.
P. Time to transfer your vinyl. Did you let your paint dry? If the answer was yes, let’s move to the final step.
Transfer Adhesive Vinyl to Wood Sign
Applying adhesive vinyl to wood can be impossible if your wood isn’t smooth enough. That’s why I mentioned at the beginning of this article that you needed a very sanded and smooth board.
The good thing is that paint adds an extra smoothness that helps the transfer process.
This vinyl design has three different layers!
The green (skin), red (flesh), and black (seeds). You can transfer each layer to the wood sign, but I prefer to layer vinyl on the carrier sheets.
A. B. C.


A. Start with a piece of transfer tape.
B. Place tape on the seeds.
C. Use a squeegee to help the tape pick up the seeds.
D. E. F.


D. Carefully place the seeds on top of the red (flesh) layer and use a squeegee to adhere both the transfer tape and seeds to the watermelon flesh.
Tip: If you find it difficult to transfer and layer vinyl by hand, you can use the same technique I explained earlier in this article, where I used masking tape to secure the stencil to wood.
E. Black and red colors are properly layered on one carrier sheet. Now, transfer them to the green carrier sheet.
F: I used masking tape to secure the green layer to my desk, so it was easier to transfer.
G. H. I.


G. Transfer watermelon to wood. Use masking tape to align it to perfection before removing the carrier sheet.
H. Use squeegee or scraper to bong the vinyl with wood.
I. Remove transfer tape.

And we are done!
Your sign is ready to be displayed.
Let’s take a closer look at the board.
There was a spot that wasn’t sanded enough, and I wanted to leave like that to show you what happens when your board isn’t smooth enough.

First of all, the stain was a bit darker because the wood was rawer, which made the second coat of stain to prevent bleeding not that effective, which led to the paint bleed a little bit.
Other than that, the other areas were beautiful and crisp.
Share it
Do you know it takes me over 25 hours to complete a single Cricut article? I know it’s wild, but I want to make sure you understand everything!
I would appreciate your support on Instagram , Pinterest , and YouTube as I try to grow my audience and continue producing great content!

I am new at creating wooden signs. The information you provided was very helpful! One thing I was wondering is do you seal the signs at all after creating them. I would like to create some winter ones for outside and didn’t know if they would need to be sealed to protect them. Thank you!
I live in a very dry state so I don’t really seal mine because I don’t make them to last forever. However, if you plan on using them over and over I recommend you seal them!
This is a fantastic tutorial Catalina, i continuously look back on your tutes for reference, as they are “Gold” for me! You teach me so much!
I can’t thank you enough. You are so inspiring, thank you, and thank you for all the time you put into making these for us. I do follow you and I encourage others to do so as well ????????????
Thank you so much! 🙂
So as I am a beginner, just a question, why not just do the sign all in vinyl? Why did you choose to do stencil and paint as opposed to just white vinyl? The sign looks great! And the tutorial on the registration marks was super helpful. I have such trouble aligning things!
Great question! I wanted to show different techniques. And what challenges one would have with each option!
You are so thorough. I love your illustrations. I like the way you’ve incorporated vinyl letters and words along with stenciling, with pictures of many steps on my Cricut Make machine (options for others).
So I did not only get around my Cricut machine, you taught me so much about the sign itself, the materials, wood and paint and how to work everything together. Amazing!
Thank you
You’re very welcome 🙂 I am so happy you learned a lot!
Thank you so much! Best totally complete tutorial I have found. And I finally understand how to use registration marks. Can’t wait to try to make a sign for my porch!