Hello Daydreamers!
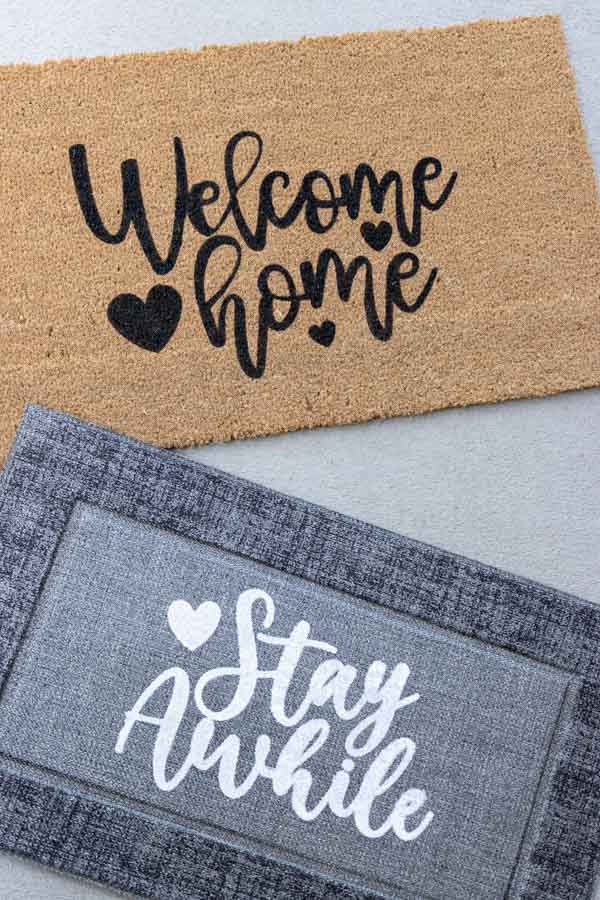
In today’s tutorial, I will teach you how to personalize doormats with your Cricut machine. I’ve also included 6 free SVG files for you to follow along or use in your projects.
There are many ways you can personalize your doormats with your machine. Today I am going to teach you how to personalize them with stencil vinyl and freezer paper.
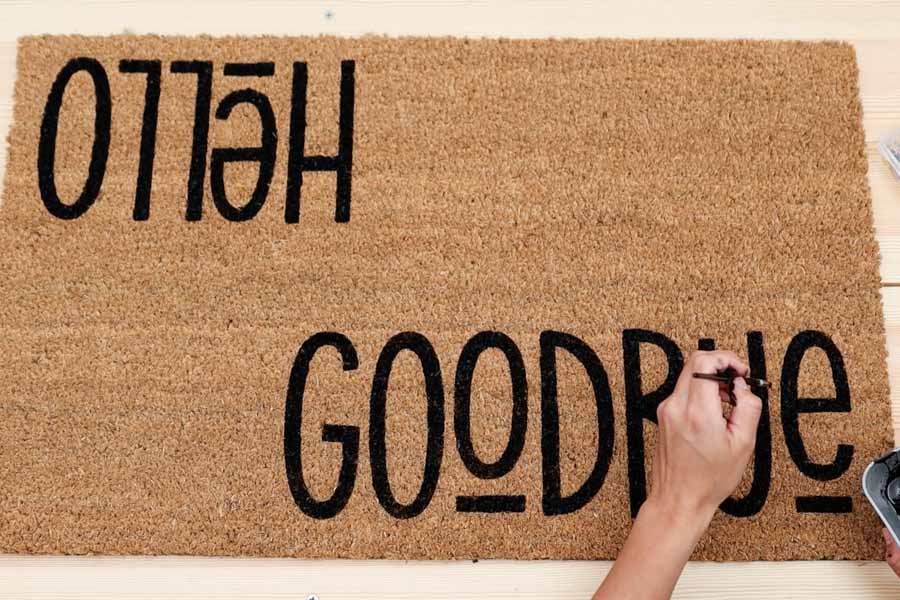
Instead of doing one doormat with stencil vinyl and another with freezer paper, I decided to do a single doormat. One part of the design will be with stencil vinyl and the second part with freezer paper.
I wanted to test both options because both methods are quite popular and wanted to give you my thoughts and opinions on what’s best.
Tip: This tutorial builds upon the skills I teach in every step. If you’re just starting with your machine, I suggest you read and follow each step.

In a nutshell, these are the topics I will be covering in this post.
- What works best, freezer paper or stencil vinyl?
- Material
- Cricut Design Space steps (upload, resize, etc.)
- Cutting Stencil Vinyl and Freezer Paper
- Placing stencils on doormat
- Painting steps

Stencil Vinyl vs. Freezer Paper
Stencil vinyl is a sticky material that adheres to a particular surface so you can paint over it. I used a stencil film, and I loved it! Some people also use regular vinyl, and if you have a color you don’t like, you can also use it.
On the other hand, freezer paper has a unique property. It has a regular finish on one side, and on the other, it has a coated finish. The coated side keeps food fresh when you store food in your freezer.
Something cool about this paper is all of the applications you can use within the crafting world.
When you apply heat on the regular side of the paper against a doormat, the freezer will stick to it, creating a seal ideal for painting.
Freezer Paper is easier to place on the mat, but the edges of the design weren’t that crispy. Stencil vinyl is tough to place on the doormat but, the lines were more crispy.
What material should you choose?
That’s up to you!
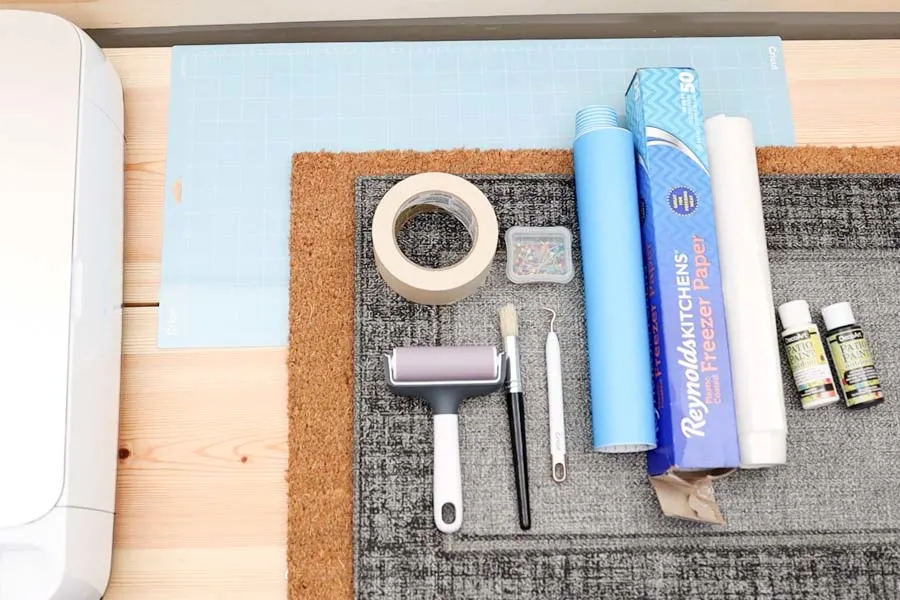
Materials
- Cricut Machine¹
- Fine Point Blade
- 12×24 blue or green mat²
- Doormat³
- Sewing pins to keep stencil in place
- Masking tape
- Outdoor paint⁴
- Stencil brush⁵
- Weeder
- Stencil Film
- Freezer Paper & Heat Transfer Mask⁶
- Practice File (Download below)
Download other files at the end of this article.

1. Technically, you can use any Cricut machine because freezer paper and stencil vinyl are quite thin materials. However, doormats are quite big. Therefore if you have a Cricut Joy, you will be pretty limited on the width of your design.
There are ways around this if you use registration marks. Check out this section in my DIY wood signs tutorial for more info.
2. Doormats are quite large. To make the best and biggest designs, I recommend a 12×24 cutting mat.
3. For this tutorial, I used a doormat made out of coconut coir (fiber), and I also did another test on a more fancy mat. The fancy mat performed terribly when compared to the coconut doormat. You can see the fail at the end of the tutorial.
If you look on Amazon, other mats look similar to the coco coir mats, but they are synthetic; synthetic doormats should be used with stencil vinyl. If you use freezer paper, some of the wax will stay on your doormat.
Synthetic mats also feel cheap. Nonetheless, they are not as messy as coco coir mats.
I bought mine at Walmart, but here is a good option on Amazon.
4. I used DecoArt patio paint. This particular paint doesn’t require any sealant. Some people decide to seal the paint, that’s ok. But I prefer to buy high-quality paint instead. I am a huge fan of DecoArt paints.
My doormat has been outdoors for about three months, and it still looks great. I’ll keep you posted to see how it does after a year or so.
5. Get stencil brushes with natural bristles because you’ll have an easier time painting than using smooth synthetic fiber brushes. I bought this set, and I had great results.
6. Using heat transfer carrier sheets is my favorite way to work with freezer paper. These are the same sheets that attach to iron-on vinyl. If you have some lying around, you can use them or buy them on their own.
The transfer mask will keep everything in place. If you want to use it without a transfer mask, check out my freezer paper stencil article for a step-by-step tutorial.
Cricut Design Space Steps for Personalizing Doormat
When personalizing doormats, I recommend you use simple designs. Something like a “Hello” or “Welcome” is perfect.
You can also use more complex designs, but the stencil is harder to transfer to the mat.
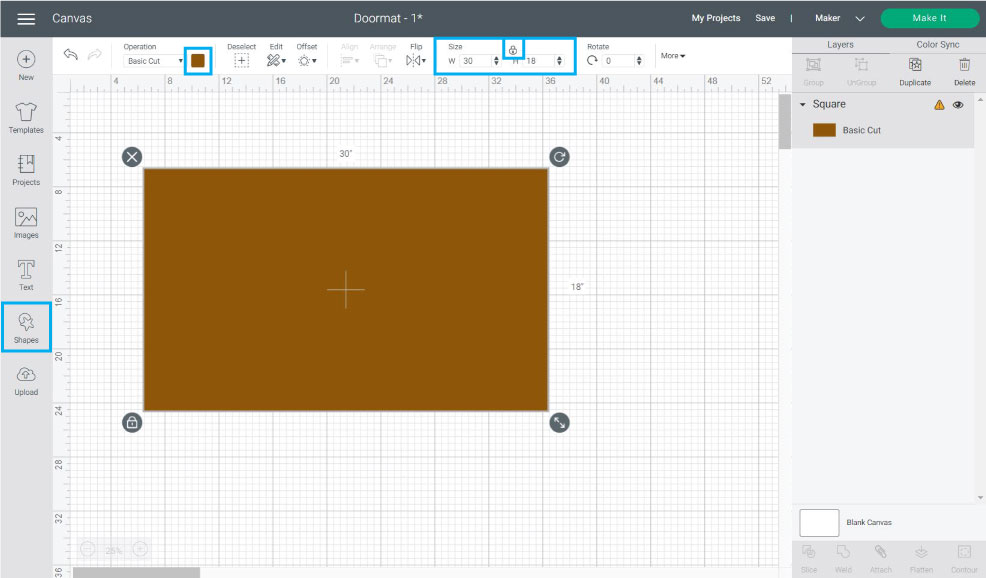
Doormat Guide
It’s a good idea to have a guideline for your doormat. A guide will help you size your stencil very easily.
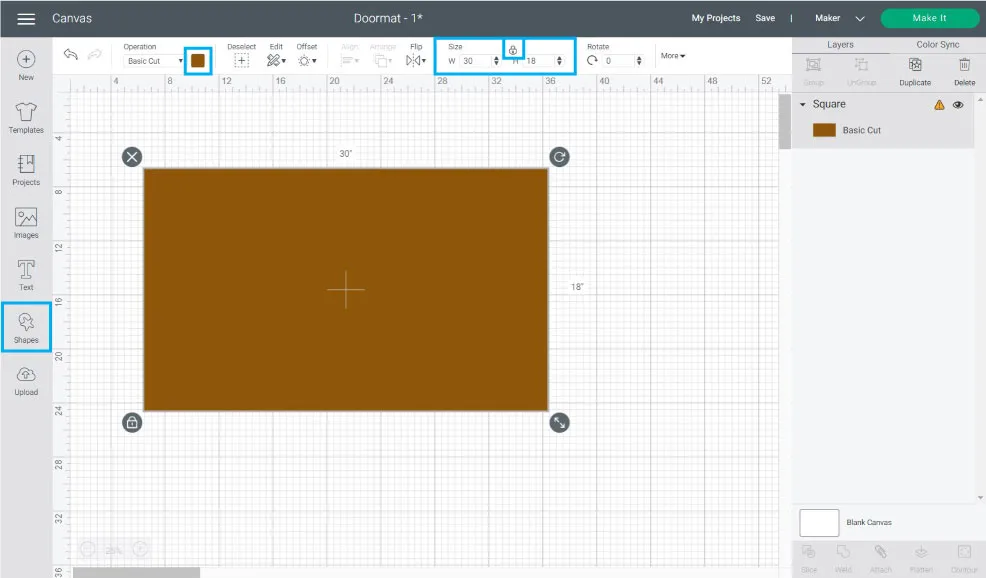
Click on “Shapes” on the left panel of the canvas, then on the editing menu, type in the exact measures of your doormat. Mine was 30 x 18 inches. Unless your doormat is square, you need to click on the little square on the “Size” options to unlock proportions.
I also changed the color of the square to brown (optional) from the little color box next to “Operation.”
Upload & Organize Design
It’s time to upload your design.
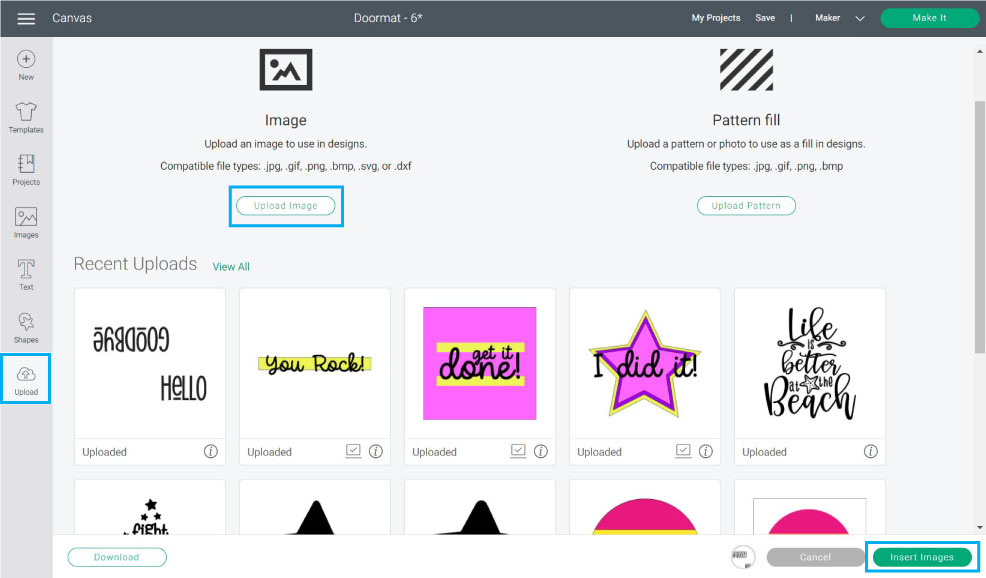
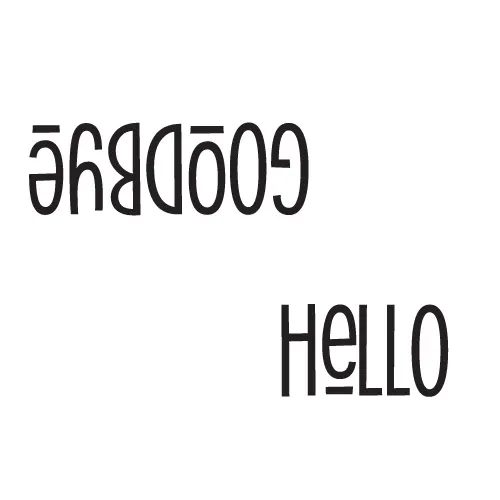
Click on the “Upload” icon, then go to “Upload Image” and upload the “Hello – Goodbye” practice file (you can download it from the materials list or the end of this tutorial).
Follow the prompts, select the file from the “Recently uploaded images,” and click on “Insert Images.”

When you first upload a file to Cricut Design Space, you need to do a little clean-up. As you can see, on the Layers Panel, the file is in multiple layers.
We need the “Goodbye” and the “Hello” on two different layers.

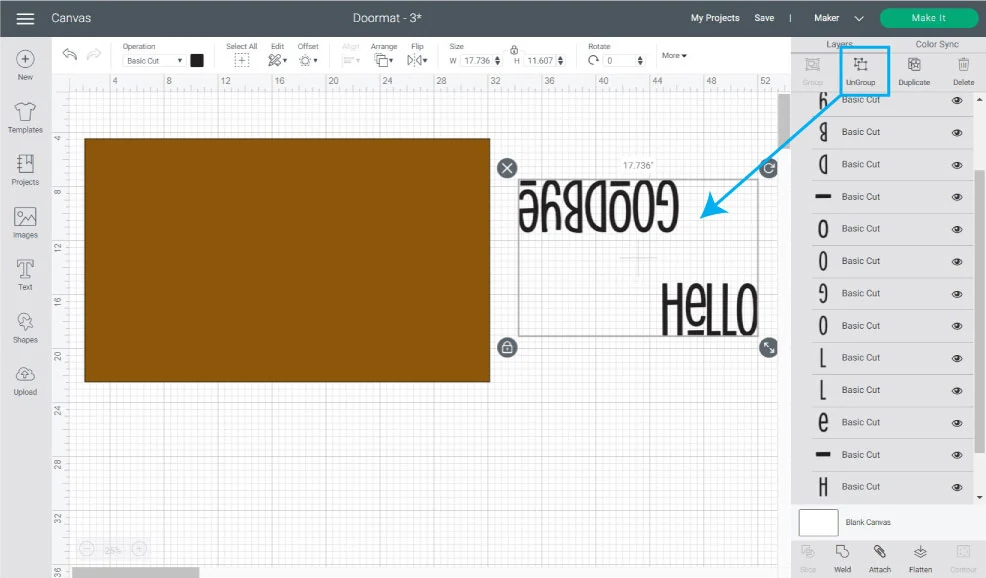
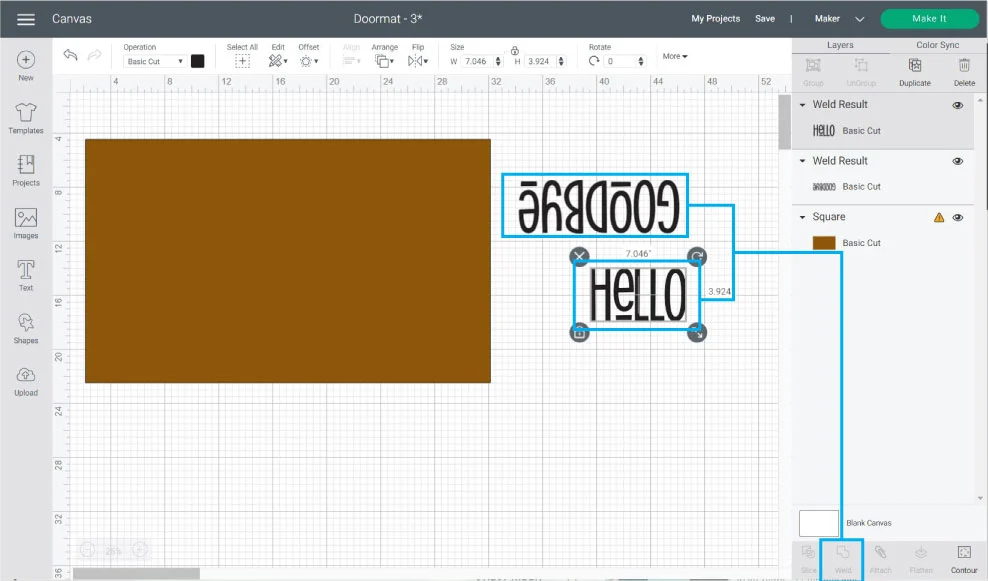
Click on “Ungroup,” then select all the “Goodbye” letters and click on “Weld” at the bottom of the Layers panel. Repeat the same steps, this time with “Hello.”

Resize and Make it
The doormat size is 18″ x 30″, and since we are using a 12″ x 24″ mat, the max size or design is 11.5″ 23.5″. Use the guideline to find the sweet spot between the doormat and the max project size.
In this particular case, I resized the “Goodbye” to 18.47″ x 6.127″. Now it’s time to resize the “hello.”
I don’t know about you, but I like having proportional designs. If you increase the “hello” on its own, the words may look asymmetrical.
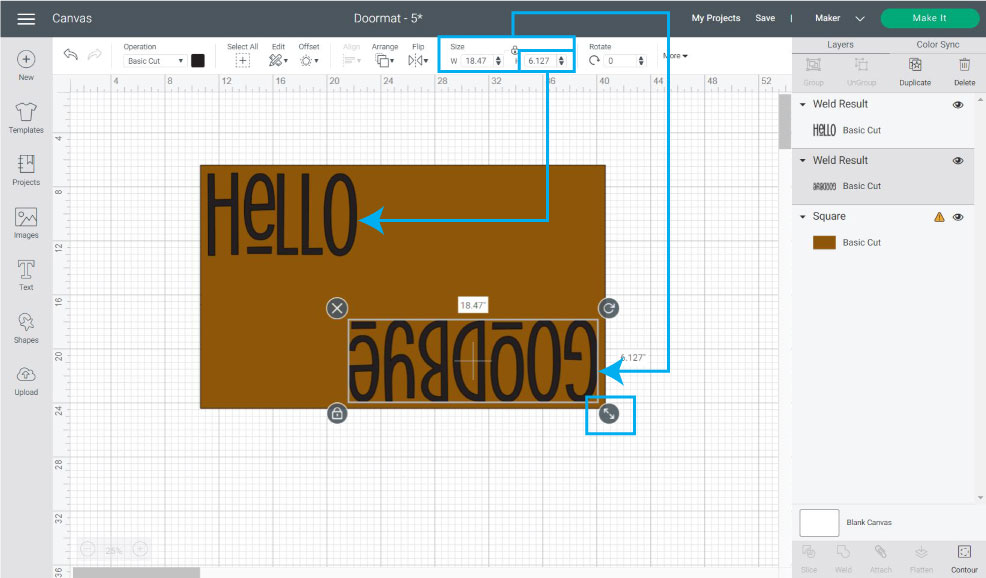

To resize the second layer, I used the height of the “Goodbye” (6.127″) and typed it on the “Size” box, and let Design Space complete the width.
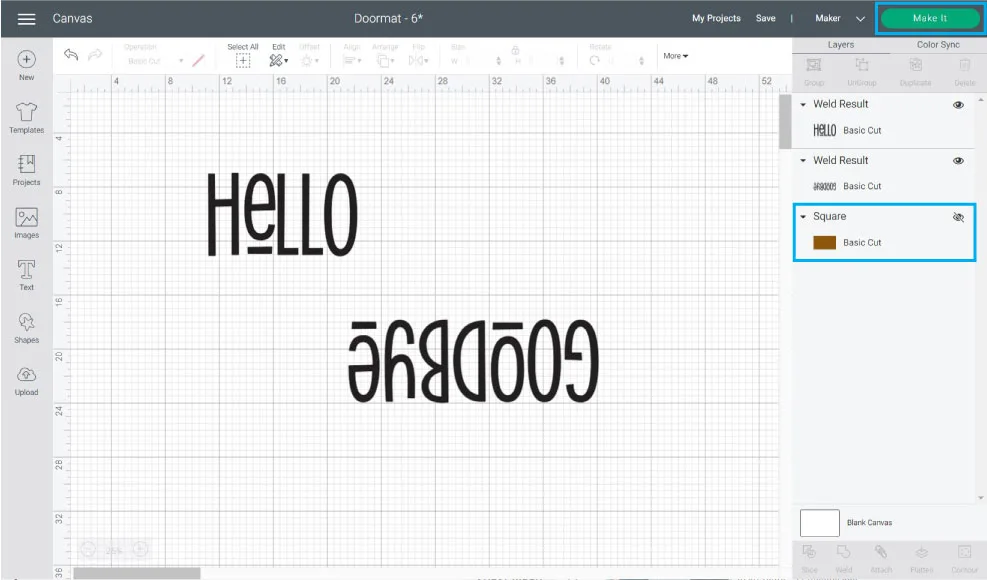
Cutting Process
When you’re ready to cut your project, hide or delete the guideline of the doormat in Design Space, and click on “Make it” on the upper-right corner of the window.

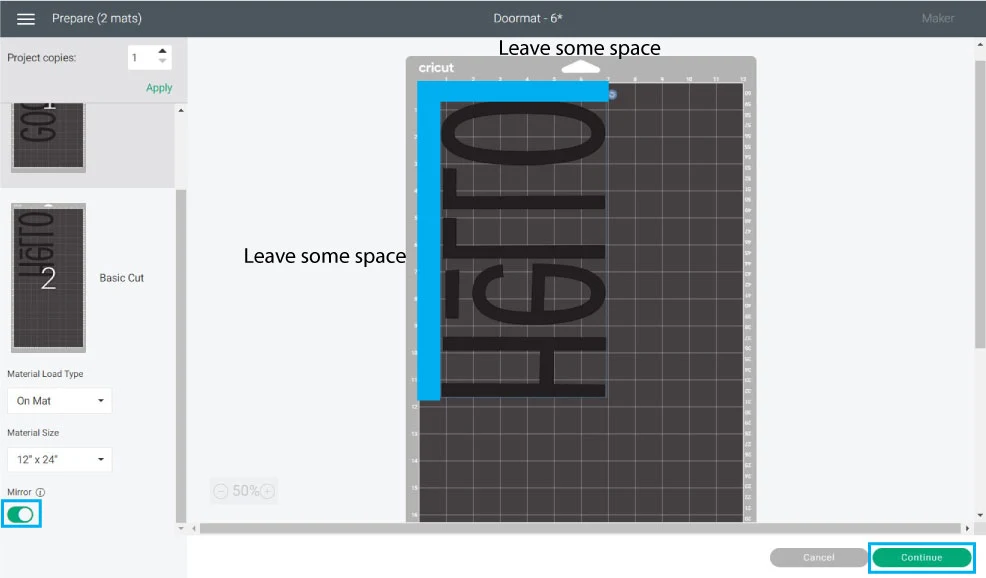
This is the mat preview. Whenever I cut stencils, I like to move the designs on the mat a little bit, about 3/4 or 1 inch to the top and the left.
This little space will help you paint with more ease.
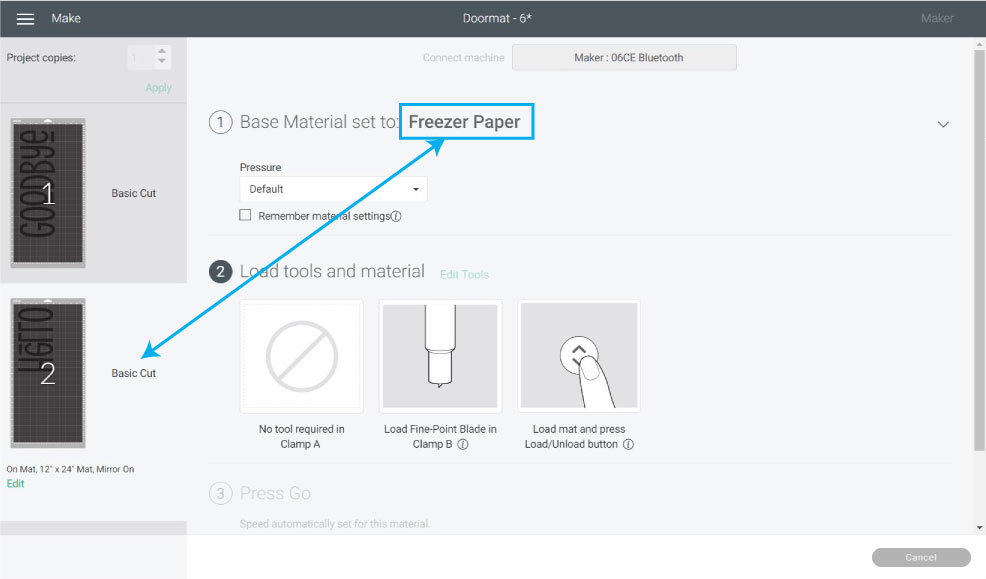
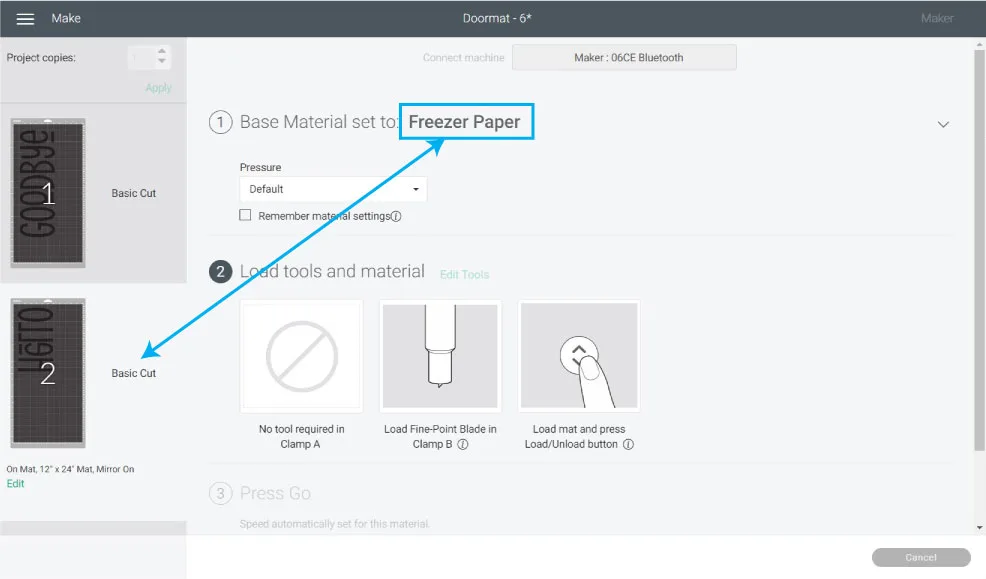
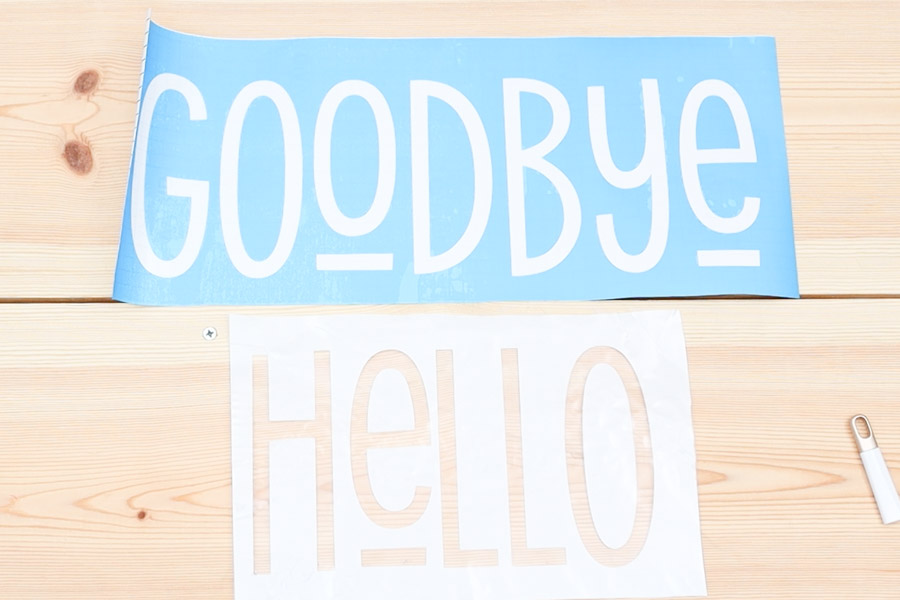
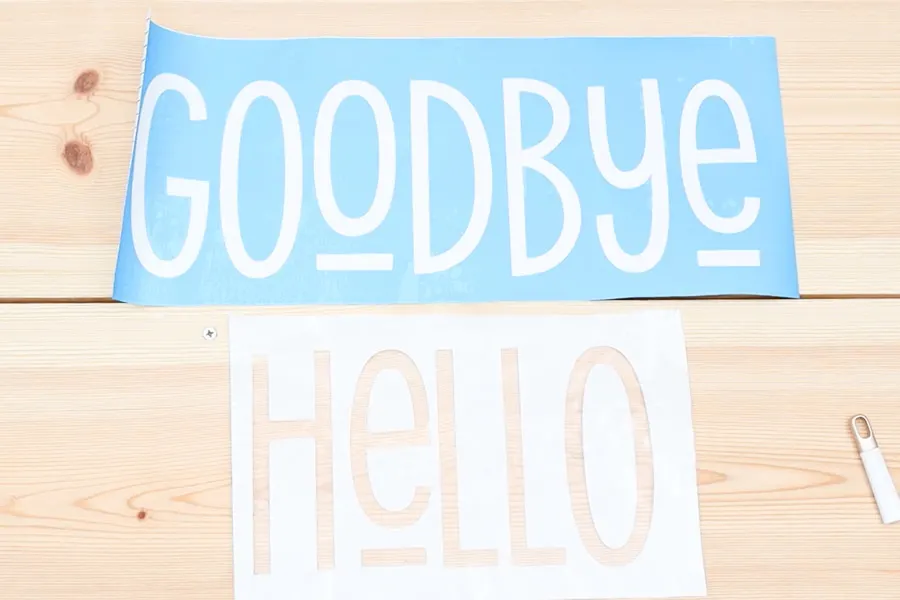
For the word “Goodbye,” I will be using stencil vinyl, and for the word “Hello,” I will be using freezer paper. If you’re using freezer paper with transfer mask, you need to mirror your image.
If only using stencil vinyl, no need to mirror.
After rearranging words on the mat to create a little cushion, click on “Continue” to select materials.

Cutting Stencil Vinyl
Let’s cut the stencil vinyl first.
If you have a machine with a dial (Explore Family Machines), set it to custom so you can follow along on the screenshots.
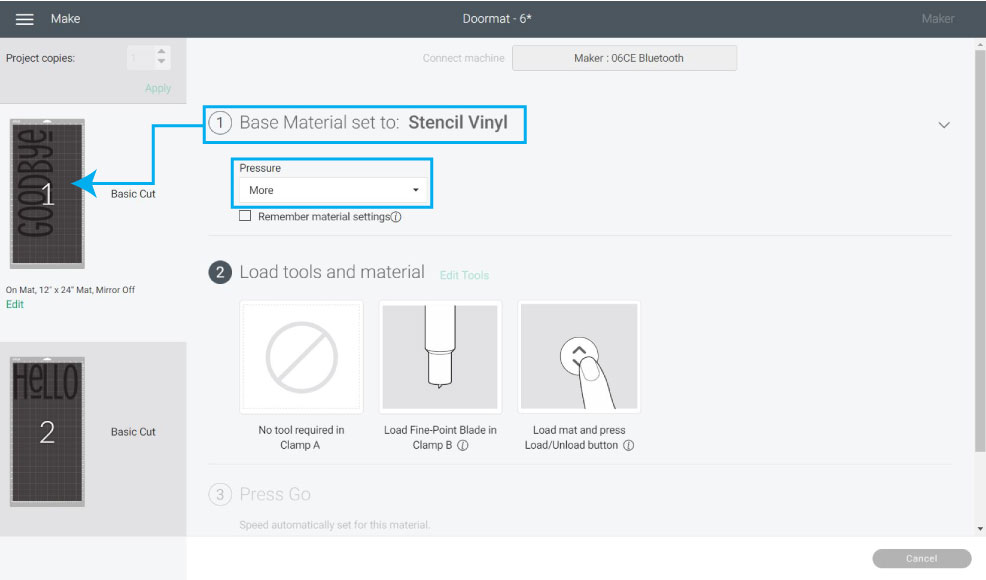
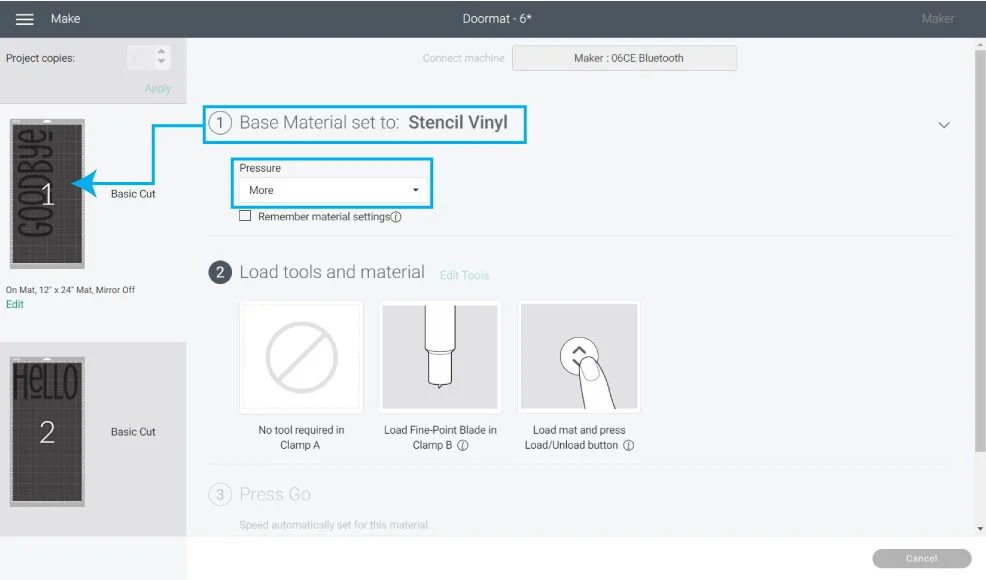
Click on “Browse all Materials” and find “Stencil Vinyl.”
For the stencil, I am using a non-Cricut stencil material (linked on materials). I did a test beforehand, and it cut with no problem when I selected “Stencil Vinyl” with more pressure.
If you’re using other brands, I invite you to do a test cut before cutting your project.
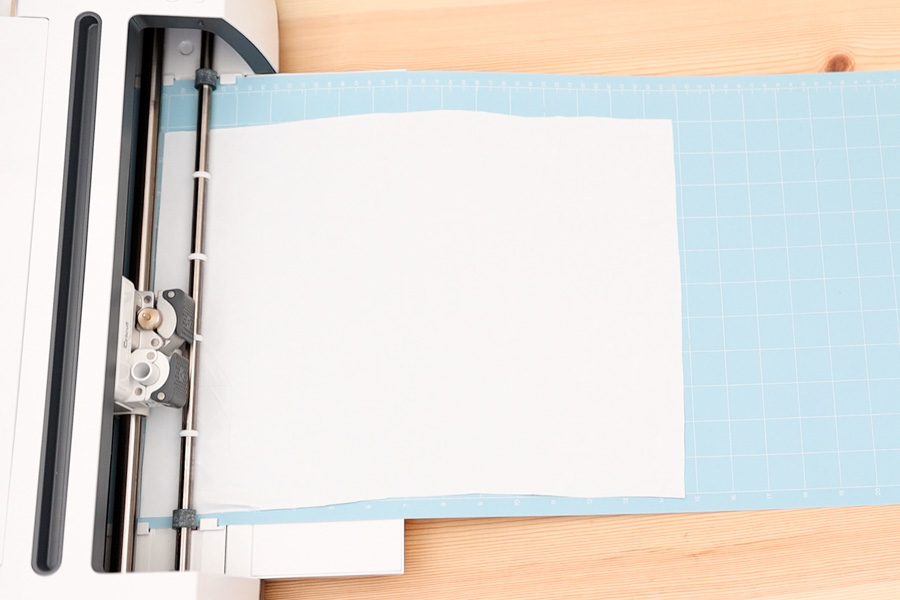
Place stencil film on the mat, load it to your Cricut, then press the flashing go button to start the cut. When your machine is done, unload the mat, and weed it from the mat itself (it’s easier).
Remember that you need to weed out the part you’re going to paint when you cut a stencil.


Turn the mat around and bend it to release the cut from it.
Cutting Freezer Paper
If you have a machine with a dial (Explore Family Machines), set it to custom so you can follow along on the screenshots.
Click on “Browse all Materials” and find “Freezer Paper.”
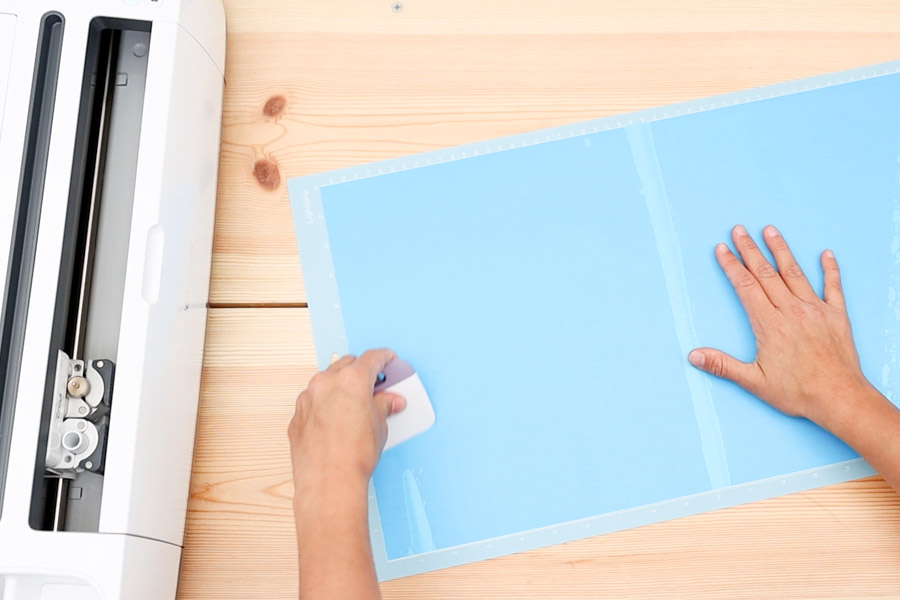
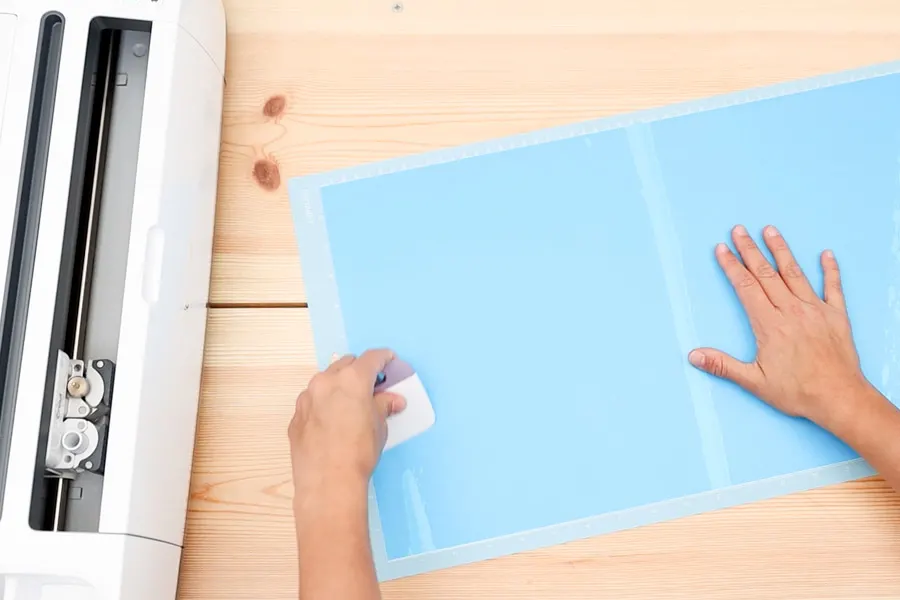
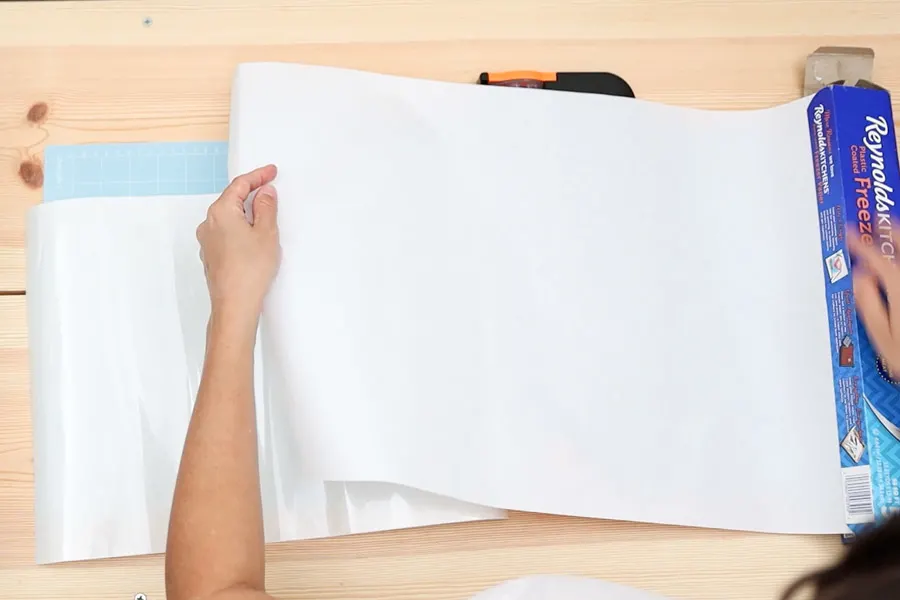
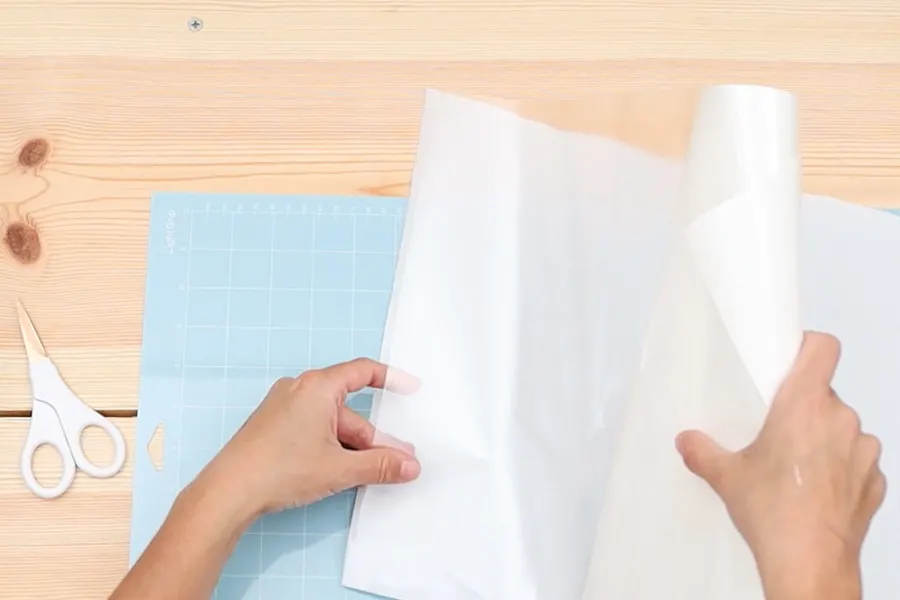
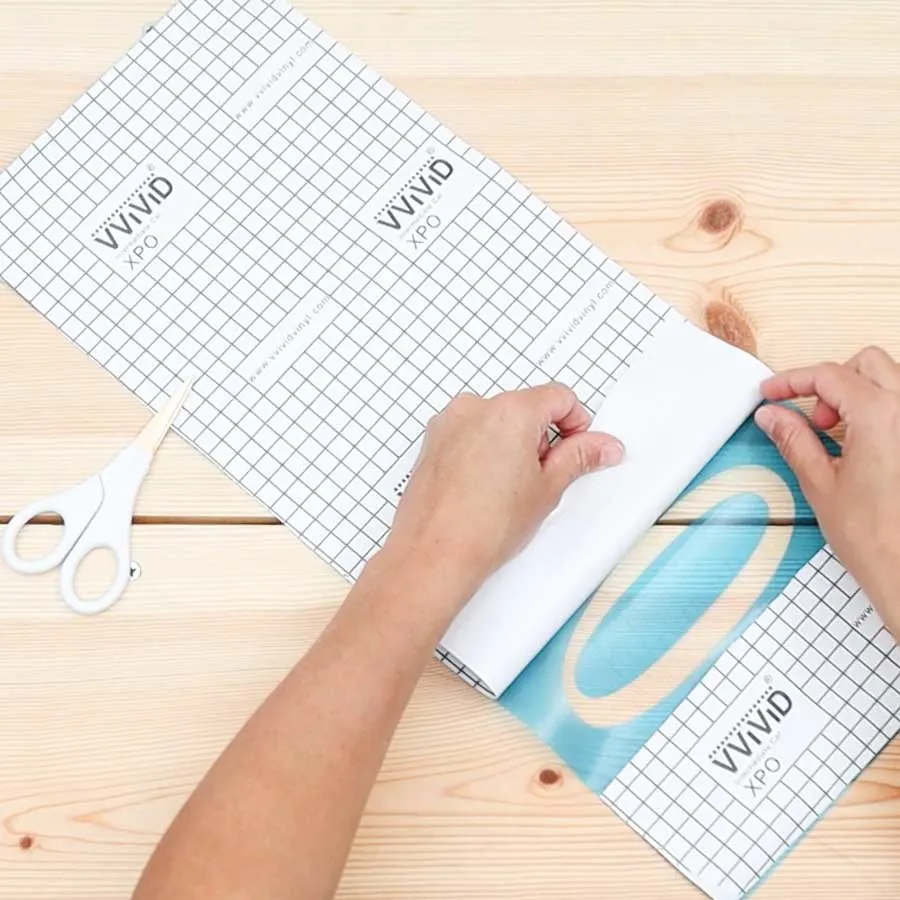
Cut freezer paper and stick it on the heat transfer mask regular (non-coated) side down. Use a squeegee or brayer (my favorite Cricut tool) to smooth out bubbles and have everything nice and even.
Place carrier sheet on Cricut mat. The coated side of the freezer paper must be facing up.
Load it to your Cricut and press the flashing go button to cut your paper.


I like using heat transfer carrier sheets with freezer paper because you can weed your design like you would with regular vinyl.
The carrier sheets will keep your design intact, meaning the letter holes won’t fall out during the weeding and transfer process.
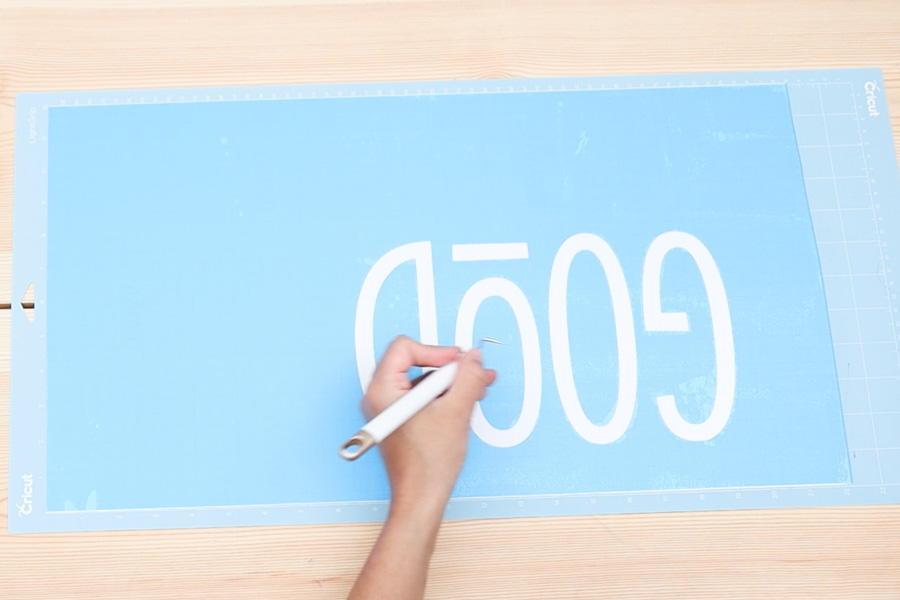
When your machine is done cutting, unload the mat and weed. The crucial part here is that you need to weed the parts where you want to paint.
It’s some sort of reverse weeding.
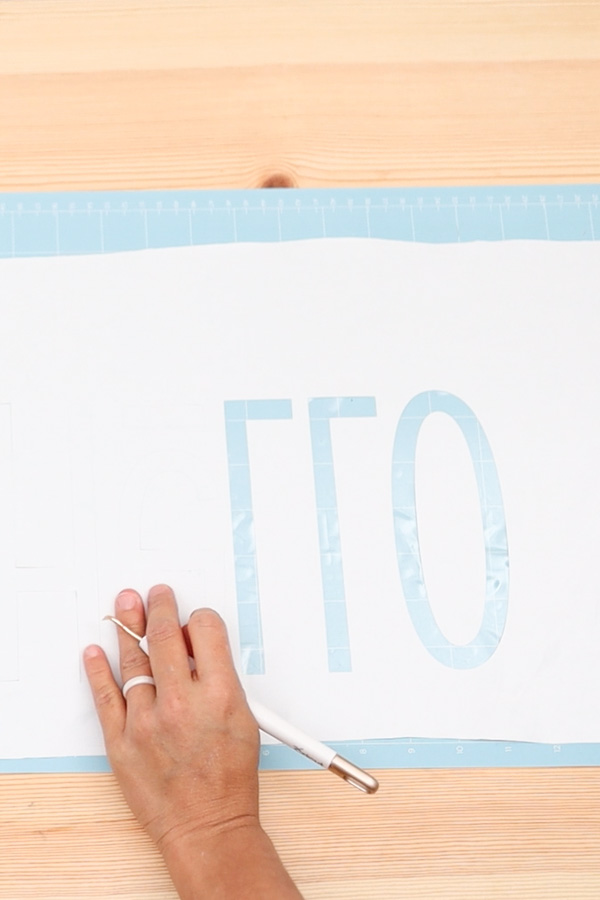
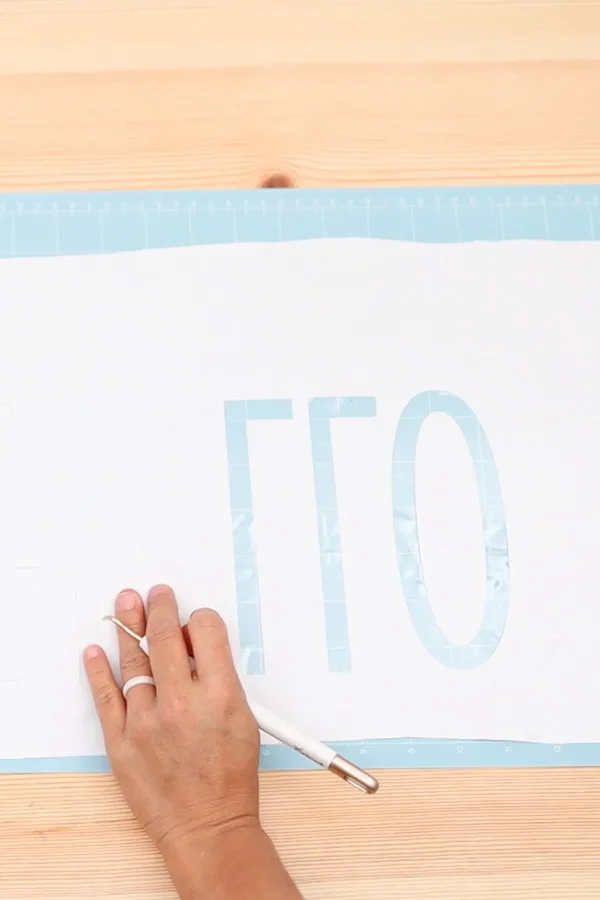
When you finish weeding, bend your mat to release freezer paper from it.
Place Stencil on Doormat
It’s time to place the stencil on the doormat.
Placing stencils on coconut fiber doormats is a little hard. The fibers fall out a lot, and it’s hard to get good bonding between the stencil and the mat.
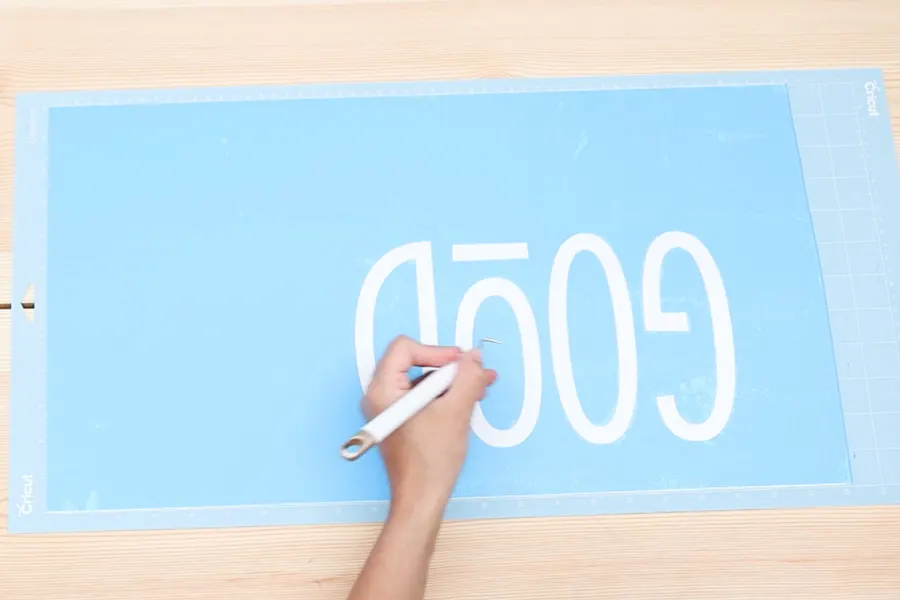
Using masking (or painter’s) tape and sewing pins to keep the stencil in place is necessary.
Place Stencil Vinyl
Let’s start with the stencil vinyl.
Placing stencil vinyl on a doormat is very hard. It requires patience and a little bit of preparation.

Step 1 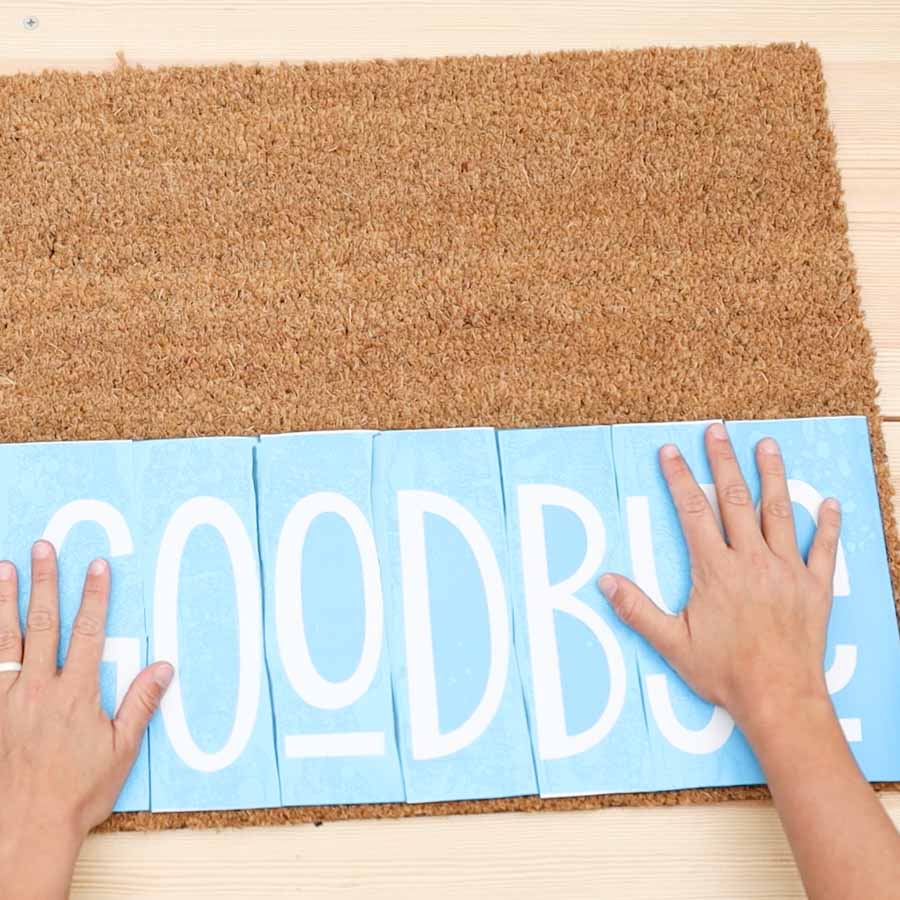
Step 2 
Step 3
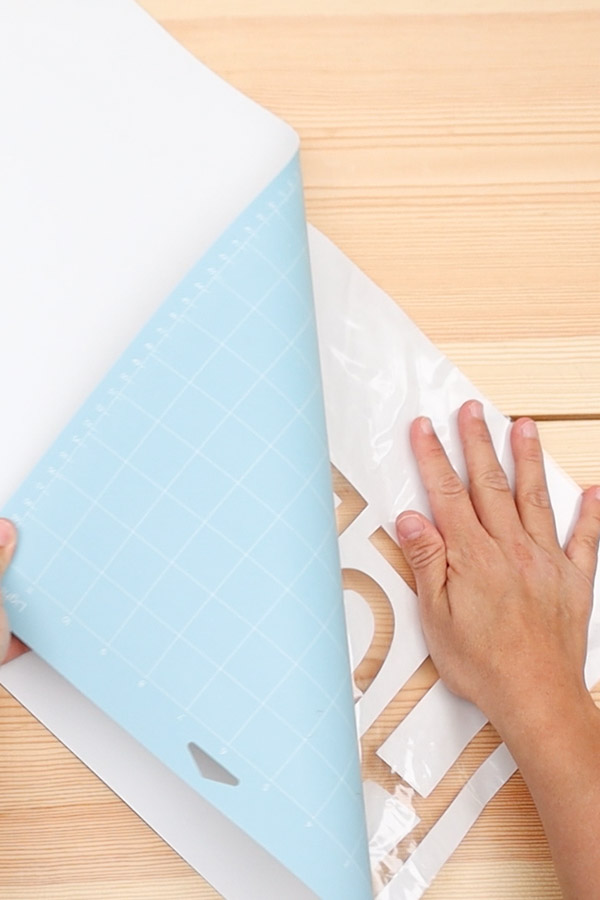
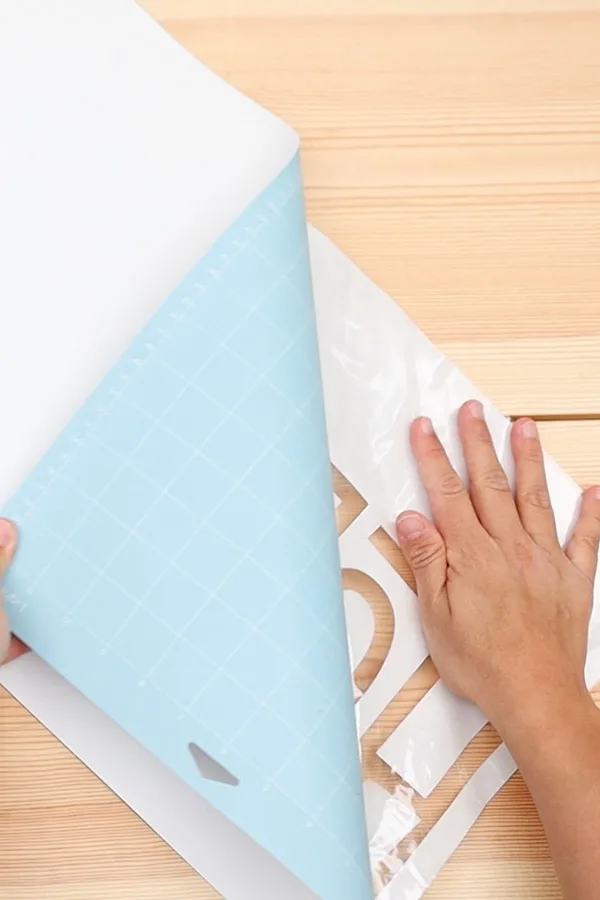
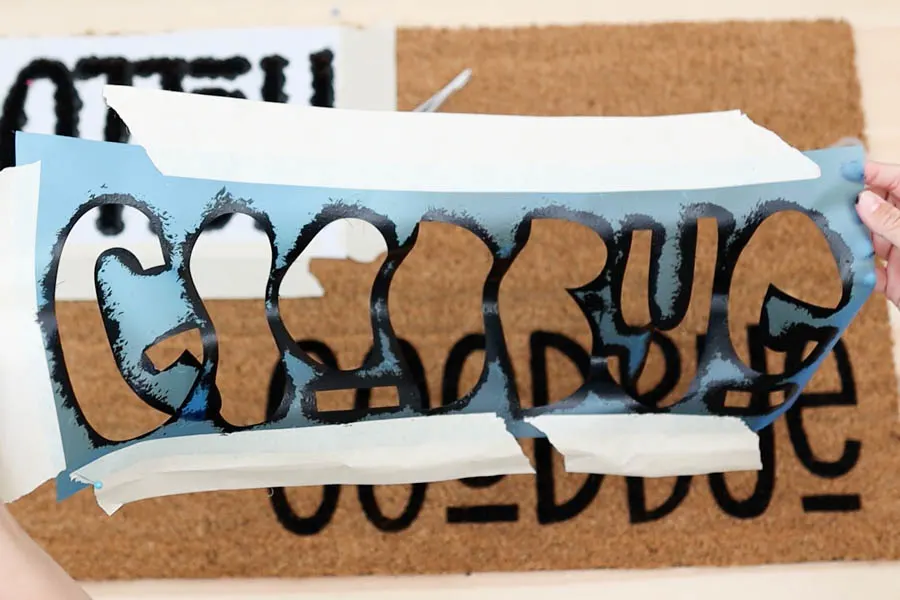
Step 1: Divide the carrier sheet into multiple parts, so it’s easier to place on the doormat. Dividing the carrier sheet is tricky because you have to lift the stencil from it manually. You can’t use transfer tape.
This design was very easy to divide because I was using big letters. It gets tricky if you have a complex design. If you do, rely on your logic to see where it makes the most sense to cut the carrier sheet.
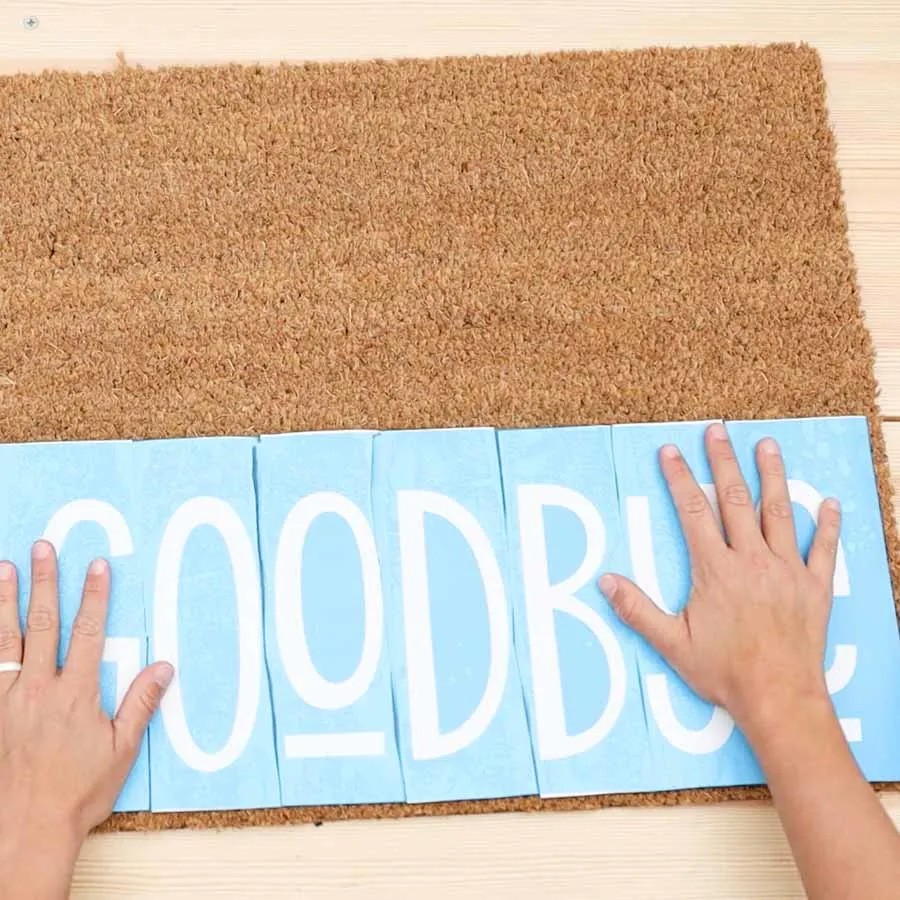
Step 2: Find the right spot on the doormat.
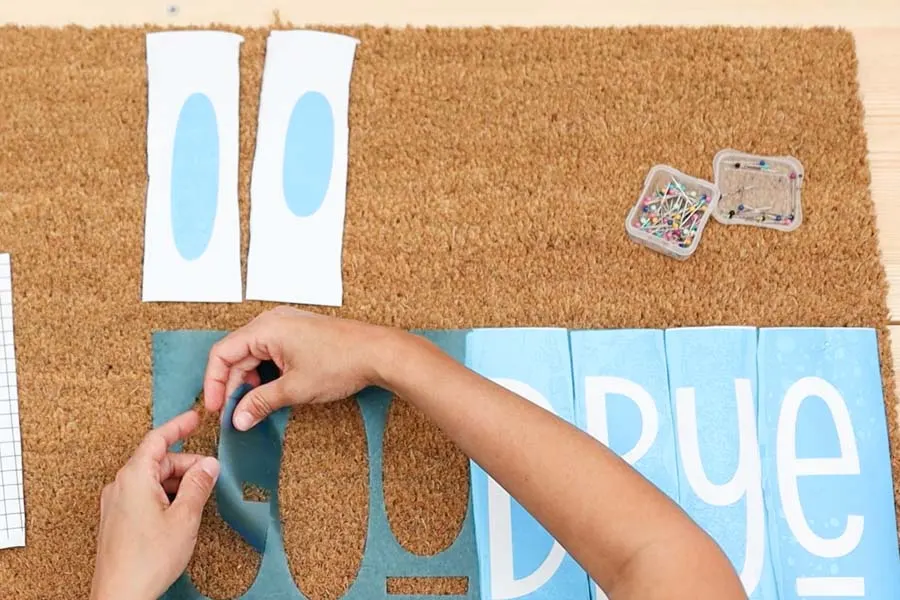
Step 3: Start the transfer by removing the carrier sheet. It’s like a dance; you have to move back and forth. The good thing, it’s that this material is very forgiving.
At all costs, avoid the stencil to stick to other parts of the stencil.
Don’t worry if the insides of the letters don’t cooperate; you can do those at the end.

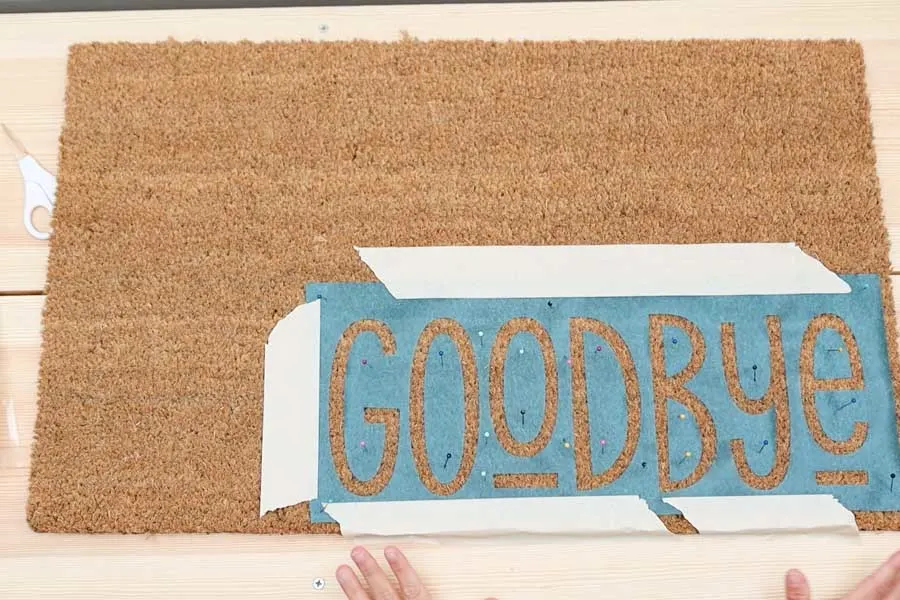
Step 4: Secure stencil with sewing pins and masking tape.
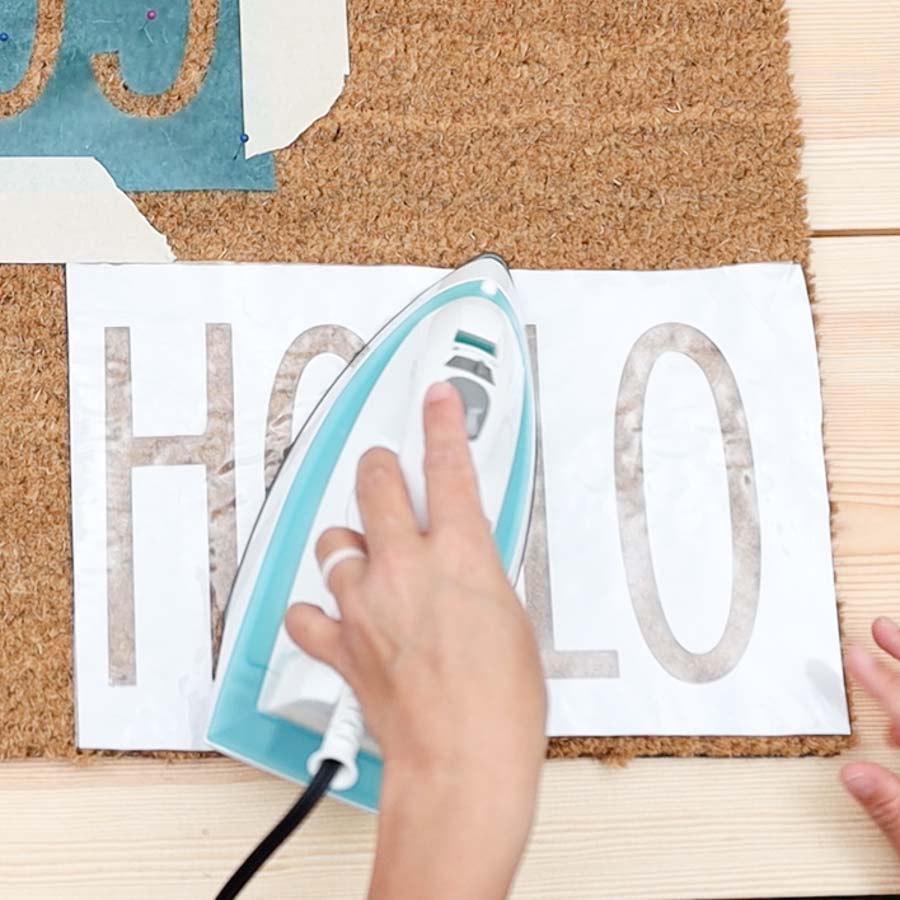
Place Freezer Paper
Freezer paper is easier to transfer. But don’t think it creates a perfect seal like when you use it with regular fabric. It takes a little longer.
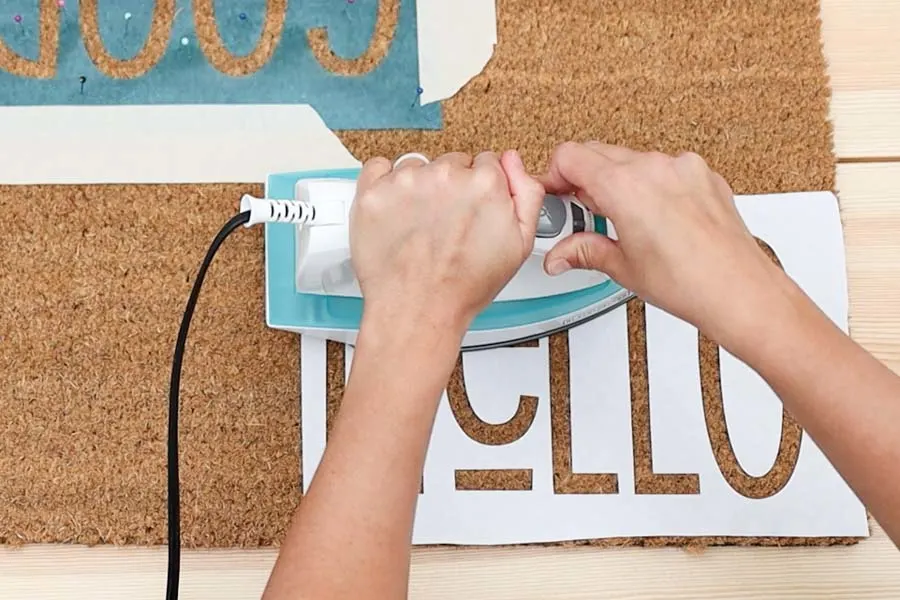
Preheat your iron to a high temperature. I did the max.

Step 1 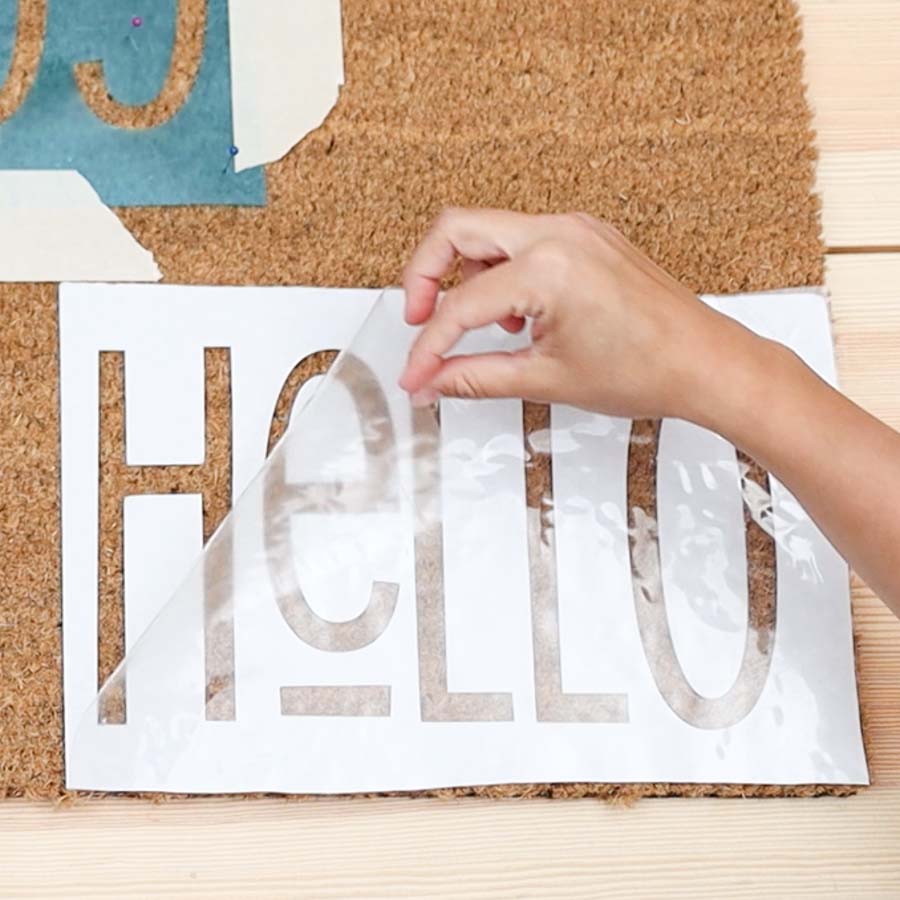
Step 2 
Step 3
Step 1: Place freezer paper on the spot you want to transfer it and do 15 second hard presses on different design sections.
The transfer mask will try to come out. Try to keep it in place so your design doesn’t move. The bond is light between the doormat, and the paper is quite light. That’s why you have to do hard presses.
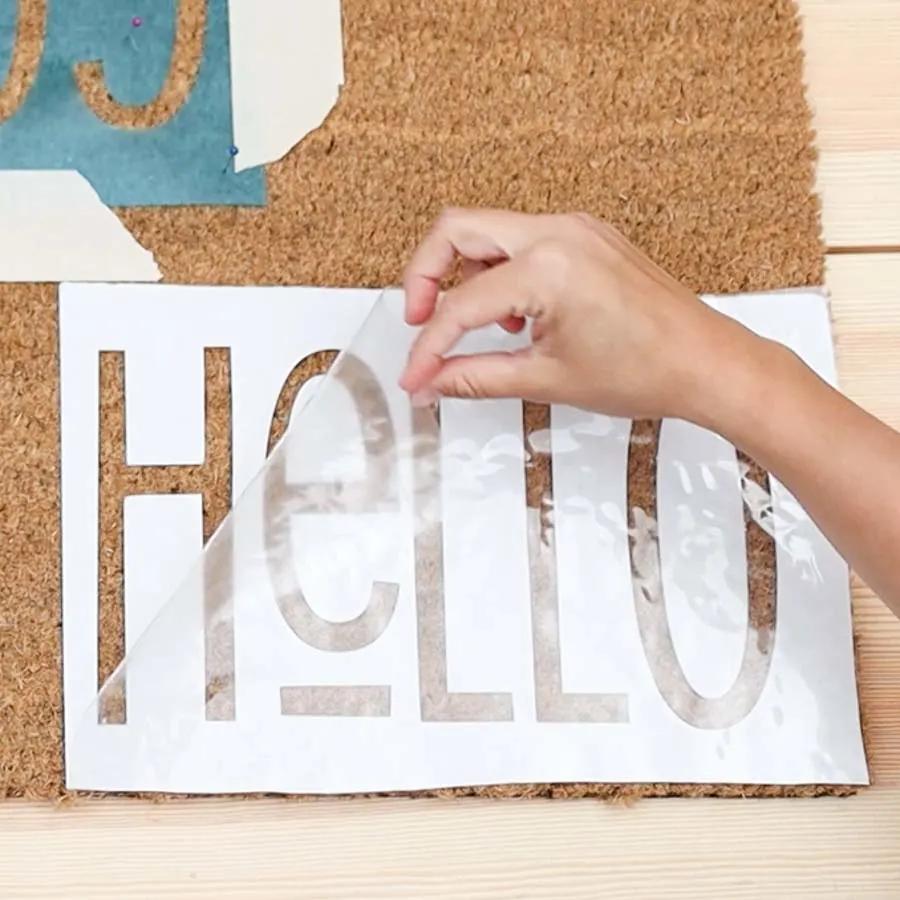
Step 2: Remove the heat transfer mask.
Step 3: Press again to make a stronger bond.

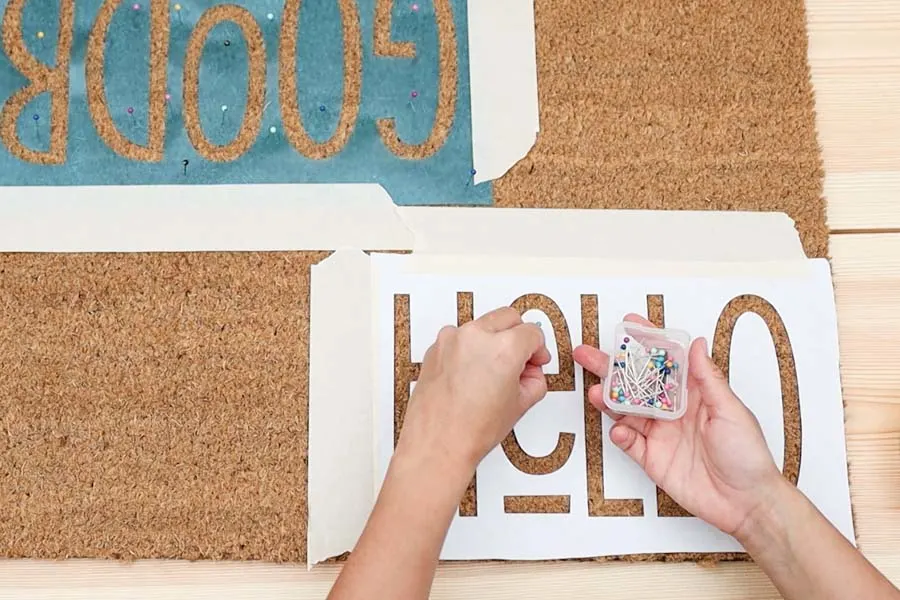
Step 4: Secure with painter’s or masking tape and sewing pins.
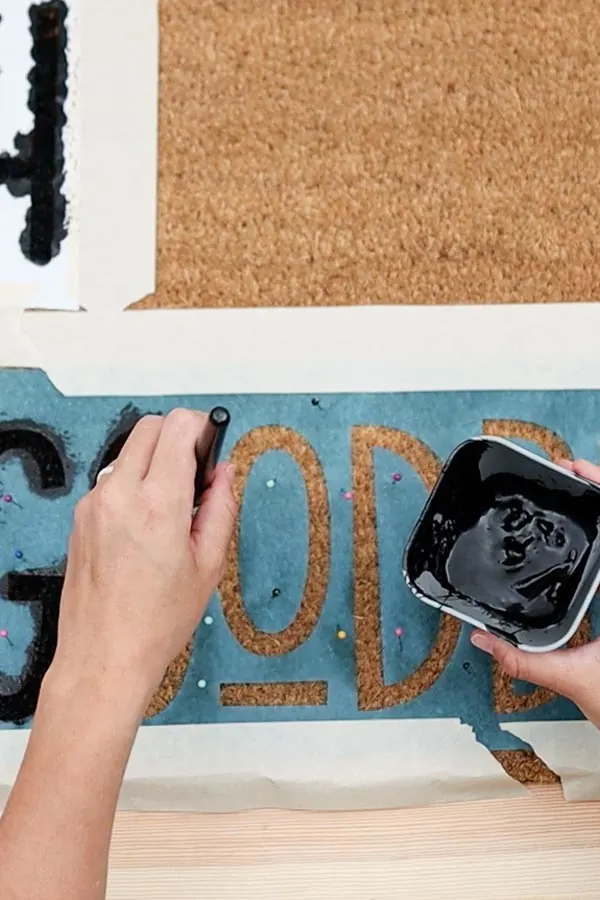
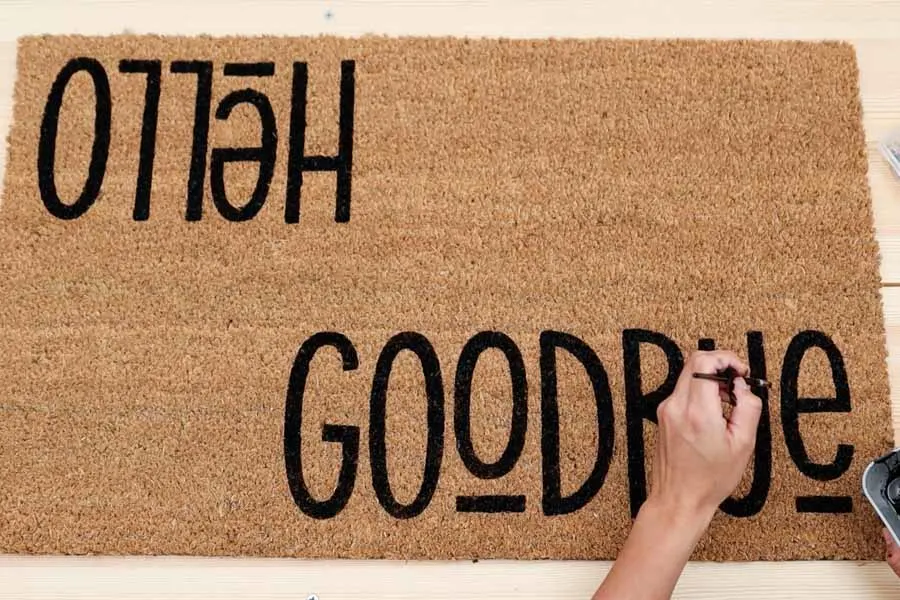
Paint Doormat
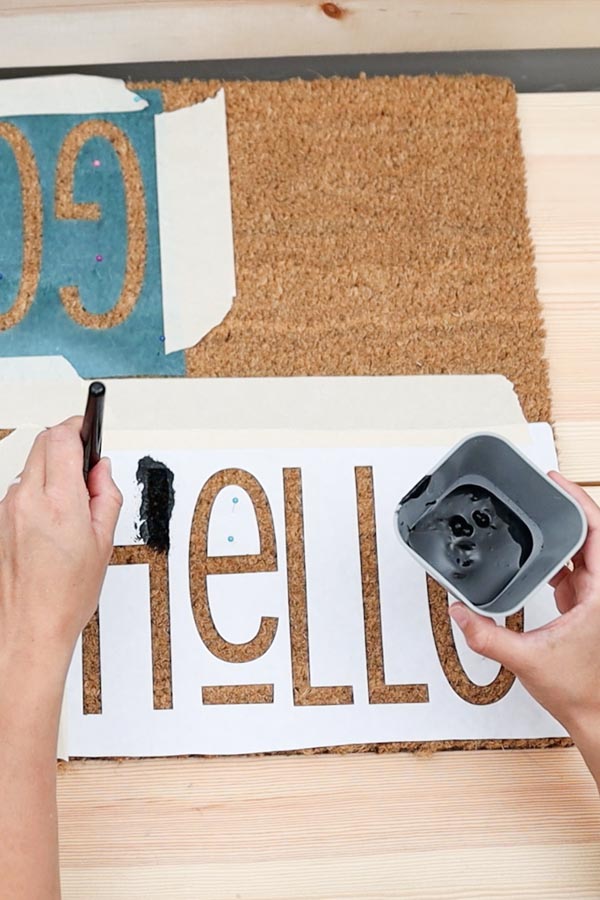
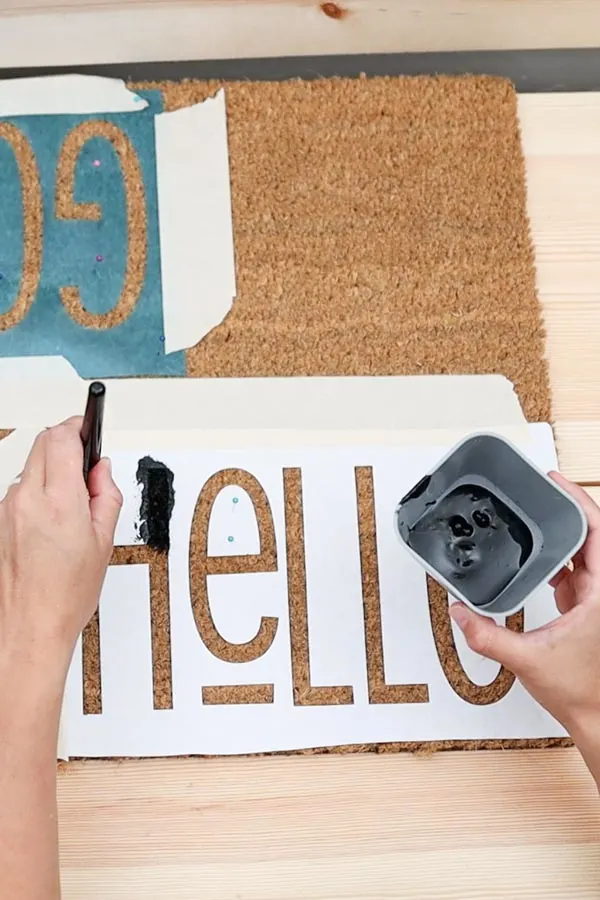
It’s time to paint.
You want to use a stencil brush because it sinks in between the doormat fibers and coats, plus it will also prevent bleeding.
Usually, you are supposed to have a little bit of paint on the brush. But, that’s not the case with a coco coir doormat. You want the paint to sip through the fibers and coat everything.
I did two coats, one right after another one.
If you feel your stencil is moving, use extra sewing pins or your other hand to hold it in place. This will happen if your design is made out of tiny and thin objects.

I am always a bit impatient, and I just remove my stencils after five or minutes of painting.
Carefully remove the sewing pins, and don’t let wet paint on it touch other areas of the doormat.
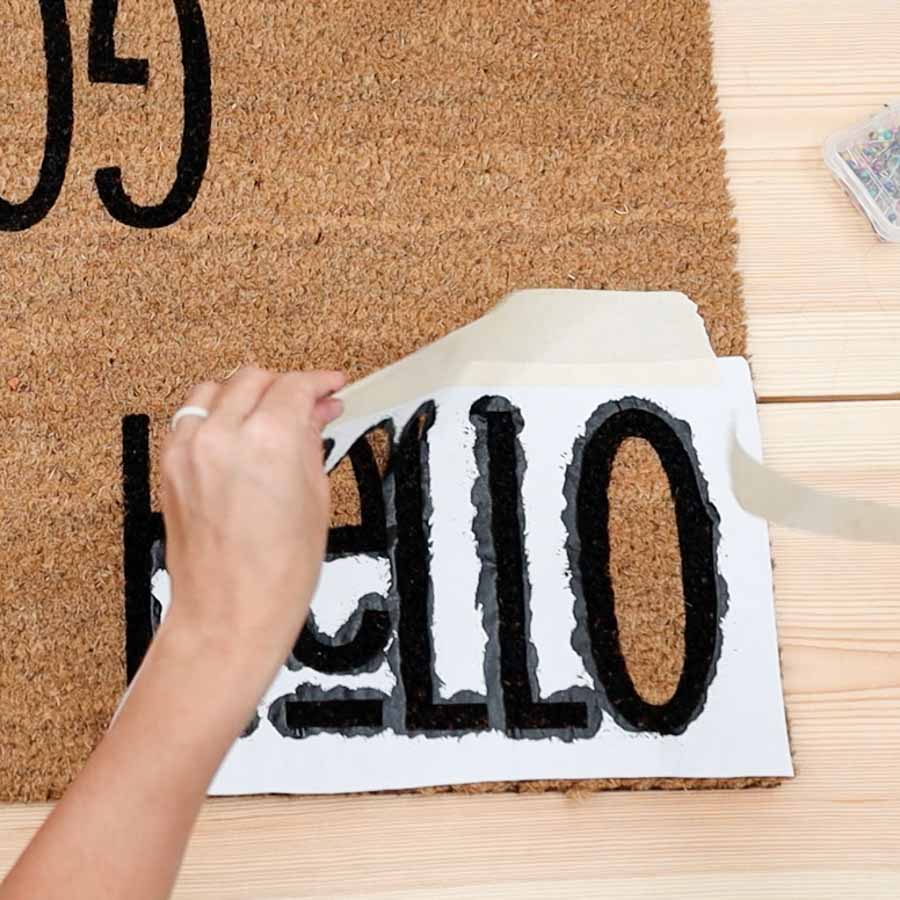

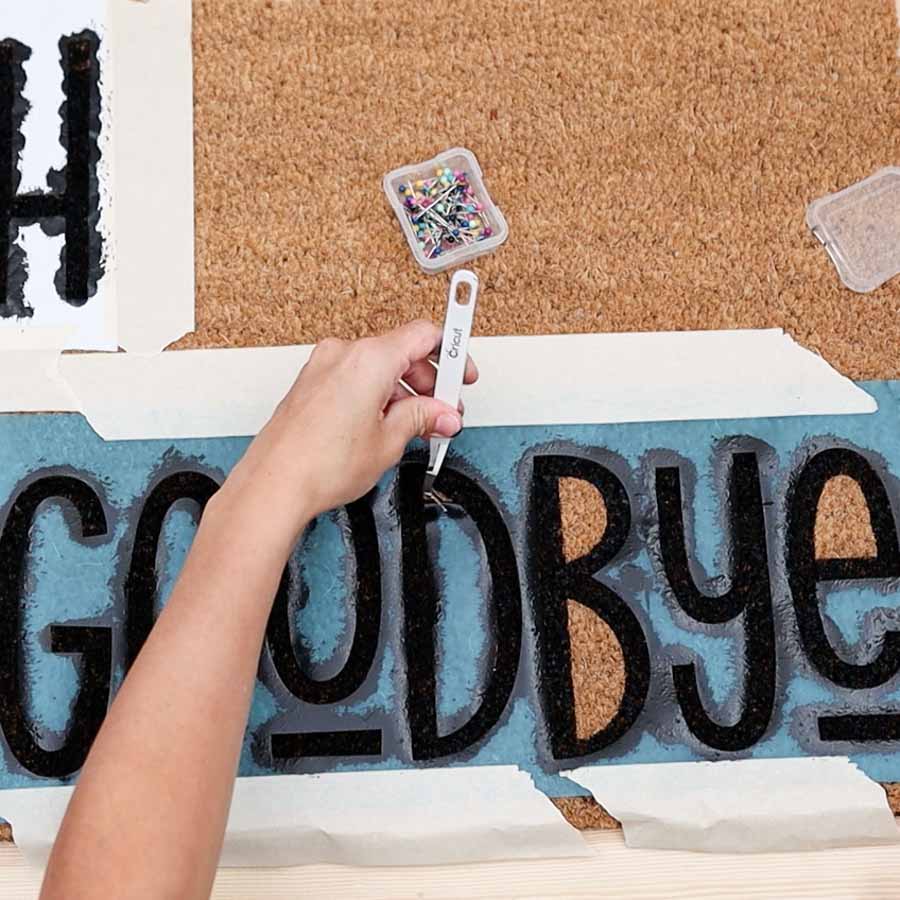
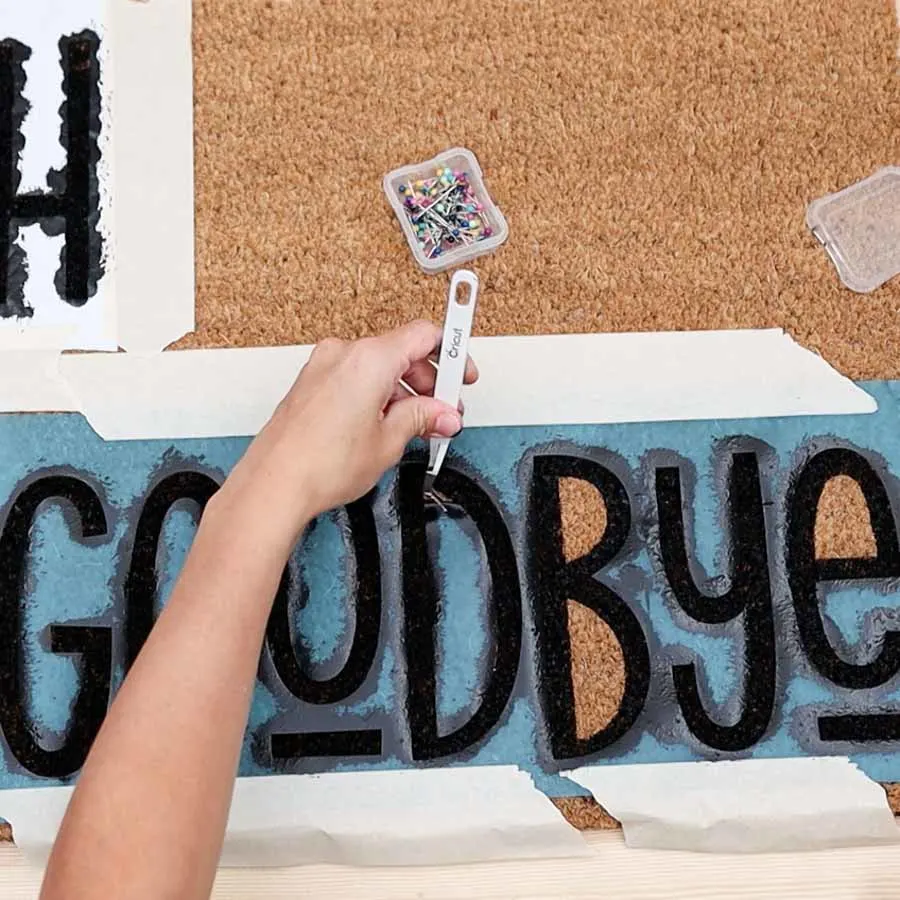

If the paint is still wet, use tweezers to lift smaller pieces like the insides of the letters, etc.
Wait for 72 hours to let the paint cure and dry completely before exposing it to moisture and other harsh conditions like extreme heat or cold air.
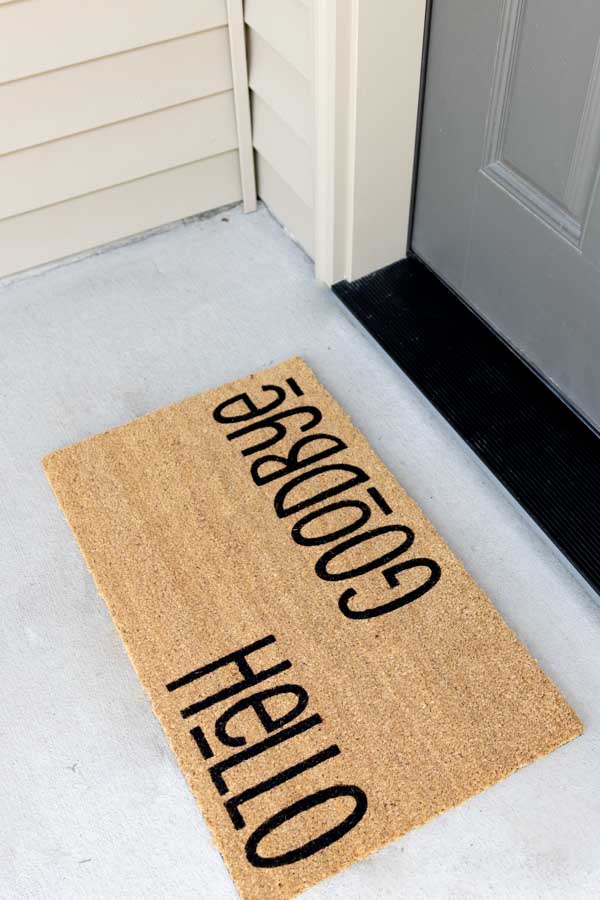
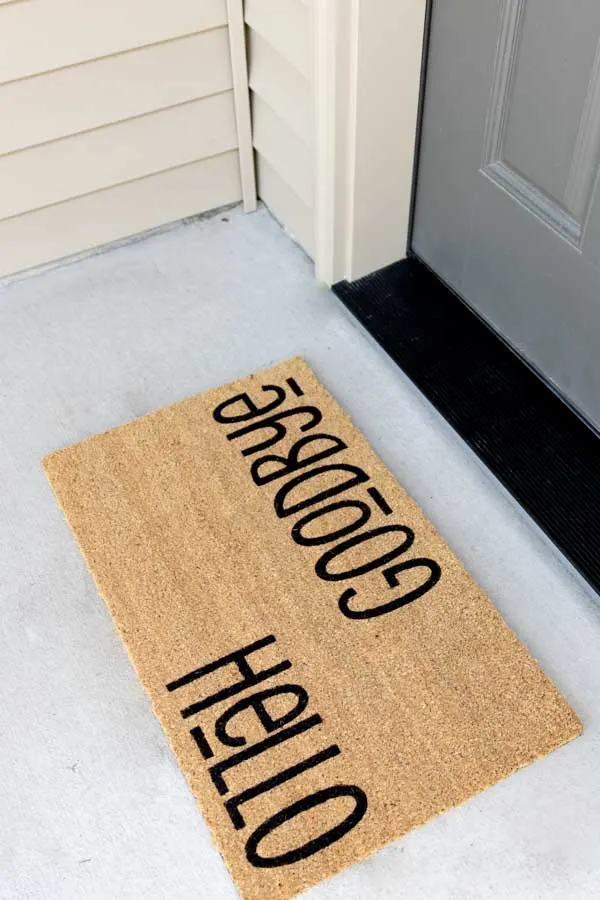
Final look and Paint Touch Up
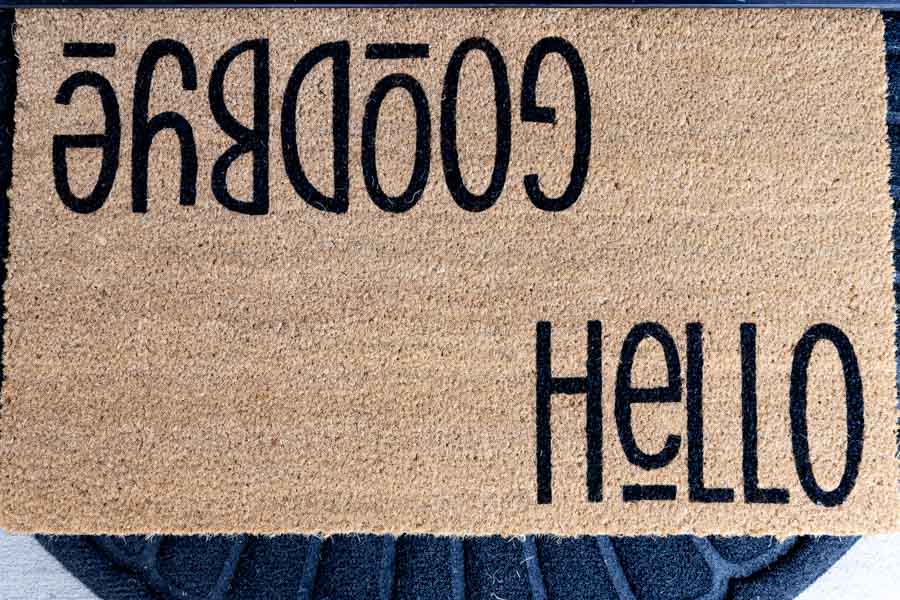
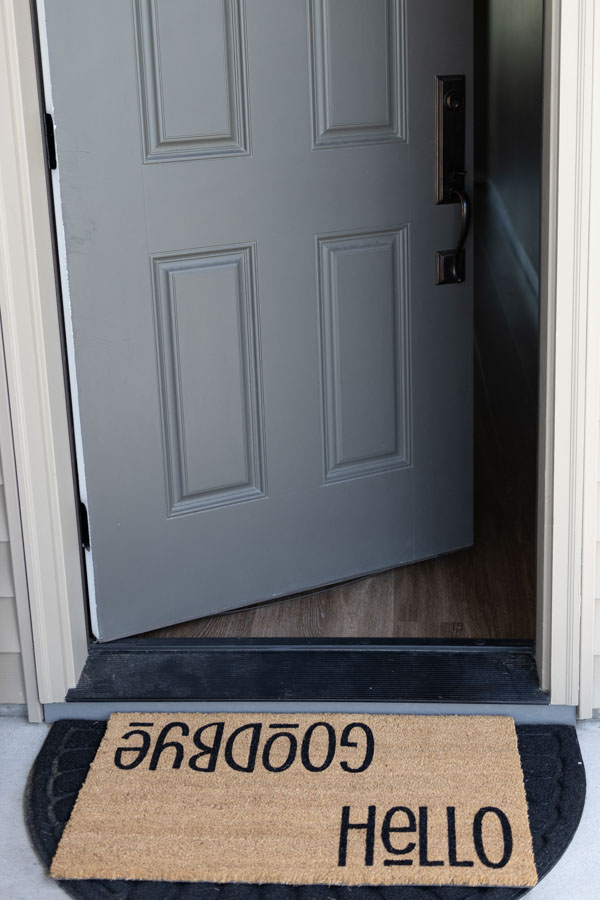
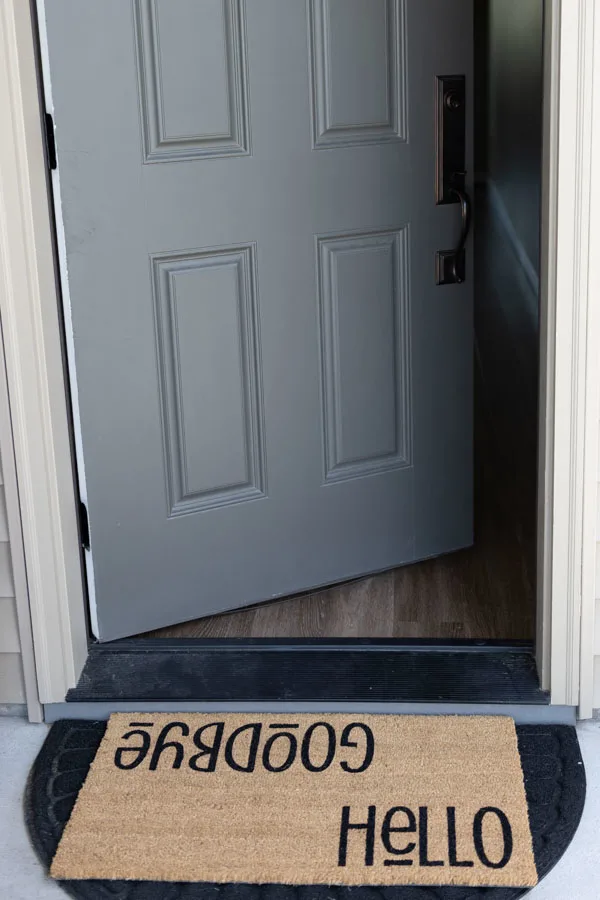
Take a look at the following two pictures to see the final result.
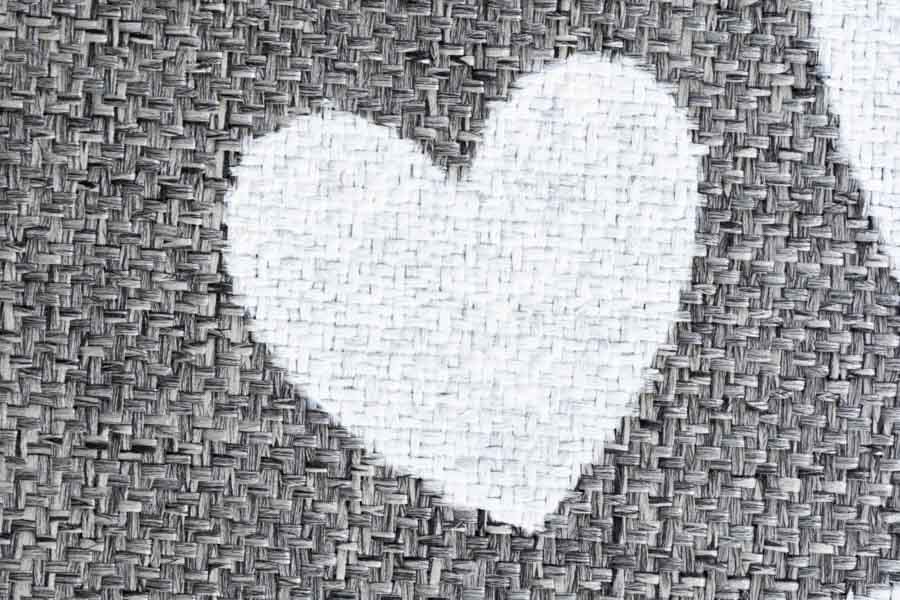
I tried to get really close so you can see how the paint looks on the doormat. From far away, you can’t really see the difference.
But, in my opinion, when you look closer, the result using stencil vinyl is a bit better.

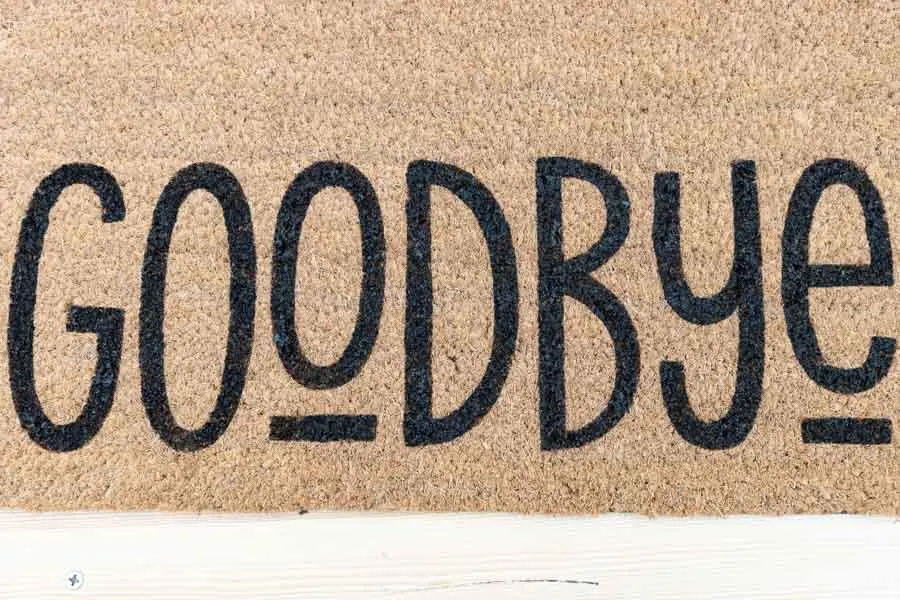
Stencil Vinyl 
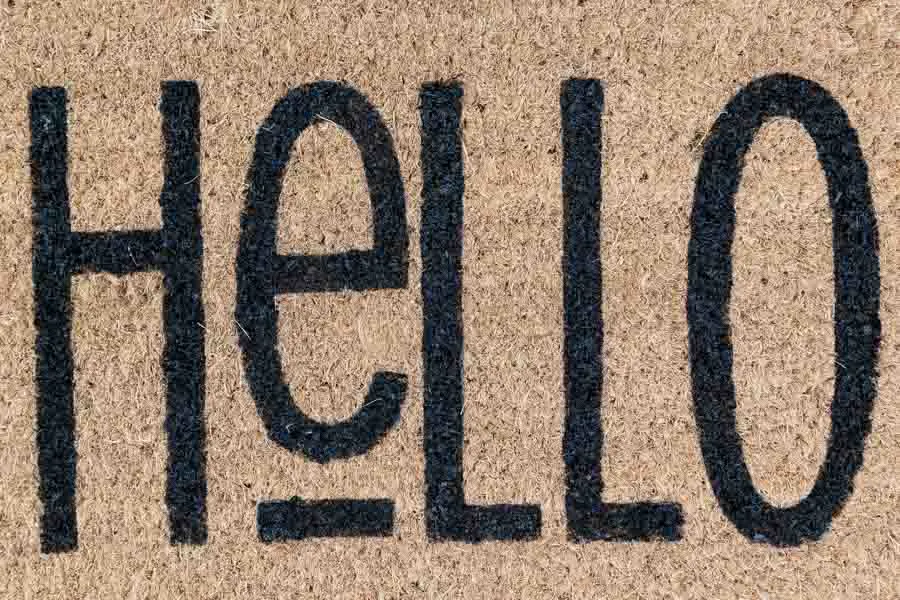
Freezer Paper
If there are spots that weren’t covered initially, you may want to use a very little stencil brush to paint those little spots. Be careful not to paint out of the lines, though.
Free SVG files for Doormats
Here are some cool designs you can use for personalizing doormats!
To download the file(s), you need to be on a desktop or laptop and click on the button to trigger a download file on your PC. However, I’ve noticed that I can also download them from my iPhone.
Depending on your browser settings, your PC sometimes asks where to save the file, although most files will be in your download folder.
If the image opens in a new window (this may happen because of your browser settings), right-click on it, select the option “Save Image As,” and choose where you want to save the file.
SVG files look like web page files when you download them.
Oh!
Just so you know, I also have a library full of free SVG files and Printables for all my subscribers, a.k.a. Daydreamers. You can see a preview right here or get access by filling out this form.


I really like the way it looks!
I also made a “Welcome Home” Doormat.

Do you remember when I mentioned that I used a fancy doormat, and the result was terrible?
The doormat itself had these little criss-cross fibers. And although the stencil created a better seal than on the coco coir doormat, the paint sipped through those fibers, and all there was no clear beginning or end.
I love crispy edges when painting!
I decided to leave this mistake here because you can learn from my mistakes, or maybe you like how it looks!
I hope you find this tutorial helpful!
Do you know it takes me over 25 hours to complete a single Cricut article? I know it’s wild, but I want to make sure you understand everything!
I would appreciate your support on Instagram , Pinterest , and YouTube as I try to grow my audience and continue producing great content!
Gina Cox
Sunday 3rd of July 2022
I found that tutorial really amazing! I’ve always wondered how they do those. I live in Australia and want to buy a CRICUT Maker 3, as I’ve said before I’m mainly a sewer/quilter and know this machine would help me with my quilting. But I’d like to branch out and supplement my Super in retirement by doing decals on baby products, clothes, backpacks etc, and sewing baby quilts and children's and baby clothes. So I’ve followed you as your tutorials are second to none, so clear and straight forward, so easy to understand, they are fantastic and cover every topic - I know I could start a business with my CRICUT machine learning from you. Thank you so much Catalina. You have helped unconfuse a very hard to decipher world of CRICUT for me, and I just can’t stop reading and learning. I just have to decide where to buy my machine from. Do you know if CRICUT charge shipping fees to Australia? I’ll buy a bundle and through you, so you make some money too. Thanks again, Gina x
Catalina
Monday 11th of July 2022
I am so happy you enjoy my tutorials and have learned a lot! I don't know how it works to buy the machine in Australia, though :(