Hello Daydreamers!
In today’s tutorial, you will learn how to make spice jar labels with your Cricut Maker, Explore, and Joy!
There are many techniques you can use to personalize spice jars.
You can use writable vinyl and Cricut pens, Print then Cut, Chalkboard vinyl, etc.
After much thought, I decided to teach you how to personalize them with adhesive vinyl.
This tutorial is full of cool Cricut tips you may not know yet, like creating weeding boxes to weed vinyl easier and transferring vinyl to the surface using the hinge method, so your design is in the right spot 100% of the time.
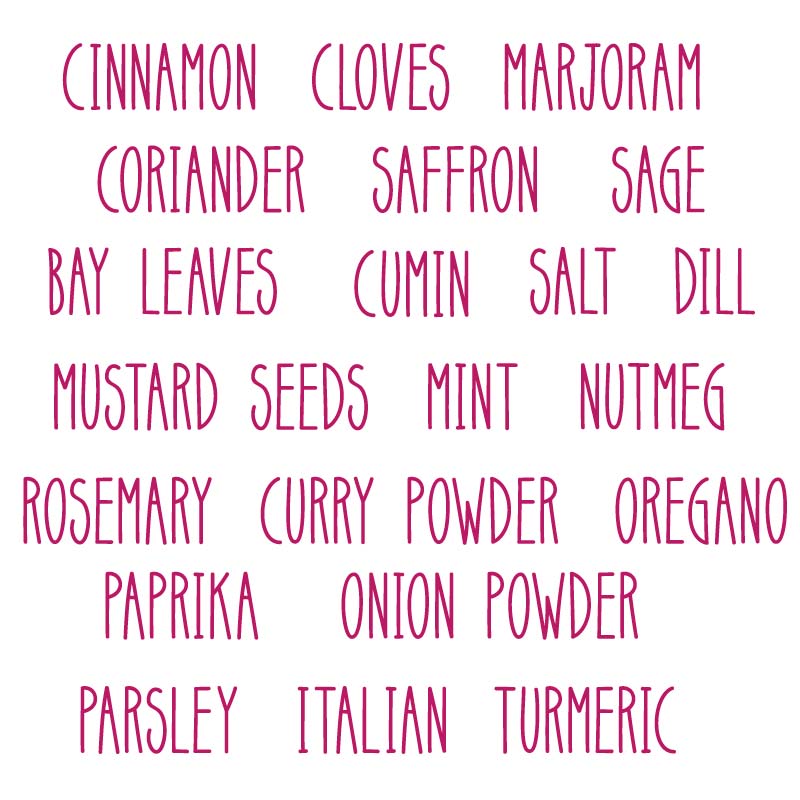
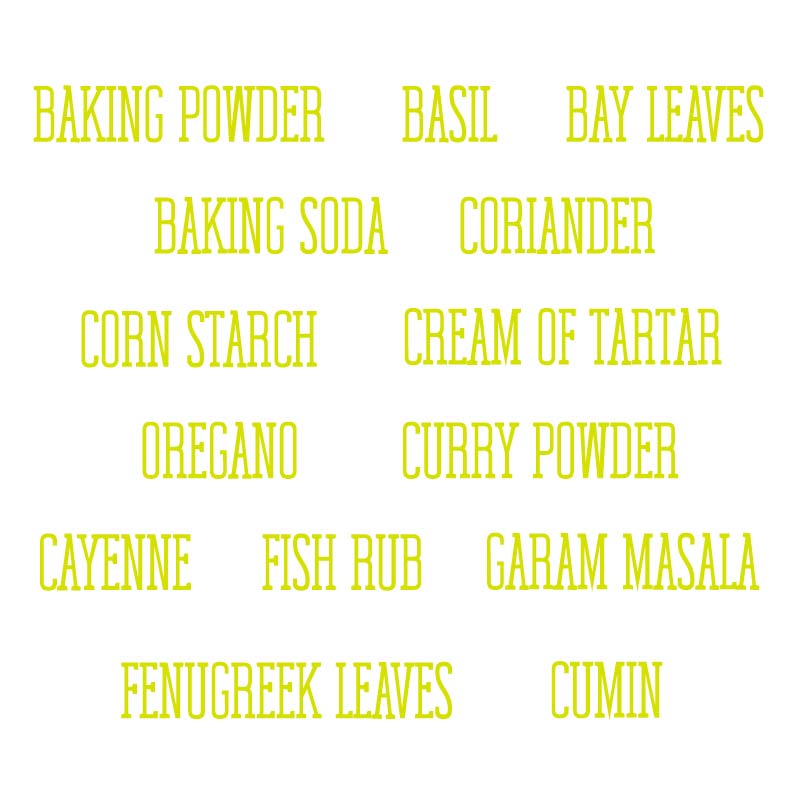
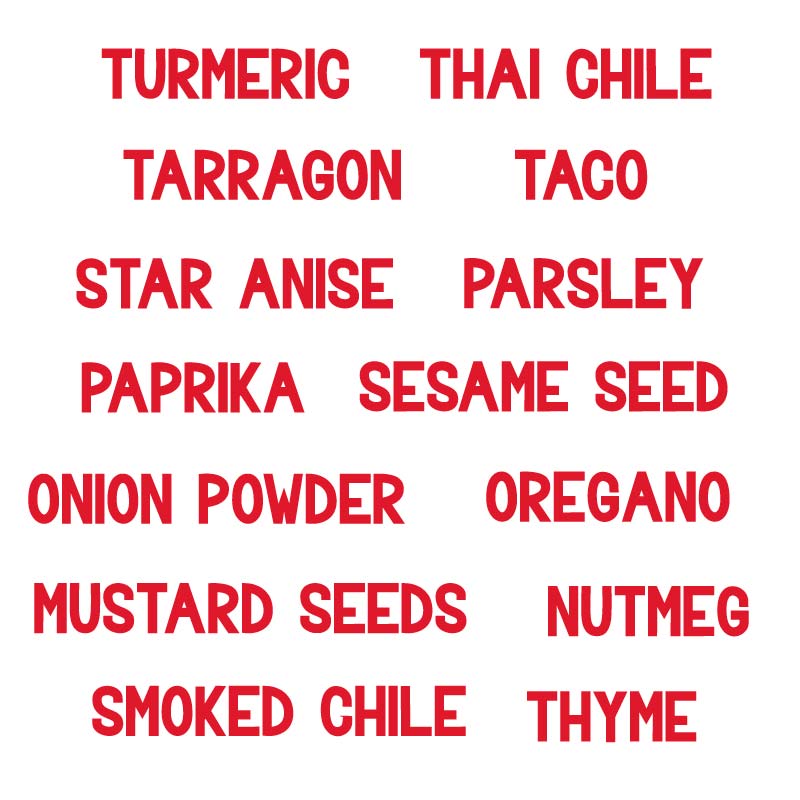
To make your life easier, I am providing you with 12 different FREE SVG templates that will help you make spice labels for pretty much any spice you can think of.
Oh, and I also have a PDF with most spices in case you decide to use a different font. I know you can type them, but why do that when you can easily copy and paste.
Tip: This tutorial builds upon the skills I teach in every step. If you’re just starting with your machine, I suggest you read and follow each step.
In a nutshell, these are the topics I will be covering in today’s tutorial.
- Materials
- Prep work
- How to upload and resize the spices labels
- Cutting process
- Transfer process using the hinge method
- Spice transfer tips
- Free SVG Space Labels Template.
Are you ready?
Let’s Daydream Into Reality
Materials
- Cricut Machine (Joy, Explore, Maker)
- Green or Blue Mat
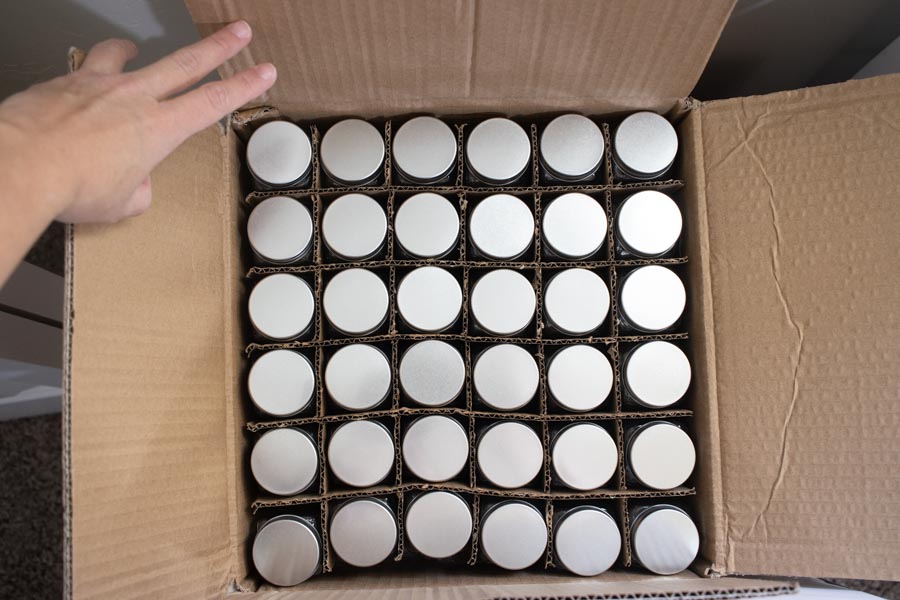
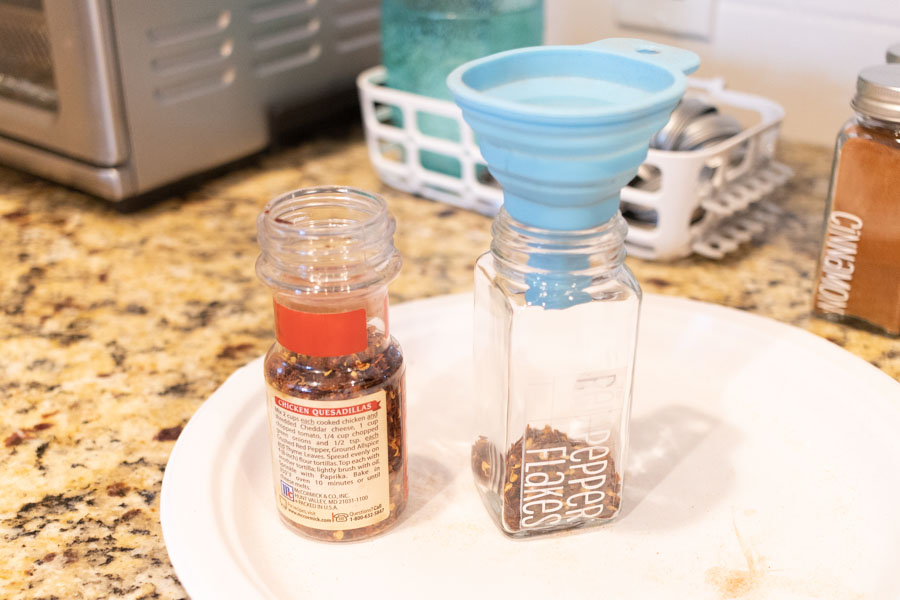
- Spice Jars
- Funnel
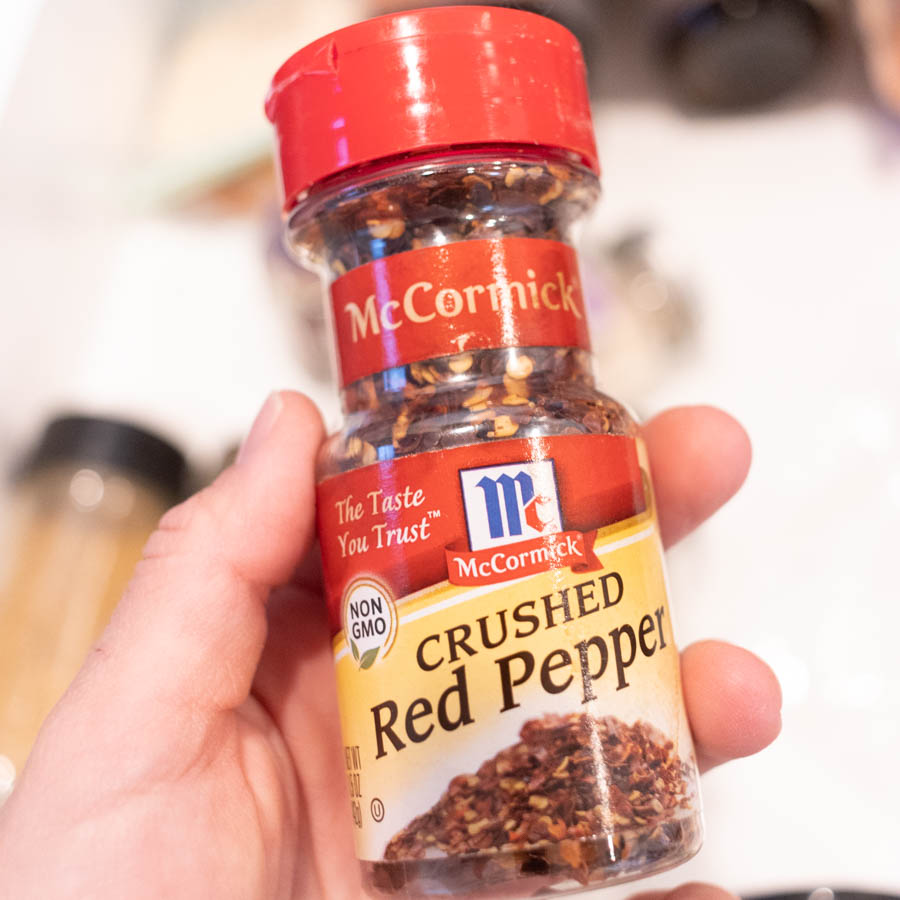
- Adhesive Vinyl (I used white because it looks great against all the different spice colors. Make sure to use a high contrast color).
- Transfer Tape
- Regular tape
- Scraper
- Weeder
- Brayer (super recommend it)
- Free SVG (download at the end of this article, NO EMAIL required).
Before you get your spice jars, let’s talk a little bit about the things you need to look for so they fit your needs.
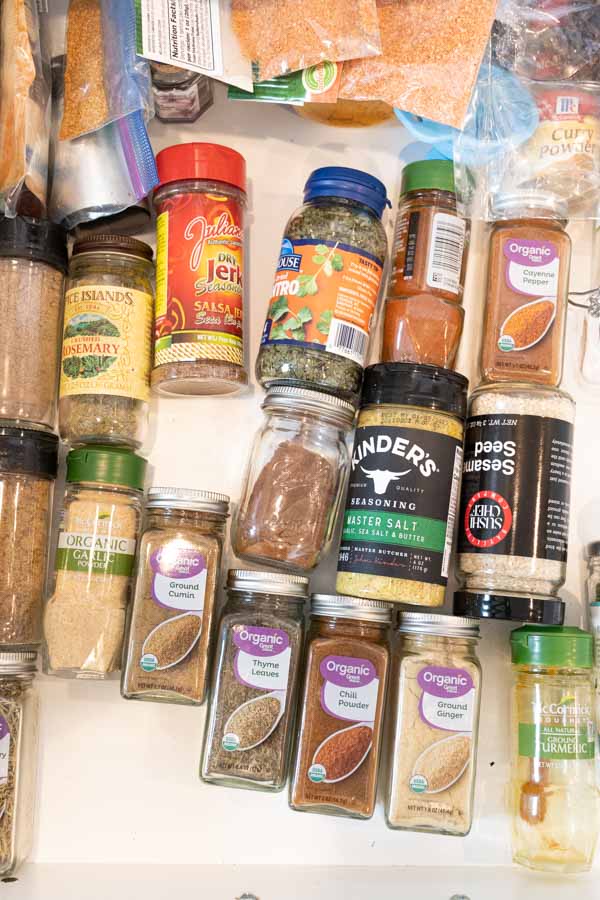
I picked some spice jars from Amazon that had the pour/sift shaker lid because I like to be able to sprinkle spices as I cook. I can also remove the sift lid easier if I want to use a measuring spoon.
When picking the right jars, I also chose them based on the smoothness. Some jars, like “mini mason” have texture, and that can get in the way of placing the label, and it will look weird to me.
I also find the spice jars I bought look pretty much identical to some at Target and Walmart, so if I get a new spice one day, I don’t need to rebuy an entire set, but I can remove the label from the new jar and add vinyl to it.
But what I prefer, it may not be what you prefer.
What do you like?
There are so many options to choose from. I was very close to pick these jars as well. I bought just a few just to show you how cute they are.
Funny thing, most spice jars will come with labels.
You could use those…
NOT!
I am sure if you have a Cricut you want to add your own touch.
For this project, I decided to use permanent vinyl because I use my spices all the time, and I feel removable vinyl would come off easier.
Prep Work
Before you start your project in Cricut Design Space, there’s some prep work you need to do!
It’s a good idea to wash your spice jars thoroughly.
You never know where those things have been before, and since you’re placing spices in them, it’s better to be safe than sorry.
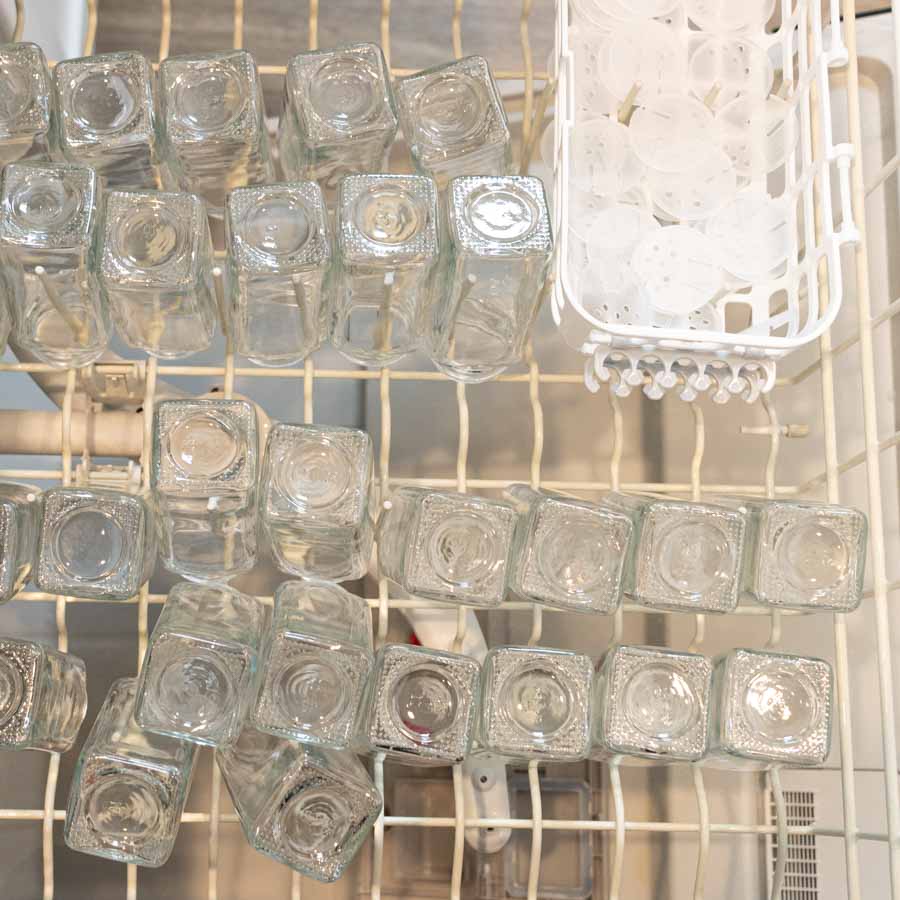
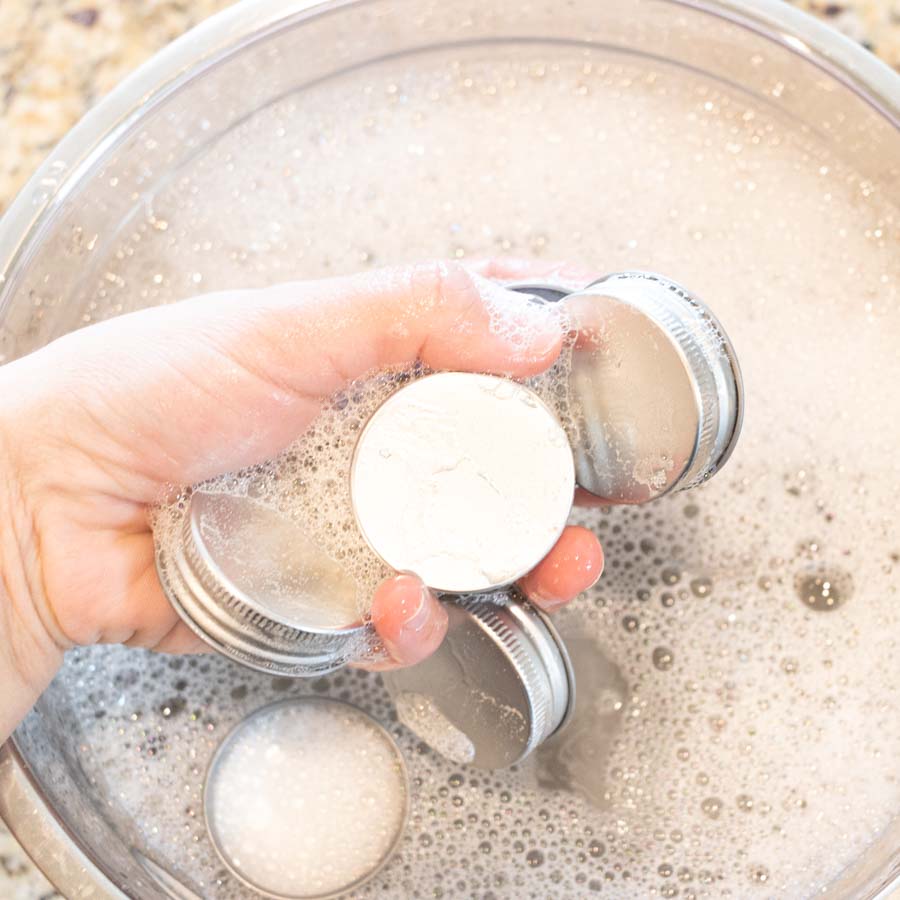
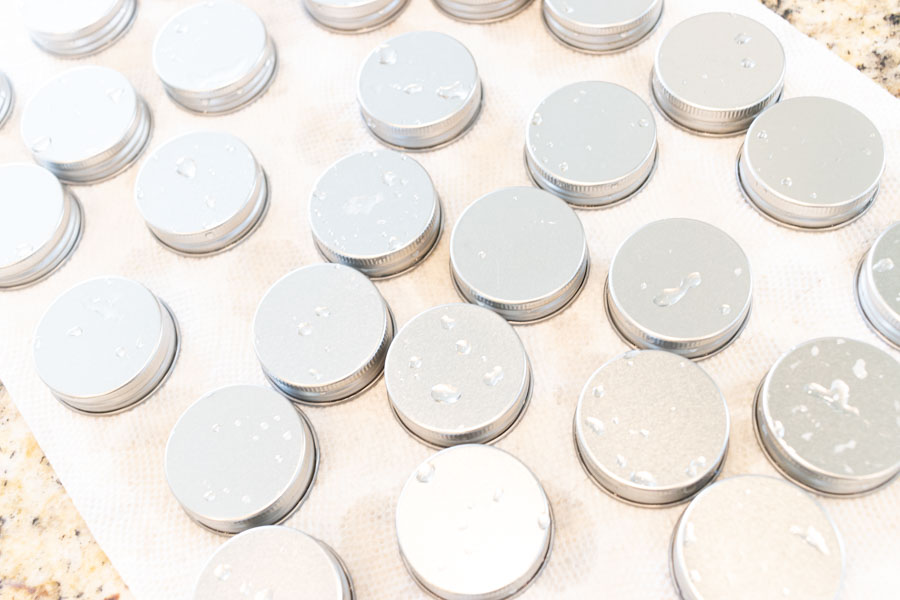
I placed jars and sift lids in the dishwasher, but the covers I washed with soapy water because they had a lining that didn’t seem dishwasher safe to me.
How to Make Spice Jar Labels in Cricut Design Space
Making spices in Cricut Design Spice is very easy.
You need to consider the size of your jar and the overall sizing of your spices.
Don’t worry, I will touch on this, when it’s time.
Upload Images
Pick (at the end of this tutorial) your favorite template, and click on the “Upload” button on the left canvas area. Click on “Upload Image” and follow all the prompts.
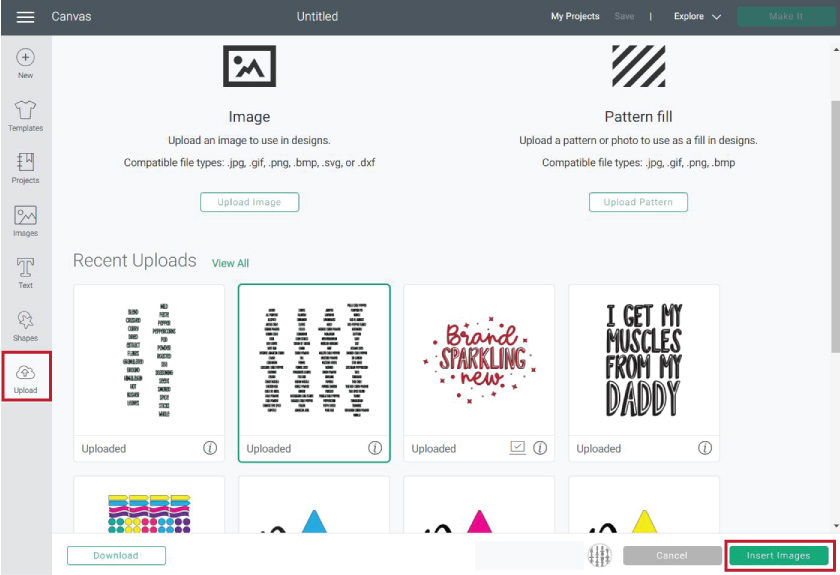
The new image will be under “Recent Uploads.”
Select it on the canvas, then click on “Insert Images.”
Organize and Resize Images
I picked the first template because I love how lovely this font is, plus it’s easy to read and weed.
IMPORTANT: This is a large project with a lot of steps. Make sure to “Save” every five minutes or so. Cricut doesn’t have an autosave for now.
Organizing the file will take you a little bit of time, but, as always, I have a frustration-proof methodology.
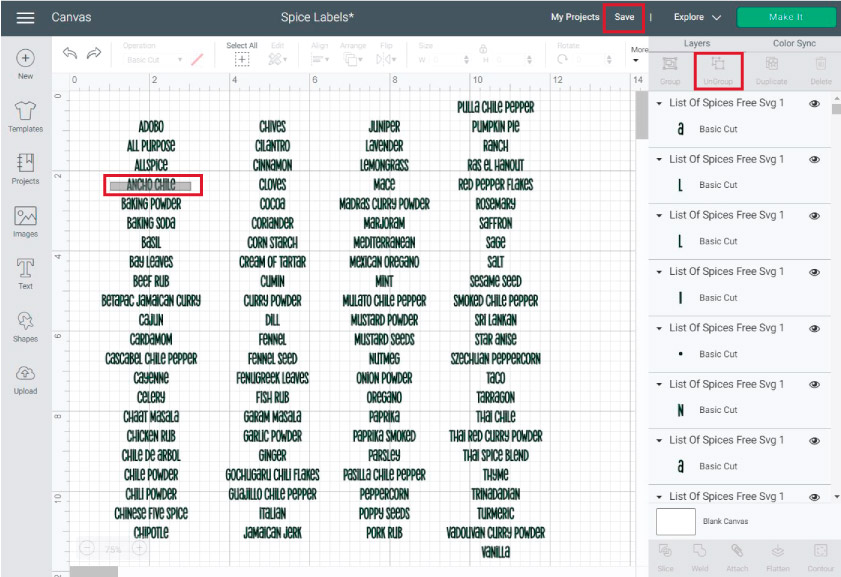
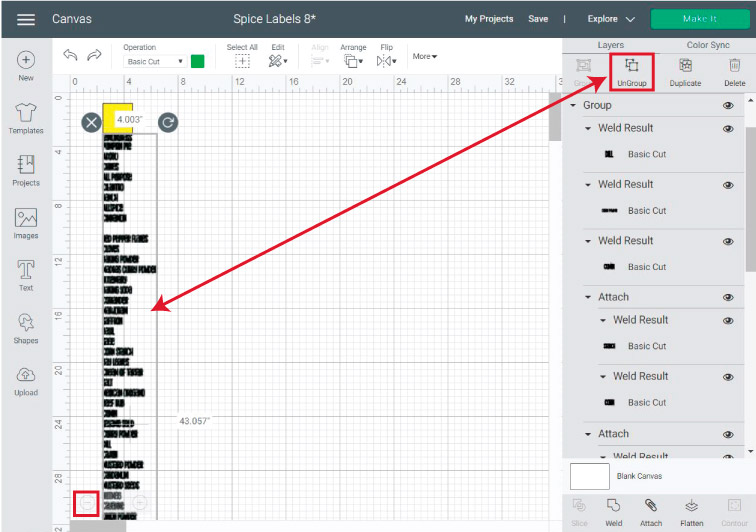
First, select the file on the canvas and click on “Ungroup.”
You will notice that the spice letters aren’t on a single layer. So there’s a lot to do.
Start by deleting the spices you don’t have or aren’t interested in buying later on. I tried to include the most common spices in this list, so, most likely, you’ll have to delete some of them.
Also, sorry if there’s a repeated one here and there.
Drag your mouse to select the entire spice you want to delete. Make sure to include the dots for the “i” letters too.
Don’t move any of the other spices yet.
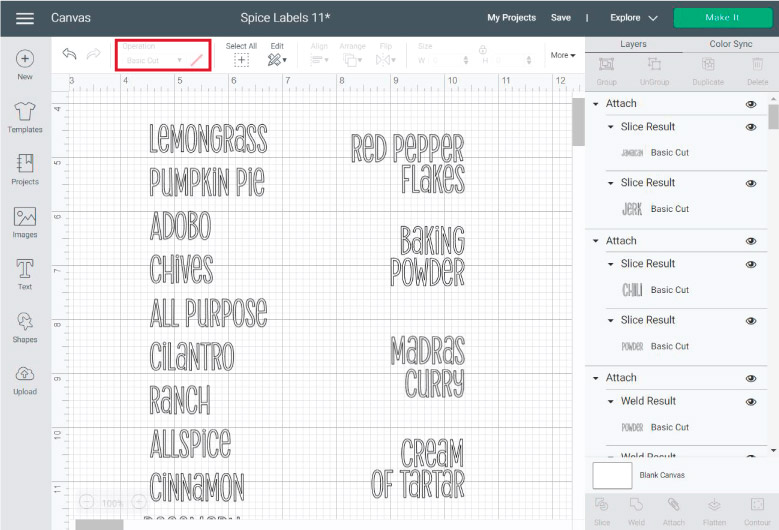
Now it’s time time to consolidate all the individual letters into a single word.
To do that, select the letters of each spice, then click on “Weld,” located at the Layers panel’s bottom.
You will notice many spices have two words (onion powder, mustard seeds, curry powder, etc.). For those spices, you need to weld every single word and then attach them.
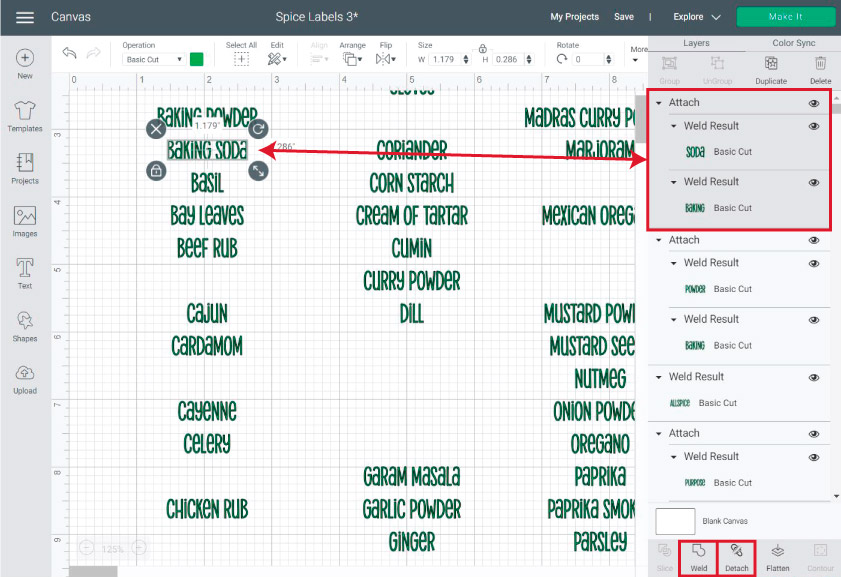
For instance, for “Baking Soda,” I know it’s not a spice, but I keep it in my spice drawer, so I put it on the list.
Weld the word “Baking,” then weld “Soda,” then select them both and click “Attach” next to the “Weld” tool in Design Space.
You can see how it looks in the screenshot right above.
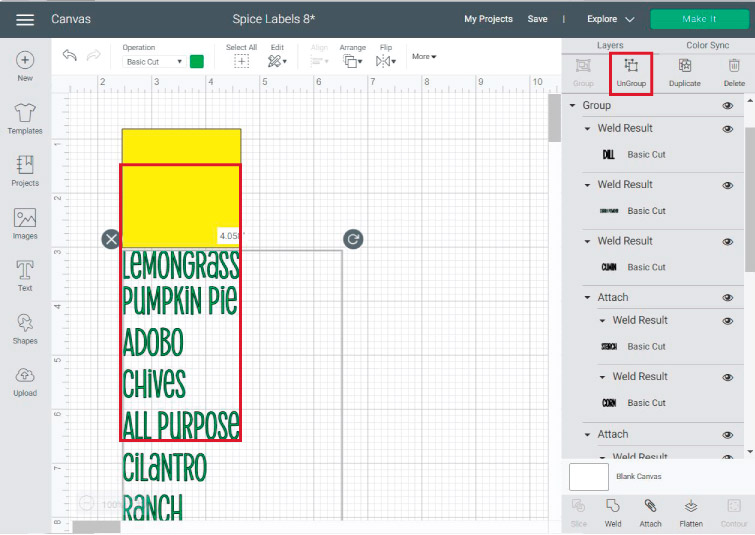
I know this seems a lot, but trust me, you want to resize all spices simultaneously.
Look at the following screenshot.
Zoom out (bottom left corner of the canvas) as much as you can in Cricut Design Space, then select one of the spices and bring it all the way to the top, then move another spice all the way to the bottom.
Depending on the number of spices you decide to keep, you may have to scroll down and move the spice further down.
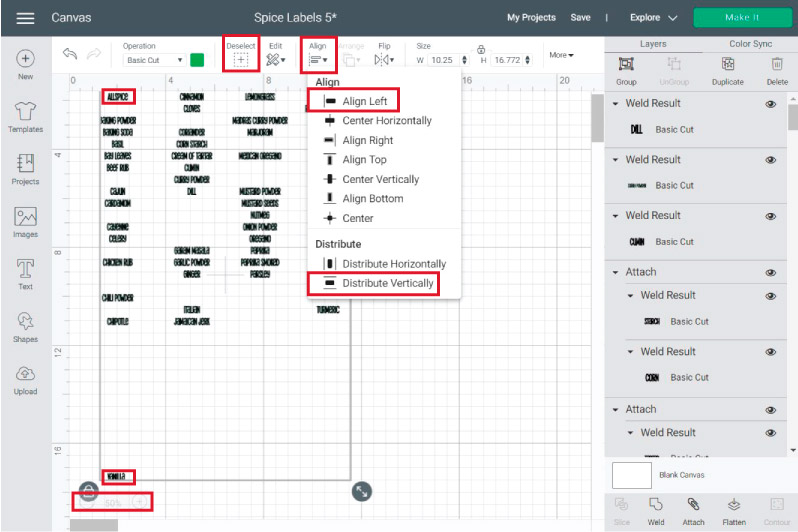
Ready for the cool part?
Click on “Select All” on the top menu to select all of the spices in the canvas, then click on “Align” and select “Align Left,” then “Distribute Vertically.”
Voila!
All your spices will be organized.
Now it’s time to resize them.
I don’t know about you, but I like my spices to all have the same size. But things get a little confusing when you have such a small place to work like a tiny “Spice Jar.”
This step depends on the size of your jar and where you plan to place your spice.
For instance, according to my spice jars and the location where I wanted to place the labels, I decided the max size for them had to be 2.2 x 1.2 inches (give or take).
You can resize each spice individually, but I prefer to do it in bulk.
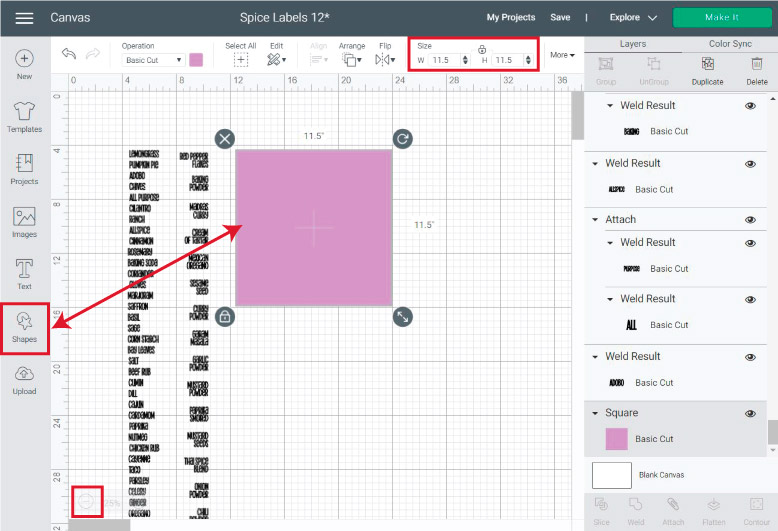
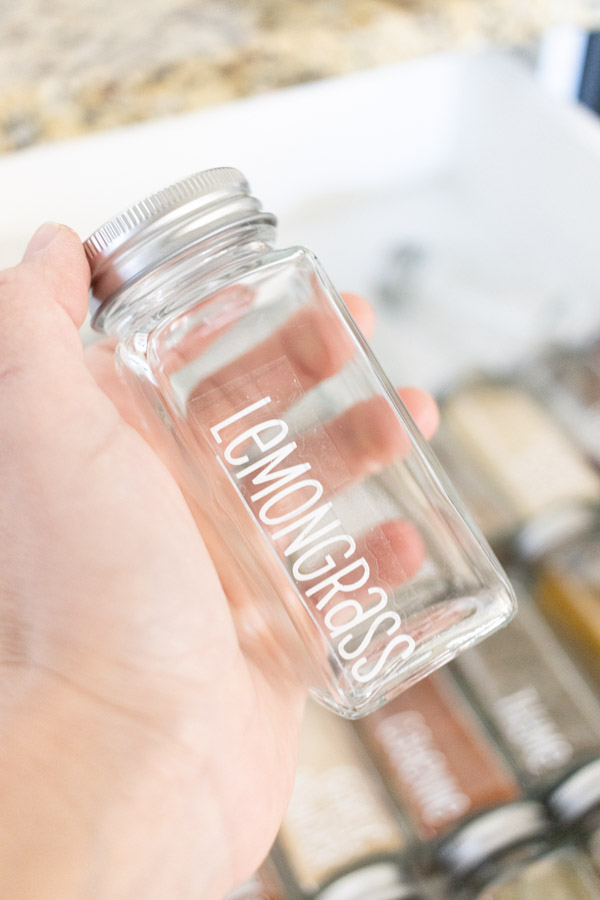
To size, everything simultaneously, select the longest single-word spice you have on the list and move it to the top.
For me it was “Lemongrass;” then click on “Shapes” and drop a square on the canvas area and resize according to the max-width.
My square was 2.2” x 2.2”
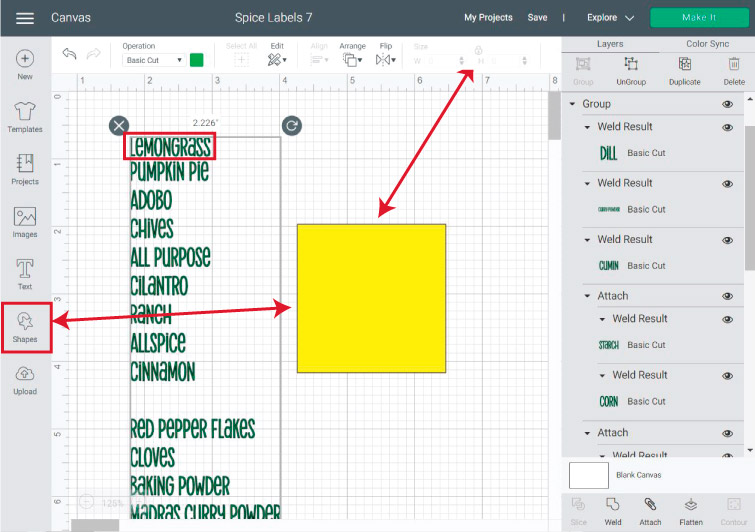
Now, zoom out again, select the spices, click on “Group” located at the top of the Layers panel, and then move them right underneath the square.
Since the spices are grouped, you can resize them all at the same time from the lower right corner of the selection.
The only thing you need to do is to resize your top spice “Lemongrass” to the same width of the square.
You may have to scroll up and down because it’s a big list, but once you finish, all spices will be perfectly sized.
Delete the square, ungroup all the spices and let’s finish up organizing our project.
Pretty much all the two-word spices will be larger than 2.2 inches. However, some like “All Purpose” and “Pumpkin Pie” are just the right fit.
To finish resizing, move large spices to the right.
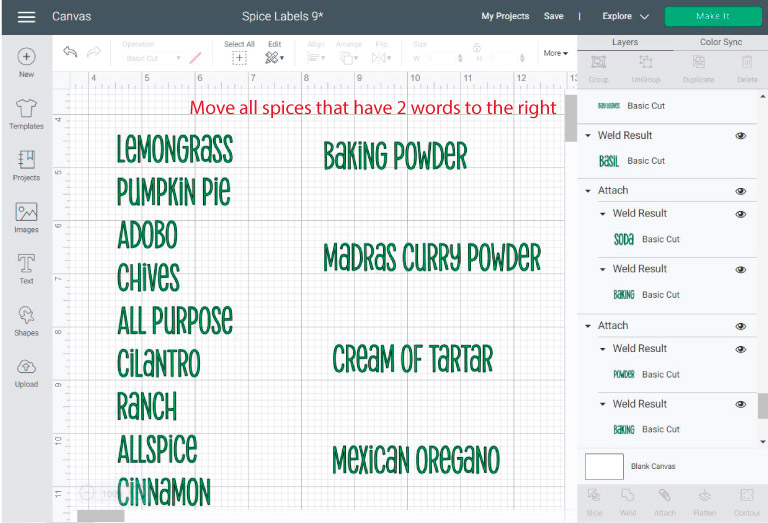
Remember we previously welded every single word and then attached them?
This was the reason.
Go through the spices you need to resize. Then, detach and organize them, as you see in the screenshot below.
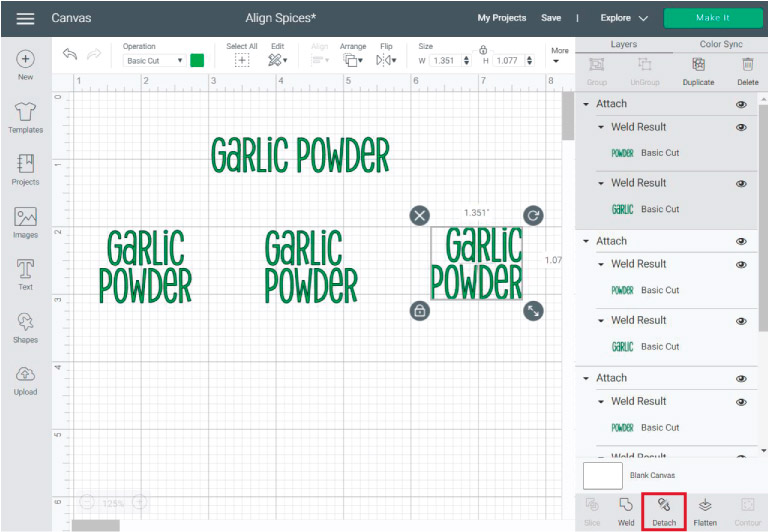
You can align center, to the left, or to the right.
Once you finish aligning them, you can either weld (if you want something permanent) or attach them again.
I also decided to change the color to white because it’s the color I picked for the project.
Tip: Check how I deleted the word “Powder” from “Madras Curry” the size would’ve been larger in height than 1.2 inches. I rather have my labels all the same size and visible. But you can also resize according to a two-word spice.
Your spices are ready to be cut, and you could click on “Make it” but, if you do, all the spices will be next to each other.
This is ok, if you have experience cutting and weeding adhesive vinyl. But if you’re just getting started, I recommend create weeding boxes.
Make a Weeding Box in Cricut Design Space
Adhesive vinyl is so sticky that some of the adhesive can accidentally touch and lift areas that you need to stay put when you’re weeding.
The best way to prevent this is by making a weeding box.
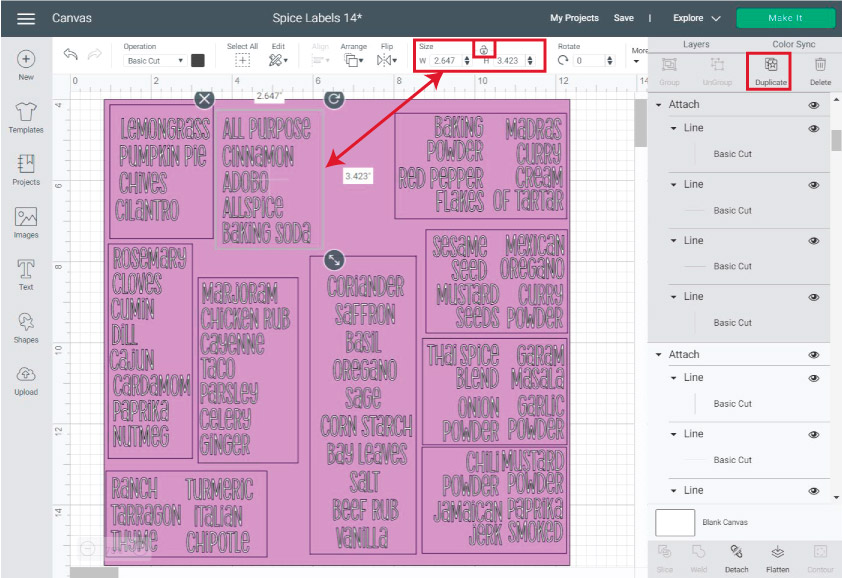
Since this a big project and the sizing needs to be perfect, we need to have a guideline for the cutting mat.
From shapes, drop a square and resize it to 11.5 x 11.5 inches (That’s the largest cut the Cricut can make in 12×12 mat).
Right-click on the square and send it to the back so you can place all the spices.
Place all the spices on the mat guideline in groups of four to ten spices. For simplicity, I was planning on using a 12×12 vinyl sheet.
I understand vinyl is an expensive material, so you can take the time to save as much space as you want. Just make sure you leave enough space in between the groups for the weeding boxes.
Tip: If you have the Cricut Joy, take advantage of Smart Materials. You can make a large rectangle that fits all your spices with a 4.5 width (Max cutting W for smart materials).
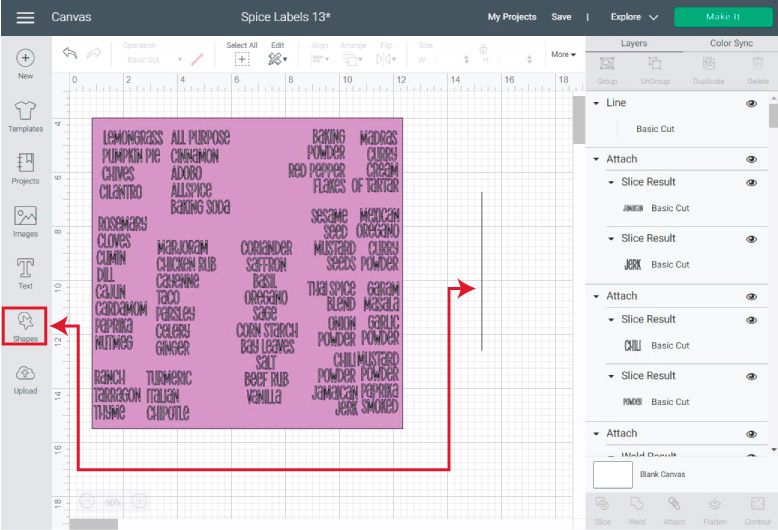
To make the weeding box, click on “Shapes” and click on “Score,” then select the score line on the canvas and change the Operation from “Score” to “Basic Cut.”
Duplicate the line until you have four identical copies and then rotate them until you form a square like the screenshot below.
Tip: To turn in increments of 45-degree angles, rotate from the shape in the canvas holding shift at all time.
One you have the square, select four lines and click on “Attach.”
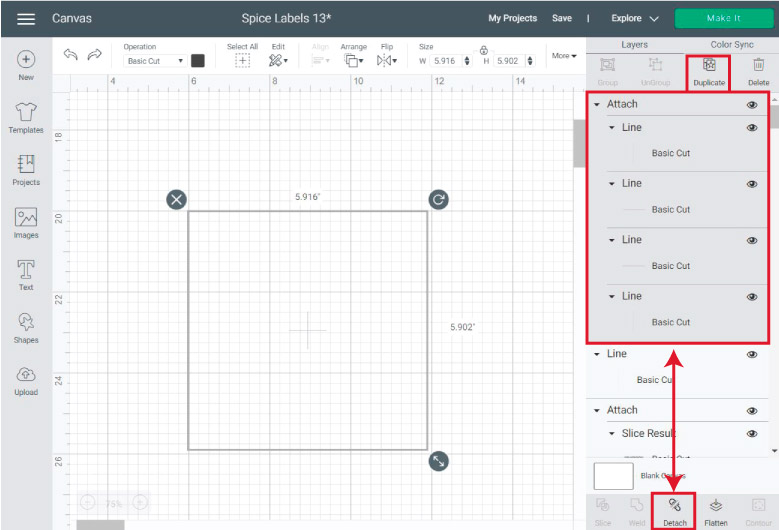
Make as many copies or duplicates of the weeding box and place them on top of each spice group.
If you need to modify the proportions, select the square and click on the top menu’s little lock.
Once you finish placing all weeding boxes, delete the mat preview, select everything on the canvas and click on “Attach.”
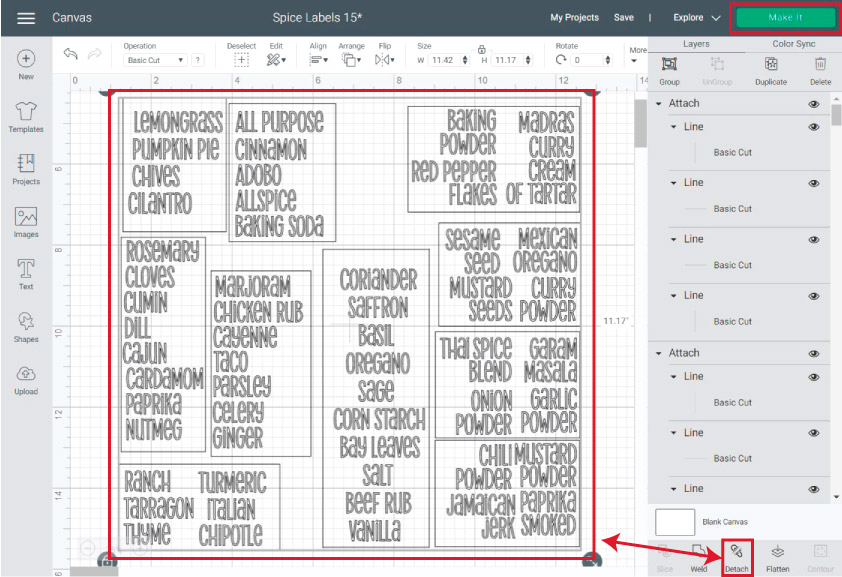
Ready to cut?
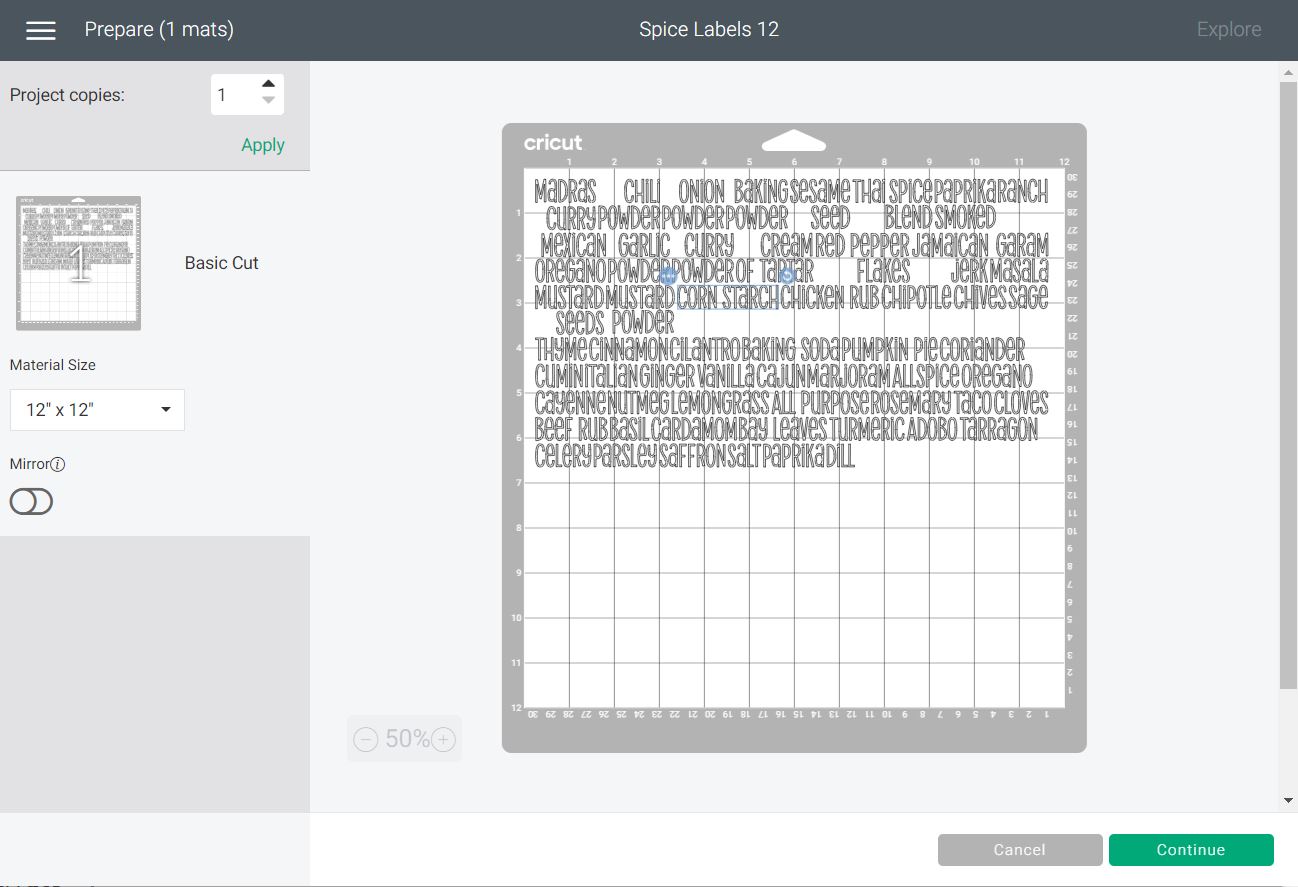
Cut Spice Labels
Look how organized that mat preview looks. Trust me. It’s going to be so much easier to weed.
If things look out of place check you attached everything.
Click on “Continue.”
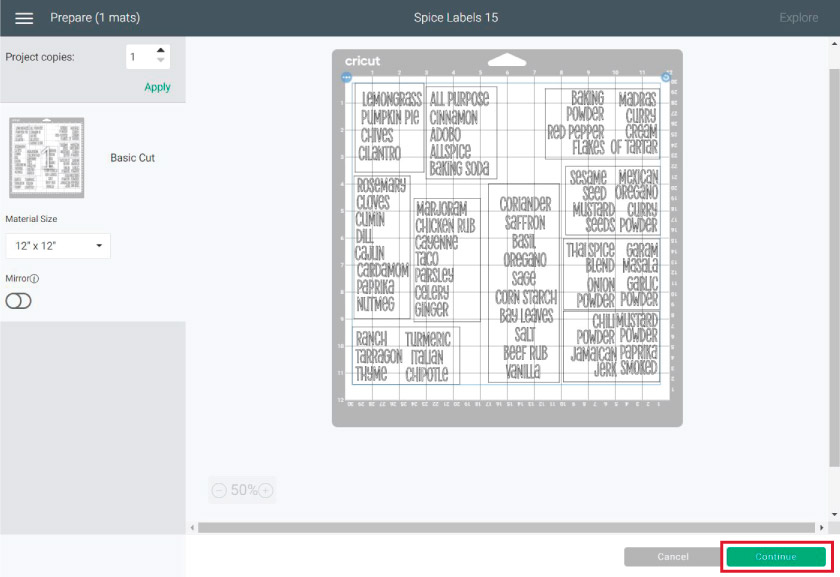
You must select the right type of vinyl. Cricut has so many adhesive vinyl types that if you choose the wrong type, you’ll waste your materials.
If you’re using a new brand of vinyl you’ve never worked with before, I recommend you do a test cut.
- For Cricut Maker and Cricut Joy, select material from Design Space
- For the Cricut Explore (the one I used), move Smart Set Dial to custom and choose the material from Cricut Design Space.
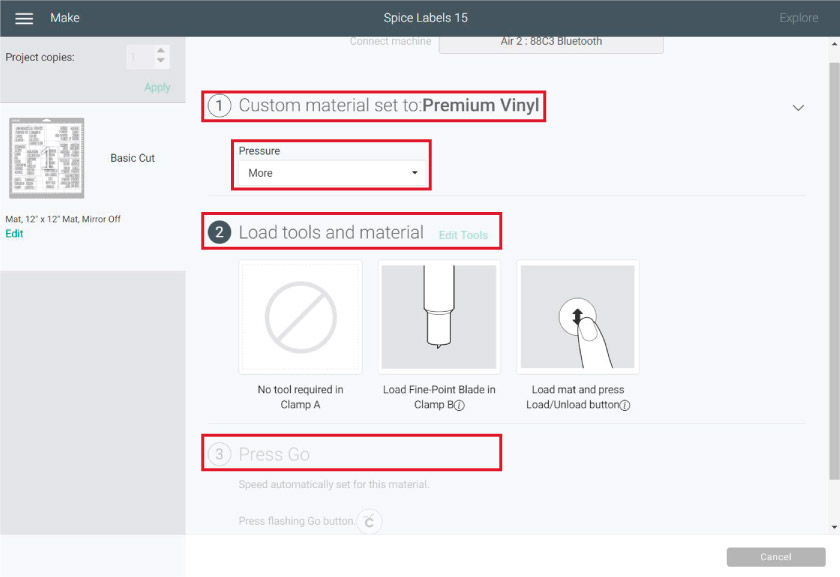
When I cut vinyl, I always set the pressure to “More” I feel it’s easier to weed.
Let’s see the mat in the following steps.
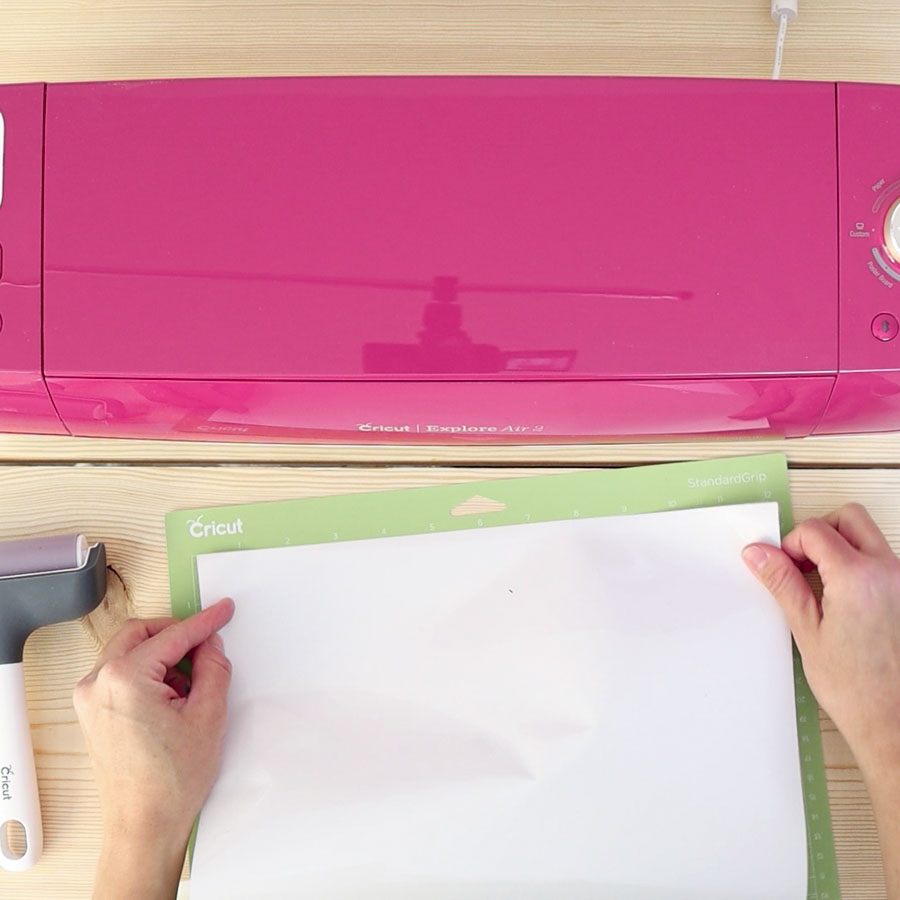
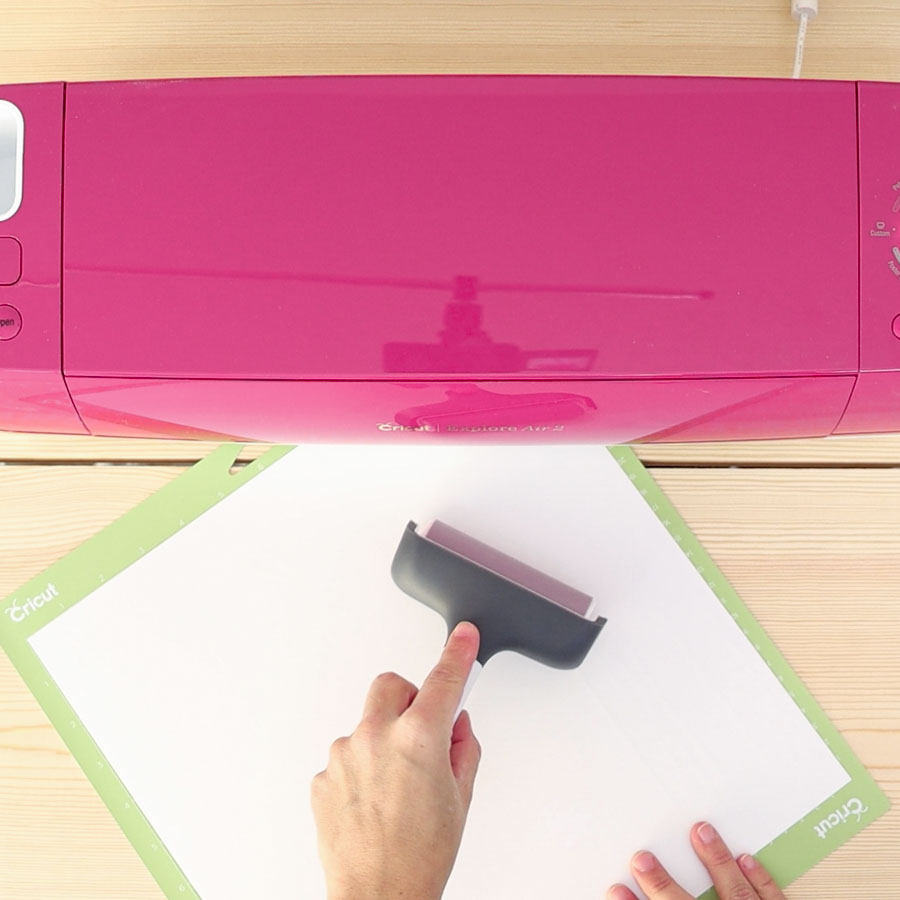
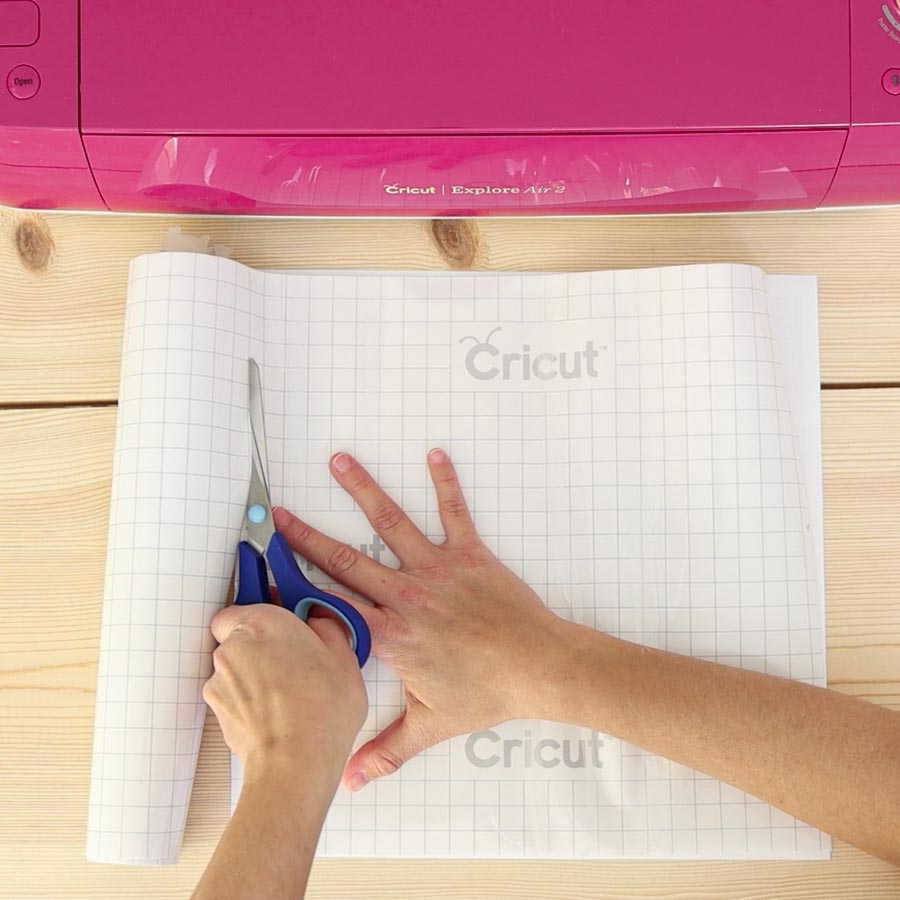
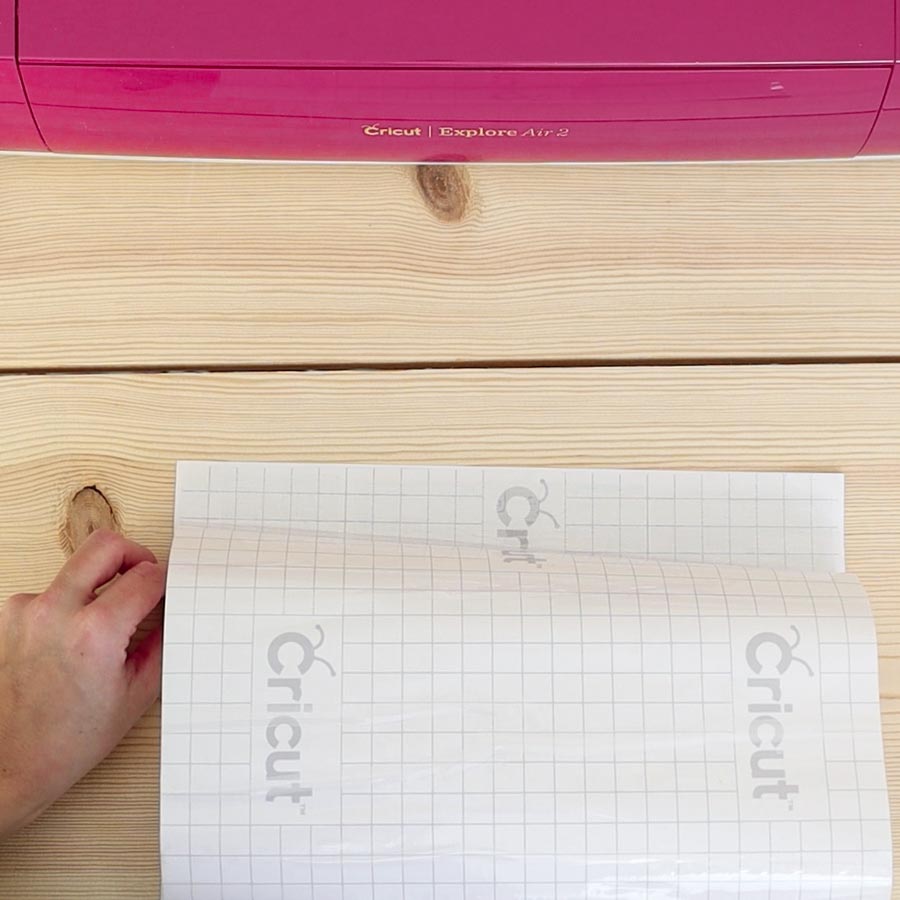
Load Mat to Cricut
Place vinyl sheet on mat pretty side up. Since this is adhesive vinyl, there’s no reason to mirror it.
Use the brayer to smooth out vinyl. You don’t want any bubbles. If you don’t have a brayer, you can use the scraper.
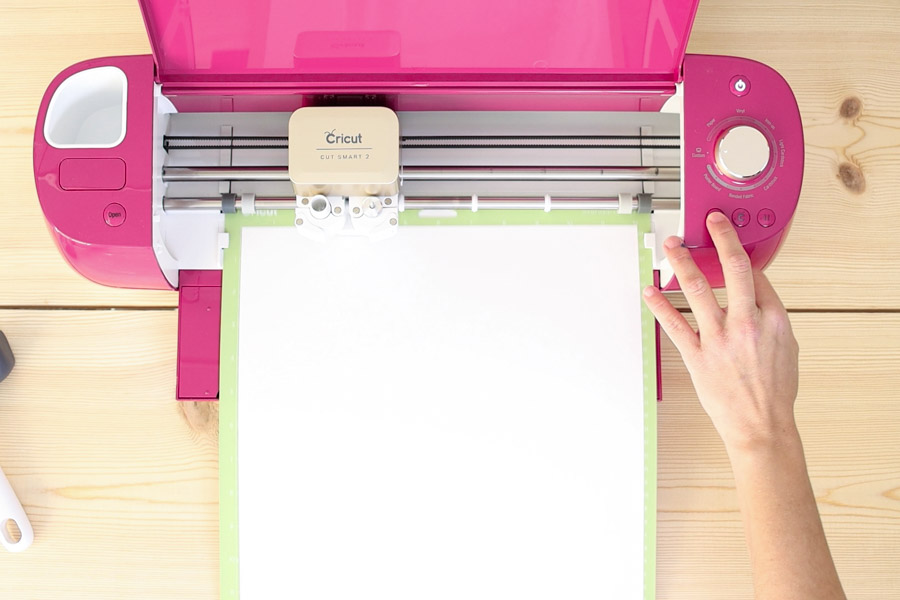
Load mat, and click on the flashing go button.
When your machines is done cutting, unload mat and weed.
Weed Spice Labels and Add Transfer Taper
It’s time to weed!
I like to start with the weeding boxes. Weed at a 45-degree angle. It truly makes it easier.
Before you start weeding an area, check if you have dots or tiny pieces that can come off when you’re removing those big pieces of vinyl.
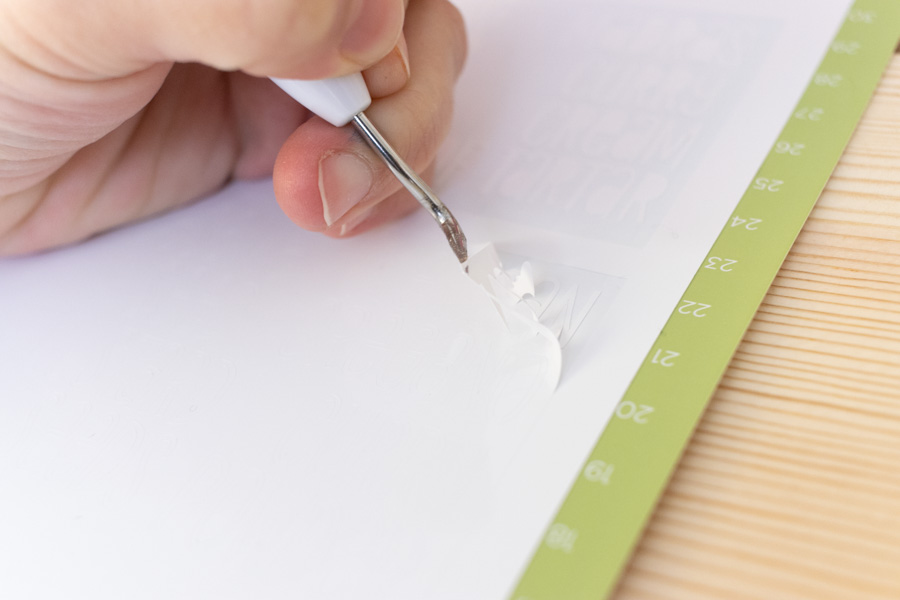
Tip: Don’t remove material from the mat, instead, remove material from mat by bending it.

Once you’re done weeding and removing the sheet from the mat, it’s time to add transfer tape to the vinyl sheet.
You can reuse transfer tape, but I prefer to work in bulk; the other way around will take three times longer.
Line some of the transfer tape to the weeded vinyl sheet, take your time.
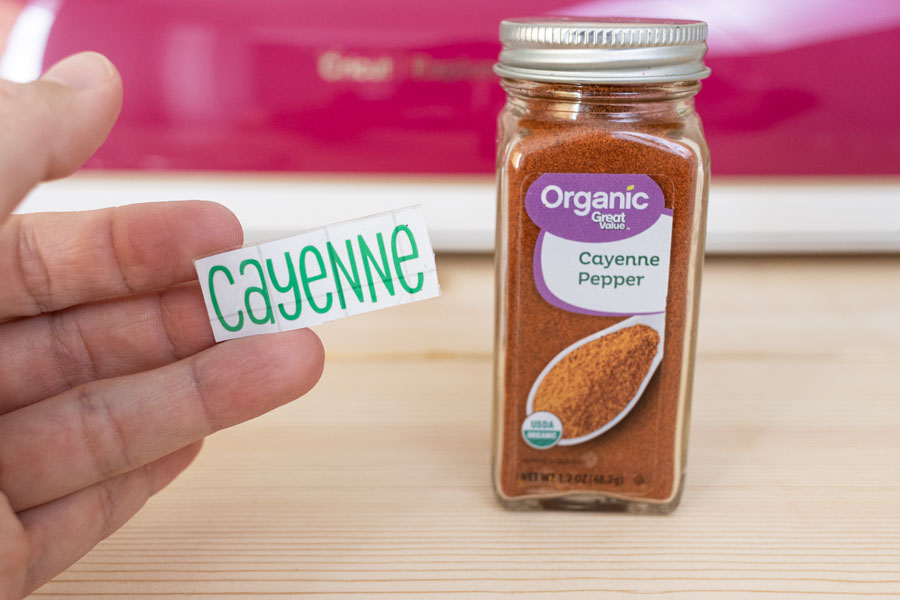
Use the scraper to get the transfer tape to adhere to the vinyl. Then cut each spice individually.
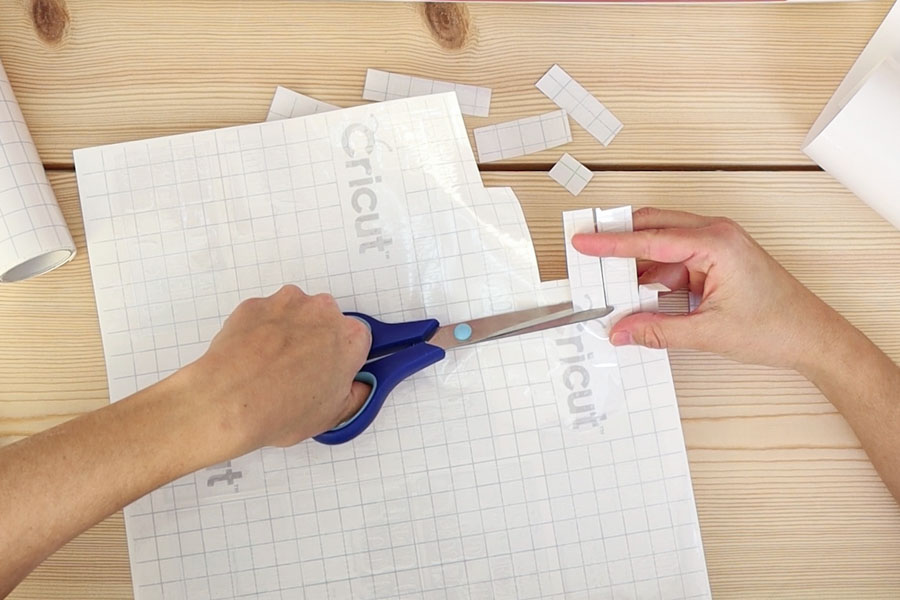
I recommend you cut the spice very close to the edges; this will help you align the spice to the jar.
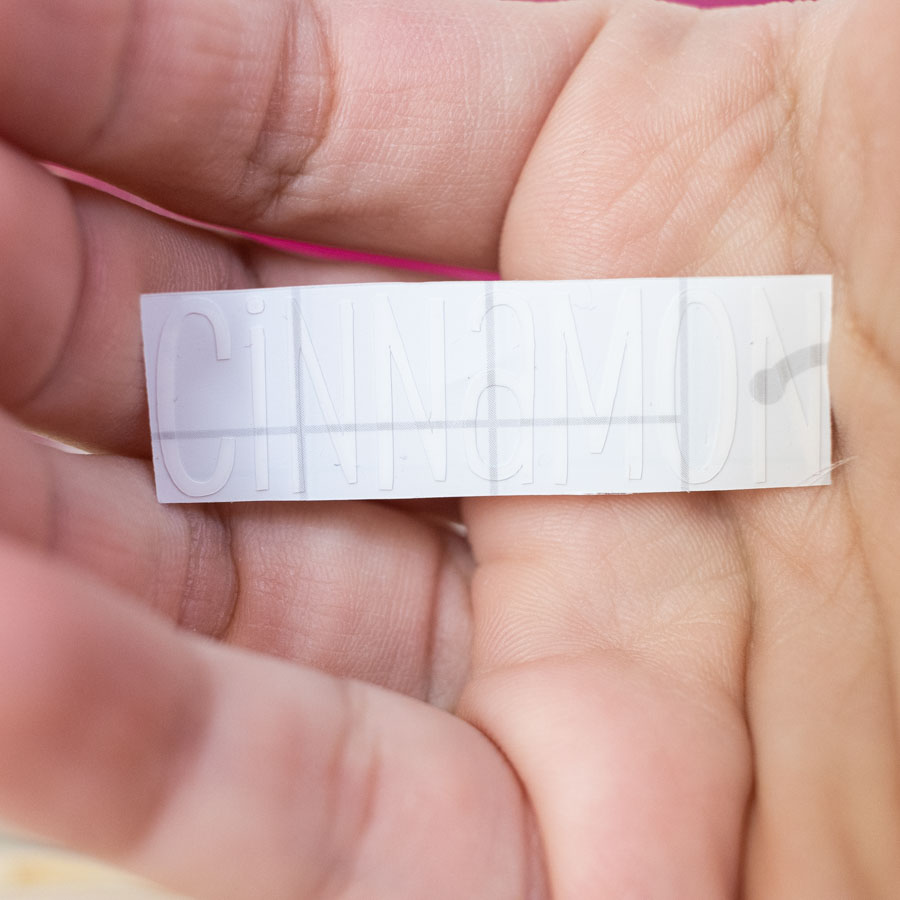

Also use the scraper, on each individual cut to attach label to transfer tape.
Prep Surface
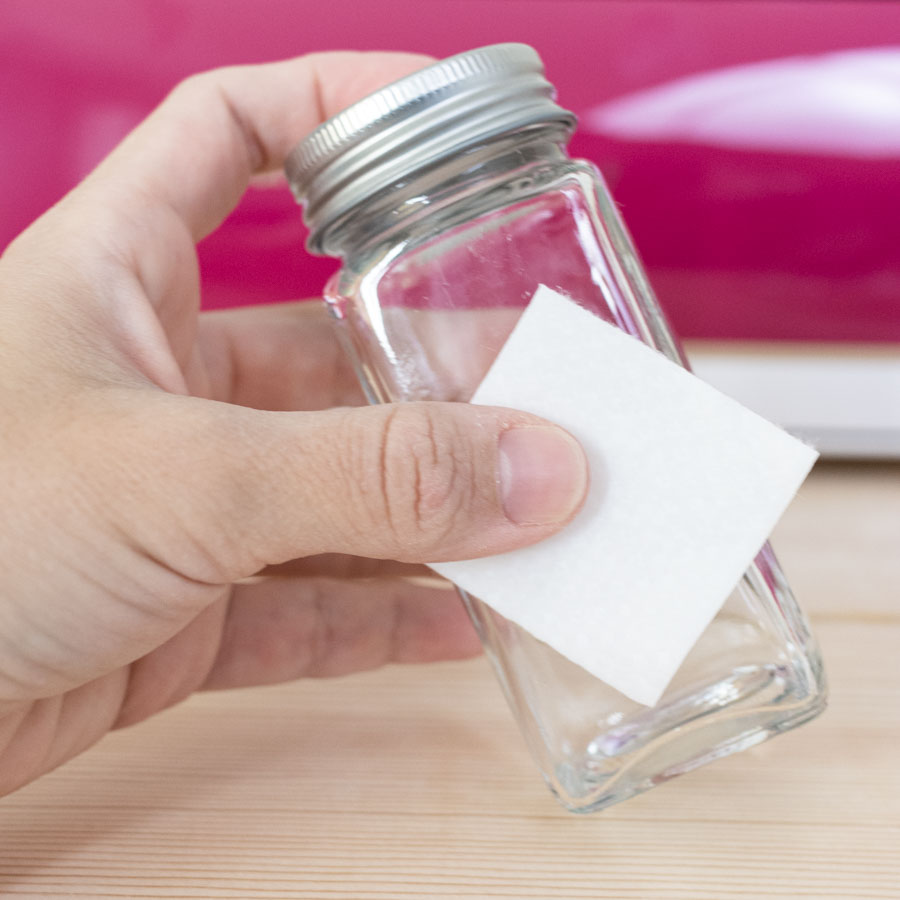
Before we transfer the vinyl to the spice jars, there’s a little prep work to do again.
Wash your hands very well, so you don’t have extra oils.
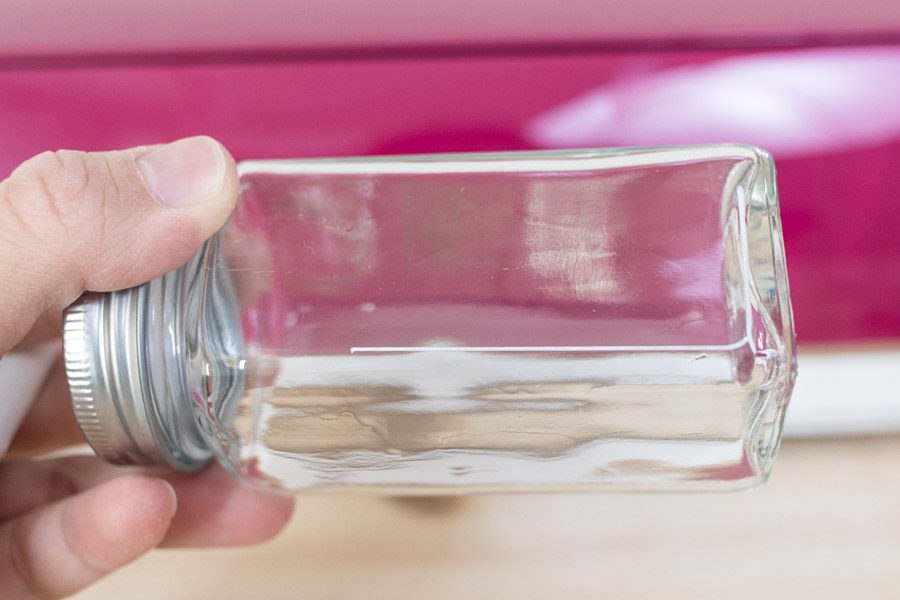
Wipe the jar with an alcohol wipe, and with a small ruler or and a dry erase marker, draw a guide of where you want to place the label.
I wanted to place them on the bottom right corner.
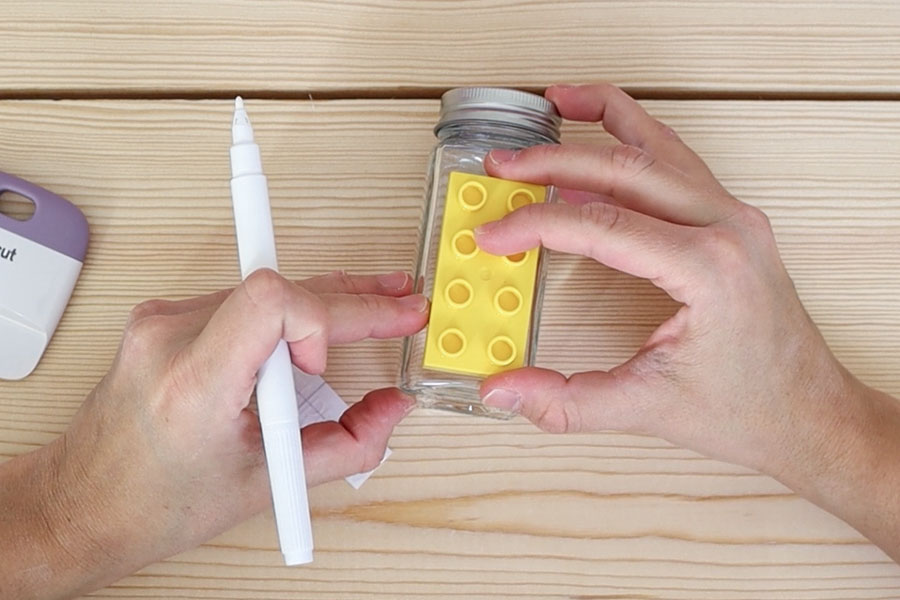
Fun fact: Can you believe I couldn’t find a small ruler and I had to use a lego?
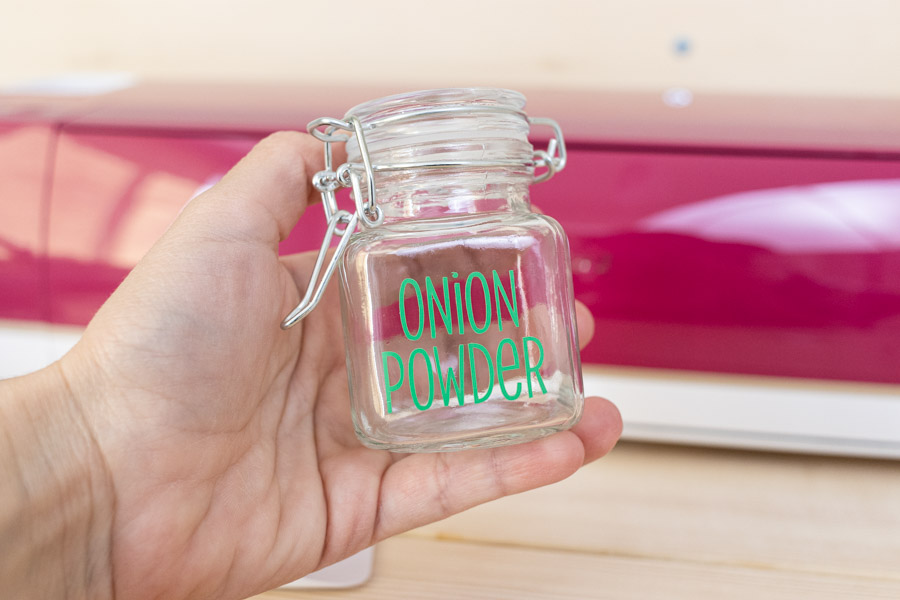
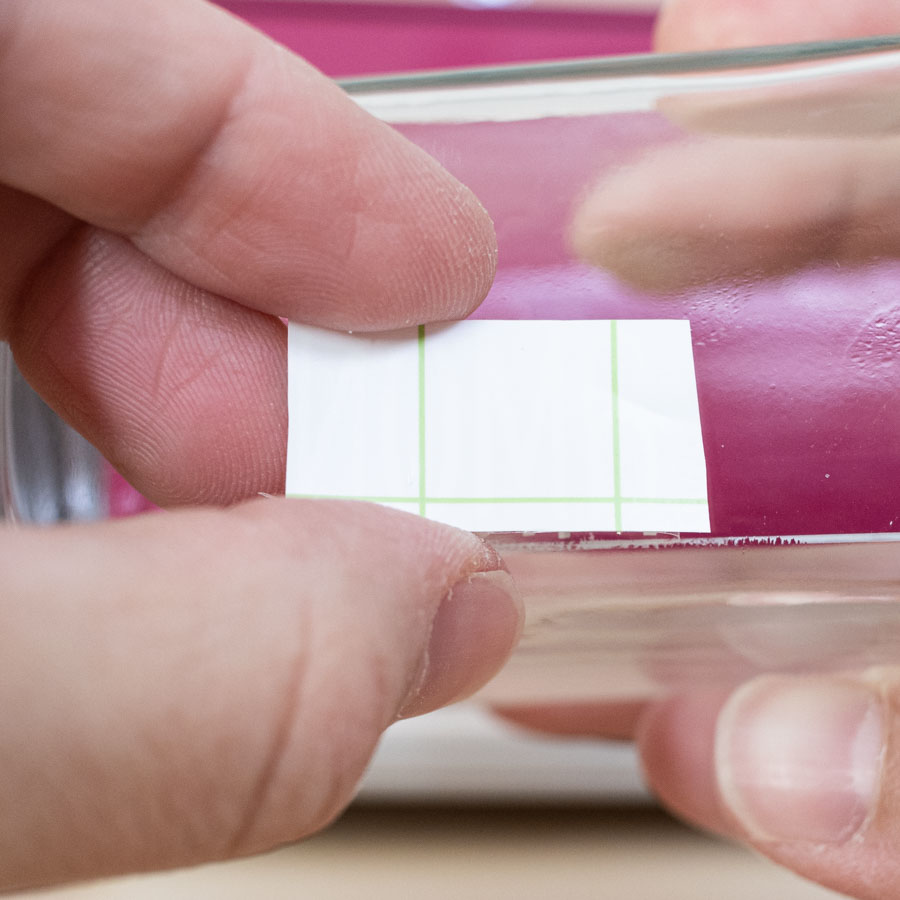
Transfer Using Hinge Method
It’s time to transfer!
I know transferring vinyl can be intimidating. It’s like you are holding your breath and hoping everything goes right.
And sometimes, even if you measure right, it’s just hard to keep a steady hand.
Well…
Do a happy dance because the method you’re going to use will work 100%. Your vinyl labels will be perfect, no need to hold your breath.

Step 1 Step 2 Step 3
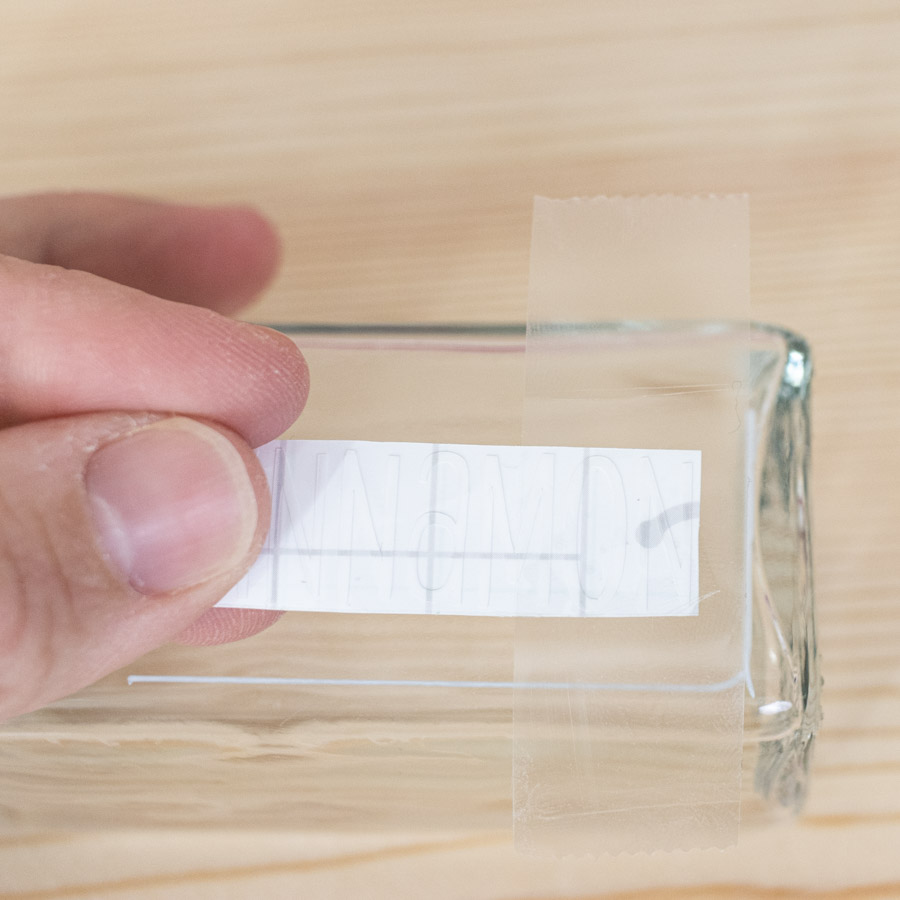
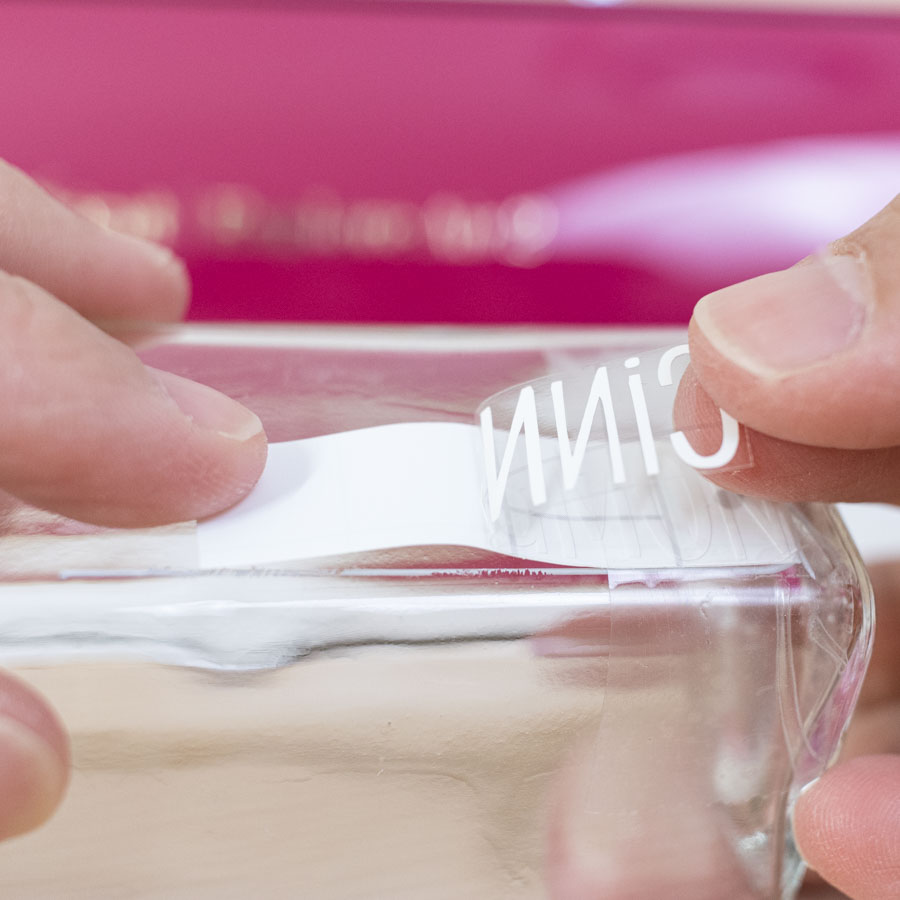
Step 1: place a piece of tape at the end of the spice label and tape it along with the guideline you drew with the dry erase marker.
Step 2: lift transfer tape about halfway through, ensuring vinyl is attached to it. If not, use the scraper and repeat.
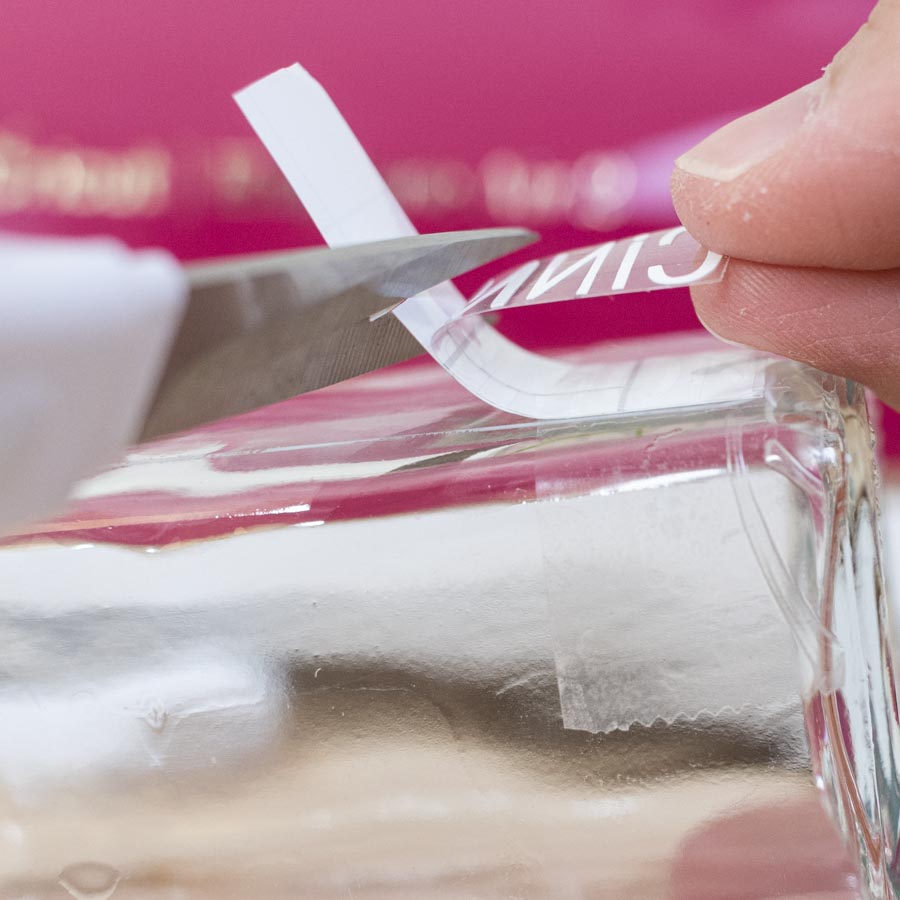
Step 3: Cut the backing sheet that was left over after lifting the vinyl with transfer tape.

Step 4
Step 4: bring transfer tape to the spice jar and use your fingers or scraper to attach the glass’s initial part.
Step 5 Step 6 Step 7

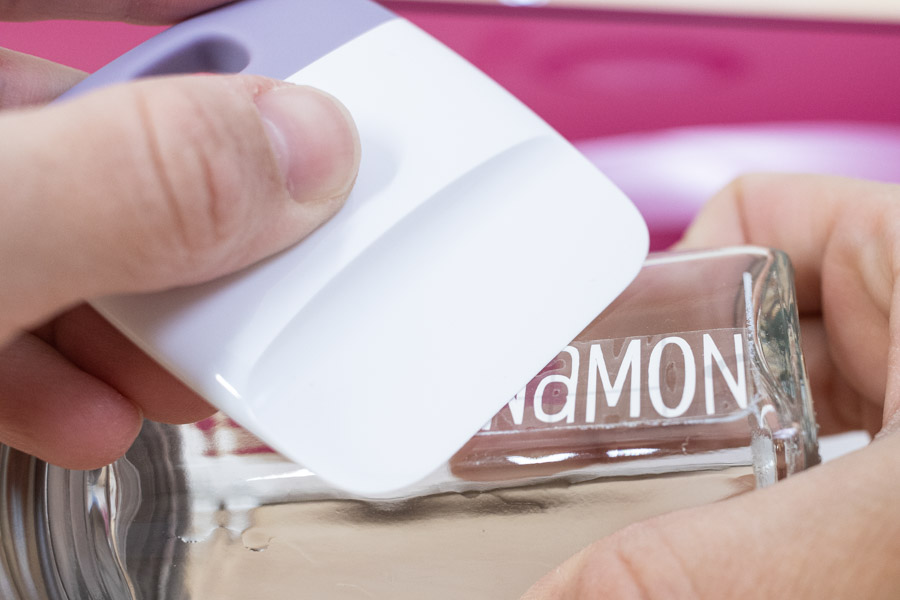
Step 5: Remove tape from the edge of the vinyl, flip label, and remove the rest of the backing sheet.
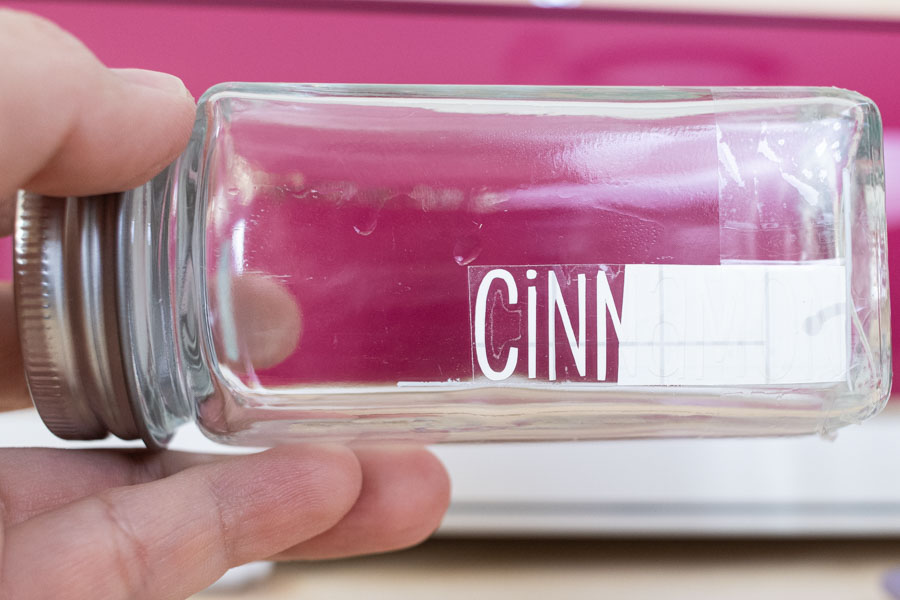
Step 6: Place remaining transfer tape on spice jar.
Step 7: Use scraper to adhere vinyl to spice jar label.
You could remove transfer tape now, but I suggest you wait until you place the spices inside the jars, so they don’t get dirty.
Work in Bulk
This project can take a while!
It’s better to work in bulk, wipe clean with alcohol, draw guides and do the hinge method.


They look so cute!
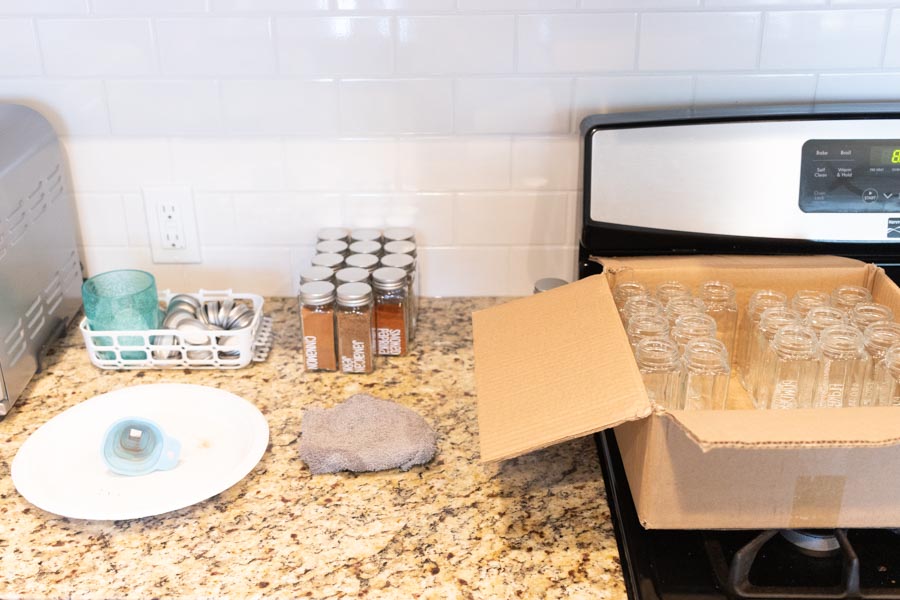
Transfer Spices to Jars
It’s time to transfer the spices to the jars.
Just like I did with the transferring and cutting process, I like to be the most efficient.
Set a station with all the spices (they can be in the box where you bought them), a damp cloth, a little box with the main and sifter lids, and a plate to catch any spills.
Bonus points if you have counter space to do this project right where your spices are located.
Don’t get them all out, it will make things hard to find.
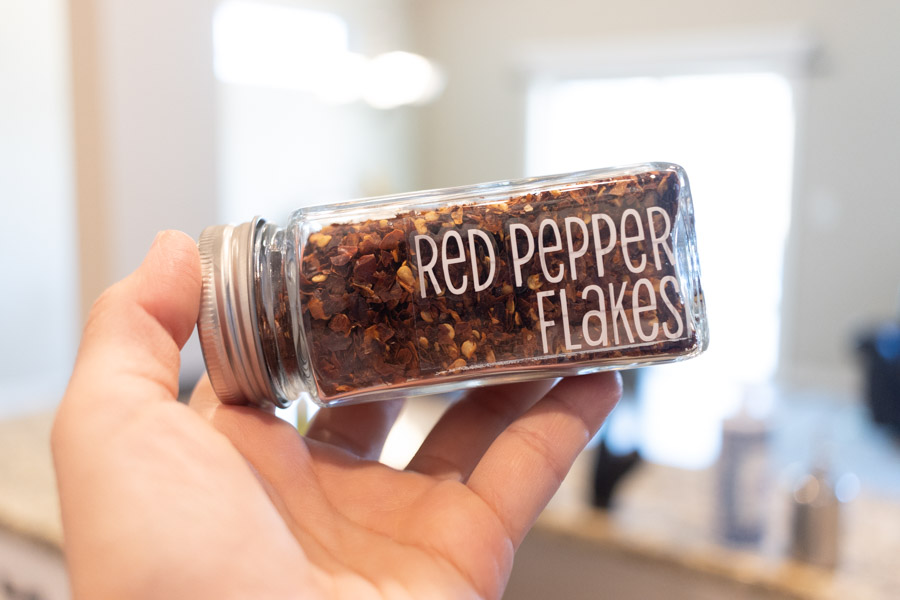
Select an empty jar from the box I got, “Red Pepper Flakes,” then open the drawer where you have your spices and get out the matching one.
Using the funnel, transfer to the new jar.
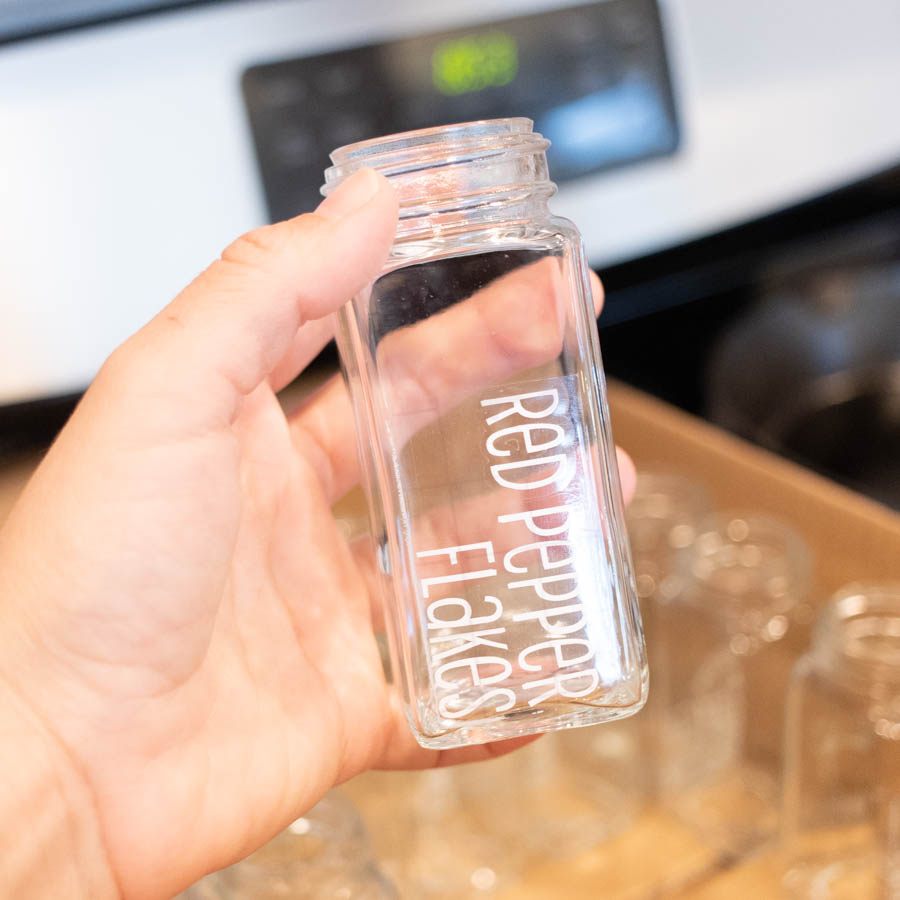
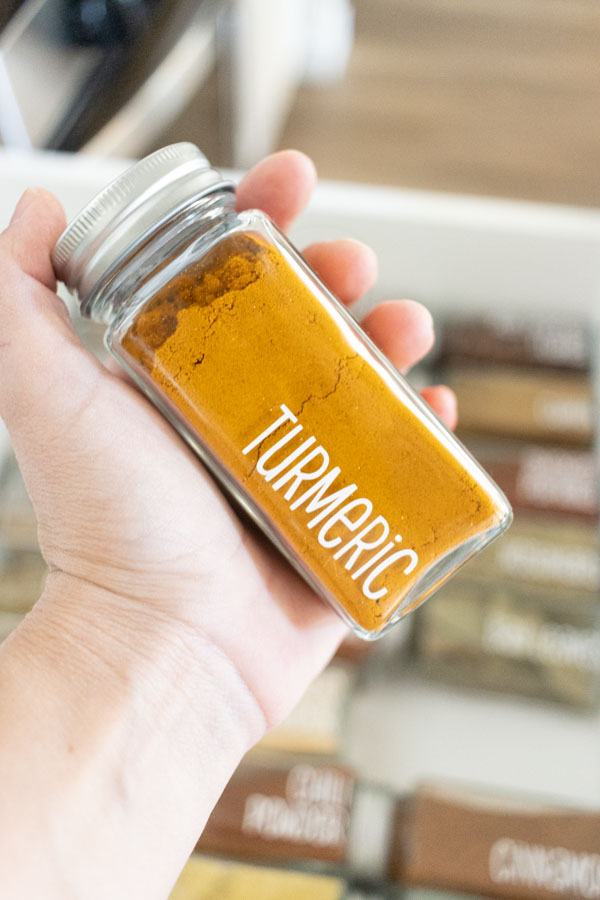
Some spices don’t stick to the funnel, but other ones like turmeric, curry, and cumin.
Use a damp cloth to clean the funnel and wait a couple of seconds for it to dry out. You may need more than a washcloth. I used like 3.
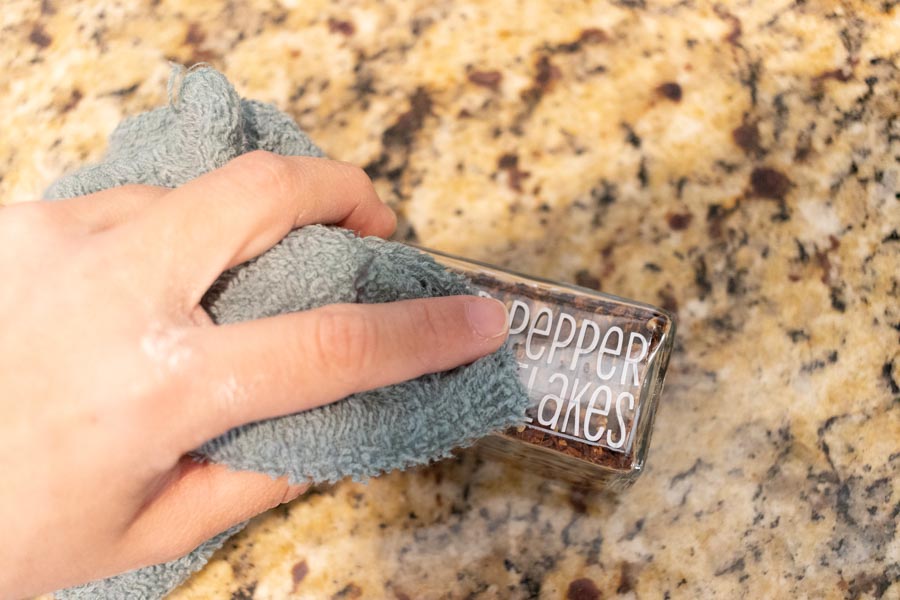
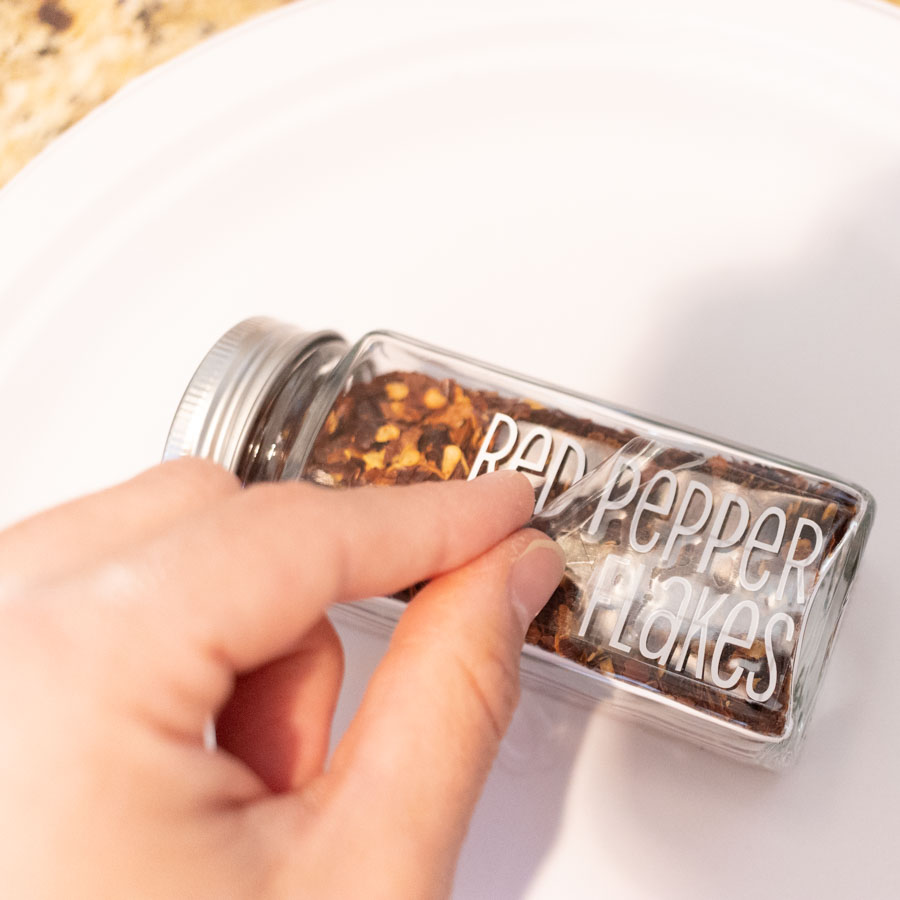
Wipe and Remove Transfer Tape
Wipe down (with a new washcloth) the jar to remove any leftover spice and then remove the transfer tape.
Most likely, the dry erase marker for the guide will be there. Don’t forget to wipe down clean.
This is by far one of the best projects I’ve made so far with my Cricut.
I love it!
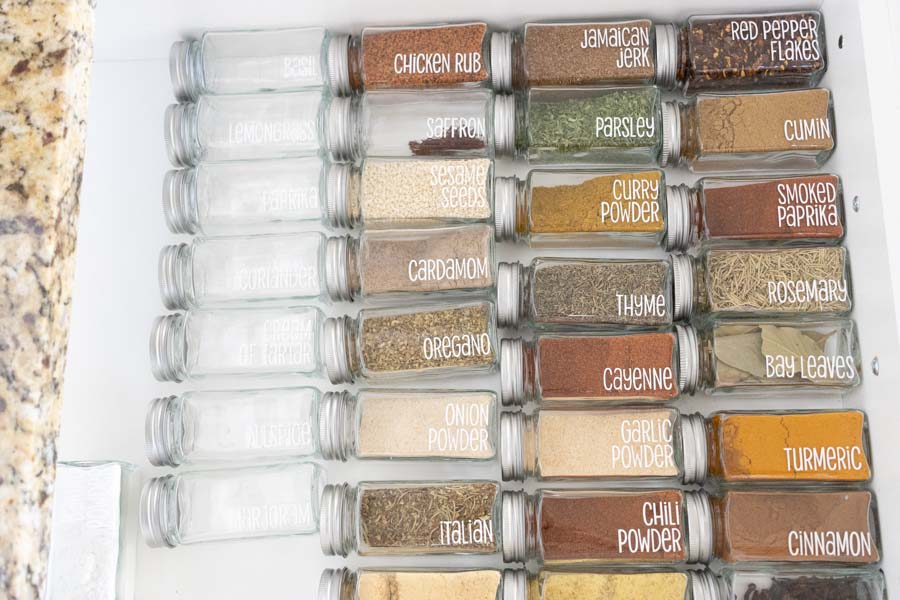
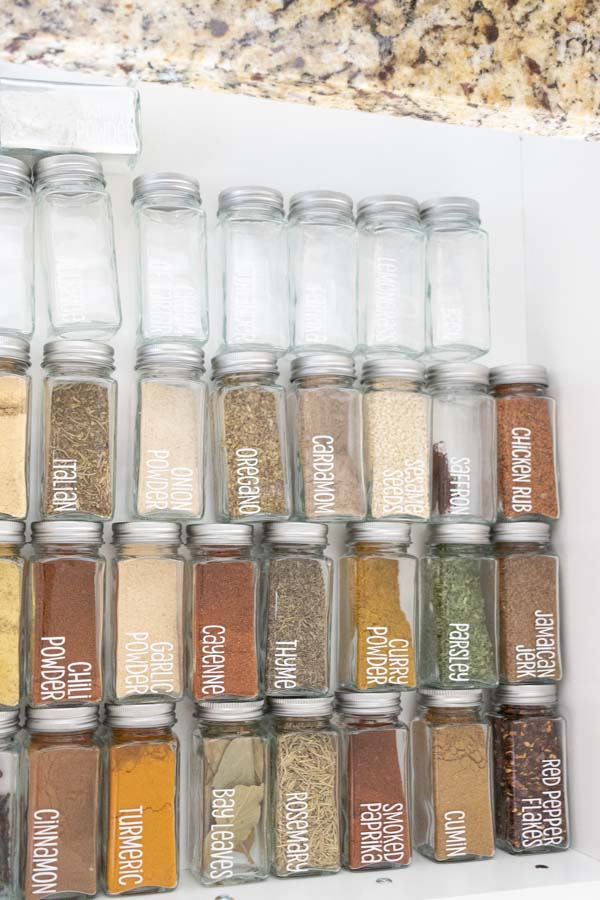
Final Result – Spice Jar Drawer
Look at all those spices!
Every time I open that drawer it makes me want to cook.
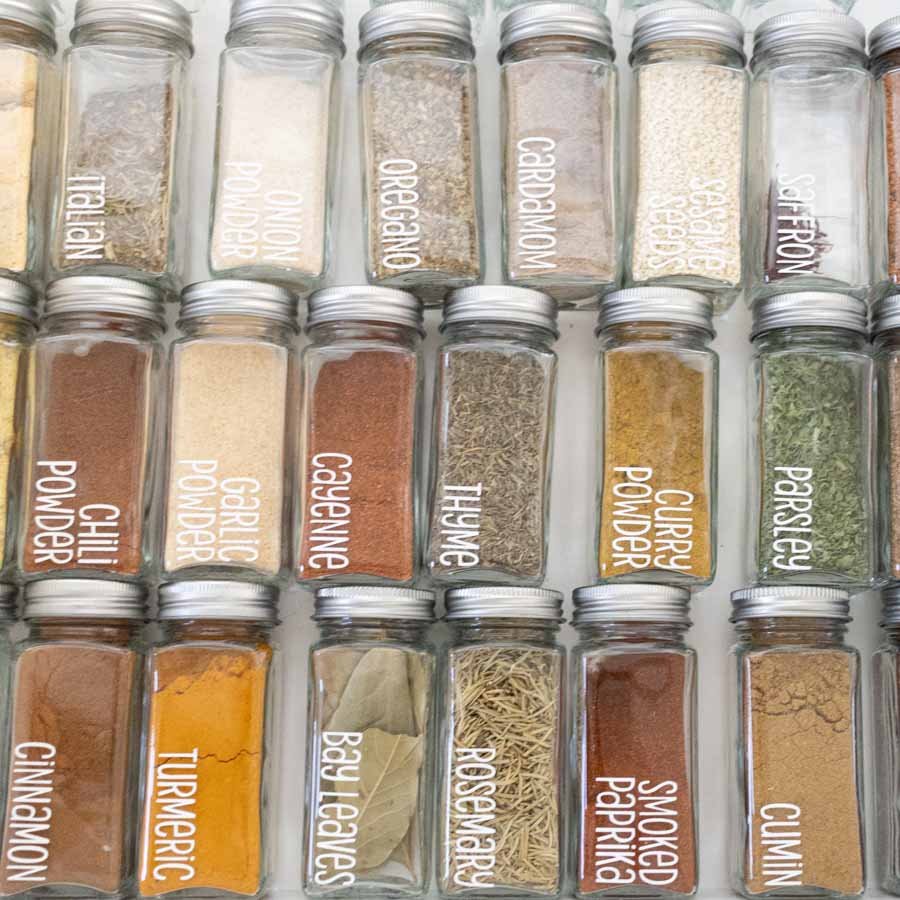
I can’t wait to start making all sorts of recipes with them!
Before & After
Do you see the mess I had?
Make sure to tag me on Instagram (don’t forget to hit that follow button) if you decide to make this great project.
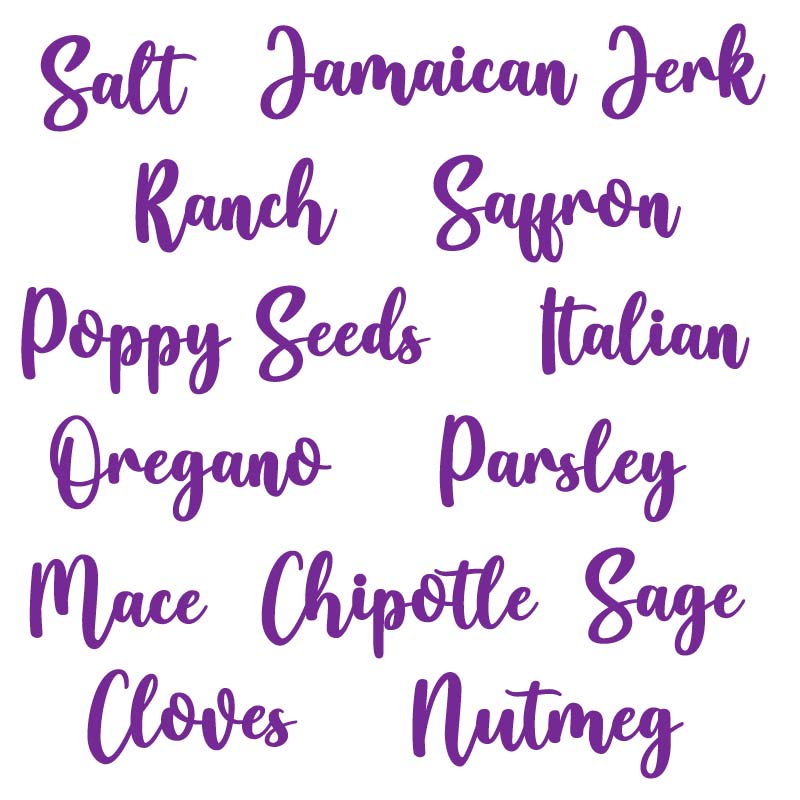
Spice Jar Labels – Free SVG Templates
It’s time to choose your favorite spice jar labels!
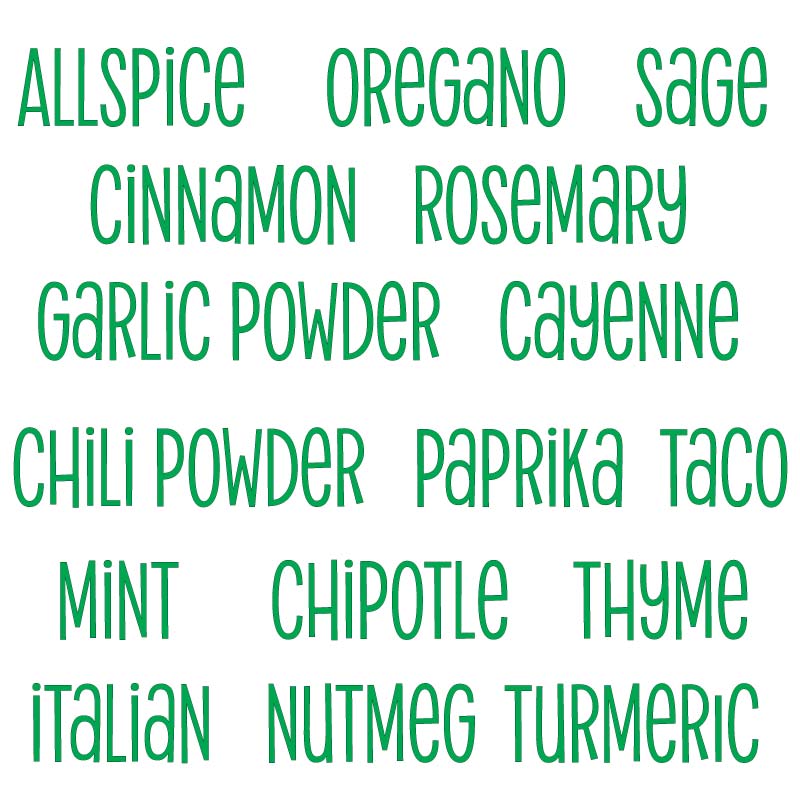
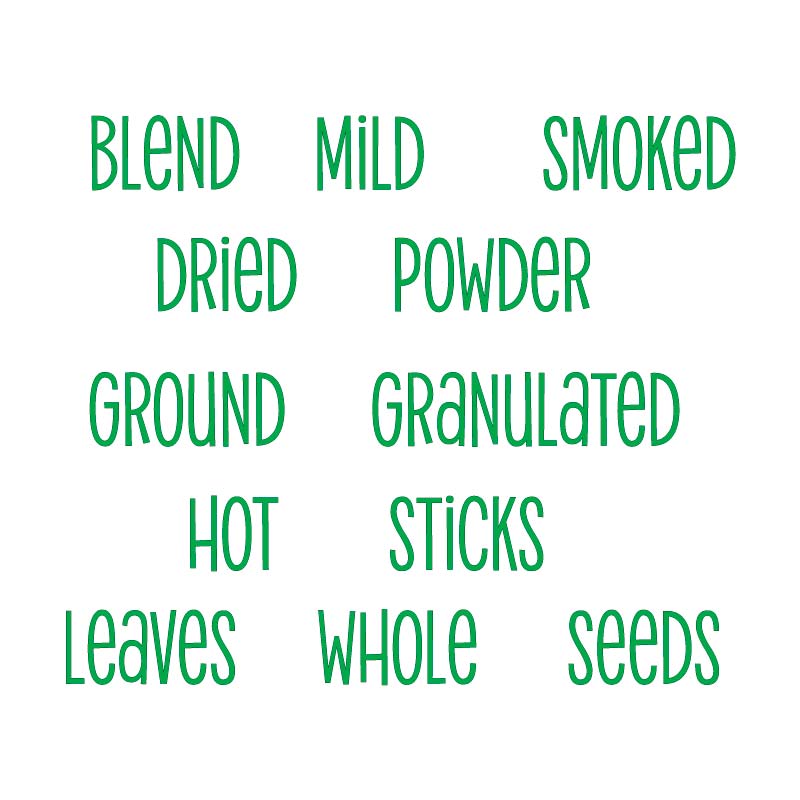
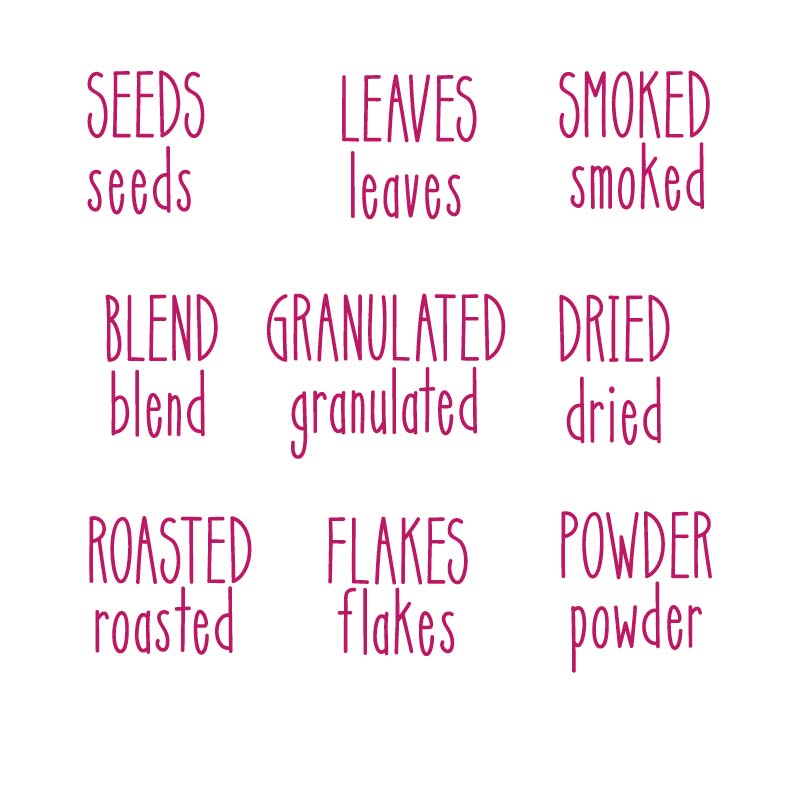
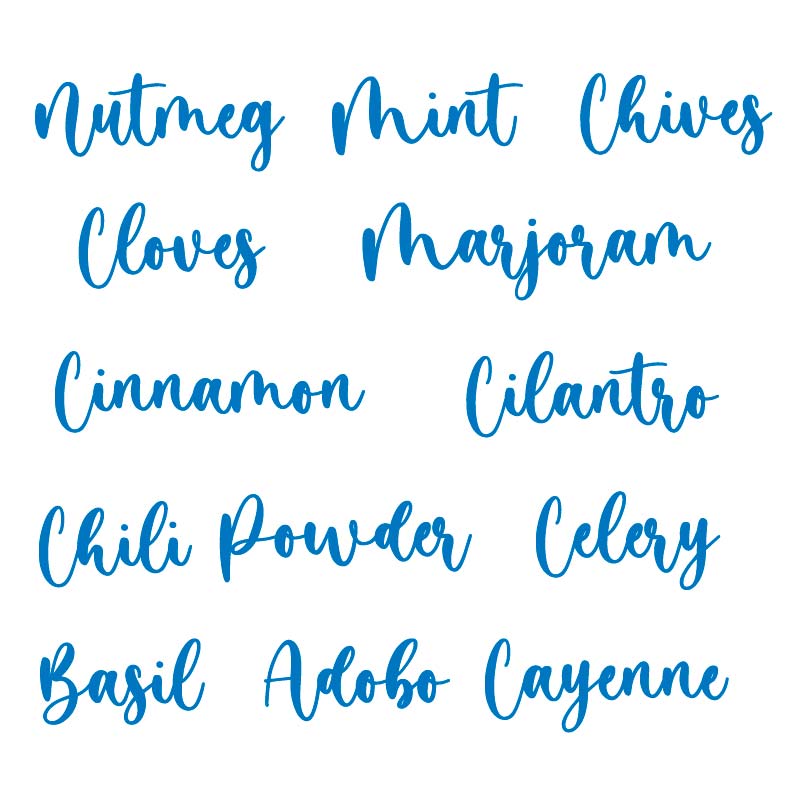
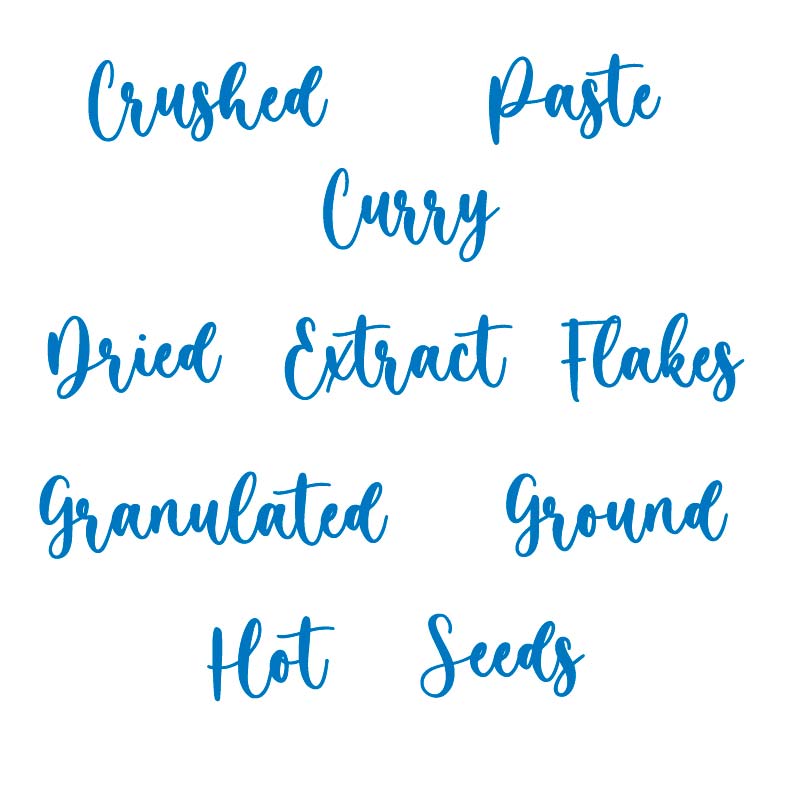
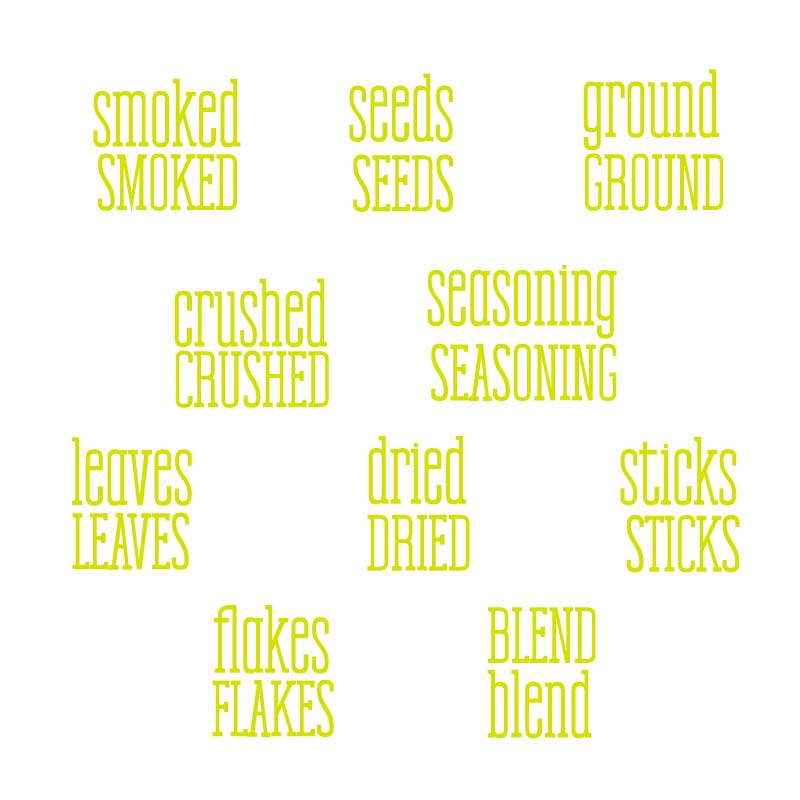
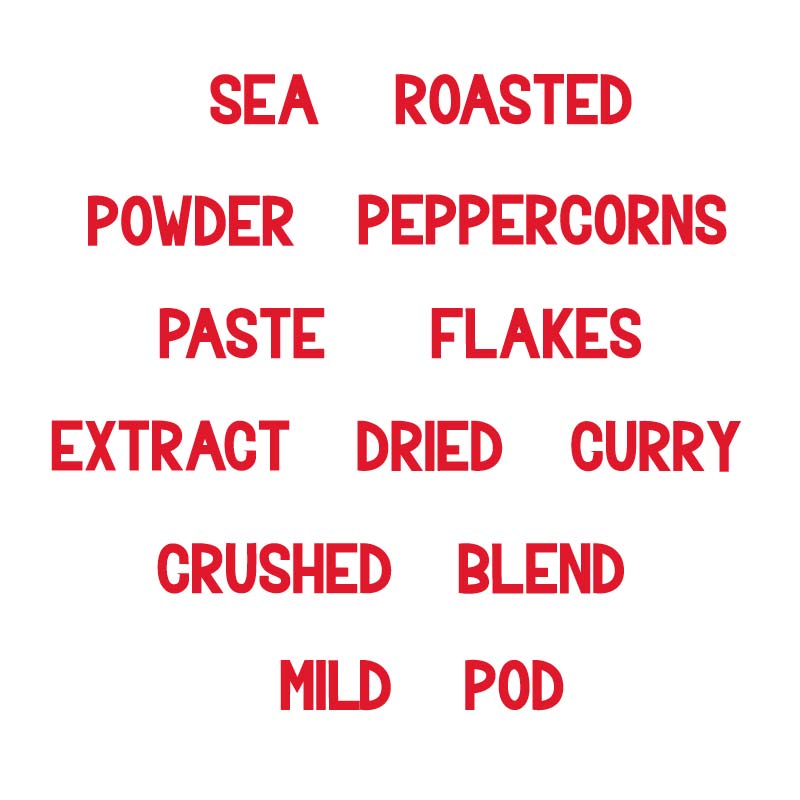
There are six types of fonts and two different files per font. One of the files contains different presentation types a spice may come (dried, pods, sticks, blend, granulated, etc.)
If the file with all the spices doesn’t have all you need because you have Granulated Garlic, Garlic Powder, etc., you can mix and match the main file to create your master spice list.
To download the file(s), you need to be on a desktop or laptop and click on the button to trigger a download file on your PC. However, I’ve noticed that I can also download them from my iPhone.
Depending on your browser settings, your PC sometimes asks where to save the file, although most files will be in your download folder.
If the image opens in a new window (this may happen because of your browser settings), right-click on it, select the option “Save Image As,” and choose where you want to save the file.
SVG files look like web page files when you download them.
Oh!
Just so you know, I also have a library full of free SVG files and Printables for all my subscribers, a.k.a. Daydreamers. You can see a preview right here or get access by filling out this form.

There are some hand-lettered files as well.
Nonetheless, there are harder to weed, and if you want to place your labels horizontally on the jars, it may take you longer, and in my experience, many details are lost.
Share it!
Do you know it takes me over 25 hours to complete a single Cricut article? I know it’s wild, but I want to make sure you understand everything!
I would appreciate your support on Instagram , Pinterest , and YouTube as I try to grow my audience and continue producing great content!
What size font for the alimentary did you use?
Thank you for this. How would I go about writing my own spice, one that isn’t on the list.
This tutorial has been a godsend for my first time using my cricut.
What font did you like? You would need to buy it.
@Catalina,
The third one on the top. Please
Thank you so much! I can’t wait to “spice up” my kitchen!
This was a wonderful surprise to find great tutorial. I am trying to find the font used in the green which you said is Alimentary but have had no luck i have 2 labels to do and i can not find the font. I need Poultry Seasoning and Minced Garlic
Alimentary Font this is the font! (It’s affiliate link).
@Catalina, what size font of Ailmentary?
I am having trouble with the svg template. I downloaded it and saved it to the mat but it won’t let me highlight and delete. Not sure what I did wrong.
Your first set of labels (green) can you tell me the font name? I have more labels to make that aren’t listed 🙂
Alimentary!
Hi… thanks so much for these I have really learnt a lot from you since getting my Cricut it’s so helpful thank you! Just wondering which is the pink font and where can I get it – need to add a few more spices, thank you! 🙂
It’s called SCAT CAT
Hello,thank you so much for this tutorial and sharing the svg’s! I was wanting to order the spice jars and would like to order through your site so you get a percentage…there isn’t a link…I hovered over the material list you have, but the only thing that is linkable is the Cricut products…thank you!
That’s so sweet of you! I have to update the article. There are so many options on Amazon that I like people to explore more beyond what I used.
Any chance you could tell me the name of the yellow font?
It’s called Cookie Kids font and you can find it on Creative Fabrica.
What an amazing resource! I barely know how to turn the cricut on, but I have wanted to do this project since I bought it. I am using the files with the yellow font, but I wanted to add a few more spices to the list. Can you tell me what font it is? And do I just select text and type it alongside the others? I was confused because the text box keeps all the letters together, but at the beginning of the instructions each letter is individual so I thought I might be missing something. Thank you so much for your thorough explanations! It is a life saver! My new favorite website!
It’s called NN Cookies Kid.
I was wondering what the best way to add a spice to the project would be?
You need the font. Which one do you need to add to?
I am just starting off with my Cricut and found your label inspirations on Pinterest. Your step by step instructions are a huge help! The only problem I am having is finding the fonts. I see through your replies to others that the font used is Alimentary, but where did you get the font from? Did you buy it on Design Space? Or did you use a third party? If it was on Design Space how did you access it because every time I search the font it doesn’t exist! Thank you!
I bought it on Font Bundles. I hope this helps 🙂
I was trying to find the link for the spice jars in the article, but I can’t locate it. I LOVE the way these look and want to get the exact ones you used. I’m new to this whole Cricut world. Can you tell me where the link is? Thank you so much!
It’s in the download section after the step by step tutorial.
Ok please forgive my last comment! I figured out how to add txt. wow I’m so sorry. What is the font you used for the last red one in the third row? Thanks again!
It’s called Bavalor Reg.
Thanks for the inspiration! Working on this project this weekend on this rainy Saturday. I’m wondering why you constructed your own square from score lines (and changing them to basic cut)? Won’t just using a square shape, changing its color to white, adjusting its size as needed, and then moving it back one layer also work? I had a hard time precisely matching up the lines at the corners doing it your way.
I did it on my own because of the transparency. When I use regular shapes, I can’t see where everything is place. But, I always say that as you go, you find methods that work best for you. Also, I didn’t think of your idea at the time, let me tell you, and it’s pretty clever.
Thanks for your thorough explanation and directions. I’m looking forward to trying to better organize my spices.
This is wonderful. I really need to do something wiht my spices. I have all sizes. I am loosing my vision and I need to have bigger print and this is excellent. Cah you share the link of the jars you used. I love them. Thanks!
Beautiful. Did I miss the link to the jars you used?
It’s linked inside the article!
List of spices svg 2 says there is no file to download
just checked. It’s working for me!
LOVE the step by step. It is exactly what I need as I am a newbie. I looked throughout the article but maybe I missed it. Can you tell me what font you used? I picked the first svg file. I have a few spices to add to the list. Thanks so much. This article allowed me to do a step by step without stressing so much about it! Beautiful job!
You’re welcome! It’s called Alimentary!
These are simply beautiful and I love all of your directions. Thank you! I am eager to get started! When I click to download the third set of spice names (the pink ones), I get an error on my PC saying Failed-No File. The others seem to download fine but I really love the pink font. Do you have any advice for me?
Thank you so much for making me aware of this! I just fixed the file and it should be working now! Let me know if it worked for you!
@Catalina,
It still will not work for me but maybe it is a problem on my end. 🙂
Thank you for doing this! We are in quarantine and this has become my project. However the list of spices for the second set (next to the green) I can’t get it to download. It says it downloads as an .html that when you click on it to open it says it can’t be found. I had no issues downloading any of the other files and getting them to work. I have tried changing the file type. I have tried converting the file type. I appreciate you hard work and I look forward to looking all over your blog while I have the time.
Fixed!
sorry, didnt even specify which font! The first green one please 🙂
This was awesome! I’m new to cricut and learnt so much from this. I cant get the font and was wondering if you could do a “Mixed Herbs” label please?!
Sent 🙂
I love the spice jar labels. Your tutorial was right on! Easy to follow the steps. Thank you for yours SVG files and your list of spices.
You’re very welcome 🙂
I really love the look of the spice jar labels. However, after trying to download them numerous times, I’m about to give up. I see the names of the spices, and when I download them, I just get that list and no cut files. I’m using a Mac Laptop. Is that the problem? I’m new to this craft. I’m using a brother scan and cut. Thanks for your help.
The PDF file that is on the top is just a list of the spices if you’re using another font. At the end of the step-by-step, there’s a section called “Spice Jar Labels – Free SVG Templates” there you have a thumbnail and on the thumbnail, you have a download button. Click on the button to download. If the file opens on a new window, right-click on the image and select the option “Save image as” and find the spot on your pc where you want to save it.
Where the files are on the article I also have some instructions of where to save them.
I hope this helps, I double-checked and everything is where it’s supposed to be!
🙂
Thank you, Catalina! This is the first major project I have done with my Cricut, though I have had it for years. Your step-by-step instructions were easy to follow and made the entire process clear. I so appreciate the work you did and the SVG files you provided for free! Thanks from a fellow Christ-follower!
You’re very welcome Donna! I would love to see the project!
How do I find the font of the first one in green so I can add more spice names?
It’s called Alimentary!
These are great! I am going to surprise my girlfriend with labelled spice jars. BTW, what font did you use for the first set of SVGs? I’ve never seen anything quite like it. Thank you again for all your hard work, you made it very simple to understand.
It’s called Alimentary!
Your amazing girl!!! These are great! Thanks for sharing and all your time and effort!
Happy you like them 🙂