Hello Daydreamers.
Looking for a delightful and easy craft project to keep your kids entertained on cold and snowy days?
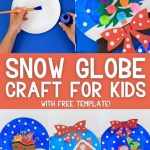
This tutorial offers a fun activity for kids: creating paper plate snow globe crafts. Plus, I included a free template to make crafting easier.
This craft can be made by toddlers, preschoolers, kindergartners, and even older children with the help of a parent or teacher. The results are so beautiful that you can use them as part of your Christmas decor.

Seriously! These snow globes are the perfect way to spark creativity and joy during the winter and Christmas seasons.
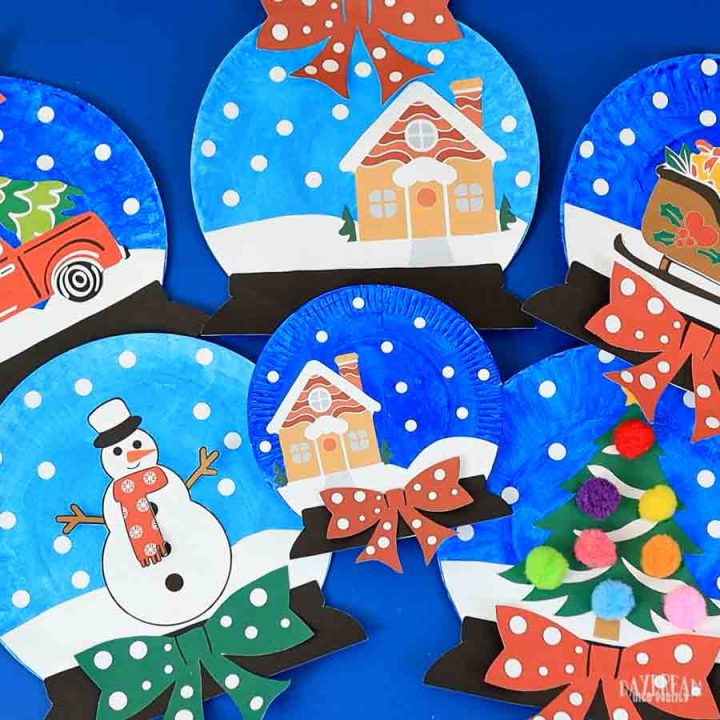
From the template, you can build snow globes with five different scenes:
- Gingerbread (Christmassy) house
- Snowman
- Christmas Tree
- Santa’s sled
- Christmas Truck with a tree in the trunk
As with all of my crafts, you can make them as easy or difficult as you want. To save time, print the colored template. For a longer activity, print the coloring one. You could even purchase blue paper plates to avoid any paint mess.
Throughout the tutorial, I’ll share some extra tips that’ll help you make crafting much more fun.

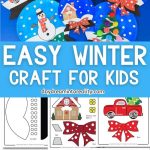
Tools & Materials
- Printer
- Template (download at the end of the article; you don’t need to subscribe!)
- 9-inch paper plate
- Scissors
- White cardstock
- Glue
- Sky and navy blue paint
- White paint (optional)
- Pompoms (optional)
- Colors, markers (optional)

You can download a color and coloring version of the template. If you have small children, I recommend printing the color version as it is faster, and little ones don’t have long attention spans. However, for older children, you may want to give them the option to print the coloring version.
Super tip: If you don’t have a paper plate, use blue cardstock and cut in 9 in diameter.
Step 1 – Print Snow Globe Template
Print the template pages that best fit you (at the end of this tutorial). The printable has options for printing five different scenes. You can make them all or ask your child which one he prefers to build.
Before you send it to the printer, check out the template. On some pages, I was able to fit the bow on the scene, but on other pages, I couldn’t. Therefore there are some pages with only bows.

If you decide to do the Christmas tree scene, there are two pages of the craft: one to build your tree and the other where the tree is already assembled and ready to glue. The snowman page has a build-your-own snowman and a full snowman ready to go.
Step 2 – Paint
Always start by painting, as it takes longer to dry. Your child will likely want to glue as soon as they’re finished cutting.
If you want the snow globe scene to be during the day, paint the paper plate sky blue. If you want the scene to be during the night, paint the plate navy blue.

Step 3 – Cut Template
While your paper plate is drying, cut the pieces of the template you want to use.
The snowfall is the hardest part to cut in this template. You may want to help your child with it or use white paint. Also if you have a punch hole you can cut white cardstock and make perfect snow!

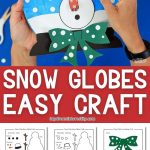
Step 4 – Glue
As I mentioned, there are five different scenes and a page with different ways you can assemble your snow globe.
For this step, I will be using the gingerbread house! But everything is very similar.

Start with the snow. If goes all the way down to the bottom of the paper plate.
Tip: Spread glue with your fingers to avoid getting the paper wet and having the color bleed.

Next, you’ll want to glue the base onto the paper plate, with about half glued on the paper and the snow.
Choose where you want to glue your house and path. (Left, center, right).

Tip: If you painted the plate navy blue, you can cut the yellow windows and glue them over the house to give the appearance that the light is on. You can also color them yellow!
Sometimes, you may have to trim some of the parts to make them fit better. Although they are designed to fit a 9-inch plate.21x Sometimes, printing settings change, and it’s hard to keep the exact location as shown on the assemble ideas page.

Finally, glue the bow on top of the snow globe or the base and the snowflakes! Don’t glue the bow flat; only in the center to curl the paper and give the bow a “ribbon” appearance.

There you have it, a charming paper plate snow globe!

Other Assembly Ideas
Here are some pictures of other snow globe scenes you can make using my template!


I loved the snowman globe! I used the red scarf and the green bow. The snowman scene is set during the day.
The Santa sled is also really cute!
And the Christmas truck with the scene is just adorable!

One of my son’s favorite snow globes was the Christmas tree!


The template has an option to cut the ornaments. However, you can use pompoms instead to make a 3d tree!
Want a Smaller Snow Globe Paper Plate?
I made an extra small snow globe using a 6-inch plate! It looks so cute, doesn’t it?
If you decide to make an extra small one, cutting will be a little harder, but maybe that can be for you to make and hang on the Christmas tree.

To make a smaller snow globe in a 6-inch plate, scale the printable to 66%.

Download Template!
Just as I mentioned, here’s the snow globe template for your craft! Click the image or yellow button to open, save, or print the PDF.


Oh!
Just so you know, I also have a library full of free SVG files and Printables for all my subscribers, a.k.a. Daydreamers. You can see a preview right here or get access by filling out this form.
Paper Plate Snow Globe Craft for Kids
Materials
- Template
- 9-inch paper plate
- White cardstock
- Sky and navy blue paint
- White paint (optional)
- Pompoms (optional)
- Colors, markers (optional)
Tools
- Scissors
- Glue
- Paint brush
- Printer
Instructions
- Download the template in color or coloring.
- Paint the paper plate sky (day) or navy blue (night) and set it aside to dry.
- Check out the assemble ideas page on the template and pick your favorite snow globe.
- Print and cut the snow globe option you want.
- Glue the snow at the bottom of the plate and the base on top of the snow.
- Paste the snow globe character on top of the snow and the snowfall.*
- Glue the bow on top of the globe or the base.
- For easier crafting, you can paint the snowfall with white paint.
Notes
*Cutting the snowfall can be a little tiresome. I included it so you have everything you need for the craft. You can also use white paint, or if you have a punch hole, you can get perfect circles and glue them to the snow globe.
You May Like These…
So there you have it – a variety of fun and cute paper plate snow globes to make with your children this winter or Christmas day. Remember to keep things interesting by mixing and matching colors and parts of the template!
- Paper Plate Baby Chick Craft
- Paper Plate Turkey Craft
- Build a Salad Craft
- Build a Fish Tank
- Paper Plate Cow Craft
Happy Crafting!


I am a preschool teacher to 3 year olds. I am always looking for simple yet fun crafts for my kids as their abilities are limited but growing and though I have great intentions, I am not good at drawing and creating my own things.
So happy to hear 🙂
Looks great and is easy to assemble.
I love this omg
Lovely
This is a very nice snow globe set,
Glad you like it!
I want the craft for my crafting club
You’re welcome to do it! The template is at the bottom of the article.
This is a very nice snow globe set. Thank you! Could you please check the link for the coloring version. It keeps coming up as a very cute turkey craft!
You’re very welcome! Thank you so much for pointing this out! It should be fixed now.