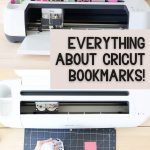


Hello Daydreamers!
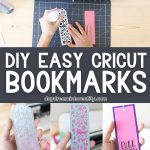
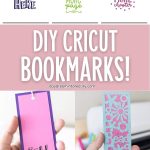
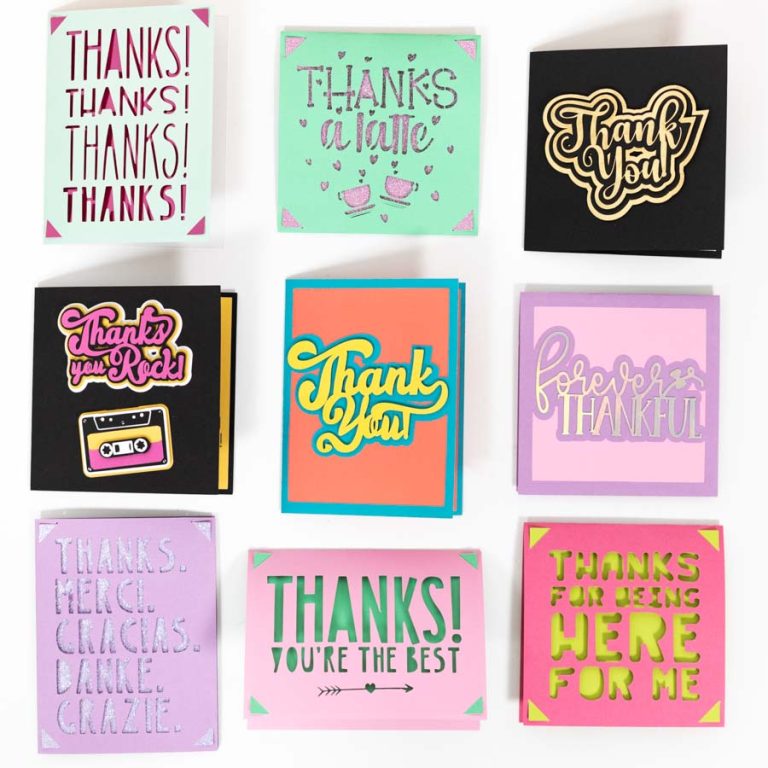
Bookmarks make for the perfect gift for a birthday, Christmas, or any special occasion for friends, family, or even for yourself if you love reading. They are easy to make, and today, I will teach you how to make them using your Cricut!
Plus, I have over 12+ Free SVG templates for you to make bookmarks until your heart is content!
This tutorial builds upon the skills I teach at every step, so I suggest you follow each step if you’re just getting started with your machine.
In a nutshell, these are the topics I will be covering today:
- Materials for bookmarks
- Making bookmarks from scratch in Design Space
- Cutting process (cut and draw on a bookmark)
- Making outstanding cut-outs in Design Space
- Using iron-on on your bookmarks
- cool bookmarks you can make with the free SVG files in this article
Are you ready?
Let’s Daydream Into Reality!
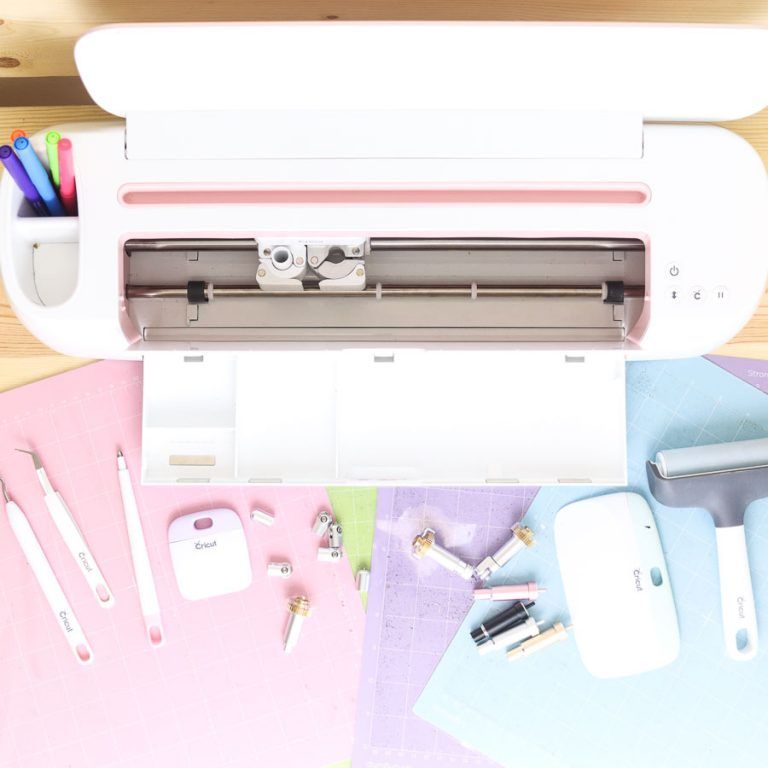
Materials
- Cricut Machine: You can use either the Maker, Joy, or Explore Air
- Green Mat
- Fine Point Blade
- 0.4 Fine Cricut Pen (if you want to write on your bookmarks).
- High-quality paper
- High-quality glue
- Twine (optional)
Always aim to use high-quality paper!
I know it’s expensive; a beautiful sheet can cost 2 dollars. However, Michael’s will have fabulous sales where you can buy paper pads for half the price.
Don’t use construction paper or kids glue if you want a professional-looking bookmark. Kids’ glue will make your project bubble, and that’s a recipe for disaster.
If you’re in the mood for making extra fancy bookmarks, you can also use:
- Faux Leather
- Iron-on
- Weeder
- Iron/EasyPress Mini

Make a Bookmark in Cricut Design Space
There are many ways you can make a bookmark in Cricut Design Space. I recommend starting with the basic shapes if you’re starting with your Cricut machine.
What’s the most common shape for a bookmark?
A rectangle!
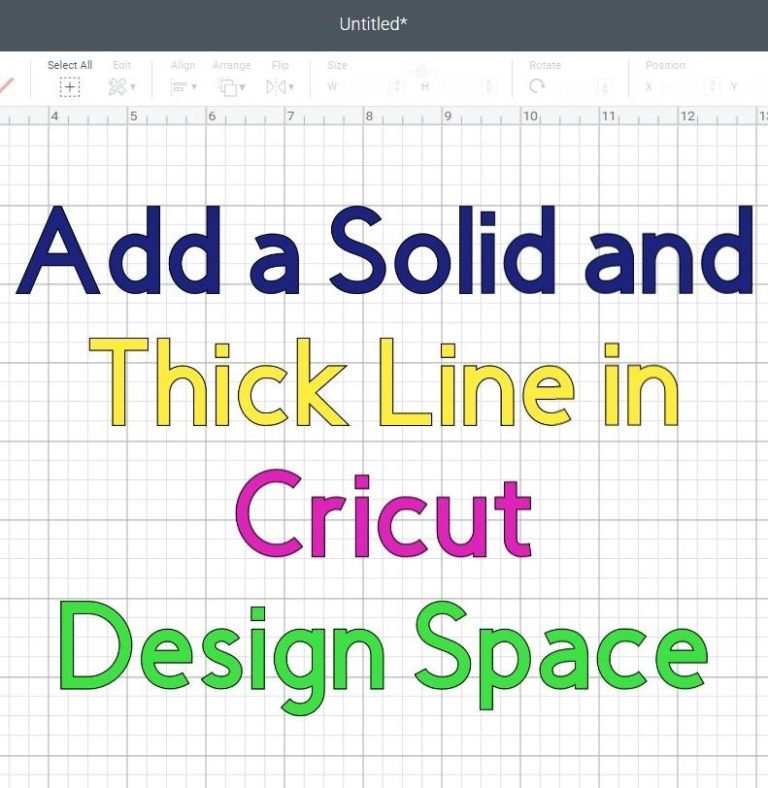
Step 1 – Add and Edit Squares
To make a rectangle in Cricut Design Space, click the “Shapes” icon on the canvas’s left panel and select the square option.
A dark grey square will appear.
Select the square on the canvas, then go to the top menu and click on the little lock between the width and the height to unlock the proportions.
Once you unlock the proportions, type in the measurements you want for your bookmark.
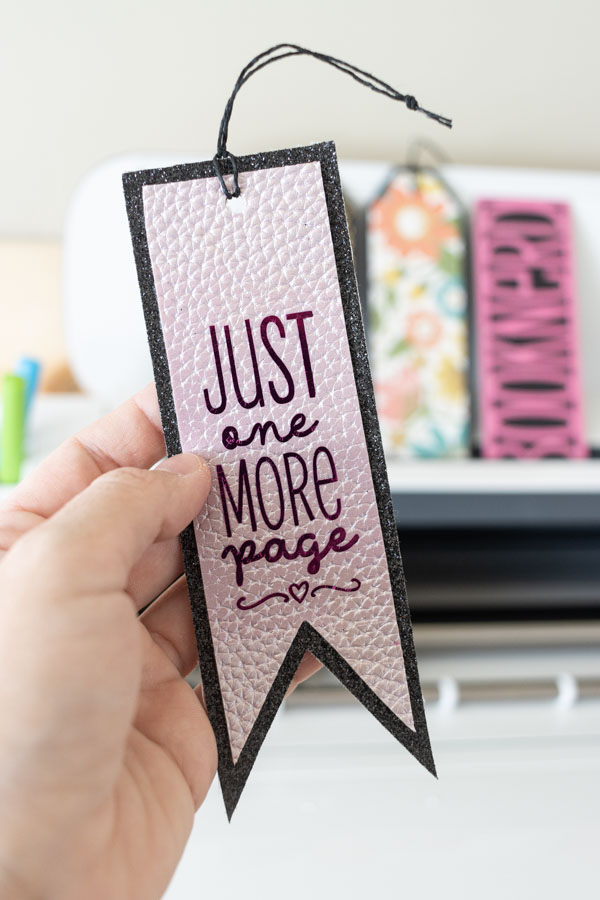
For this particular project, I used 1.8 inches for W and 6 inches for H.

Step 2 – Add Bookmark Offsets
I like to use two different colors for my bookmarks. This adds extra sturdiness to the bookmark, and you can combine two different papers to create a lovely contrast.
Adding a second color to your bookmarks is very easy. Select the layer, click on the “Offset” icon on the top panel, and slide the bar until you find your desired size. Since I am working with a rectangle, I decided to also use rectangular corners.
When you’re done, click on “Apply.”

The offset is usually black or grey.
You can change the bookmark color from the color box next to the “Operation” menu at any time.

Step 3 – Add Punch Hole
If you would like to use twine in your bookmark, you’ll need to add a small punch hole.
Let me show you how.

- Make a copy of the original bookmark.
- Unlock the proportion of the light pink rectangle and lower it just enough to fit a small punch hole.
- Add a circle from the shapes panel and resize to about 0.22 in.
- Place the circle between the light and bright pink rectangles.
- Use the align tools to make sure everything is centered.
- Select the bright pink rectangle and the little circle and click “Slice” at the bottom of the layers panel.

Tip: You can skip making the light pink rectangle shorter and make the hole on both rectangles. Just make sure you “Slice” in the right position twice so everything is aligned correctly.
Now that you know how to make a basic bookmark, let’s have some fun personalizing and adding different effects.
Step 4 – Add Text to Your Bookmark
Adding text to your bookmarks will give them that homemade look. You can add a quote you like, a name, or even an image!
Click on “Text” and type your phrase on the dialogue box.
For this bookmark, I typed “Just one more page.” Every word is on a single line to increase the size and have every word very visible.

When you add text in Design Space, Cricut will always show the font “Cricut Sans, and it’s set to cut.
Since we want to write, we need to choose a writing font. Select the text on the canvas area and notice all the options you have!
You can change the font, style, size, and more!
Let’s take a closer look at the types of fonts you should use when writing with your Cricut.

When you click on “Font,” you cannot only see all the fonts Cricut has, but you can also filter them by specific attributes.
For writing with pens, I always prefer “Writing” fonts because they look more natural. You can learn more about this in my Cricut Pen tutorial.
Keep in mind that most of these fonts cost money. However, if you’re part of Cricut Access (which I recommend), you can use them over and over.

Tip: If you choose a font without a “Writing” style, change the Operation from “Basic Cut” to “Pen.”
Step 5 – Add Images & Attach your Bookmark
Can we agree that the text alone looks a little bit meh :/
With pens, you can also draw images!
Click on the “Images” icon and use the search bar and the filters to find the ideal image. I narrowed my search by typing “book” and looking for “free” images. I loved the little book with the heart; it is an image designed for drawing!
Select it and click on “Add to Canvas.”

When you insert a new image, something essential to do is to look at what other layers they come with.
This particular image comes with a white outline.
Since we are only using the drawing, delete that outline.

Now, it’s time to resize the image and place it on your bookmark.

Once you finish designing, select your text, the image, and the inner rectangle by pressing shift on your computer at all times and click on “Attach,” located at the bottom of the Layers panel.
When you’re ready to cut, click the green “Make” button!
Bookmark Cutting Process
Yay!
You’ve made it to the cutting process.
Pay extra attention to this step because I won’t cover it again in the next customization ideas I have for making bookmarks in this tutorial.
When you click “Make,” you should have a preview, like the one on the screenshot below.
For “Cricut Joy,” select “Cut on Mat.”

If everything looks in order, click on continue.
If things look all over the place, check if you attached the text and image with the small rectangle.
It’s time to select your materials. I used my Cricut Maker, but you can do this project with the Joy and Explore Air family Machines.
Here are some quick instructions for each machine.
New Machines: Select the materials from Cricut Design Space. Click on “Browse Materials” to find the one you’re working with. For this project, I used pink cardstock and hot pink glitter cardstock.
If you’re using two different types of materials, once you finish the first cut, click again on the “Base Material” options and update it before you cut the next mat.
Explore Air 2 and older: Move the smart set dial to “Custom” and browse the Design Space materials.
Yes, you can move the dial to “cardstock, vinyl, etc.,” but to avoid any doubt, it is better to select from the software.
If you’re using two different types of materials, once you finish the first cut, click again on the “Base Material” options and update it before you cut the next mat.

Let’s move to real pics!
First, let’s cut and draw the inner rectangle.
To consider: You can use the same pens for the Maker and the Explore machines. If you have a Cricut Joy, you need Cricut Joy Pens.
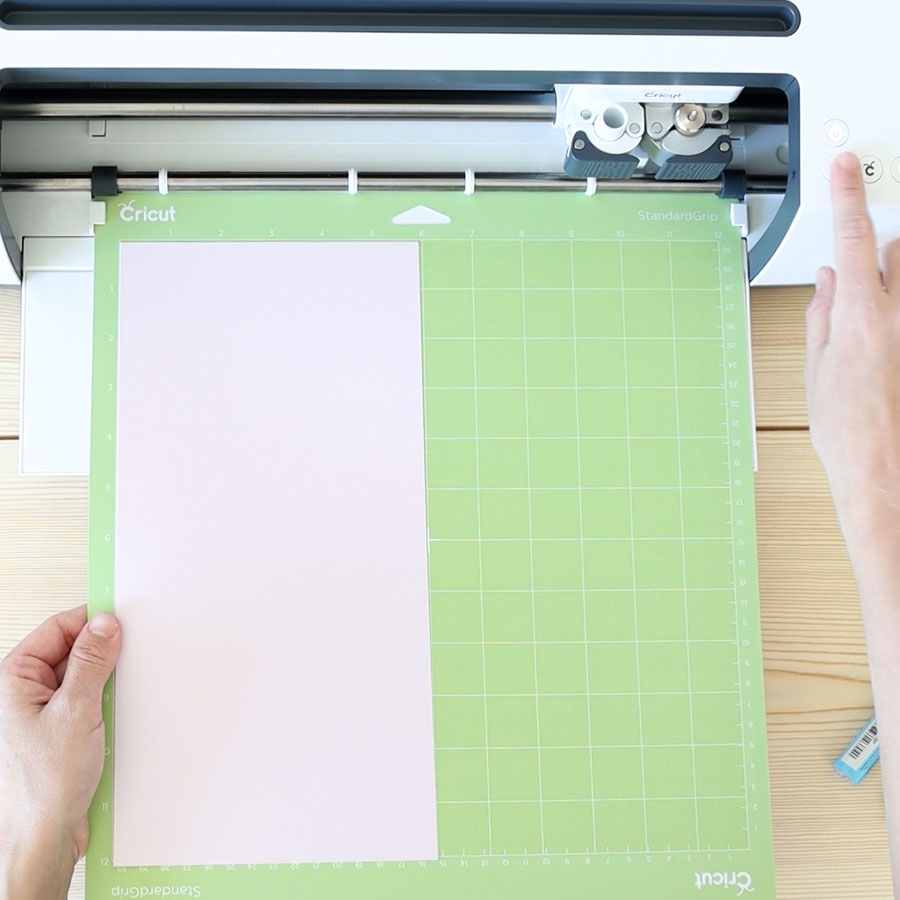
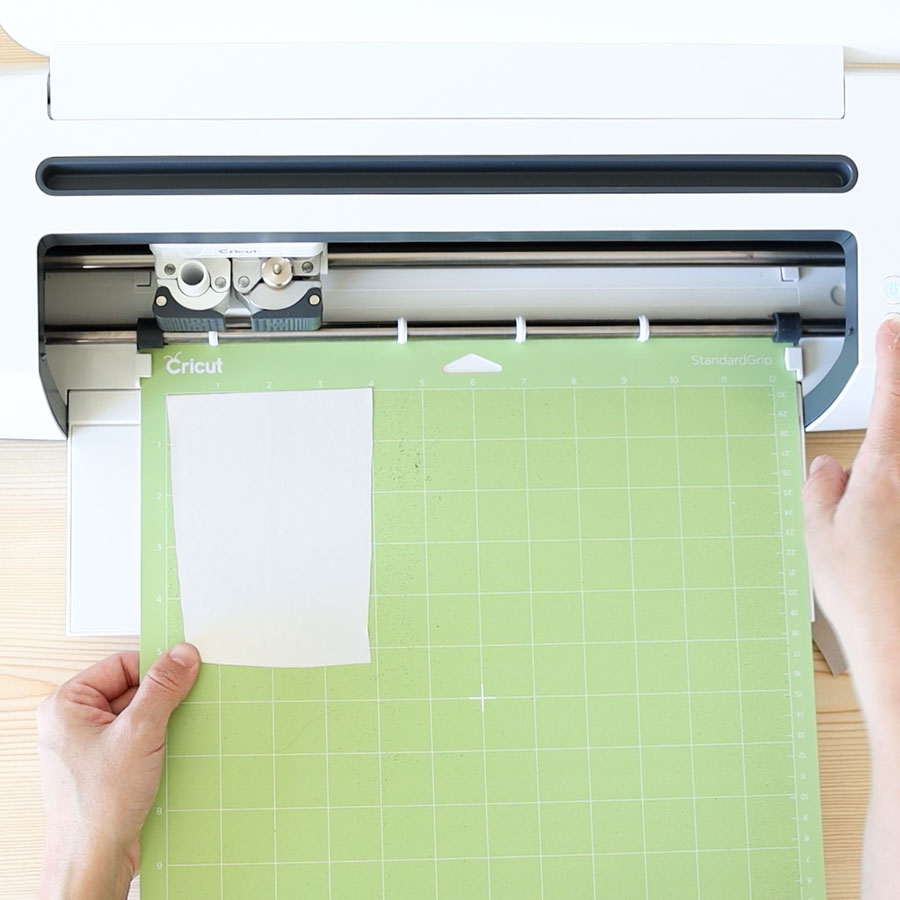
Place paper on the green mat. A new blue mat can also work with cardstock. Then, install the fine-point blade and pen you want to use.
Load the mat into the machine and press the flashing go button to start the cut. (For Cricut Joy, start the cut in Design Space.)
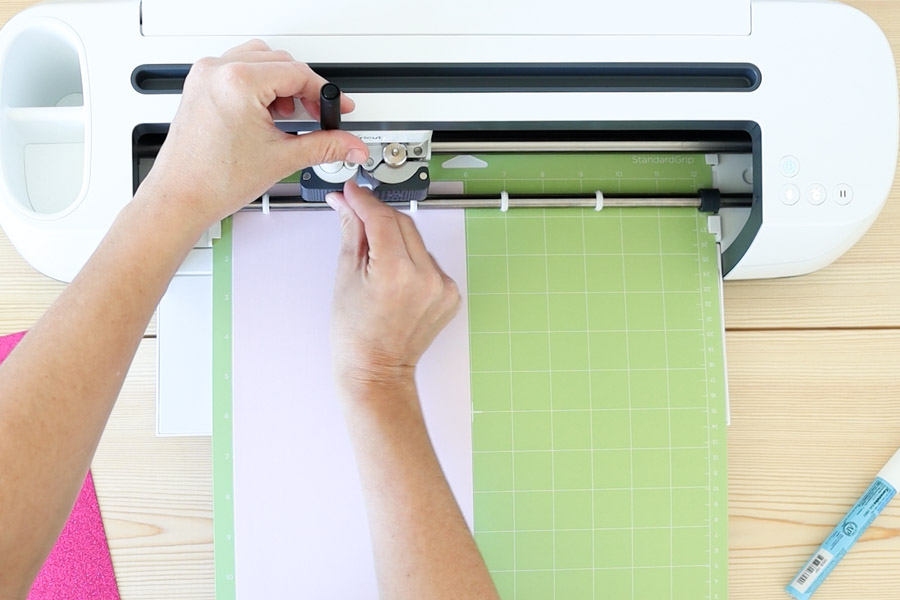
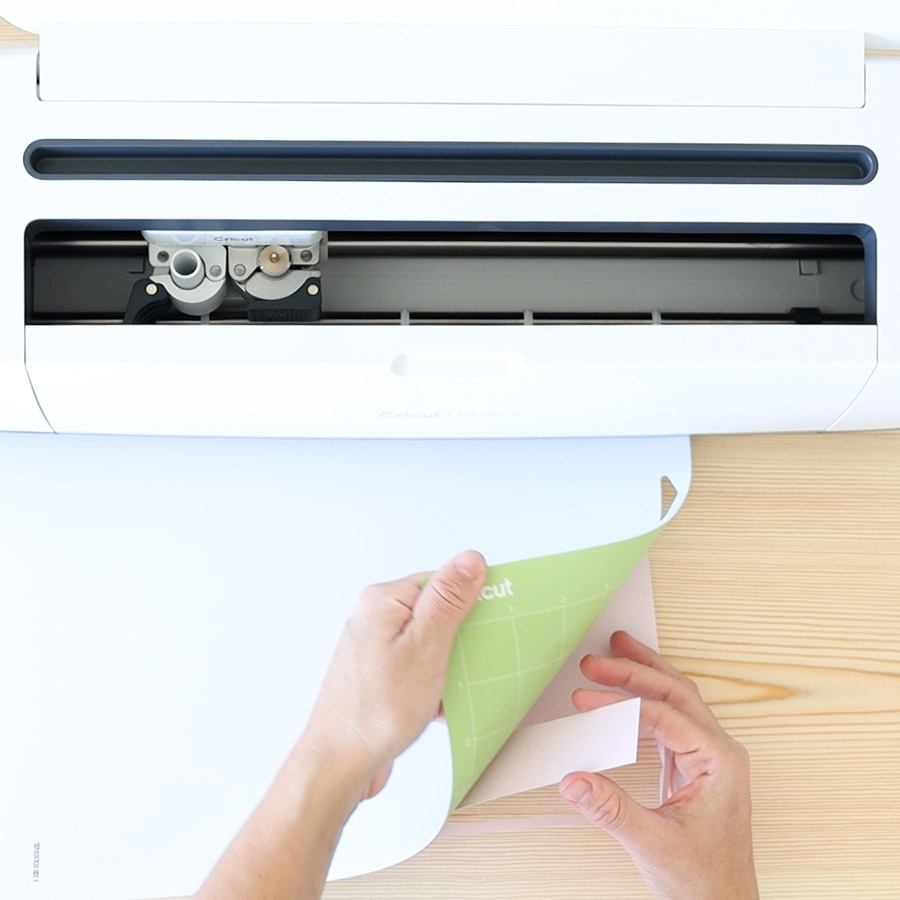
When the cut is complete, remove “the mat from the material” by bending the mat. This trick will prevent your paper from curling.
Repeat the same process with the other mat.
Remember to change materials in Design Space if you use a different one for the big rectangle.
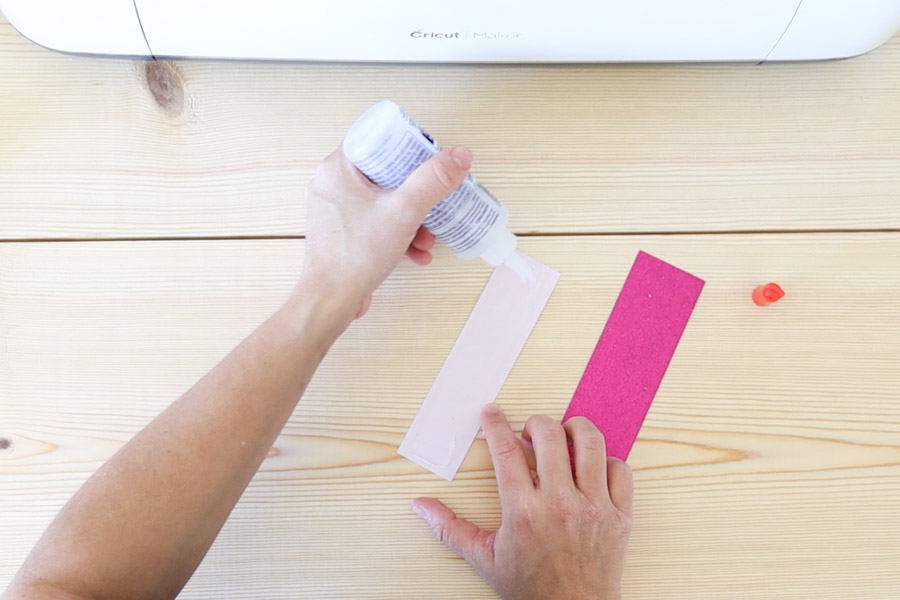
Once you finish both cuts, glue your bookmark.


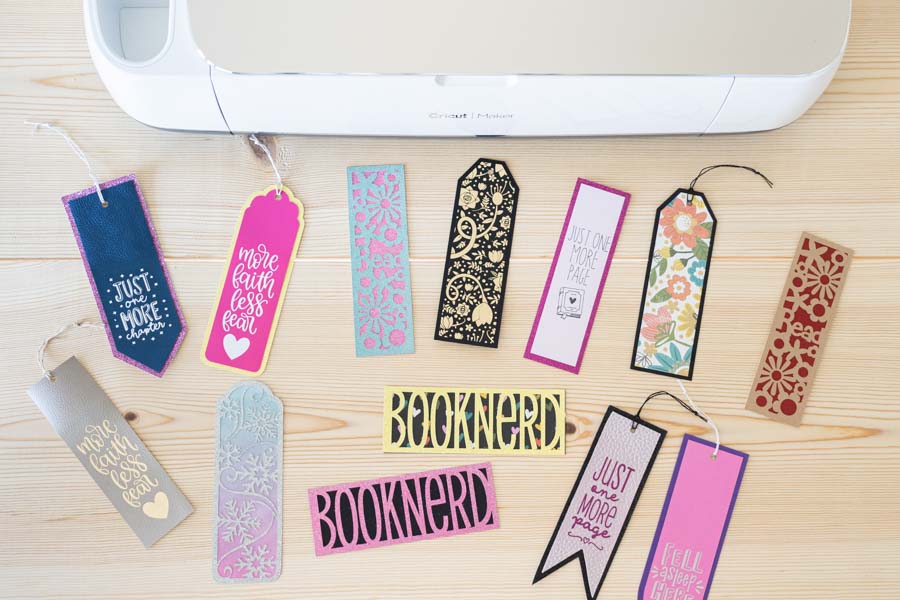
I like the simplicity of this bookmark!
Making Bookmarks with Beautiful cut-outs
It’s time to add a little extra spice to this tutorial!
One of my favorite things Cricut can do that a regular pair of scissors can’t are intricate cuts. You can cut so many little details with your machine that neither your hand nor a true control knife can.
Take advantage of that!
Step 1 – Make a Frame
Let’s start with these three rectangles (like I showed before).
To make a frame, select the small (pink) and the big (blue) rectangles simultaneously and click on “Slice.” Ensure both rectangles are entirely centered.

Keep the blue rectangle and the frame, and delete the other slice results.

Step 2 – Adding, Overlapping, and Welding Images
Making cutouts with the Cricut is tricky when you’re just starting out because you must consider what pieces will fall out once you cut your paper.
No worries, though!
Let me show you how to make perfect cut-outs every single time!
The first step was adding the frame; now it’s time to add some images.
You want your images to be simple; don’t use complex images. If you want text in your bookmarks, find a picture where letters don’t have spaces in between.
If you want to follow along, these are the codes of the images I used:
- M2FBAE
- M38A46
- M39CA1
- M3D82D
- M8B1B82E
- M3A86E
Not all of these images are free. However, you can still practice this technique for free if you don’t cut the bookmark.
Many of these flowers came with other backgrounds and extra elements. I deleted the ones I didn’t need and resized them before I took these screenshots.
The key to making cut-outs is to fill the frame with all the images so they overlap. Don’t leave a flower or text alone, or it will fall out of the bookmark.
It can be a little complicated to align and overlap all the images.
It takes time and practice, so don’t feel defeated. Try rotating your images to find better angles. Copy and paste different flowers as needed.

Once you complete arranging and overlapping all images, select the frame and all the elements inside it and click “Weld,” located inside the “Combine” menu at the bottom of the layers panel.

There you have it!
A beautiful bookmark with neat cut-outs!
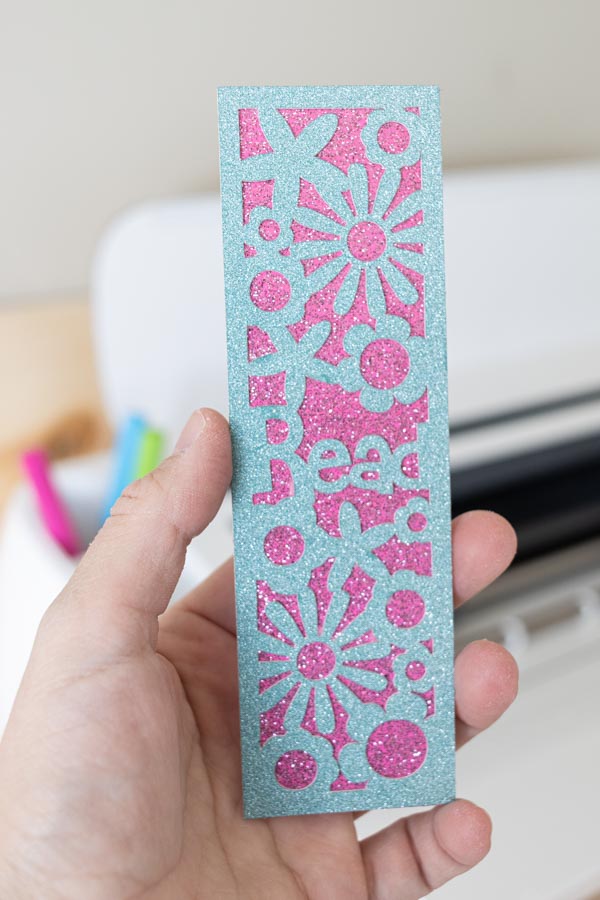
As you can see, I changed the background color from blue to pink. I also changed the bookmark color to teal.
Tip: Sometimes, overlapping isn’t perfect, and there will be little cuts that aren’t flattering. Use “Contour” to hide those imperfections. (Read my contour tutorial if you still have doubts)

When you’re ready to cut the bookmarks, click “Make” and follow the prompts in the earlier screenshots.
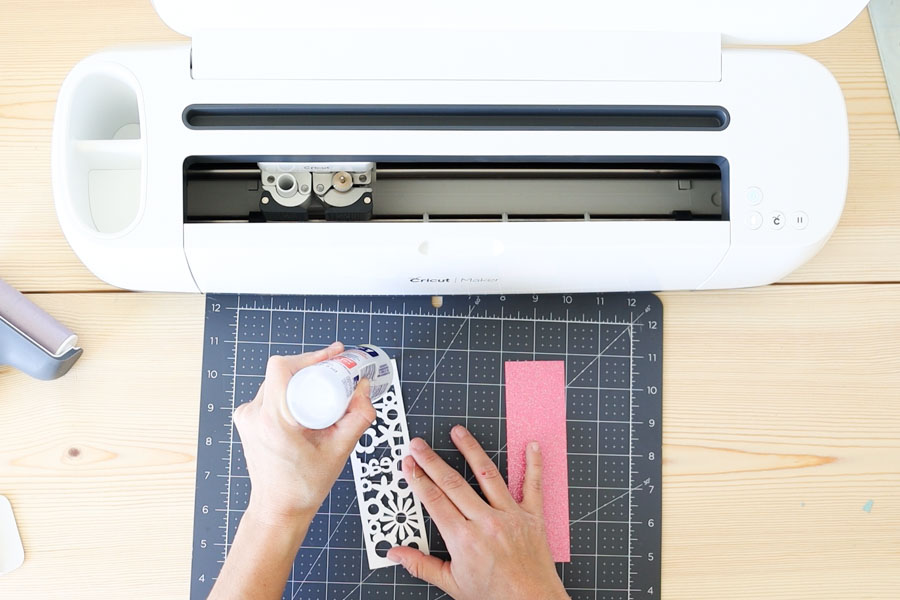
I decided to use glitter cardstock again, as you can see!
If you use glitter cardstock for the top of your bookmark, I recommend using a new or lightly used green mat and a brayer to stick the material on it evenly.
With such small intricate cuts and a thick materials like glitter cardstock, the paper can move, and you’ll have to repeat the cut.
After cutting, glue your bookmark.
What do you think?
I think it looks fantastic!
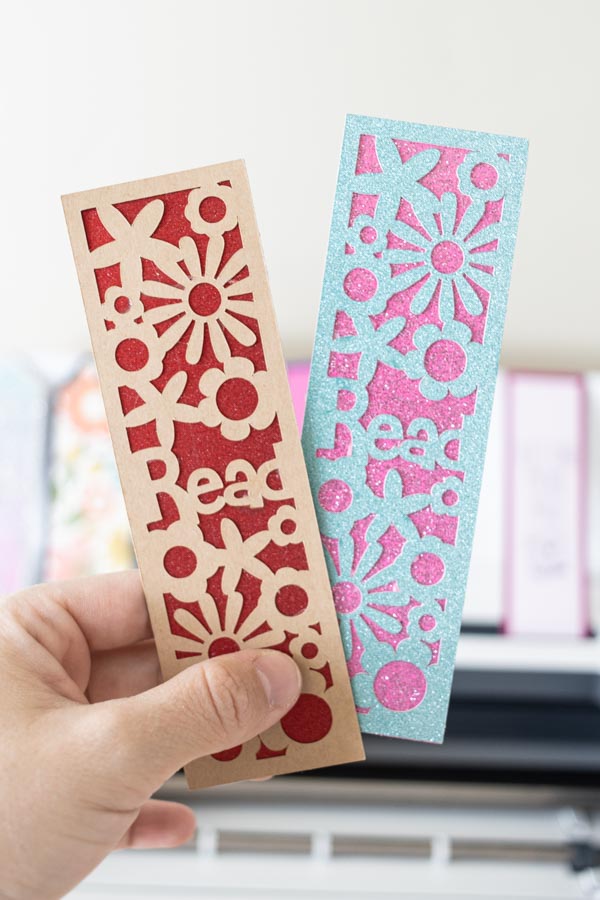
I also cut this bookmark in red and brown cardstock to show you how different it can look using other materials.
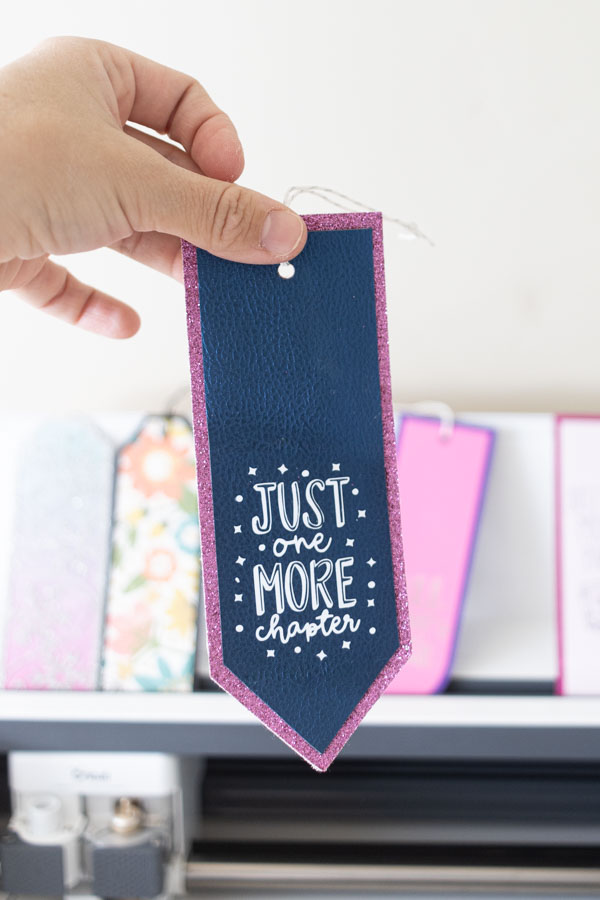
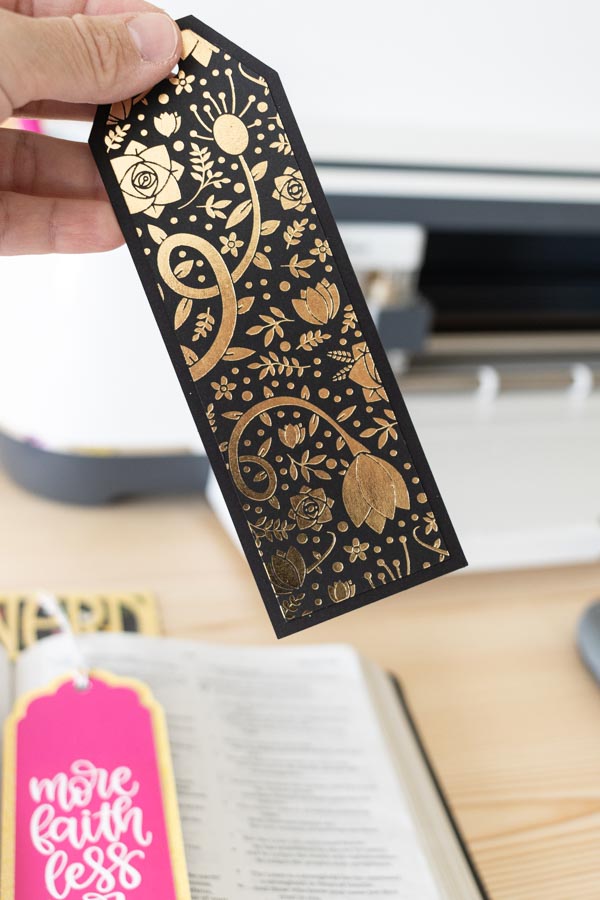
Making a Bookmark with Faux Leather and Iron-On.
If you want a more durable and elegant bookmark, use faux leather and personalize it with iron-on/HTV.
Important: This is not an in-depth iron-on tutorial. If you’ve never worked with iron-on, check out my Iron-On guide.
There are so many colors to choose from, and if you use Cricut’s faux leather, it’s easy to cut with any of the Cricut machines.
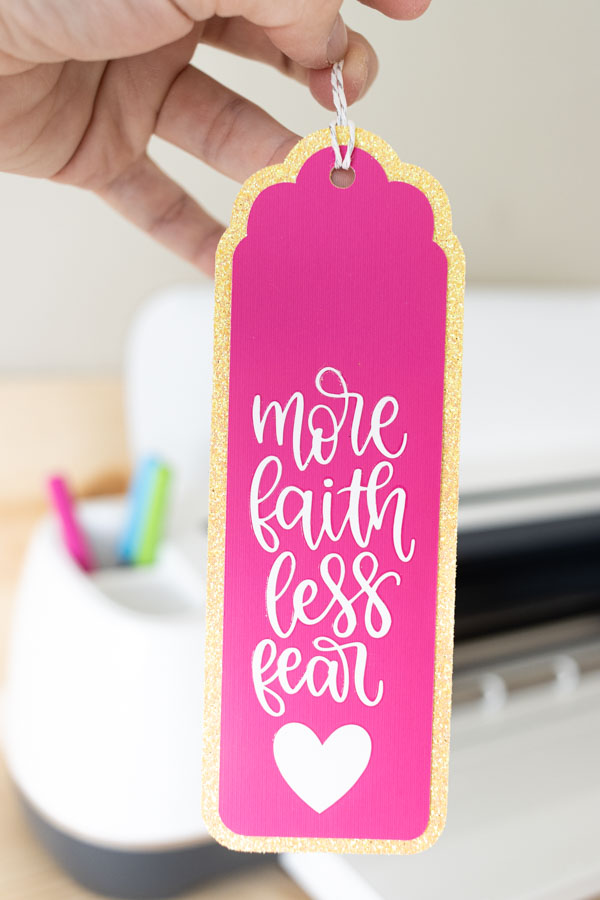
Step 1 – Add Design Elements
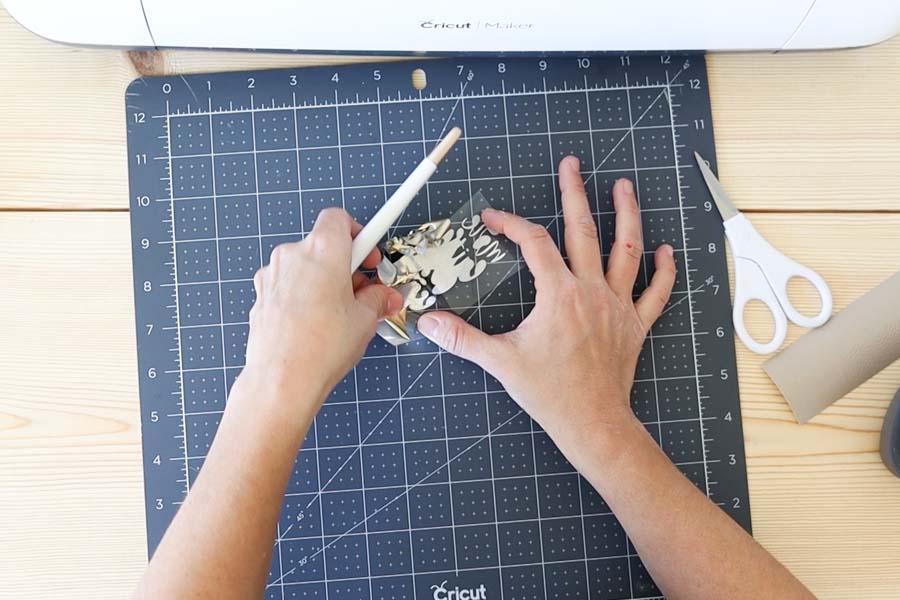
I used only a rectangle for this bookmark and made a small hole to insert some twine through it. I also personalized it with an image from Cricut’s library (MB359018) and used gold foil iron-on.

When you’re ready to cut your project, click on “Make it” and choose the materials from Design Space, as I showed you in the cutting process earlier in this tutorial.
If you want to use fine or chunky glitter canvas, I recommend checking my YouTube video on how to tune your settings.
Step 2 – Make it
Something to remember if you plan on using HTV (heat transfer vinyl) is to mirror your image.

If you don’t mirror, your design will look backwards once you transfer it.
Step 3 – Cut, Weed, & Transfer
When working with HTV, place your pretty or shiny material down on the mat. Then, remove the negative cuts with a weeder.
Once you weed, grab your bookmark and transfer vinyl to it.
For this project, I used the EasyPress Mini; you can also use a regular iron or mini iron.
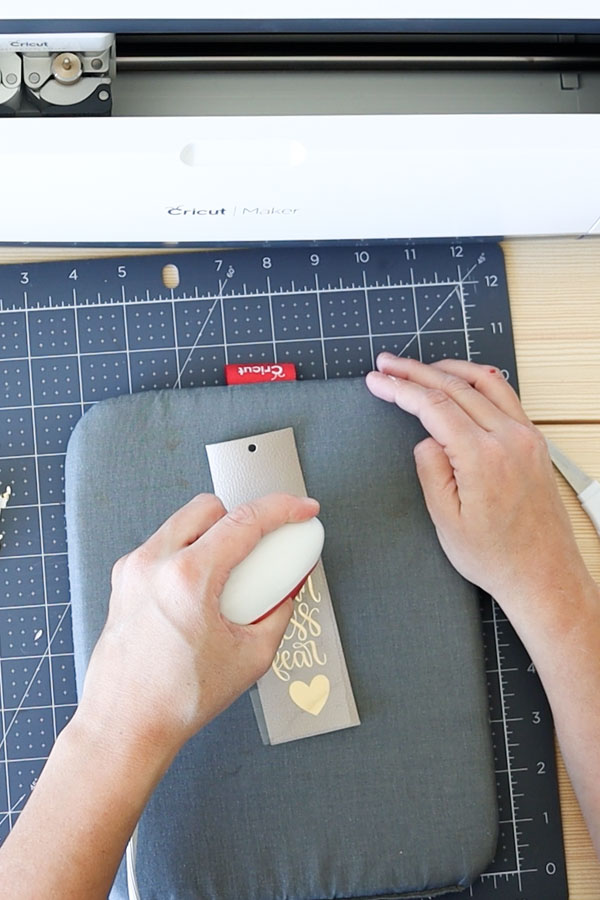
According to Cricut’s heat guide, when you use the EP Mini, with foil iron-on and faux leather, these are the steps you need to take:
- Preheat Cricut EasyPress Mini, low setting
- Place faux leather on the pressing mat (you can also use a towel).
- Preheat faux leather for 5 s
- Place iron-on material face down, liner side up
- Secure with tape, avoiding image area
- Press while moving with light pressure at a low setting for 30 s
- Slowly remove the liner when the design has cooled off.
For instructions on how to use a regular household iron, please check out this section on my Iron-On guide.
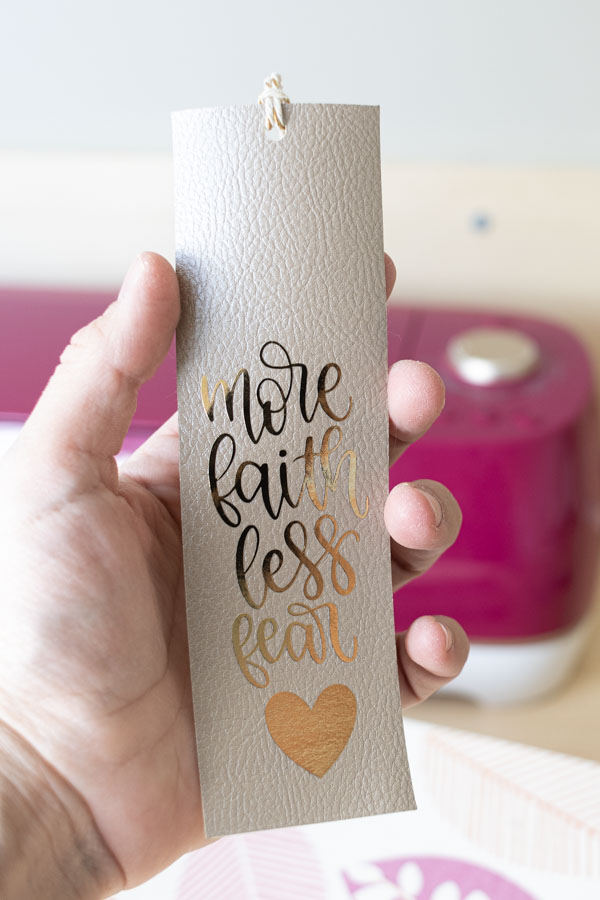
Doesn’t it look pretty?
Free SVG Bookmark Templates and Quotes
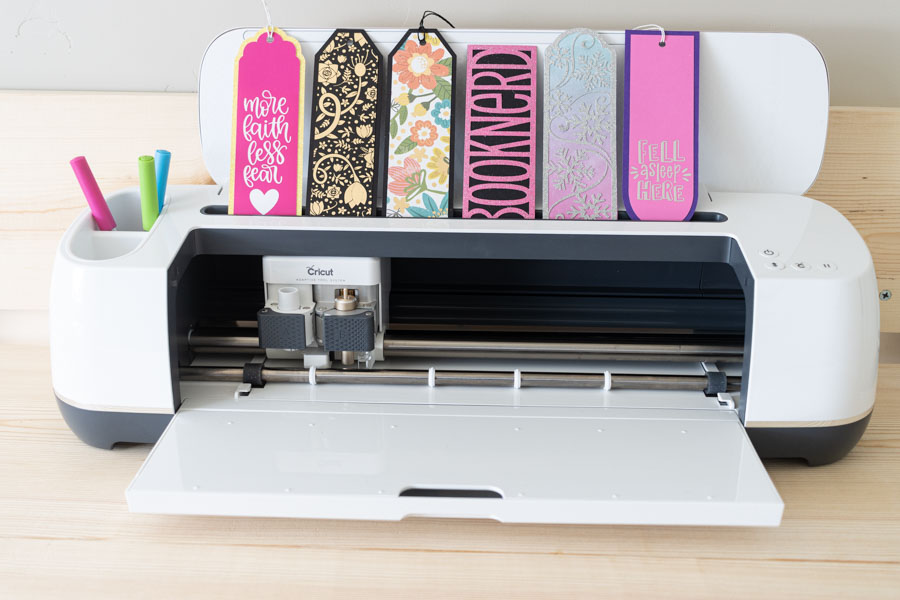
As I mentioned at the beginning of this tutorial, here are some cool templates you can use to make bookmarks for yourself, friends, or family (for personal use only).
Each bookmark style comes in four different types, allowing you to make all sorts of bookmarks.
I also included some cute quotes and doodles for more fun ideas.
Oh!
Just so you know, I also have a library full of free SVG files and Printables for all my subscribers, a.k.a. Daydreamers. You can see a preview right here or get access by filling out this form.


To download the file(s), you need to be on a desktop or laptop and click on the button to trigger a download file on your PC. However, I’ve noticed that I can also download them from my iPhone.
Depending on your browser settings, your PC sometimes asks where to save the file, although most files will be in your download folder.
If the image opens in a new window (this may happen because of your browser settings), right-click on it, select the option “Save Image As,” and choose where you want to save the file.
SVG files look like web page files when you download them.
Making Bookmarks with Free SVG Templates
Here are some ideas for bookmarks you can make with the files I provided.
First, download the files you want to use, then open Design Space and go to “Upload.” Click on “Upload Image” and follow the prompts.
When you finish uploading, the file will be available under “Recent Uploads.”

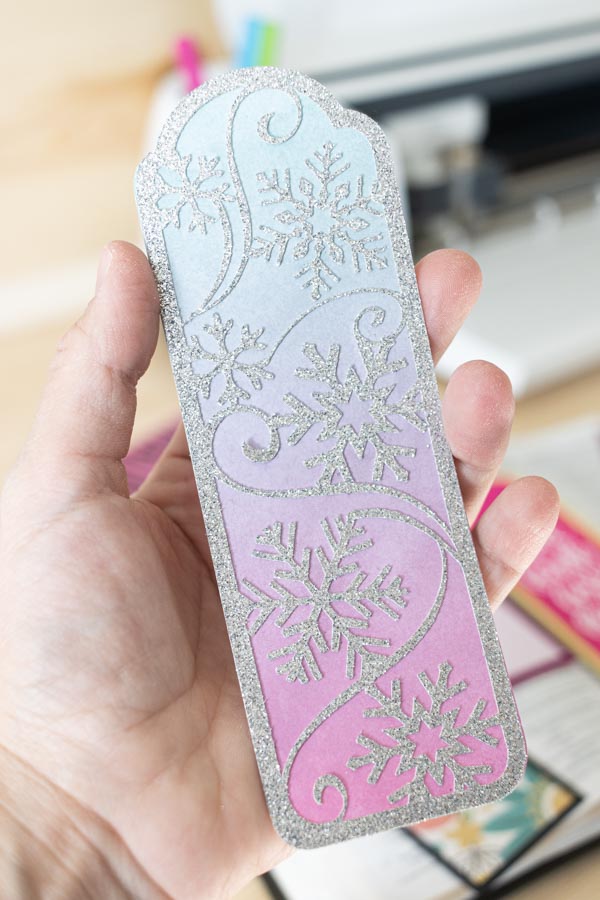
I use the doodles and blue and purple templates for the bookmark I am about to show you.
Organize Files on Canvas Area
Ungroup and delete the things you don’t need.
For instance, I only kept the snowflakes, some swirls, and the frame and background bookmark.

Create!
Look how I overlapped the snowflakes and the swirls to make a winter bookmark.

Once you finish, click “Combine” and select “Weld.”

It’s so unique and different.
Make sure to tag me on Instagram so I can see your projects!
Another idea!
I used the booknerd file and the rectangle templates to make a different style of cut-out bookmarks.

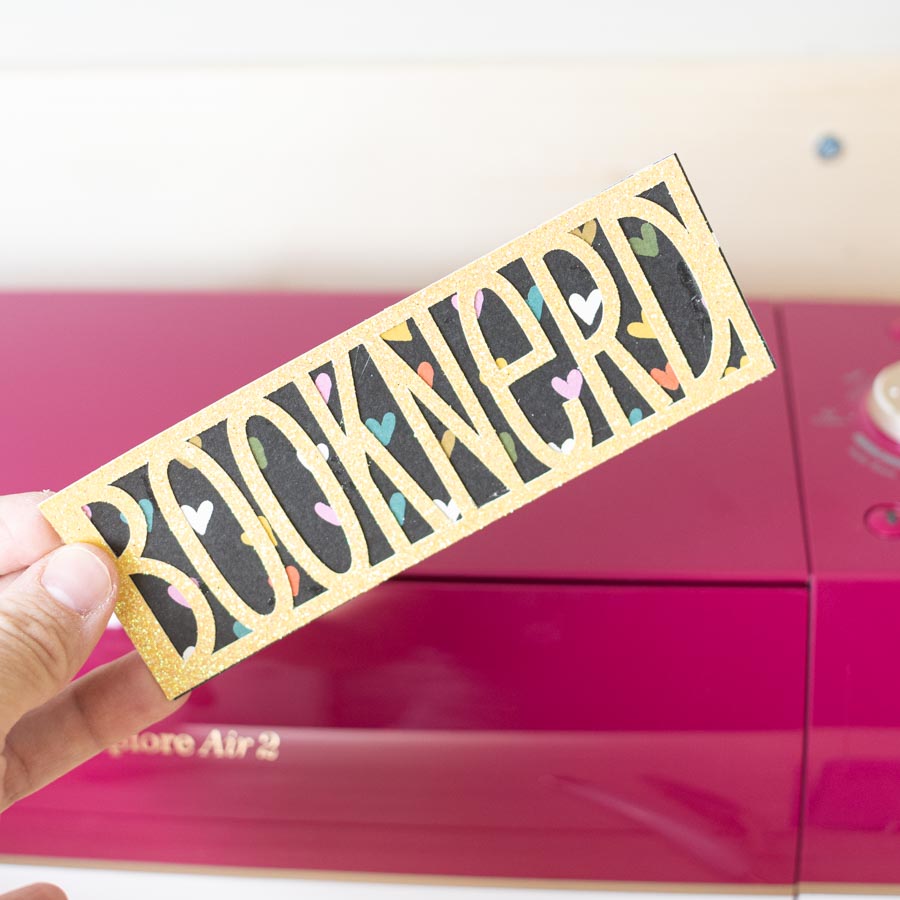
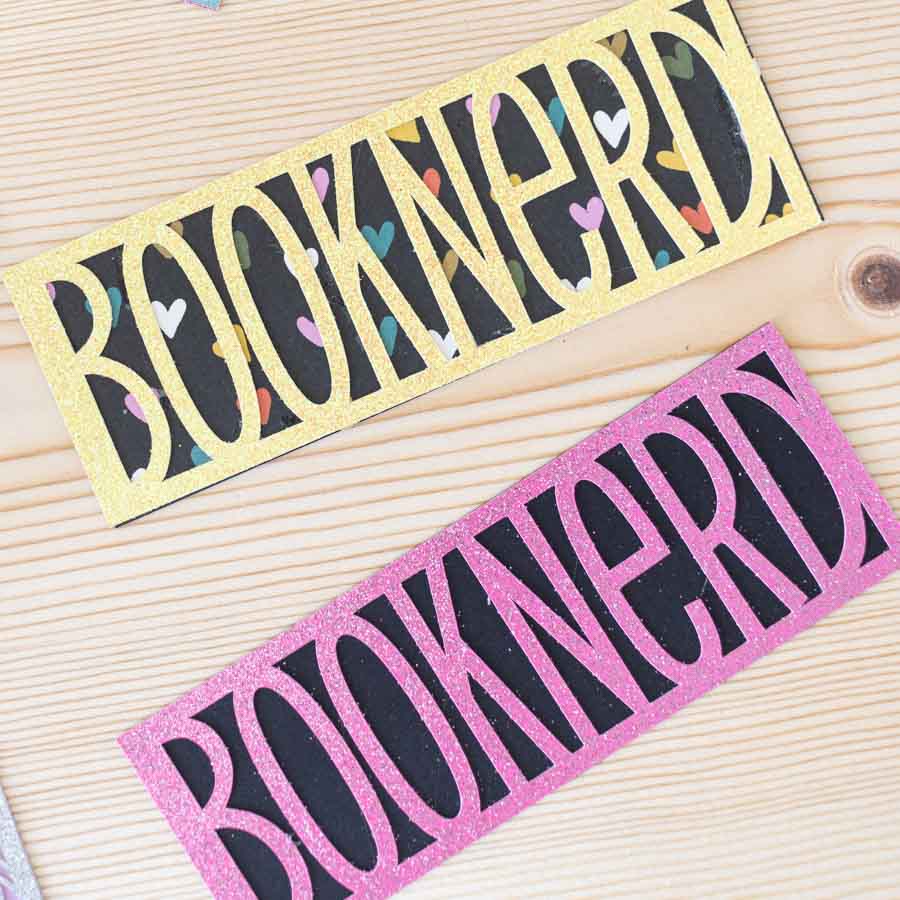

I combined one of Cricut’s images and one of my templates for the next bookmark.
I used iron-on on paper!
Doesn’t it look adorable?
More, more, and more ideas!
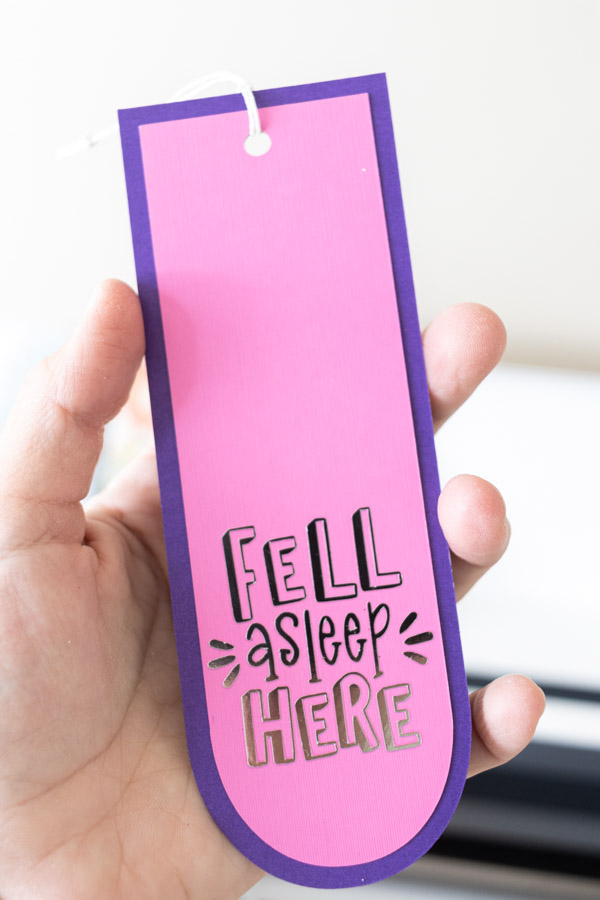
I think the Fell Asleep Here bookmark is one of my favorite ones.
Again, I used foil iron-on and paper. The pictures don’t do it justice.
You can even skip pens, iron-on, and cut-out effects if you have beautiful paper like the following floral bookmark.
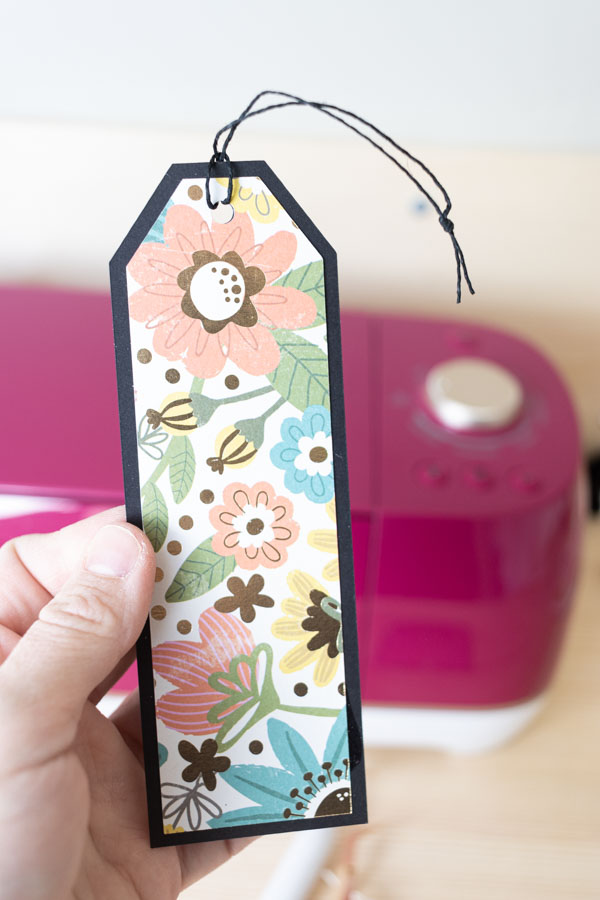
Or this other one!
Do you see what high-quality paper can achieve?
Other Bookmarks you may like!
I am not just the Cricut lady! lol
I also have pretty cute free printable bookmarks for hassle-free crafting! Make sure you check some of them out!
- Coloring Auntie Bookmarks Free Printable
- Free Printable Coloring Easter Bookmarks (Also in color)
- Coloring Valentine’s Day Bookmarks Free Printable
- Coloring Mother’s Day Bookmarks Free Printable
- Coloring Christmas Bookmarks Free Printable
Share it!
Do you know it takes me over 25 hours to complete a single Cricut article? I know it’s wild, but I want to make sure you understand everything!
I would appreciate your support on Instagram , Pinterest , and YouTube as I try to grow my audience and continue producing great content!


When using faux leather, you say to secure with tape, avoiding the image area. What kind of tape do you suggest?
Masking tape should be fine!
I’m looking to make one with the faux leather and I’m having trouble understanding the punch hole. You explained it using 2 different color materials. Is there an easier way to explain it just using 1 material?
I don’t have another example. Hopefully you were able to figure it out.
Thank you for these great instructions! One question – do you ever use more than one color pen when making a bookmark? Is that even possible? Does it need to be done in stages? I’m new to all of it but want to make a series of bookmarks for my Bible study group.
Yes you can! Here’s my cricut pen tutorial.
Thanks.
Do you ever coat your cardstock bookmarks with something to protect them?
Not really. They are inside a book and that should protect them enough.
Love the bookmarks.
What do you consider high quality glue? I am still new to cricut and just have school glue sticks
I like 3-in-1 or glue pens made by recollections.
@Stephanie,
I have been searching for free bookmarks to make for people in facilities. These are perfect, I so appreciate them and the tutorial. Thank you.
Love love love thank you!
Awesome! Thanks for the great tutorial!
Wow! This was a great tutorial. I am going to try to make some for my book club
Awesome Job you thought of everything. Keep them coming.
Thank you! They are beautiful. I hope mine will look ????
For sure you have one of the best blogs for someone new ( and not so new ) learners to cricut. Instructions are always straightforward and easy to follow.i just had a question about faux leather with iron on vinyl. I did a bookmark with faux leather and iron on…worked great but I noticed the texture that was part of the leather …got ironed out! I tried to iron lightly with no pressure but it still happened. Anyway to avoid this?
If you have the EP mini try using the tip only on the iron-on and not on the edges. If you are using a regular iron you may want to leave enough carrier sheet (unless is glitter) to cover the entire bookmark so everything looks uniform.
I am wondering if you allow your designs for “small business ” commercial use? Like under 25 each?
Thank you. ????
You can contact me at daydreamintorealityblog@gmail.com to see what file you’d like to use.
How did you add the inner rectangle in step 2?
You can now use the offset tool. The instructions are in the tutorial.
What glue did you use?
Beacon 3-in-1
@Catalina, Thank you!!
Great job. Easy to follow instructions, I made the Booknerd one, just curious as to what you suggest for glue. I know you say kids glue isn’t a good option. Figured I would check before I attempt to put it together.
Beacon 3-in-1! I love it 🙂
I love this guide to making bookmarks! Just wondering what kind of glue you would recommend that won’t bubble. Thanks in advance!!
I love Beacons 3-in-1
These look fabulous!
I have a question I followed your tutorial but there are designs that I got off the Internet from like Etsy and I want to include those but I don’t know how you insert those instead of like using vinyl I’d like to the pan to draw those. How would I do that
Change the operation from cut to pen.
Hi I would love to make something like the “Making Bookmarks with Beautiful cut-outs”
But where do you get the coded images from? I’m lost. Thanks
Lys
Those are Cricut images. If you go to the images icon and copy paste the code you can follow along.
Is there a way to receive these instructions in printable form? I can learn it better reading it on paper than trying to follow along with a tutorial. Thank you!
I don’t have it in printable format.
This was very clear and detailed instructions, I followed along and making my first bookmark was a success!. I have the confidence now to go on to make others and customize to my liking. Thank you very much!!!
You’re welcome!
This article was amazing! Thank you. Very clear, detailed instructions giving me the confidence necessary to try these bookmarks!
These are beautiful! Where did you get the black and gold paper?
Michael’s and Hobby Lobby.
Thanks so much for the great article!
can these svg files be used to make wood veneer bookmarks or are they too detailed. I can’t find svg files to make bookmarks with thin veneer and want to do some for gifts. would like with outdoor themes, trees, animals, etc. and also musical notes….thank you
I haven’t worked with Wood Veneer before, so I don’t have a concrete answer. I hope this helps! 🙂
Is there any way to get these instructions in a printable format?
they are so detailed and would to have them to check off my steps as I go
thank you
Great article, thanks!
Love these
You’re welcome 🙂
Thanks so much for your time in showing us how to make bookmarks in so inspired
Happy to help!
Wow. I will definitely become a daydreamer!! I’ll also follow you on social (I got you!! 🙂 )This is the second post I’m reading today and I am so glad I’ve found you! Thank you!
I am so happy to hear! I am glad you’re becoming a Daydreamer!