


Hello Daydreamers!
T-shirts are one of the most popular items people create when they own a Cricut machine. They are easy to make and are the perfect personalized gift for any occasion, whether a birthday, Christmas, or even matching t-shirts for the family!
I have been creating t-shirts with Cricut for over five years, and in this tutorial, I will share all the tips and tricks I’ve learned during that time. By the end of this tutorial, you will feel confident and ready to make your first t-shirt.
This project is compatible with Cricut Maker, Explore, and Joy. Of course, there are some minor differences, but I will cover those specifications, so no matter what machine you own, this tutorial will guide you through the entire process.
If you stumble upon this tutorial and don’t know what a Cricut Machine is, read this fantastic guide I wrote!
Since I don’t want you to get lost, here are the topics I’ll cover in this tutorial:
- Upload design for t-shirt in Cricut Design Space. I included a free cutting file (SVG) for you to follow along, but you can also use a different design.
- Cricut Design Steps to prepare a design for a T-shirt, plus steps to send it to your machine.
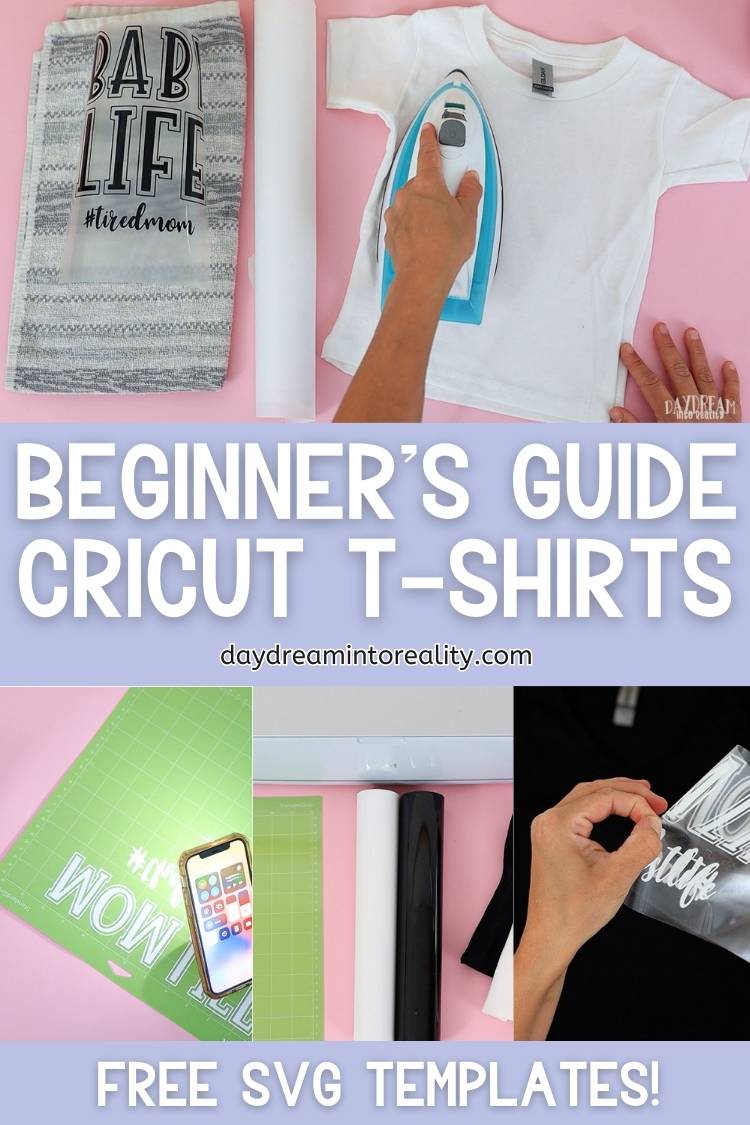
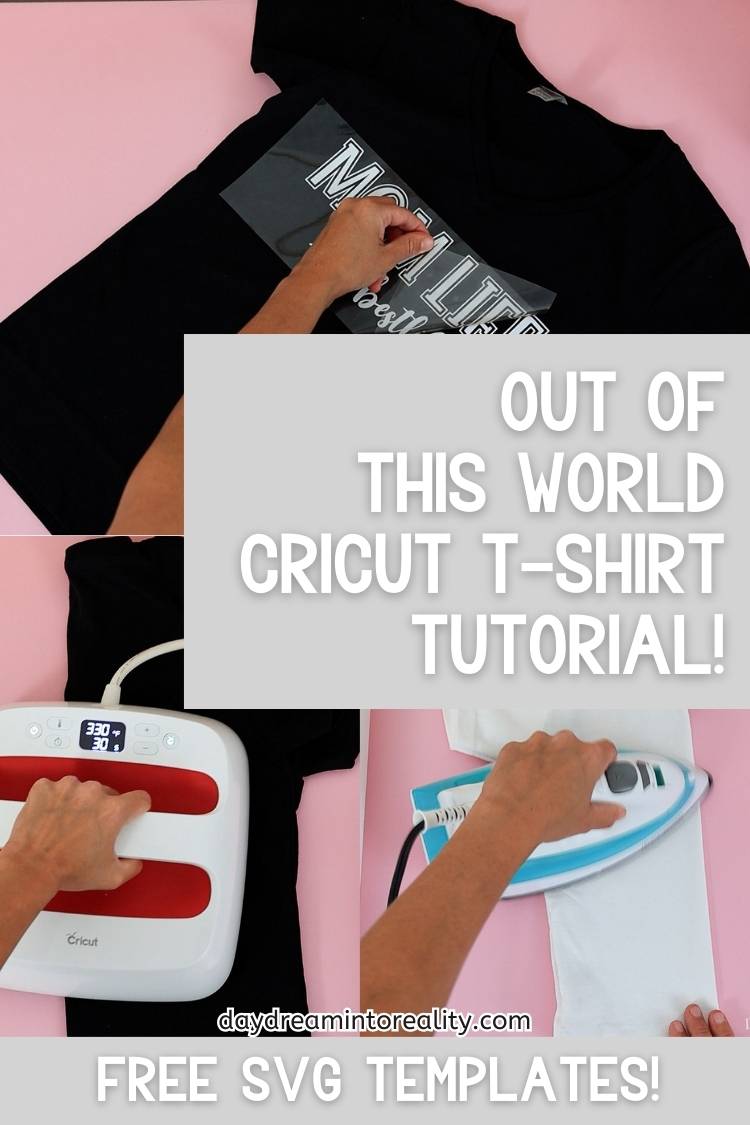
- The weeding and transfer process using an easypress and a regular household iron.
Tip: If you want to learn everything you need to know about iron-on (HTV) and master its use on different surfaces, make sure to check out this amazing tutorial I put together.
Tools & Materials
The materials for this project are very simple. Here is a list of everything I used:
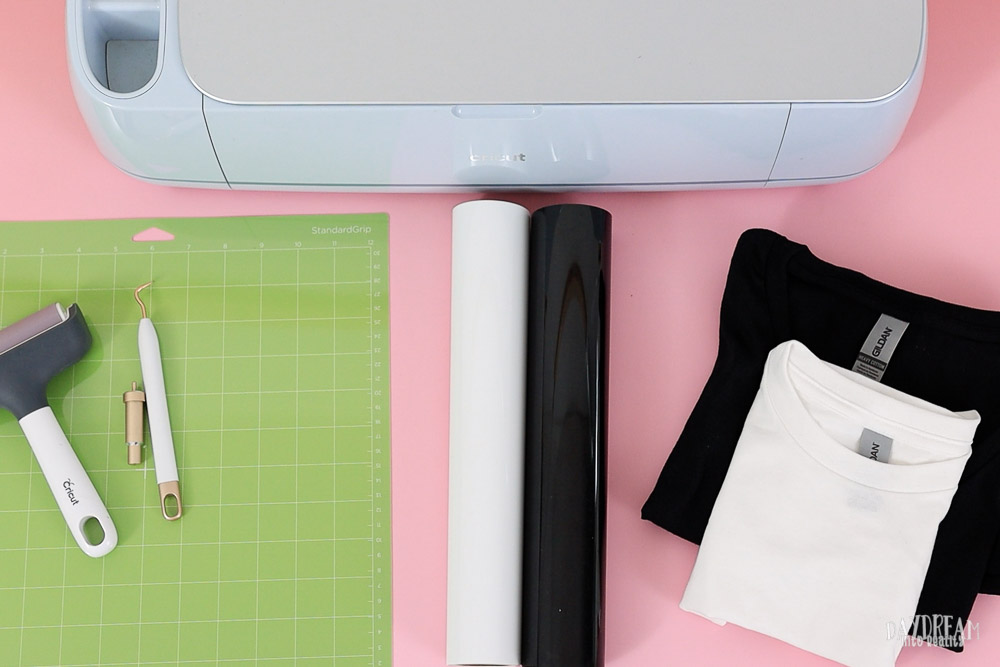
Tools
- Cricut Machine & Fine Point Blade¹
- Weeder
- Brayer – Scraper²
- Green or very new blue mat.
- EasyPress or Household Iron
- Pressing mat or small towel³
Materials
- Parchment Paper⁴
- Prewashed Blank T-Shirts⁵
- Iron-On⁶
- You can use any Cricut machine for this project; the “Fine Point Blade” is the blade the machine comes with (silver-gold housing). Learn more about Cricut Blades.
- I love the brayer for smoothing things on the Cricut mat, but you can also use a scraper or your hands.
- Whether you’re using an iron or EasyPress, you must use a towel if you don’t have a pressing mat.
- If you’re using a household iron, you’ll need parchment paper.
- It’s essential to prewash your T-shirts. They usually have chemicals to preserve them, and they shrink when you wash them, which can affect your project’s durability.
I also love cotton, so I usually wear Gildan T-shirts. They are very affordable and popular for crafting. Something to keep in mind, though, is that they have heavy cotton or soft cotton styles. For extra comfy t-shirts, get the Softstyle. - You can use any brand of Heat Transfer Vinyl (Iron-On). I like Cricut’s brand.
Download Follow Along File
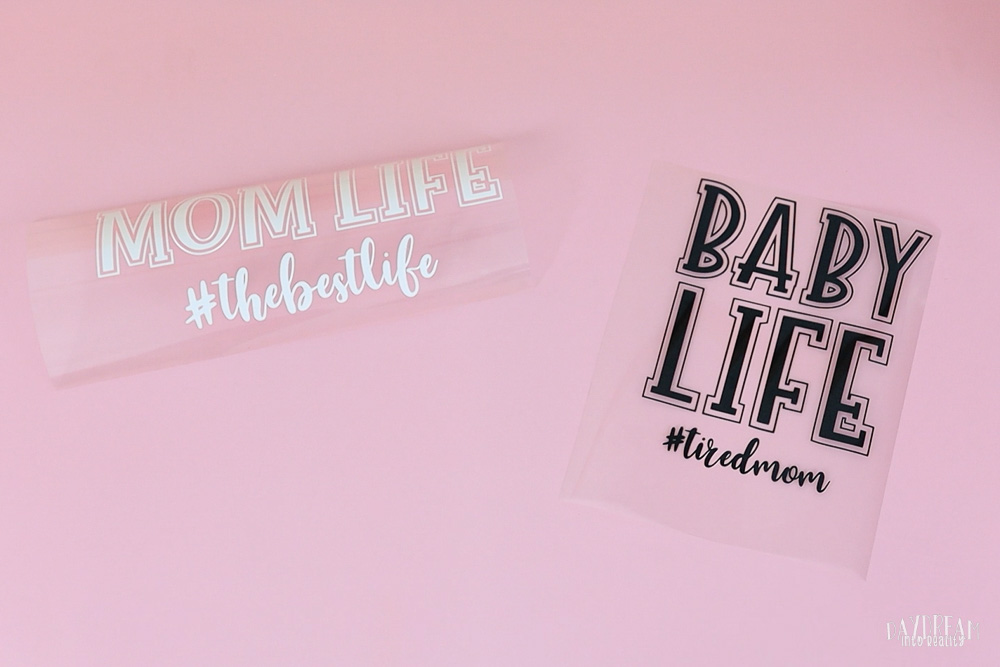
There are two SVG files that we will be using:
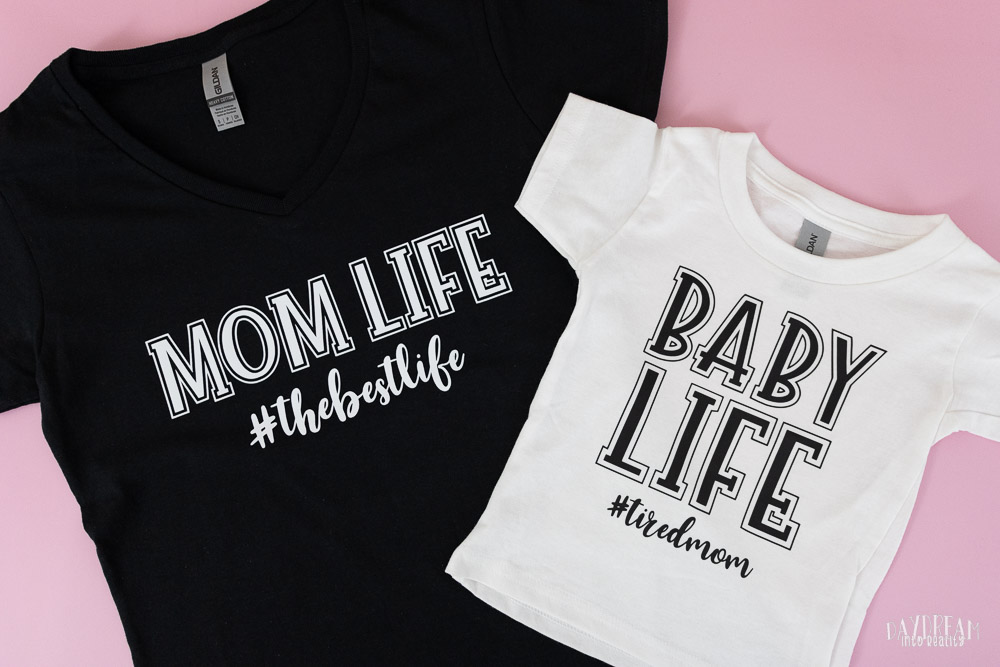
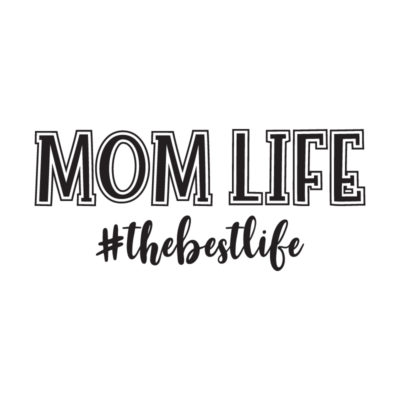
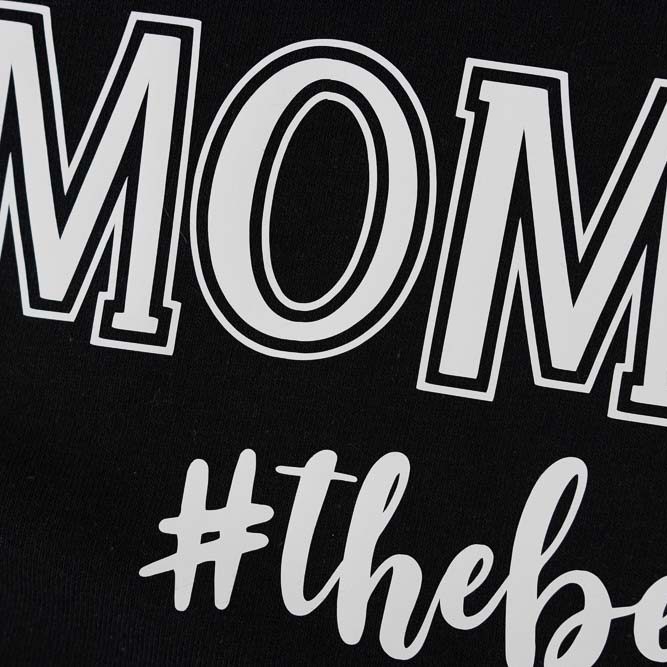
- MOM LIFE #thebestlife
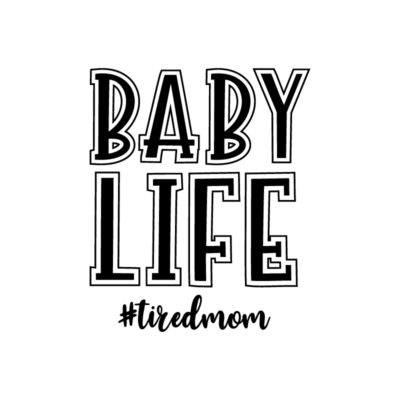
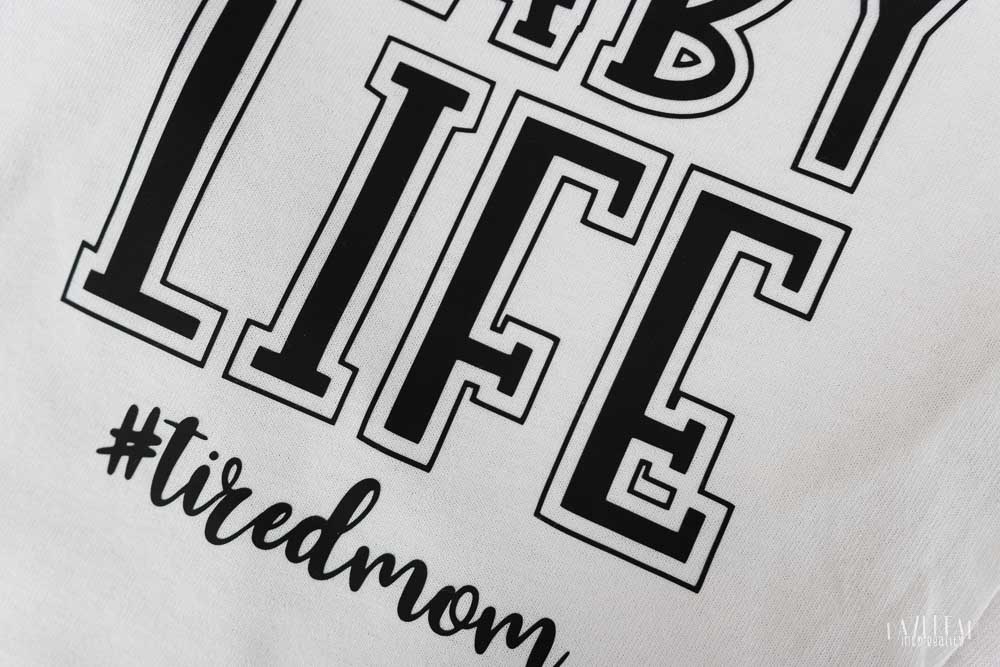
- BABY LIFE #tiredmom
Here’s the thing. Since both files are very similar, I will only explain the Cricut Design Space cutting and weeding steps with the first file, “MOM LIFE #thebestlife.”
However, for the transfer process, I will use both designs. For the “MOM LIFE” file, I will use the EasyPress. For the “BABY LIFE” file, I will use my household iron.

To download the file(s), you need to be on a desktop or laptop and click on the button to trigger a download file on your PC. However, I’ve noticed that I can also download them from my iPhone.
Depending on your browser settings, your PC sometimes asks where to save the file, although most files will be in your download folder.
If the image opens in a new window (this may happen because of your browser settings), right-click on it, select the option “Save Image As,” and choose where you want to save the file.
SVG files look like web page files when you download them.
Oh!
Just so you know, I also have a library full of free SVG files and Printables for all my subscribers, a.k.a. Daydreamers. You can see a preview right here or get access by filling out this form.
Cricut Design Space Steps
Once you have downloaded the SVG files I provided for this tutorial, open Cricut Design Space.
If you are a beginner still figuring out Cricut’s software, I recommend this comprehensive and easy Design Space tutorial.
Step 1: Upload & Prepare File
On a blank canvas, go to the “Upload” icon on the left panel, click “Upload Image,” and follow the prompts to complete the process.
When you finish uploading, the file will be available under “Recent Uploads.”
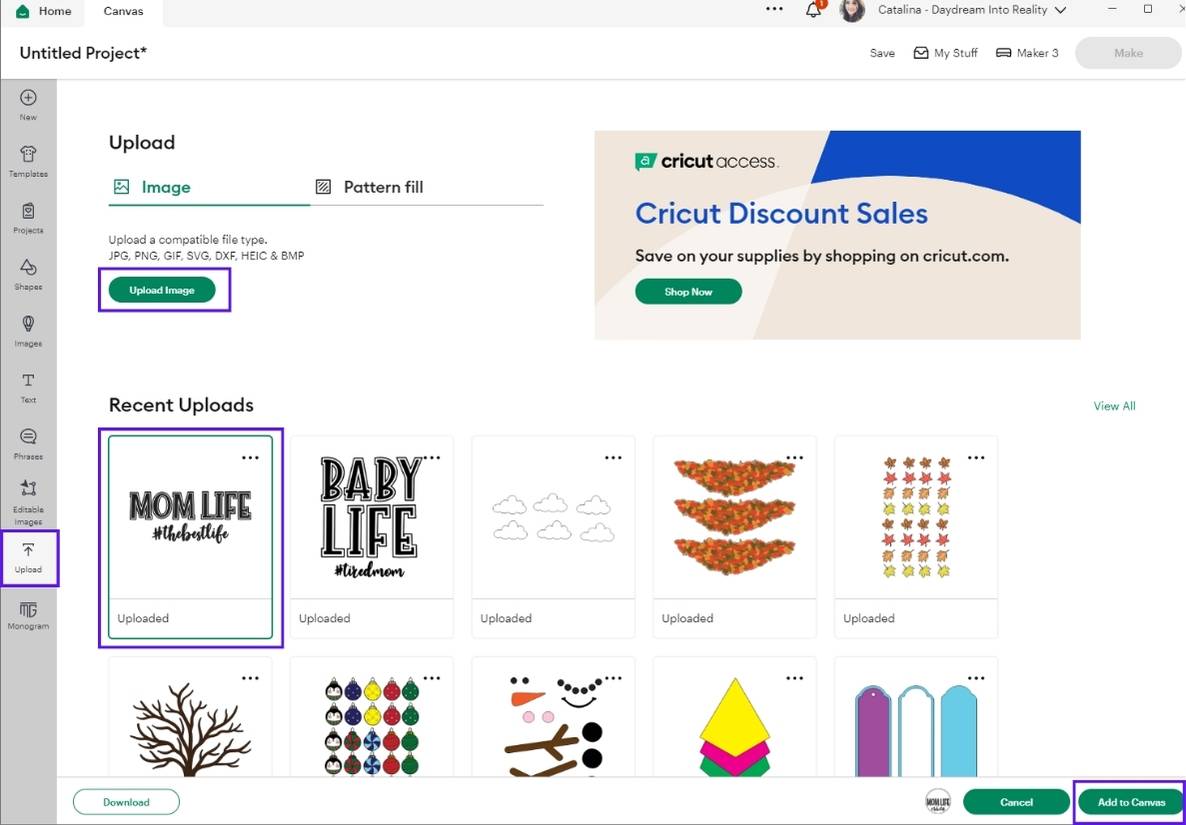
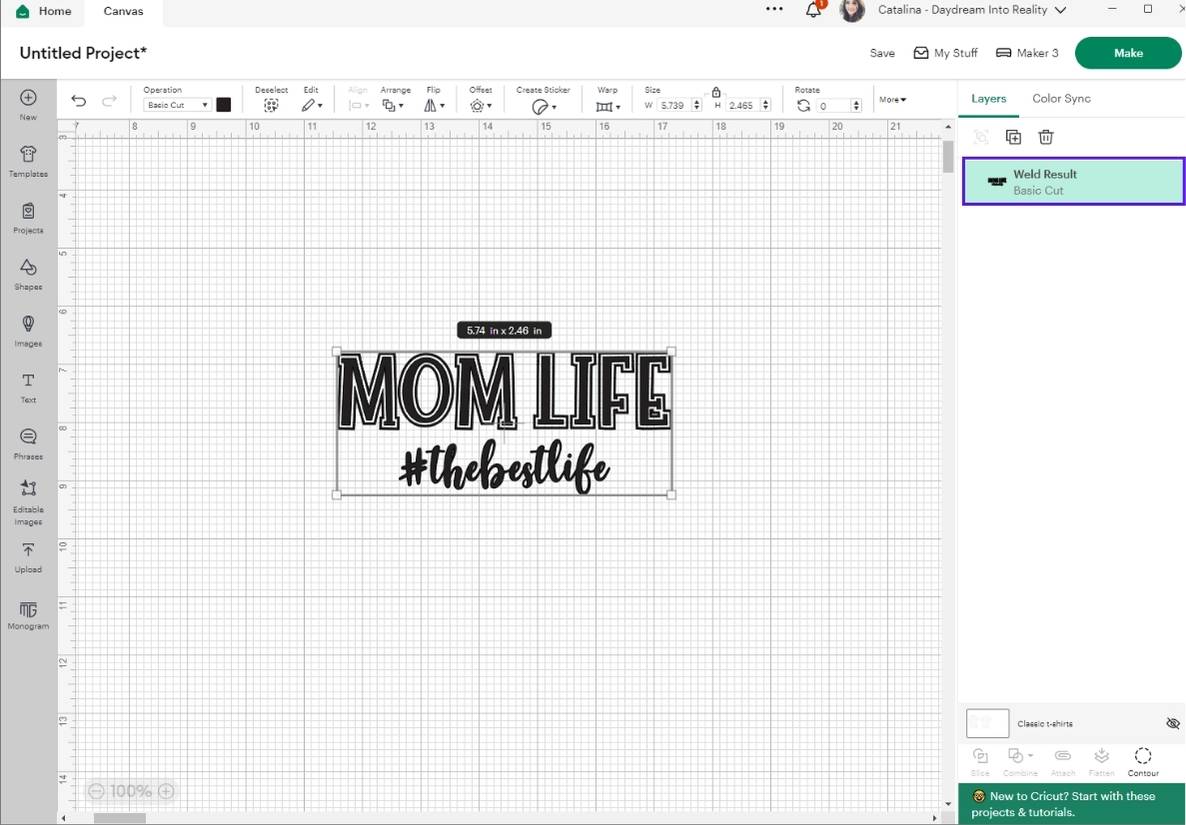
Select the uploaded “MOM LIFE” SVG and click “insert images.”Add to Canvas.”
As you can see below, on the layers panel, the design is in multiple layers. If you were to press on “Make” all the pieces would be scattered on the mat preview.
Before we can continue, we need to make this file into a single layer. Select it on the canvas and click “Weld,” located inside the “Combine” menu at the bottom of the layer’s panel.
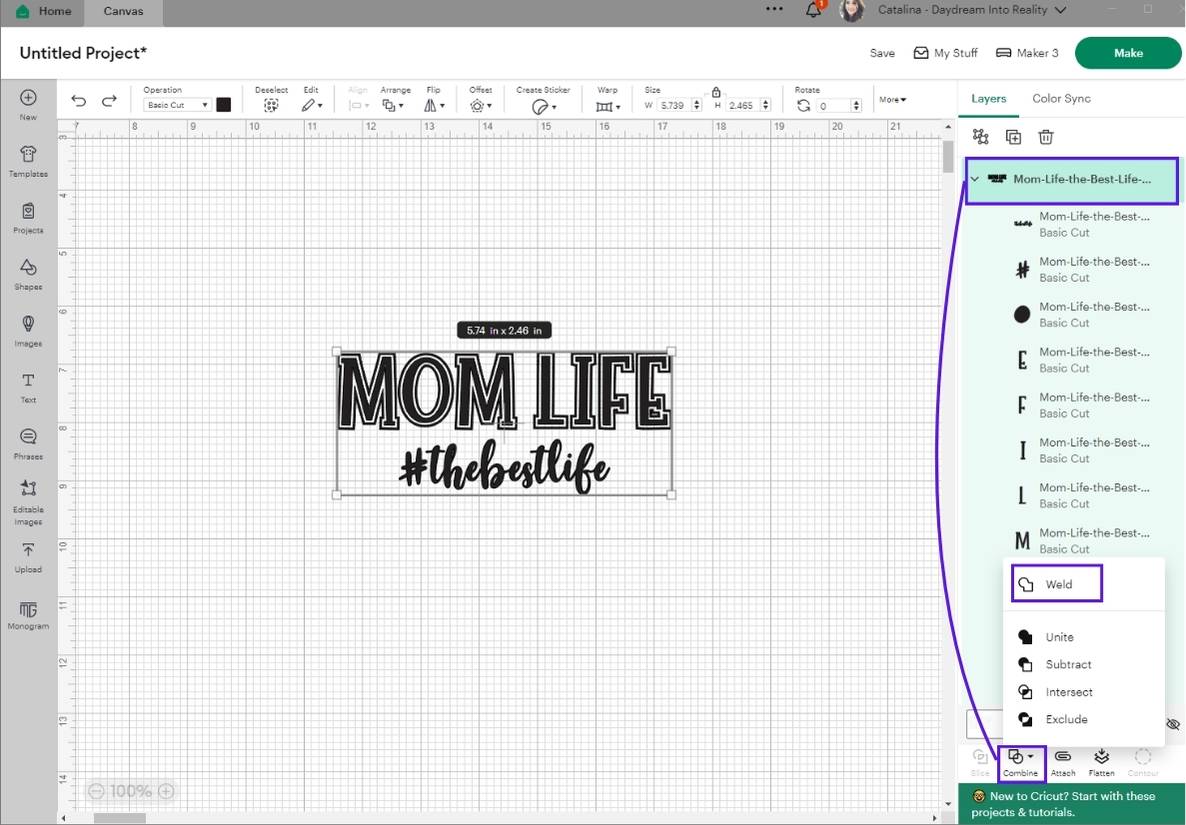
As you can see, the design is in a single layer.
Step 2: Measure your T-Shirt or Use Templates to Find the Best Size
Have you heard of the saying measure twice, cut once? Who knew some carpentry concepts would be helpful while making projects with our Cricut?!
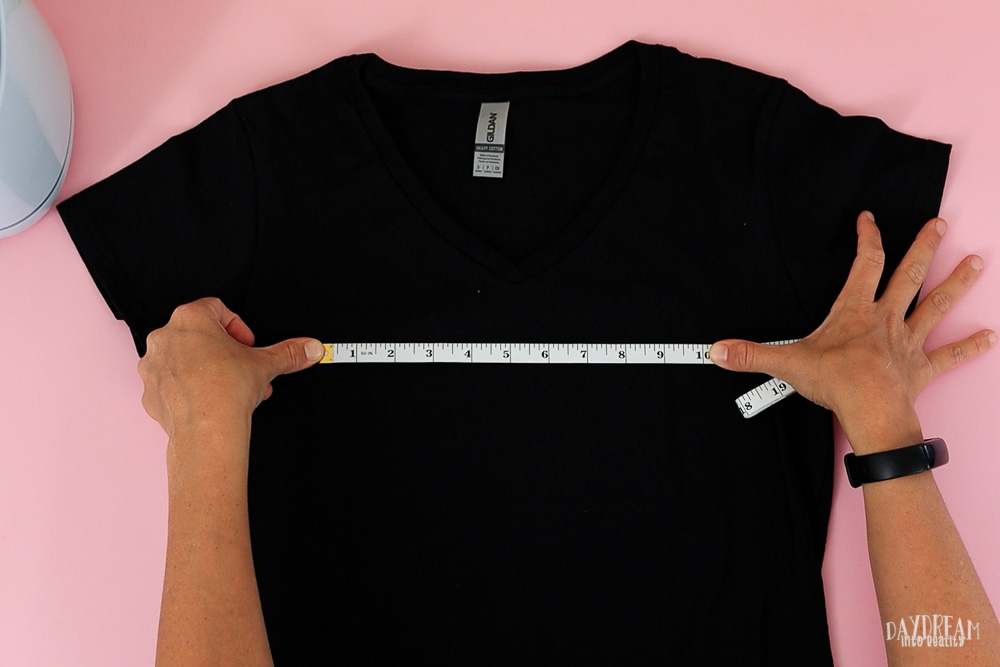
Now, I don’t quite measure twice, but I will give you two ways to measure your t-shirt to resize your design properly.
The most straightforward way is to use a measuring tape. I usually do that because t-shirt sizes vary so much from brand to brand, and that way, I can be 100% sure my design will fit just right.
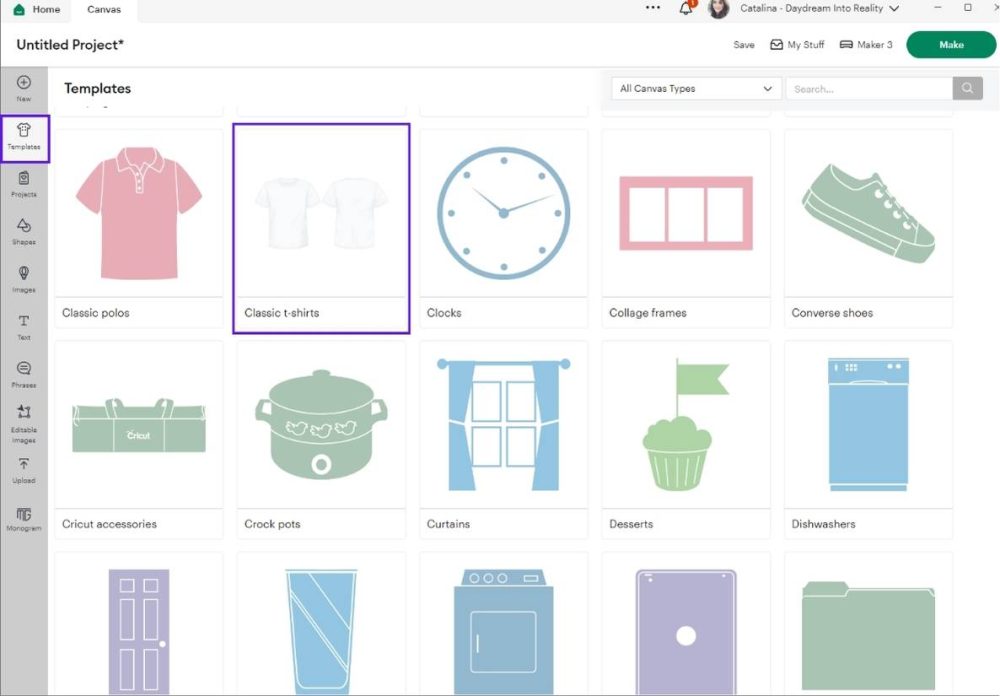
The second way is by using “Templates” in Cricut Design Space.
Click the “Templates” icon on the left panel and search for the type of design you want to personalize; in this case, “Classic t-shirts.”
Read my “Cricut Templates” tutorial.
When you click or tap on a particular template, Design Space will bring you back to the design area, but you will see the template on the canvas this time.
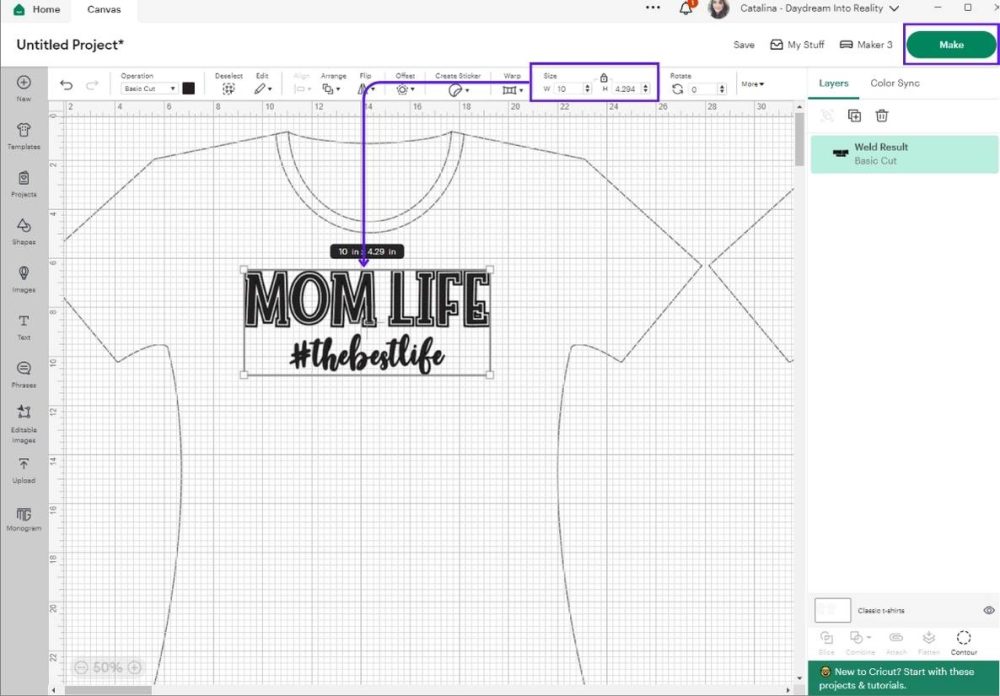
Initially, you’ll see a menu that allows you to change the type, size, and color of your t-shirt. If you select “Custom” on the size drop-down menu, you can also change the proportions of your t-shirt. If the menu disappears, you can access it by clicking the template icon at the bottom of the layers panel.
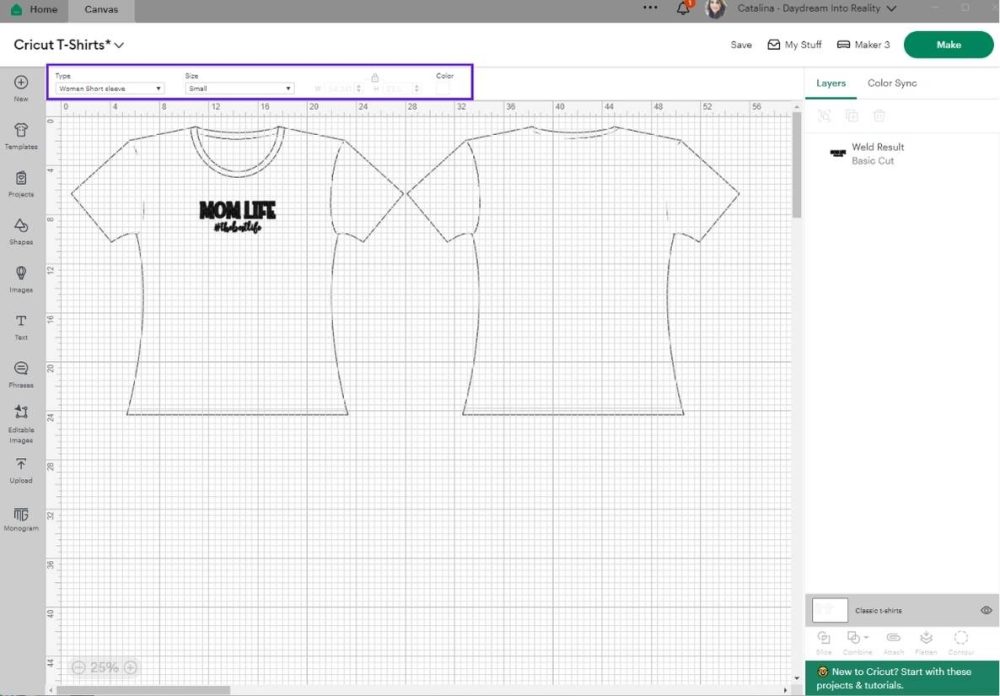
By measuring my t-shirt and using templates, I resized my design to 10 inches wide.
Tip: By keeping the little lock locked on the “Size” menu, Design Space will fill out the height. So make sure the proportions are locked.
Remember that Cricut does have a “limitation size” per machine. Check out the table below to stay within those “safe” ranges and avoid getting errors.
| Mat/Max Size | Maker & Explore | Maker 3 & Explore 3 | Joy | Joy Xtra | |
| 12×12 Mat | 11.5 x 11.5 | 11.5 x 11.5 | N/A | N/A | |
| 12×24 Mat | 11.5 x 23.5 | 11.5 x 23.5 | N/A | N/A | |
| 4.5 x 6.5 Mat | N/A | N/A | 4.25 x 6.25 | N/A | |
| 4.5 x 12 Mat | N/A | N/A | 4.25 x 11.75 | N/A | |
| 8.5 x 12 Mat | N/A | N/A | N/A | 8.75 x 12 | |
| Matless* | N/A | 11.7 x 12ft | 4.5 x 48 | 8.5 x 48 |
Note: I didn’t include a “Venture” size because I don’t own that particular machine; it’s more of an industrial size, and I don’t know everything about it. However, rest assured you can cut even larger design sizes with it.
I personally prefer to use regular HTV rolls because they are cheaper, and I am not making t-shirts left and right every day. I also like weeding on the Cricut mat (you’ll see that later). Also, when you do “matless” cuts, you waste a lot of material because the machine needs something to grab onto.
However, many crafters love matless cutting, and I think I would probably prefer that method if I were making many t-shirts at a time.
Pick the method you like best as long as your machine is compatible!
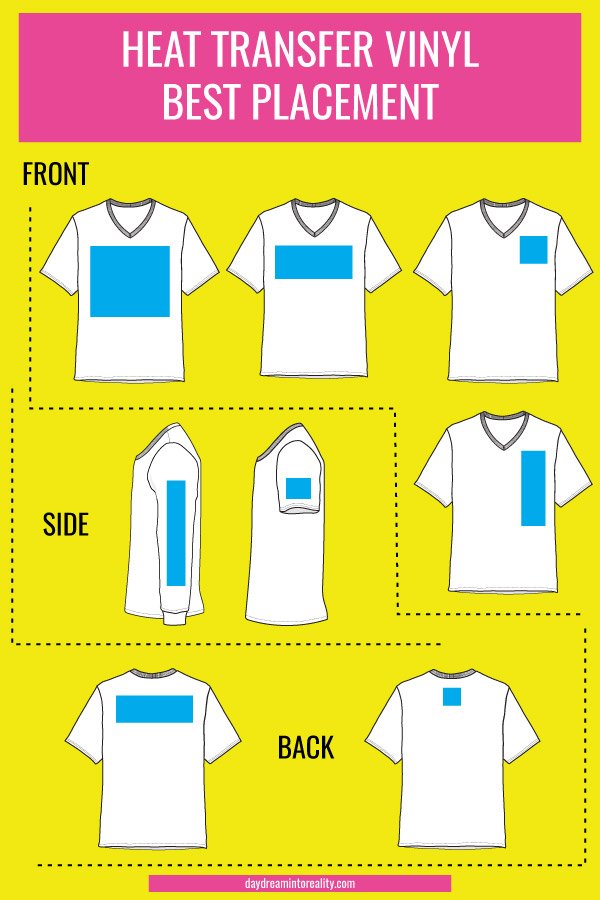
Check out this placement infographic if you want to try different locations for your design.
Cutting Process
Right after you resize, click “Make” in the upper-right corner of the window to send your project to your machine.
Step 1: Mirror Image
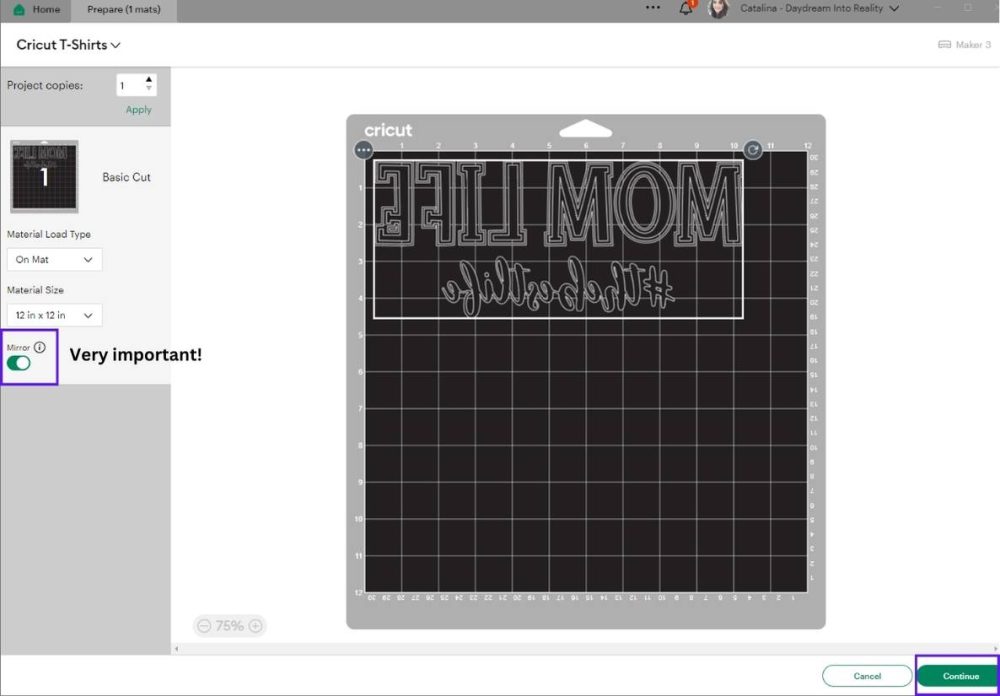
The following window is called “Mat Preview.” From this interface, you can see where Cricut plans to make the cuts. You must place your material in that location.
Now, here’s one of the most important things you must do when working with iron-on.
Whenever you work with Iron-on (Or Heat Transfer Vinyl, it’s the same thing), you must mirror your image! This is because when you cut this material, you cut it upside down. Therefore, if you forget this vital step—as I have in the past—your design will look backward during the transferring process.
Not fun at all!
Right?
Step 2: Select Materials and Send to Machine
At this point, your Cricut must be connected to your computer. I’ve always preferred a Bluetooth connection, but for some reason, it’s been giving me trouble, so I decided to move to a USB connection, and I am so happy I did.
If you experience connection problems, make the switch! If your machine is not connected, you won’t be able to select your material.
If you have a machine with a smart set dial, move it to “Custom” to follow along.
Now, select the specific type of iron-on you’re using. I am using “Everyday Iron-On.” If the material doesn’t appear, click “Browse All Materials” and search by keyword.
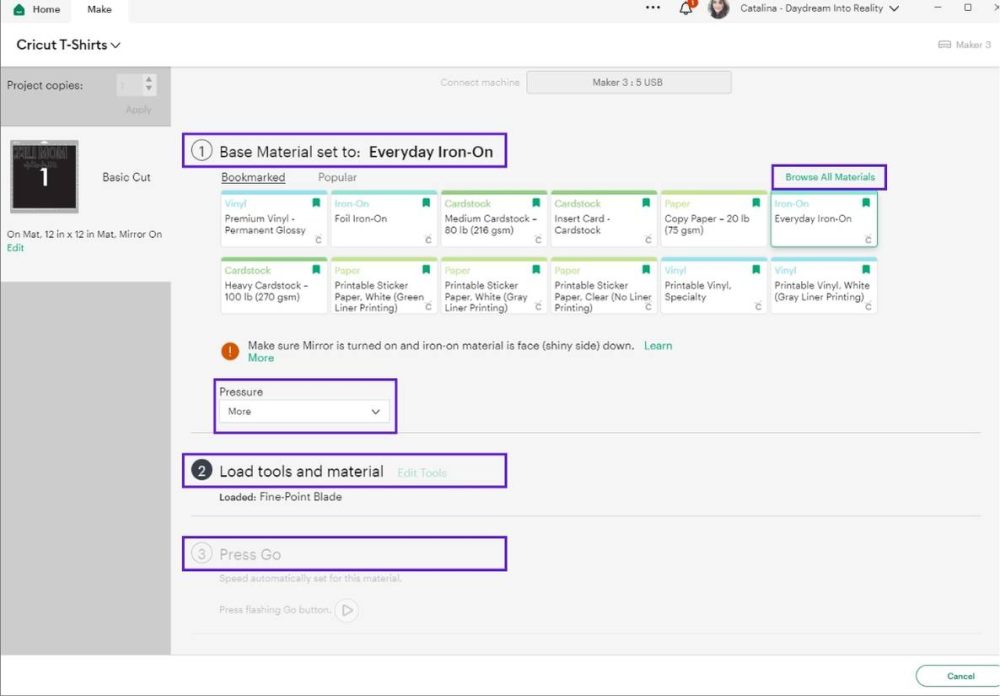
You can leave “Pressure” as it is, but after many years of trial and error, I’ve found that I get better results when I set the pressure to “More.”
Step 3: Prepare Mat & Cut
I am using the green (standard) mat, but you can also use a fairly new blue mat. Keep in mind that as mats get older, they become less sticky, and when that happens, you’ll notice the vinyl won’t stay in place.
If you notice your vinyl is not staying in place, you can try washing your mat or getting a new one. The vinyl will move while the machine is cutting.
To cut your design to perfection, follow the next steps:
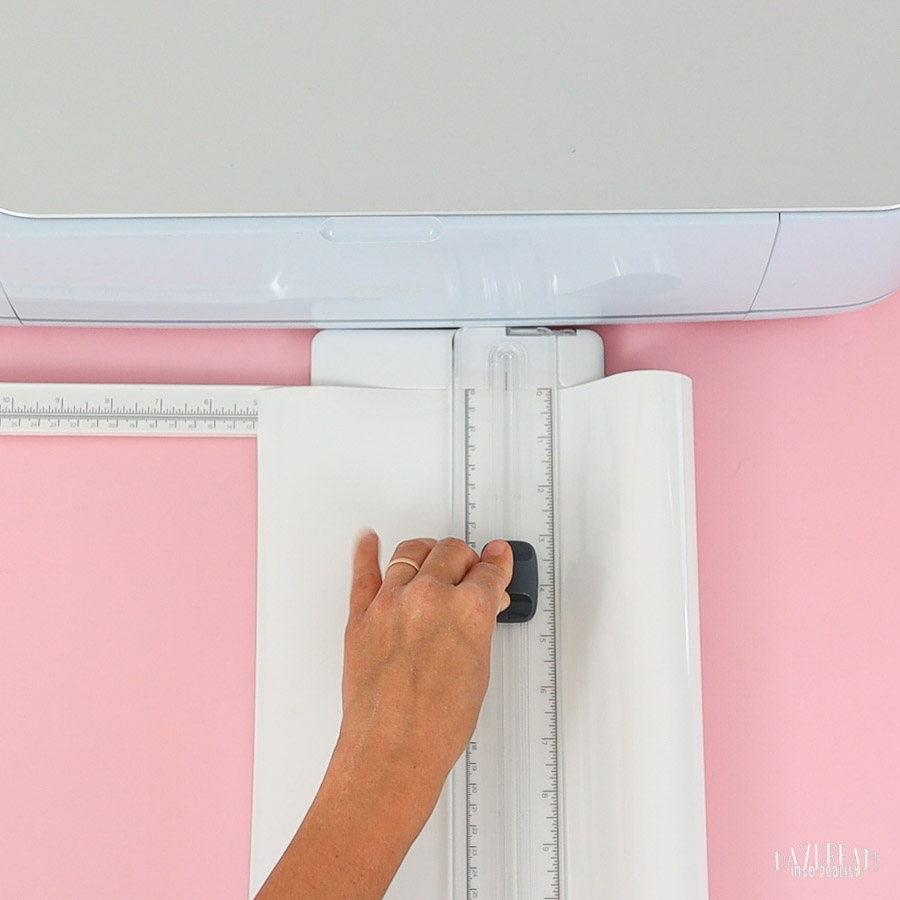
Step 1: Trim vinyl; ensure it’s large enough for your project to fit but small enough that you’re not wasting materials.
Step 2: Place iron-on vinyl on your mat shiny side down; this is very important. If you place it the other way, you will not cut the vinyl but the transparent material it is adhered to.
Note: For some brands, it’s hard to notice which side to cut. If you’re having trouble, use the weeder in a little corner to find the vinyl.

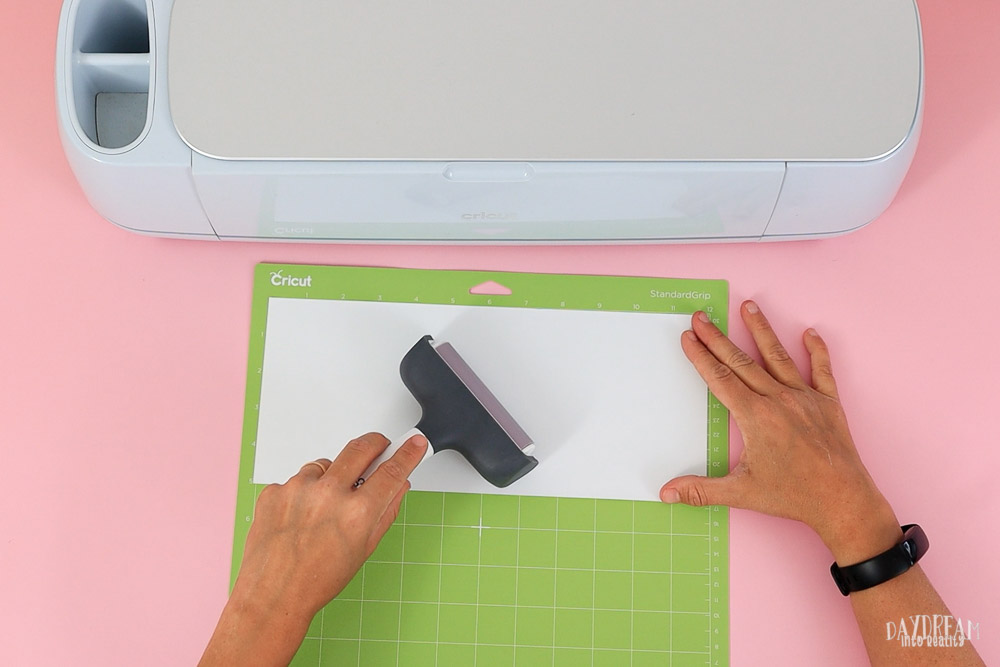
If the material seems to have bubbles, you can use a brayer (one of my favorite tools) or a scraper to gently smooth out the vinyl on the mat.
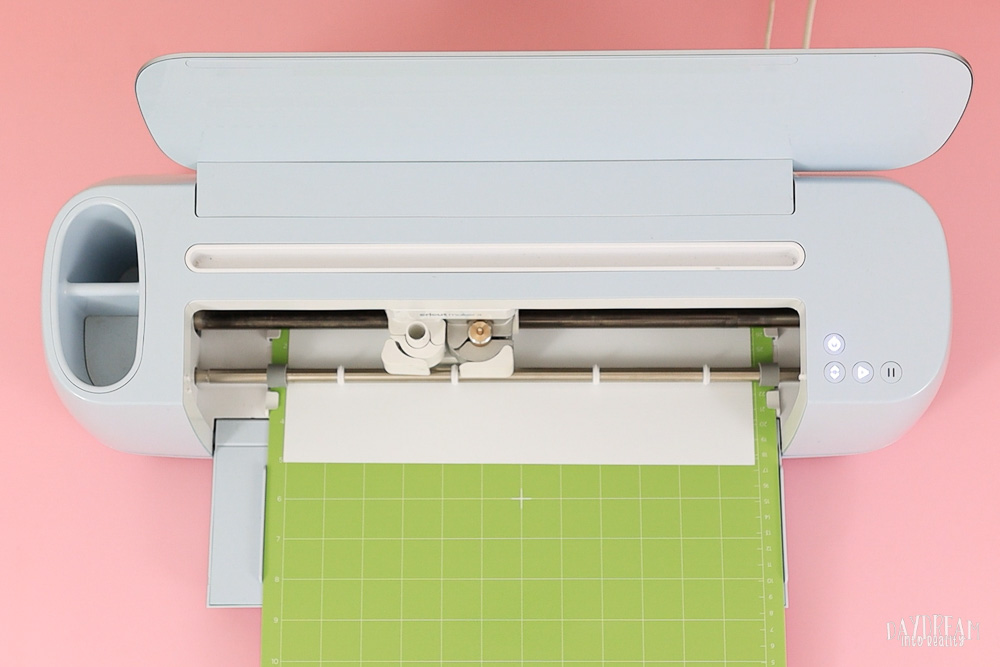
Step 3: Install the fine-point blade and load your mat into the Cricut by tapping the little arrows on your Cricut Machine. After you are done with this, go ahead and press the flashing go button to see the beauty happen.
Cricut Design Space will inform you when your design is 100% cut. When this happens, unload the mat to weed out the file.
Tip: I’ve noticed that Design Space says 100% and keeps cutting. Only unload the mat when the machine has stopped cutting altogether.
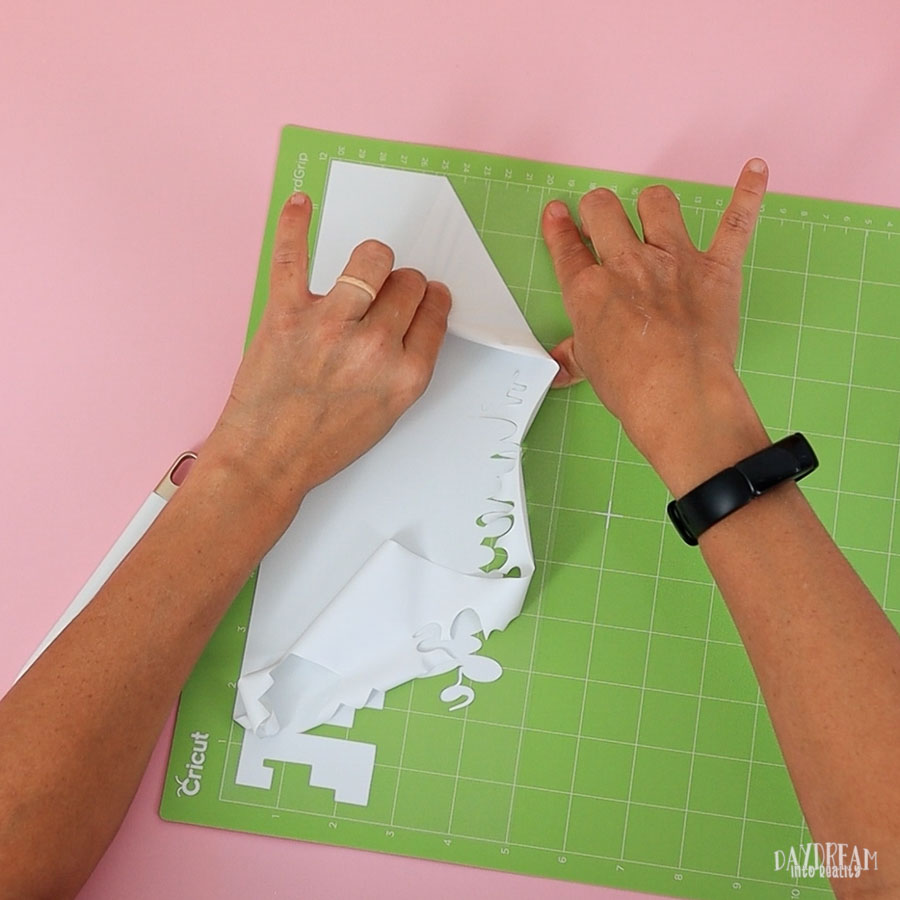
Weed Design
Step 4: Remove all of the negative parts of your design. I recommend reopening the image on your PC to ensure you cut out the right negative pieces.
I wish I had followed this advice! I removed the “LIFE” part of the file incorrectly and had to cut it again. So, take your time and enjoy the process.
I enjoy weeding from the mat because it always keeps the vinyl in place—it’s like an extra hand! If you decide to also weed from the mat, try not to overtouch the other sticky parts but rotate it as needed. The less contact the mat has with different surfaces, the longer it will last.
I started with the weeder but used my hands to get those large negative cuts out!
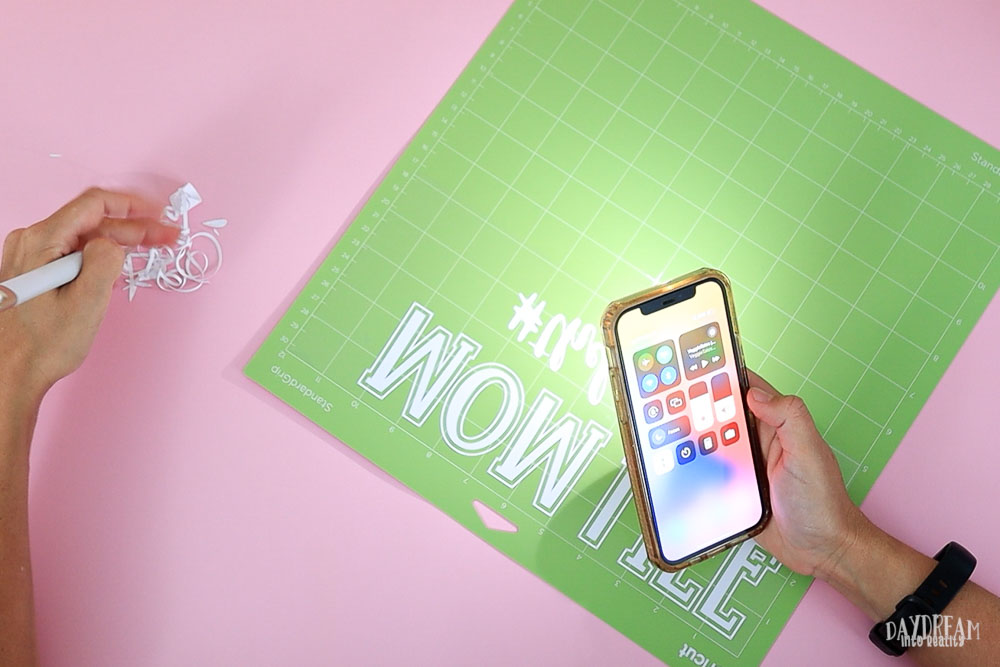
Tip: Sometimes, it’s hard to see where to weed; you can use a light pad or a flashlight! I like it simple, so I always use my phone!
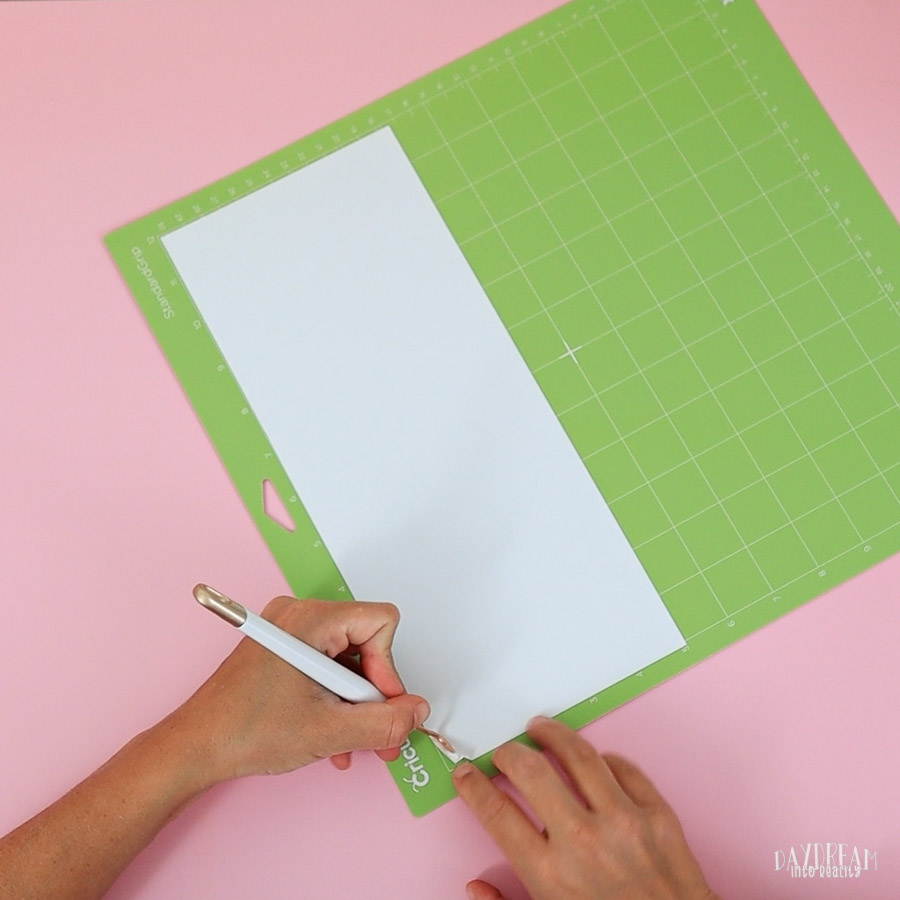
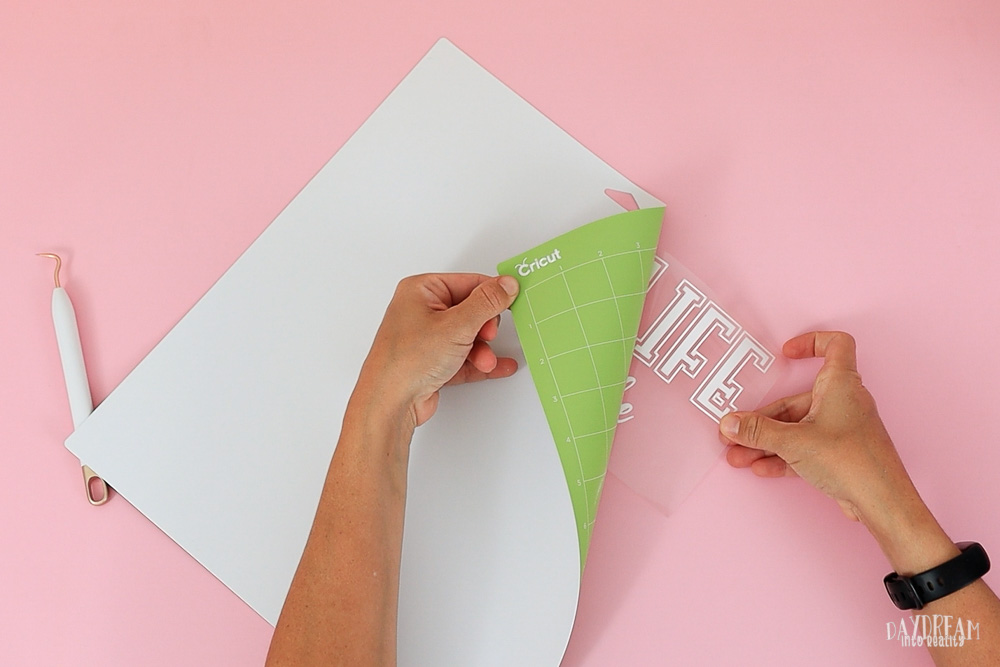
Once you’re done weeding, bend the mat to release the material from it.
Transfer Iron-On (HTV) to T-Shirt
It’s transfer time!
For the “Mom Life” file, I will be using the EasyPress, and for the “Baby Life,” I’ll be using a regular household iron.
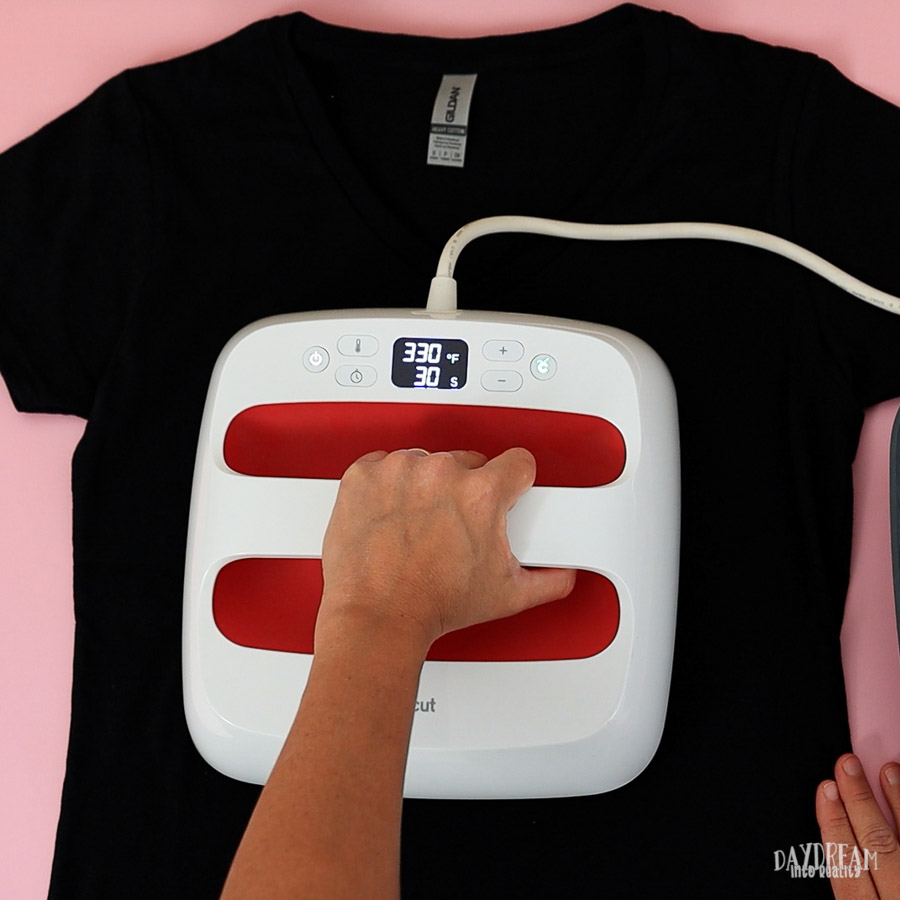
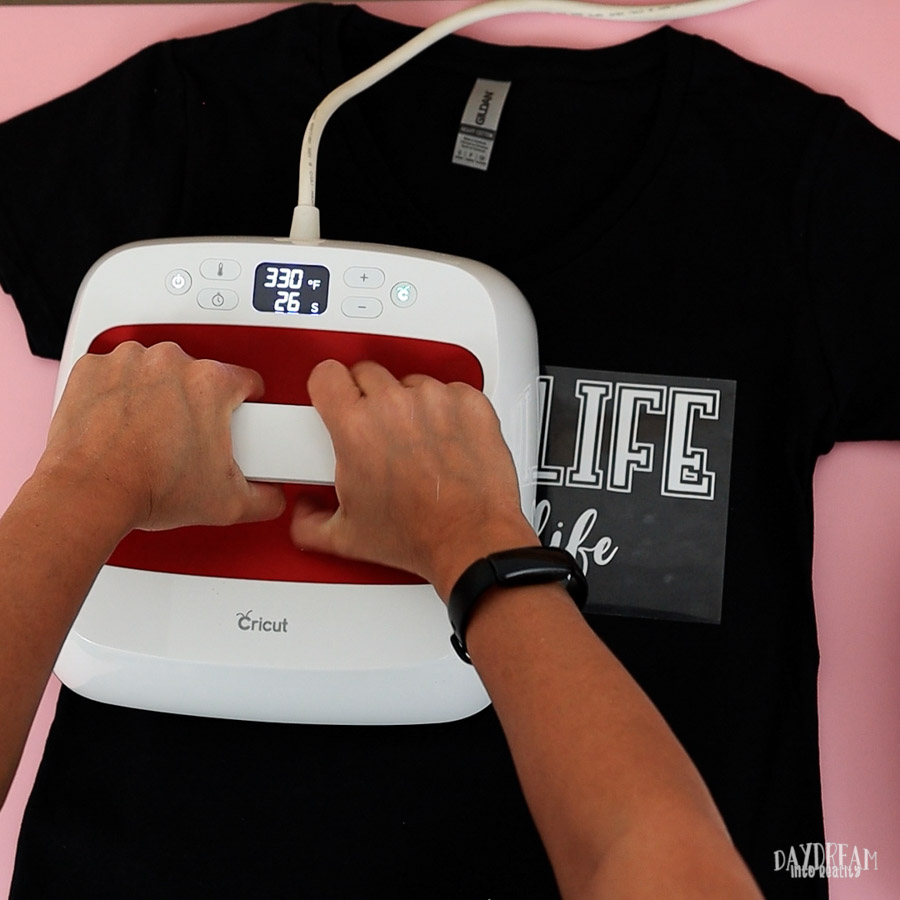
Transfer Iron-On with EasyPress
The temperature Cricut recommends for everyday Iron-On as a material and cotton as a base is 330 °F, so go ahead and preheat your EasyPress.
If you have another base material or type of vinyl, like foil or glitter, check Cricut’s heat guide for the most optimal results.
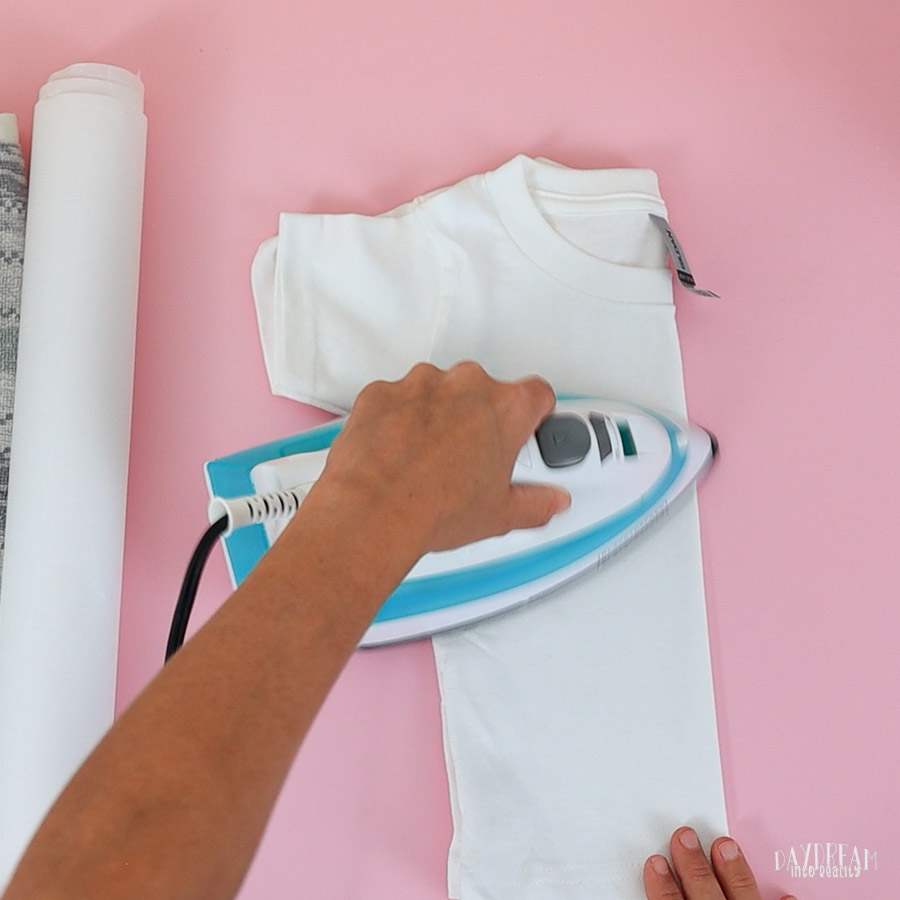
Step 1: Once your EasyPress is preheated, remove some of the wrinkles and press for about 5 seconds on the area where you plan to transfer your design.
Step 2: Quickly find the middle of the t-shirt, fold it in half, and press for a couple of seconds.
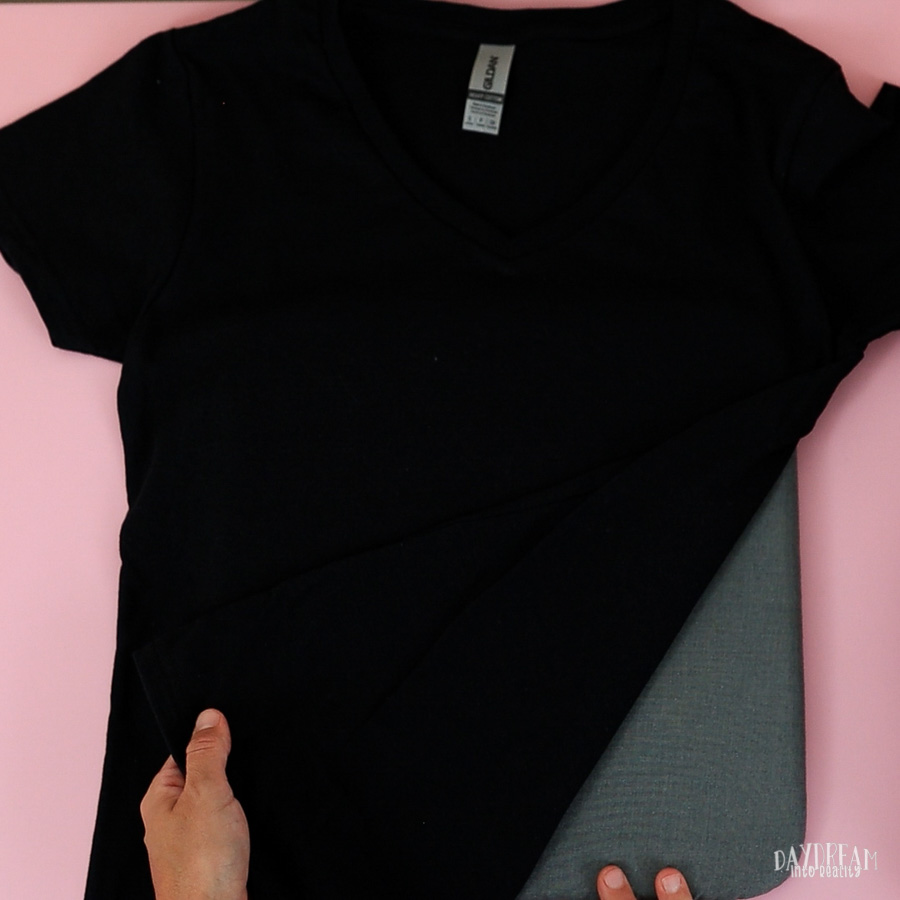
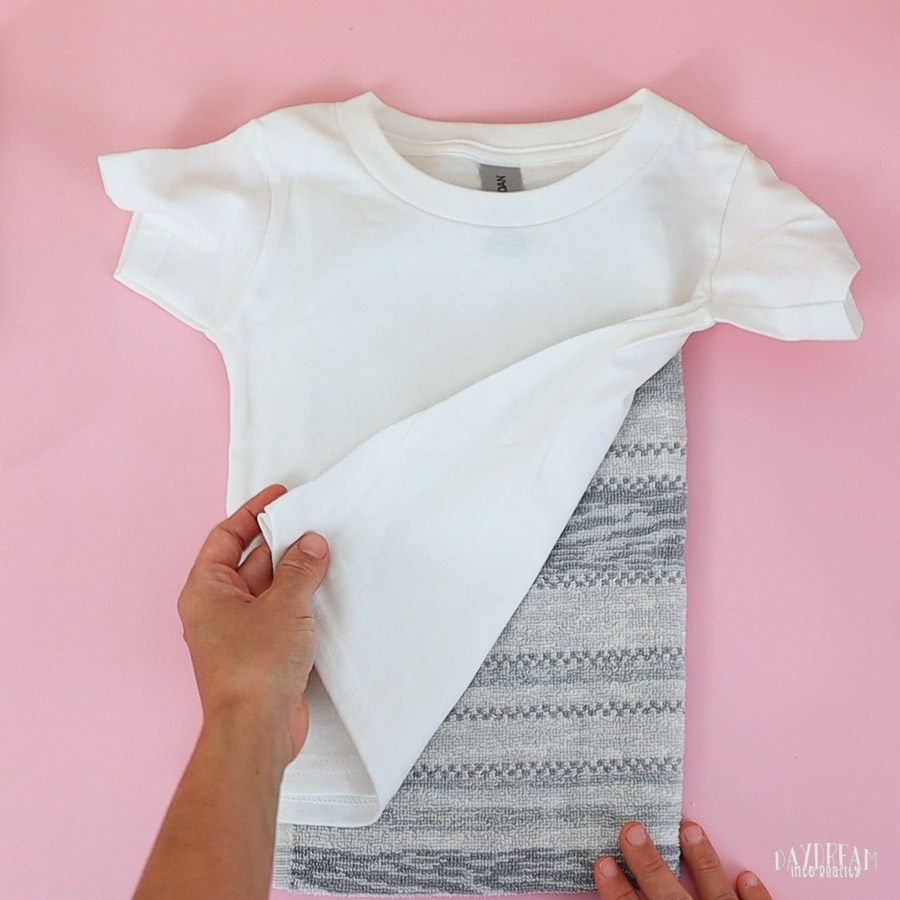
Step 3: Place the pressing mat (or towel) under the t-shirt.
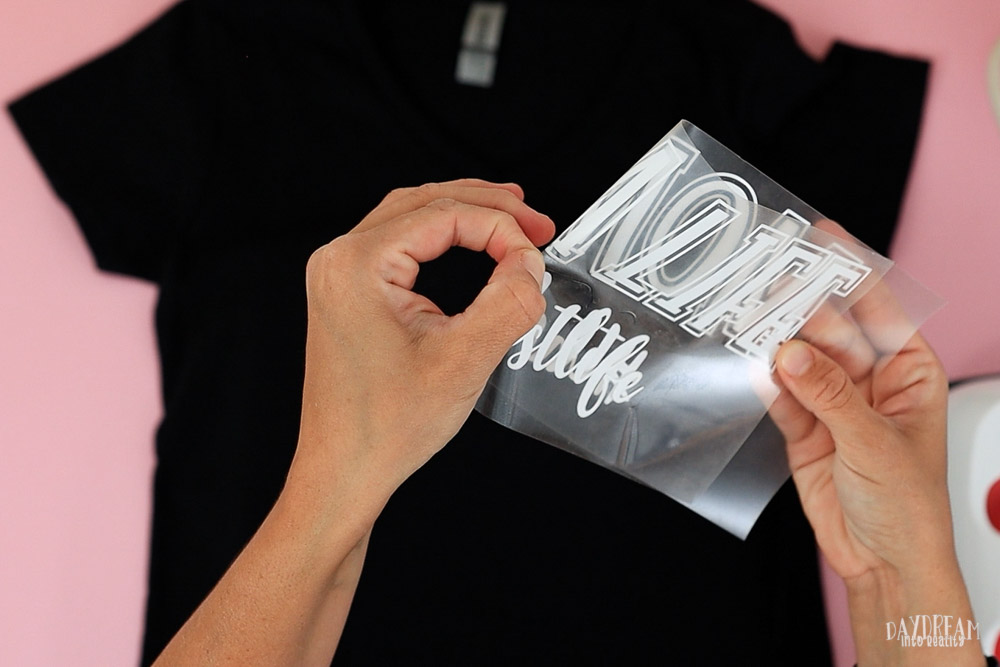
Step 4: Fold the carrier sheet to make a mark in the middle of the cut file. Don’t fold vinyl; only the carrier sheet is needed. Also, ensure you’re going from edge to edge to the design, not the carrier sheet.
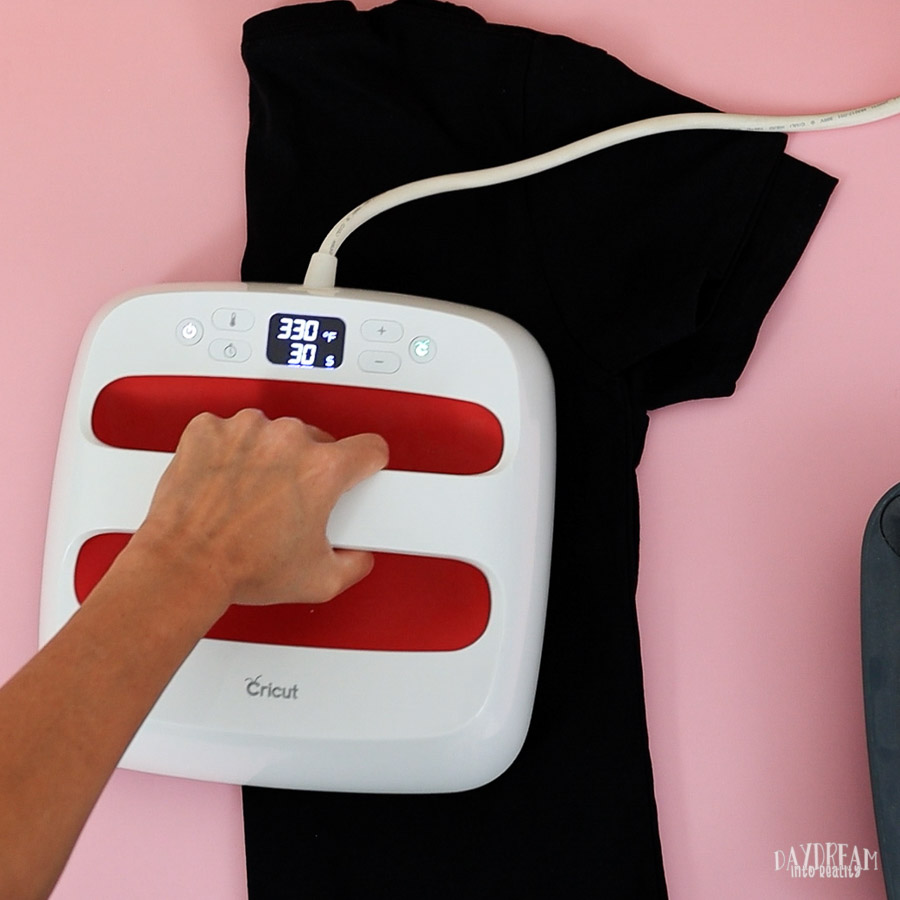
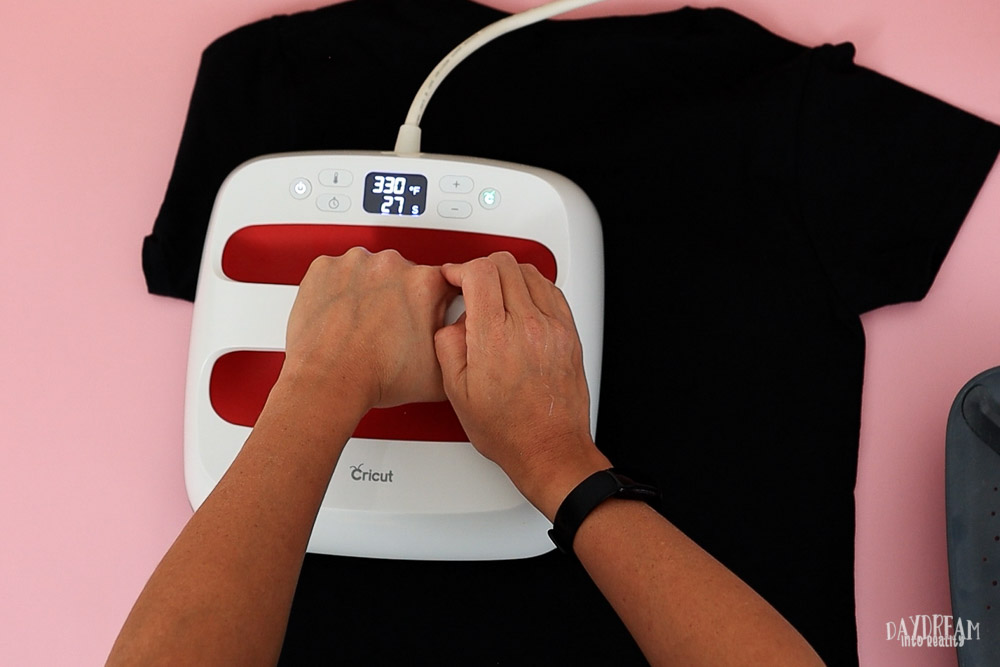
Step 5: Align the middle of your design with the t-shirt and press (medium pressure) for 30 seconds. Since my press was smaller than the design, I had to do two 30-second presses. If you think you’ll need to do more than 60 seconds because of the size of your design, I recommend protecting your t-shirt with parchment paper.
Tip: For adults and young children, place the top of the design 2-3 inches below the neckline. For babies and toddlers, place the top of the design anywhere between 1-2 inches below the neckline.
Step 6: Flip the T-shirt around and press for about 15 seconds on the back to finish the process.
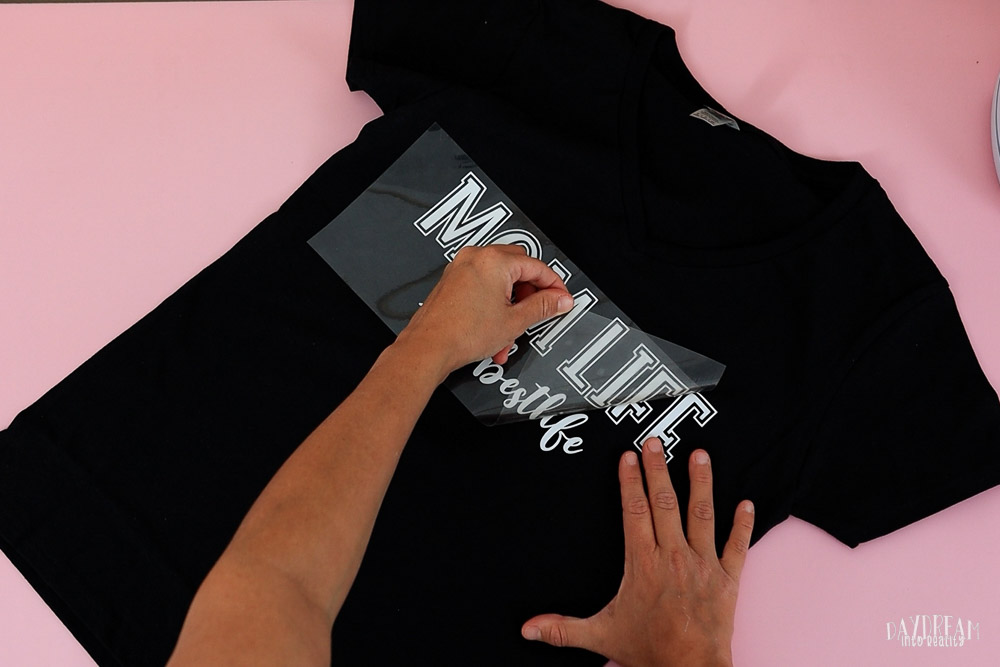
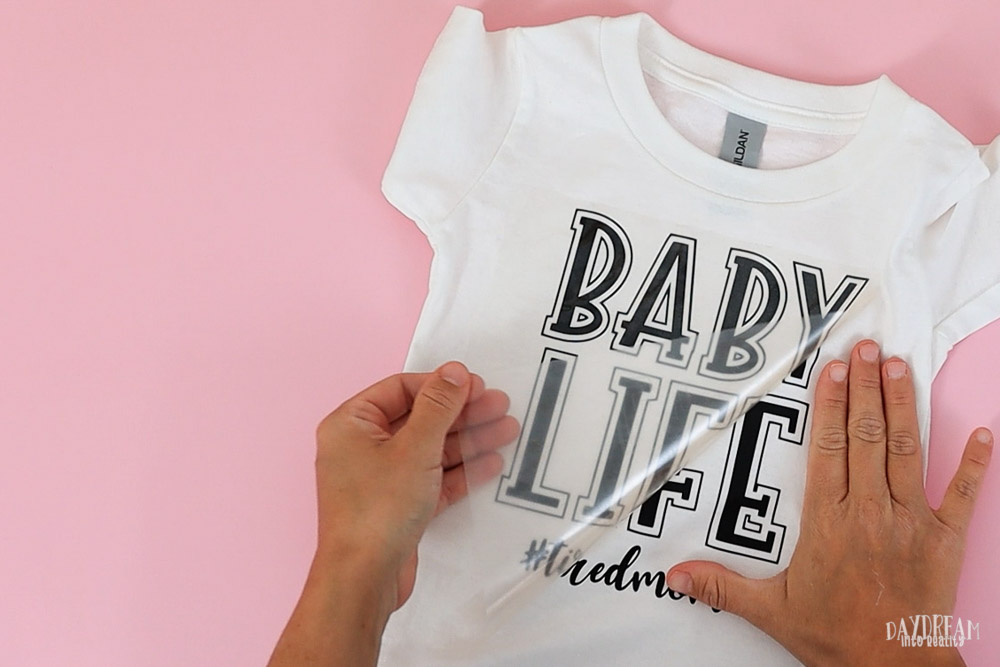
Step 7: Wait a bit until the design has cooled enough, then peel it off while it is still warm to the touch. I like to remove the carrier sheet diagonally, which I feel is the most gentle way to do it.
Note: Some types of vinyl require design to be thoroughly cooled off before you peel. If you don’t wait, believe me, it will be a disaster.
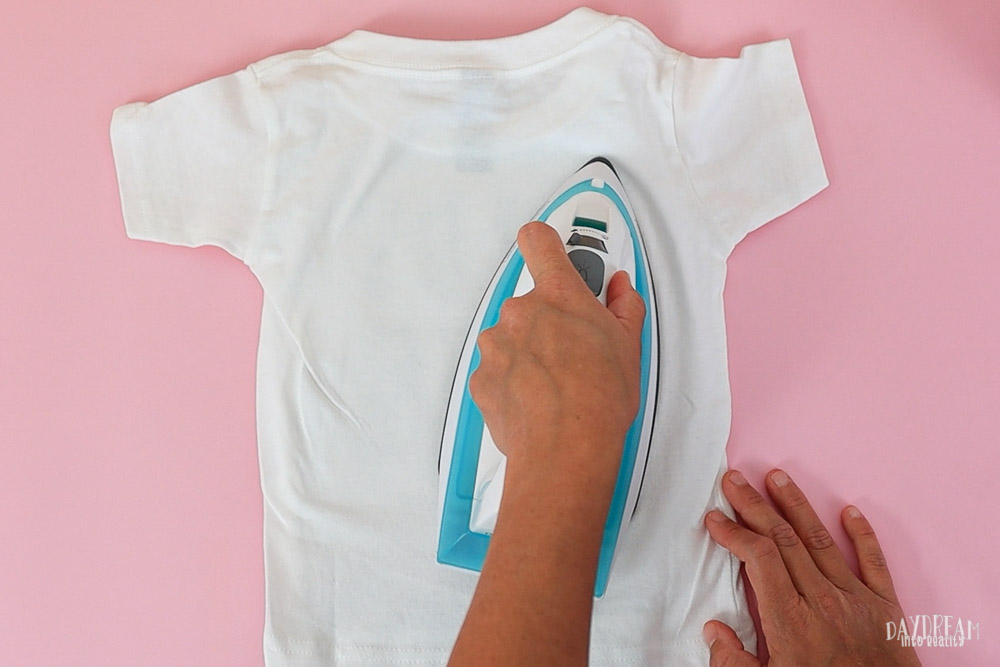
Transfer Iron On with Regular Household Iron
When I first tried using a regular iron to make t-shirts, I had such a terrible experience that I didn’t attempt it for almost half a year.
No matter how many tips I saw online, nothing worked until it clicked! What if I use a towel as Cricut recommends with the Easypress? The result was mind-blowing.
If you plan on making t-shirts just a couple of times a year, you can use your household iron; just make sure it doesn’t have any water inside! My iron has steam holes; you don’t need a full plate.
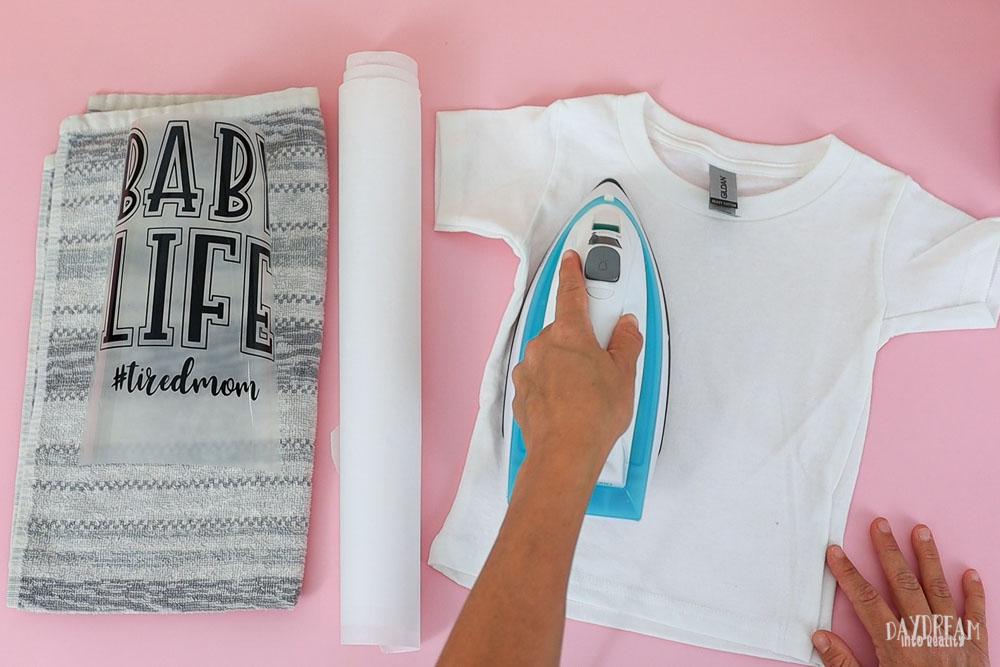
Step 1: Preheat your regular iron to maximum heat. Once it is preheated, remove some of the wrinkles and press for about 5 seconds on the area where you plan to transfer your design.
Step 2: Quickly find the middle of the t-shirt, fold it in half, and press for a couple of seconds.
Step 3: Place the towel under the t-shirt, ensuring it won’t be in the way while you press.
Step 4: Place your design and cover it with a thin cloth or with parchment paper (my favorite).
I didn’t use parchment paper with the EasyPresss, but I recommend using it with an iron. With a regular iron, you usually require more heat presses. So, if you expose your T-shirt to the heat for that long, you will burn it.
It has happened to me, and it can happen to you!
Note: I’ve tested this method with 100% cotton materials. I wouldn’t use it with very expensive or delicate fabrics.
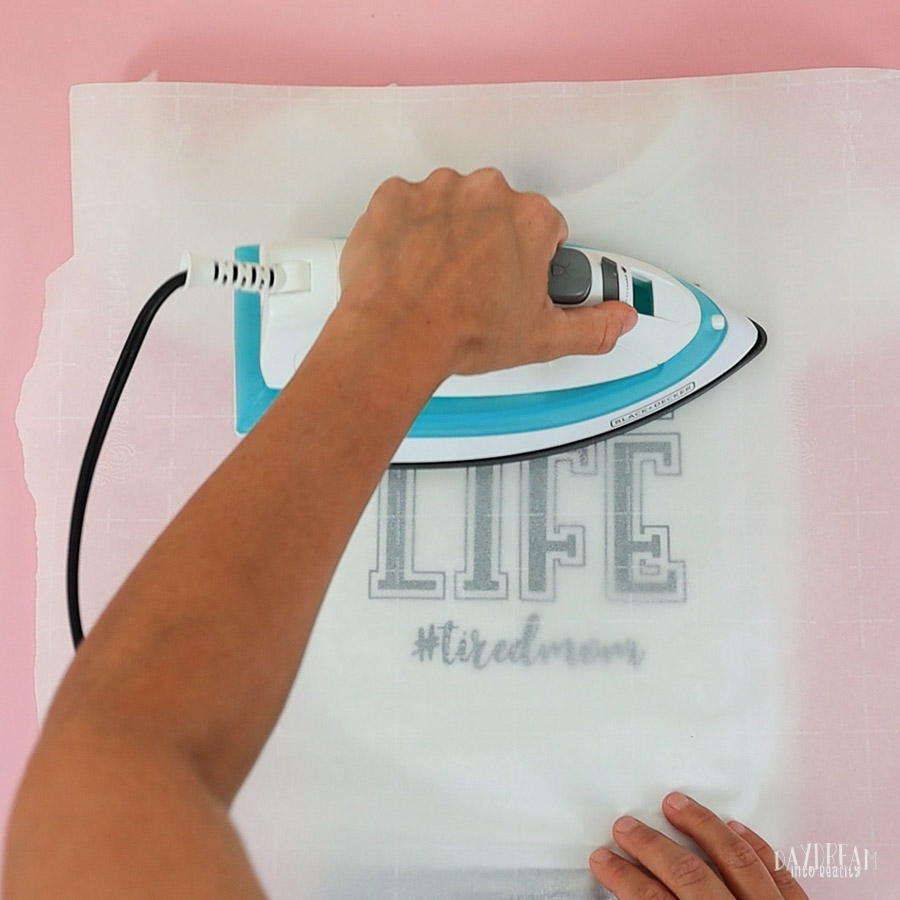
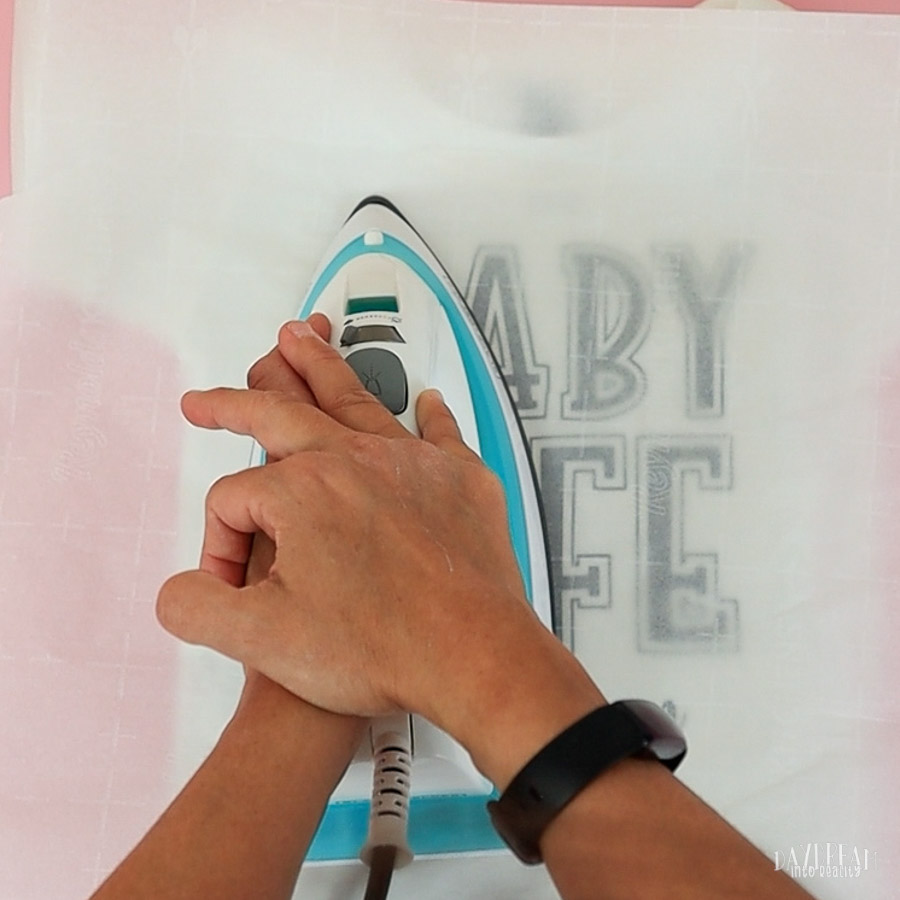
Step 5: Medium press for about 30 seconds on half of the design in a vertical way; then press for another 30 seconds on the right side. After pressing vertically, press horizontally on the top half of the design for 30 seconds, then the top bottom for another 30.
Sometimes, the design may be bigger than the one I have. You must ensure that you cover each area for 30 seconds vertically and 30 seconds horizontally because the heat of an iron is uneven, plus some of them have steam holes as well. A little overlap is okay, but try not to touch a particular area for more than 60 seconds at a time.
Step 6: Turn around the T-shirt and medium press the back of the onesie (with the parchment paper on top) for about 30 seconds.
Step 7: Wait a little bit until the design has cooled off enough, but peel it off while it is still warm to the touch.
Here’s a close-up of the t-shirts!
You couldn’t tell which one was made with the EasyPress or the regular iron!
Caring for Your T-Shirt
Always allow 24 hours before you wash your brand-new T-shirt.
Cricut recommends you dry inside out. However, I follow the garment washing and drying instructions of the base garment I used. Never Bleach!

How to Make Custom T-Shirts with your Cricut
Materials
- Iron On or HTV
- Black Long Sleeve T-Shirt
- Parchment Paper
- Small Towel
Tools
- Cricut Maker or Cricut Explore
- Cricut EasyPress (Optional)
- Regular Iron
- Weeder and Scraper/Brayer
Instructions
- Upload Design to Cricut Design Space
- Weld, resize, and Make it with Mirror ON* and follow the Cutting Instructions
- Load Mat with Iron-On material pretty side down** and Fine Point Blade
- Remove from Mat and weed design
- Transfer to your T-shirt*** and peel when the backing is still warm to the touch.
- Wait 24 hours before washing. Don't use bleach.
Notes
*Always make sure to turn Mirror ON when working with HTV; if not, your design will be backward once it is cut.
** Remember to place Iron On or HTV pretty or Shiny side down.
*** If using a regular Iron, heat to max temperature and cover the design with parchment paper to protect the garment. Use a towel to press against the t-shirt and the Iron.
If using the EasyPress, preheat to 330 °F and press for 30 seconds in front, then press for 15 seconds on the back. Use a Towel or Easypress Mat to press against the T-shirt and EasyPress.
Congrats – You are a Pro at making T-shirts with your Cricut
I hope this tutorial was handy for you. I would love to see your creations.
Do you know it takes me over 25 hours to complete a single Cricut article? I know it’s wild, but I want to make sure you understand everything!
I would appreciate your support on Instagram , Pinterest , and YouTube as I try to grow my audience and continue producing great content!
This was the beginner tutorial I was looking for. I really also need to know how to make the templates. I got my Cricut at Christmas and I have made Nothing. Upsetting.
It will get easier with time!
What font did you use? I’d like to make a COLLEGE LIFE shirt for my granddaughter’s first year at college. Thanks
Thank you so much for this article!! I didn’t know about using a towel inside the shirt, nor did I know about ironing the backside of the shirt after pressing the front – soooo helpful!!!
It’s a game-changer! I am glad you learned new things!
I followed this tutorial for my first ever iron on project and it worked flawlessly! I used my home iron and parchment paper. Thanks for the easy guide!
You’re very welcome 🙂
Thank you for this precise tutorial on making t-shirts. Although I feel I know how to do all of these steps, reading step by steps sure helps to ensure what and how I do it is correct and that the results are fabulous. I really enjoy your tutorials, they have helped in so many ways.
I follow all instructions and use an easy press 2 and easy press mat and the heat guide online, but after washing (days later) some of the edges of my HTV peel up and make the design scratchy. When I re-press, the HTV gets wrinkled. I have tried to make my own shirts using many different types of blanks. Good quality t shirts, Cricut vinyl. Please help me understand what I am doing wrong.
If you used Cricut’s vinyl and the instructions to the T, they have a satisfaction guaranteed. I would call them and mention your issue.
Thank you so very much for the step by step tutorial!! Best one I’ve seen yet!! I’m not nearly as nervous as I was before I read this!! Thank you again!!
I have only the Cricut easy press 2 machine. Do I have to get the other machine as well? I’m so new, and lost. But ready to give it a try.
You need the Cricut machine to cut your vinyl.
Hi, I’m new and interested in making my own t-shirts… if I want a vinyl iron on and I want to print from my Cricut, will it print exactly like the picture, meaning all the colors?
You need Printable heat transfer vinyl. You can’t just use regular iron-on.
Hi, does the letters peel off easily from the t-shirt?
No, if you follow all the instructions.
If you did make the dad life one is there a way to show the items made in the comments
Have you made a dad version of this by chance?
I haven’t 🙁 Would like to do a Dad Life #the best life? And add it to this article?
@Catalina,
That would be amazing if you did
I just added. You can download it from the blog post, where the other ones are 🙂
@Catalina,
Thank you 🙂
I am new to this (I just got the cricut joy and the easy press 9×9. I am a little confused on what to use for T-shirts/onesies. Does Infusible ink work the same as iron-on, or permanent? I thought permanent is only for mugs, or other materials. I am afraid to start my new project but, I need to start otherwise I would be leaving these two machines without use. Thank you for the tutorial, I will be checking the others you have, as I never used Design Space.
For T-shirts and baby suits you need Iron-On or Infusible Ink if your material is mainly made out of polyester. Read my Iron-On guide and also my tutorial on how to make t-shirts with infusible ink.
Thank you so much for this tutorial! I just bought my first Cricut today and this got me through printing my first HTV piece (I used a different design). I haven’t ironed it on yet but I can not tell you how much this helped!
I am happy I can help!
Do you need to printer to make shirts like this or just the Cricut? If, so what would be a good printer.
For this particular project you don’t need a project. You need a material called Heat Transfer Vinyl or Iron-On.
I’ve had a request to make some custom masks for a small Veteran’s organization (using their logo on their patch) I’m wondering if you think it’s possible to do that on a mask made from T-shirt fabric. I was thinking of buying plain white masks and ironing on the patch logo. Just wondering if something like that was possible to make using the circut? I don’t own one but have a niece who does. Any info you could give would be much appreciated…. Thank you!
You absolutely can use iron-on and transfer to your masks. You can follow this tutorial just adjust the project size.
Good Morning, Thank you for this video, it is very helpful. Can I ask what font this is? I need to make a shirt to go with these that says;
Big Sister Life
#momshelper
and would like it to match the others
Thank you so much
Of course! Cuddle Buddy and Masterblush. Keep in mind that I made some modifications on Illustrator so it won’t look the same.
Love the fonts! Ty for sharing!
You’re very welcome 🙂
I’m new to using the Cricut explore air 2, I’m trying to make shirts with different country flags but since they have different colors and some have a picture in the middle I’m not sure how to accomplish that. Could you give me and idea please.
you can layer HTV or you can cut Printable HTV and use print then cut for the entire flag.
I looking at doing this for my small business does the vinyl wash off? Does the quality of the T-shirt meet a standard of being able to sell?
It does wash off when you follow instructions. Before you sell your first T-Shirts test different products, washing, drying so you can be confident on it!
I am SUPER brand new, and I didn’t see anything about using transfer tape. How do you use that?
You don’t need to transfer tape with Iron-On. You need to for regular vinyl. Learn more about it in this article.
If the vinyl comes off after washing can I press it again or do I start again?
Yes, you can press it again! If it’s Foil Iron-On or specialty vinyl you may get an undesired texture after pressing again.
I have had a couple problems when layering vinyl projects on t shirts. After they wash the top layer seems to start to come off. Any idea why that would be happening? We waited longer than 24 hours to wash and dried inside out. What do you think happened? What extra steps do you use when layering vinyl?
Thanks for the tutorial!
Did you press the second layer with an easypress mat or a towel underneath your shirt? It really makes a difference. Also what type of layer was the first one. Check out the “how to layer up HTV section” in this complete Iron-On tutorial.
This tutorial is perfect! I love the step by step. I do have a few questions. Will my Mini easy press work for making shirts? If i have an easy press mat, do I put that inside the shirt when transferring the vinyl with the Easy Press or do I put the mat underneath the shirt? I’m looking forward to using your tutorial to make my first shirt, very soon!
The EP mini is for small projects, you can do t-shirts for small designs, but if you’re planning on doing something big, I recommend you use the regular press or an iron. For the heat may you can do it either way. Sometimes if seams are on the way I put it in between the shirt. Just make sure your T-shirt doesn’t stretch out.
Thank you
You’re welcome!
This was great, I’ve been so nervous to try…had been putting it off! More confident now! Following for more encouragement, thank you!
This makes me very happy!
Any chance you might have a video as well? I didn’t check Youtube.com, but I will! ???? Thanks!
It’s in my to do list! 🙂
How long will the design hold up? I’m looking to do shirts for the finances bee business and seeing if it’s worth my time.
Hi Deanne, I wear this t-shirt very often. It’s been a year since I made this project, and it looks perfect. In fact, the T-Shirt is what looks old now (not the vinyl).
Thank you so much for this article. It was very helpful as an into. I will be checking out more of your articles.
You’re very welcome 🙂
I am not able to find the files to download
You had to right click and save them. However, I finally found a way to add download buttons.
I am confused about how the transfer paper works if it’s backwards. The part that needs to iron on to shirt has paper on it.
I know it sounds weird. But if you don’t mirror it, your design will be backward when you transfer it; this is because the carrier sheet is will be attached to the front of the design and not the back of the material, and when you cut with your Cricut you have to cut the backside, not the front.
I hope it makes sense.
Where do I find the shirt template if I am working on my iPhone ?
Hi Jes,
Templates are only available when using Design Space from a Desktop computer.
Hi Catalina!!
Thanks so much for the awesome tute and actually all of them you have posted! I read 2 then became a member! I’ve just finished making my 1st tee using all your instructions.
1 question tho’… how do you get the mat to be white in the ‘make it’ view? Mine is black … also how did you change the template tee color to black as there mine shows white.
TYVMIA! <3 – Cris
Hi Cris, my mat is white because the color of the design was white. About the templates, you can find all about them here.
What font did you use for the hashtags? I would love to do “tiredmoms
Hi Sarah, I used the font Masterblush.
However, I made it thicker in Adobe Illustrator; therefore it won’t look quite the same.
Thanks for the tutorial . Pls can you share the name of the fonts used for the files,?
Yes. The fonts are Masterblush and Cuddle Budy!
This is the best tutorial I have ever seen. I’ve never heard of the template button until now. Thank you!
Thank you, Linda! I am glad I was able to help.
Hi Catalina
Not often do I read a set of instructions that are so easy to understand, so well written grammatically and in other ways, and so well structured as yours. I do quite a bit of instruction writing also for my web design business so it doesn’t suprise me that it took you 15 hours to write this post. You must be a lot like me, trying to be as perfect as possible with all you do and you certainly succeeded here.
I have one question. Regarding the parchment paper. I don’t have any so I can’t remember what it looks like. Doesn’t this paper have a shiny and a matte side? If it does, which side faces up when you iron?
Thank you so much, Catalina, for all the work you put in to help others!
Hi Leontine,
Thank you for your kind words (they really motivate me.) Regarding your question, you can use a thin cloth as well, or when you go to the store look in the kitchen section, it will have its name all over.
Have a great day!
Thank you for sharing, great job.
Question please, is your svg for personal use only? TIA
Hi Beej, you are welcome!
Yep, my SVG files are for personal use only.
Have a lovely day!
Thank you for all amazing tutorial. Your instructions could not have been easier for a beginner. Thank you, Thank you, Thank you. Curious to see what your thoughts are when it comes to using an Easy Press Mat in place of the towel, when using a regular iron.
Hi Katie,
I think they will be even better. I got my Easypress Mat the other day and I like it tons!
I already have the Cricut maker and will be purchasing the EasyPress 2 this week. I have 2 questions.
1. Which size press would you recommend 9×9 or 12×10? (I know I don’t want the smallest 6×7)
2. Am I understanding your tutorial correctly in that when using the easy press I don’t need to use any type of cover sheet (Teflon or parchment)?
Hi Kate!
I have the 9×9 and this works perfect if you are working with vinyl. However, if you want to work with Infusible Ink and want to create large projects I recommend you get the 12×10.
You can still use it with smaller projects if you Isolate the Area from any seams.
I hope this makes sense! Have a great day.
My daughters bought me an explore air 2 last Christmas and I have only used it a few times. I really love it though! Just have to make more time to use it and figure out the ins and outs. Tutorials like your really help a lot! I bought an easy press a couple of months ago but have not had the time to use it yet. I see the infusible ink being demonstrated and promoted now. Does that make the vinyl and easy press obsolete?
Hi Stacey!
I am glad I can help. Infusible Ink will never replace Iron-On because Infusible Ink can only be used with light and polyester coated materials. The same goes for the Easypress, you can still use it with Iron-On and you definitely need it for Infusible Ink.
If you want to learn how to make T-Shirts with Infusible Ink, check out my tutorial.
Used your tute to make me a T-shirt just now. Thanks so much! It was soooo helpful!
That’s awesome Lynn! Glad I was able to help
Excellent! I love how you explained everything. I will try the parchment paper. Thank you!
Great! Let me know how it goes
Great learning tool! I will be referring to it as I do t-shirts. Thanks so much for sharing!
Happy to hear Lynn! I am glad this tutorial was a great help for you
Where is the best place to design what you want on your tee to be able to make it compatible with Cricut design space?
Hi Christina!
There are many software options. If you are getting started you can start within Cricut Design Space. Or if you feel like learning more advanced skills you can use Inkscape (free). However, I love and use Adobe Illustrator.
I love the fonts you used!! Do you mind sharing the name of the fonts and where they can be found?
Hi Calandra of course. I used a font called Cuddle Budy. Here’s the link for you to get it: https://fontbundles.net/theinkaffair/148222-cuddle-buddy-a-cute-playful-font
Have a great day 🙂
Excellent , Thank you!!!
You’re very welcome Tammy
I have the first Easy Press and the first time out the design came off the first day my daughter wore it. This was before the new vinyls that are stronger. So, I will be trying again.
Hi Joy! I recomend you to use the towel or the Cricut Easypress Mat. Let me know how it goes!
Thanks so much for this! I have been curious what the shirts look like when pressed on with the vinyl.
Does the print stay on quite long after washing it a couple of times? I have been using print-on-demand for my shirts but would like to be in control of the design, colors and outcome a little more as you never know what will arrive at your doorstep – I had to return it so many times.
Hi Leoni!
The vinyl should be sort of melted into the fabric. But watch out to not melt vinyl by applying a lot of heat. You just need to make sure that both fabric and Iron On are bonded. I haven’t used printable vinyl so I can’t give you an honest answer. However, regular vinyl should last a long time, it will last as long as your shirt. I have not had problems with any of my T-Shirts.
I hope this helps!
Very nice tutorial and I love how you shared what worked and didn’t for you! Thank you!
Thank you Bethany! Yes I feel is very important to be honest and share our experiences as we go. I make tons of mistakes and if I can avoid you the headache then that makes me happy!
Thanks for the advice. I am interested in getting a cricut machine to design my own t-shirts for my business but don’t know where to start. I have an idea to use a picture and add a saying. Is that possible?
Hi Nora! Yes you can… Picture work a little different you need something called printable vinyl or sublimation. Basically, you print your design, cut it and then you transfer to your T-Shirt. I have an article on how to do this pretty soon too.
Is it possible to print a full colour image onto a t-shirt?
Hi Carol, yes you can!
However, you need to use a material called Printable Heat Transfer Vinyl.
Wow ! You could have not explained it better . Thank you sooo much !!!
I am so happy I could help! Have a great day. Happy cutting 🙂
I love this step by step instructions you make it very easy to follow. I am going to make this for my daughter and grandson.
That’s awesome! I am so happy I can help you on your journey 🙂
Thanks so much Catalina! Your instructions were so clear and easy to follow. Great job!!
You are very welcome!