Hello Daydreamers!
In today’s tutorial, you will learn to make wonderful thank you cards with your Cricut Maker or Explore machine.
I will also be providing you with 12 free thank you card templates so you can cut until your heart is content. Nine templates are SVG files, and three are for print then cut, so no matter what time you have, I got you covered.
I worked so hard to make these cards, and I genuinely believe there’s at least one you’ll love!
If you have a Cricut Joy, you could adapt some of these templates (the cards with cut-outs) using the “Contour tool” and following my card-making tutorial with the Joy.
For this article, I am using one of the templates I included in this tutorial; however, if you feel like doing a card from scratch, check out my card-making tutorial with your Cricut Maker or Explore.
In a nutshell, these are topics I will be covering in today’s tutorial:
- Tools and Materials
- Overview of the card we will be making
- Cricut Design Space (organizing and cutting process)
- Card assemble
- Free thank you card templates
- How to convert some of the cards to use with the new 2×2 CardMat
- More pictures and ideas using the files I included in this article
Tip: This tutorial builds upon the skills I teach in every step. If you’re just starting with your machine, I suggest you read and follow each step.
Are you ready?
Let’s Daydream Into Reality!
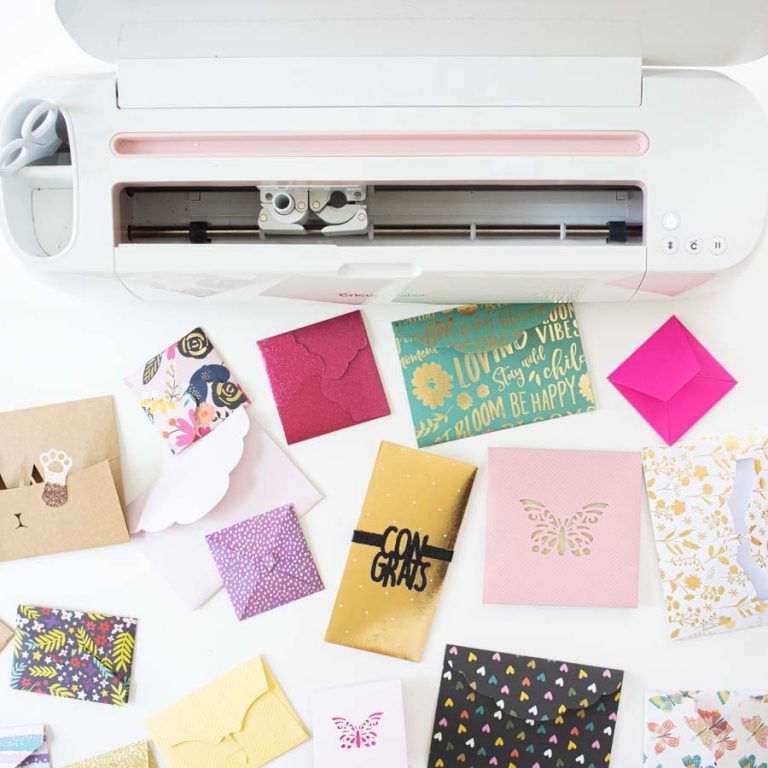
Tools & Materials
- Cricut machine (Maker or Explore)¹
- Green mat
- Fine point blade
- Scoring stylus or scoring wheel if you have a Maker
- Cricut pen
- Brayer (optional)
- High-quality glue²
- Four cardstock colors that look good together³
- Double-sided foam dots⁴
- Practice file⁵

1. I decided to use my Explore 3 machine and the scoring stylus. However, I will give you all the details you need to know if you’re using a Maker and the scoring wheel.
2. Above all, run away from kids’ glue as it will make your paper wet and bubbly when it dries. I recommend Beacon 3-in-1 or a glue pen for the little tiny pieces.
3. If you want your cards to look super-wow, you need super-wow paper. A high-quality paper will enhance your project and take it to another place.
I understand paper is expensive!
Check for sales in Michael’s. Sometimes you can get paper for half the price.
4. Foam dots will add a pop-up effect to your card that you don’t want to miss!
5. You can download the practice file and all the other templates at the end of this step-by-step tutorial. No gimmicks, no subscription needed.
Thank You Card Overview
Let’s take a look at the card we’ll be making today.
Sometimes, and as you learn, when you start with the end in mind, things will make more sense once you see them in the software.
The card itself is black and is squared-shaped. On the front of the card, there’s a “Thanks, you Rock” phrase and an old-school cassette.
The phrase has four different layers, and the 3d effect you see in the pictures below are the foam dots. I used them between the black, yellow, and white layers.
The cassette is made out of multiple pieces. The front details are the trickiest, so be extra careful when cutting the white layer.
There’s a smaller yellow square on the inside of the card where I typed a small message and will use Cricut pens.


Now that you have a clear concept of the card let’s move to Cricut Design Space.
Cricut Design Space Steps
Open Cricut Design Space and click on “New Project” to open the canvas area. Make sure to save your project, so you don’t lose any precious time.
Step 1 – Upload Image
Download the practice file to your computer, then click on the “Upload” button on the left panel of the canvas and go to “Upload Image” follow the prompts and select the image from the “Recent Uploads” view, and click on “Add to Canvas.”

Step 2 – Organize File
Before we cut the card, we need to do a couple of things!
If you want to resize the card, now it’s the time to do it. I recommend you don’t make it smaller because the card has tiny details, and your Cricut may have a hard time cutting them.
Second, select the card on the canvas and click on “ungroup” so you can edit each layer.
Whenever possible, I like to have fewer layers on my project to move things around with more ease. Select “Thanks Rock!” and “you” and click on “Weld” at the bottom of the layers panel. Repeat the same with the small white layers on the front of the cassette.

If using paper, you don’t have to weld, but you must keep everything together on the mat if using iron-on.

If you pay extra attention, you’ll notice a straight line on the middle of the card. That’s where we’re going to score so we can fold it.

Select the line from the layer’s panel (don’t move it) and change the operation to “Score;” then, attach the score line to the card by selecting both layers and clicking on “Attach” at the bottom of the layers panel.
Step 3 – Add Text
It’s time to add text to your card!
In Design Space, you have your system and Cricut fonts. Your system fonts won’t do a writing effect; instead, they will look outlined if you choose to use Cricut pens.
However, many Cricut fonts DO have the option for “Writing;” they were designed with that purpose. So if you want to write like the screenshots below, you must use Cricut fonts.
Here’s the problem: they usually cost money; you can either buy them individually or get Cricut Access.
I have a helpful article that will help you find fonts to recreate “writing fonts” for Cricut.

Click on the “Text” icon on the left panel, and before you start typing, click on “Font” to pick your font.
Tip: to find writing fonts click on “Filters” and check “Writing.”

After scrolling for a while, I chose the font “DTC Fluffy Socks.” First, I wrote the entire text and then adjusted the font size and line space.
Check out my how-to edit text tutorial if you feel lost on this step.
I also added a heart from the “Shapes” icon and changed its operation to “Pen.”

When you’re happy with your text, select it along with the yellow square and heart (if you added one) and click on “Attach.”
That’s it; our card is ready to go. Click on “Make it” to send it to your machine.
Step 4 – Cut Card
Depending on the machine you have, when you click on “Make it,” you’ll have different options. To follow along, select the option “On Mat” and click on “Continue.”
Note: If using a machine with a smart set dial, place it on “Custom” to select material from Design Space.

This project requires four different cuts. Cricut will always give you a random order to cut your project, and most of the time, I follow that order.
Before we move on, I want to bring up something essential. Every time you score, you’re supposed to do it on the inside of the card; however, if your paper is the same color and texture on both sides, you don’t have to do anything in particular.
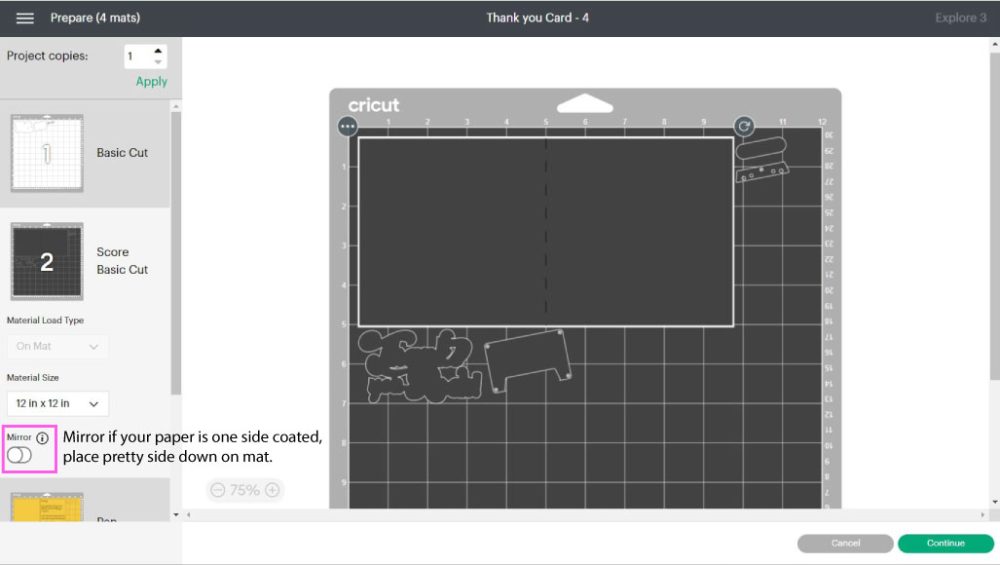
If your paper is one side coated/textured, you must turn on the mirror setting and place the paper coated/textured side down on the cutting mat.
Click on “Continue” to select materials.
Cutting Mat #1
For this card, I used “Medium Cardstock,” and since all of the other mats had the same material, I checked “Remember material settings.”

I have noticed that even if you leave the “Remember materials settings” unchecked with older machines, Cricut doesn’t consider it. Hence, as a good practice and if you’re using different materials, check your settings before cutting.


Place the paper on the mat and secure it with a brayer (optional). This cut has tiny details, so the mat must be very sticky, and the paper must be well adhered to as well.
Load mat to the machine and press the flashing go button to start the cut.
Once the Cricut is done cutting, unload the mat, bend it to release the pieces, and set them aside safely, so they don’t get lost.
Cutting Mat #2
It’s time to cut the card itself along with other details! I left the mirror setting off because my paper was black on the front and on the back.

You need a scoring tool and the fine point blade for the second mat.
If you have a Maker, the scoring wheel will be the default option; if you want to change it for the “scoring stylus,” click on “Edit tools” to select it.
Important when using the wheel and Maker: You need to install it in clamp “B” and score first. When Design Space brings notification to change tool, install fine point blade.

If using the scoring stylus (as I did), go ahead and install it on clamp “A” and the fine point blade on clamp “B.”


Prepare your mat with the paper you’re using for the card, and remember to place it pretty side down if using single-sided colored/textured paper.
Load the mat to your Cricut, start the cut, unload and bend the mat to release the material.
Cutting Mat #3
For this mat, Cricut will prompt us to install a Cricut pen.

Install pen on clamp “A” and blade on clamp “B.”
Load the mat to your machine and press the flashing button to start the cut. Once finished, unload the mat and remove the paper by bending your mat.


Tip: I used a gel pen that takes forever to dry, so I didn’t bend the mat as I usually do it. I turned it sticky side up and made sure I didn’t touch the ink.
Cutting Mat #4
We’re on our final mat!

Again, prepare the mat, load it to your machine and press the flashing button to start the cut. Once finished, unload the mat and remove the paper by bending your mat.


Assemble Thank You Card
That was a lot of work; pat yourself on the shoulder.
You did it!
Now, it’s time to put the card together.

Start by gathering all the pieces, then get your glue.
This project has tiny cuts. If I could go back in time, I would use the glue pen on those little pieces.
There’s no particular order to start with. First, I assembled the “Thanks, you Rock” phrase.


Experiment with the foam dots between layers to create a beautiful 3d pop-up effect.
Glue the squares inside the card and the little cassette as well. It’s a little tricky, but if you look at the original file in Design Space, you can see the order of the pieces.
Last but not least, glue the phrase and the cassette on top of the card!


There you have it!
A gorgeous thank you card!
Free Thank You Cards SVG Templates
As I noted at the beginning of this article, here are the thank you card templates for you to use for personal projects.
To download the file(s), you need to be on a desktop or laptop and click on the button to trigger a download file on your PC. However, I’ve noticed that I can also download them from my iPhone.
Depending on your browser settings, your PC sometimes asks where to save the file, although most files will be in your download folder.
If the image opens in a new window (this may happen because of your browser settings), right-click on it, select the option “Save Image As,” and choose where you want to save the file.
SVG files look like web page files when you download them.


Oh!
Just so you know, I also have a library full of free SVG files and Printables for all my subscribers, a.k.a. Daydreamers. You can see a preview right here or get access by filling out this form.
Can I use the 2×2 CardMat with these Thank You Cards?
I am so excited about the new 2×2 CardMat that I decided to make some of these cards compatible.
All the cards you see with the cut-out corners can be used with the CardMat! You can also try the other ones, but you need to make different cuts on different mats.
To make the card compatible, upload the template to Design Space, place it on the canvas, and click on “Contour.”

On the contour window, click on a space on the card, so you are left with the letters and the cut-out corners.
Don’t know how to use contour? Read my tutorial.
This is what you should have when you close the contour window.

Before sending the card to cut, check the sizing. I had to make it smaller (W: 4 h: 5.24) to use R20 cards.
Click on “Make it” to send the project to your machine and select “On Card Mat.”

Now, click on “Continue” to select materials, load your mat and finish your card.

I will be working on a tutorial on using this mat very soon, so stay tuned! 🙂
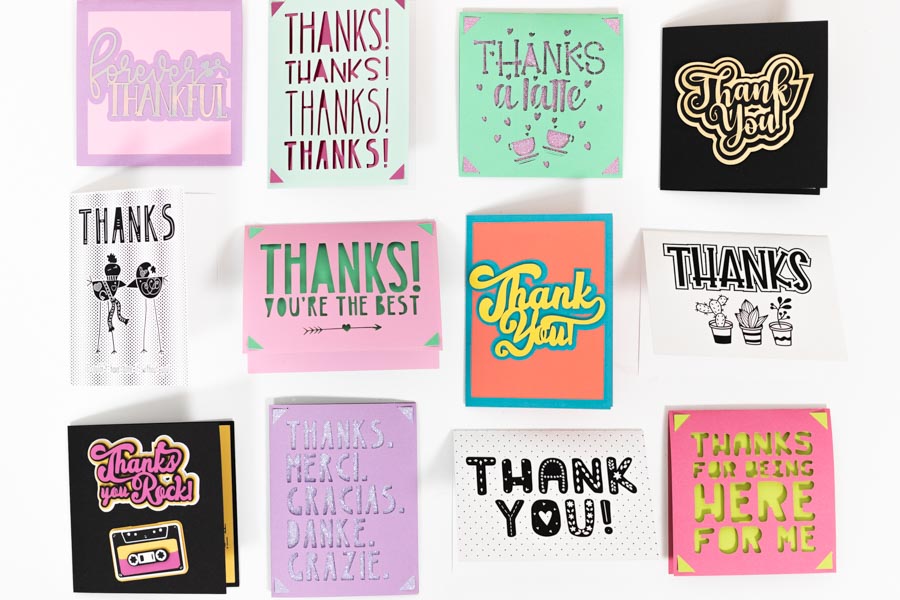
More Thank You Cards with Cricut!
I test all the cards I design to ensure they cut perfectly for you. These cards can be made using the same technique I showed you in the tutorial. Of course, some things will vary, but the concept remains.


Take time choosing your paper. Paper is what gives a card that wow factor!
Which card is your favorite one?


It’s hard to choose, don’t you think?
Believe it or not, my favorite one is the one that says, “Thanks, You’re The Best,” I like the color combination, and the font is fantastic.
Also, for the “Print then Cut” lovers, try these black and white cards.


There’s a little caveat with print then cut cards!
The score line would be on the outside of the card. So it’s not “technically” correct.
Who cares, though?
I won’t tell anyone you did it!
When you upload the card, resize it, add a score line to the canvas area from the “Shapes” tool, rotate it 90 degrees, and size it to fit the card.

Select the line and the card, click on “Align,” choose the option “Center,” and attach.

Now your card is ready to be printed and then cut!
Check out my print then cut tutorial if you’re just getting started with your Cricut.
Share it!
Do you know it takes me over 25 hours to complete a single Cricut article? I know it’s wild, but I want to make sure you understand everything!
I would appreciate your support on Instagram , Pinterest , and YouTube as I try to grow my audience and continue producing great content!


Thanks for the cards!
You’re welcome 🙂
Wow your work is amazing. thanks for sharing. Karin
These are great cards. I’ll be using a few of them very soon. Thanks!
I love them all especially the You Rock one.
Once again you nailed it! Thanks for the cards and the thorough tutorial.
Thanks so much for the templates and the step by step instructions.