Hello Daydreamers!
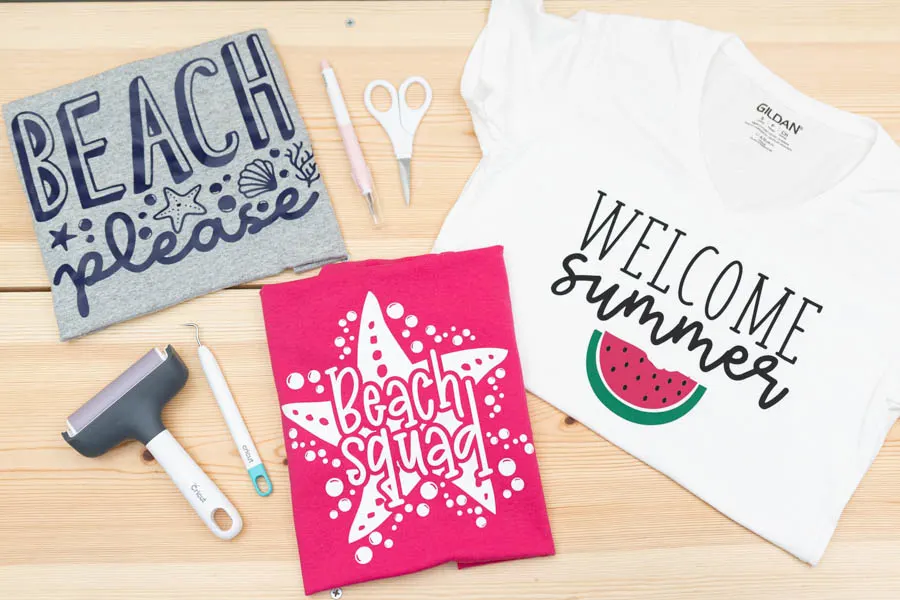
It’s warm and sunny outside. That’s why today I will teach you how to make beautiful summer t-shirts with your Cricut Machine!
I have multiple articles on making and personalizing clothing with your Cricut. Today we are personalizing with iron-on. Nonetheless, you can also visit my making t-shirts with freezer paper stencils and infusible ink t-shirts tutorials for different techniques.
Not only will I teach you how to make summer t-shirts, but I also have 12 Summer Free SVG files for you to get creative and personalize everything summer with your Cricut.
This article is full of tips and since I don’t want you to get lost, this is what I will be covering:
- Materials
- Cricut Design Space Steps
- Cutting and Weeding
- Transfer steps using an Easypress
- Example of another t-shirt using a regular household iron
- Free Files!

Tip: This tutorial builds upon the skills I teach in every step. If you’re just starting with your machine, I suggest you read and follow each step.
Are you ready?
Let’s Daydream Into Reality!
Materials
Tools/Accessories
- Cricut – Maker, Explore, Joy
- Fine Point Blade
- Standard Grip Mat (green mat)
- Brayer/Scraper
- Practice file (download below)
- Weeder
- Easypress/household iron
- Easypress mat/towel
The rest of the files are at the end of the step by step tutorial.
Materials
- T-Shirt blank*
- Everyday Iron-On (black, pink, green)**
- Parchment paper if using a regular iron-on.

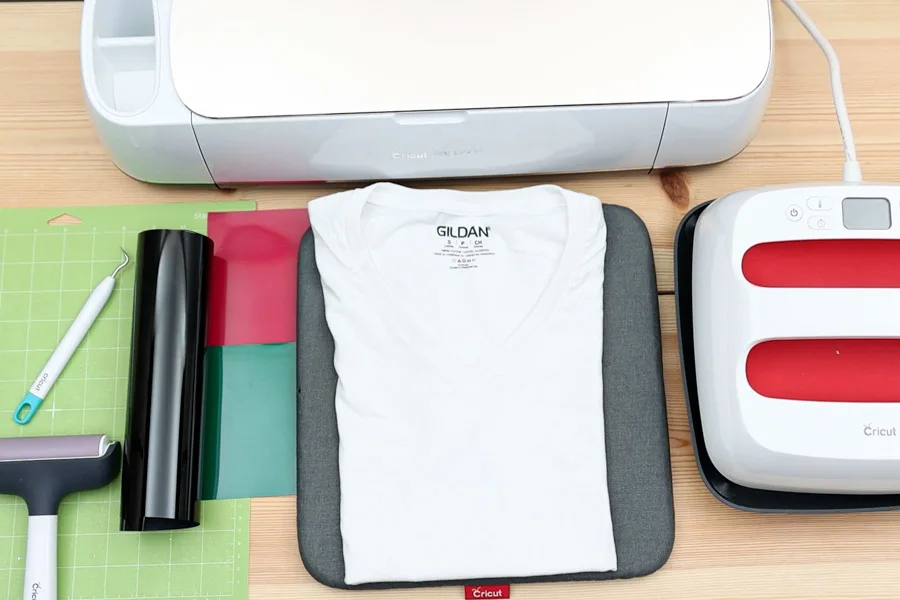
* I used Gildan® t-shirts. I like them because their cotton is already preshrunk, and you can get away without washing before you press vinyl on them.
What I don’t like about them is that their cotton is a little bit stiff. I prefer H&M blanks, and other soft and comfy clothes to wear on a daily basis. So, don’t be afraid to look for blanks on your favorite brands.
**If using specialty vinyl like glitter or foil iron-on, check out the section of this tutorial as layering is more tricky.
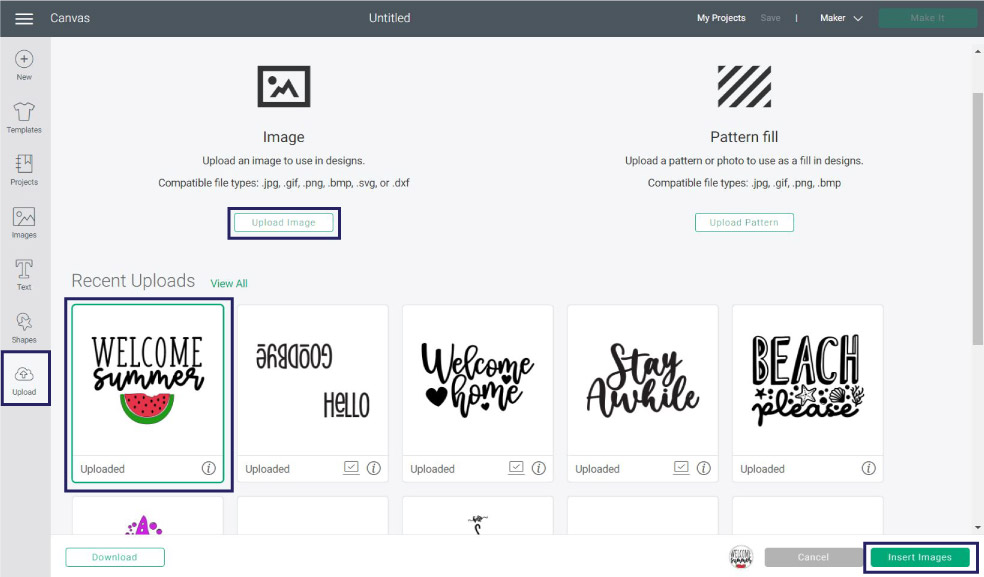
Step 1 – Upload to Cricut Design Space
Create a new project in Cricut Design Space, then by clicking on the “Upload” icon, go to “Upload Image.” and upload the “Welcome Summer” practice file (you can download it from the materials list or the end of this tutorial).
Follow the prompts, and select the file from the “Recently uploaded images” and click on “Insert Images.”

Step 2 – Organize File
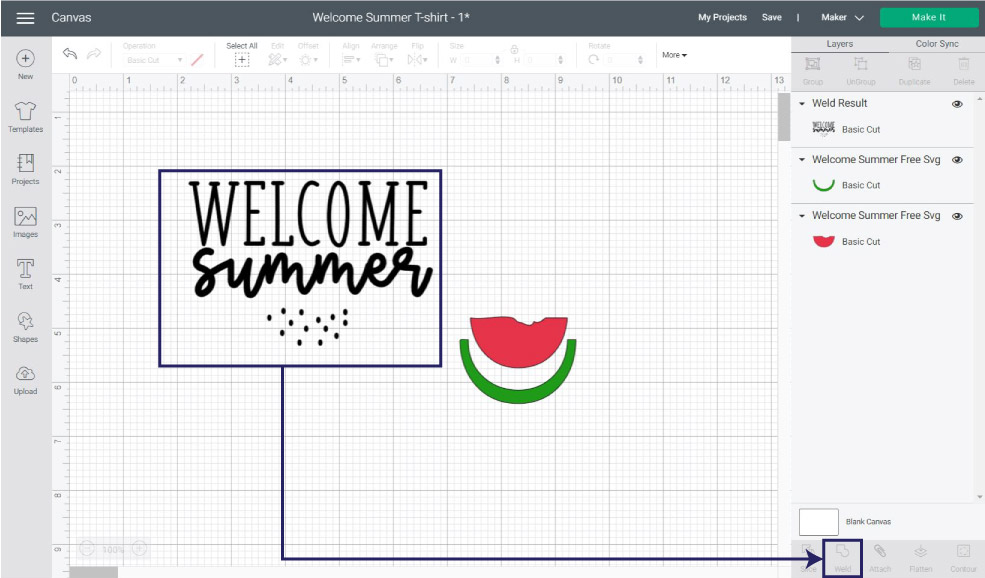
When you first upload a file to Cricut Design Space, you need to do a little clean-up. As you can see, on the Layers Panel, the file is in multiple layers.
This design has three different colors. Black, pink, and green. Each color represents a different iron-on color we will be using.
This particular file is quite interesting, and I designed it because beyond making a summer t-shirt, I also wanted to teach you some principles when layering iron-on.

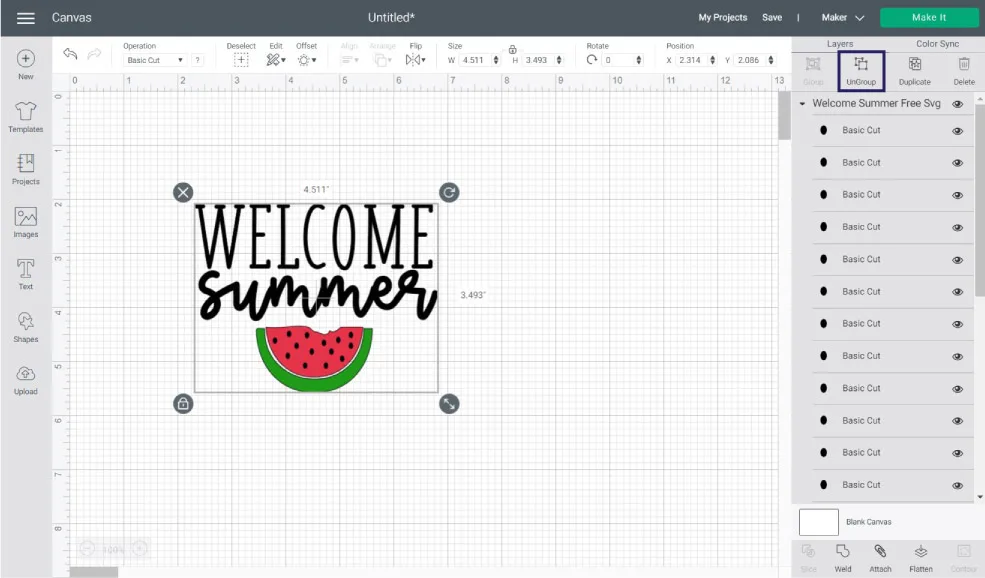
First, let’s organize the file by clicking on “Ungroup,” then select all the black pieces from the Layers Panel (pressing shift at all times), and click on “Weld” located at the bottom of the right panel.

Now the file is in three single layers.
When layering iron-on, having an EasyPress is pretty much a must because you need even heat. However, if you don’t have one, I would recommend you organize the file in the following way:
- Ungroup file
- Weld the “Welcome Summer” letters to form one single layer.
- Weld the “seeds” to have them on another single layer.
- Select the pink layer and “welded” seeds and click on “Slice” located next to “Weld”
- Weld letters with watermelon.
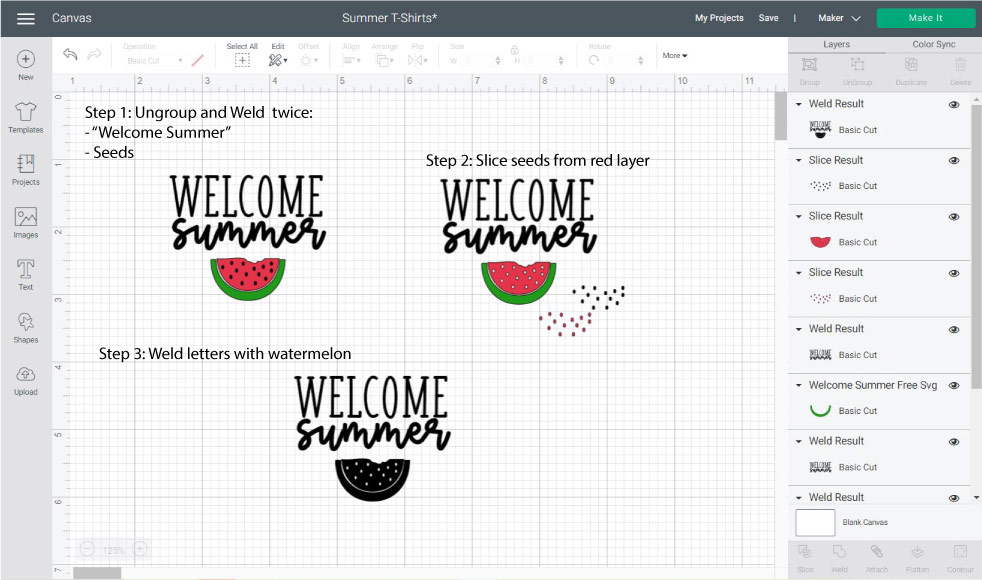
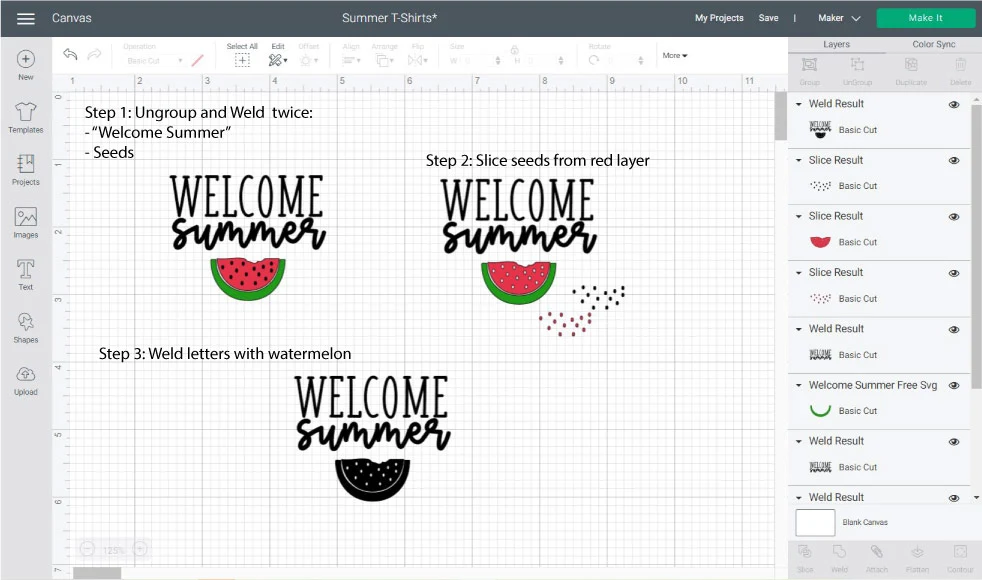
You could try using an iron after slicing the seeds and trying to avoid the areas you already pressed. I am working on a tutorial to see how feasible it is to layer iron-on with a household iron.
Since I am using and EP for this t-shirt I will leave it with the black seeds.
Step 3 – Resize & Send to Cut
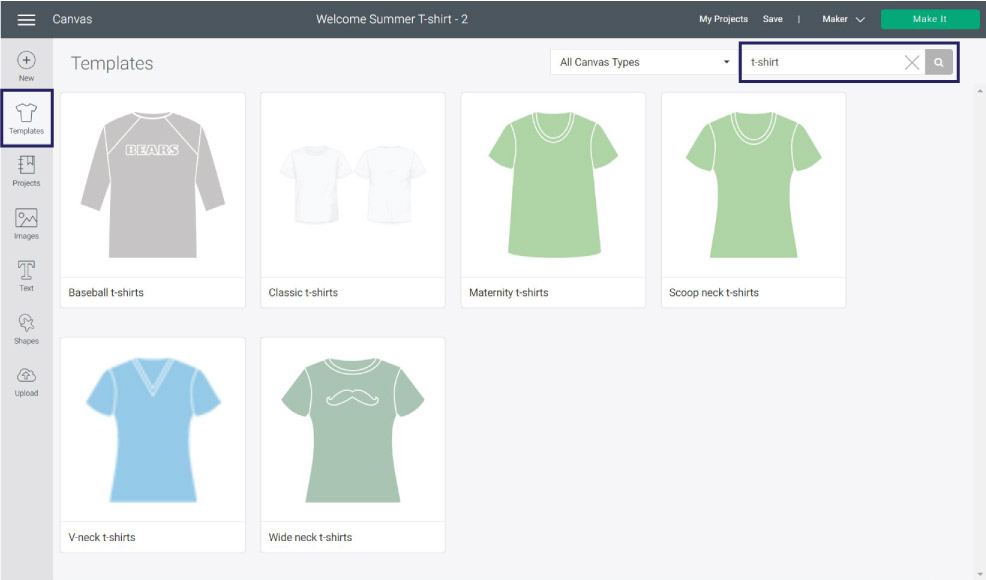
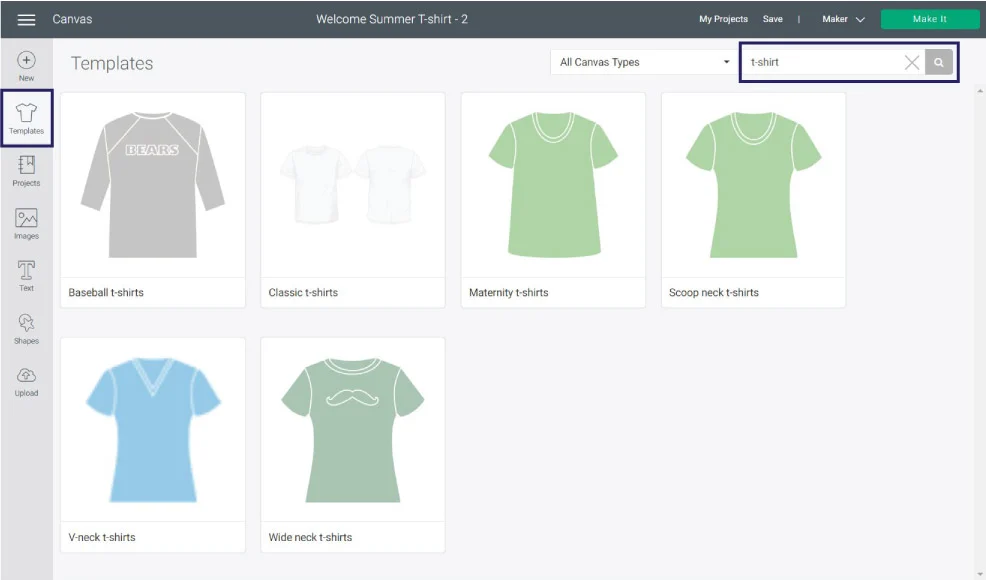
When making t-shirts, I love using the “Templates” tool because it allows me to resize and visualize where I will place my design in real life.
Here is how you do it!
Click on the “Templates” icon and search for the surface you want to use. For example, I typed in “-T-shirt.” To resize the file, select and drag it by the bottom-right corner until it fits the template. Keep in mind the cutting limits of your machine.
Learn all about using “Templates” in Cricut Design Space.
Important: For Cricut Joy, and if using smart iron-on, each color can’t be larger than 4.5 inches wide and 4 feet long. If using Cricut Mat, the size can’t be larger than 4.25 inches x 6.25 (small mat) or 4.25 inches x 11.75 (large mat).
If you don’t trust the template size because there are many brands and each one of them uses a different sizing system, you can also change the measurement of your design from the top menu.
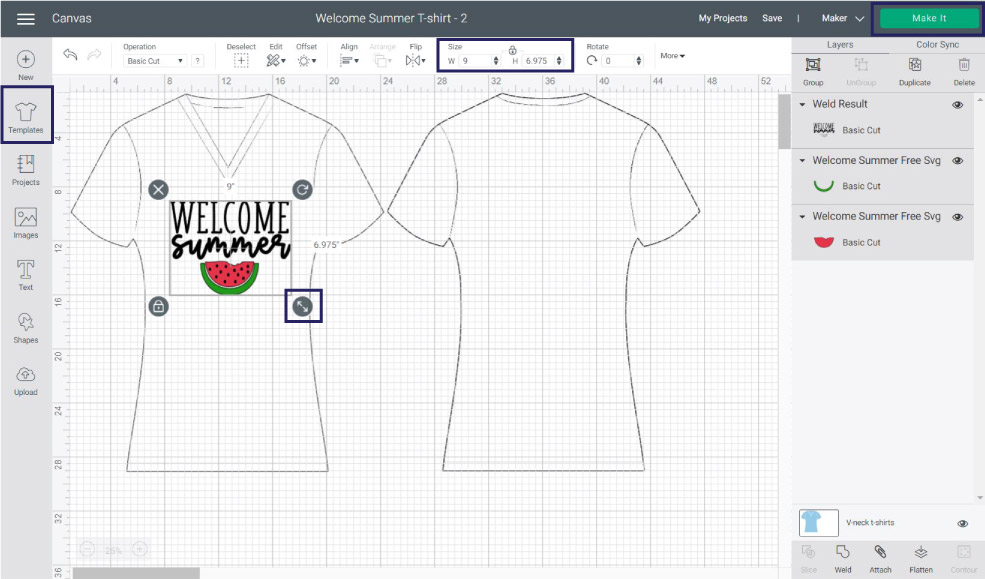
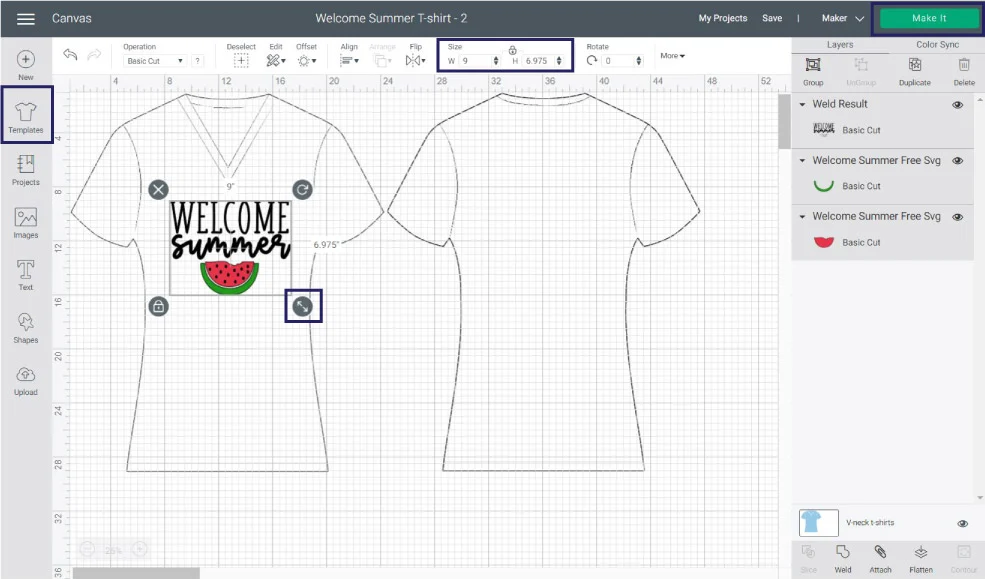
Once you’re done sizing, click on “Make it” to send your project to your machine.
Step 4 – Turn Mirror On
Every time we use iron-on vinyl, we need to toggle the mirror option to turn it on. Otherwise, your design will look backward after your transfer.
Tip: For newer machines and if using “Smart Materials” Design Space will prompt you to cut without a mat.
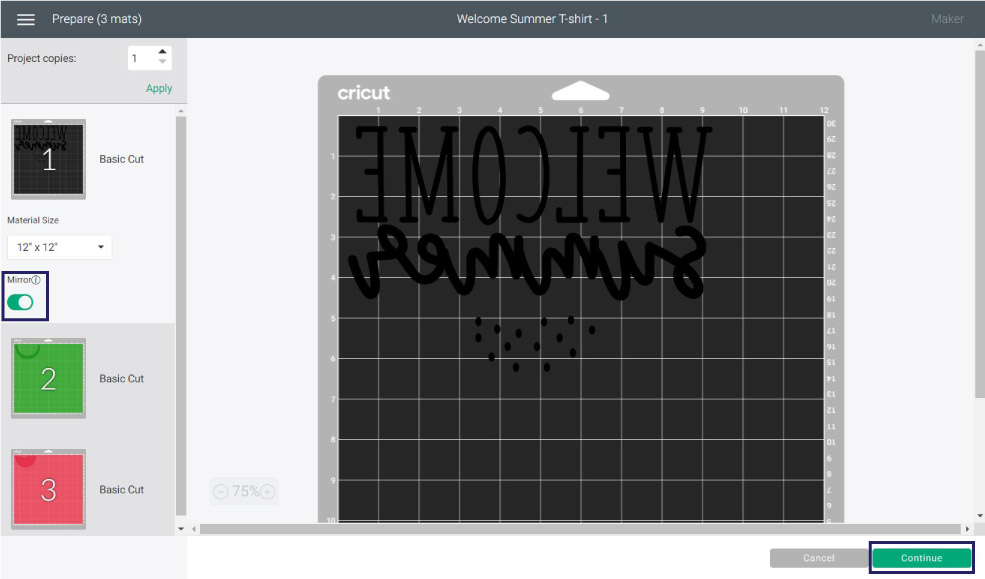
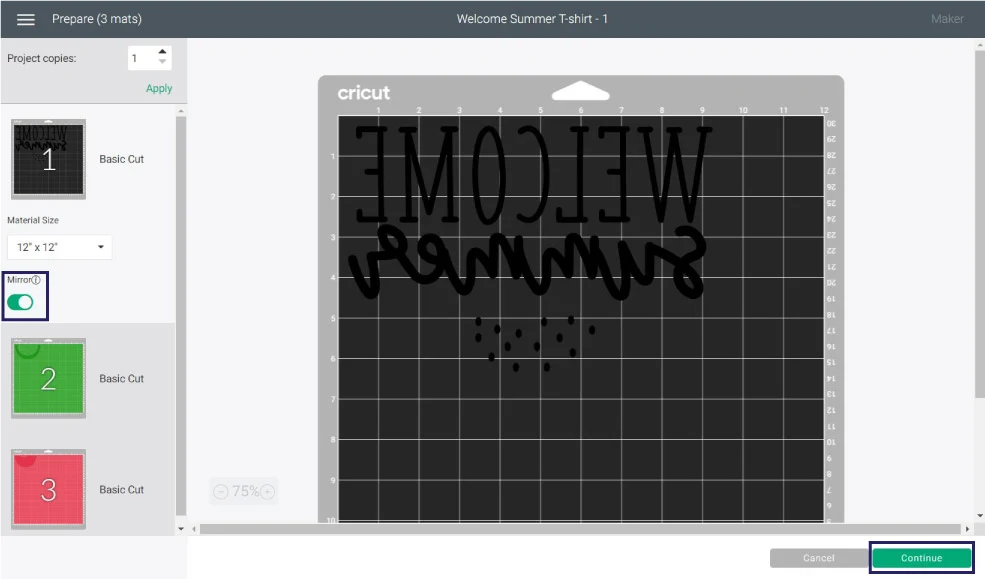
For this cut I used my Cricut Maker so I am cutting on a regular mat.
Click on continue to select materials.
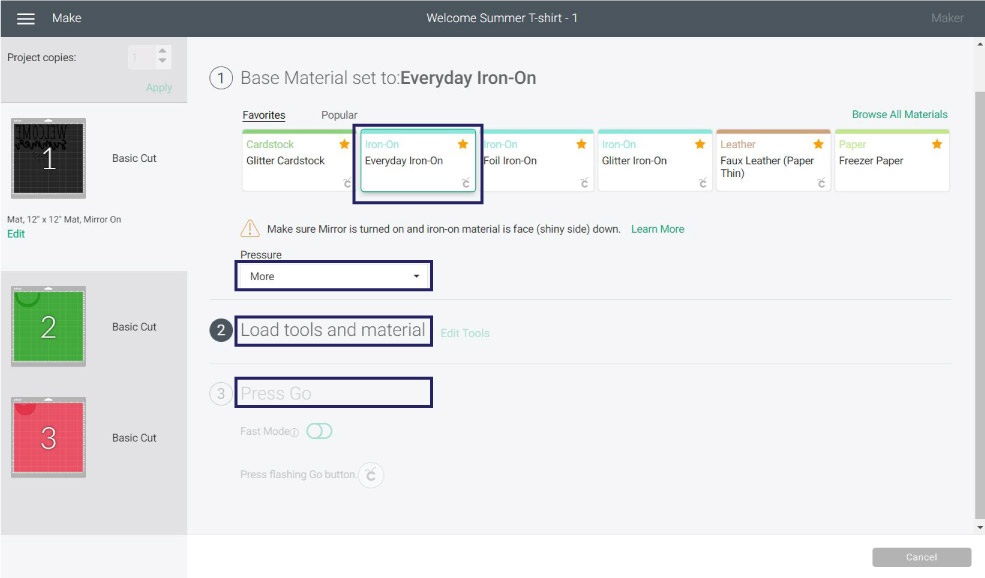
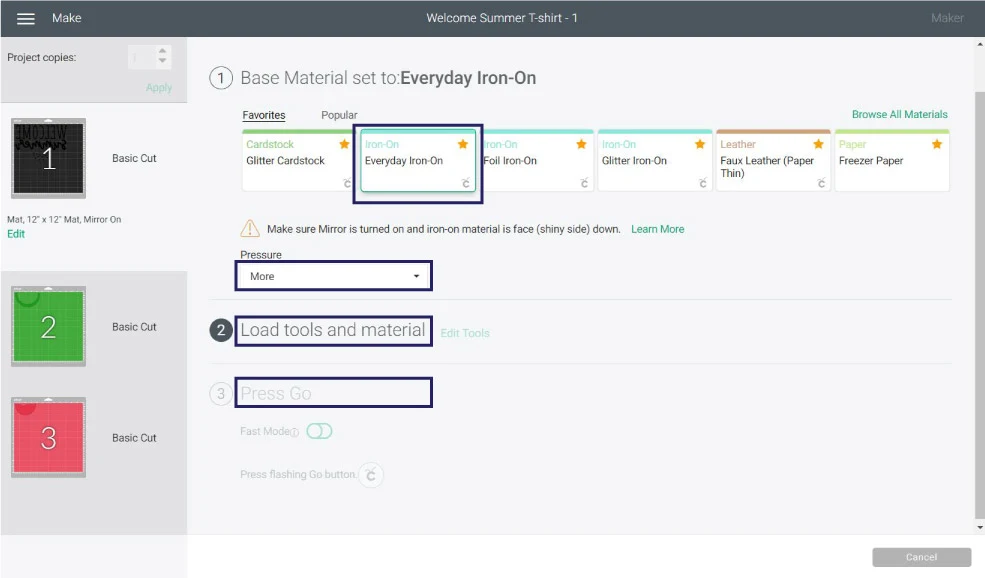
Step 5 – Select Materials and Cut
If you have a machine with a smart set dial move it to custom and select material from Design Space. For the machines without a dial (Maker, Joy, Explore 3, etc.) always select your material from Design Space.
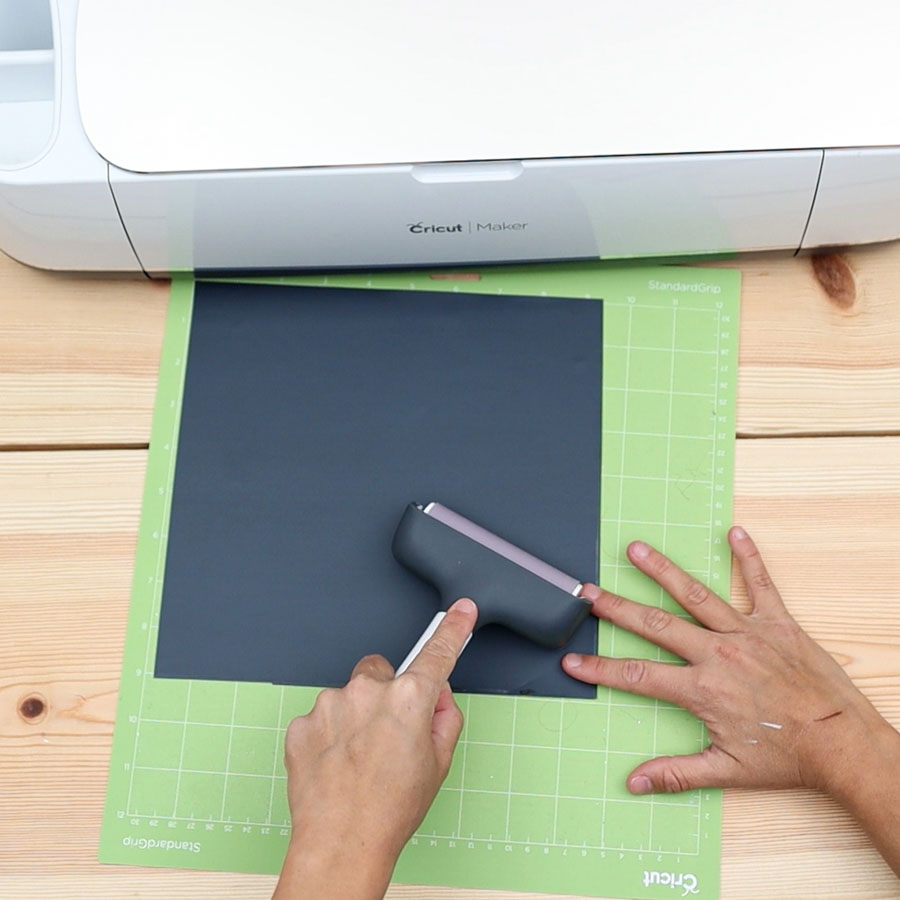
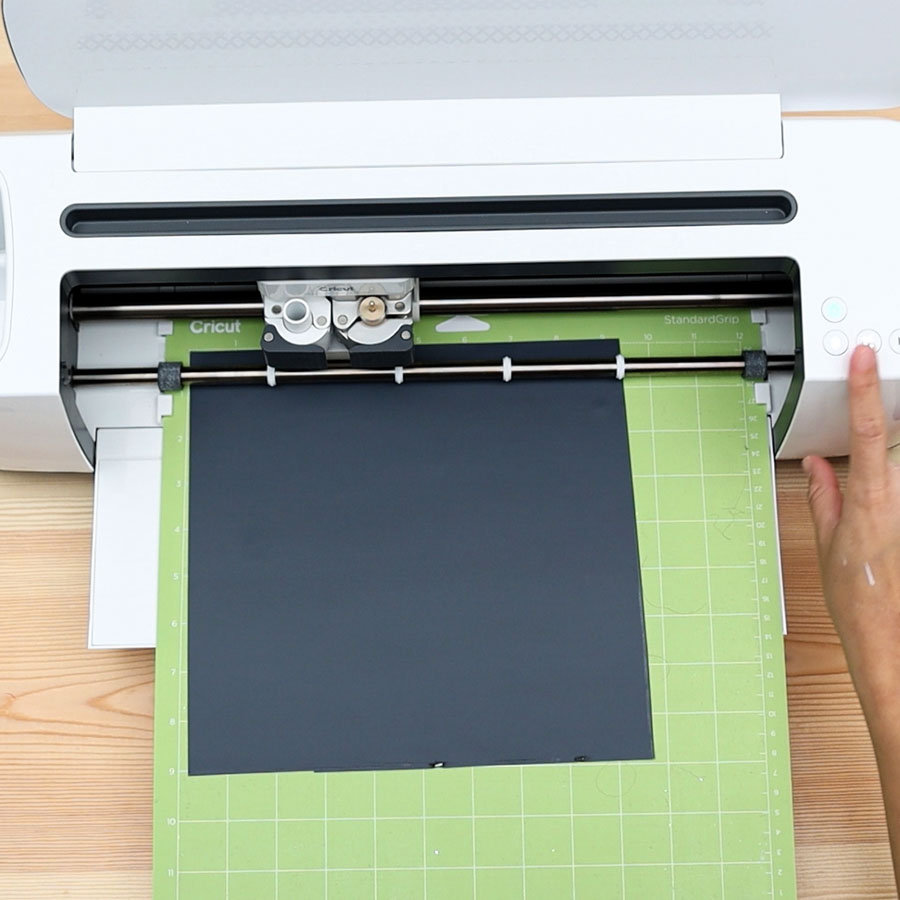
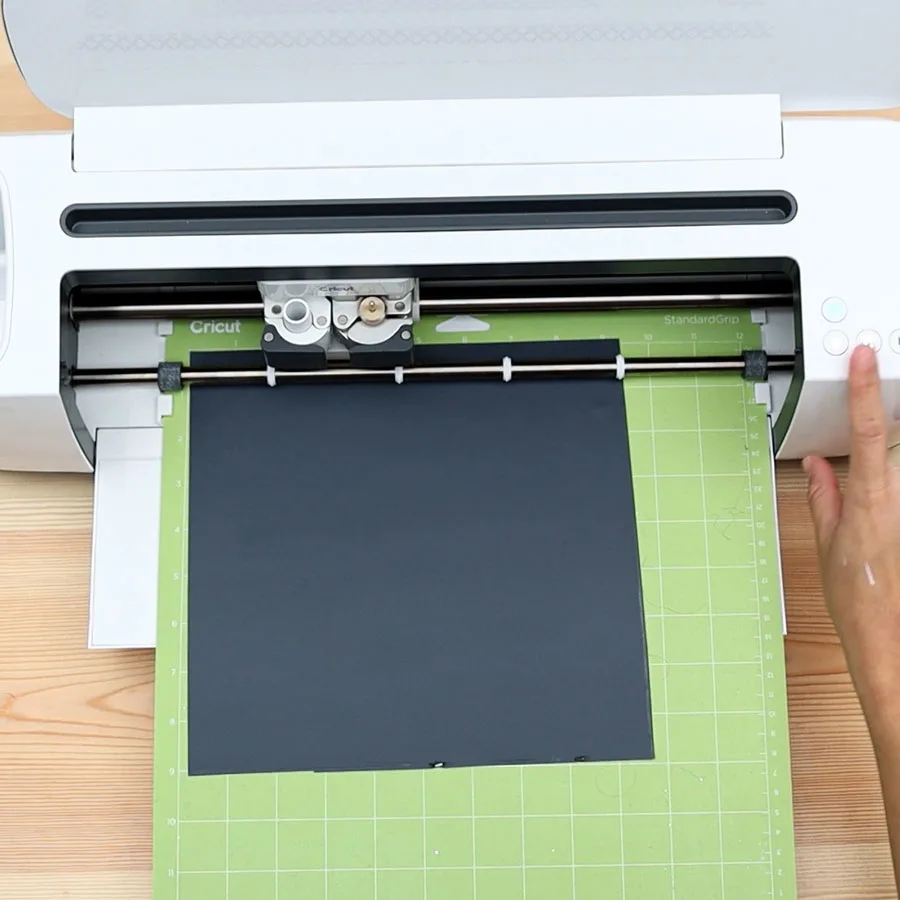
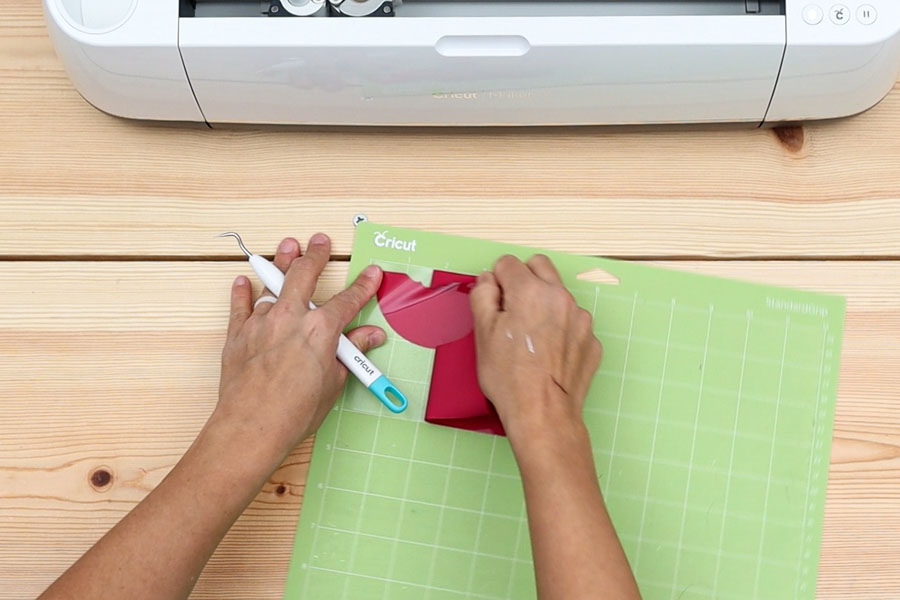
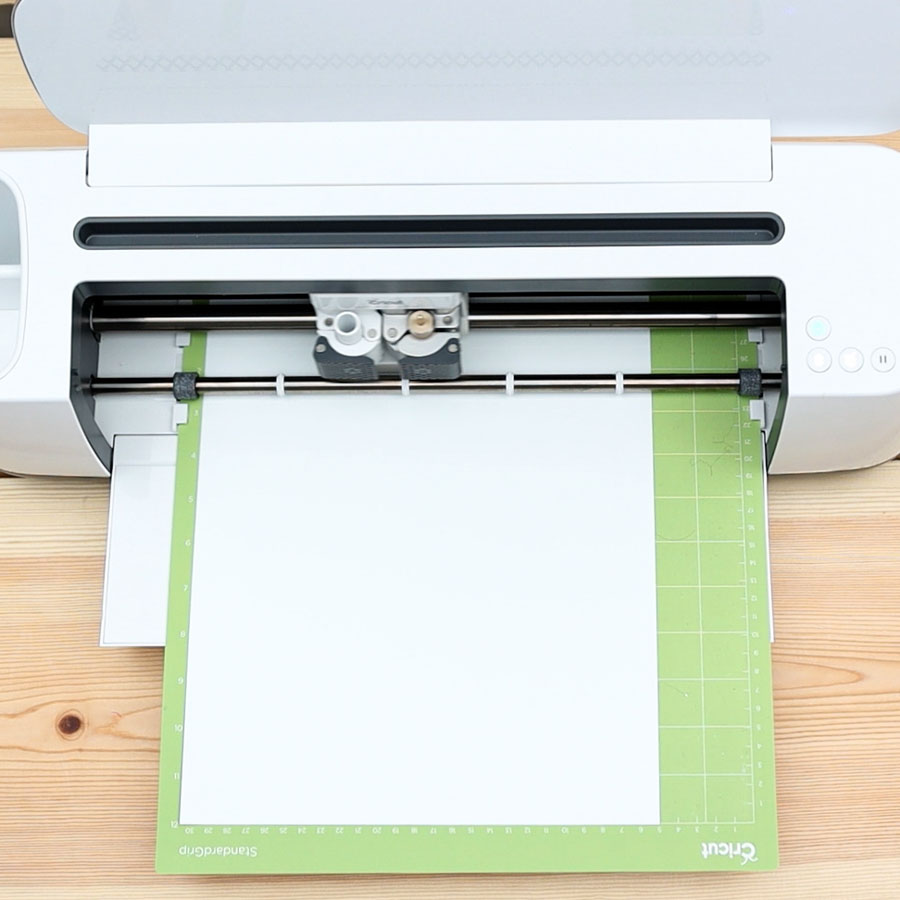
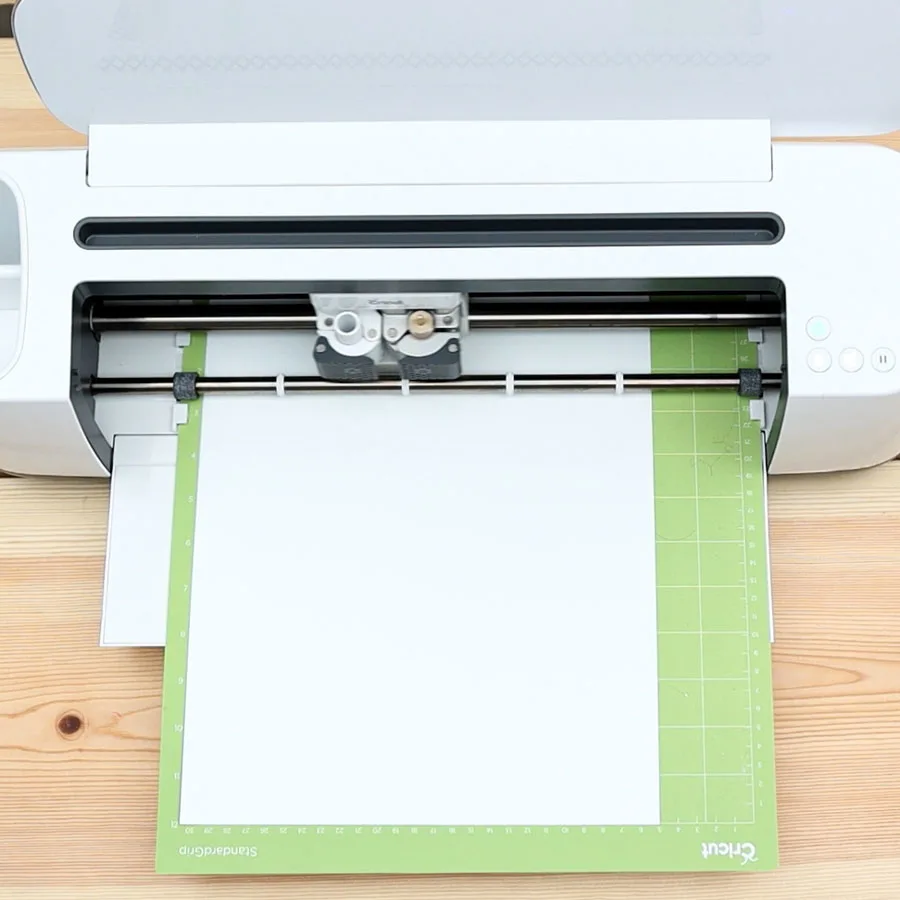
Step 6 – Prepare Mat, Cut & Weed
It’s time to prep the Cricut mat and cut!
Place iron-on on mat pretty or shiny side down (Very important). Use a brayer or scraper to get rid of bubbles. I personally love using a brayer, and it’s a must-have tool in my craft room!
Load mat to your Cricut machine and press the flashing go button to start the cut. For Cricut Joy, start the cut from Design Space.


When the cut is complete, weed your design.
Related: Learn how to work with iron-on to perfection!
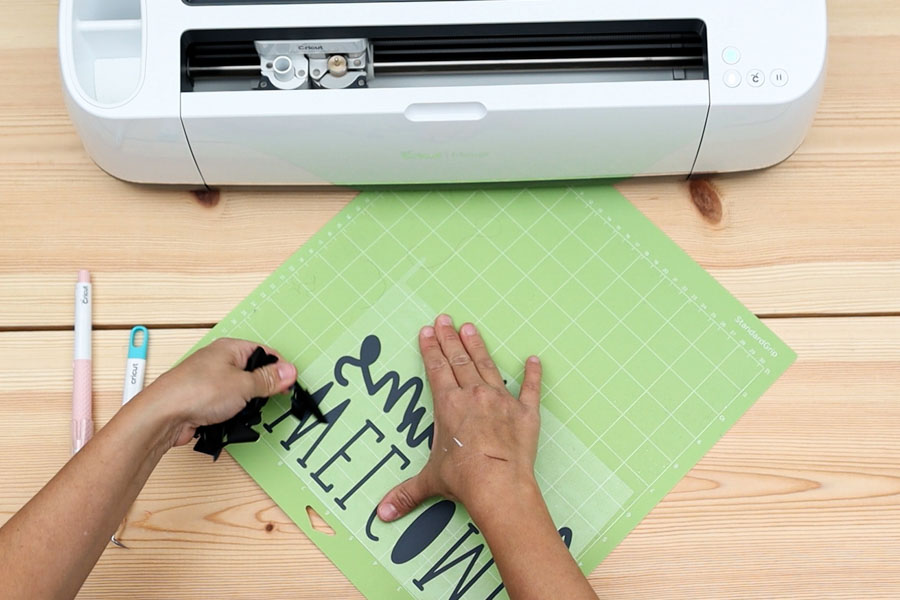
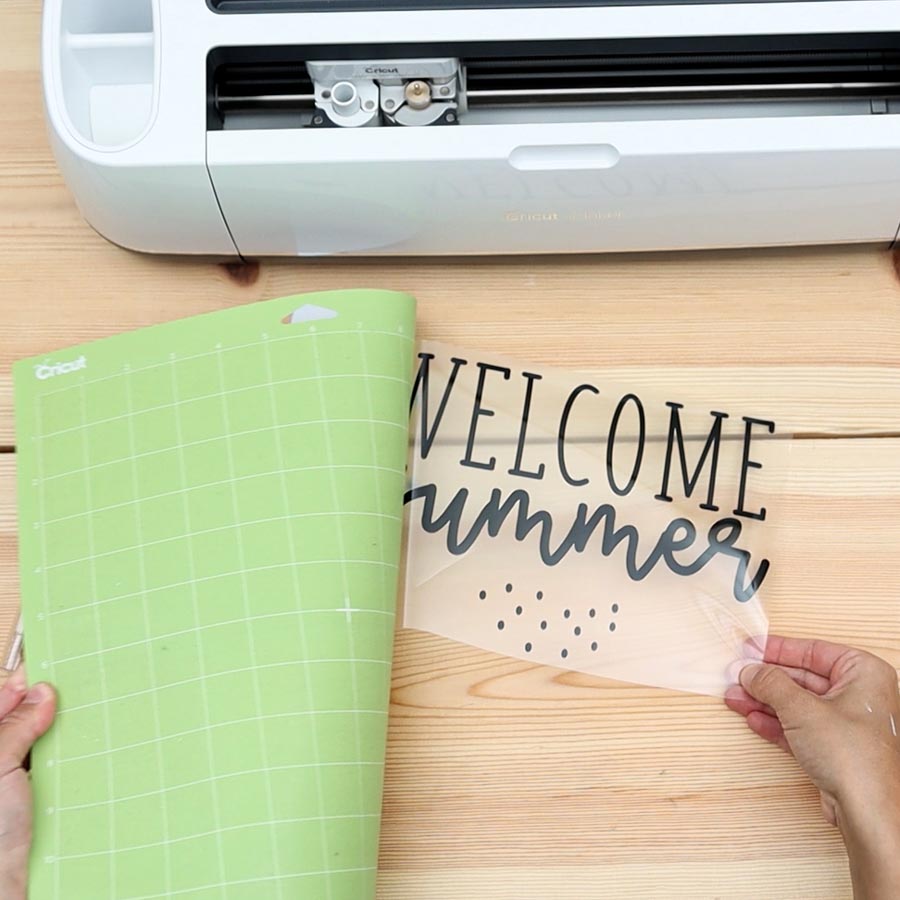
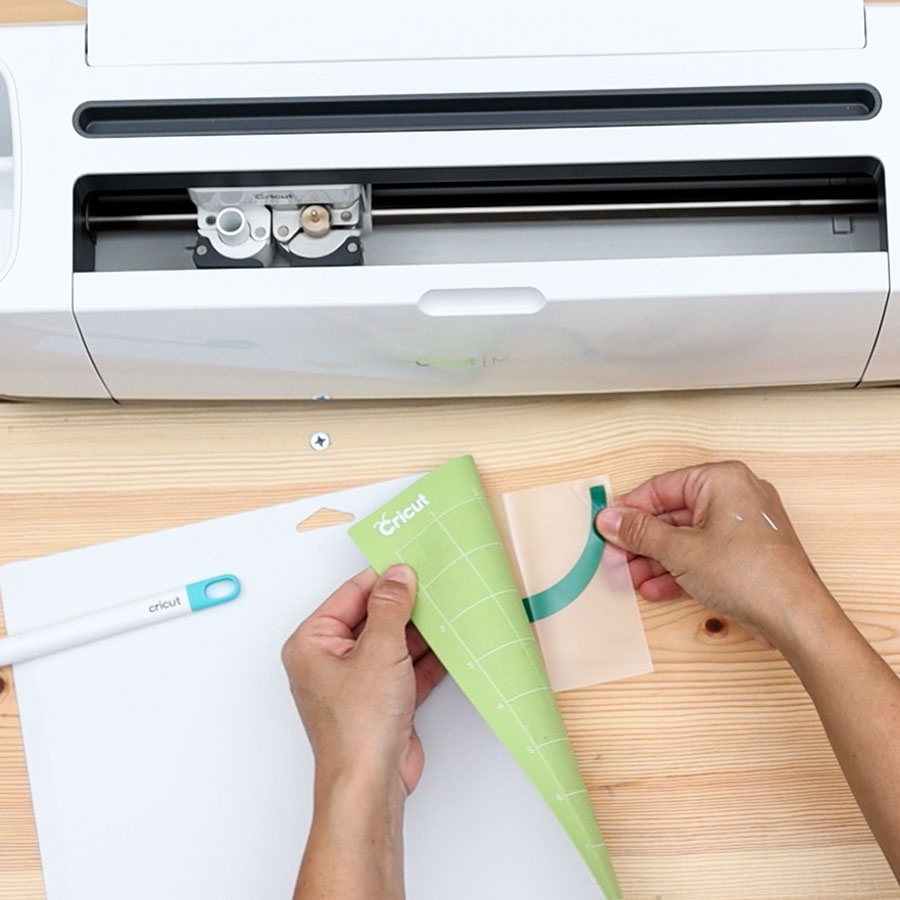
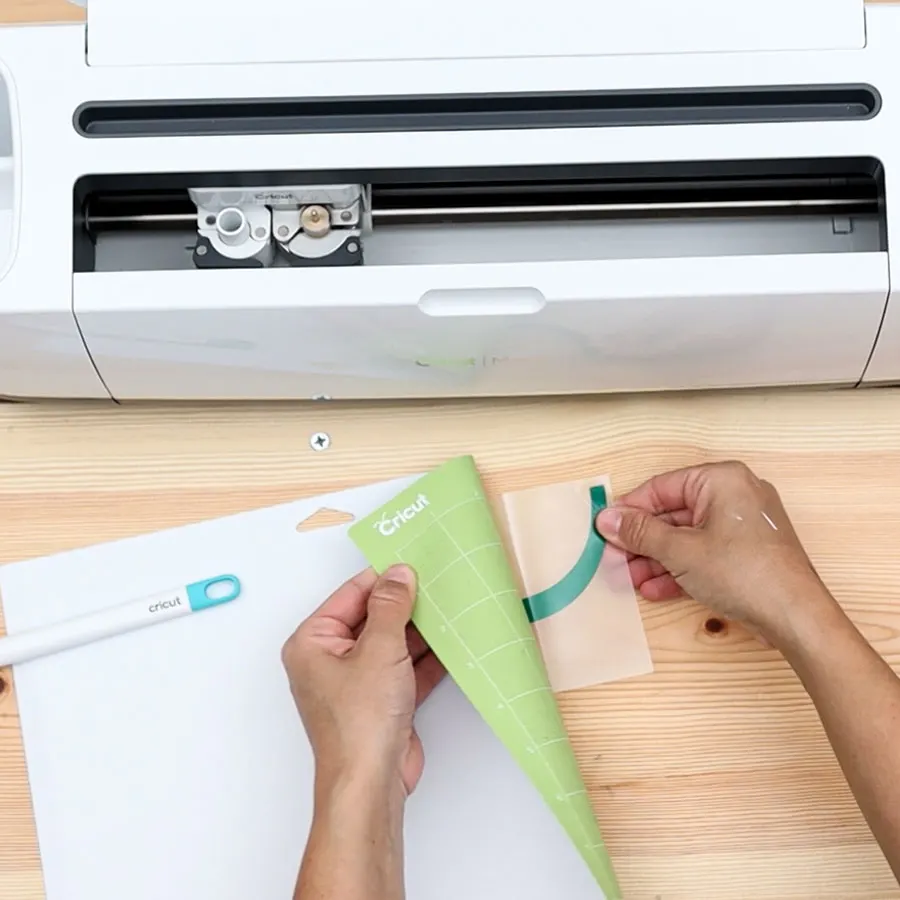
Step 7 – Remove from Mat & Repeat
Once you weed, bend your mat to release your design from it. Repeat the same process, with the green and pink colors.


Have you tried weeding from the mat?
It’s so much easier!
Step 8 – Transfer Iron-On
It’s time to transfer design to the blank, and since I am using an Easypress and everyday iron-on I preheated to 315° F.
Take a look at the following picture and let’s have a little chat.


When you weed iron-on, you have the carrier sheet or heat-resistant transfer tape. This sheet holds the vinyl in place while cutting the vinyl, and it also withstands the heat when you transfer it.
One of the best practices when layering iron-on is to avoid presses that can mark the vinyl and scorch the materials.
Every design is different, and not all steps will be the same but try to think outside the box and apply the same principles when layering iron-on.
To save a press, trim the “watermelon flesh” so it fits inside the “watermelon skin.”
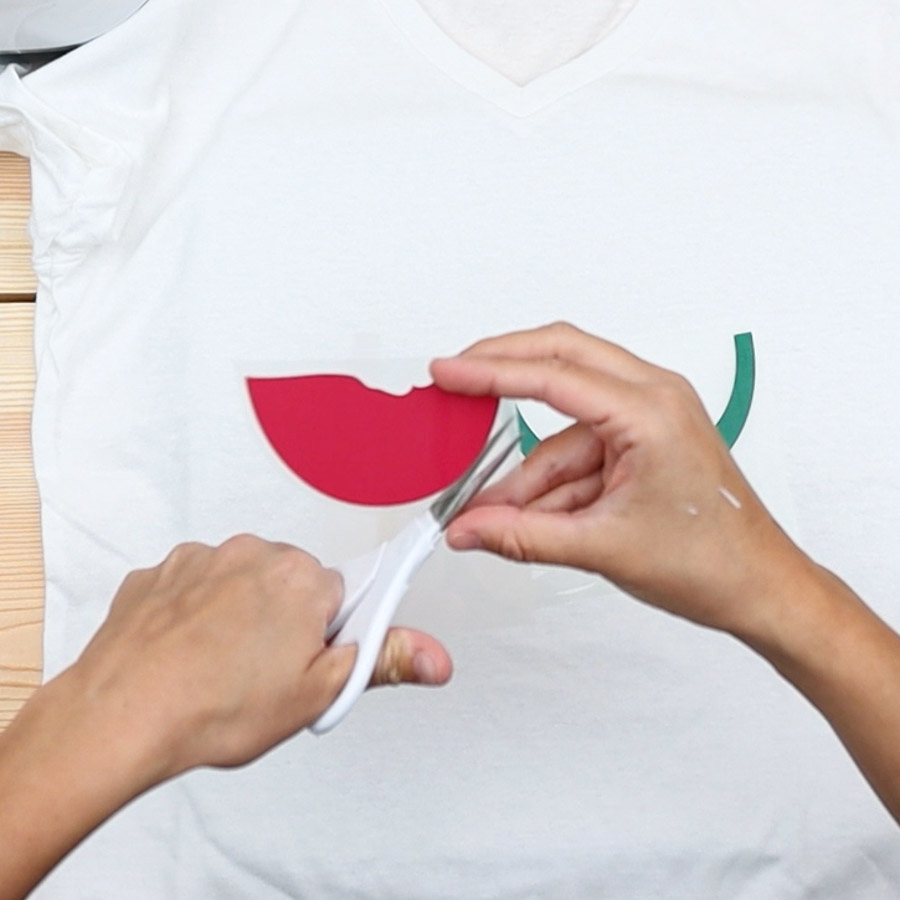

Trim 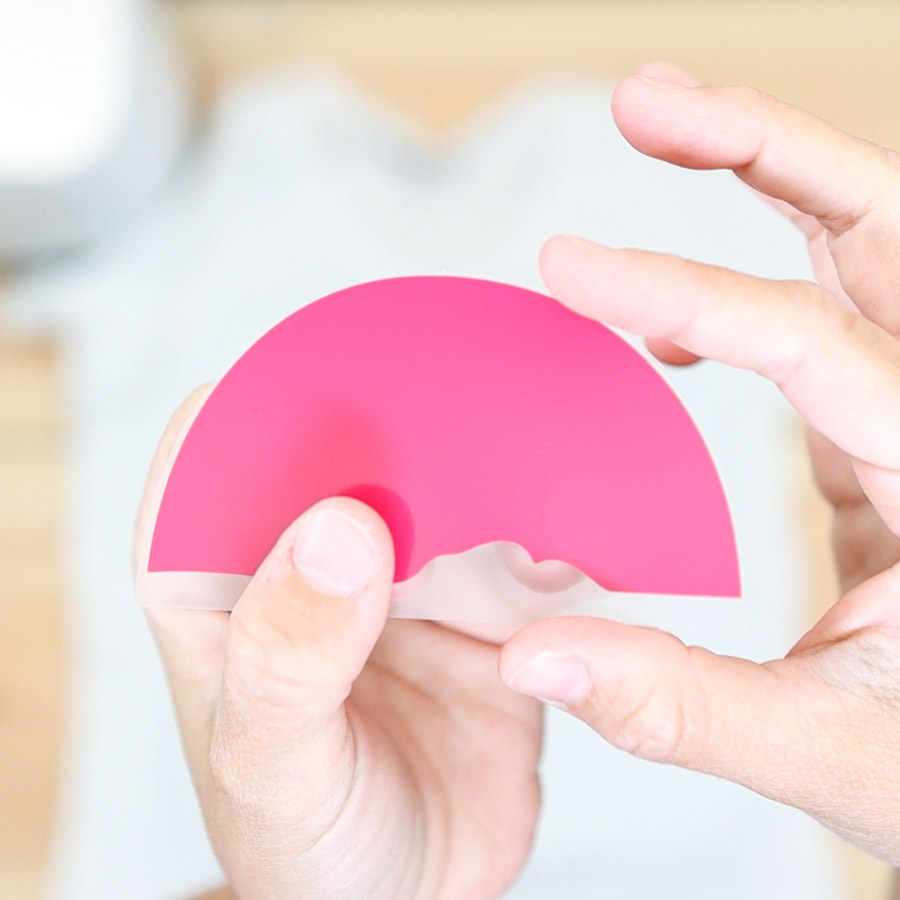

Trim 
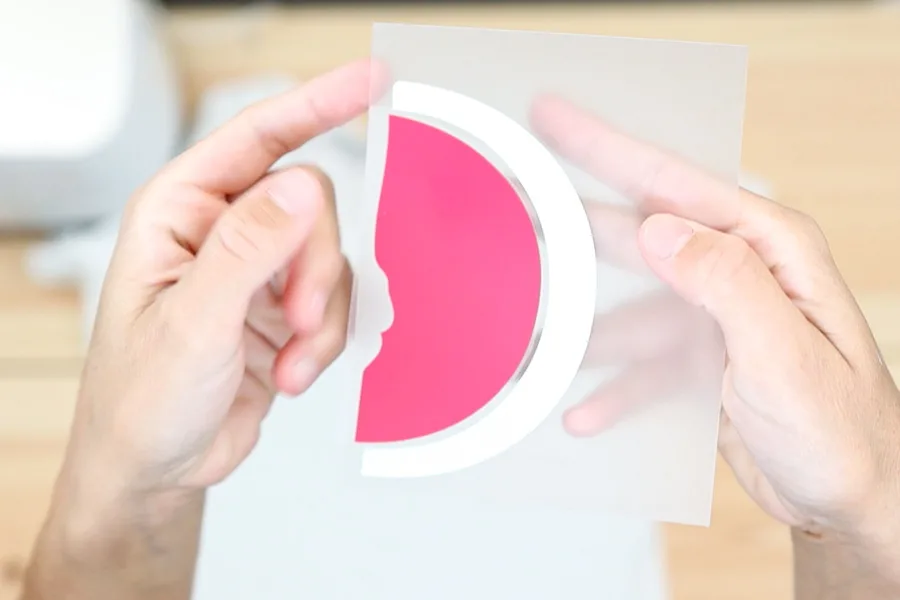
Fit to perfection
The pink layer needs to fit perfectly inside the green one. Otherwise the transfer would fail and we don’t want that.
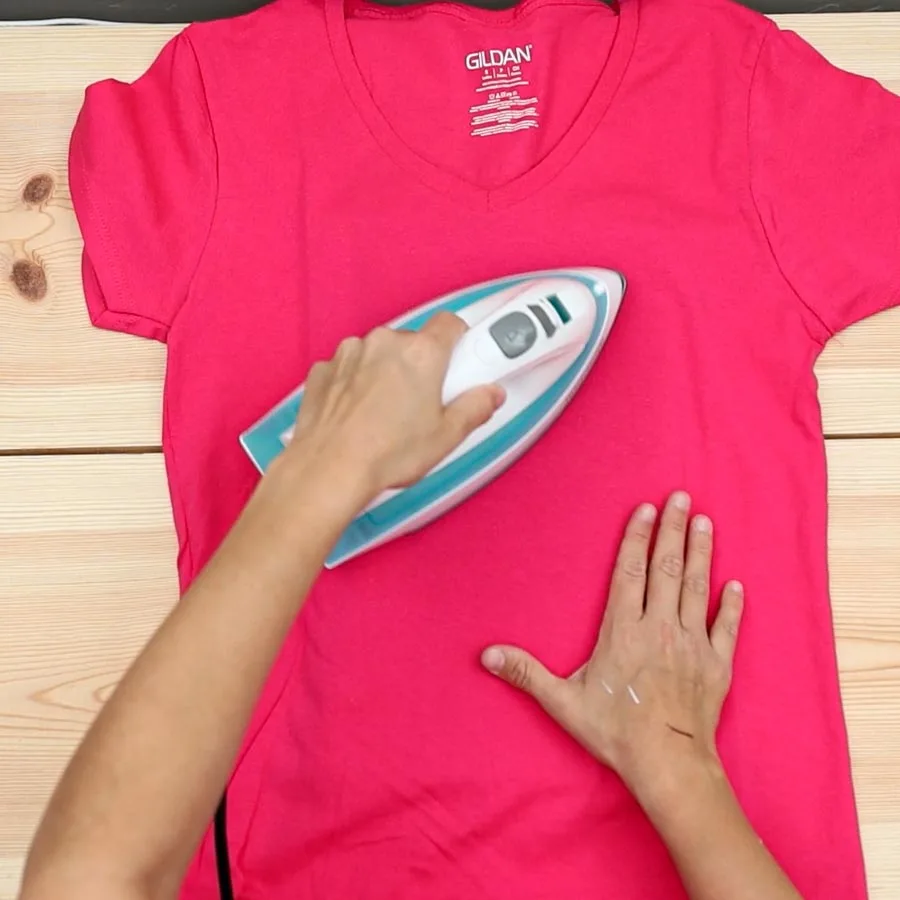
Before you do an initial press, go ahead and preheat your t-shirt for about 5 seconds to get rid of moisture and/or wrinkles.
Important: Have a towel or an EasyPress mat underneath the t-shirt.
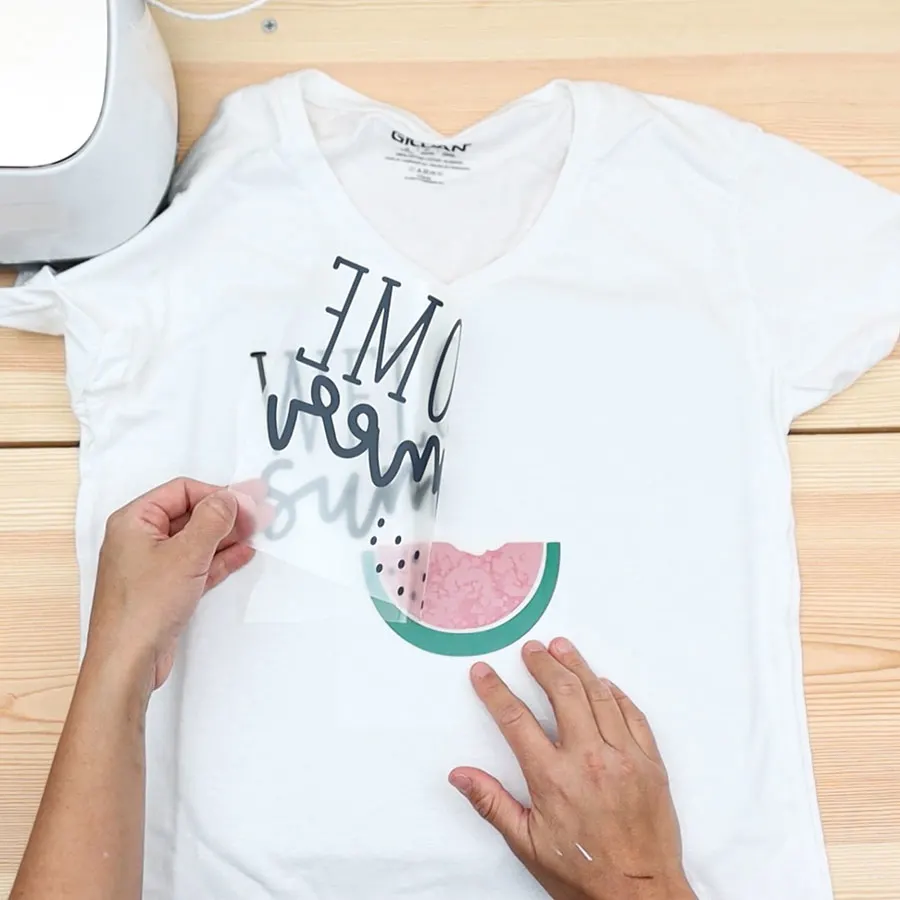
Now it’s time to press the watermelon, but you need to find the perfect position. You can grab a ruler, but I like to be practical.
Place the black layer where it’s supposed to go, lift it from the bottom and place the watermelon using the seeds as a reference point.
Once you find the perfect spot remove the black layer and press for about 5-10 seconds on the watermelon. This press has to be really hard to establish an initial bond between the fabric and vinyl.
Lift press and wait a couple of seconds to remove the backing sheet. If it doesn’t come out, repeat hard press for another 5 seconds.
Don’t rush to lift up vinyl while is hot, remember the initial bond is kind of weak so you need to be careful.

Remove black layer 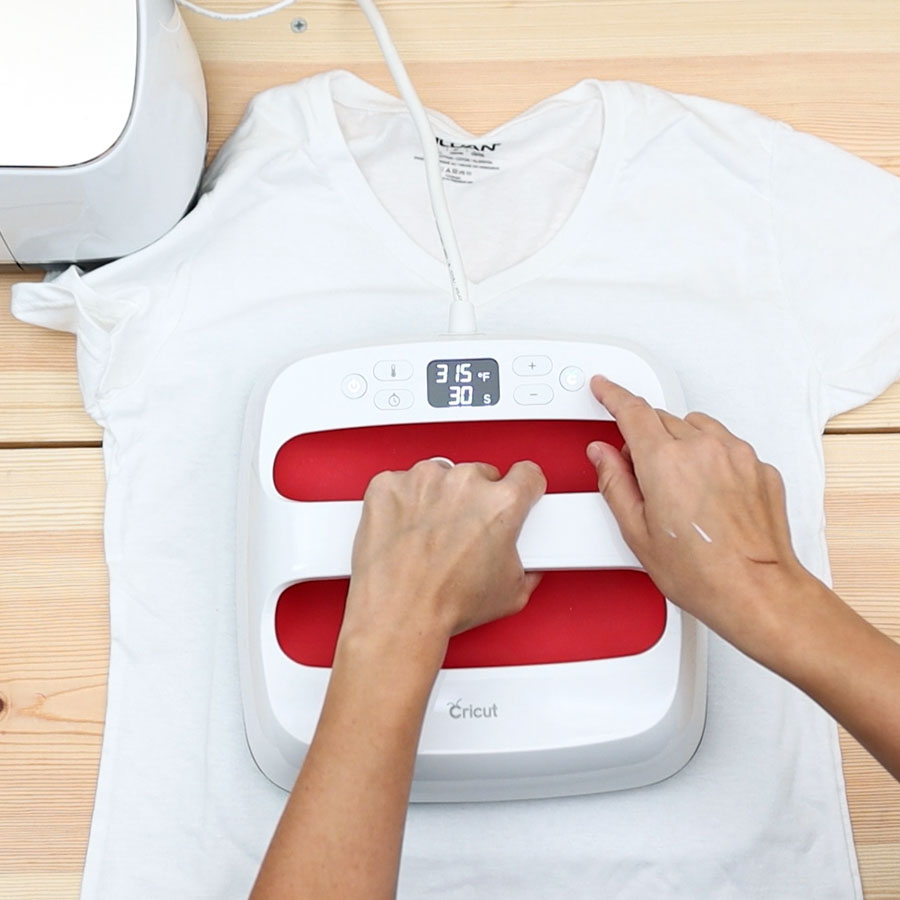

1st Press: Hard 5-10 seconds 

Position Black Layer
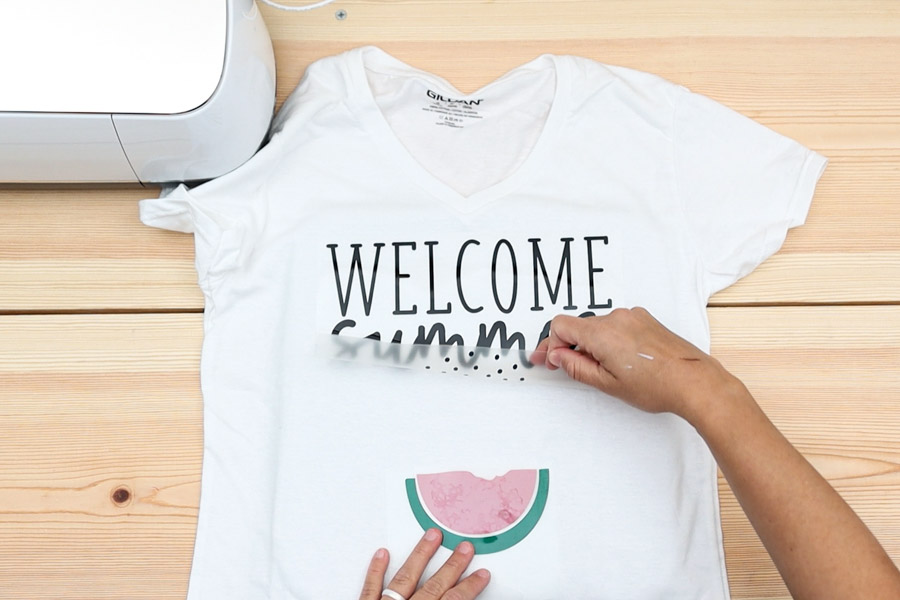
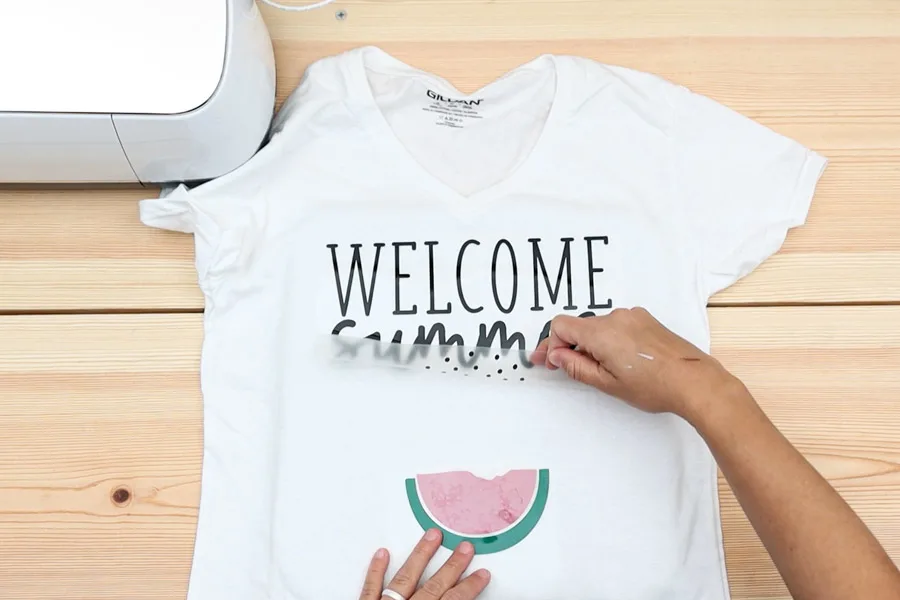
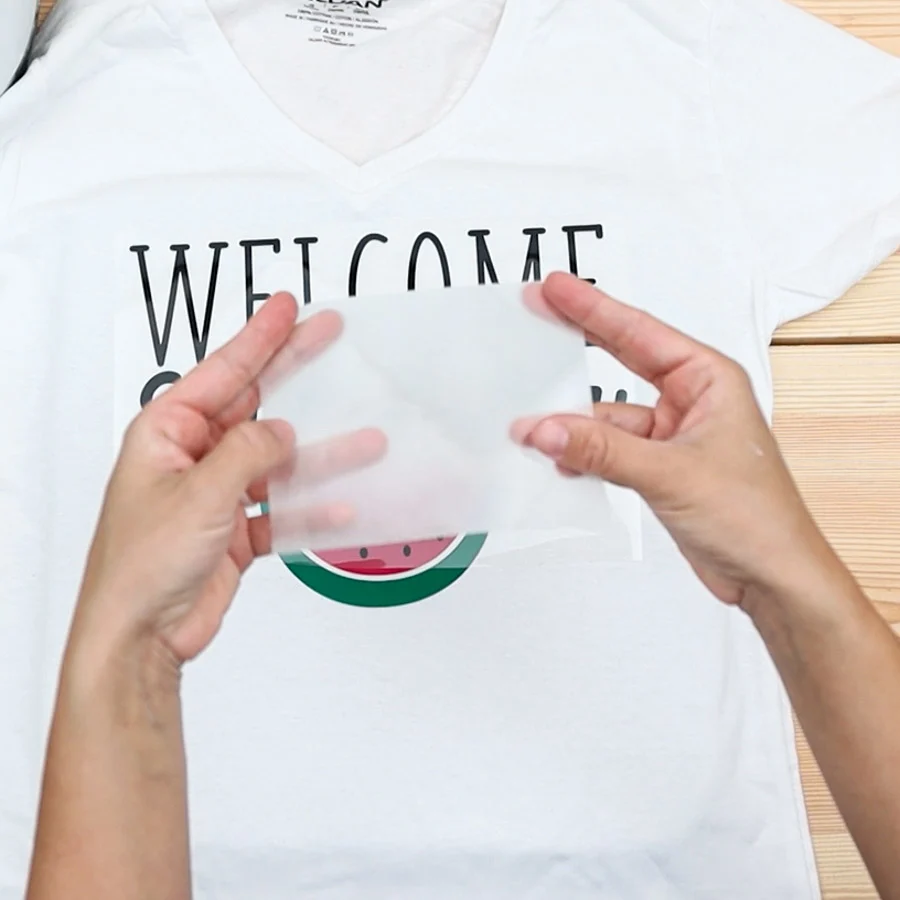
Remove the backing sheet from watermelon layers and place the “Welcome Summer” and “Seeds” on the t-shirt.
Important: To protect the initial press, place one of the backing sheets you just lifted and place it on top of the exposed vinyl.
Press the t-shirt with regular settings. If you are using other types of HTV, check out the instructions for that particular brand.
This is what Cricut recommend when using everyday iron-on, considering we already preheated out t-shirt before we did first press.
- Press with light pressure at 315°F for 30 s
- Flip 100% cotton over and press for 15 s
- Slowly remove liner when cool to touch

Protect Exposed Vinyl 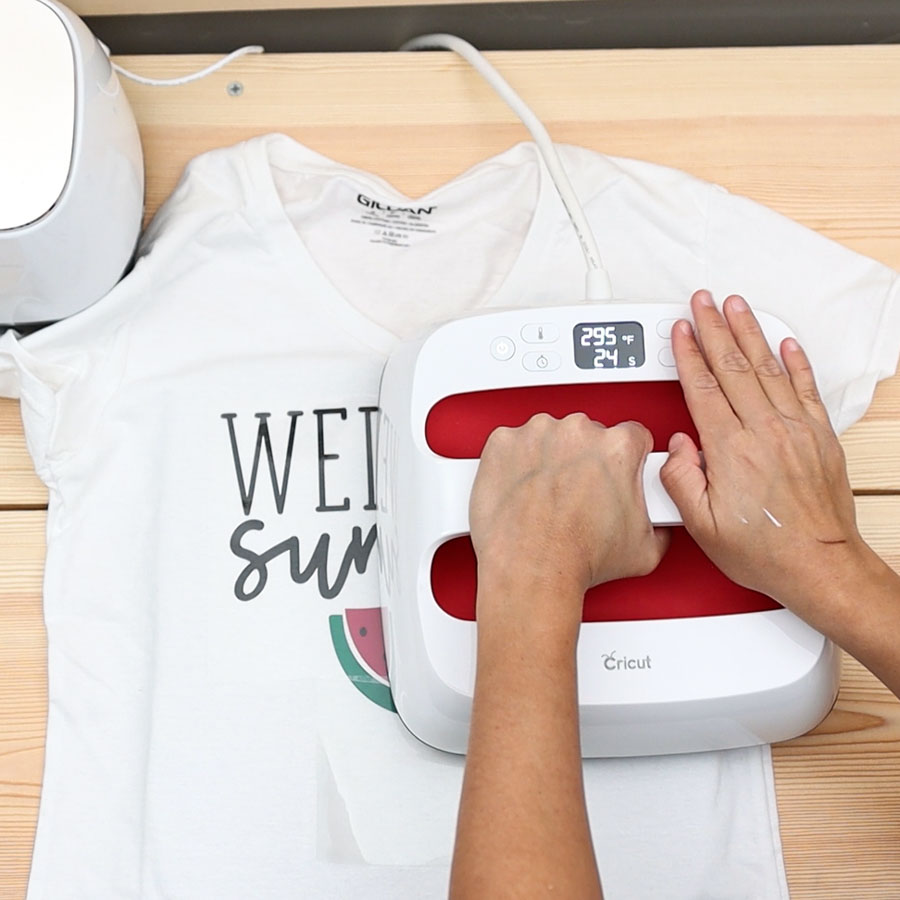

2nd press with regular settings 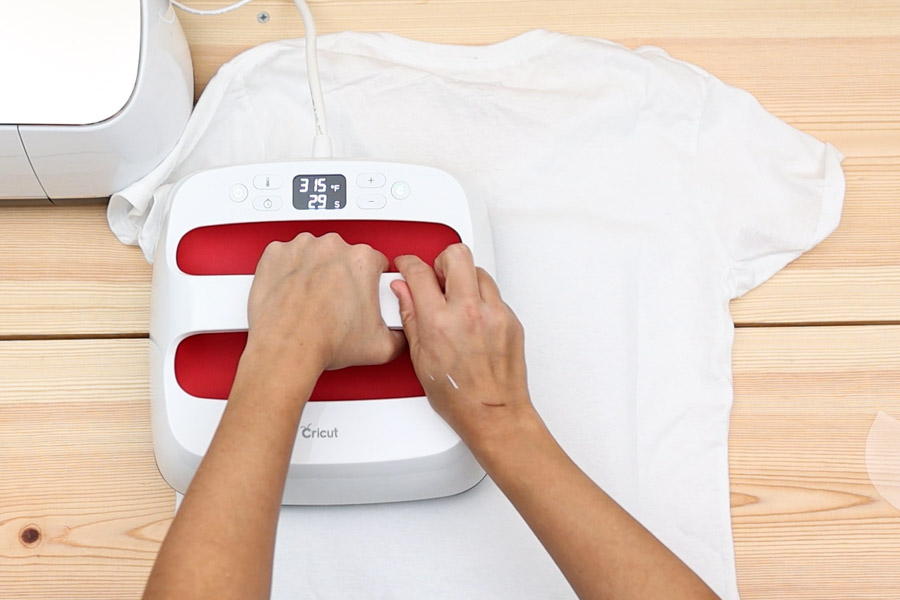

Press the back
This design is bigger than the heat plate; therefore, I did one press on the left and one to the right. And for the back, I did 15s on the left and 15s on the right.
For perfect timing and different material combinations, check out Cricut’s heat guide.


Pressing Marks when Layering Iron-On
When pressing iron-on, you can have unwanted marks on other layers. It isn’t very pleasant but also a learning experience. In this case, they are barely noticeable, but I had to zoom in and show you because my job is to teach you.
There’s a couple of ways you can avoid them.

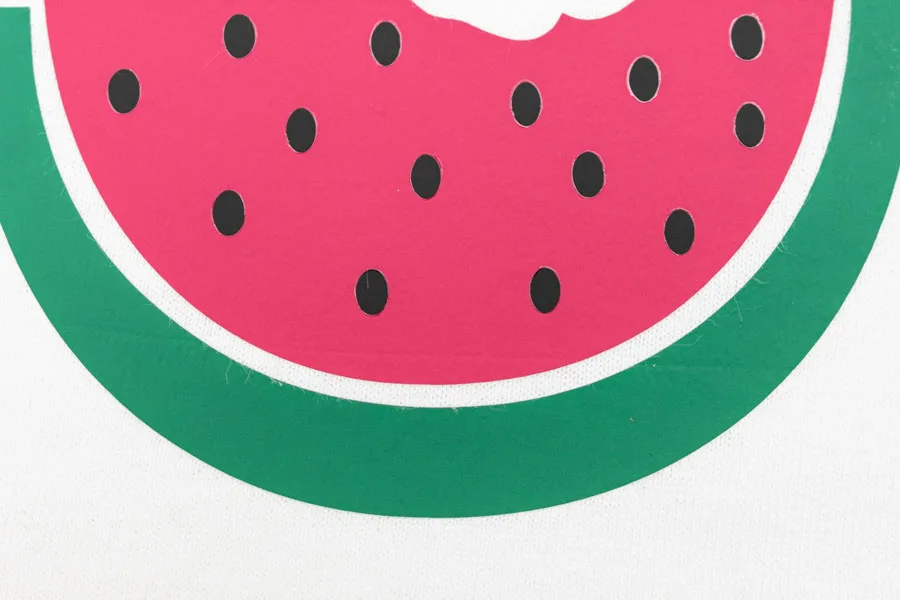
- Make sure the black layer’s carrier sheet is big enough to cover the entire watermelon.
- Trim watermelon seeds to fit the watermelon flesh, making sure the carrier sheet doesn’t touch any green layer. And protect exposed vinyl parchment paper.
I gave this t-shirt to my beautiful AuPair, and you can’t notice the marks at all. However, if you sell your project, you want to make sure you have perfect results all the time.
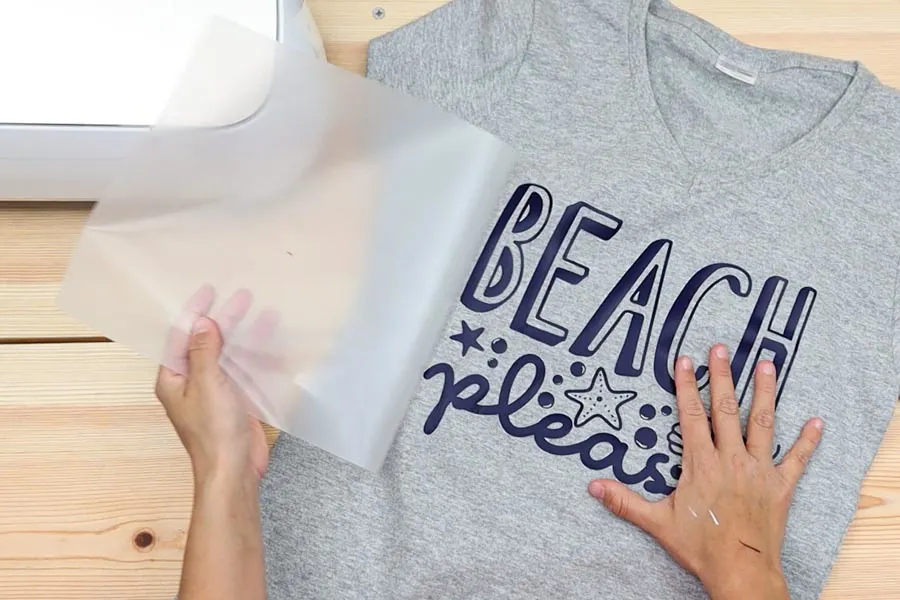
Transfer using a Household Iron
So here’s another t-shirt, only this time I used a regular household iron to transfer the design! The file is after the step-by-step tutorial. And the steps for cutting and weeding are basically the same as well.
Cut 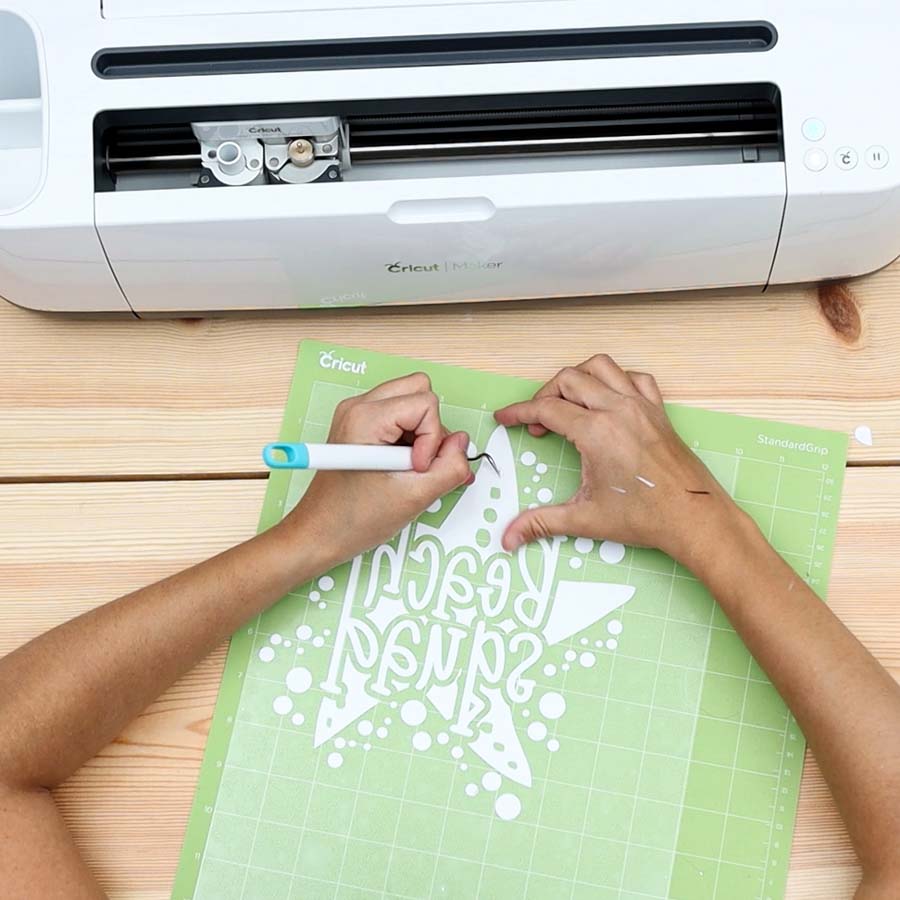

Weed 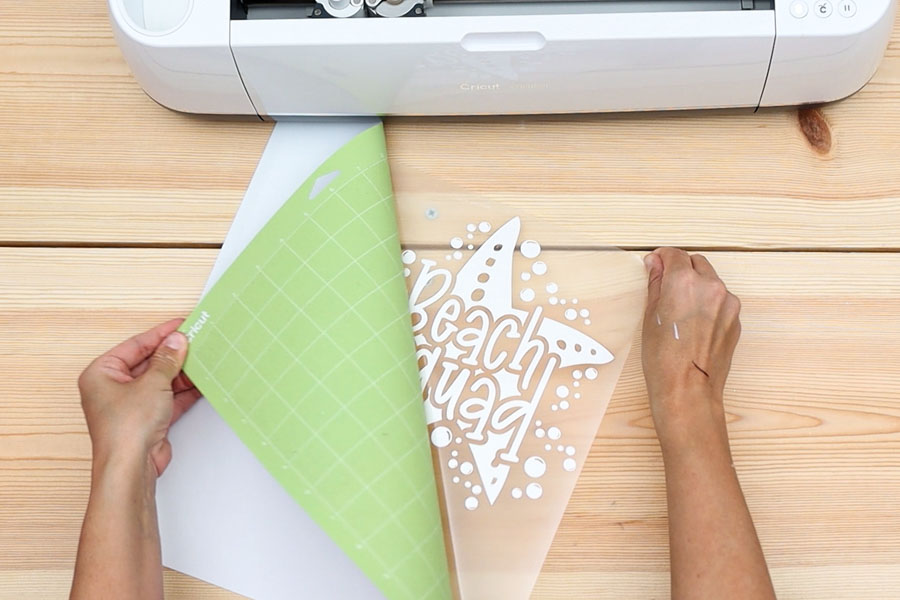

Remove
Let’s see how to transfer with a regular iron!
You must have a folded towel and place it underneath your t-shirt, avoiding seams. The towel must be bigger than the design you’re trying to transfer.
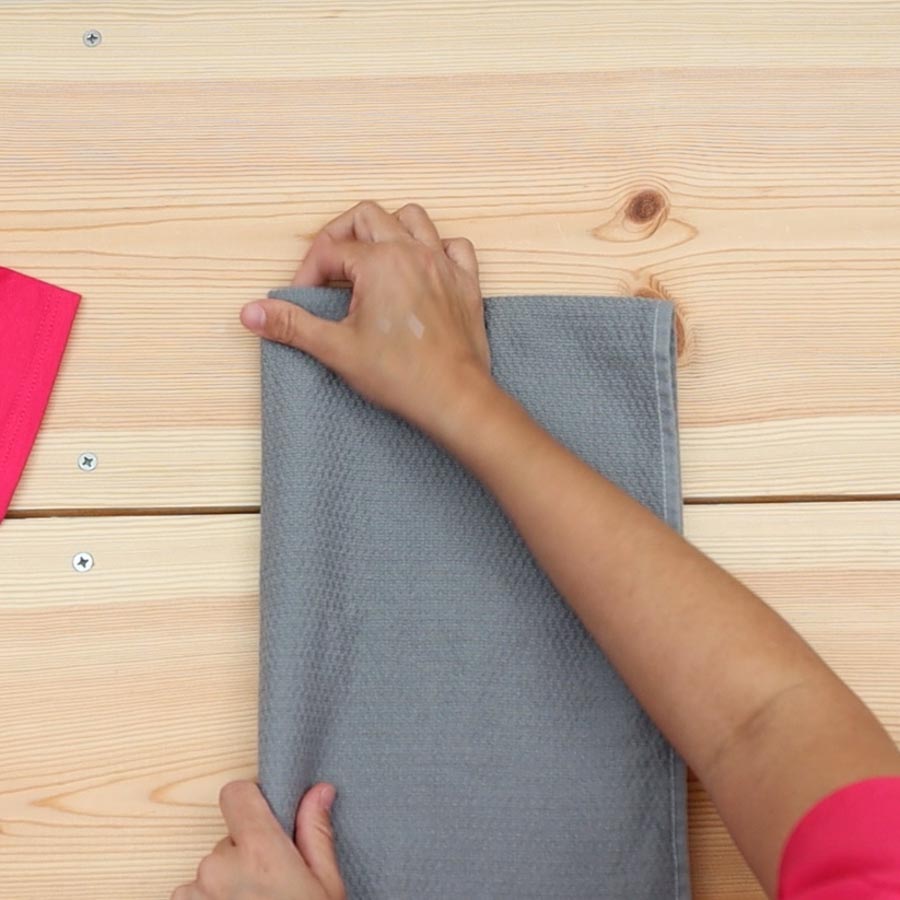

Fold Towel 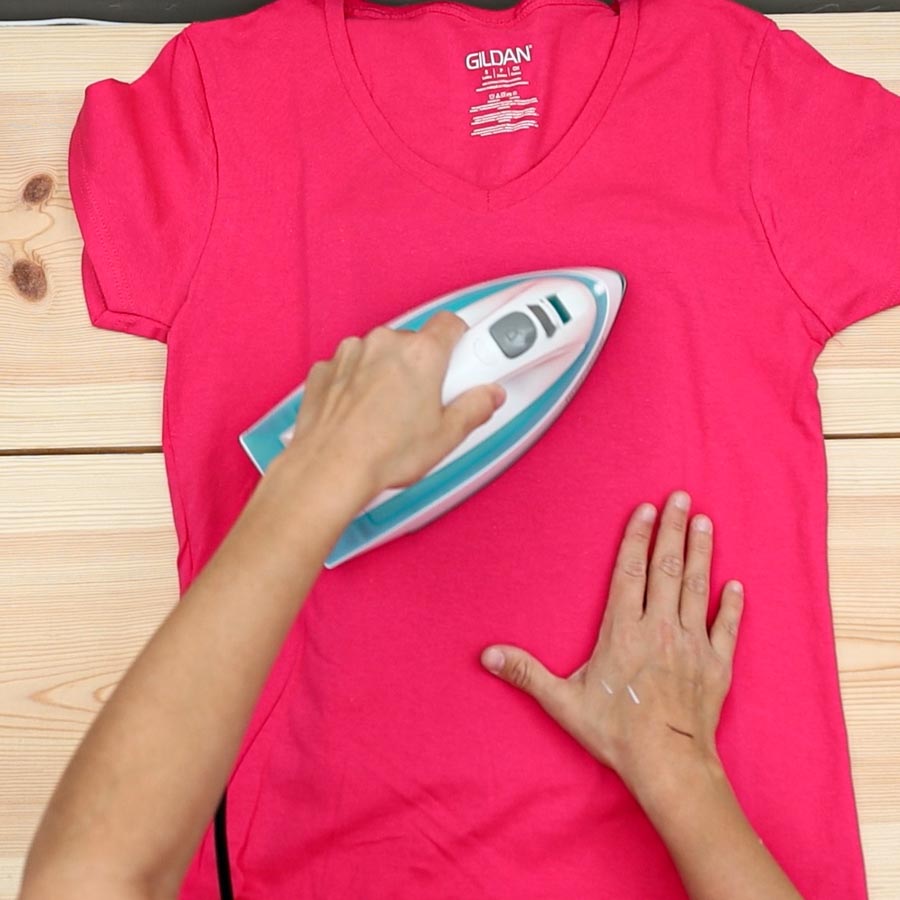
Preheat T-Shirt 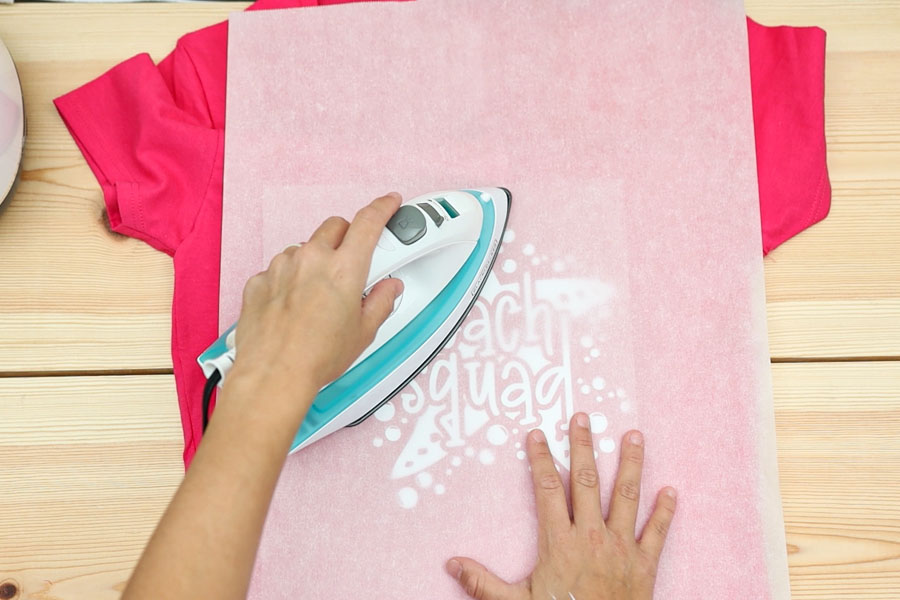

Press
The key to a successful transfer with a household iron is using a towel and dividing your design in order, and pressing it from two different angles for 20 to 25 seconds, each avoiding seams at all times.
As you can see, this design is way bigger than my little household iron. So I divided this design into three parts and decided to press diagonally from the top left and then vertically from left to right. Thus, making sure I covered every area.
Because we need to do multiple presses (six in total), you need to protect your t-shirt with parchment paper.
Keep in mind that household irons vary, and some of them are very potent, so I can’t guarantee everything will be perfect.
If you want to get a more accurate measurement of the heat that’s coming out of your iron, I recommend you buy this affordable laser heat thermometer and follow Cricut’s heat guide to find the sweet spot.
The sweet spot for pressing HTV on my garments is the highest heat and one to three notches down (most of the time, two).
These are the presses I did in order:
- Diagonal left top
- Diagonal left middle
- Diagonal left bottom
- Vertical left
- Vertical Middle
- Vertical right
Don’t skip. Always work in order, so you know what areas have received heat and what areas need it. When you’re done pressing, flip the t-shirt and press for 15 seconds using the same dividing principle. (This time, I only did 15 seconds three times)
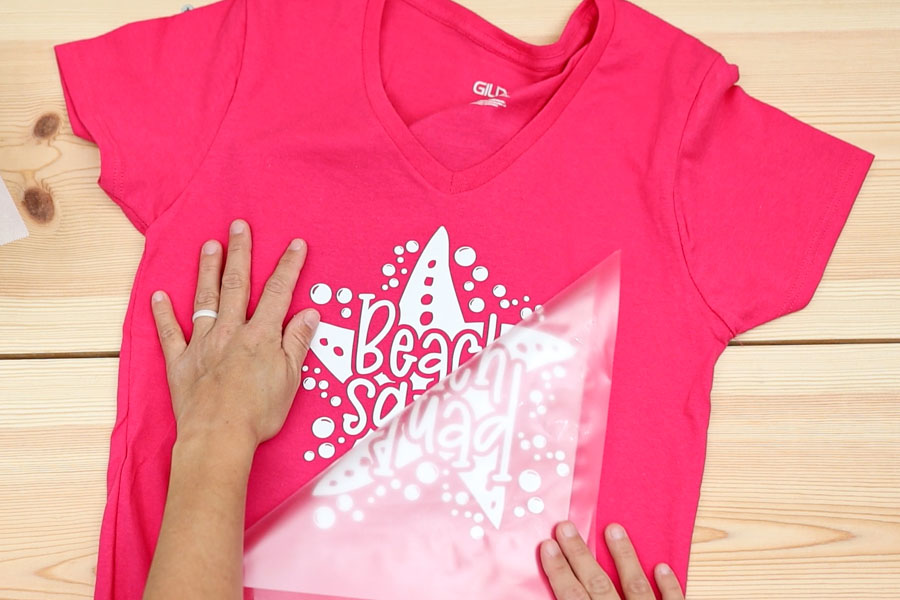

When you’re done, wait till design is warm to the touch and flip t-shirt.
Isn’t it so cute?
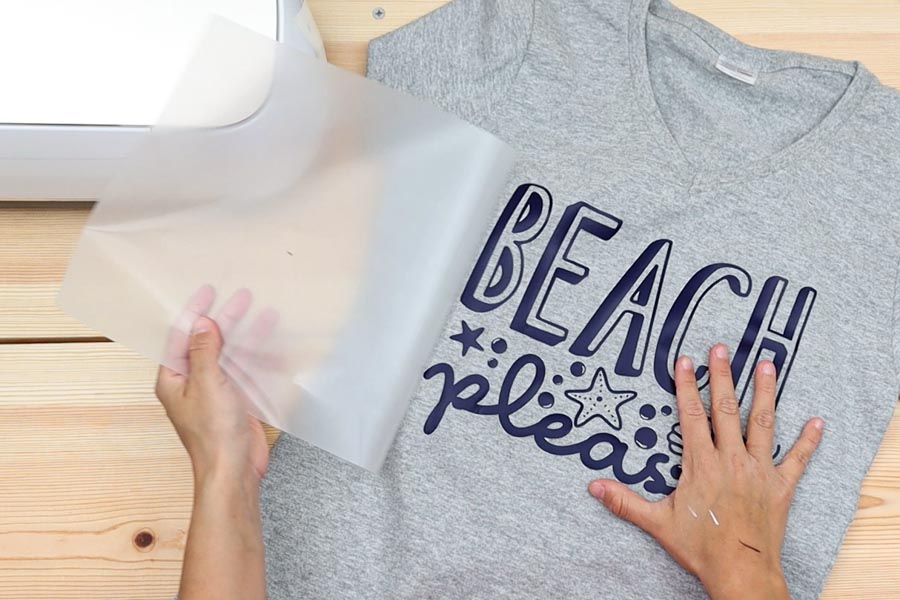
Another one!
Here’s another one I did!
I love how navy blue looks against grey!
The big questions is?
Which t-shirt is your favorite?
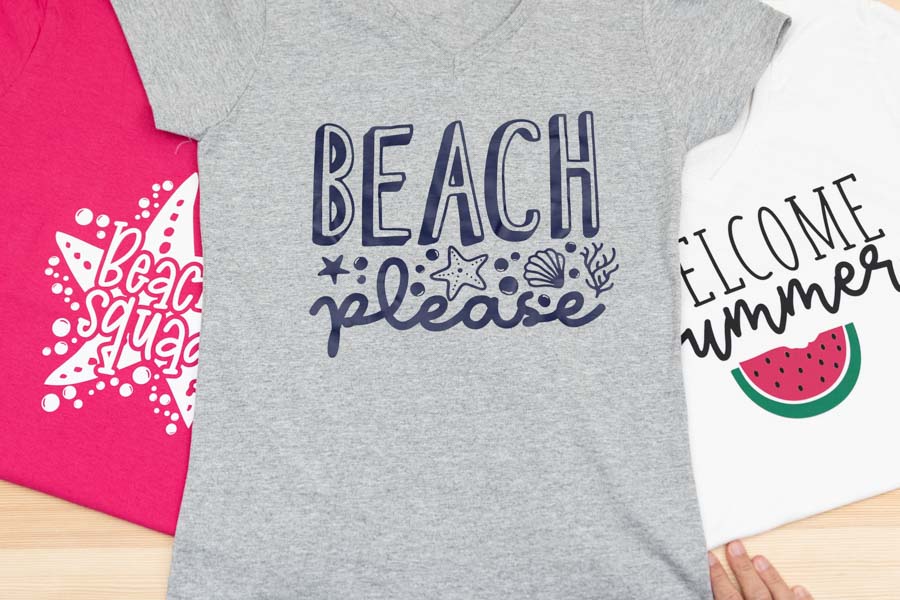

Hard for me to pick!
But, if I had to, I guess it would be the “Beach Please” one!
Free SVG files for Summer T-Shirts or other Summer Crafts
As I promised here are some cool free SVG files to use on your summer t-shirts or why not, other crafts like wood signs, blankets, mugs, etc!
To download the file(s), you need to be on a desktop or laptop and click on the button to trigger a download file on your PC. However, I’ve noticed that I can also download them from my iPhone.
Depending on your browser settings, your PC sometimes asks where to save the file, although most files will be in your download folder.
If the image opens in a new window (this may happen because of your browser settings), right-click on it, select the option “Save Image As,” and choose where you want to save the file.
SVG files look like web page files when you download them.
Oh!
Just so you know, I also have a library full of free SVG files and Printables for all my subscribers, a.k.a. Daydreamers. You can see a preview right here or get access by filling out this form.


Sharing is Caring!
Do you know it takes me over 25 hours to complete a single Cricut article? I know it’s wild, but I want to make sure you understand everything!
I would appreciate your support on Instagram , Pinterest , and YouTube as I try to grow my audience and continue producing great content!
Jeanette
Saturday 9th of April 2022
Thank you sooo much for this tutorial!!!! It really does help a lot🙏🏻
Jackie (Just J Stylin Life)
Wednesday 14th of July 2021
These SVG file designs are SO cute! And thank you for this super detailed post. I am saving up to buy a Cricut Explore and an Easy Press, so I'm reading all the Cricut tutorials I can now to be prepared. Yours have been the most helpful and detailed. I have a bunch of them saved on Pinterest, and I'll be saving this one too! Thank you for making these - they are much appreciated!
Catalina
Tuesday 27th of July 2021
You're very welcome. I am happy to hear!
Diane
Saturday 12th of June 2021
I have to admit that I have never used my Explore Air that I got from a yard sale a couple of years ago. I'm guilty of looking at websites to find free SVGs. Now that I found your site and read my first tutorial, I may actually dig it out and try to use it after I read all of your tutorials. I read your "About Me" and want to congratulate you for your wonderful website and family! Thank you so much for the easy to read tutorials with pictures. I love this website!
Catalina
Thursday 17th of June 2021
I am so happy you like my website and tutorials! It makes me very happy to hear.