Hello Daydreamers!
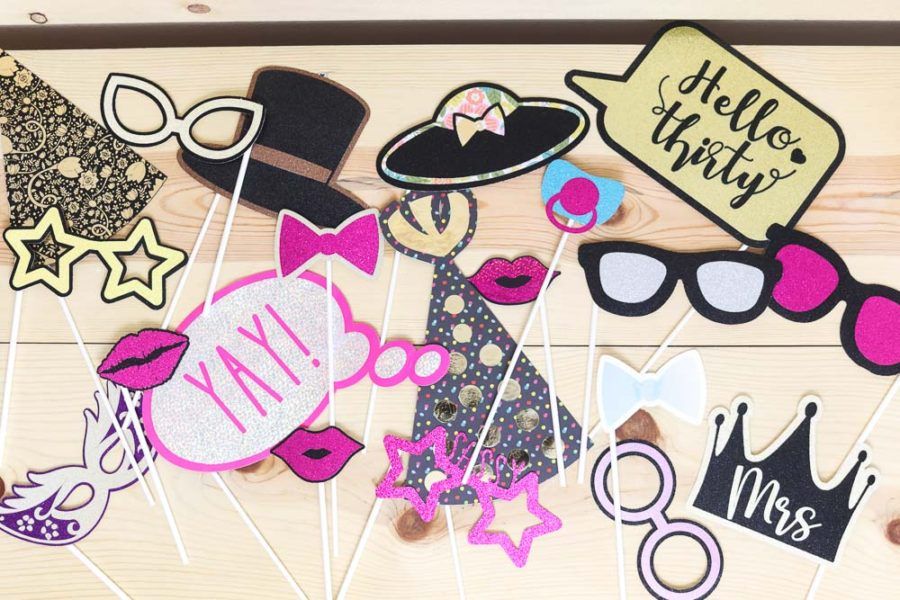
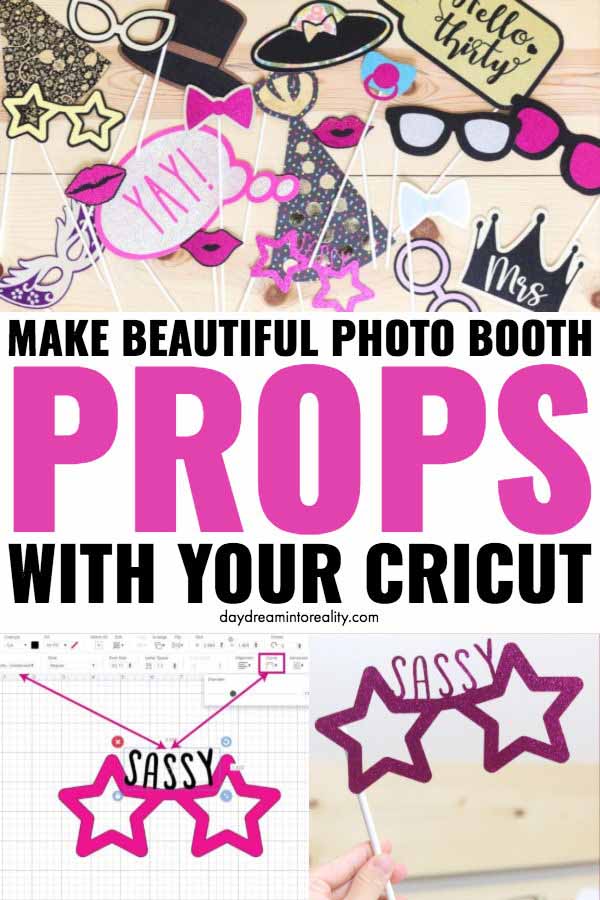
In today’s tutorial, I am going to teach you how to make beautiful photo booths Props with your Cricut Maker or Explorer.
I am going to empower you to make stunning photo booth props for any occasion you can think of; birthday parties, wedding, baby shower, gender reveal, etc.!
In other words, this is going to be an entertaining tutorial!
Before we get started, and since I don’t want to get confused, this how this article is going to unfold.
- First, we will be talking about materials and which one you should choose for your photo booth props, this can change how you have to design them in Cricut Design Space.
- I will be showing you different techniques in Design Space of how to make photo booths using Cricut images, shapes, text, and uploaded SVG files I will provide you with.
- The cutting process of photo booth props and the specific materials required to achieve the same results.
- More ideas and photos of other photo booth props.
Ideally, you will read this tutorial from the beginning because, as we go, we will be implementing the concepts mentioned in the previews steps.
Are you ready?
Let’s Daydream Into Reality.
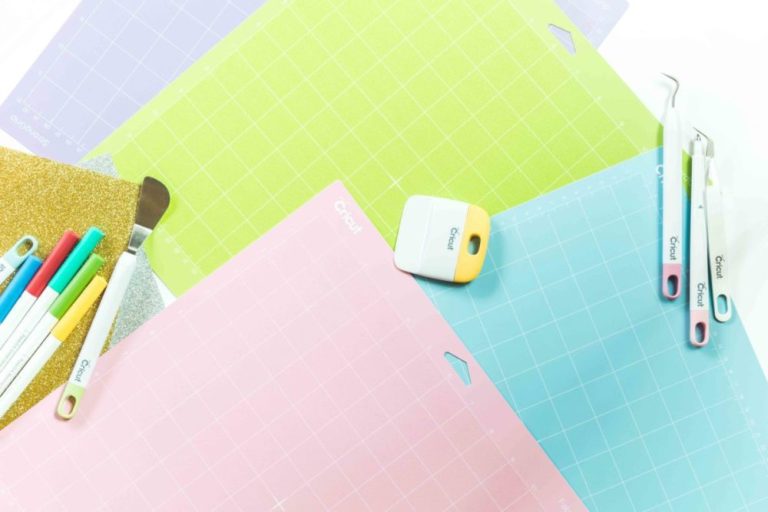
Consideration – What Materials do I need to make a Durable Photobooth Prop?
Before you start your designing process, you need to think about the materials you want to use for your photo prop.
The materials can vary depending on the machine you own and the way you intend to use the photo prop.
For instance, if you own a Cricut Maker, you can make very sturdy photo props by cutting chipboard, or thin woods like bass and balsa.
If you have any of the Explore machines, you can still use thick materials like poster board.
Both of these options above can be expensive, but very beautiful.
The question is, do you need those two materials?
Well, it depends?
Ask yourself these questions:
- Are these photo props for a single day or for years to come?
- Am I hosting a big party (over 20 guests)?
- Am I making photo props for my photography business?
If you plan on making photo props for your business or want to use them over and over, the best way to go is by using the thickets materials you can cut with your machine so that you can have extra durability.
You can also cut different layers of materials to add extra thickness.
For instance, you can cut a layer of poster board and another one of glitter cardstock and glue them together to make a durable photo prop.
My favorite approach is by layering different materials.
Not only you have to think about the sturdiness of the photo prop, but you also need to consider how you want to embellish it.
You can stay in the realm of paper, or you can use materials like iron-on or Adhesive vinyl.
If you stay in the realm of paper, you are going to experience letter fall-outs. And there’s going to be some manual process of you having to glue individual letters during the assembly process.

If you use vinyl, you won’t experience fall-outs, but there are other things you need to consider.
You can’t use adhesive vinyl on glitter cardstock, and, if you use adhesive vinyl on paper, the bond is not permanent (you can remove the embellishments with your nails). Iron-on will be a great option, but it’s also more expensive.
Learn more about adhesive and heat transfer vinyl (HTV) in this guide I put together.
Why am I getting into all of these details about the materials?
Because I want you to experiment and play around with what you have on hand, learning the possibilities with materials will affect how you design your photo prop, how you cut it, and how you assemble it.
Don’t worry, though!
I will show you tons of possibilities that will awaken the creative side of you!
How to Make Photo Props in Cricut Design Space
There are multiple ways you can make photo props with your Cricut. The way you design and cut it depends on the materials you have on hand, or want to use in consideration of what I mentioned in the previews section.
I will show you a couple of techniques that will get complicated as we go on.
Simple Photo Props in Design Space
First, let’s make a photo prop using only shapes and text.
Step 1 – Insert Elements
Insert a square and a triangle to the canvas area by clicking on the “shapes” icons located on the left panel, then click on text and type in the word you want to use on the photo prop.
Initially, both shapes will be gray, select the square and unlock the proportions (little lock on the left corner of the selection, or top menu) to form a rectangle.
Then change the color (optional) on the color box next to linetype.
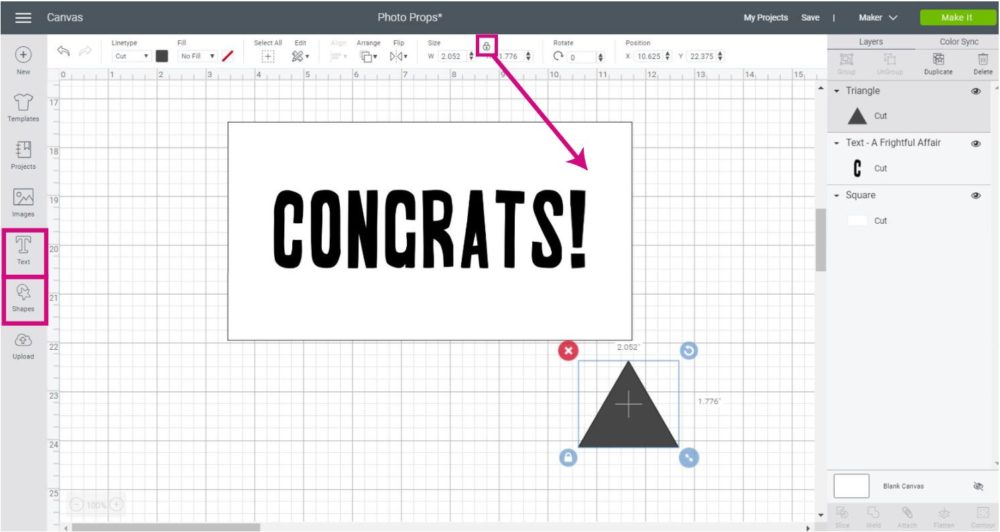
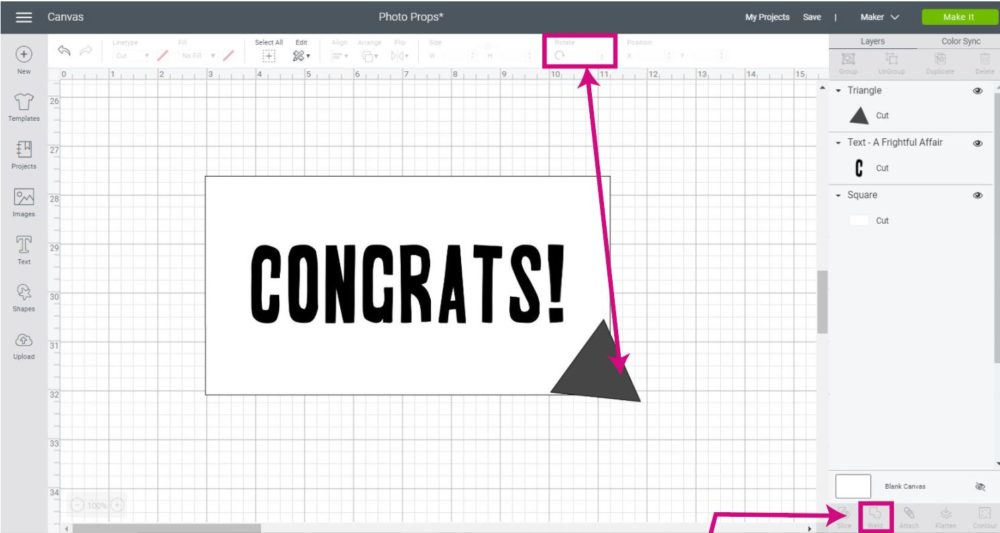
Step 2 – Rotate Triangle
Rotate triangle from the upper-right corner of the selection and place it on a corner of the rectangle.
The idea behind this action is to create a conversational photo prop.
When the location is right, press shift (at all times) on your computer and select the rectangle and square. Then click on “Weld” to form a single shape.
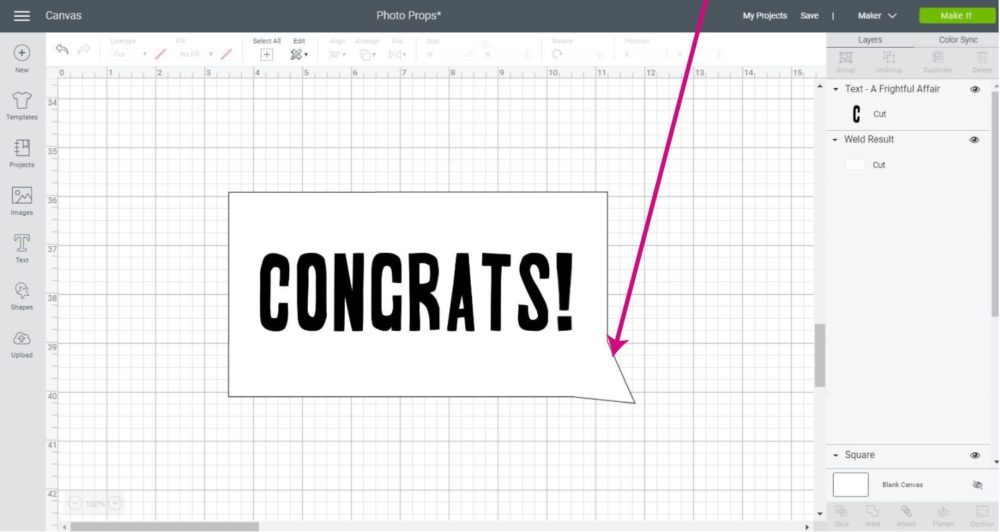
Doesn’t it look great?
Tip: Your text will be in the back after welding. Select the new shape, then right-click on it and select the option “Move to the back.”
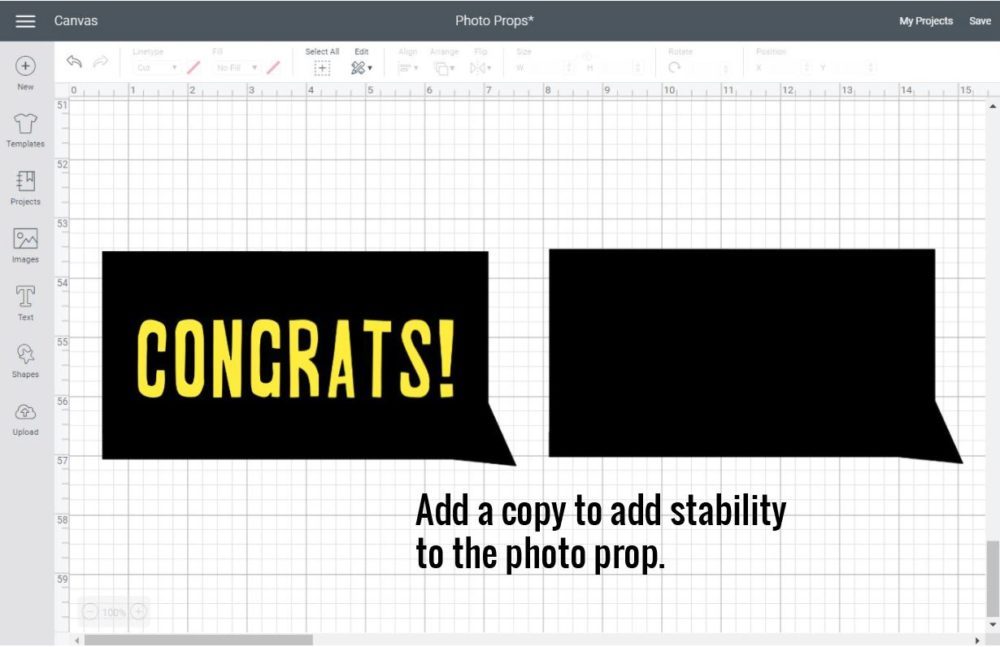
Step 3 – Add more Structure to Prop
If you are working with thin materials, I recommend you copy-paste the rectangular shape to add extra sturdiness to your photo prop.
It will really make a difference.
On the other hand, if you are working with thick materials like chipboard or poster board, a single rectangle will be fine.
Free SVG Photo Booth Props
Before we continue to the next techniques, here are some SVG templates to follow along and use for personal projects. You need to be from a desktop computer to save them.
We won’t be using them all in this tutorial, but there are tons of room to practice and make photo props for any occasion.
Make sure to follow me on Instagram and tag me so I can see all of your creations! (I’d love to see you over there).


Oh!
Just so you know, I also have a library full of free SVG files and Printables for all my subscribers, a.k.a. Daydreamers. You can see a preview right here or get access by filling out this form.
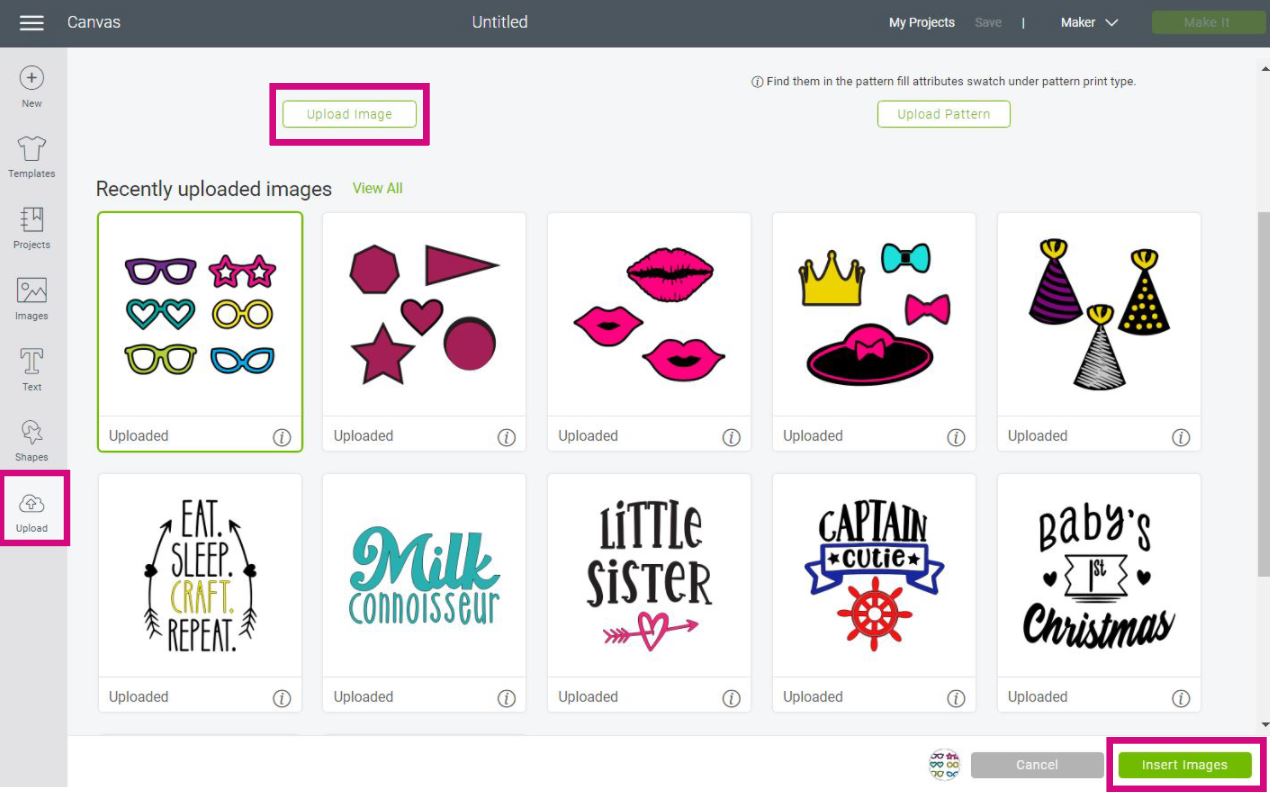
To upload the files, go to Design Space and click on the upload button located in the left panel of the canvas, then select “Upload Image” and follow the prompts to insert the prop to the canvas.
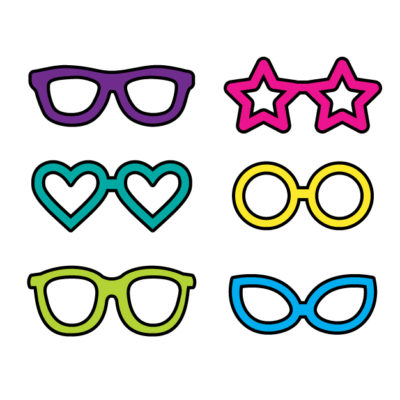
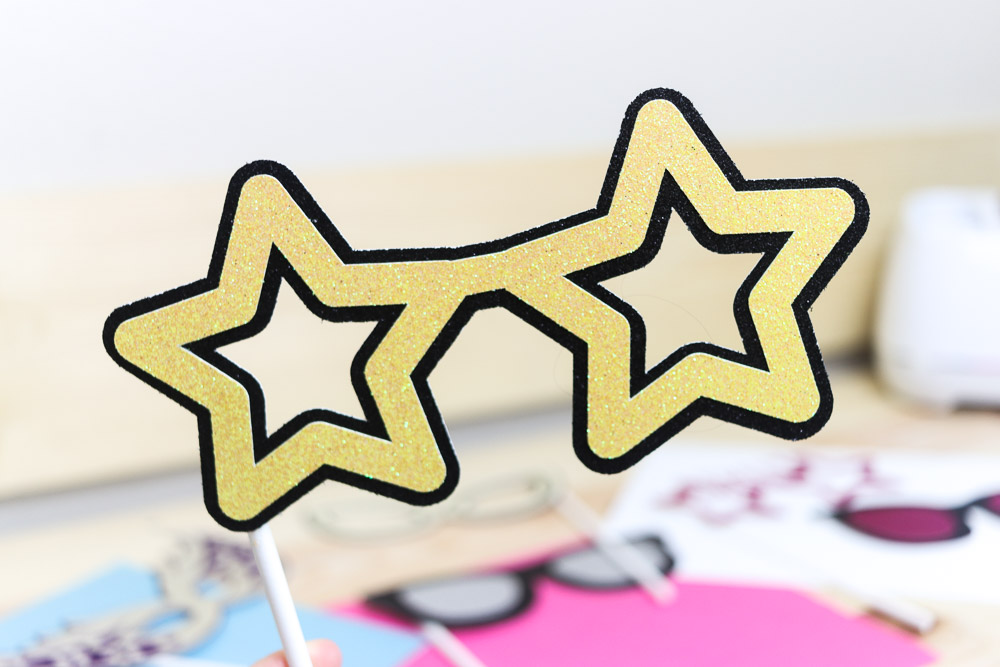
Glasses Photo Booth Props
Glasses are one of the most common and cool photo props out there.
There are so many things you can make with them; just changing the colors you use during the cutting process can give you a different feel; therefore, you can make them for any occasion!
Step 1 – Insert Elements
Download the file I provided you with and upload it to Design Space. You will notice that all of the styles are grouped. To separate them, click on “Ungroup.” located on the top of the Layers panel.
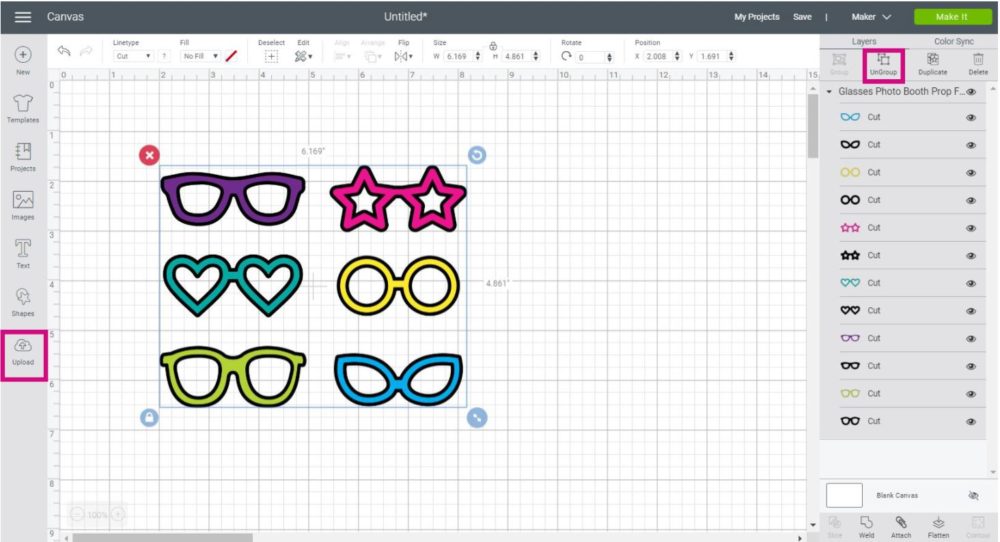
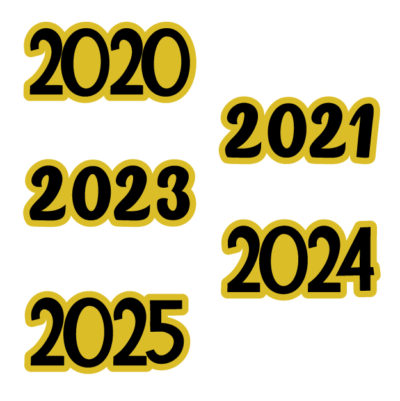
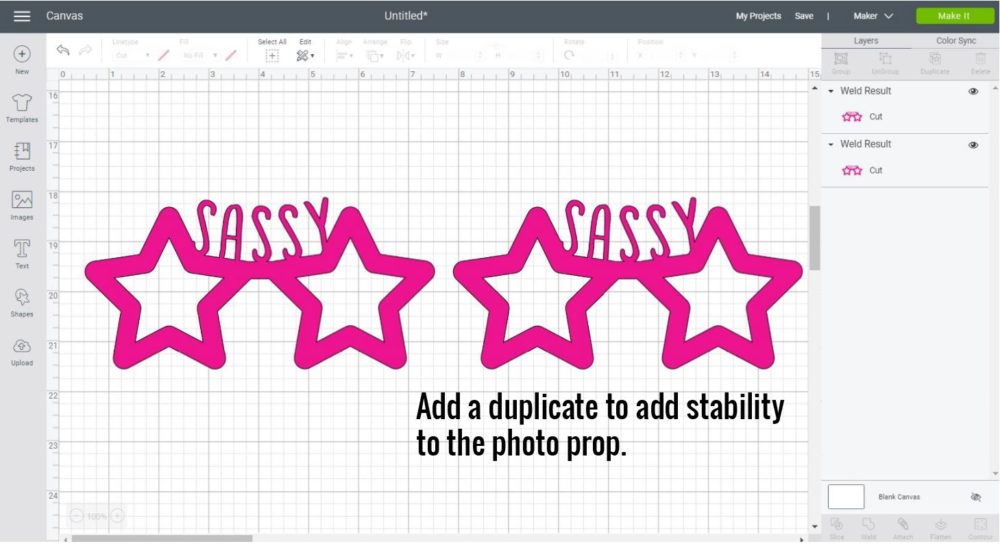
Delete all other glasses, except the star-shaped ones, and add text.
I added the word “Sassy” because I was feeling a little spirited when I was writing this tutorial, but you can add so many other words!
You can even put the coming year 2020, in this case, to make photo props for a new year’s party.
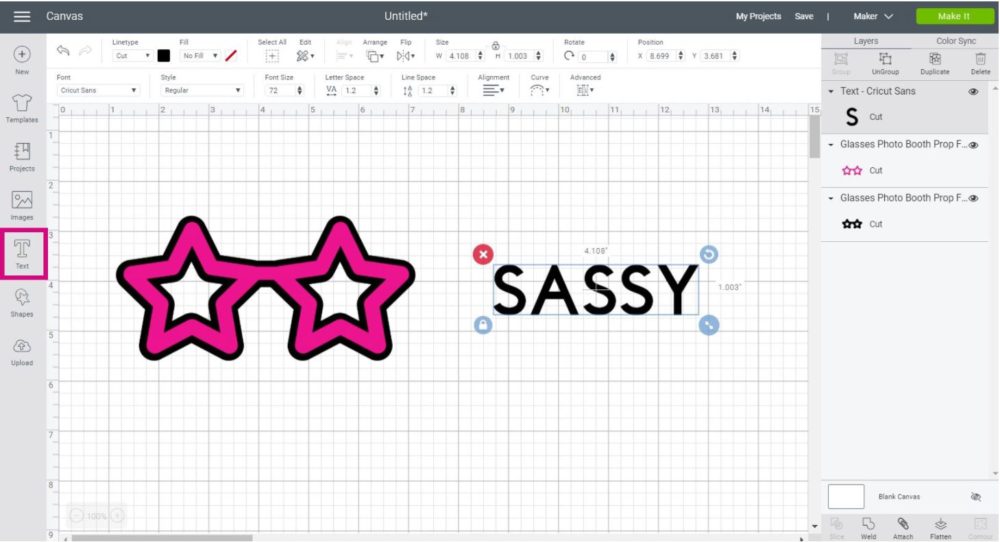
Tip: Since the text doesn’t have an outline like the star-glasses (that word sounds quite cool), delete it.
Now, change the font. For this tutorial, I use a font from Cricut called Chalkboard.
Step 2 – Join text with Glasses
To join the text to the glasses, you can curve your text. Select it and click on “Curve” on the top menu.
When curving the text, ensure each letter touches the glasses. You still want the letter to be visible.
Note: Curve is not available on Cricut’s App; however, you can ungroup the text to letters and organize them one by one. You can also do this on desktop computers if your word is too long.
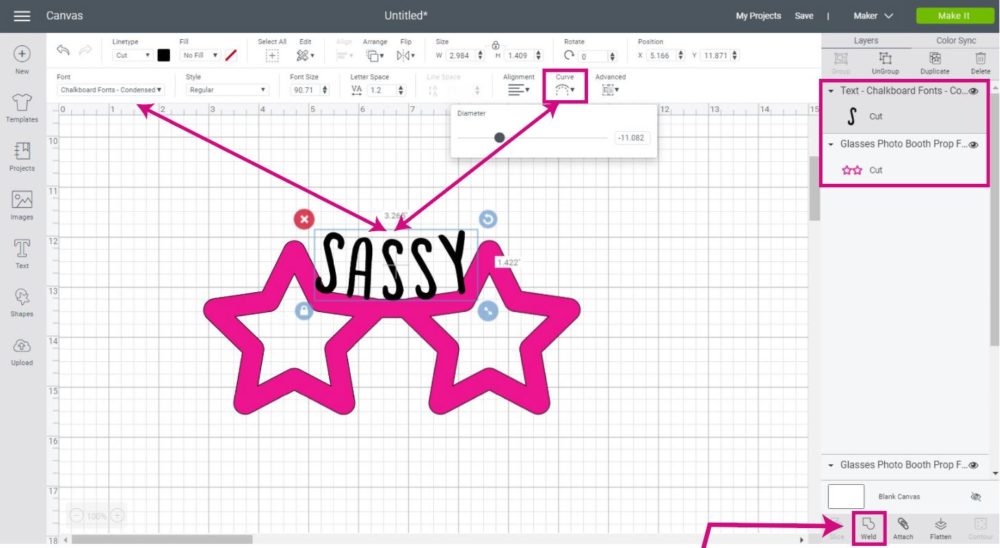
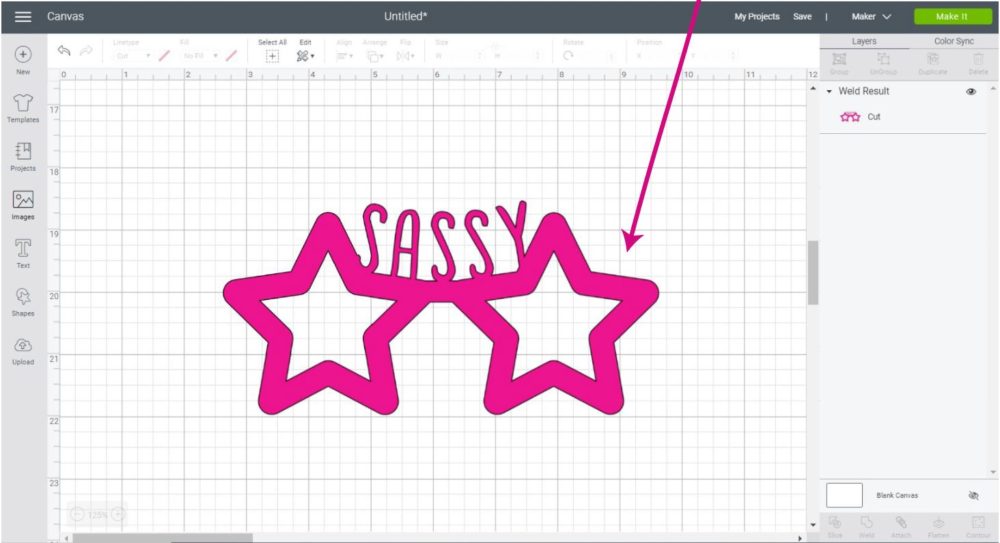
Once all text is overlapping the glasses, select them along with your text and click on “Weld.” to form a single new shape.
Step 3 – Add more Structure to Prop
Don’t forget to add an extra copy to add extra sturdiness to the photo prop.
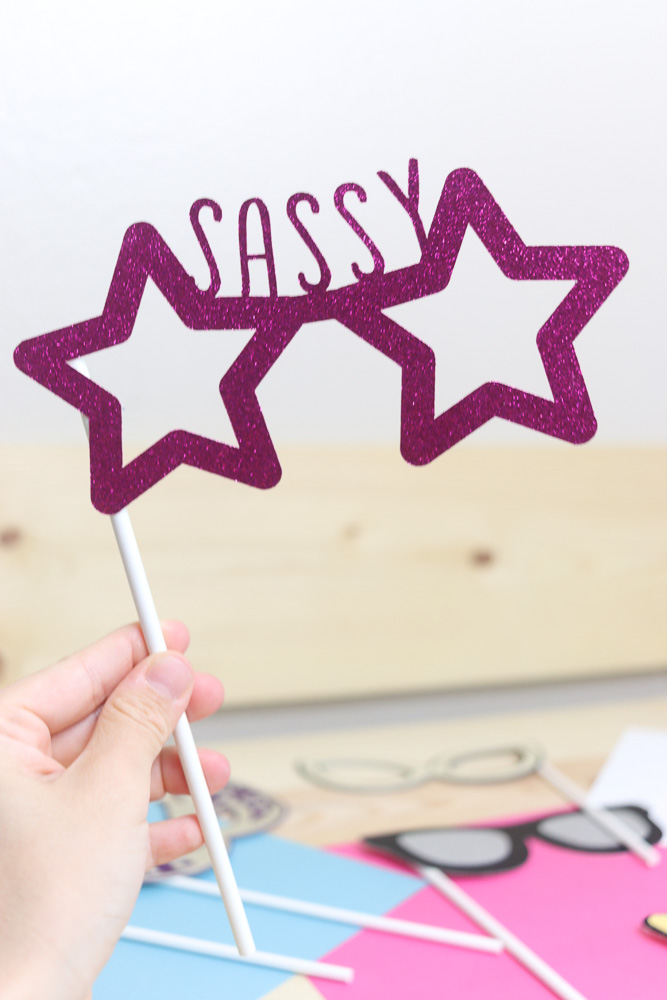
Here’s is a photo of how they look once cut!
Aren’t they super cute?
Remember, I will be covering the cutting process in the last technique.
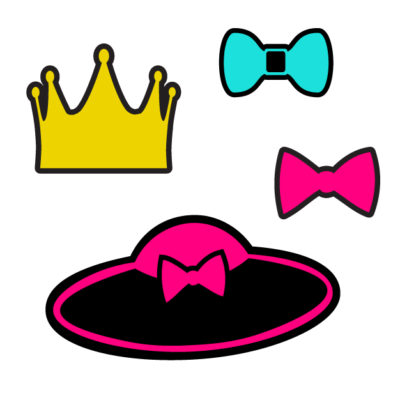
Making Photo Booth Hats
Hats are a must-have if you are going to be making photo props!
With the options I provided you with, you can make countless customizations.
Add text to personalize your party, color to match it, etc.!
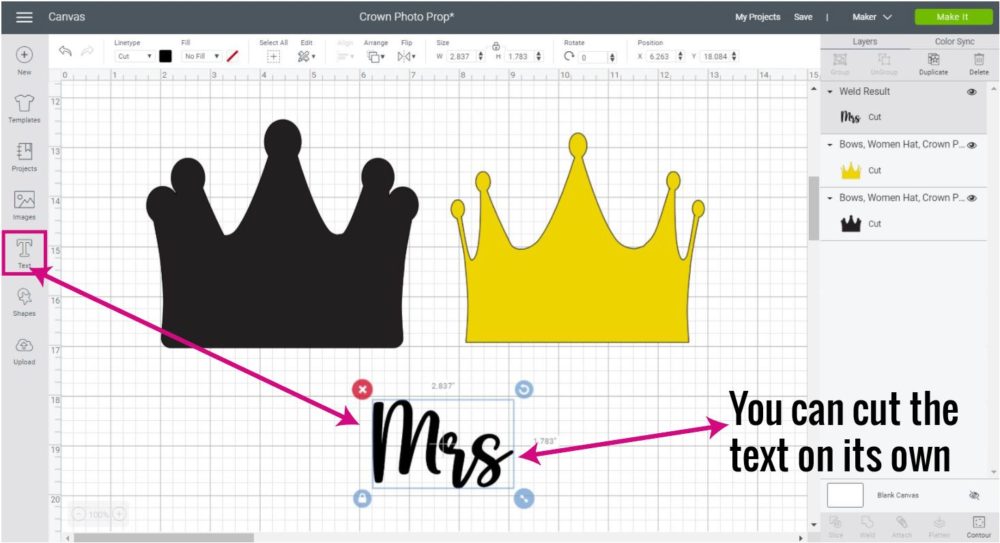
For this crown, I added the word “Mrs,” and it will be perfect for a wedding photoshoot.
I used a font called “Vanilla Cream.” Since it’s a cursive font, I had to fix it and make it into a single layer. If you don’t know how to fix these types of fonts, check out my tutorial on how to edit the text in Cricut Design Space.
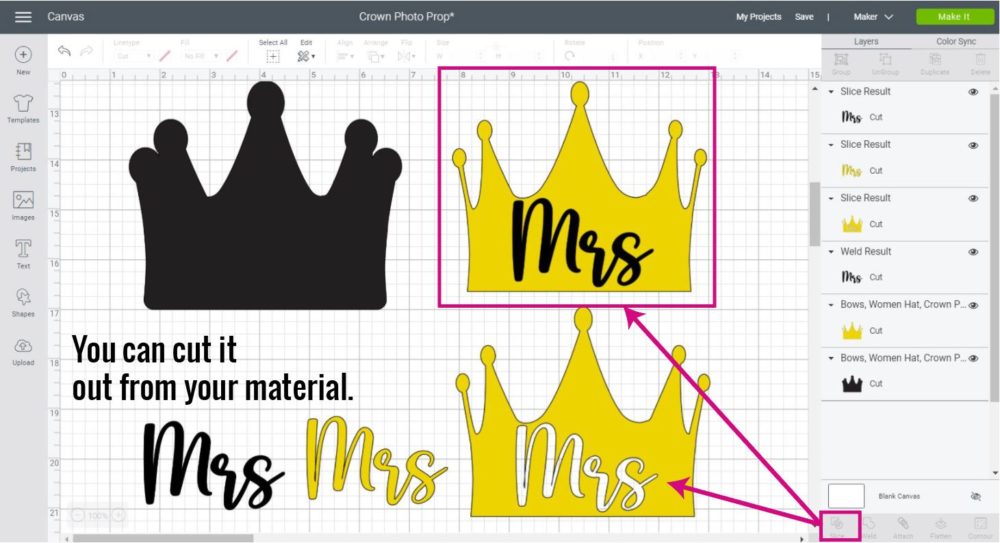
When making photo props and using text to decorate them, you can decide whether to cut the text out of a shape (in this case, the yellow crown) and have the background-color be the color of the text.
To cut the text out, place it on top of your shape, then select them both, and click on “Slice” located at the bottom of the Layers panel.
Or you can also cut the text on its own and glue it where you want it to be.
Here’s an example of how they look when cut.
The first crown was made with black cardstock and holographic iron-on. On this prop, I sliced the text out of the crown.
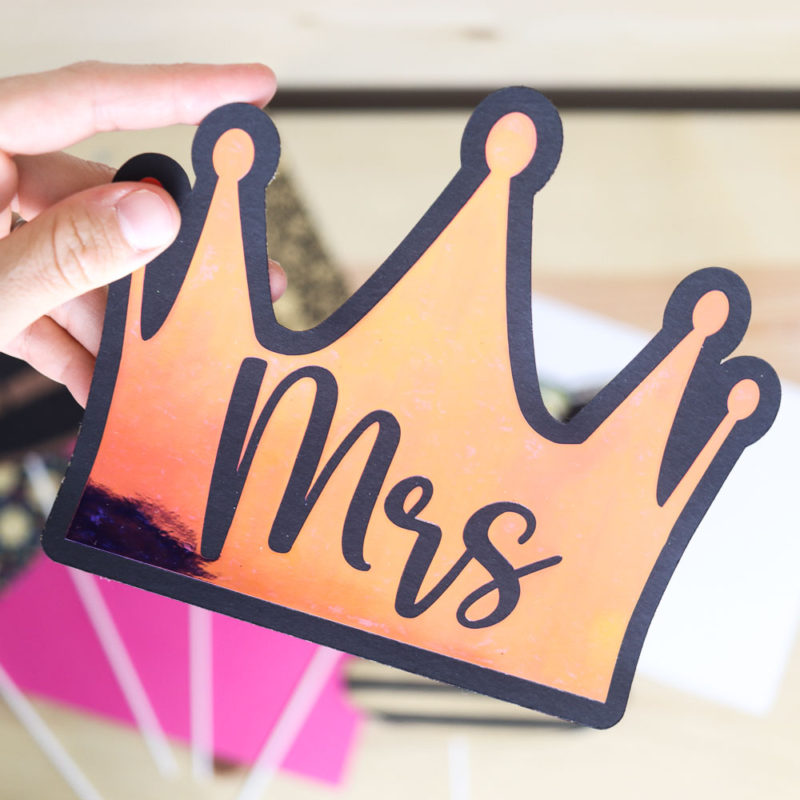

The second crown was made with black and cream glitter cardstock, and the text was glued manually.
What should you choose?
What you like the most, of course!
Complete Photo Booth Tutorial with Cutting Process
It’s time to do a full photo booth with the entire cutting process included!
We are going to be making conversational photo props in two different ways, but you can replicate this tutorial with anything you have on the mind!
Materials
General Materials
- Cricut Maker or Explore
- Fine Point Blade
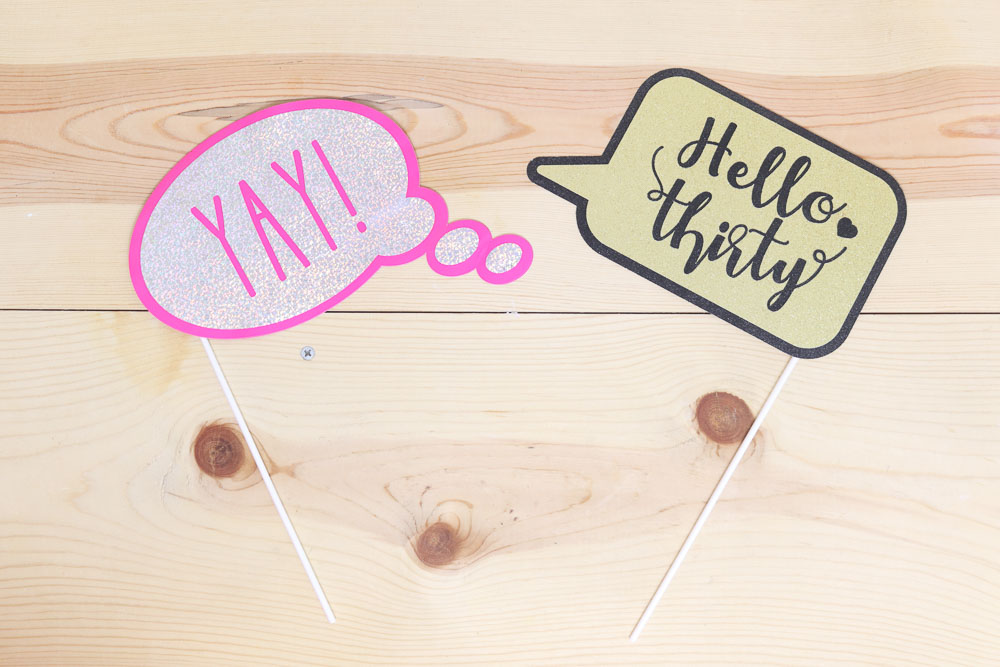
“Hello Thirty” Photo Prop
- Strong Grip (Purple Mat)
- Lollipop Sticks
- Glue
- Glitter Cardstock (Black and Gold)
- Brayer
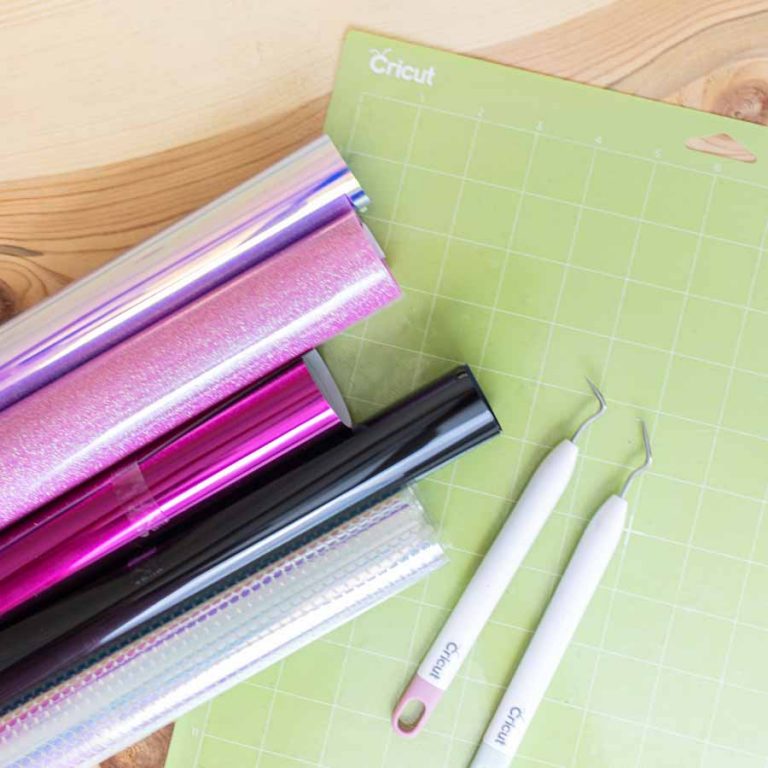
“Yay!” Photo Prop
- Light Grip (Blue Mat)
- Light Cardstock (Pink)
- Holographic Sparkle Iron-On
- Weeder
- Iron
- Parchment Paper
- Lollipop Sticks Glue
- Brayer
About glue, please abstain from kids glue, it will make your projects look ugly. Trust me! Glue is one of those things you never want to go cheap on. I always recommend the 3-in-1 beacon.
Step 1 – Insert Elements
Upload the conversational file shapes I provided you with and upload them to Cricut Design Space.
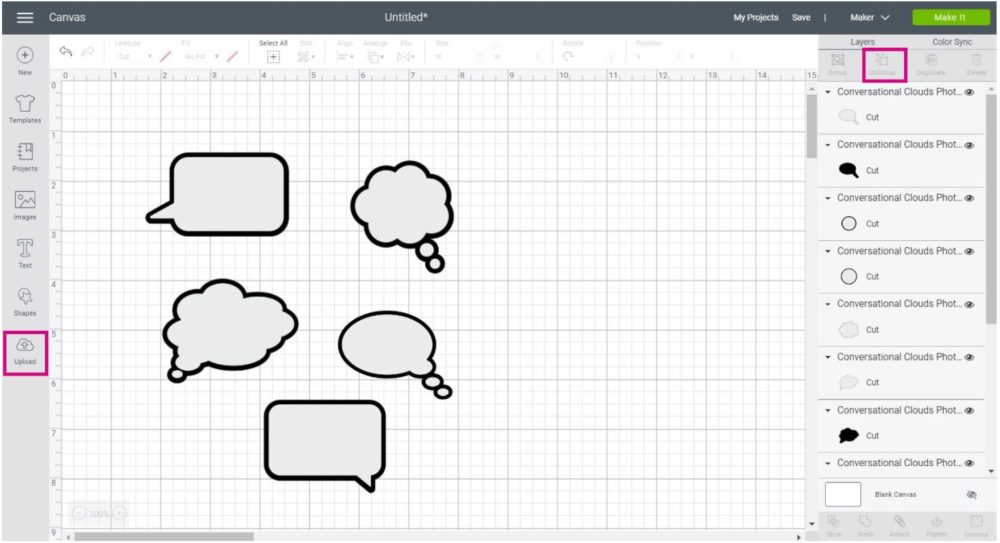
After uploading, ungroup the file.
Tip: Weld loose pieces. For instance, the grey conservational shapes that are made out of multiple parts (cloud and circles). If you don’t weld, you need to attach to keep everything in place.
Now, you can add more images!
This is where Cricut’s library comes into play. Click on the “Images” button located on the left panel and search images by keyword.
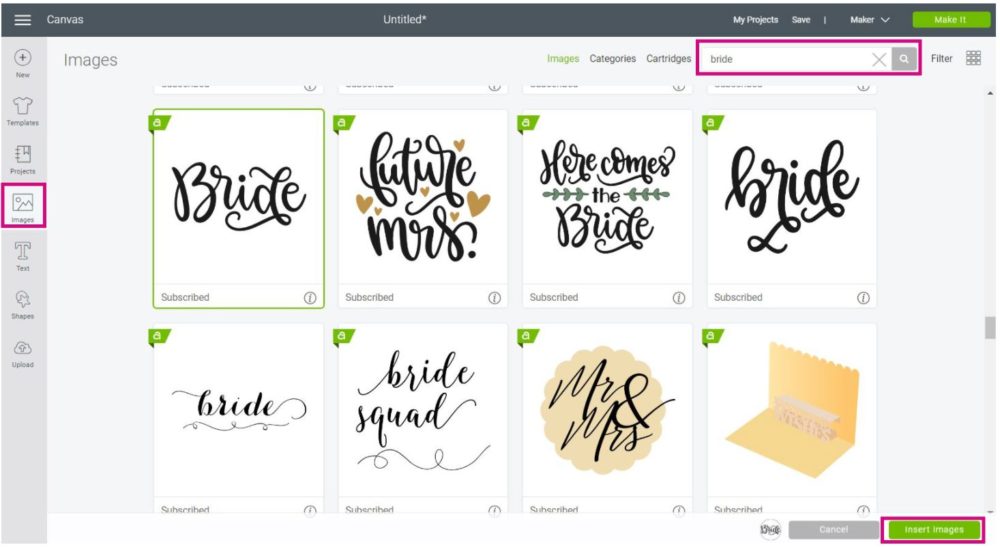
You can type in something related to whatever you want to celebrate.
- Wedding
- Birthday Party
- Numbers
- New Years
- Cake
- Ice Cream
- Baby
- etc.
I added a couple of images to start with:
- Hello Thirty
- Bride
- Cake
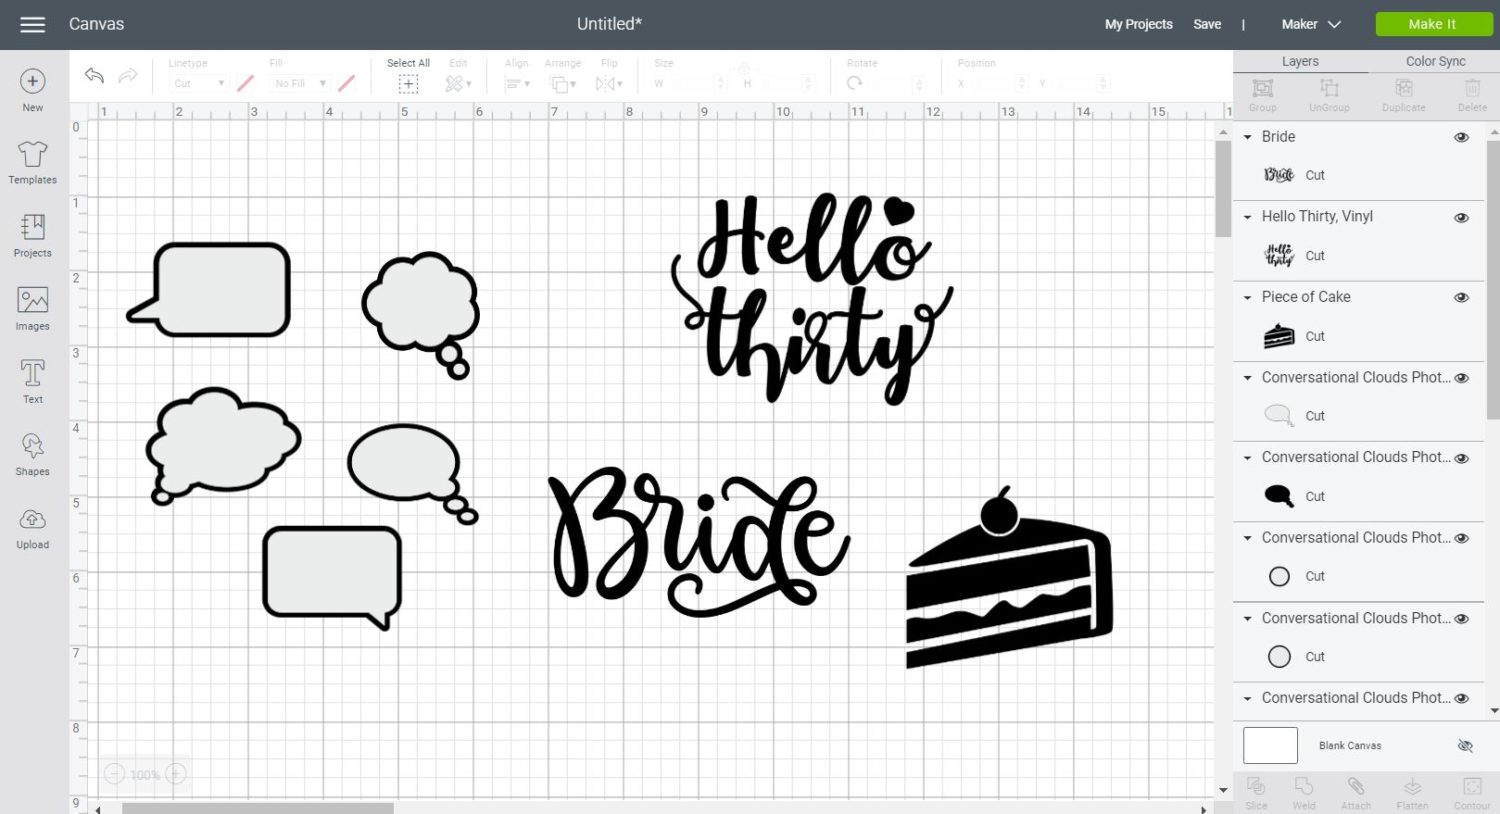
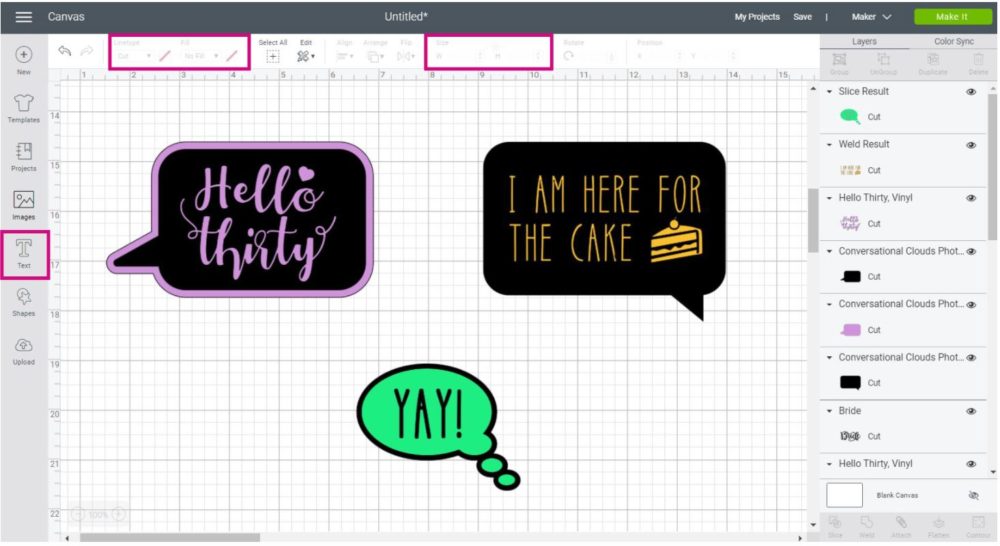
Step 2 – Change Colors, Add Text and Resize
At this point, I dropped the “Bride” image, and I added extra text. I added the word “Yay!” and the phrase “I’m here for the Cake.”
I changed the colors as well.
It’s vital to check the size of your project before you cut it. You don’t want to end up with something tiny or gigantic.
Resizing is very important, especially if you are making photo props like shades, lips, and mustaches.
To resize, select the entire prop (text, shape, outline), and change the size on the top menu option.
When in doubt, grab a measuring tape and measure something that can give you some clues or ideas. Photo booth props are supposed to be funny and carefree. There’s no need to overcomplicate things either.
Here’s how they look when I separate the colors from all of the layers. Notice how I use “Slice” to cut the word “Yay!” on one of the shapes.
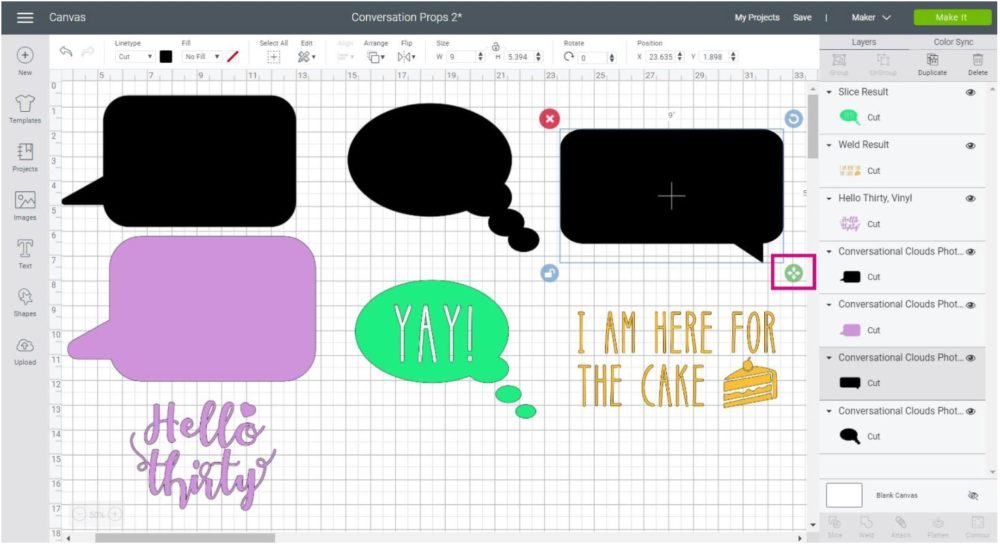
Tip: Unlock proportions of some of the conversational shapes to make them more rectangular.
Step 3 – Prepare Design to Cut
After resizing, I add extra copies of conversational clouds to add stability to the project.
I only did this to the “Yay!” prop because I was using a very thin cardstock. The “Hello Thirty” one didn’t need any extra layers because of both conversational squares are going to be cut on glitter cardstock.
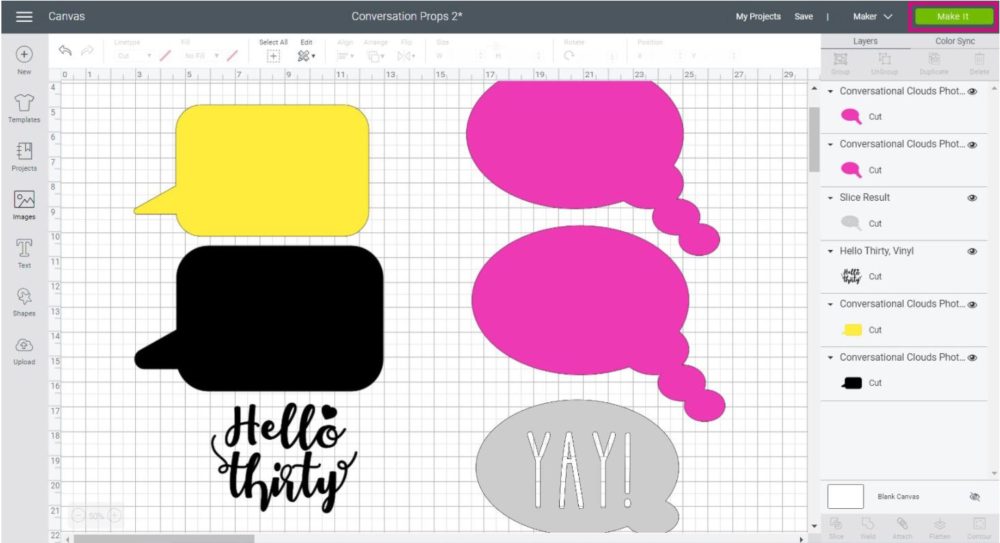
When everything is ready, click on “Make it” on the upper right-hand corner of the window.
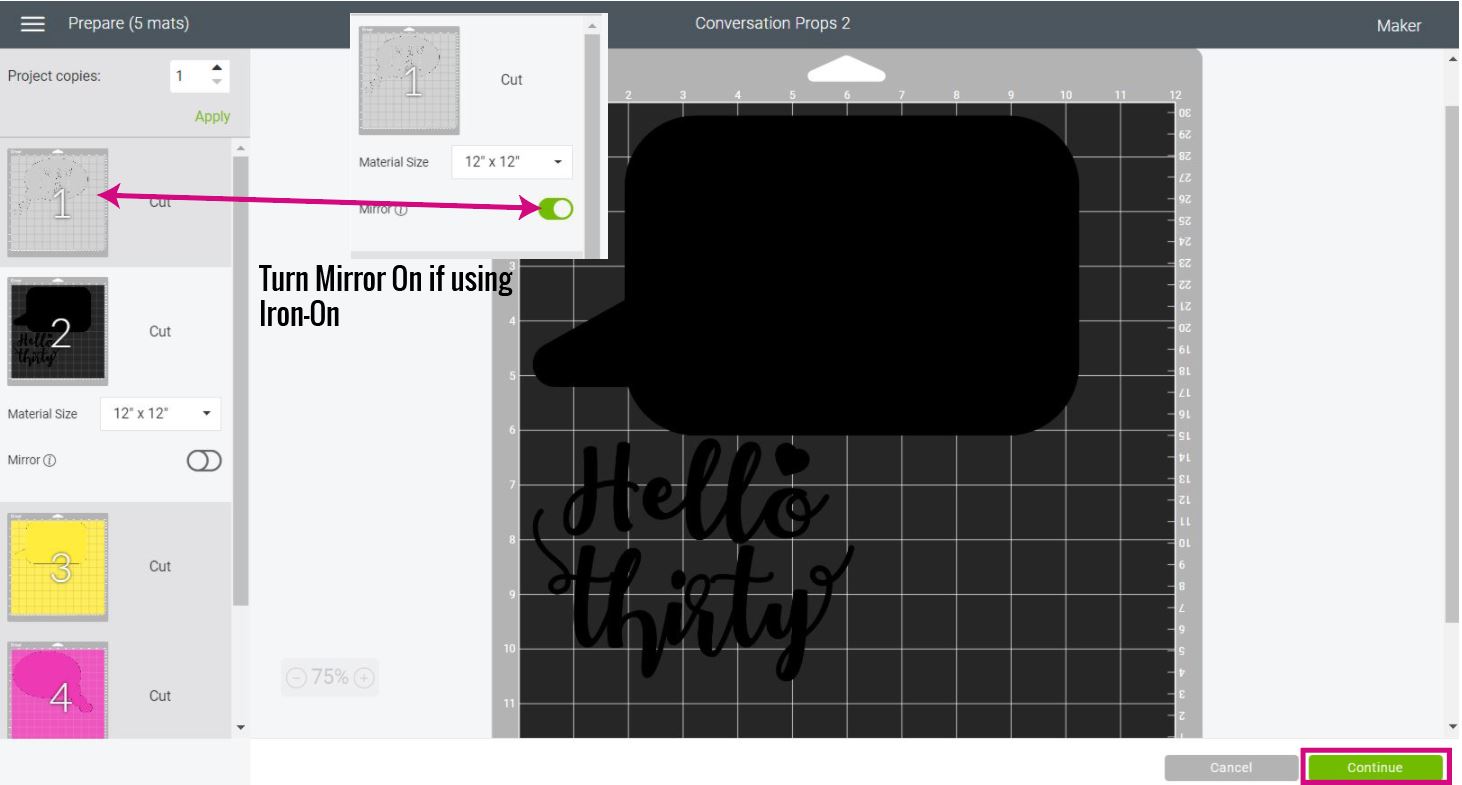
Upon sending your project to cut, you’ll see a preview of all of the mats you are cutting.
IMPORTANT: If using iron-on, turn on the mirror option. In this case, I did it for the “Yay” mat.
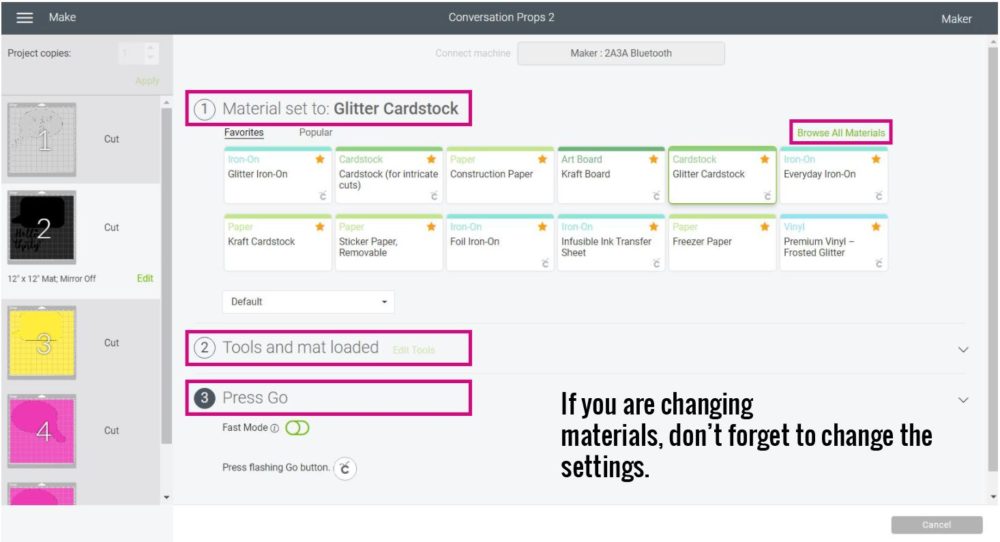
When cutting a multi-color and material project with your Cricut, you have to be extra vigilant and careful.
If you have an Explore machine, you can select the materials from the Smart set dial on your device, or you can move it to Custom material and select them all from Cricut Design Space.
It’s very important to choose the correct vinyl in Design Space, they all differ in thickness, so if using Sparkle Iron-On like I did select it from Design Space.
If you have a Cricut Maker, select the material from Design Space.
Usually, the order of the cuts will be in the order of the mats you have on the left panel in the cutting area.
As you cut each piece of your project, change the material on your “Smart Set Dial” or Design Space.
You can also cut mats in different orders by selecting them on the left panel; this is what I did on this step by step tutorial, but usually, I leave it in the order it comes. (less room for error)
Cutting and Assembly Process Photo Booth Prop (Hello Thirty)
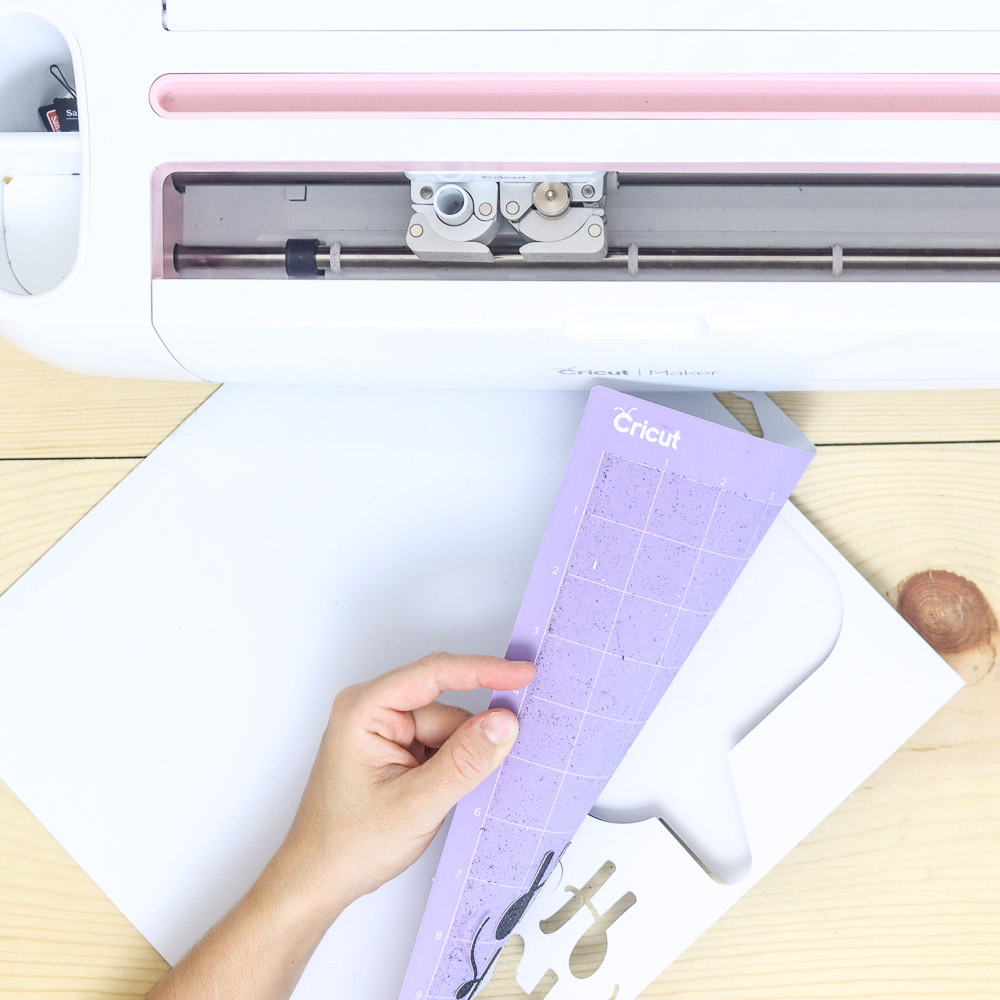
Select glitter cardstock in Cricut Design Space and install the fine point blade in your Cricut.
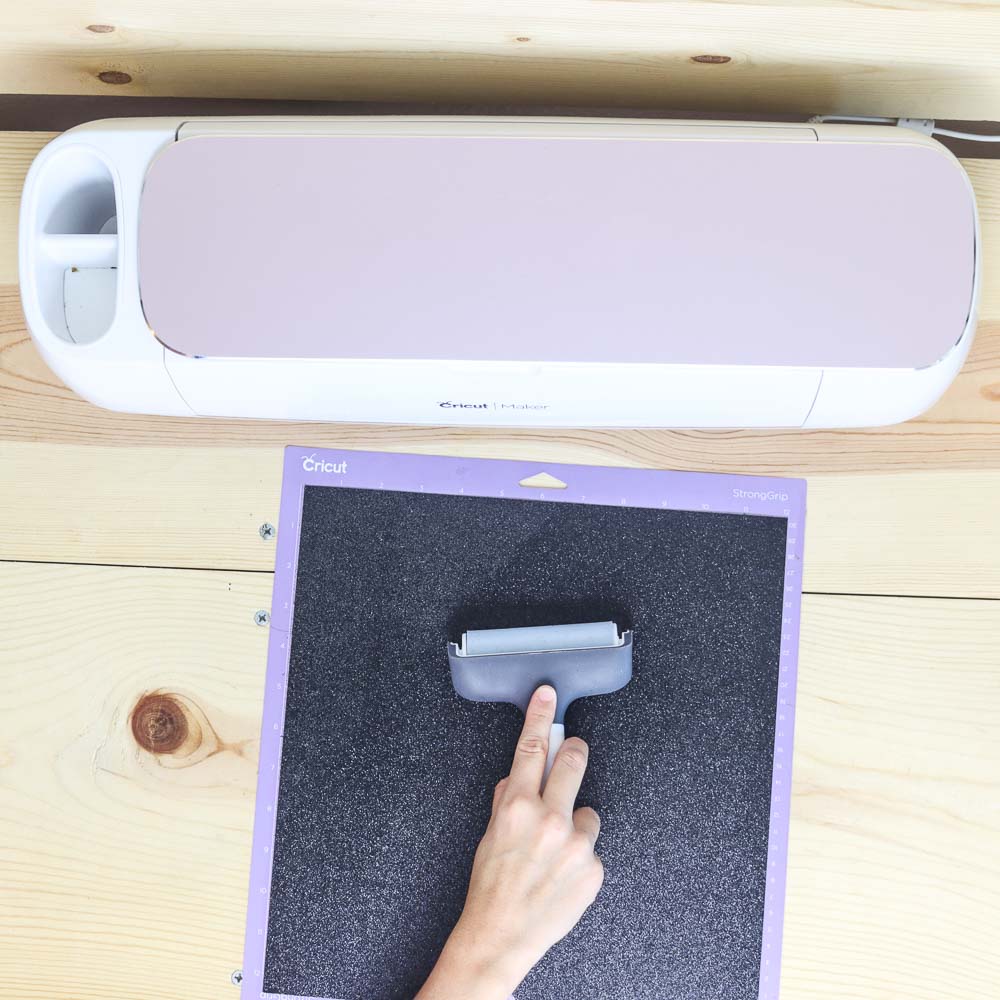
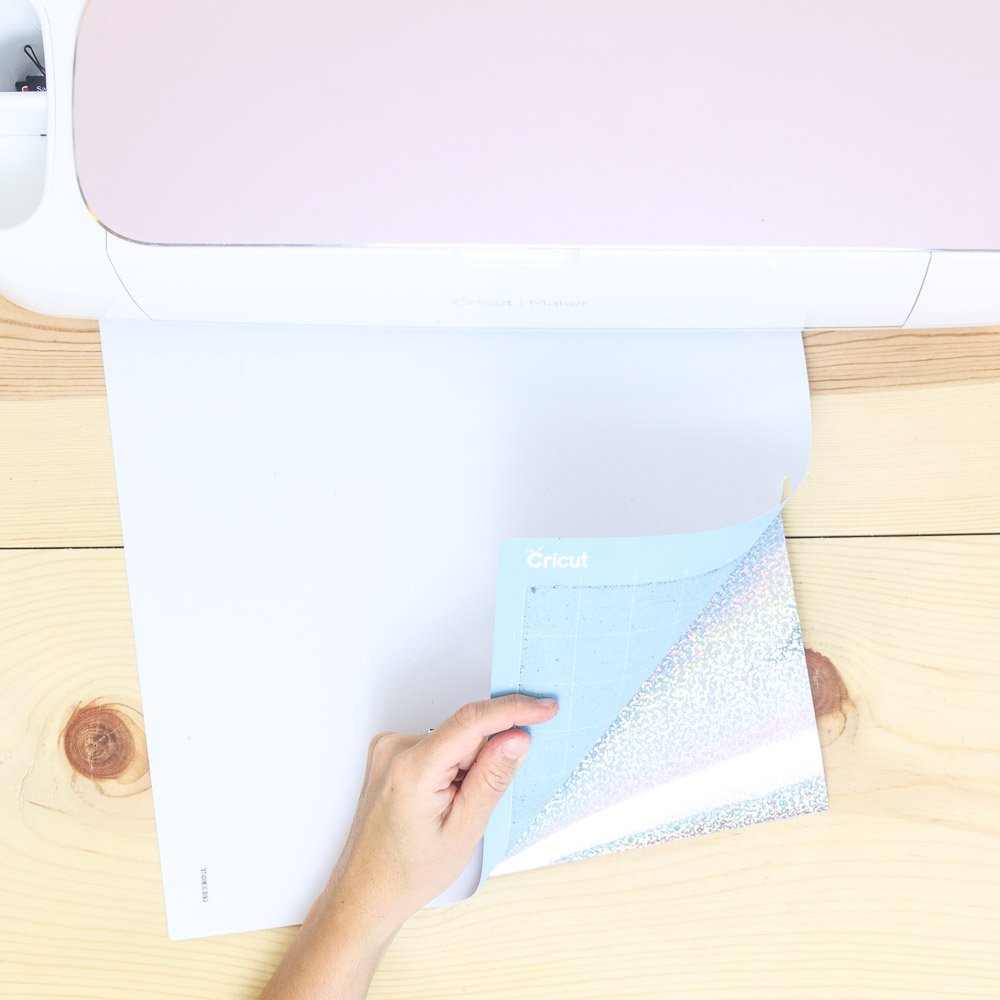
Step 1: Place glitter cardstock on the purple mat and secure it with a scraper or the brayer (my favorite tool in the Cricut world).
Ensure your material has completely adhered to the mat, so it doesn’t move during the cutting process.
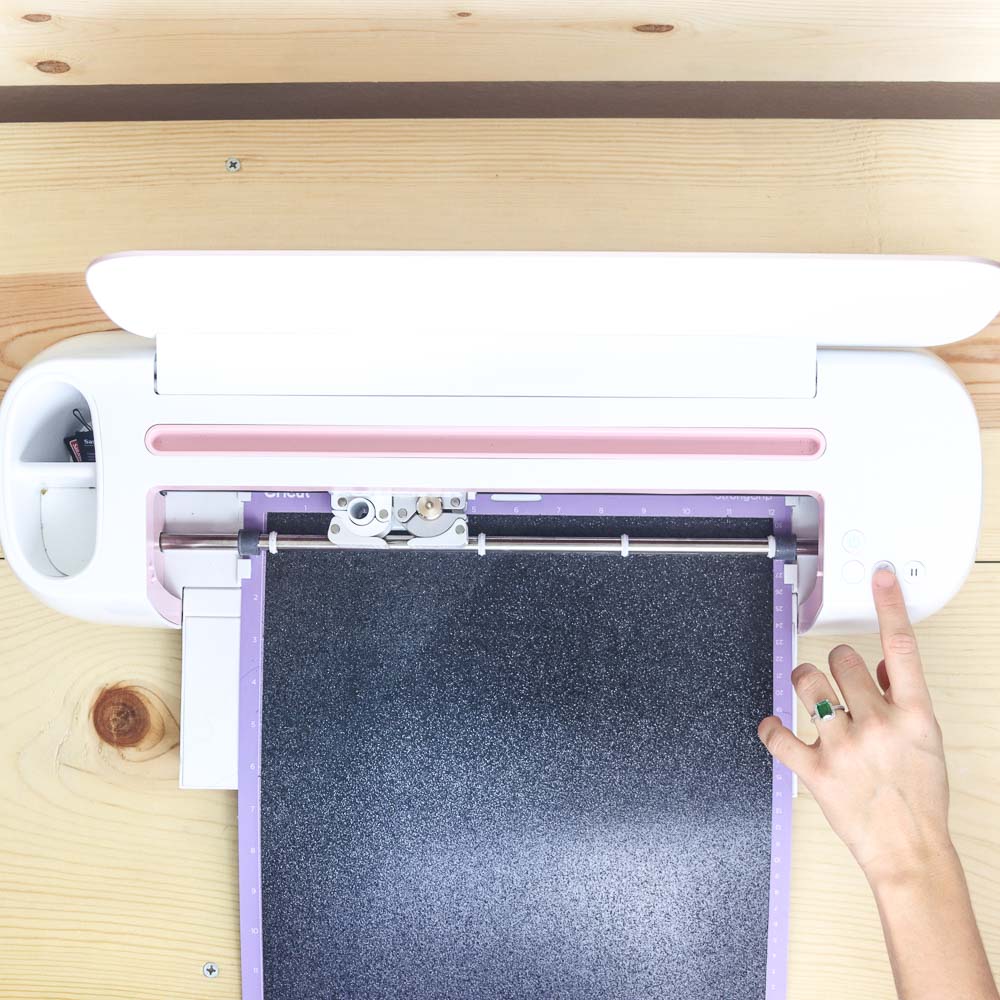
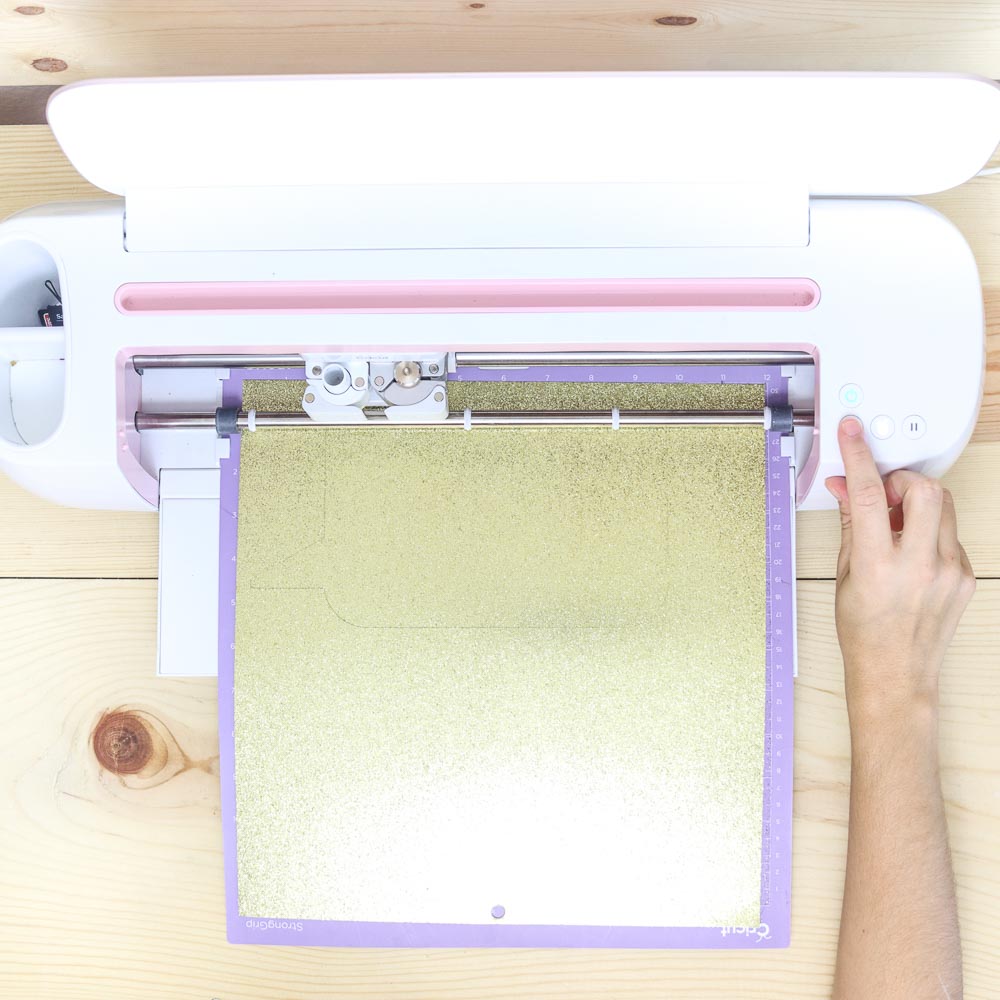
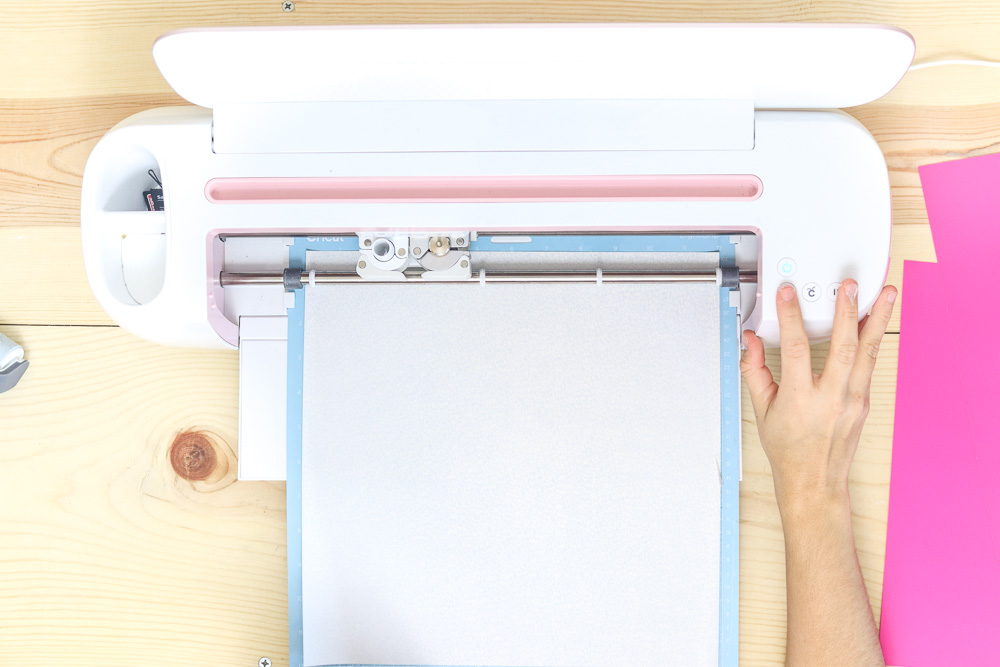
Step 2: Load mat to your Cricut and press the flashing go button to start the cutting process.

Step 1 Step 2 Step 3
Step 3: Unload mat and bend it to release cardstock from the mat. Make sure to keep all the pieces in a safe place because we need them later on.
Step 4 
Step 5 Step 6
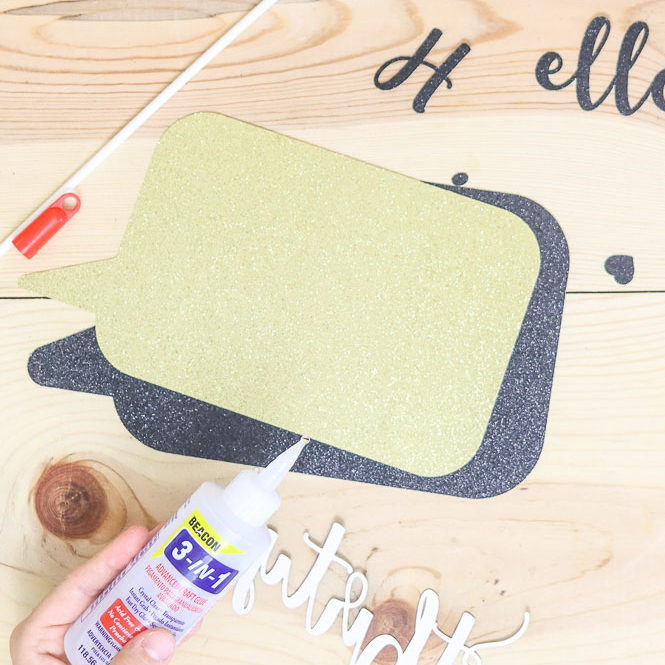

Step 4: Repeat the same process with the other color.
Step 5-6: It’s time to glue! Glue the gold cardstock to the black, then glue the letters. These letters are very simple because they are connected. It helps to also look at the original design on your computer to see the order and placements.
I placed the heart in a different spot.
Step 7 Final Result
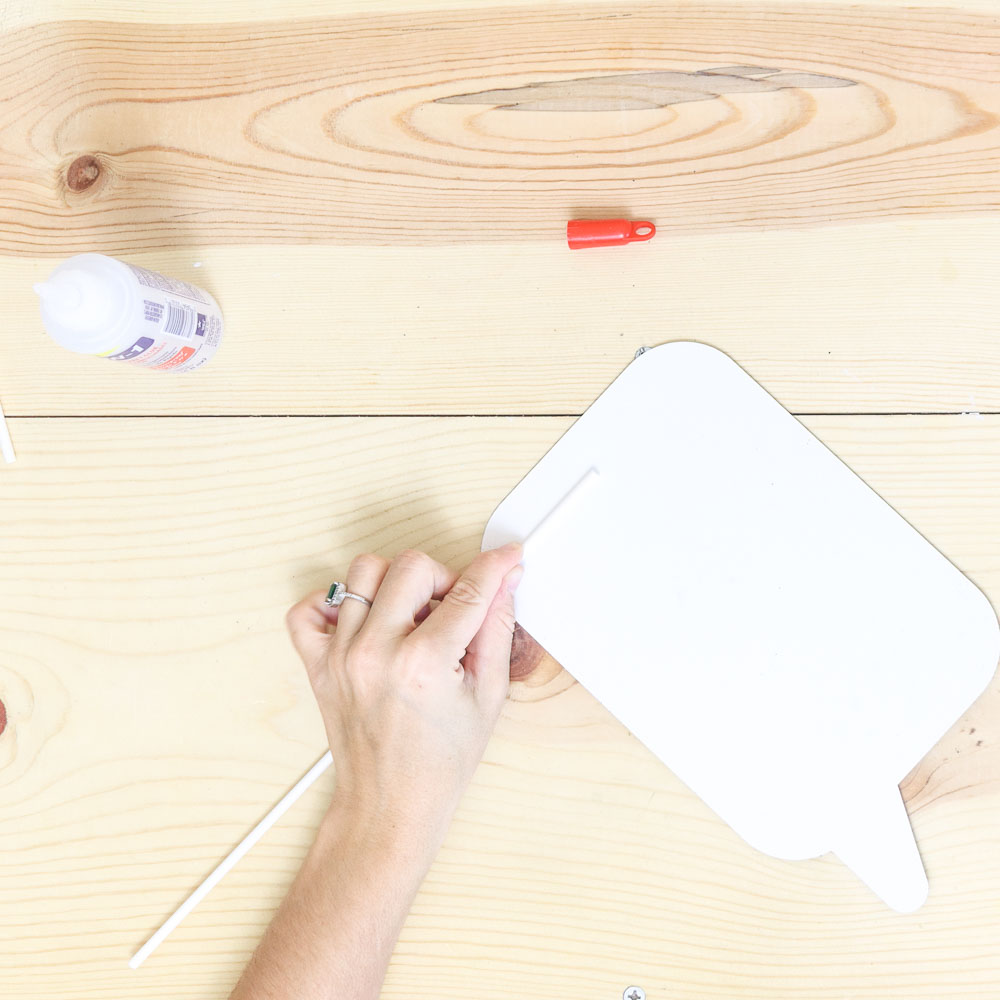
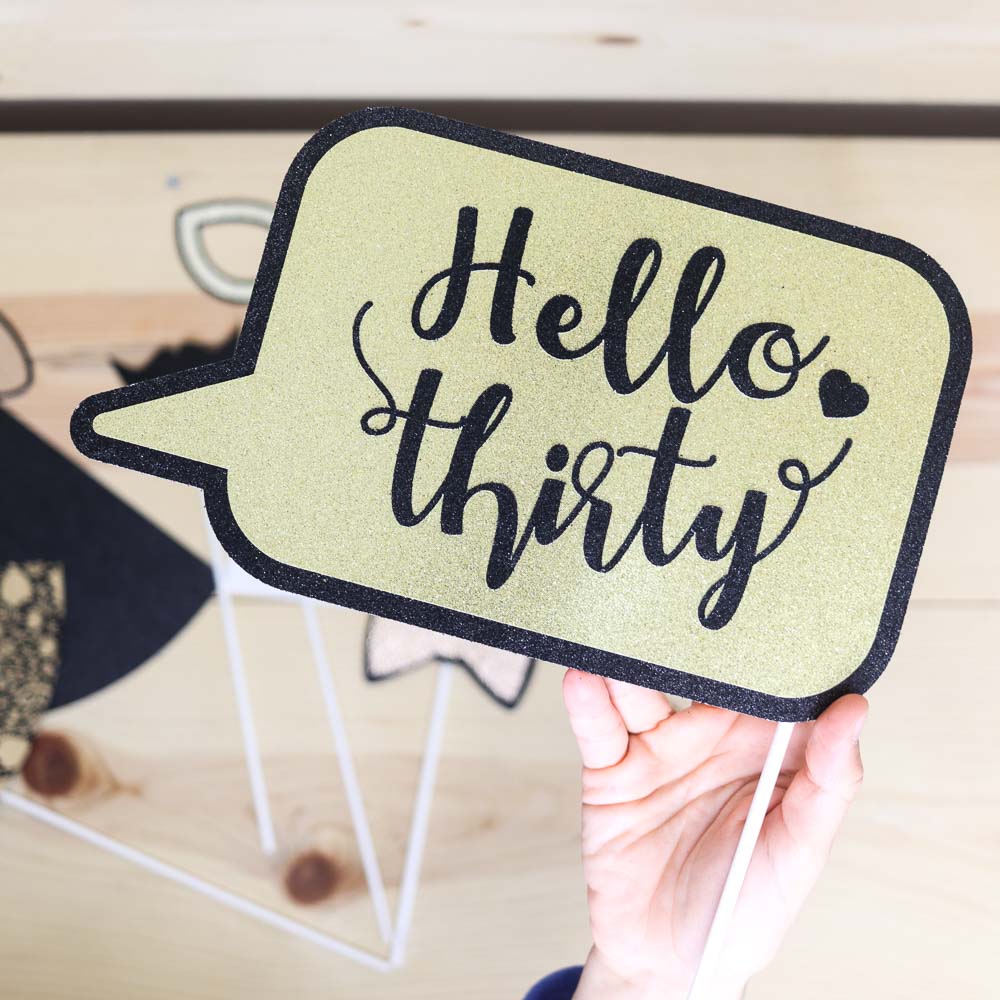
Step 7: Last, use a lollipop stick. There are many options out there, white, black, bright colors, transparent. I happened to have white ones on hand.
Don’t you think it looks incredible?
Photo booth props are one of my favorite projects I’ve made with my Cricut so far!
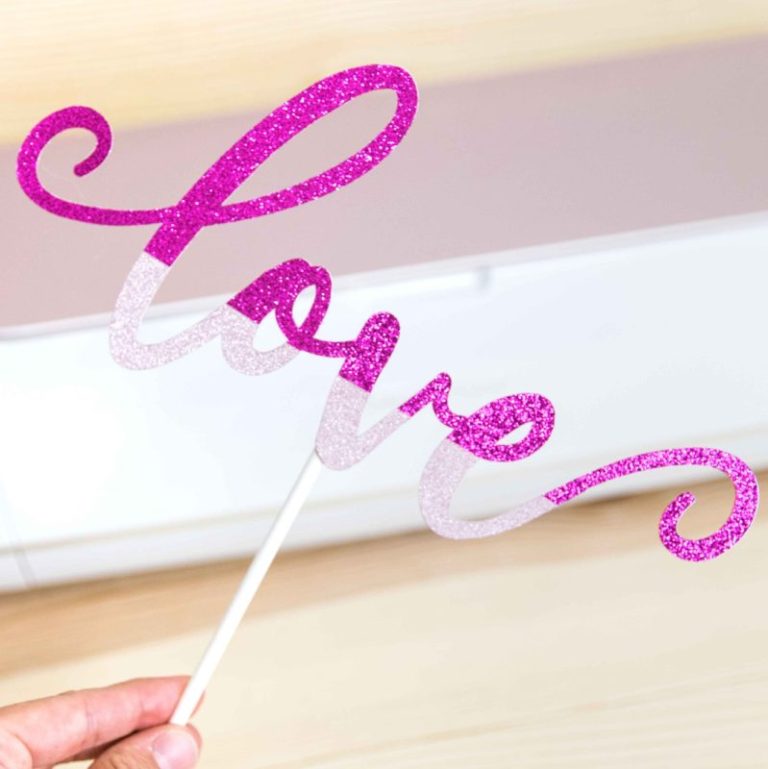
Cutting and Assembly Process Photo Booth Prop (Yay!)
Using Heat Transfer Vinyl on your paper projects will be life-changing. The results you get are beyond professional.
They literally look like you bought them at Target or some fancy shop!
Mirror your image in Design Space if using Heat Transfer Vinyl, and install fine point blade in your machine.
Also, don’t forget to choose the right type of vinyl. If you have doubts with an Explore machine, select “Custom” and choose from Design Space.

Step 1 Step 2 
Step 3
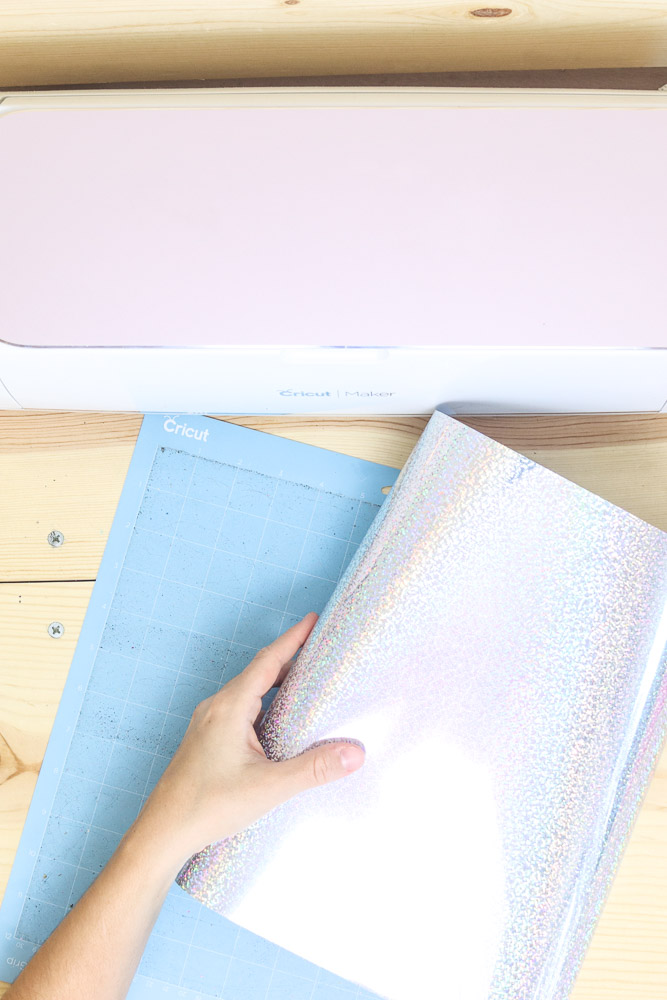
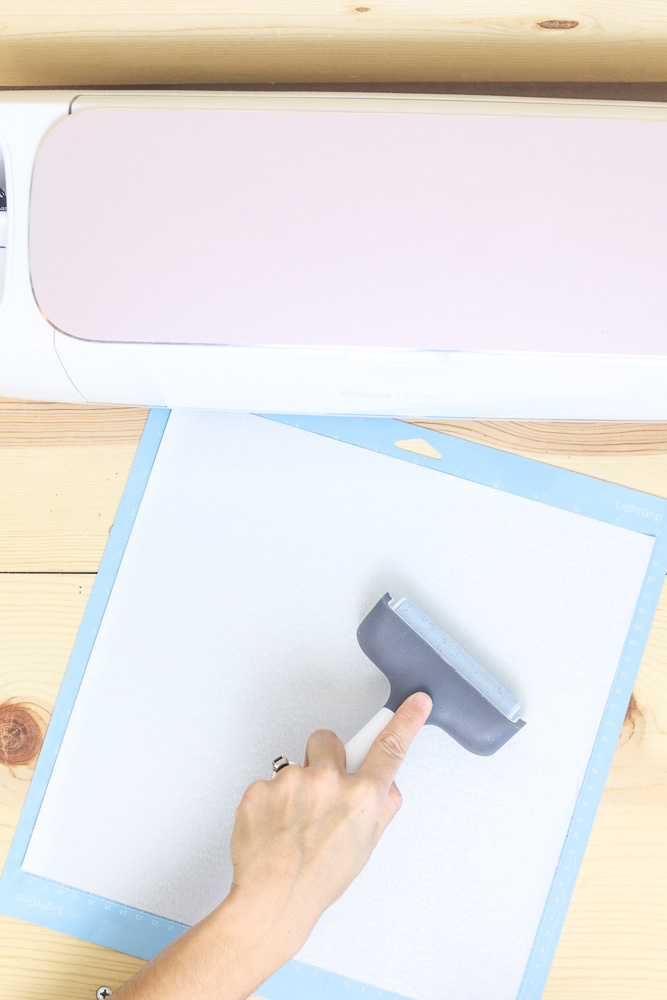
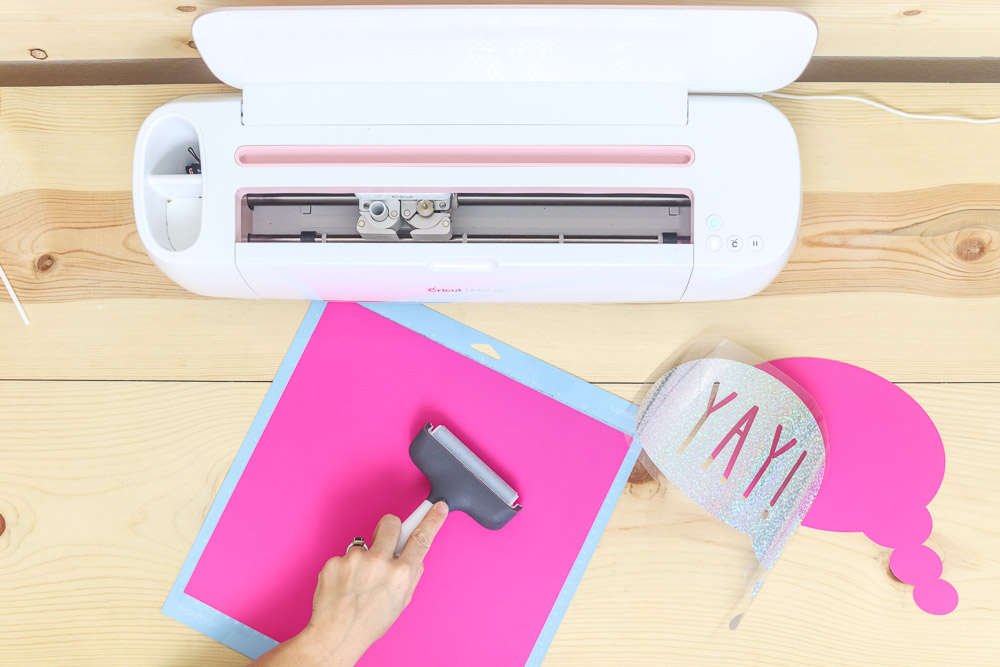
Steps 1-2: Heat Transfer Vinyl must be placed pretty side down on a blue or green mat. Use a brayer or a scraper and adhere iron-on to the Cricut mat, so it doesn’t move during the cutting process.
Step 3: Load mat to the Cricut machine and press the flashing “go” button.
Step 4 Step 5 Step 6
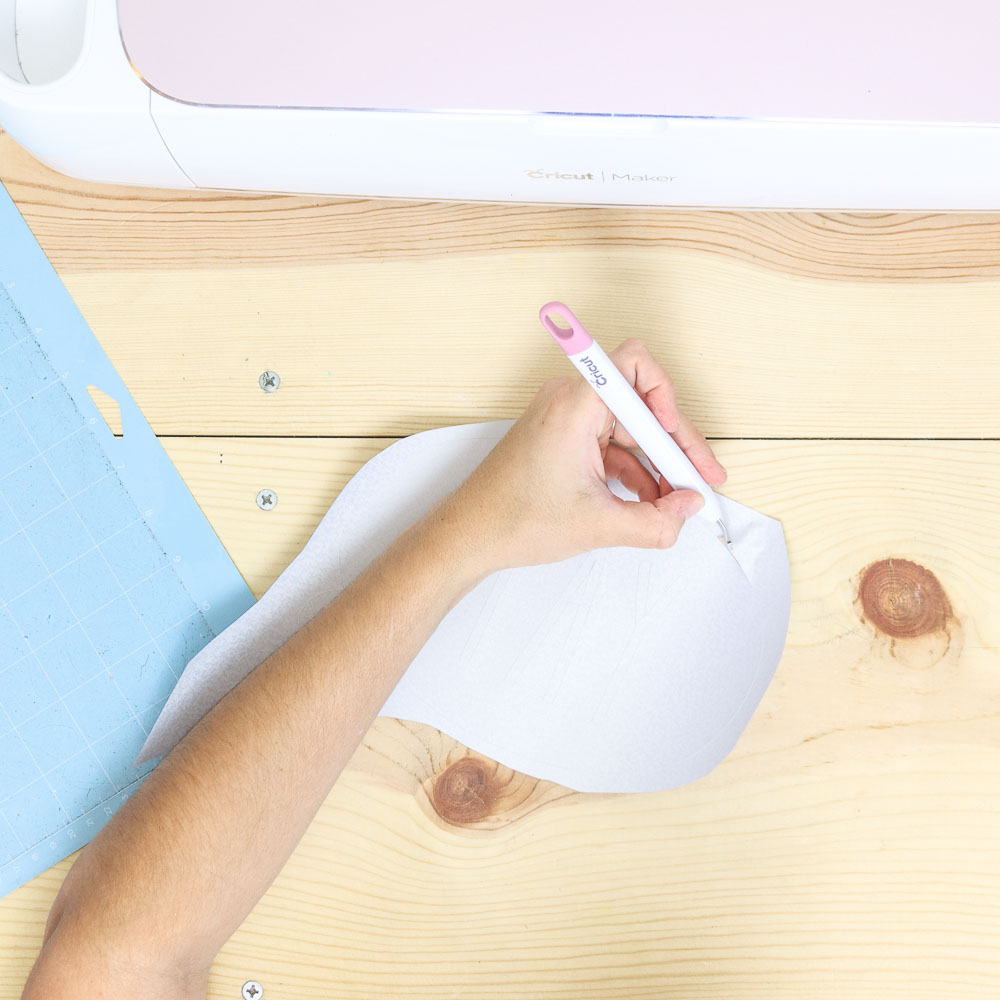
Step 4: When the machine is done cutting, unload the mat, and remove the vinyl sheet by bending it.
Step 5: Weed vinyl with a weeder tool.
Step 6: Cut the other pieces of the photo prop. Since I used a very thin cardstock paper, I used the Light Grip mat. If your cardstock is thick enough, you can also use a green (Standard Grip) mat.
Don’t forget to change the material settings in Design Space.
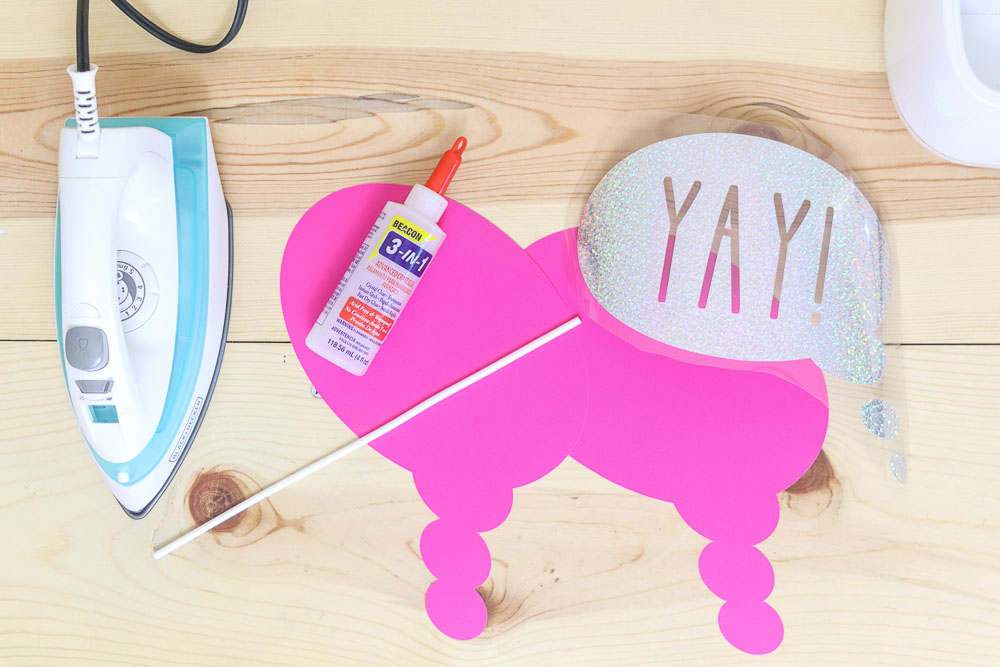
The following photo shows all the pieces you should have before assembling this project.
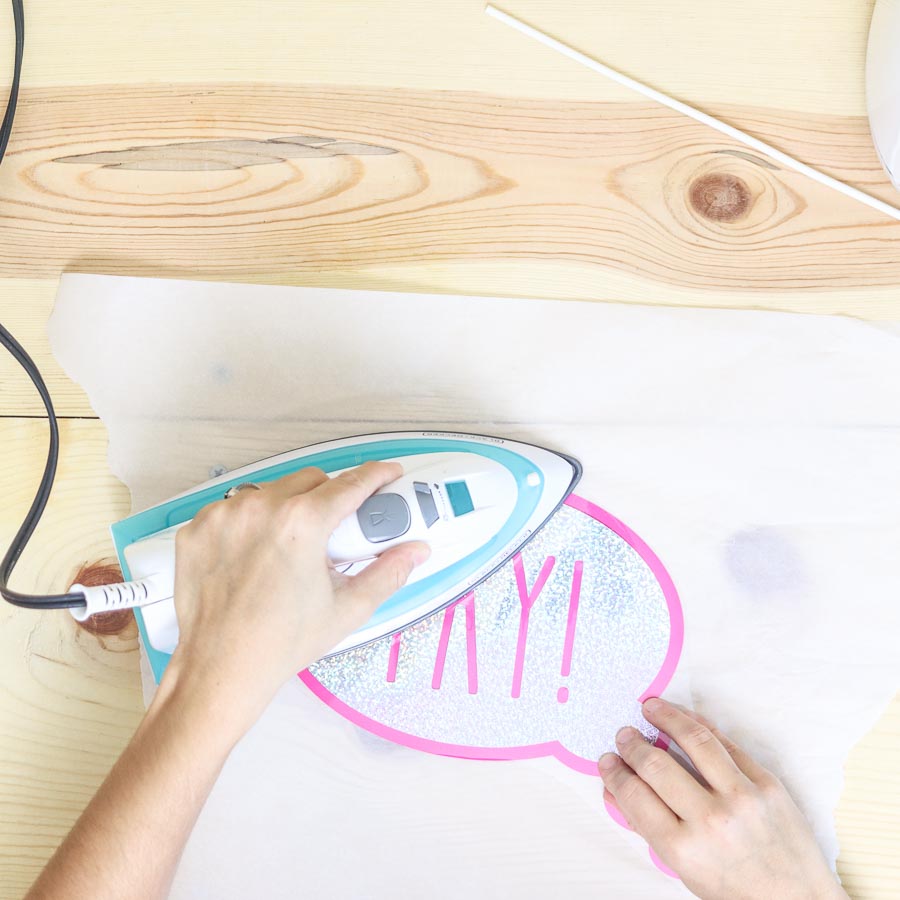
Step 7: Preheat your iron to two notches down below the highest setting and press with constant movement, for about 30 seconds.
Don’t let your design move at all, or it will get ruined. If you feel it may move, use some heat resistant tape to secure it.
Tip: Place parchment paper at the bottom to protect your surface.
You can also use an Easypress, or Easypress Mini for smaller projects. I did, and the results are amazing!
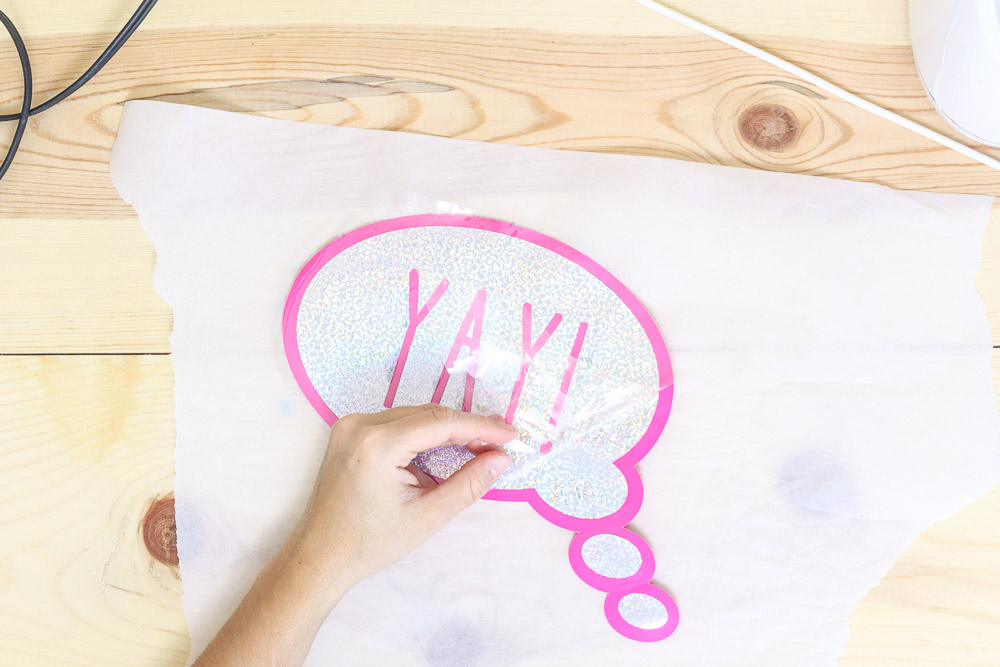
Step 8: Let holographic sparkle vinyl cool down a bit, but peel off carrier sheet while still warm.

Step 7 Step 8 Step 9
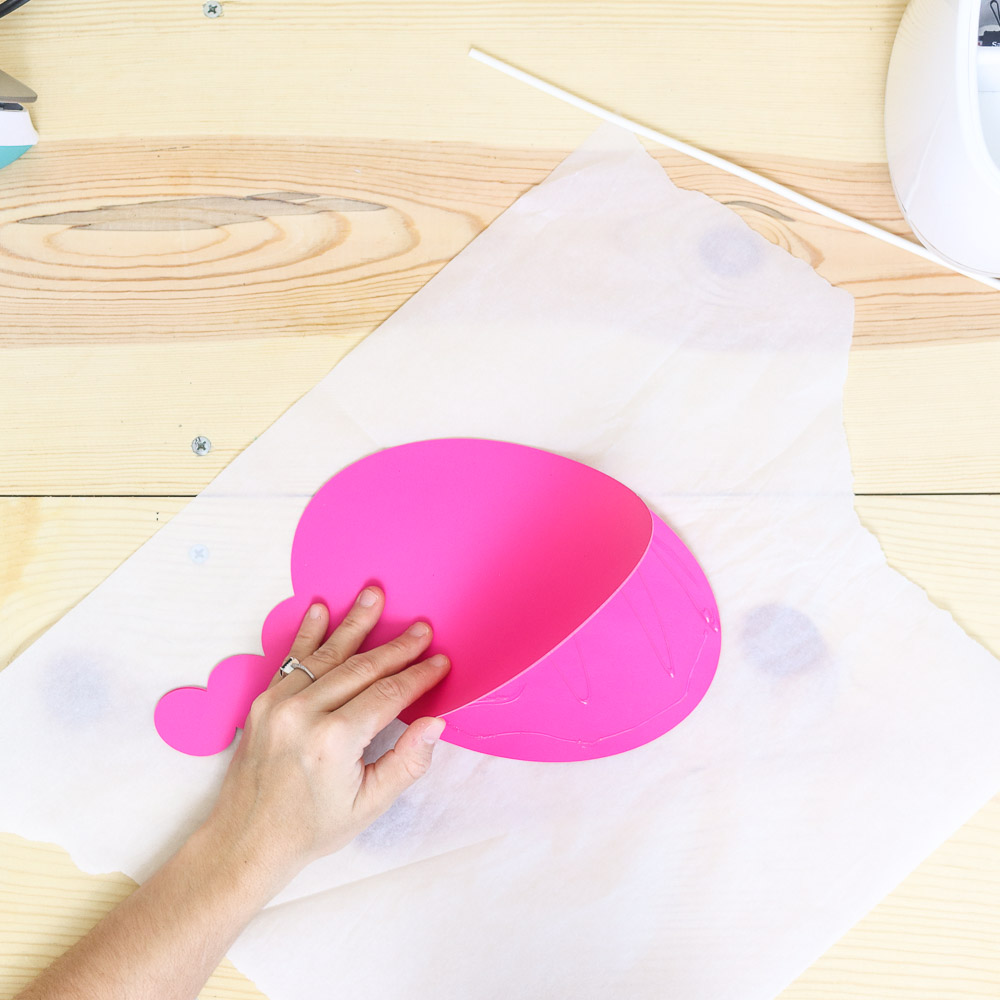
Step 9: Glue the other cut to the backside of the prop to add extra sturdiness to the photo prop.
Step 10: Glue lollipop stick to the photo prop and let it dry for a couple of minutes.
Step 10 Final Result
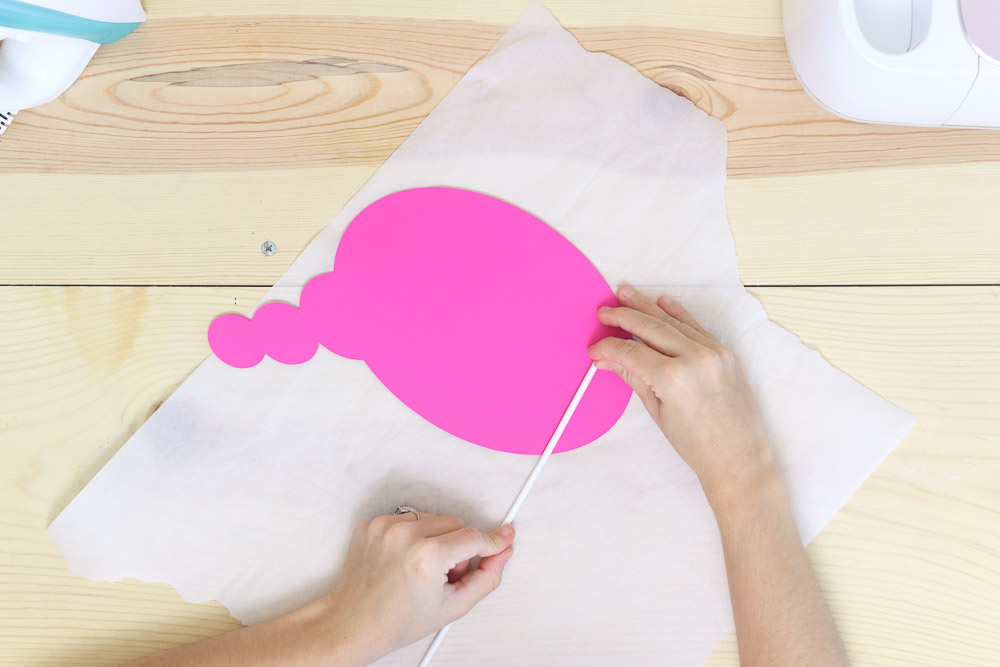
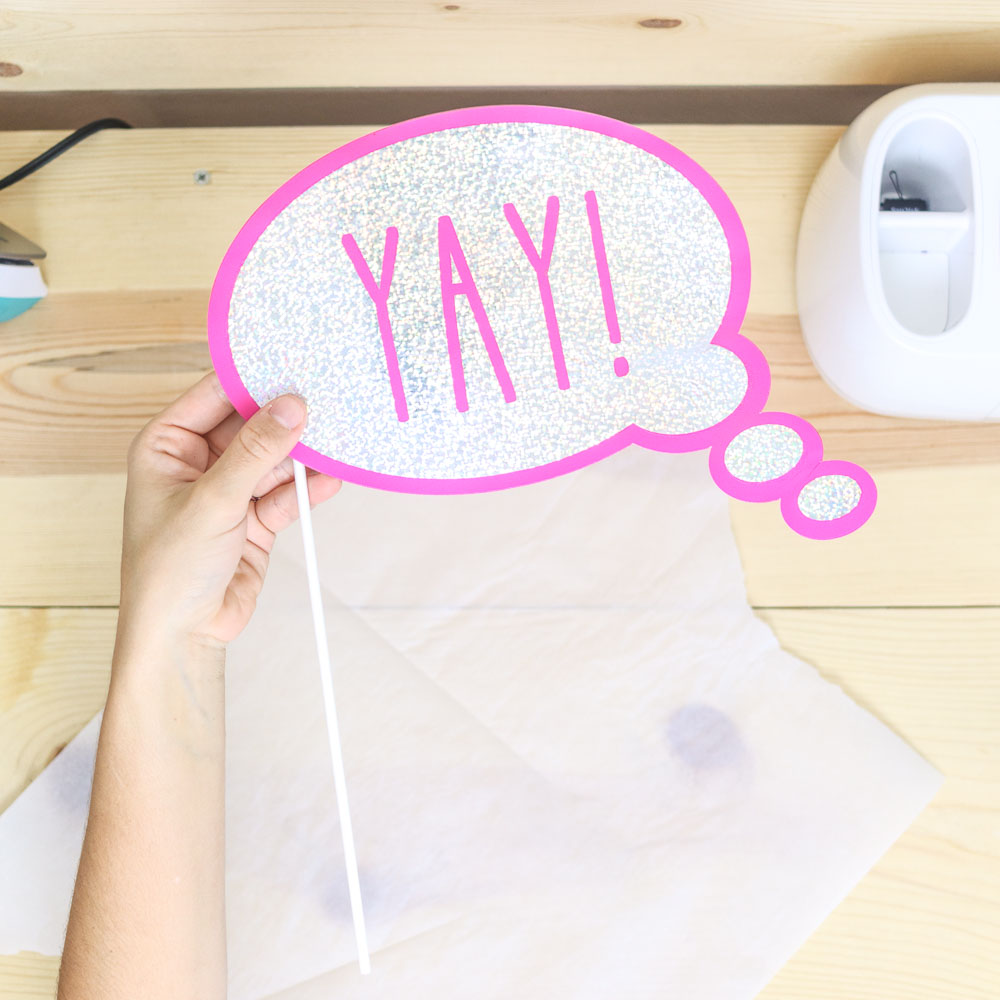
Don’t they look spectacular?
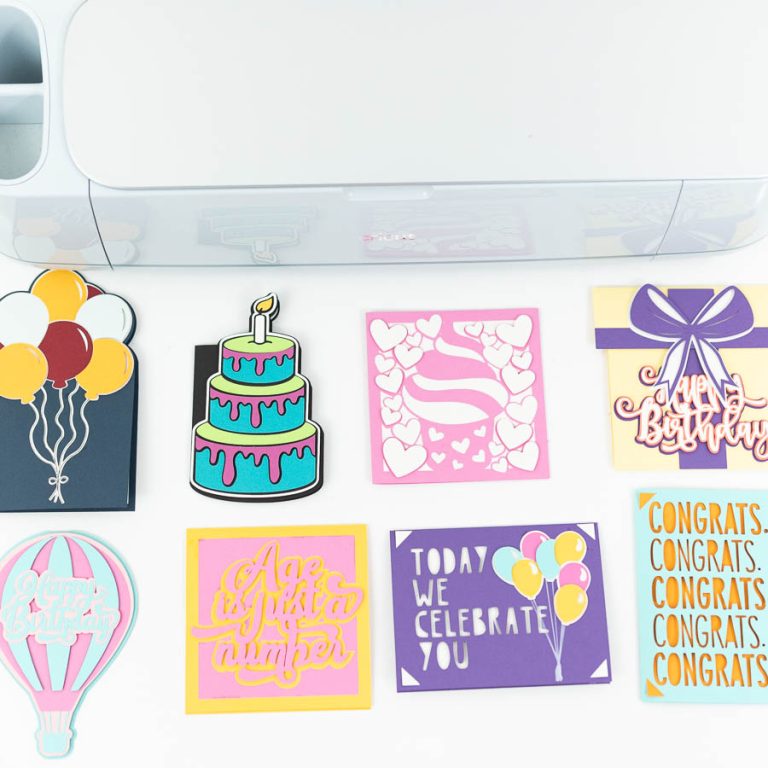
Cricut Photo Booth Prop Ideas
Now that you just the step by step process of how to make photo props with your Cricut step by step let me show you other ideas that you will absolutely love!
My main tip for you is to experiment with different types of paper and vinyl. Be creative, be willing to make mistakes, and, most of all, have tons of fun.
All the following photo booth props that I am about to show you can be recreated with the files I provided you with!
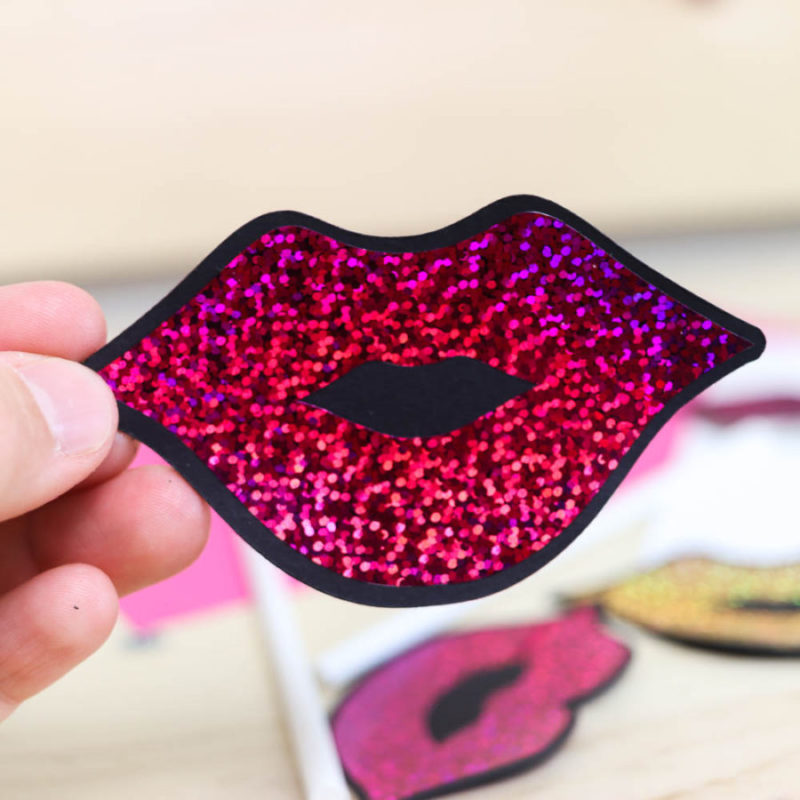
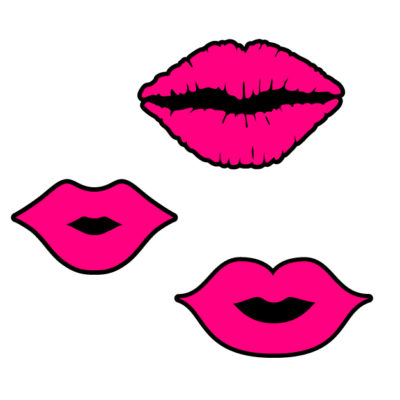
Lips Photo Booth Props
Lips are a must-have photo booth prop!
I made a wide variety of them with different materials, including black and pink glitter cardstock, regular black cardstock, and holographic sparkle iron-on.
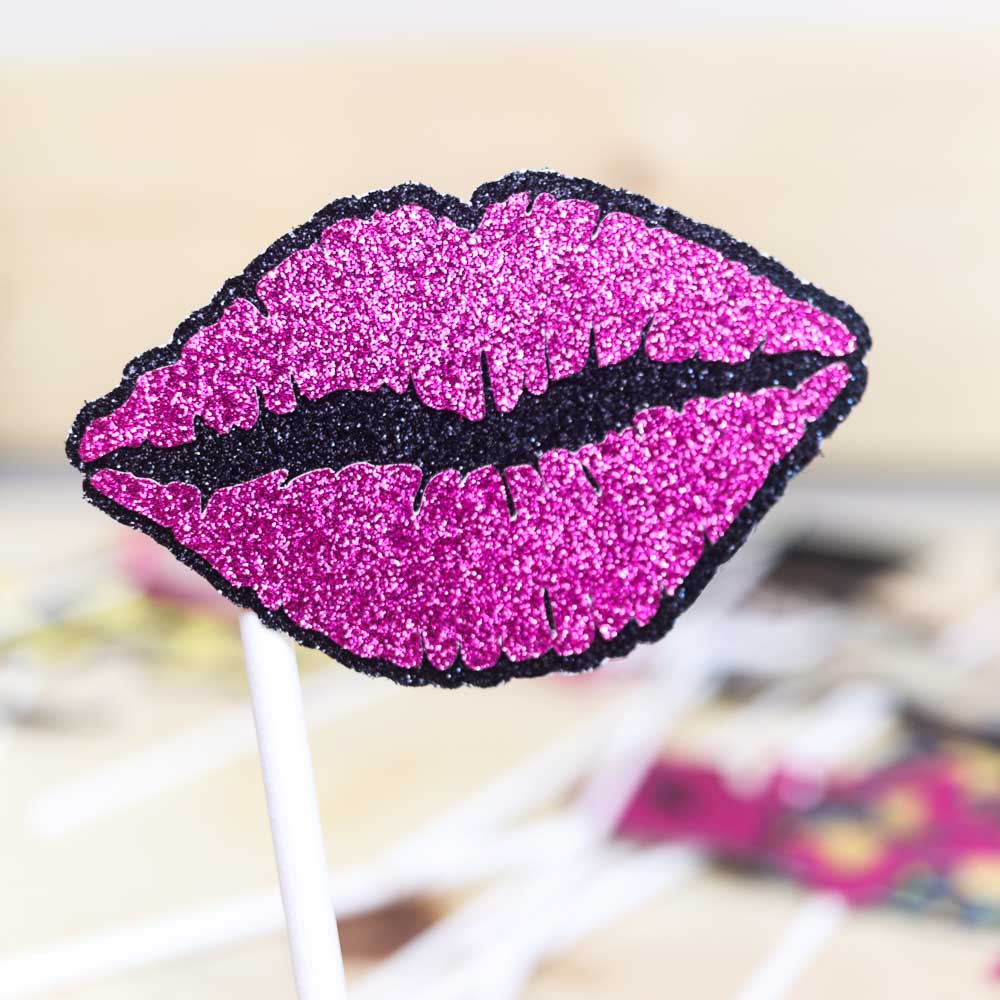
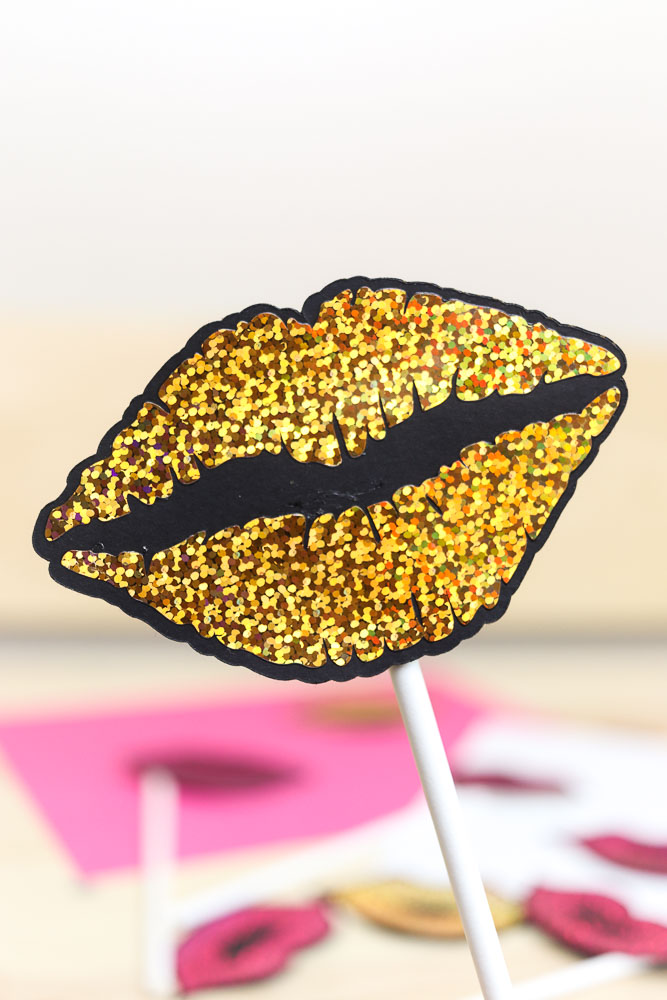
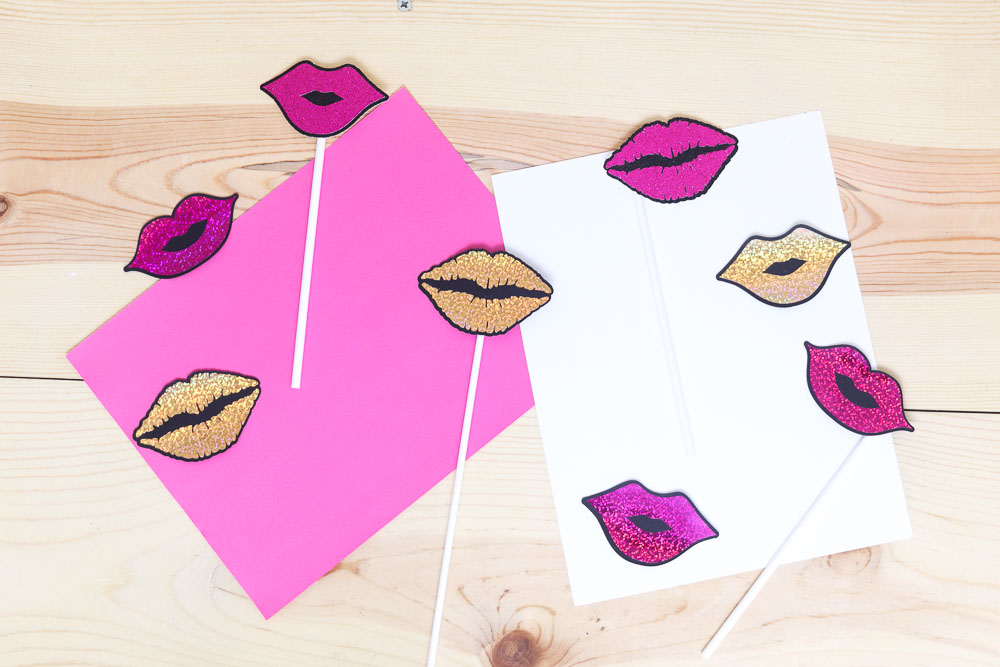
The lip props I made with sparkle iron-on look so professional. People won’t believe you made them.
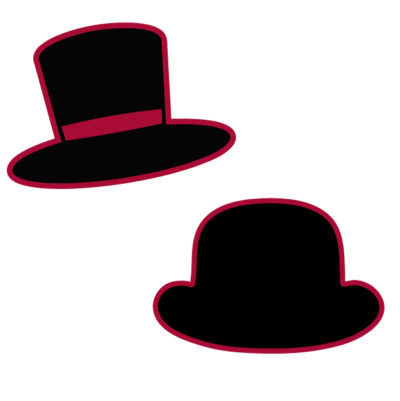
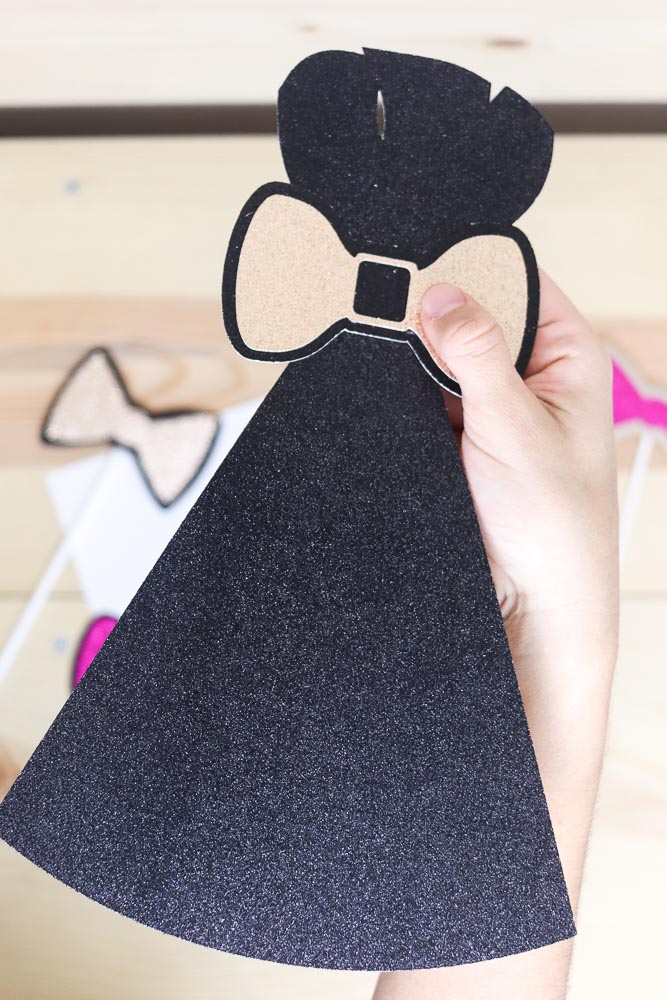
Hats Photo Booth Props
Hats are so much fun to use with photo props!
If your hats are on the bigger side, you may need three cuts to add the right amount of stability.
Not all layers have to be the same material or size.
The ladies hat you see right-below has three different cuts, but that’s enough for the photo prop to be strong and durable.
You can also match bows and hats!
How fun?

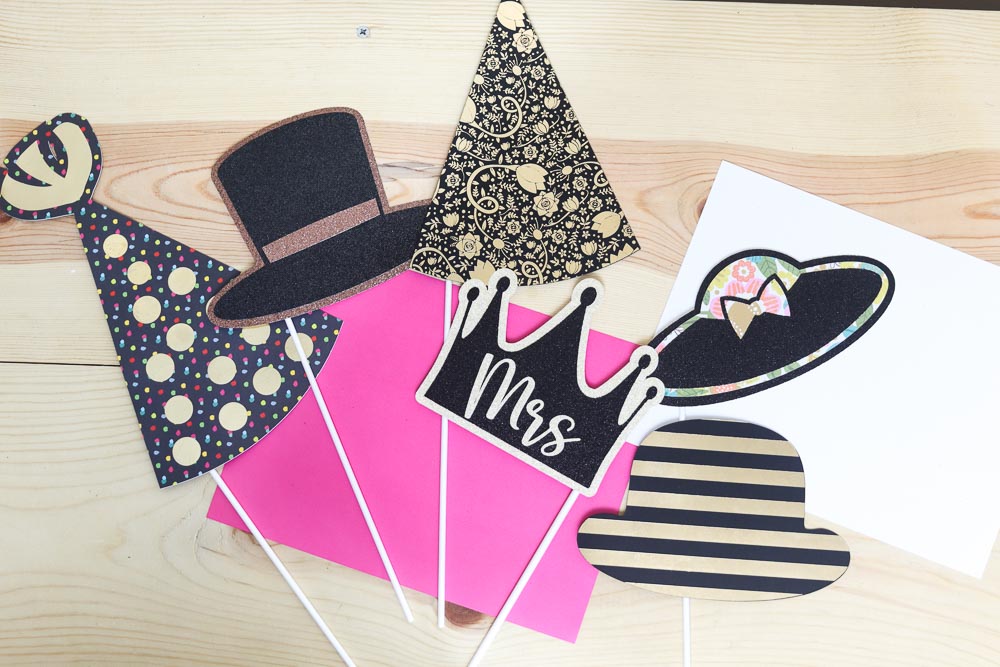
What hat is your favorite?
Do you see all the different styles of paper I used? That floral paper is breathtaking.
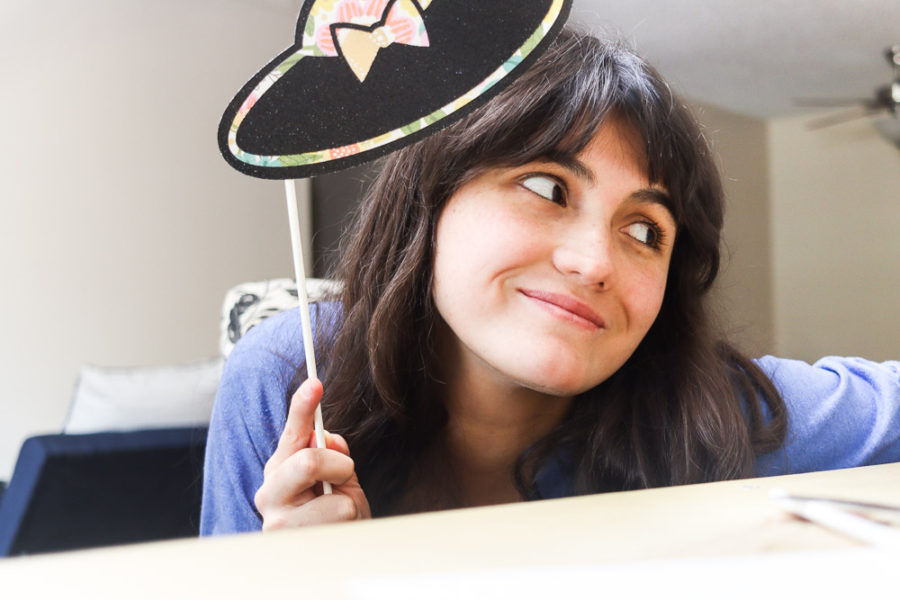
Well, and here’s me, doing a little cameo on my blog post!
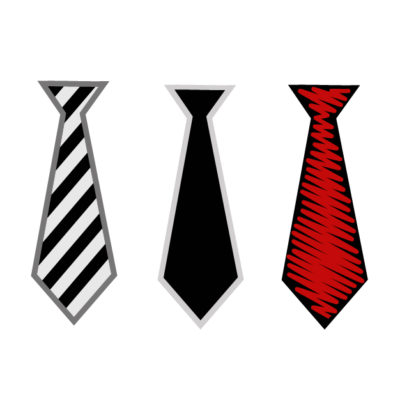
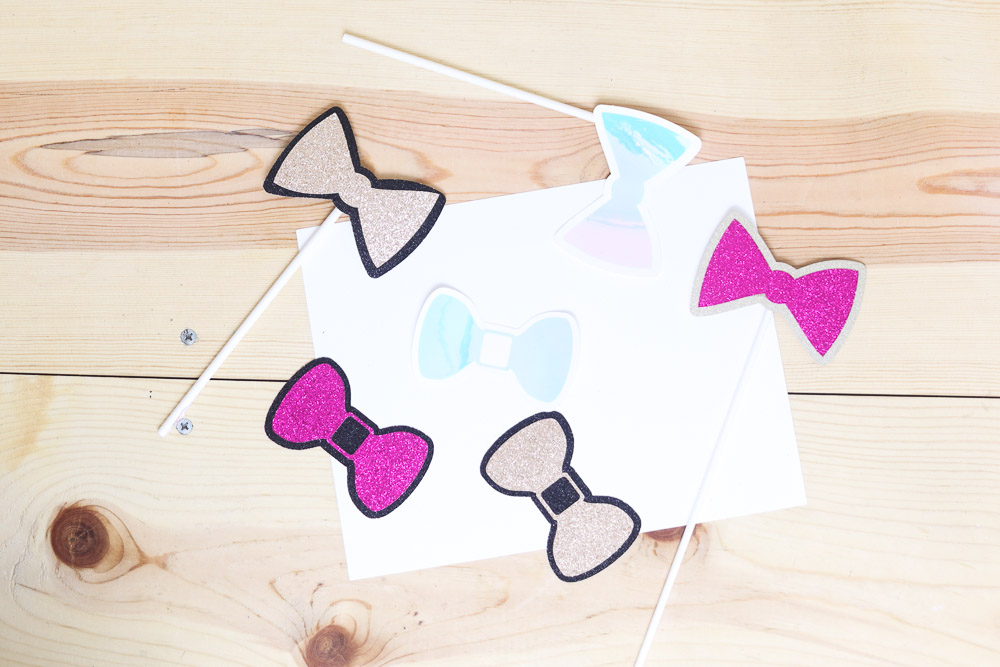
Bows/Bowties Photo Booth Props
Use pink colors and use these photo props as cute bows, use black color, and use them for bowties.
For these first two pics of the following gallery, I used holographic Iron-On. When you use holographic vinyl, you will have different shades of color.
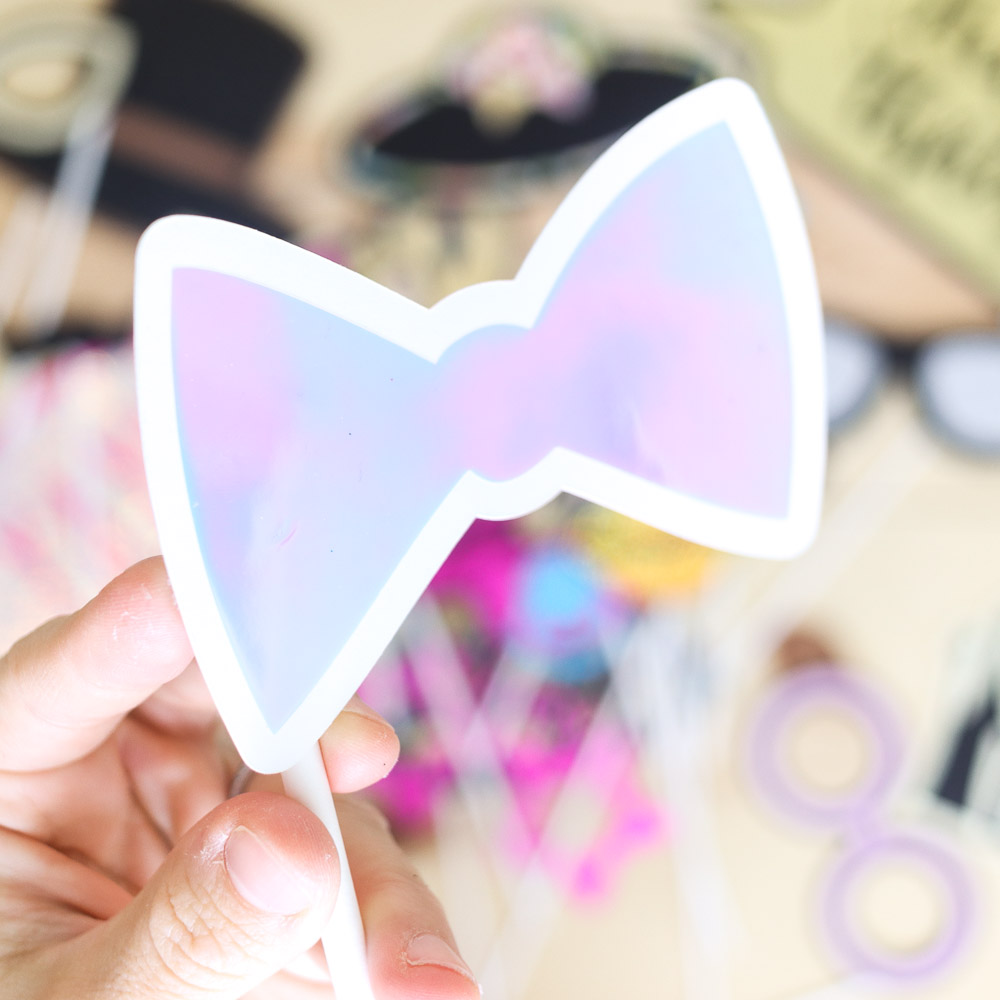
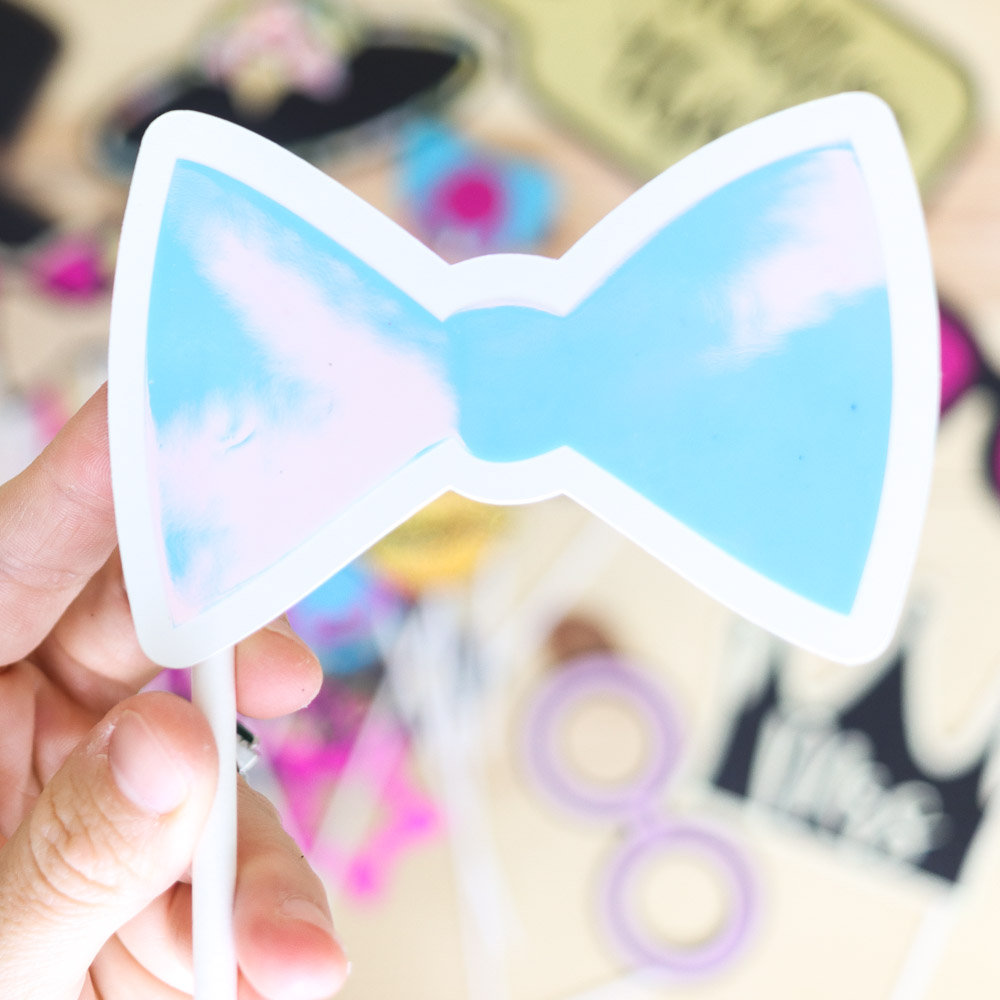
Note: For holographic vinyl to look similar to the color you see on the surface, you need to use white and very light paper.
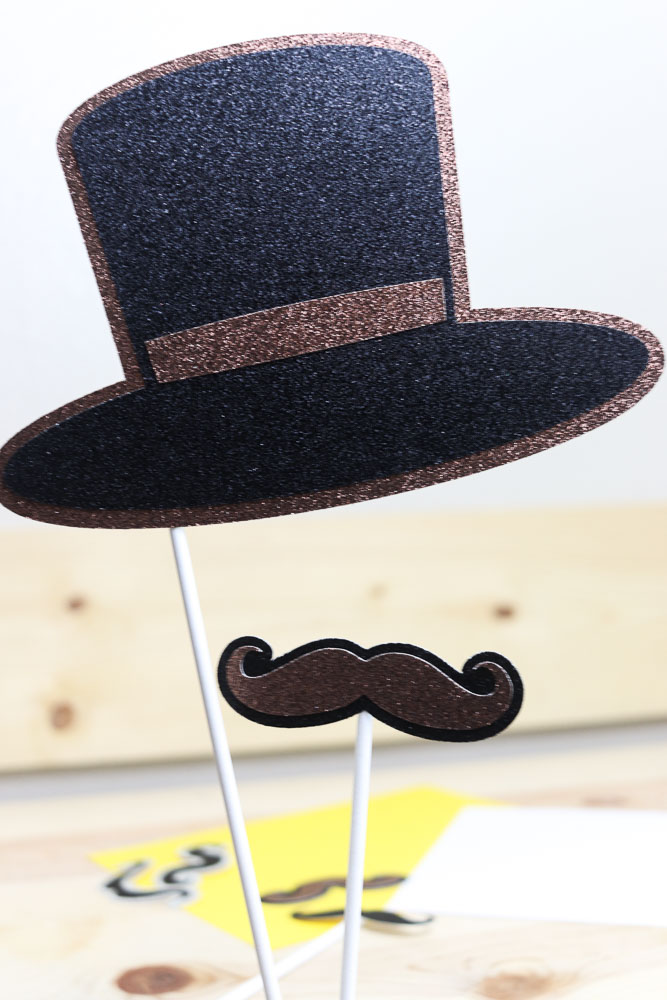
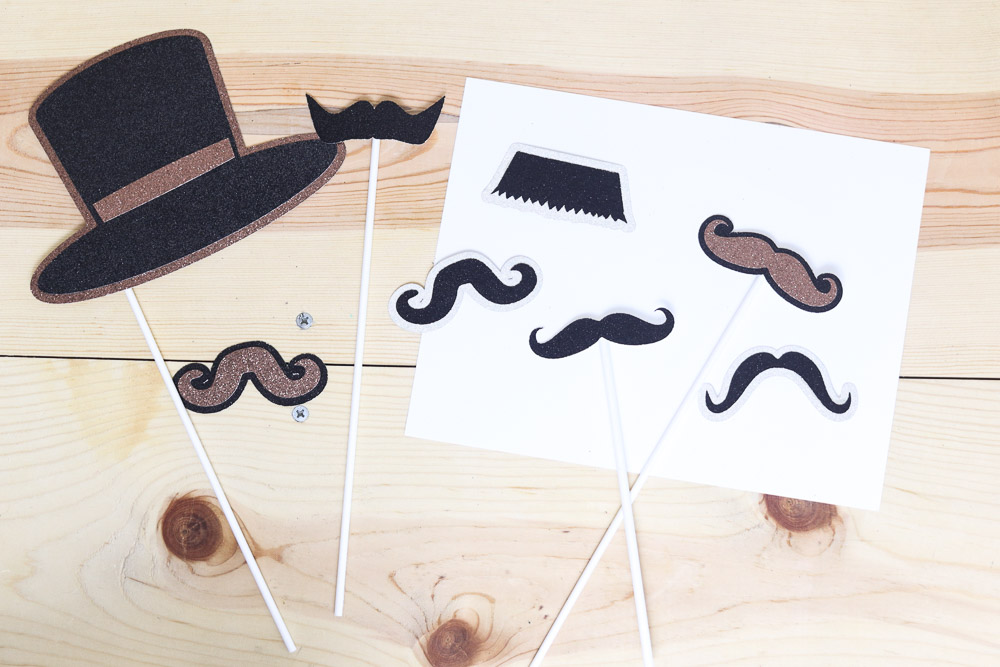
Mustaches Photo Booth Props
Mustaches are so fun for photo props!
Cut them on their own, or with the “shadow.” They will match perfectly with the hats as well.
There are so many styles, that’s hard to choose from!

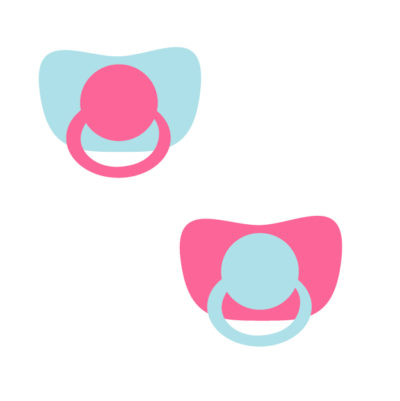
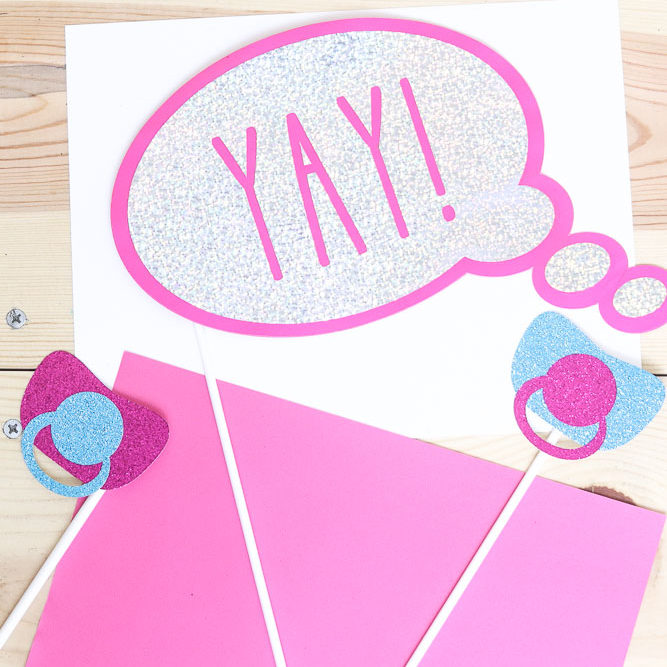
Pacifier Photo Booth Props
I love the pacifier idea if you are hosting or planning a baby shower or gender reveal.
You can also make some that say, team boy, or team girl.
I love the pacifier idea if you are hosting or planning a baby shower or gender reveal party.
You can also make some that say, team boy, or team girl.
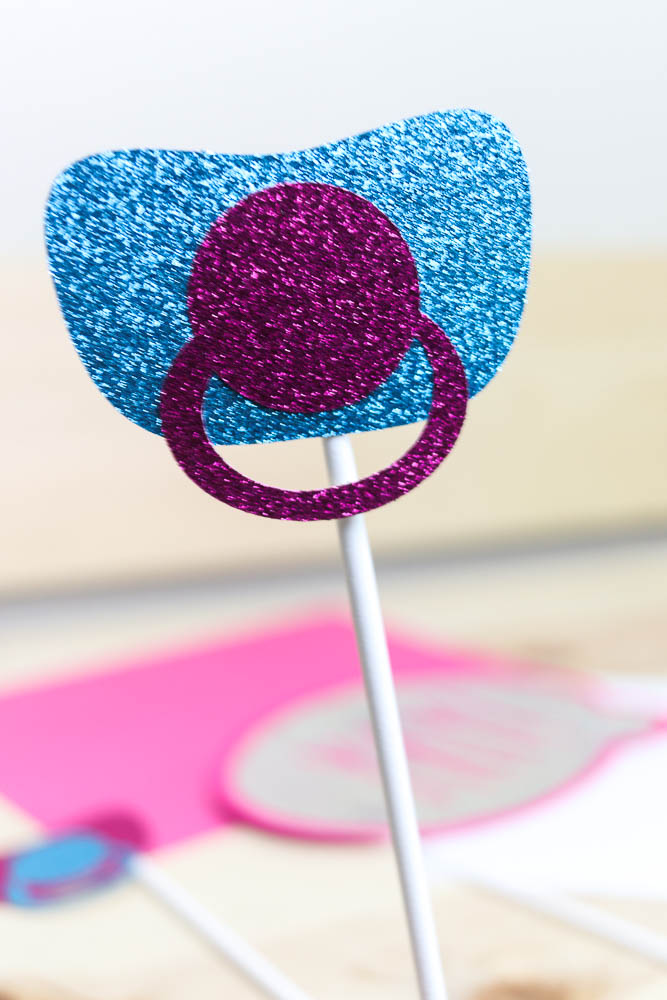

Look how I paired these pacifier props with the “Yay!” sign.
The sky is the limit!
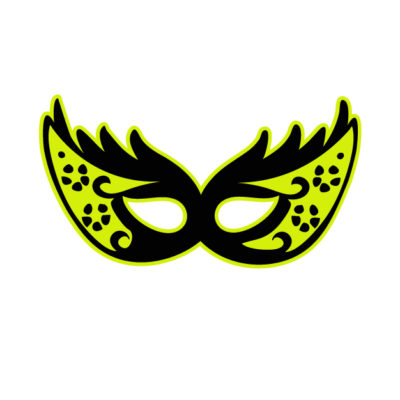
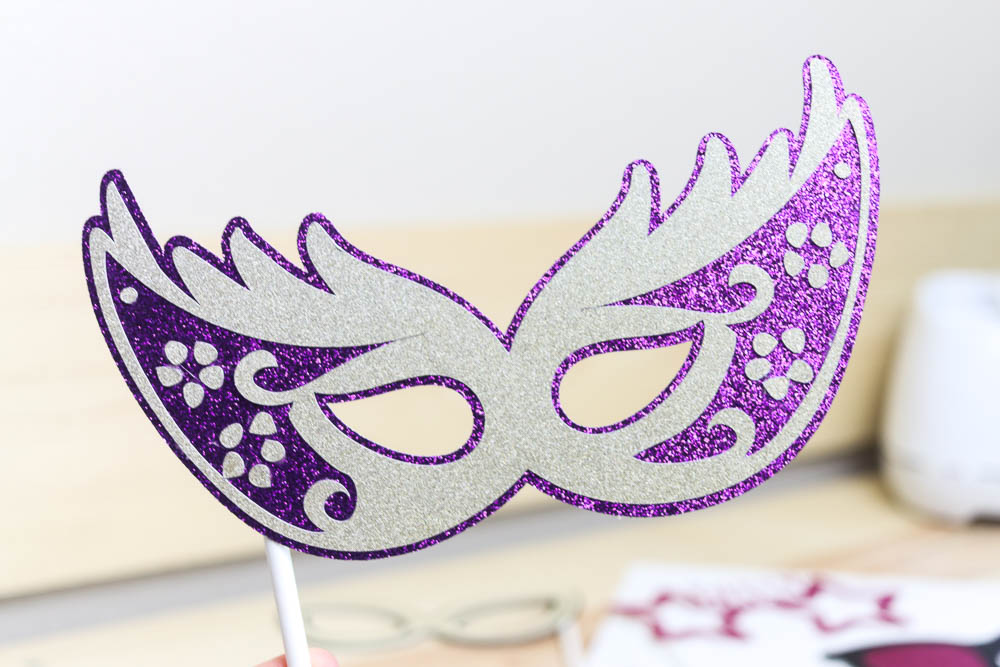
Glasses/Mask Photo Booth Props
Last but not least, look at these glasses and masks I made.
They are so fun and beautiful. Remember, you can customize them with text, or you can even make them with solid “lenses.”
To cut only the solid lenses, you would need to use the contour tool to reveal them. (Learn more about contour in this tutorial)
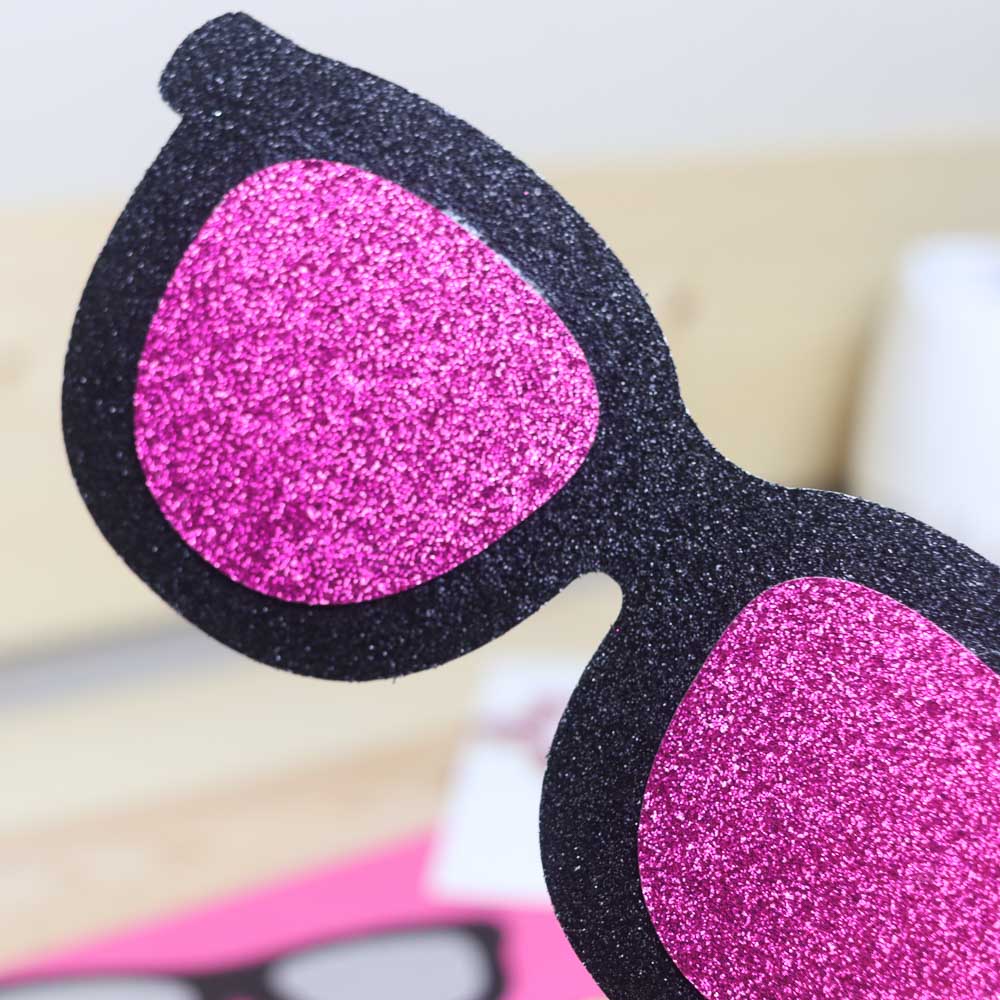
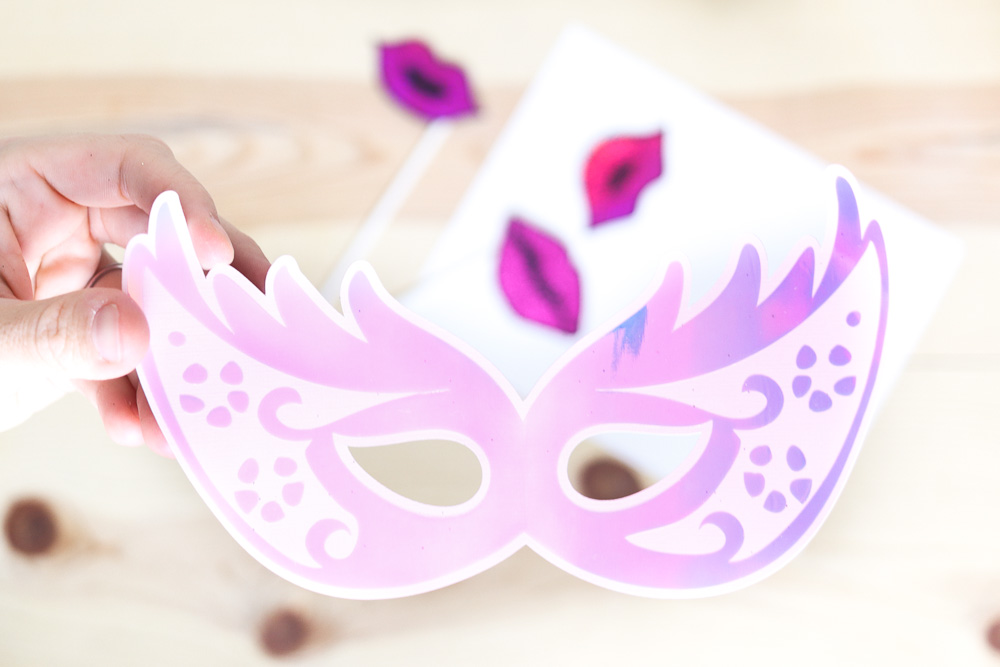
I made the same mask twice, but with different approaches.
One is with a very light pink cardstock and holographic iron-on; the second one was made with glitter cardstock.
I had to glue all those little individual pieces (very time-consuming!).
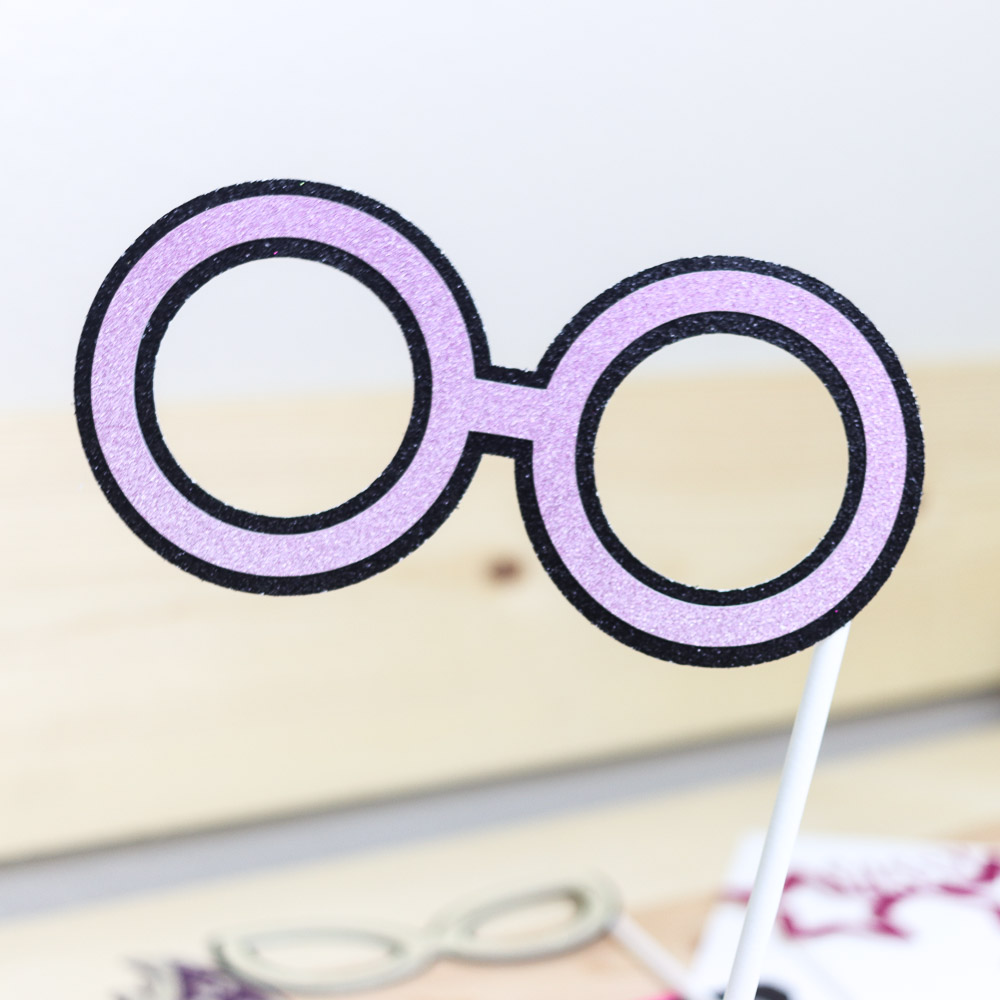
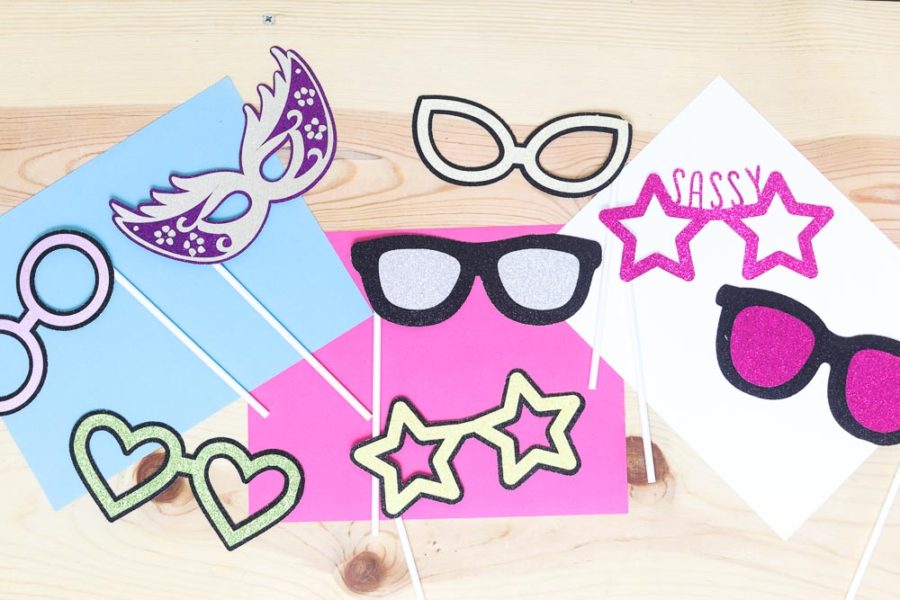
Which pair of glasses is your favorite? I like the circle-shaped ones! They look extra silly and carefree.
Share it
Also…
Do you know it takes me over 25 hours to complete a single Cricut article? I know it’s wild, but I want to make sure you understand everything!
I would appreciate your support on Instagram , Pinterest , and YouTube as I try to grow my audience and continue producing great content!
Thank you so much for your generosity in sharing your svgs and knowledge…you rock!
i would love your templates;
Thank you for your tutorials, I am new and can’t work out how to put different images to cut on different mats. I have an 8inch letter to cut in one colour, and shapes 12inch to cut in another colour. On the canvas it tells me its too large. Do you have to have a new canvas for each cutting mat.
You’re very welcome, Kirstan. The size of your image has to be between 11.5 23.5 if using a large mat, or 11.5 x 11.5 if using a regular size mat. That will solve your problem 🙂
Este ha sido un excelente artículo lleno de ideas y consejos para toda aquella persona que desee hacer sus propios trabajos.
Muchas gracias!! Eres el mejor.