Hello Daydreamers!
In today’s tutorial, I will teach you from start to finish how to work with the Perforation Blade.
We will examine this little but powerful tool, so you feel encouraged to make the most creative and beautiful projects with your Cricut machine.
In a nutshell, these are the topics I am going to be covering in today’s tutorial.
- What is the perforation blade, and what machine does it work with.
- How to install perforation blade
- How to use the perforation blade in Cricut Design Space
- Using the perforation blade with print then cut
Are you ready?
Let’s Daydream Into Reality!
What is the Cricut Perforation Blade?
The Perforation Blade is a tool that allows you to cut your materials in small and uniform lines to create perfect and crisp tear effects like the ones you see in raffle tickets, coupons, tear-out cards, etc.
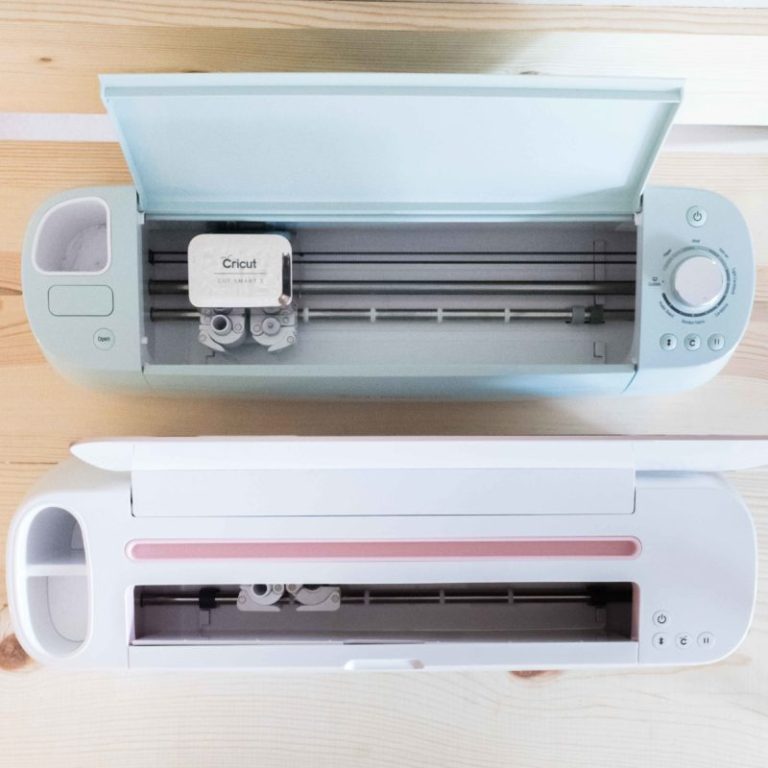
The perforation blade needs the “Quick Swap” housing; therefore, this little tool is only compatible with the Cricut Maker.
For more information about the “Quick Swap housing” and other blades, make sure to check out my Cricut blades guide.
Are you an Explore or Joy user and feel sad because you can’t use the perforation tip?
Don’t worry!
If you have a Cricut Explore machine, I found a beautiful alternative to get tear effects that resemble the perforation blade.
How to Install the Perforation Blade?
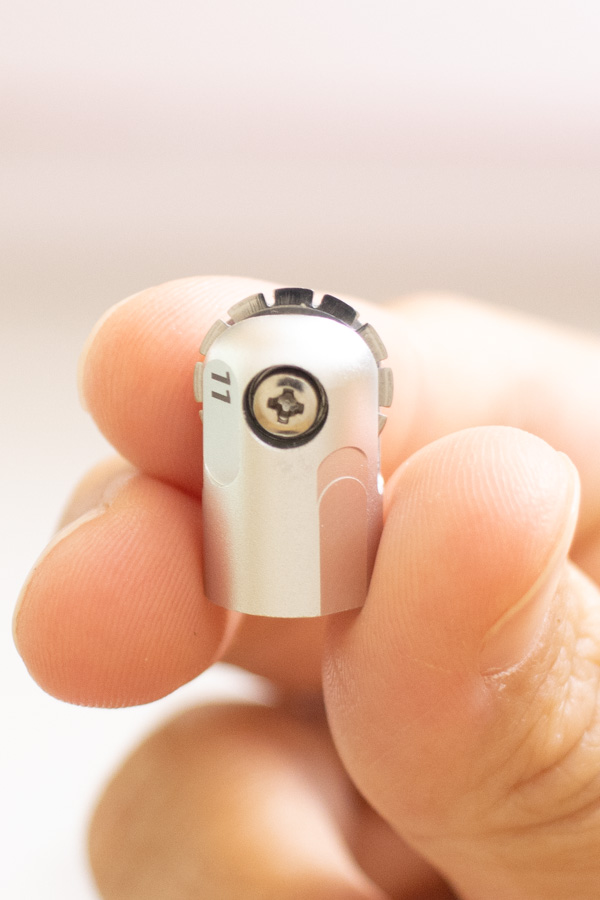
Before you install the blade in your Cricut Maker, it’s a good idea to recognize it; trust me, it can be quite confusing if you’re just getting started, and if you install the wrong tip, well, your Cricut will bring up an error.
This particular tip has small teeth that measure 2.5 mm each, and between each tooth, there’s a 0.5 mm gap.
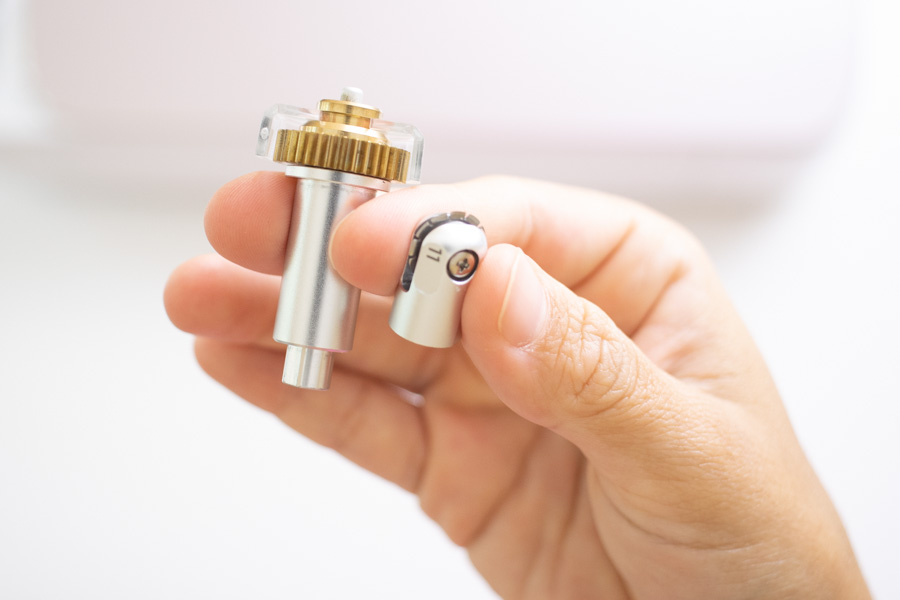
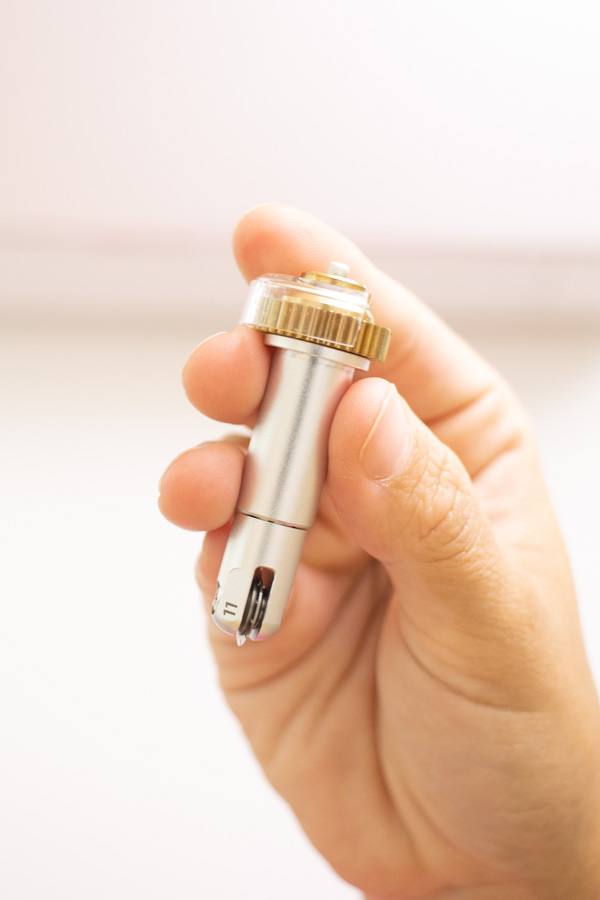
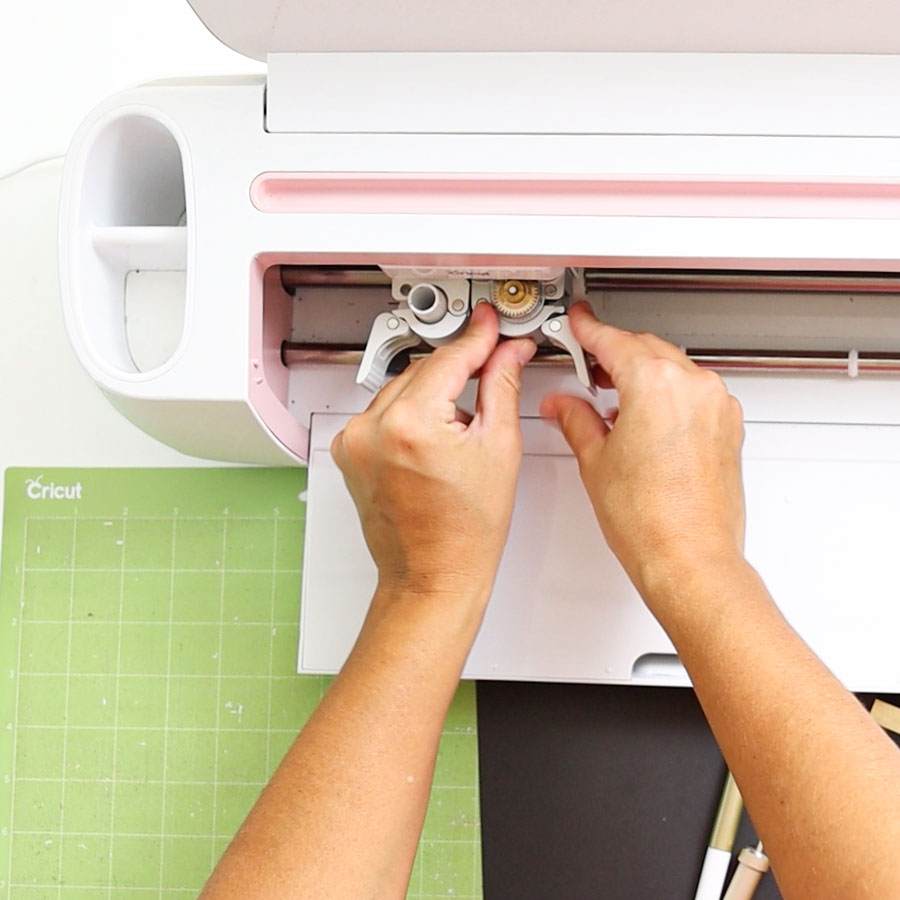
The perforation blade works with the “Quick Swap” housing, and it’s very easy to install.
First, look for the “Quick Swap” little knobs coming out at the bottom of the housing. Then take a look inside the perforation blade and notice two tiny holes; this is how both blade and housing need to be aligned.
Press the plunge on top of the “Quick Swap” and align the perforation blade, so the holes inside the tip are aligned with the knobs of the drive housing.
Let go of the plunge, and that’s it.

Align 
Insert 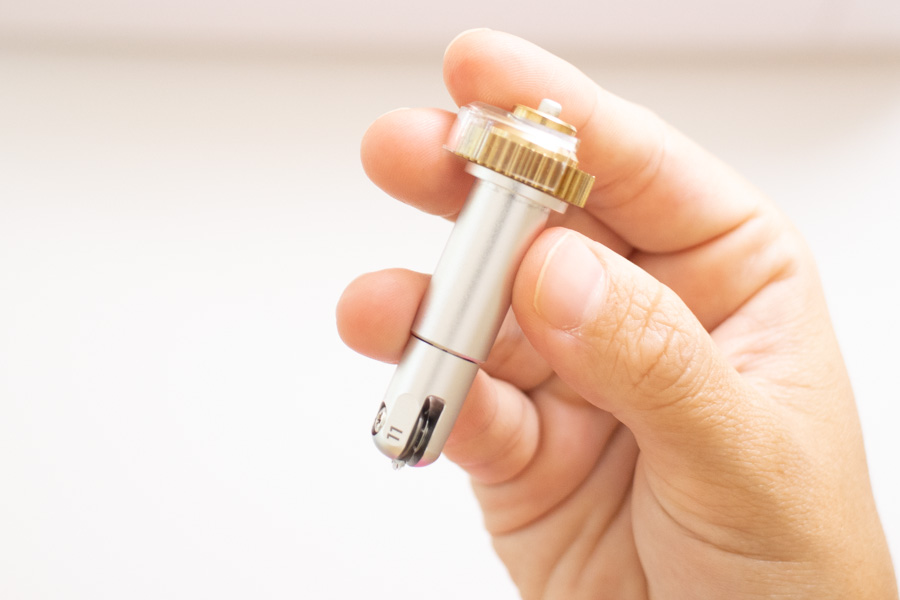
Let go!
Easy, right?
Remember that all of the “Quick Swap” tools always go on the right side – Clamp B – of the tool holders.
How to Use the Perforation Blade in Cricut Design Space
There are some steps you need to take in Cricut Design Space to use the perforation blade.
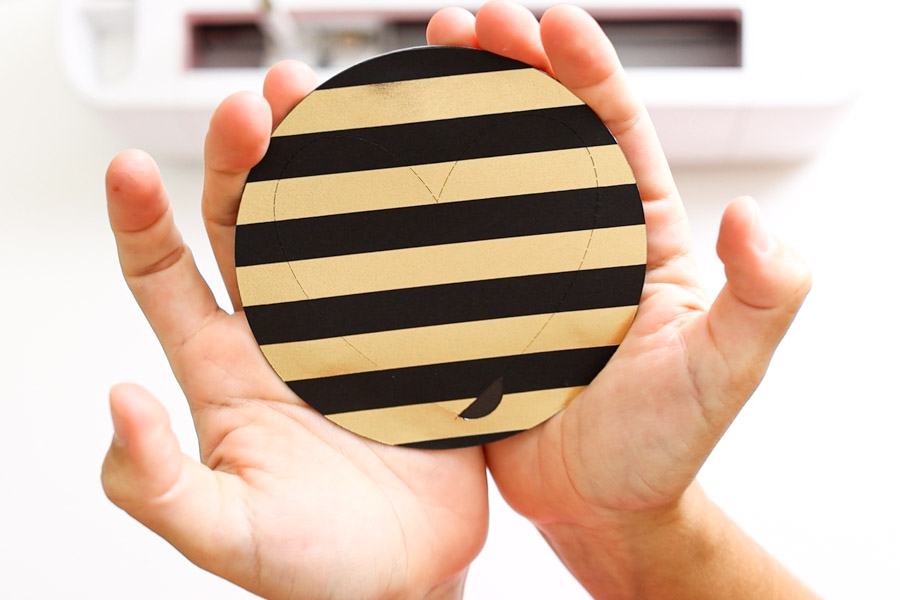
Let’s make the following tear-out card in Cricut’s software, so you learn all the tips and tricks when working with this tool.
Step 1 – Add Elements in Design Space
The card I showed you right above has to cuts of paper and heart that you can tear out to reveal some text that says, “You are my favorite.”
To make this cute little card, you need to add all the elements to the canvas area.
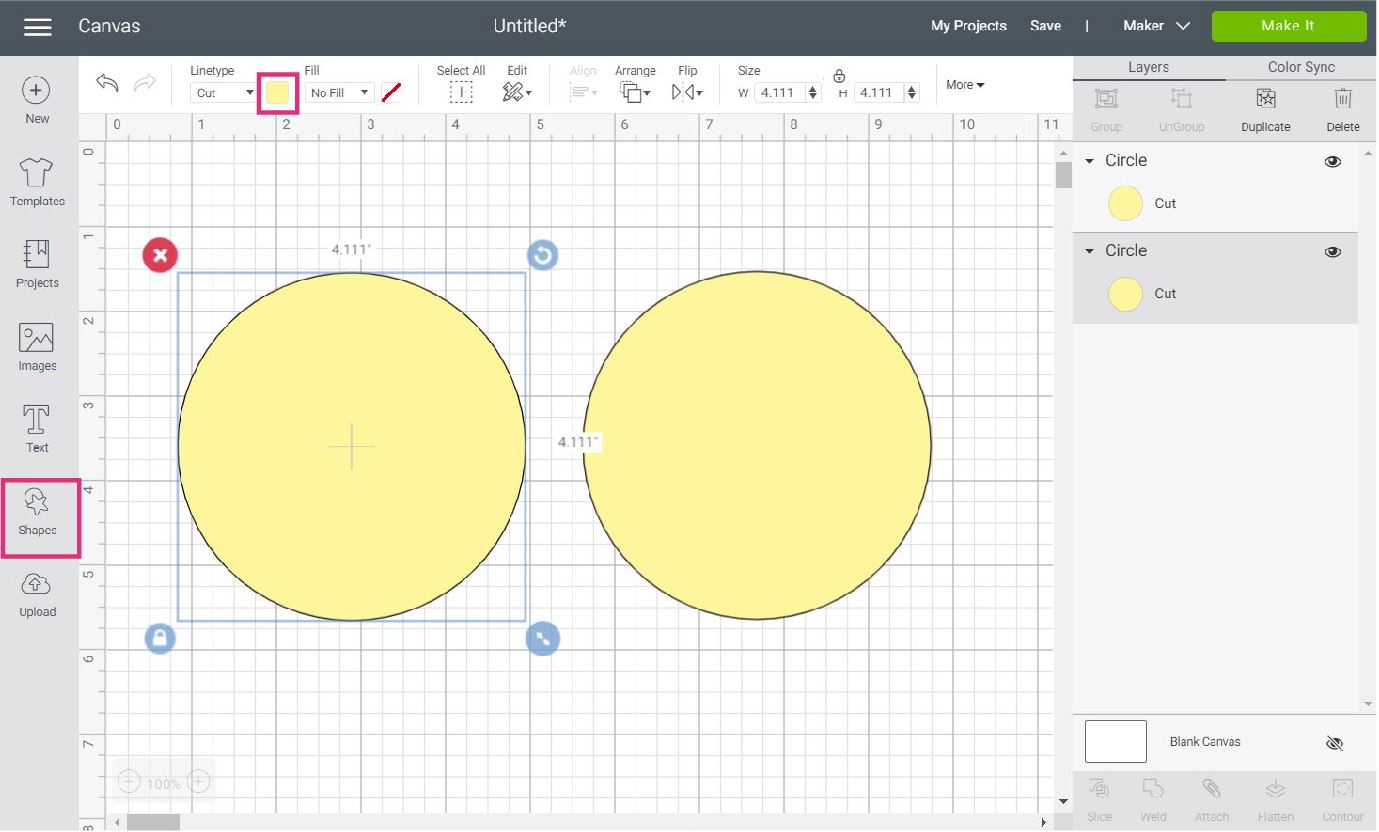
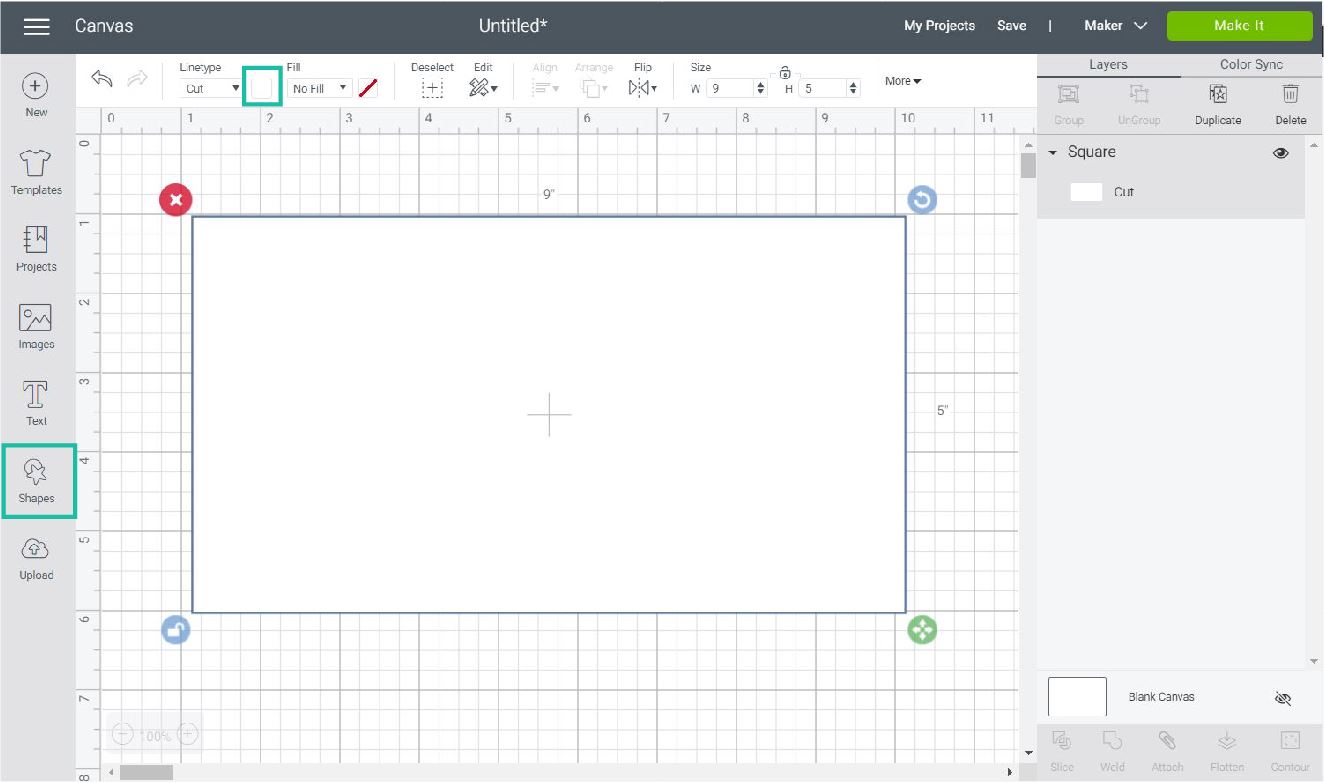
Click on the “Shapes” icon located on the left panel area and add a circle. Resize it, and change the color by click on the color box next to “Linetype.”
Then copy and paste it, so you have two identical copies.
One of these copies will be the top of the card, and the second one will be the bottom.
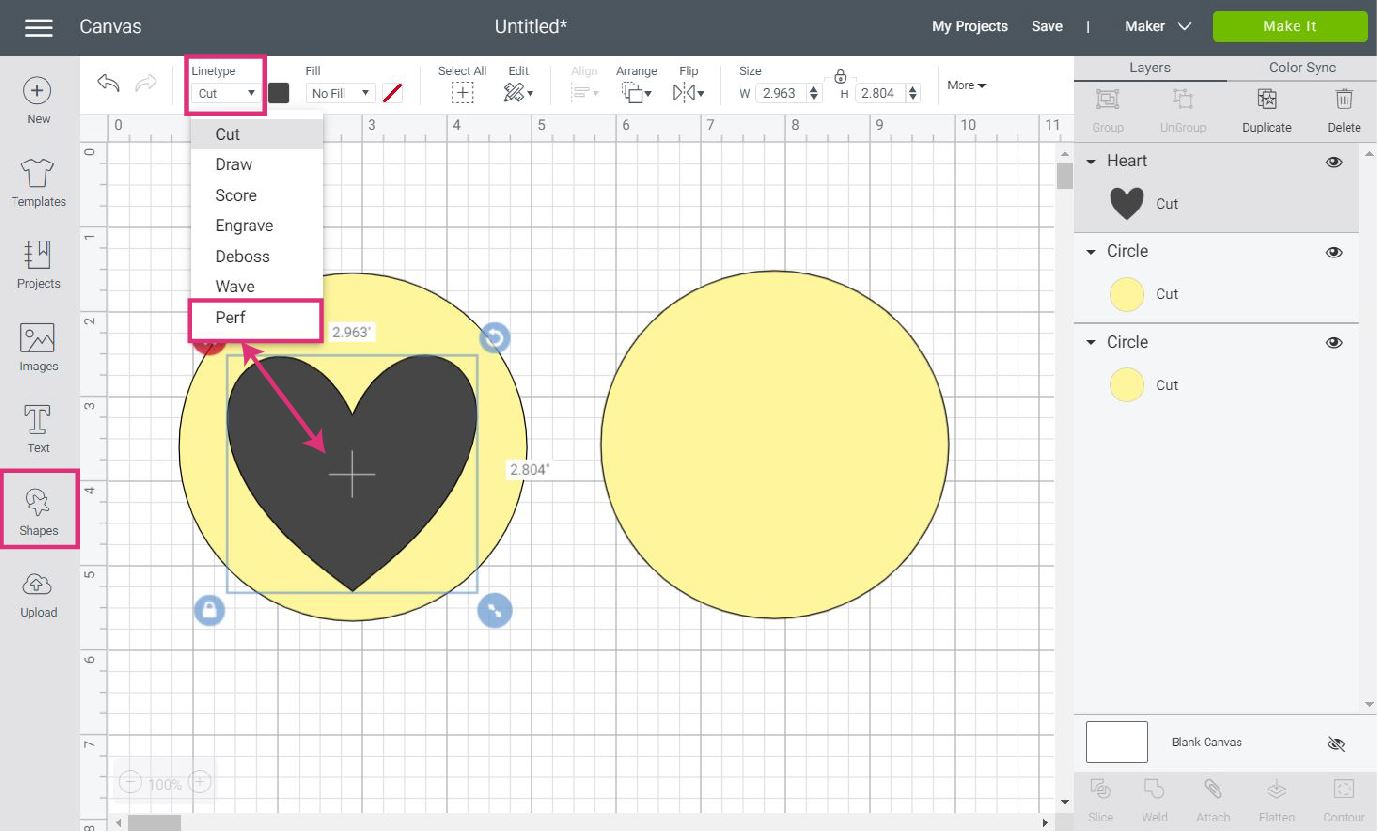
Now it’s time to add the heart.
Again, click on shapes and add a heart, resize it, and change the “Linetype from “Cut” to “Perf.”
Necessary: Make sure you have “Maker” on your machine selection on the right-hand corner of the window next to “Make it.”
It’s time to add some text!
Although text goes on the other circle, I like to add it and resize it using the perforation lines as a guideline.
The font I used is called “Algebra,” and it’s a writing font from Cricut’s library. When you use a “Writing Font” by default, Design Space will change the “Linetype” from “Cut” to “Draw” because it usually means you will be using Cricut Pens.
If you use a system font, make sure to change the “Linetype” from “Cut” to “Draw.”
To learn how to use Cricut pens in full, make sure to read my ultimate guide.

Step 2 – Align & Attach Design
The following steps are the most critical, so don’t skip them!
At this point, we have the text and the perforation heart on top of one circle. However, the text and heart don’t go together.
You can move the text and the heart with the mouse; however, you may not achieve a perfect alignment.
To ensure everything fits, I like to use the “Align” tool.
Click on “Align” located on the top menu and select “Center.”

All layers are going to be perfectly centered!
Nonetheless, notice how the heart and text don’t look centered; this is because the software does things mathematically, and it doesn’t consider how pleasant things look in front of us.
To correct this, press the Ctrl key on your pc at all times (Command in Mac) and select the heart and text from the Layers panel. Then move them down a notch, so it looks centered to you.
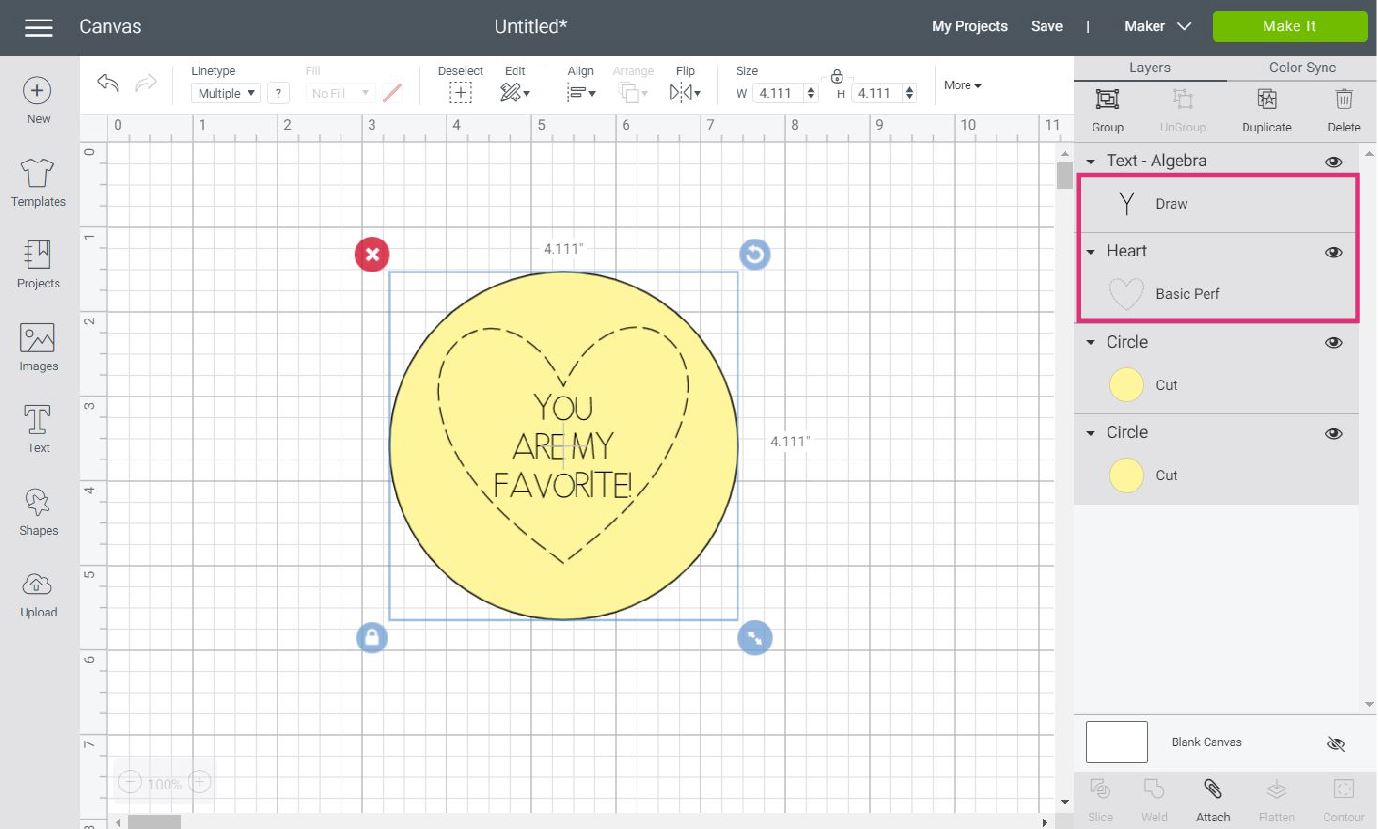
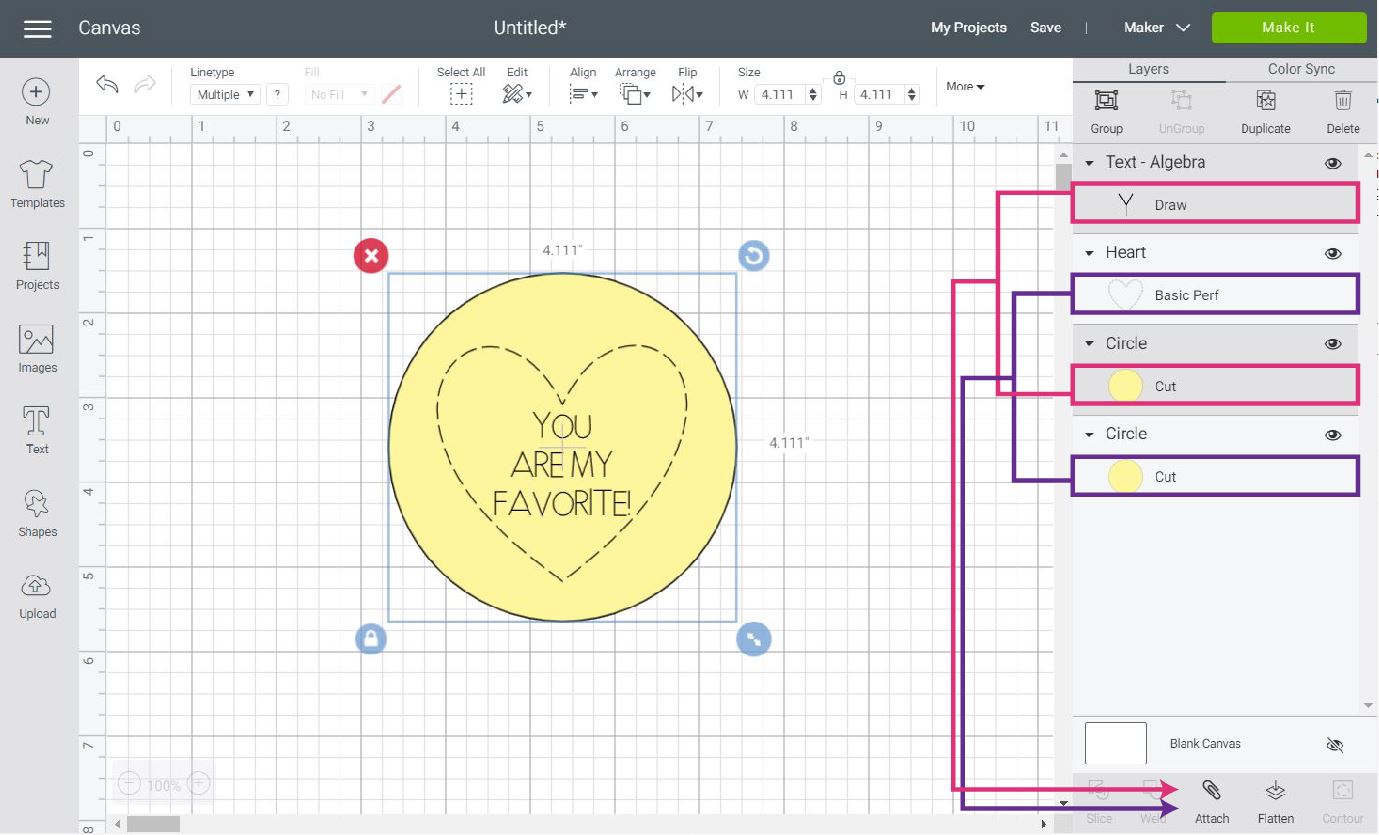
Now, you need to attach it!
Whenever you use the perforation blade and/or pens, you need to “Attach” to tell your machine where you want to perforate/write.
In this case, we need to attach twice. First, we are perforating a heart on one of the circles, and second, we are writing some text on the other one.
You won’t select what you need; therefore, you need to select them from the layers panel.
Again, pressing the Ctrl key on your PC at all times (Command in Mac), select one circle and the text and click on “Attach” located at the bottom of the Layers panel. Then, repeat for the next circle and the heart.
After attaching, you can move each circle around, and everything will remain together on the canvas area.

Step 3 – Adding a “Lift” cut out.
When using the perforation tool, sometimes you’ll want to add a little cut-out that helps you lift out the perforated shape, especially if that shape is not touching the edge of your project.
If you don’t do this, the person who receives the card may have difficulty removing the perforated shape.
An easy way to add a lift up cut-out is by slicing a circle against a square.
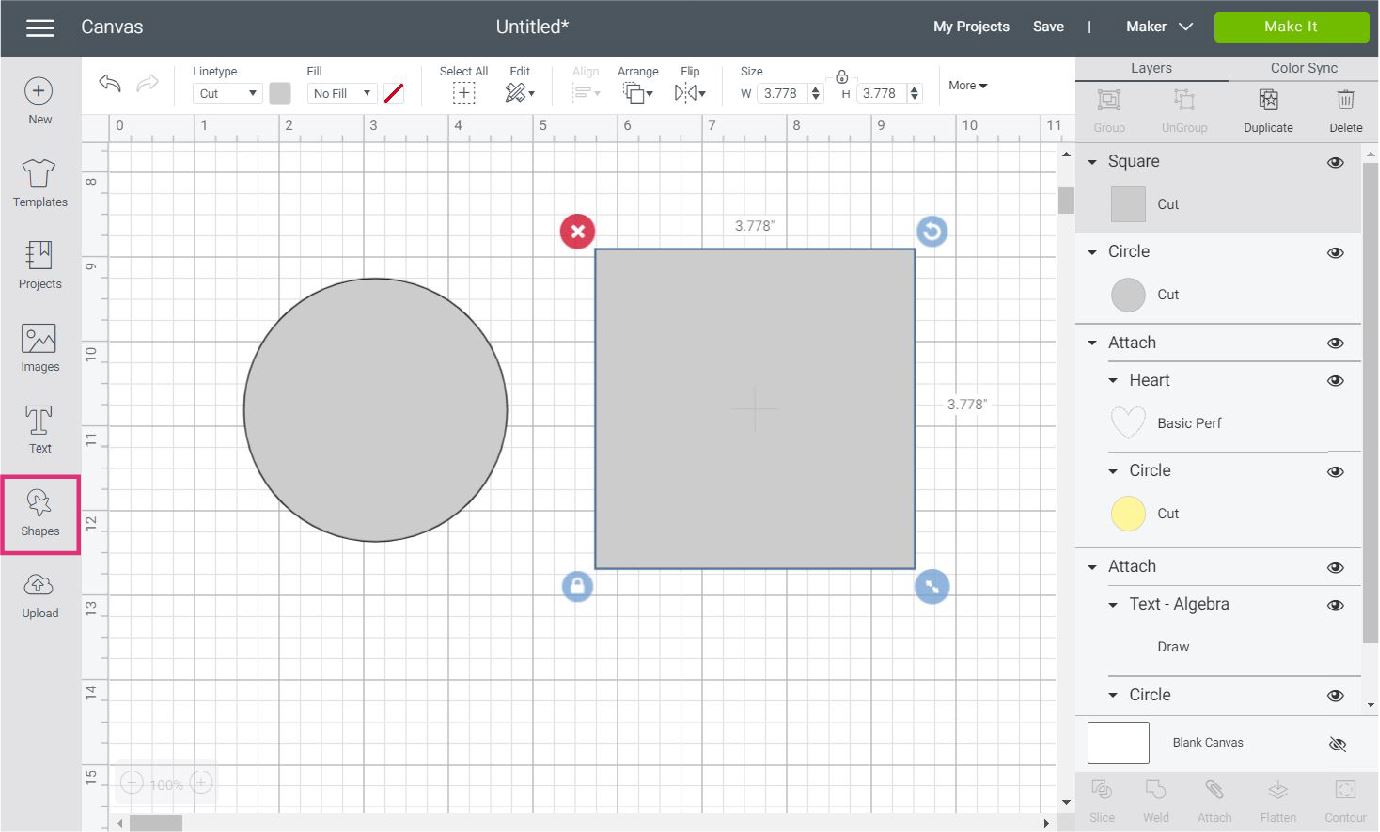
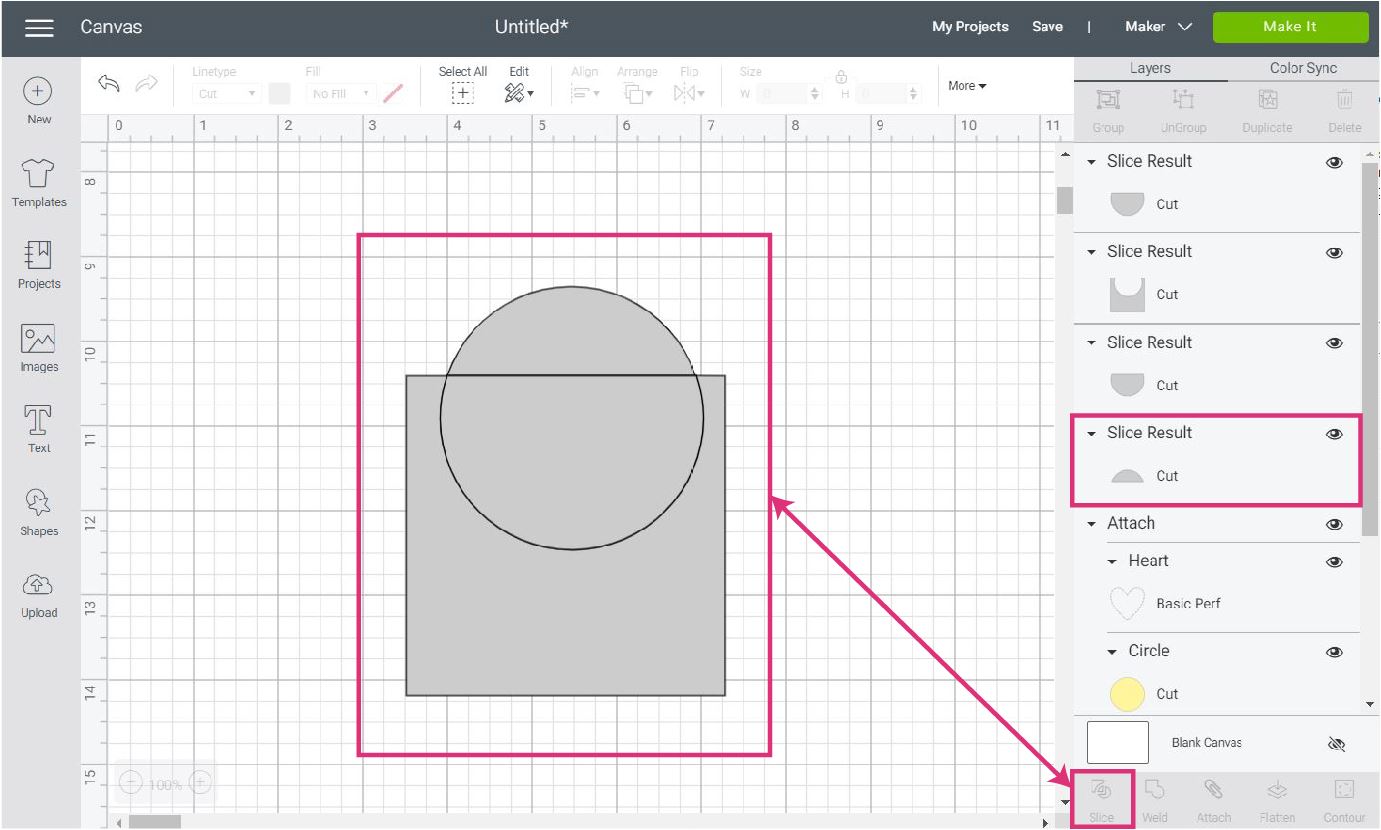
Add the circle and the square, making sure the square is bigger than the circle, then place the circle on top of the square, and click on “Slice” located at the bottom of the Layers panel.
Keep the small top of the sliced circle and delete the rest of the “slice result” layers.
Learn more about the slice tool.
Resize and rotate the cut-out layer, so it fits nicely next to the perforation line, then attach it to the circle and heart.
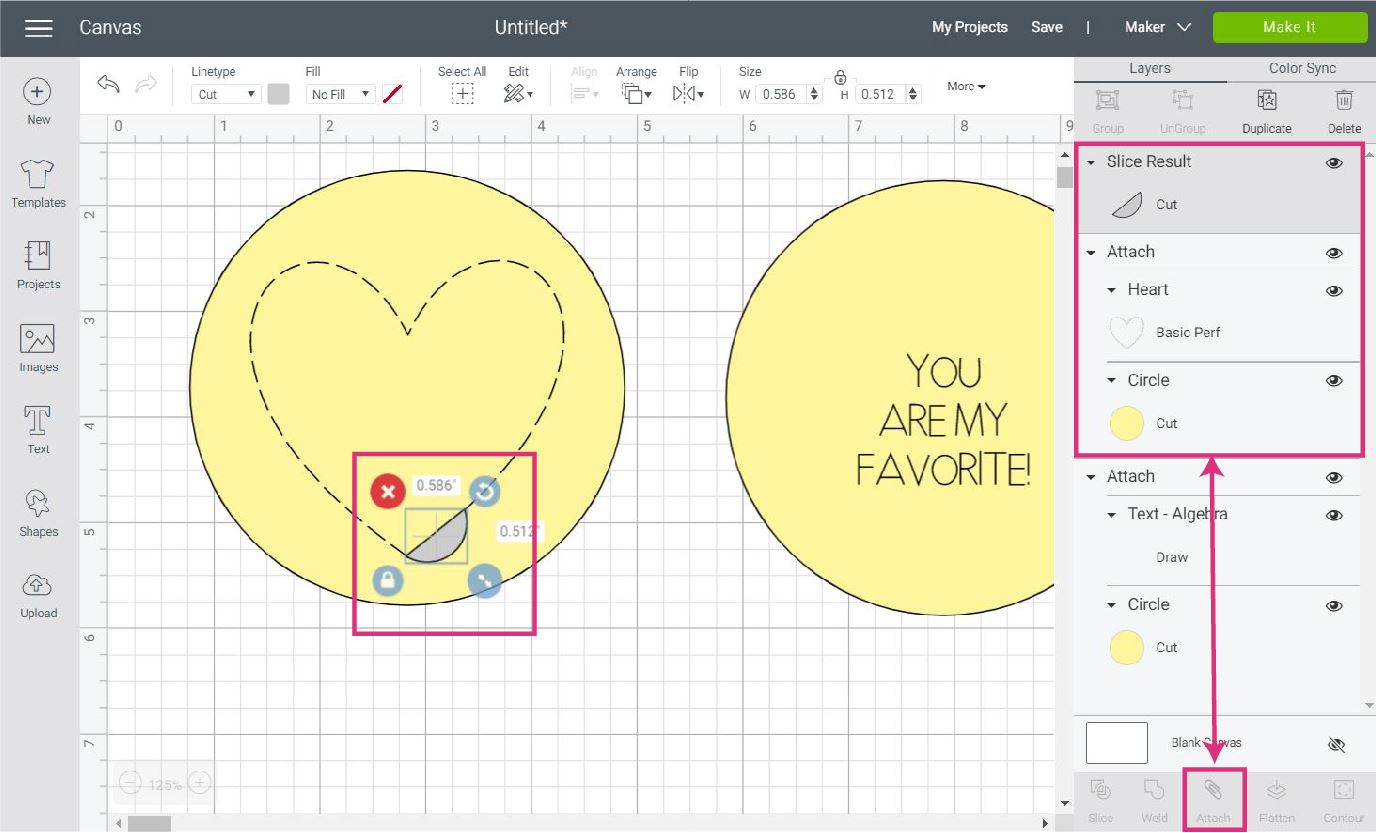
If you want to cut the circles on the same color, click on “Make it,” but if you want two different colors (like I did). Select the circle from layers panel (Not the entire attachment) and change the color by clicking on the color box next to “Linetype.”
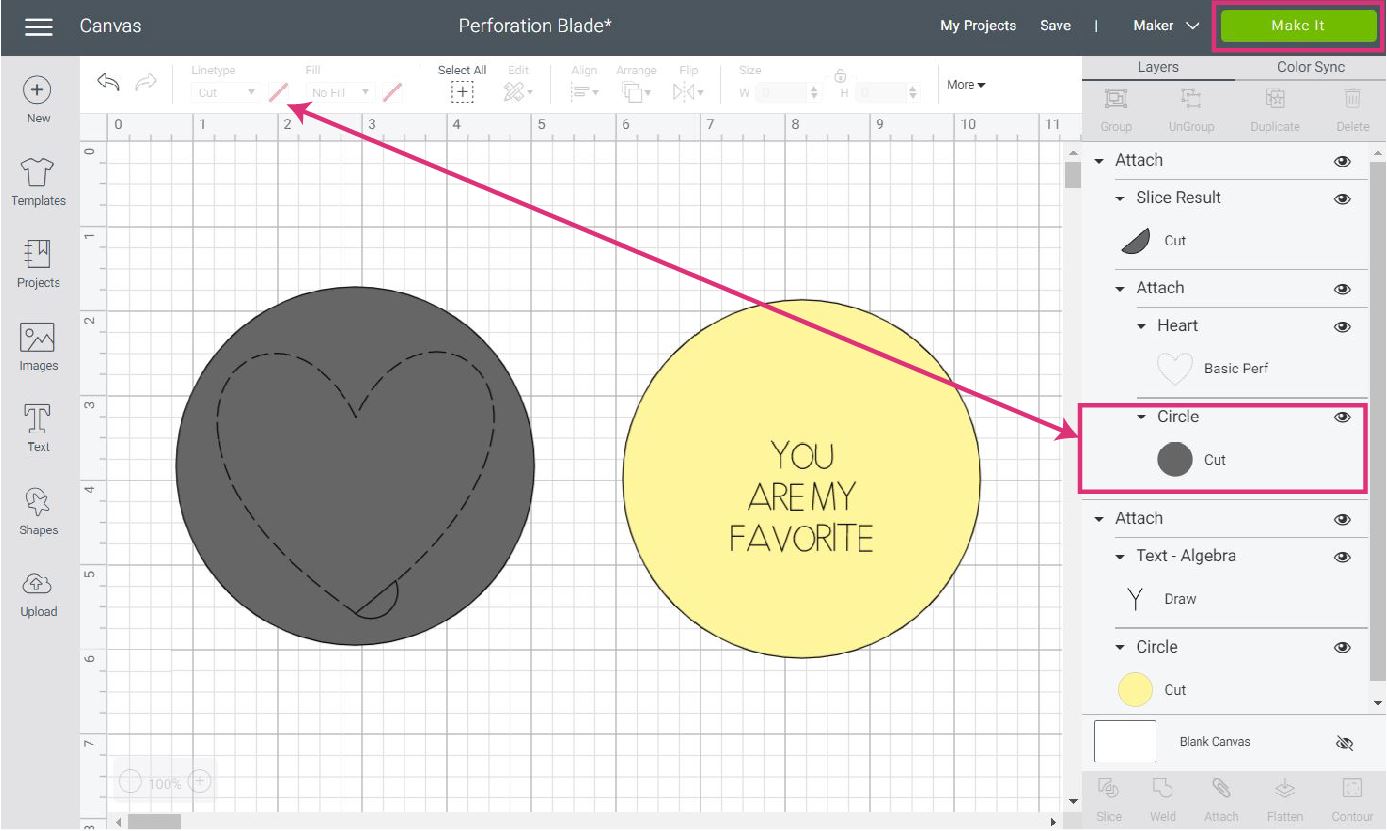
When your design is ready, click on “Make it” to go to the mat preview.
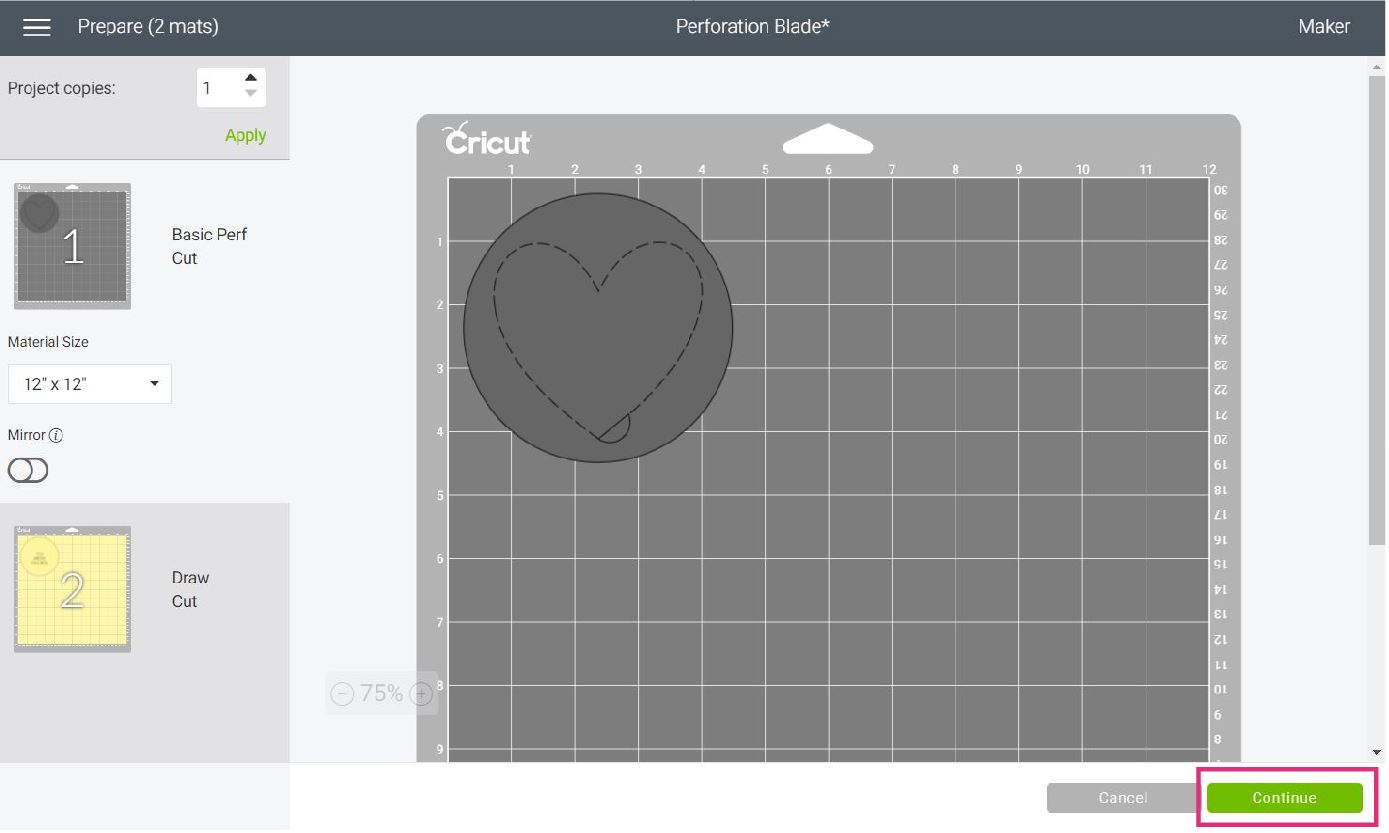
If everything looks good, click on continue to start the perforation and cutting process.
Step 4 – Perforate, Cut & Draw
First, you need to select your material.
For this particular card, I used medium cardstock. Now, it’s time to load the tools Cricut is asking for.
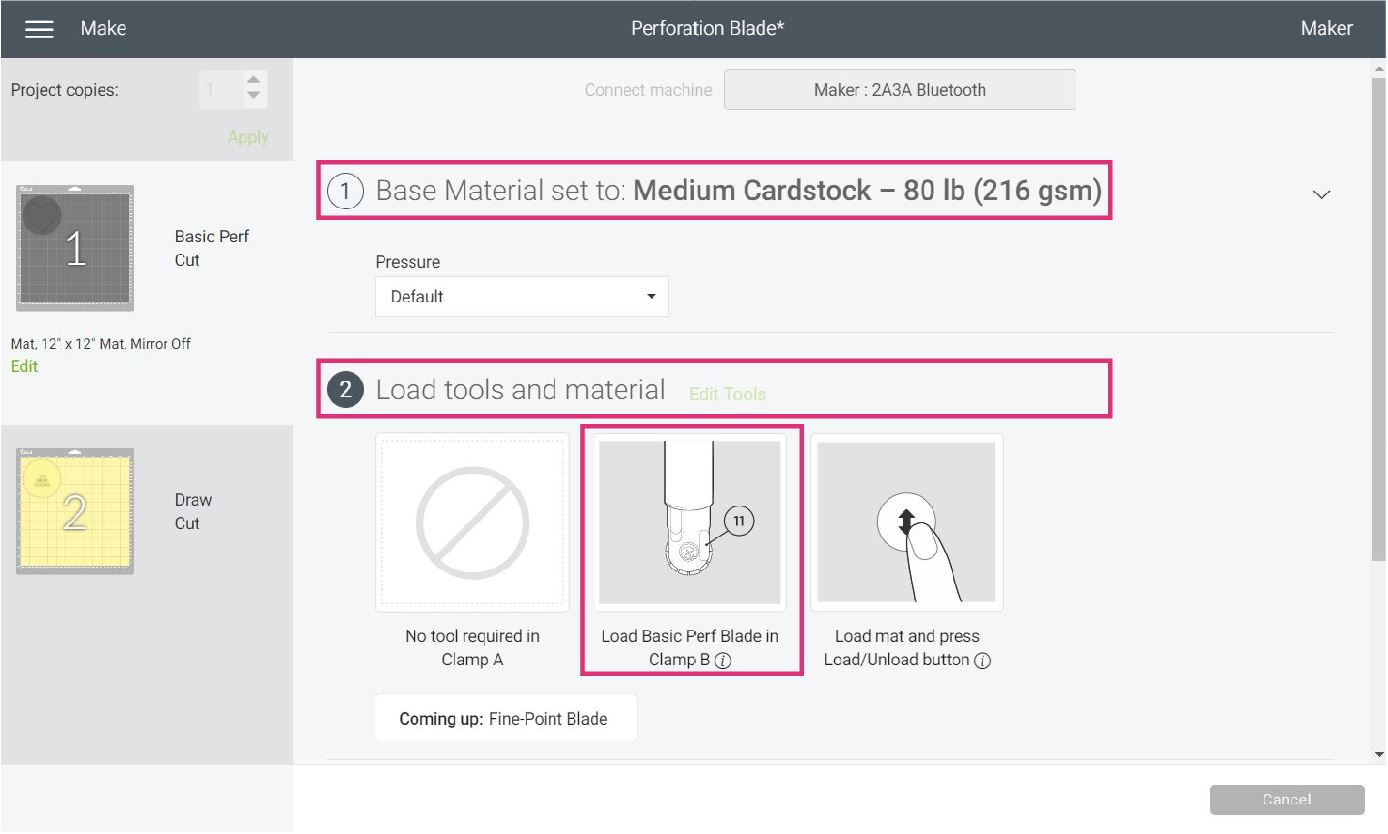
Let’s move to real-life pics!
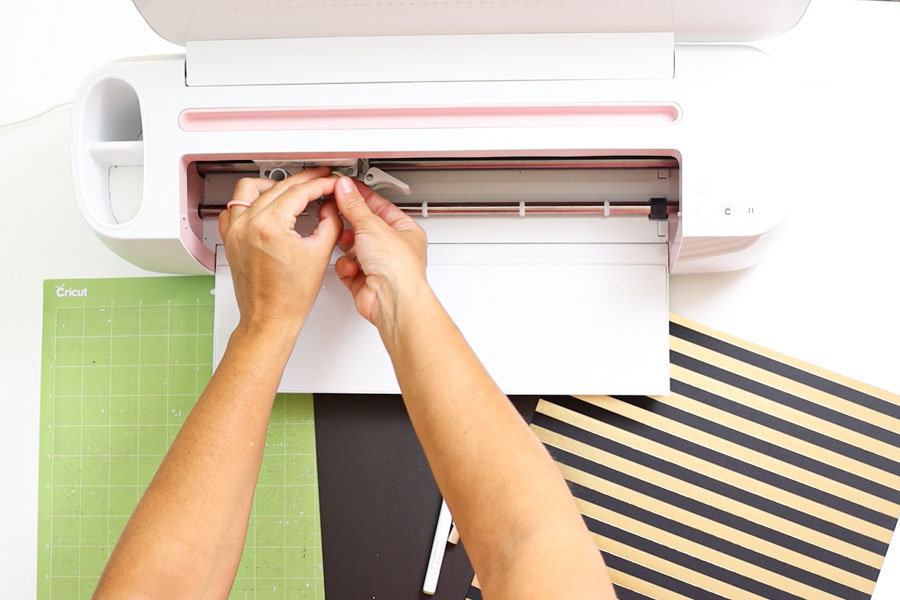
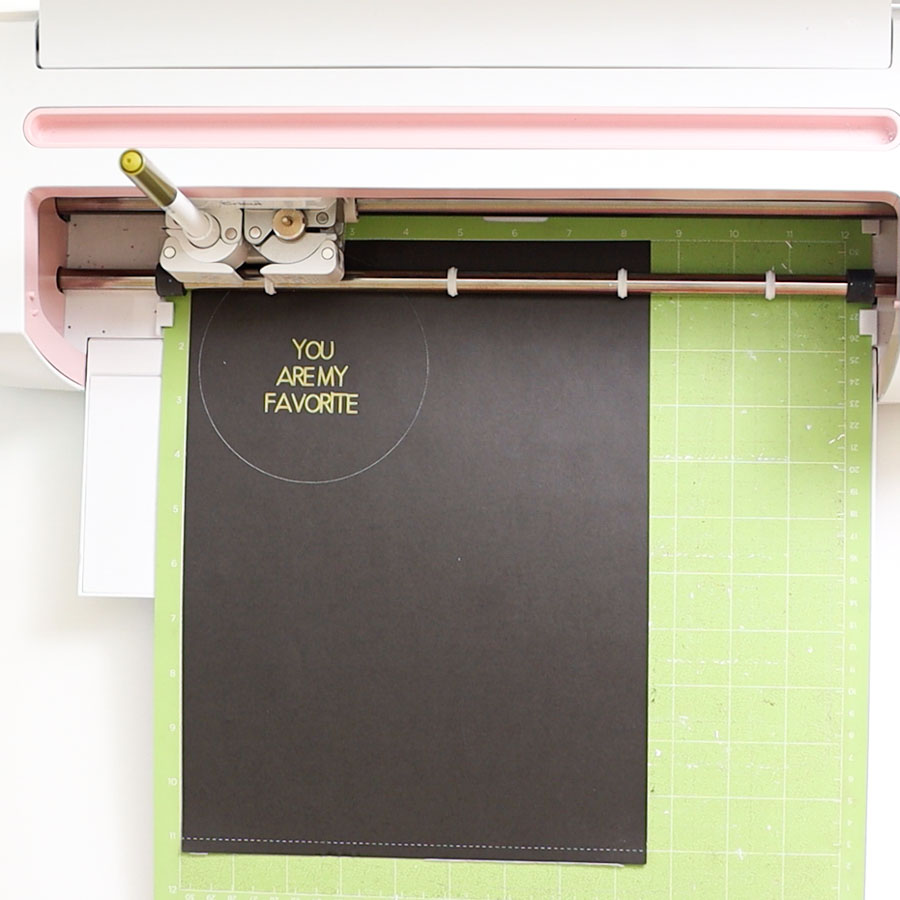
First, you need to install the perforation blade in the “Clamp B” of your Cricut Maker.
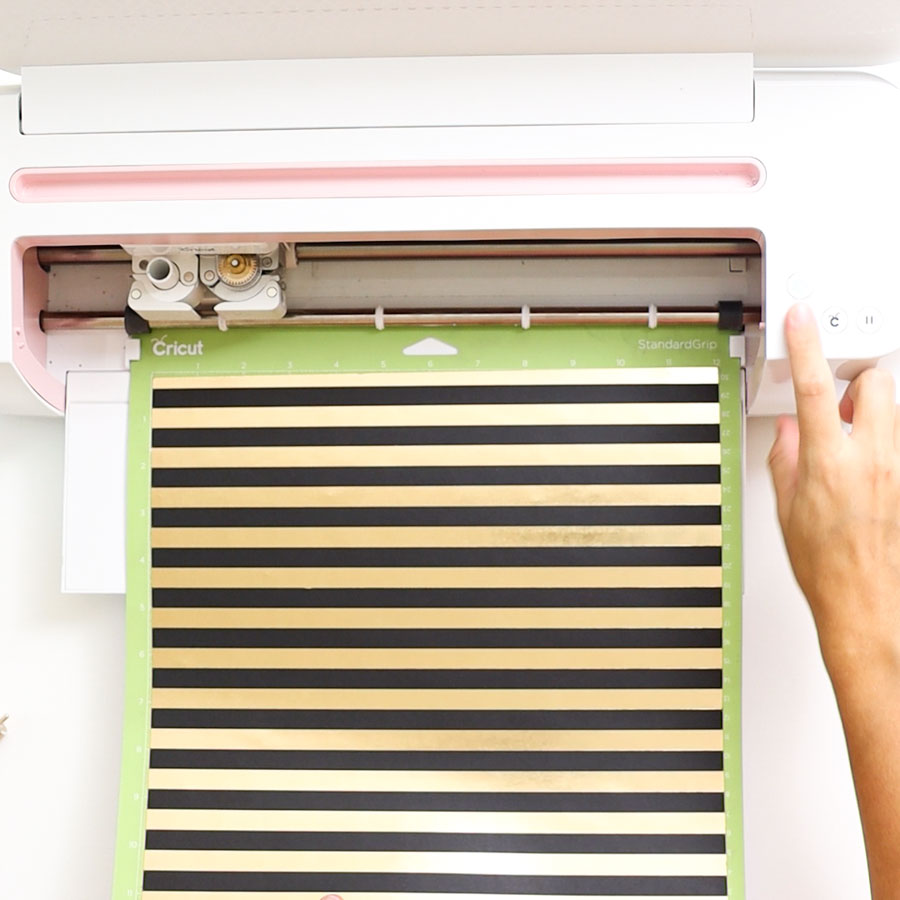
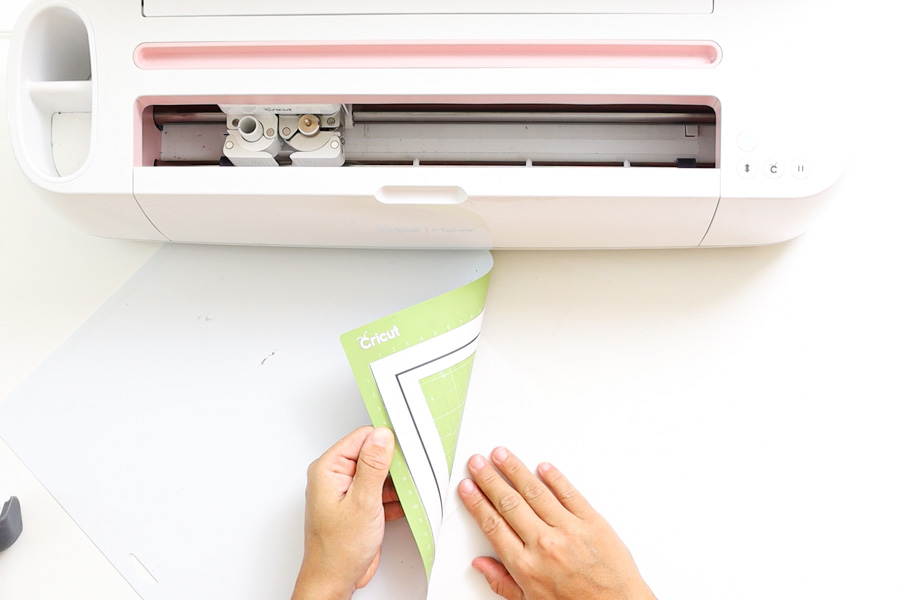
Then on a green mat or very new blue one, place paper, load it to your machine, and press the flashing “go” button.
After perforating, Design Space will bring a notification to install the Fine Point Blade.
Remove the perforation blade and install the fine point blade and, once again, press the flashing “go” button to finish the cut.
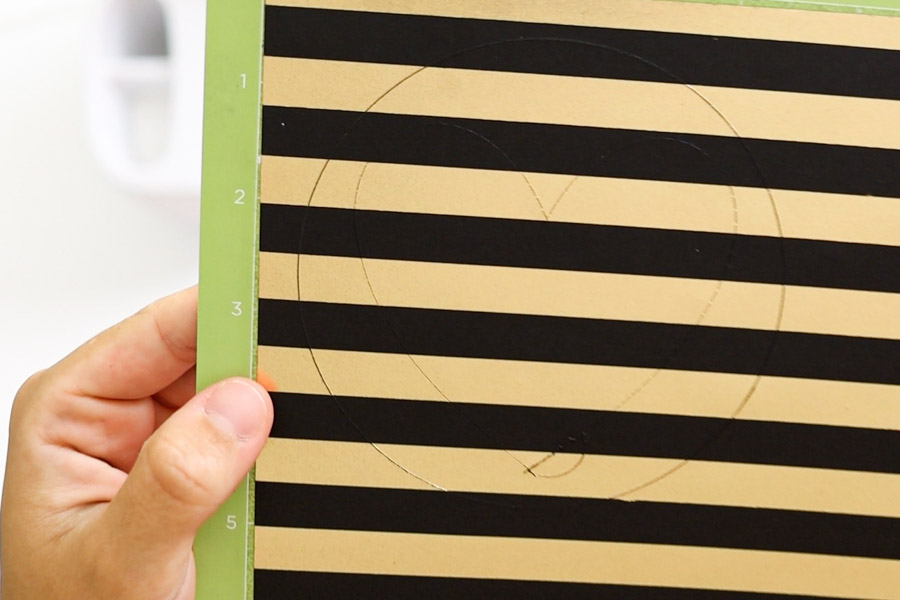
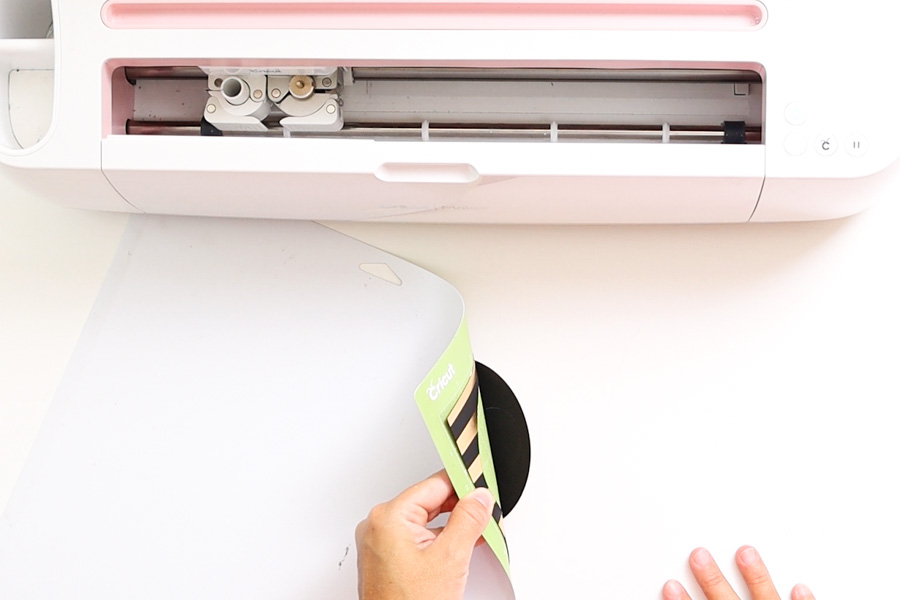
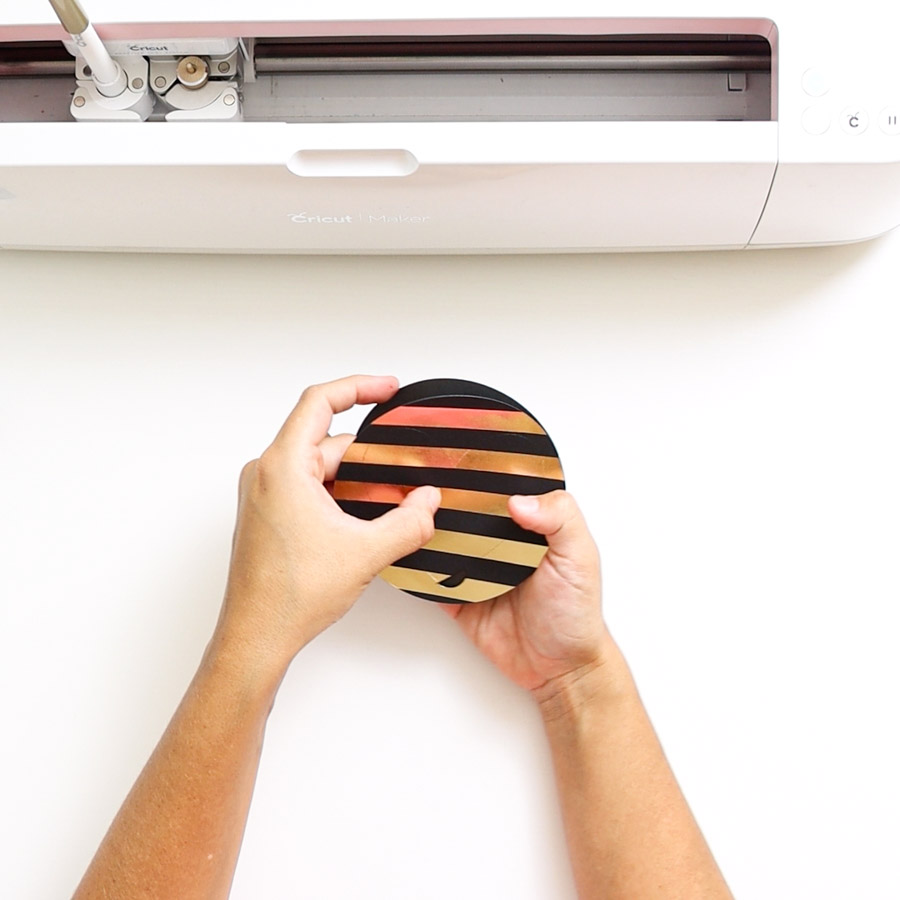
When Cricut is done cutting, unload the mat, and remove cut by bending your mat.
When you bend the mat, you prevent curling up your material!
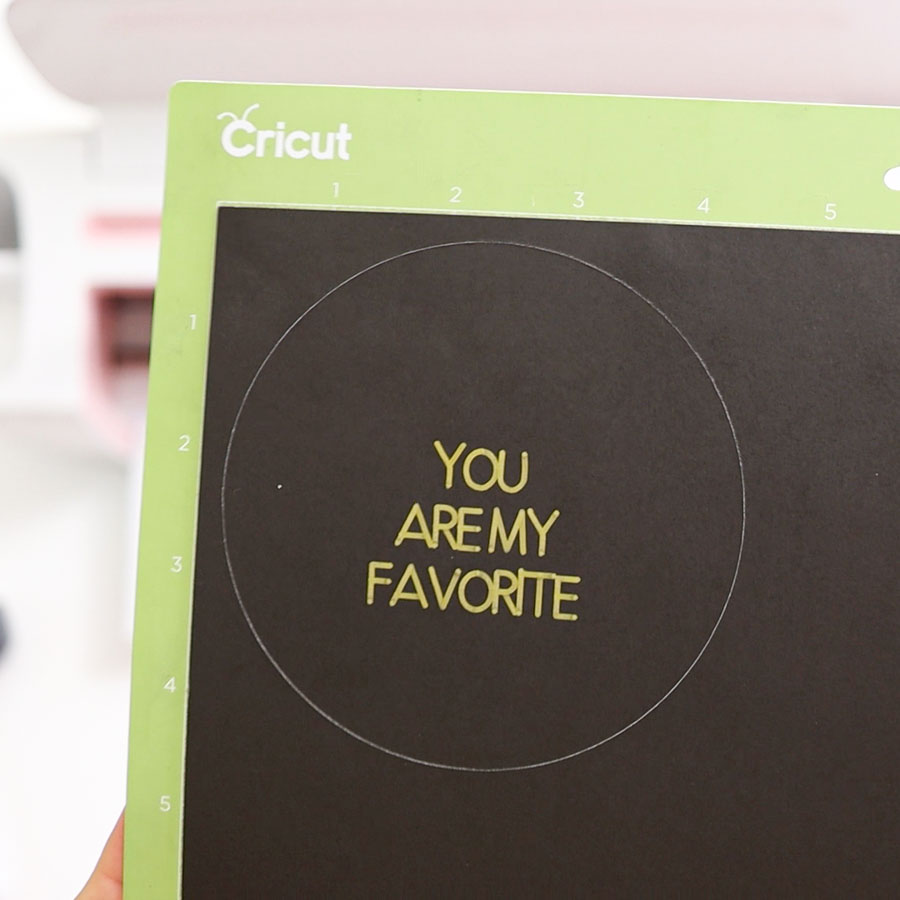
It’s time to write and cut the other circle.
Prepare the mat, load it to your Cricut, install the fine point blade and pen you want to use, and tap the “go” button.
When Cricut is done, unload the mat, and remove the cut from it.
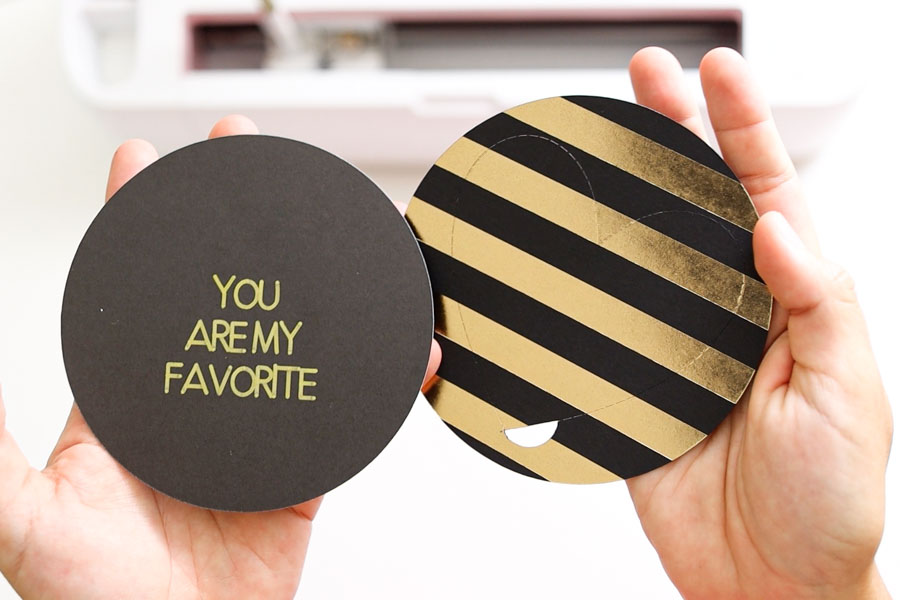
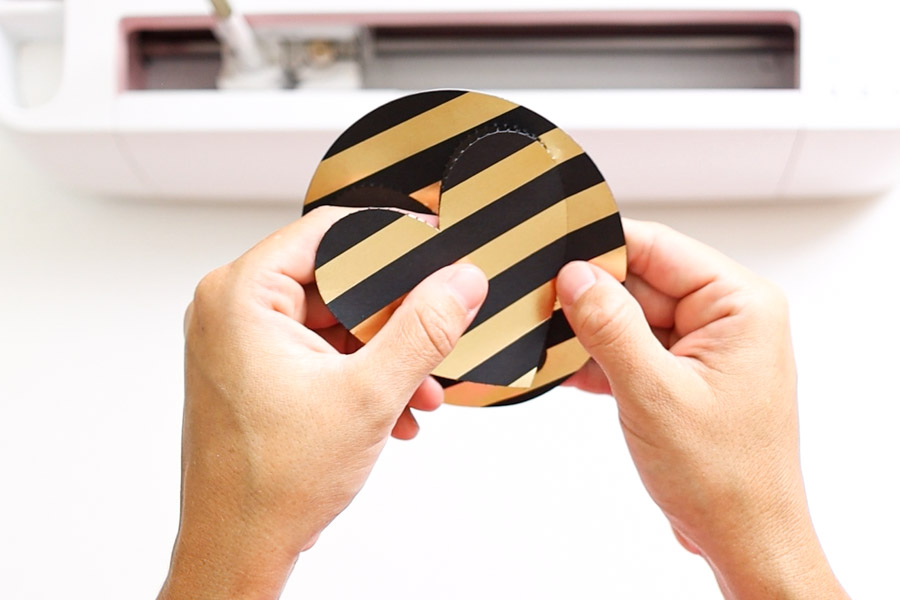
Ready to assemble the card?
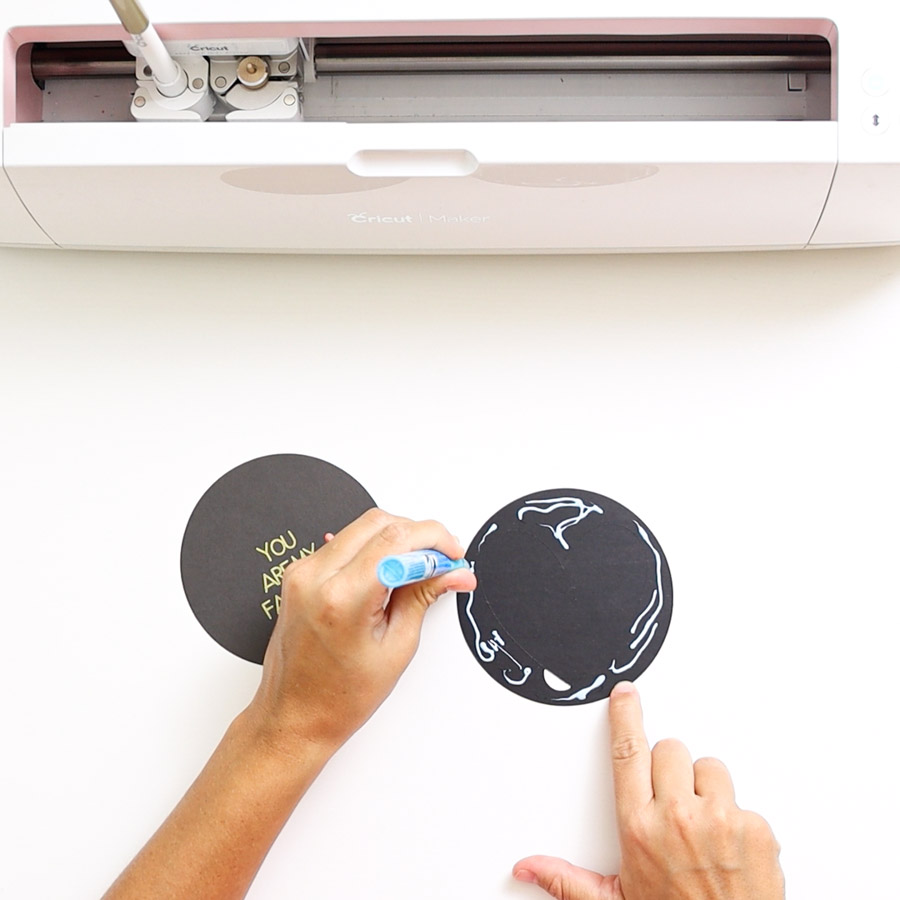
Join the circle with text and the circle with the perforated heart using a high-quality glue. Please abstain from kids’ glue; they’ll make your project look ugly.
When gluing, make sure that the glue stays outside of the perforated shape and text. Also, ensure that heart and text are aligned to perfection; the last thing you want is to have a crooked design.
My design looked a little lopsided because I had to manage the camera and to make the craft at the same time!
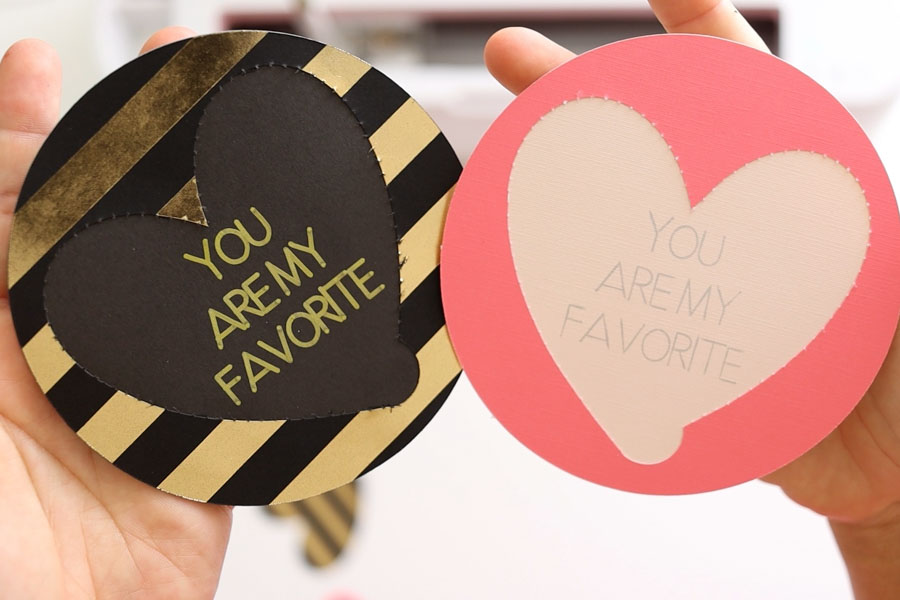
However, I looked at the same card but in pink, and it looks perfect!
Don’t you think?
Using the Perforation Blade with Print then Cut.
Print then Cut is one of the main reasons many people get a Cricut in the first place.
This feature allows you to print your designs and then cut around them. With “print then cut,” you can make stickers, gift tags, invitations, etc.
Tip: If you are new to print then cut, I recommend reading my ultimate guide, so you learn everything there’s to know about this setting.
Let’s make the following birthday coupons together so you can learn how to combine print then Cut with the perforation blade.

Step 1 – Add Elements & Flatten
To use “print then cut” and the perforation blade, you first need to put together your artwork.
Don’t worry about the perforation lines of linetype.
Let your imagination take over!
These coupons will be placed on a rectangle cut, so start by dropping a square from the Shapes icon on the left panel.
Unlock the rectangle’s proportions by clicking on the little lock on the lower right corner of the square and resize. Make sure the size of the rectangle doesn’t exceed 9.25″ x 6.75.
For this case, I made a 9″ x 5″ square.
If you want your coupons to have a white background, change the rectangle’s color to white. You can use light and pastel colors, maybe dark ones if you use images with good contrast.
Keep in mind your printer will use a lot of ink when printing a big colored rectangle.
It’s time to add some images!
The images will depend on the type of coupons you want to make. They may be for Christmas, Valentine’s Day, or whatever you have on mind. That’s the beauty of having a Cricut!
You can make them using inside jokes or things that only you and the person is getting the coupons will know what they mean!
I have Cricut Access; therefore, I can use all of their images except the ones with Disney or other trademarked characters at no extra cost.
You can also find free SVG files for your project online; make sure to look for copyright warnings, etc.
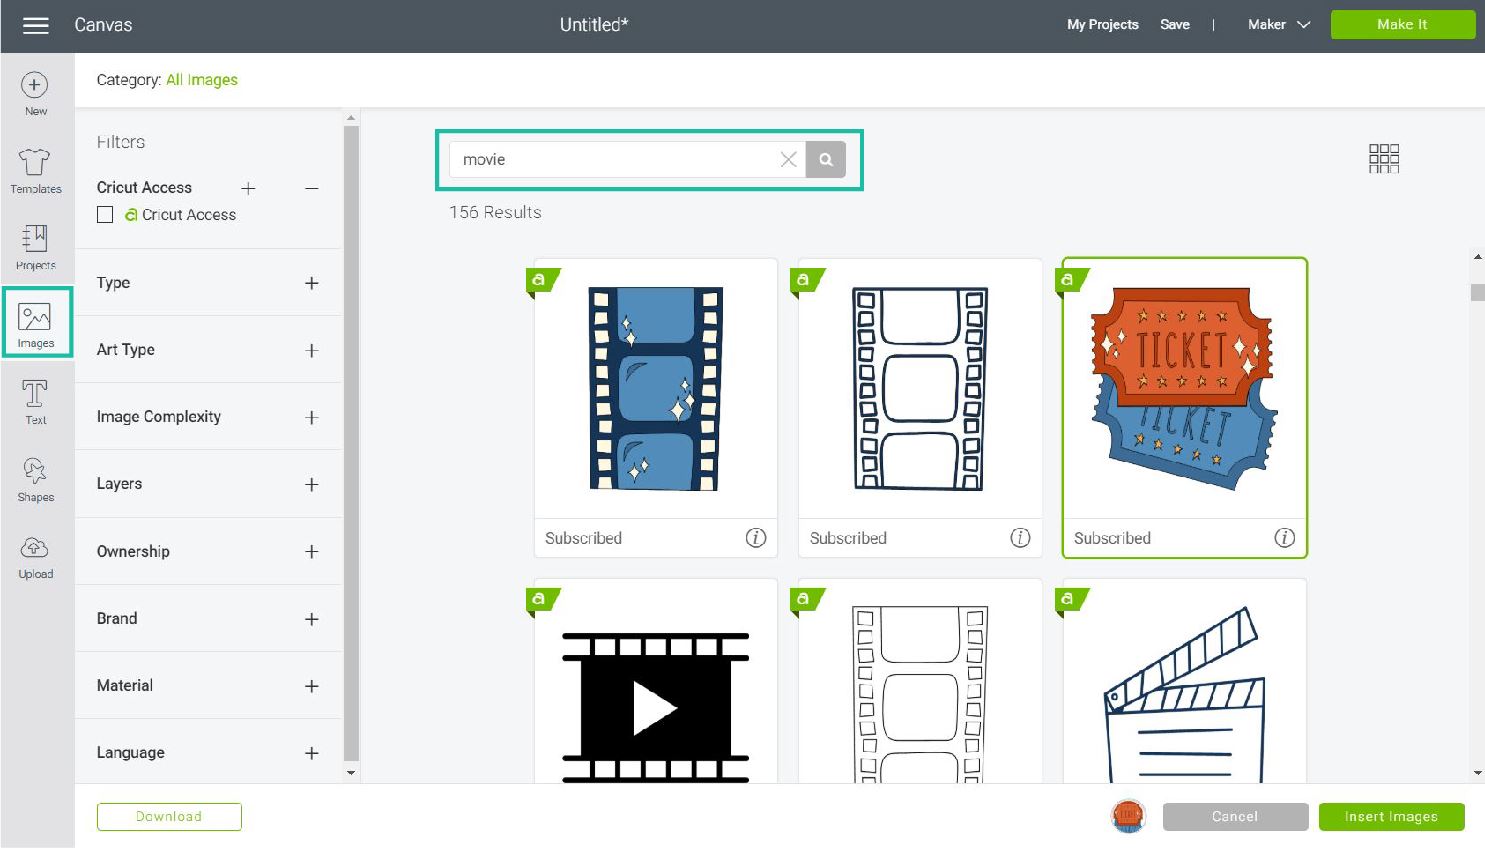
To find cute illustrations, click on the “Images” icon located on the left panel, and use the search box to type in keywords that will help you narrow your search.
You can also search for images by code, so if you want to follow along, here are the images I used:
- Movie ticket: #M1428062F
- Breakfast: #M1286CC97
- Airplane: #M38443
- Coffee mug: #M3EE01
- Lips: #MC3D5FDD
- Beach: #M3CB04
Oh!
Just so you know, I also have a library full of free SVG files and Printables for all my subscribers, a.k.a. Daydreamers. You can see a preview right here or get access by filling out this form.
Once you have your images, resize them and place them on the rectangle!
I usually take a reasonable amount of time figuring out the position or the layout. It’s normal! Don’t think for a second that everything comes easy to me.
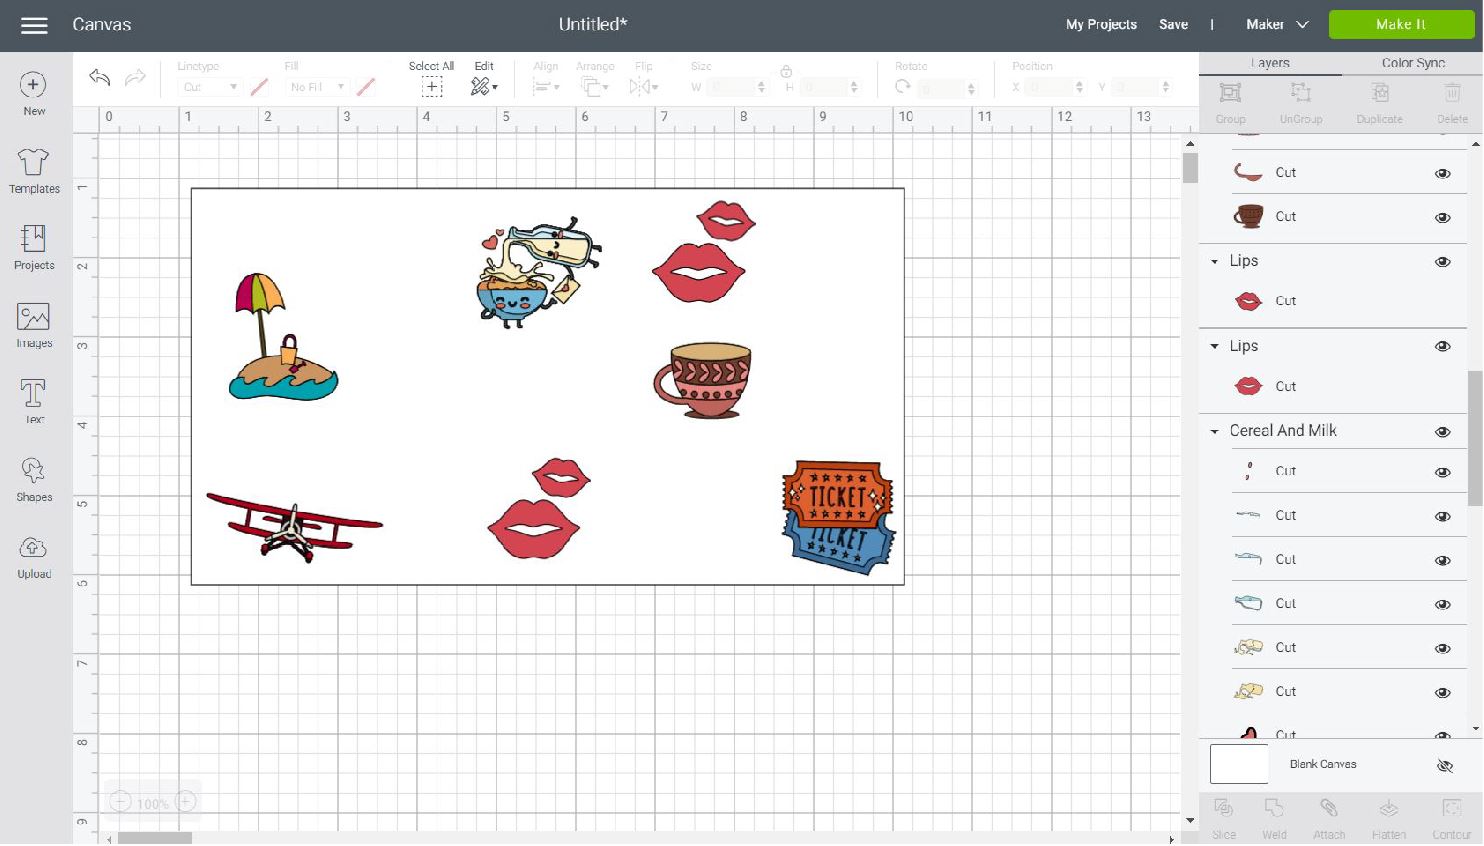
I also added some text.
I usually use Cricut’s fonts, but I decided to use some premium fonts I bought a couple of weeks ago and love so much!
- Alimentary: for the text on each coupon
- Little Bear: Birthday word
- Fiesta: Coupon word
Note: Links for fonts are affiliate.
You can also use Cricut or system fonts. I have an excellent tutorial where I also show you the best free and paid fonts to use with your Cricut machine.
When your coupons look ready, select all the layers on the canvas and click “Flatten” located at the Layers panel’s bottom.
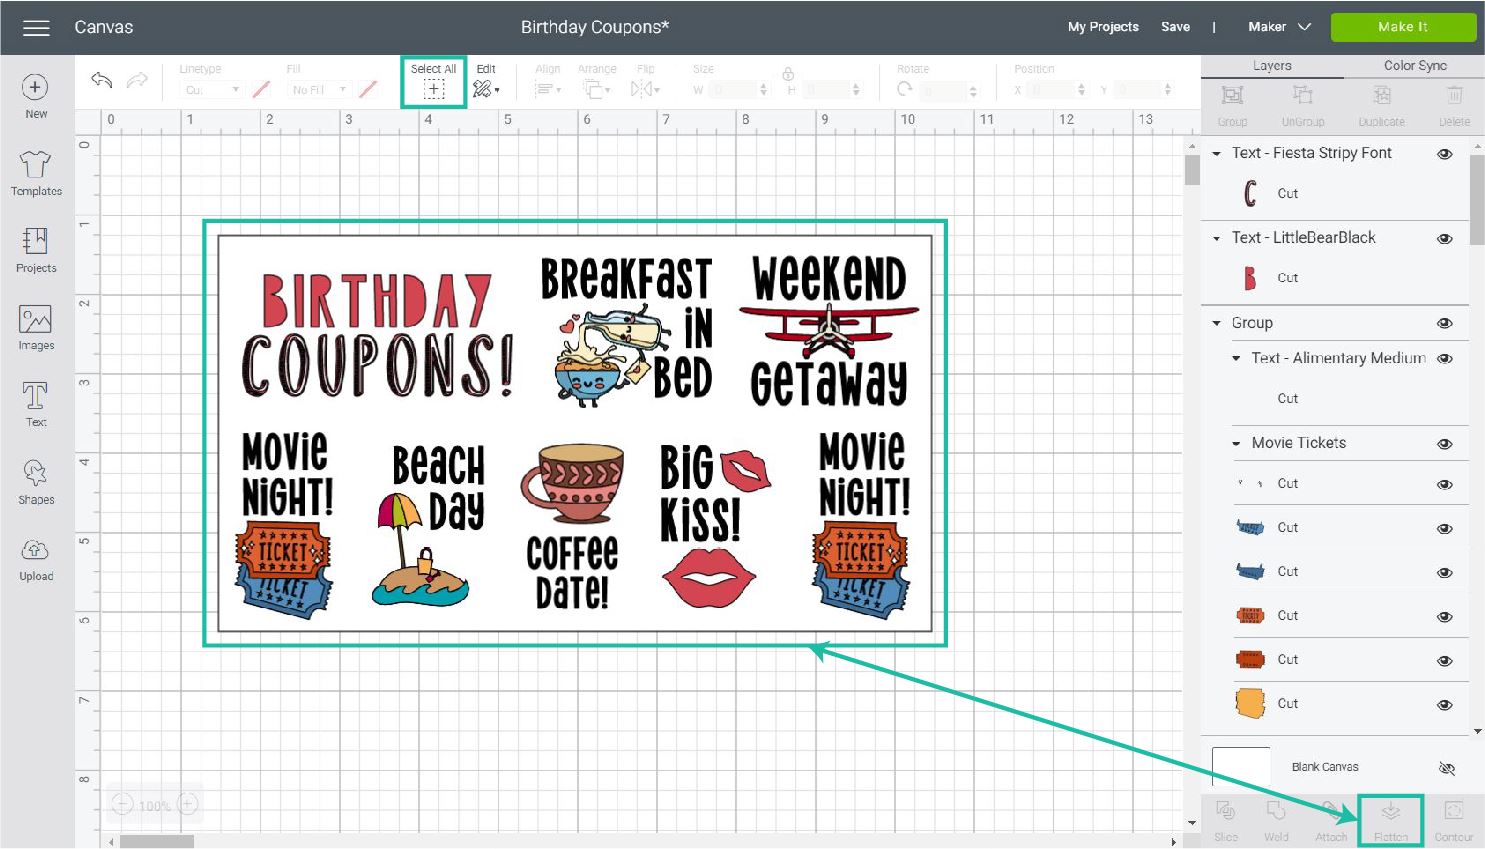
Tip: Before flattening, make sure you save your project. Usually, print then cut projects are quite large, and sometimes Design Space is a little glitchy, and I don’t want you to lose all your hard work.
Step 2 – Add Perforation Lines
Once you flatten, you will have a single layer that will tell your Cricut to print all of the illustrations and cut around the rectangle.
It’s time to tell your Cricut that you want to use the perforation blade.
You can use any type of shape you want in these coupons. However, I designed them with perforation lines in mind.
To add a perforation line, click on the “Shapes” icon on the left panel, and select the option “Score Line.”
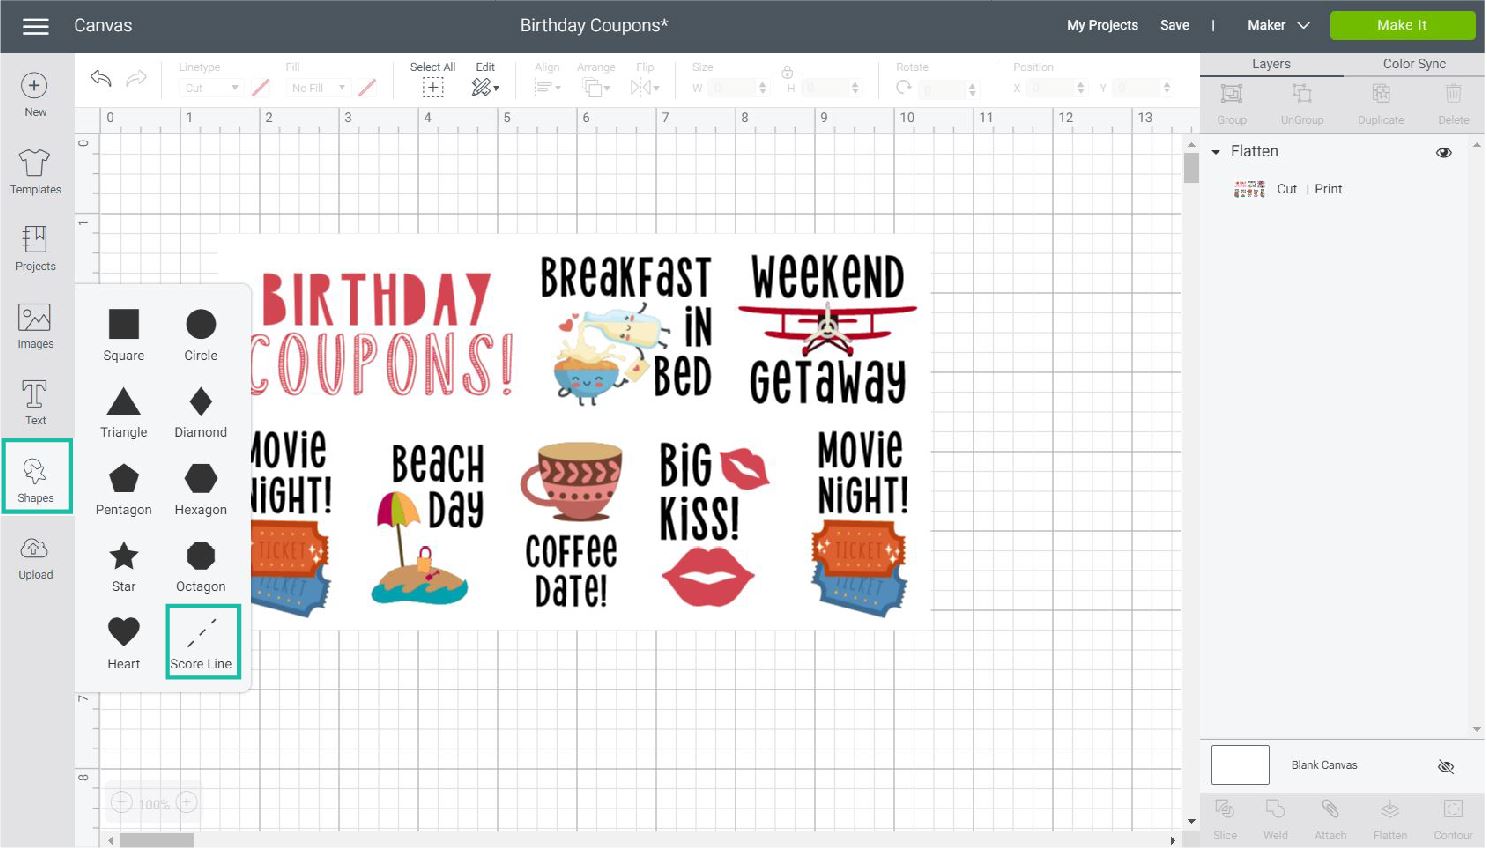
Once the score line appears on the canvas, select it, and change its Linetype from “Score” to “Perf.”
Now duplicate, rotate, and resize the perforation line to complete your coupon sheet.

For this case, I had a large horizontal line, along with six small vertical lines that isolated each coupon.
When you are done organizing the perforation lines, select everything on the canvas and click on “attach.”
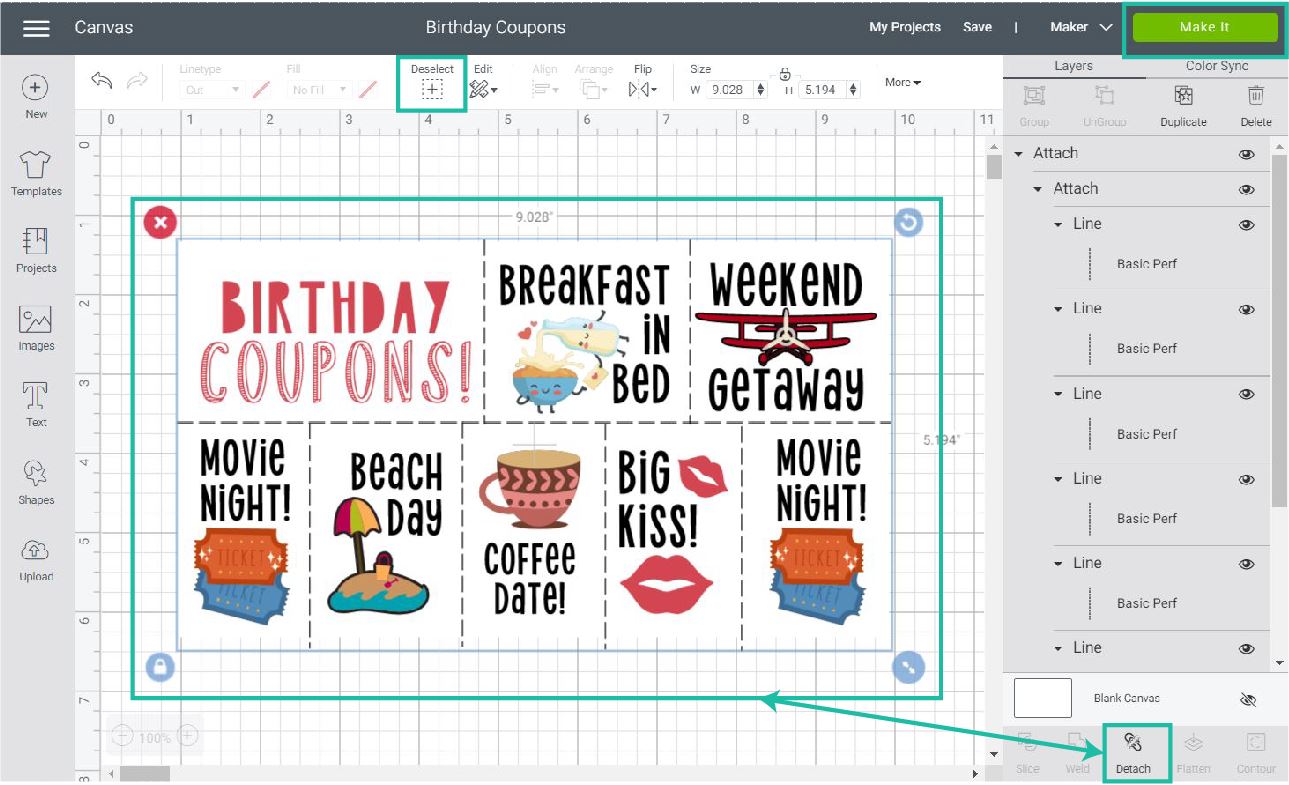
Tip: If Design Space is slow, attach all perf lines from the Layers panel, and then do another attachment with the flattened coupon sheet.
After attaching, click on “Make it” to print then cut.
Step 3 – Send to Print then Cut.
This is the preview of your mat.
Once you print, you will want to place your copy on the mat as you see it on the preview.
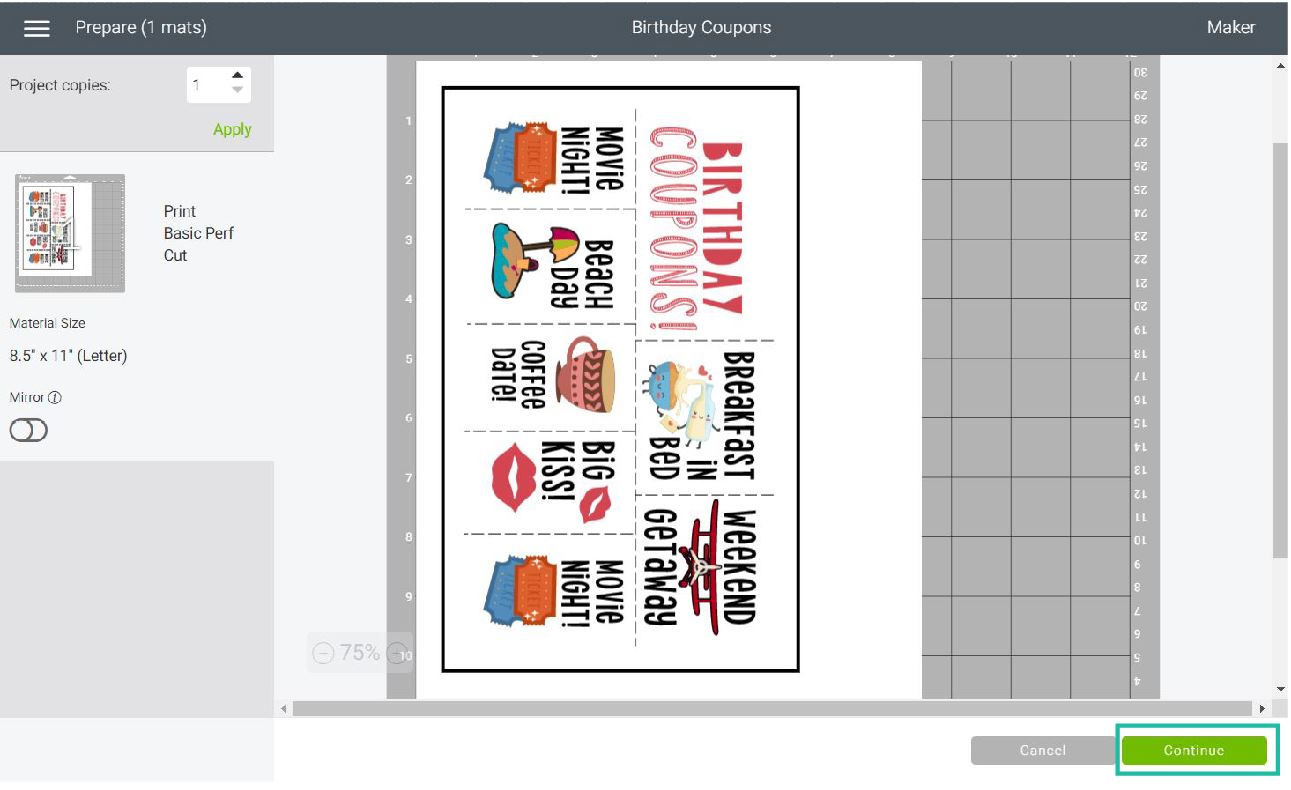
Click on “Continue.”
On the next screen, you will be asked to send your project to your printer and select your materials. In my case, I used medium cardstock.
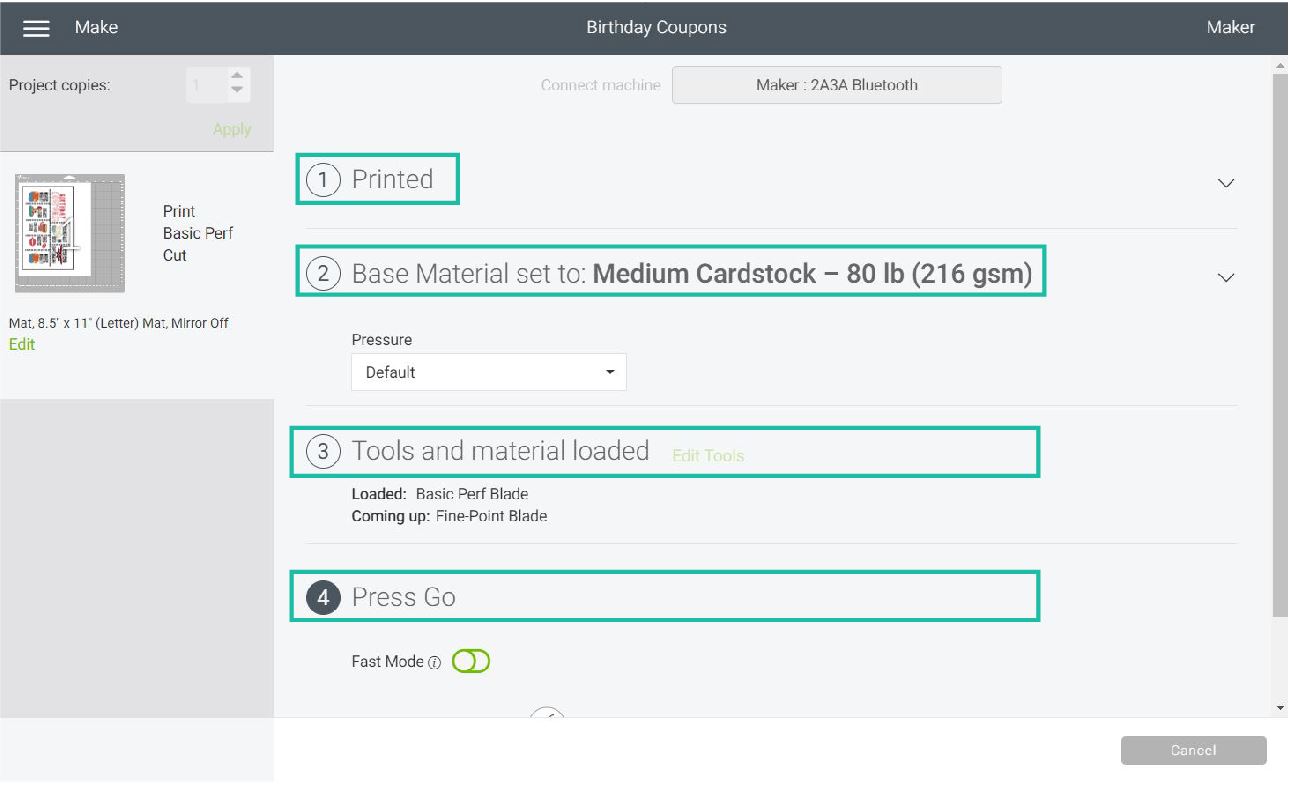
Here are some real-life pics!
Whenever you are perforating, you will need to install the perforation blade first; when your machine is done with that step, it will bring a notification in Design Space for you to install the fine point blade.
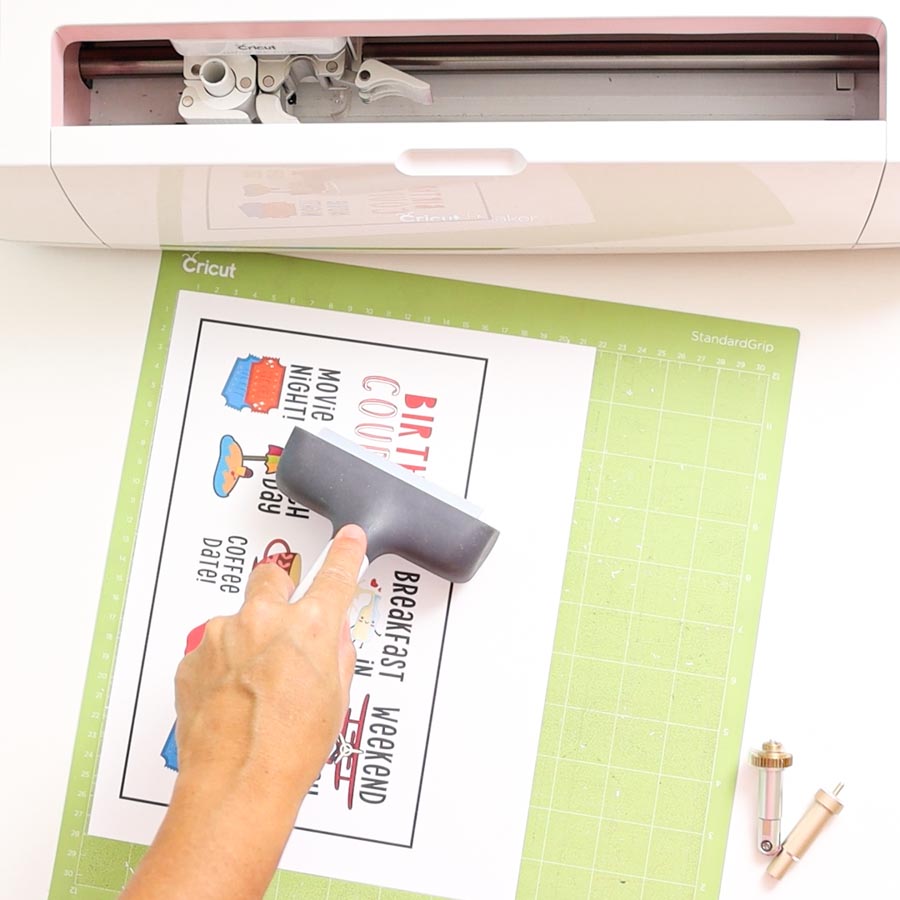

Once you are done with the fine point blade, unload the mat, and remove the project from it.
Don’t these coupons look super cute?


Which is your favorite?
I think I would use the “Weekend Getaway” coupon right away.
Share it!
I hope you feel empowered to use the Cricut perforation blade! Let me know in the comments if you have any questions.
Do you know it takes me over 25 hours to complete a single Cricut article? I know it’s wild, but I want to make sure you understand everything!
I would appreciate your support on Instagram , Pinterest , and YouTube as I try to grow my audience and continue producing great content!


Thank you, I love the very clear way you set out your tutorials, so easy to follow
You’re very welcome!