Hello Daydreamers!
In today’s tutorial, I am going to teach from start to finish how to make beautiful and stunning hair bows with your Cricut machine.
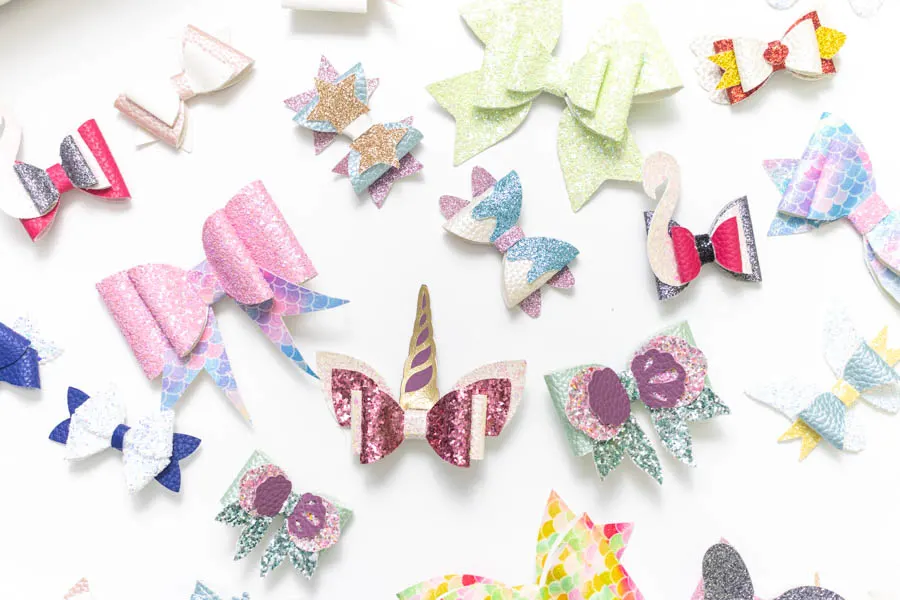
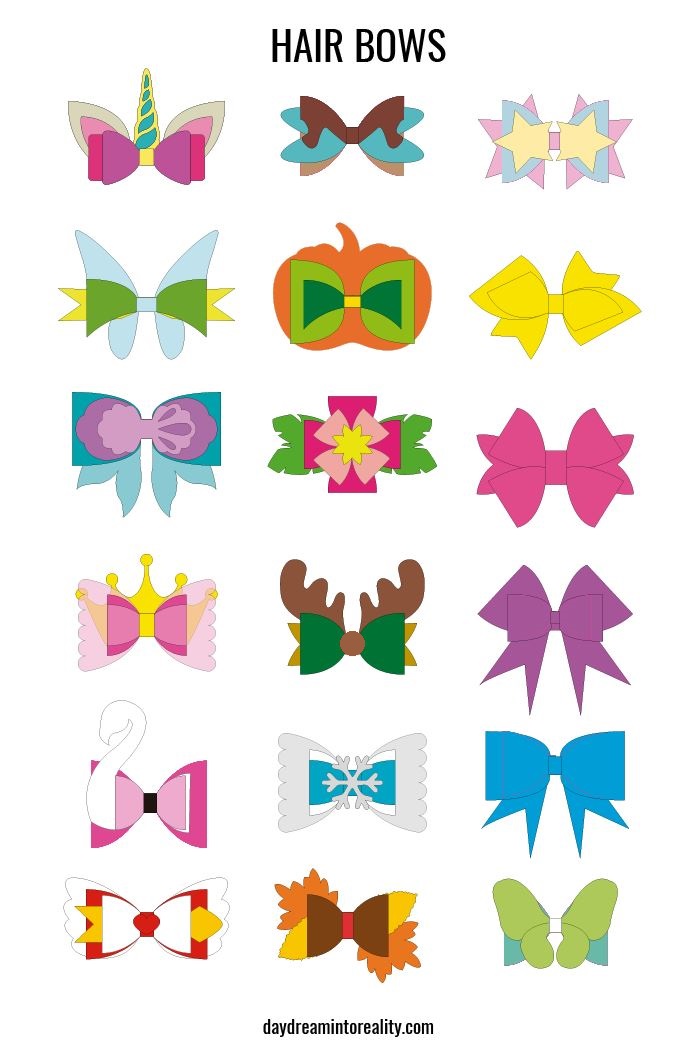
Not only am I going to show you how to make them, but I will also provide you with 18 free hair bow templates all in this article!
Ideally, you will read this tutorial from the beginning because, as we go, we will be implementing the concepts mentioned in the previews steps.

In a nutshell, these are the topics I am going to be covering in this tutorial.
- Materials you need to make bows
- Cricut Design Space steps
- Cutting and Assemble process
- Tips and other considerations when making bows
- 18+ Free SVG bow templates
- More pics of bows you can make with your Cricut.
Are you ready?
Let’s Daydream Into Reality!
Materials
Making bows with my Cricut, believe it or not, has been one of the most challenging projects I’ve made so far.
I mean, the steps are easy, but the variety of materials you can find out there to make bows is unlimited and, sometimes, tough to cut.
Don’t worry, though!
I need to start with this, so you trust my recommendations when doing this project.
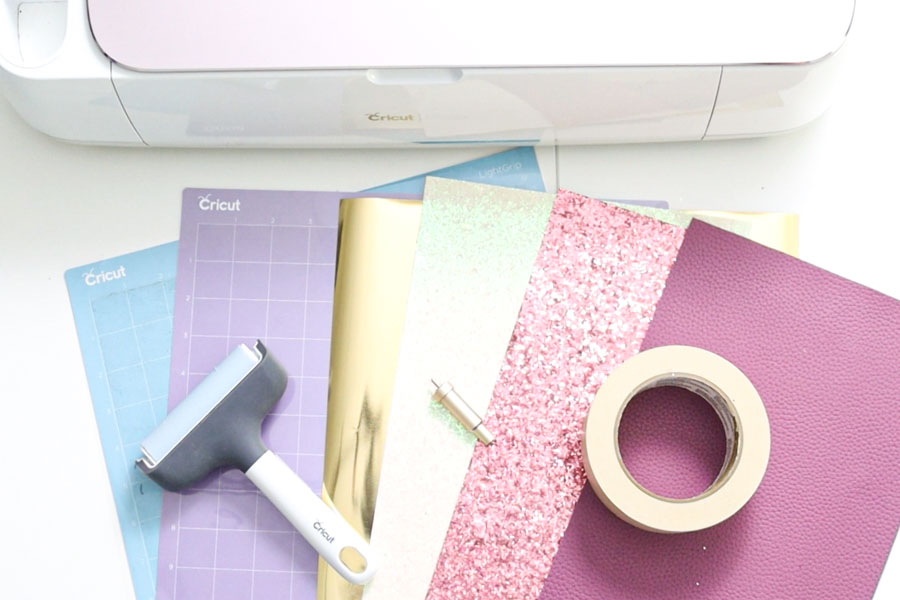
- Brand New StrongGrip Mat (purple)
- Fine Point Blade (sharp)
- Cricut Maker or Explorer
- Brayer
- Faux Leather
- Glitter Canvas (faux leather)
- Hair Clips
- Iron-On
- LightGrip or StandardGrip Mat.
- Masking Tape
- Practice File (yellow download button)
The rest of the FREE files are in this article after the Step by Step tutorial.
Note: I only used Iron-On on one bow because I wanted to show you different possibilities.
To make these bows, I invested in a wide variety of materials from Amazon. There are so many companies that have so many options. However, I found them to be a little deceiving.
The materials are beautiful!
But, every single glitter sheet that claimed to be “faux leather” was, in fact, canvas, or for very chunky glitter was some sort of fabric.
It’s not a huge deal to me, but it does mean you need to test a lot!
Here are some of the faux leather and glitter canvas I bought.
- Mermaid Style
- Pastel Colors Glitter Sheets
- Mixed Faux leather and glitter canvas (beige colors)
- Mixed Faux leather and glitter canvas (black and white colors)
- Chunky Glitter Canvas
- Variety Pack fine glitter Canvas sheet.
All of these packs have a strong smell before you work with them, let them air out for a couple of days.
Make Hair Bows in Cricut Design Space
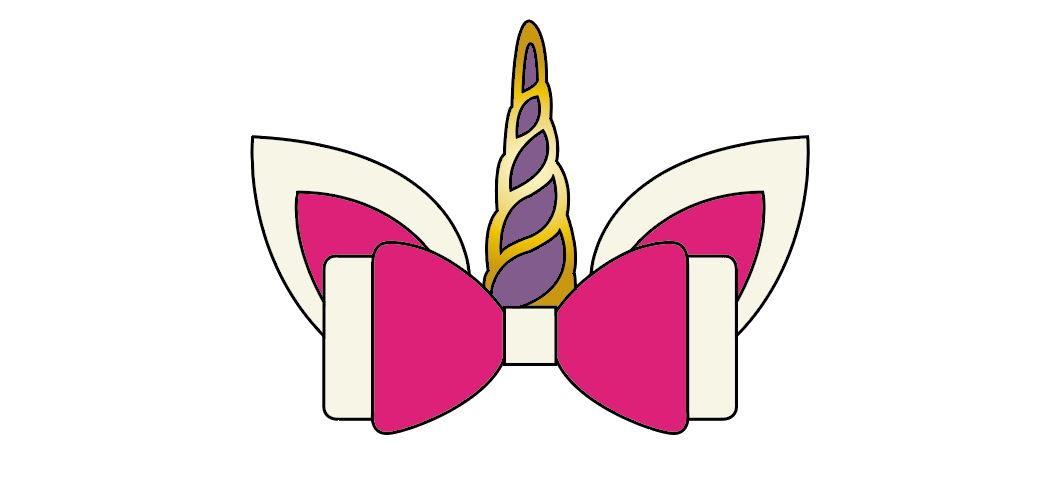
For this step by step tutorial, I picked the “Unicorn File” because there’s a lot of details and opportunities for you to learn.
Upload Bow
Download the file (in the materials section) the go to the canvas in Cricut Design Space, and click on the “Upload” button located on the left panel.
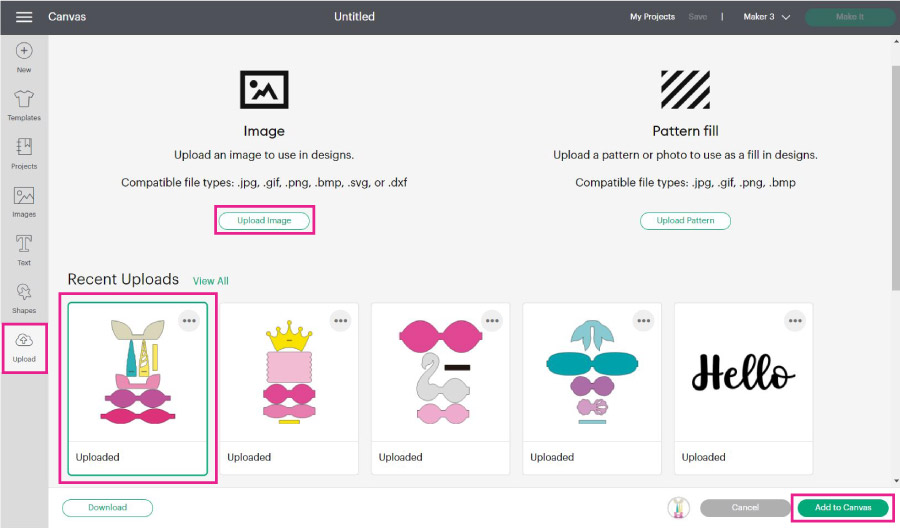

Follow the prompts to upload the bow, then select it from the “Recently uploaded images” and add it to the canvas.
Resize Bow Template
This is how the hair bow looks when you upload it. There are multiple colors, and all of the pieces of the bow are grouped.
The first thing you need to do is resize your project.
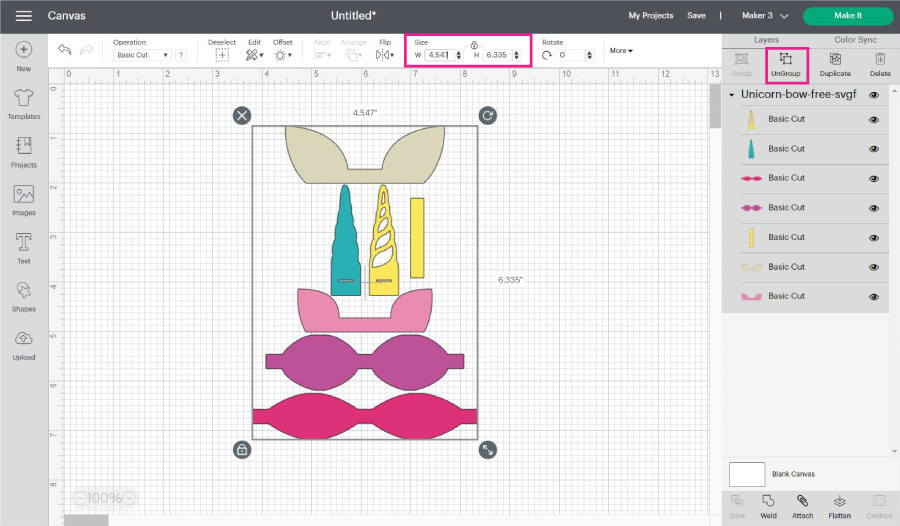
Make sure you resize according to the largest piece. In this case, it is the one at the bottom.
Everything has to increase proportionally!
So select all of the pieces that are part of the bow and type in the width you want.
In this case, I did a width of 6 inches.
Bows need to be folded, so the actual size of this bow be cut in half pretty much. The ears and the horn will be bigger than the larger piece on the canvas.
I think 6 inches is an excellent size for small bows; they end up looking cute. However, you can also make them bigger.
Change Bow Colors
After resizing, ungroup the bow and change the colors of your bow. If you were going to leave it as is, you would need six mats!
That’s ok, but I just wanted four different colors. All of these colors will represent different materials as well!
To change colors, select the layer, and click on the color box next to “Operation.”
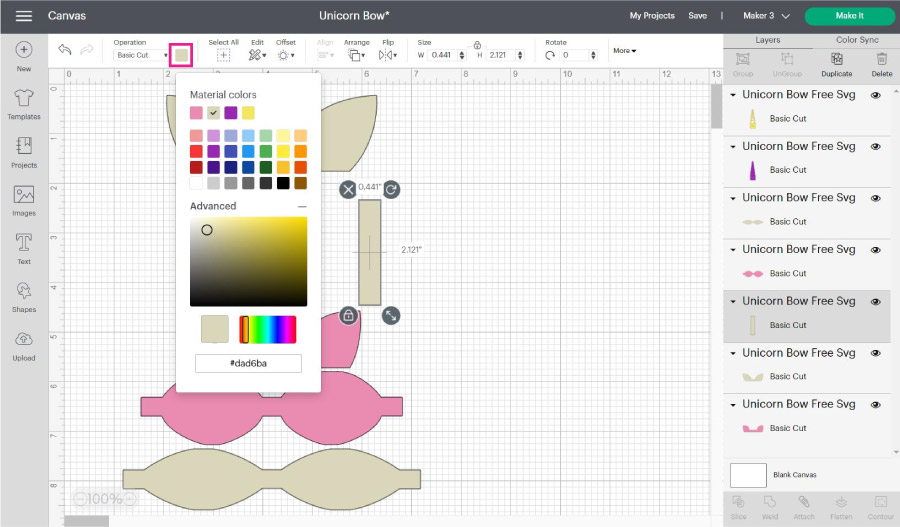
Here’s how my bow looks like, and these are the materials I am going to use per color.
- Beige & Pink: Chunky glitter canvas
- Purple: faux leather
- Yellow: iron-On
The reason why I am using iron-on on the horn is because of the small details. I don’t recommend cutting visible intricate cuts on glitter canvas.
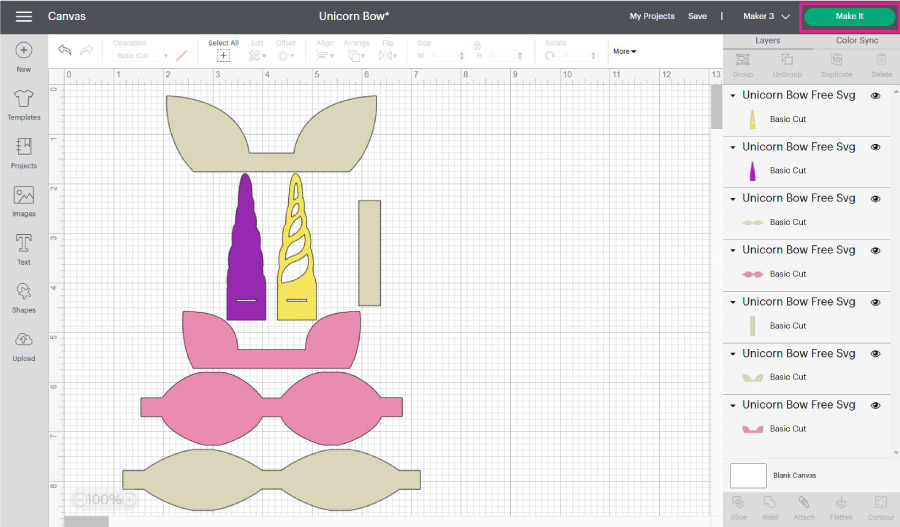
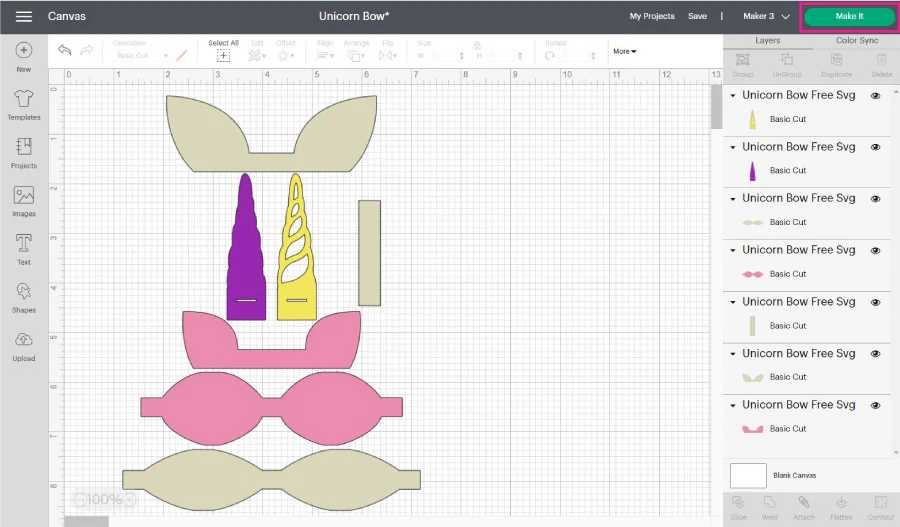
Once you’re happy with the colors and size, click on the green “Make it” button.
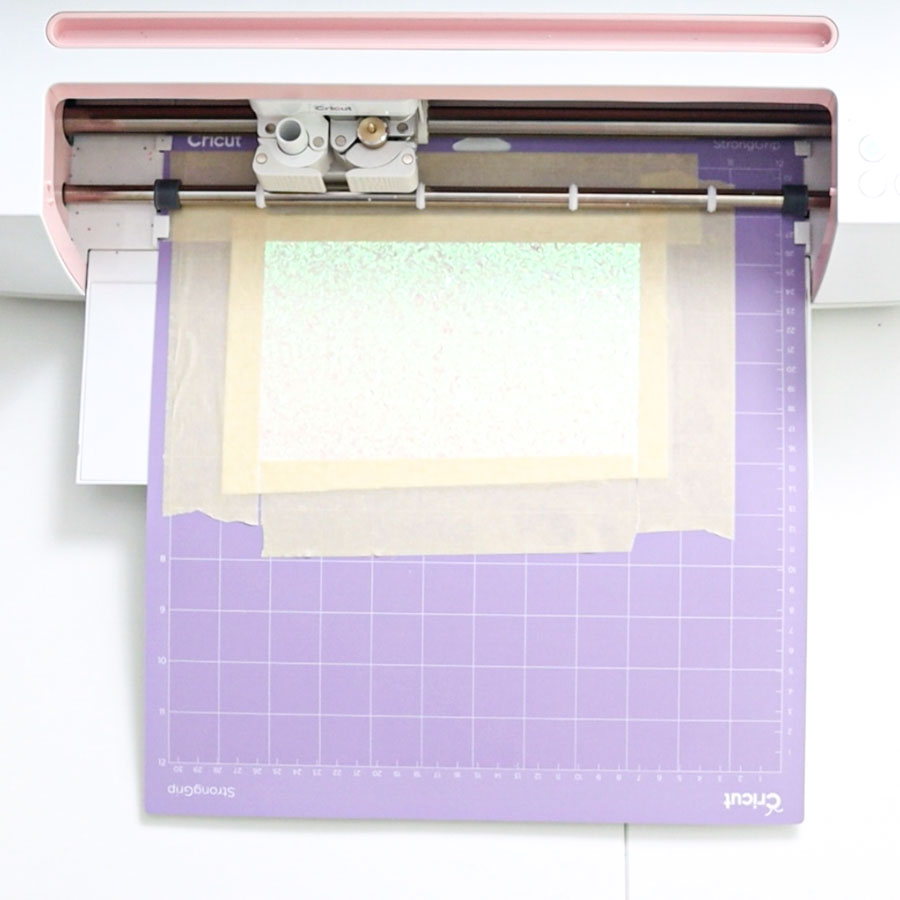
Hair Bow Cutting Setting in Design Space
It’s time to check out the mats your project needs.
After trial and error (I made more than 100 cuts to bring this article to you), I found that the best practice when cutting glitter canvas is to move all pieces leaving an entire inch on the left and one on the top.
Click on them and move them around. You also want a functional space between each space.
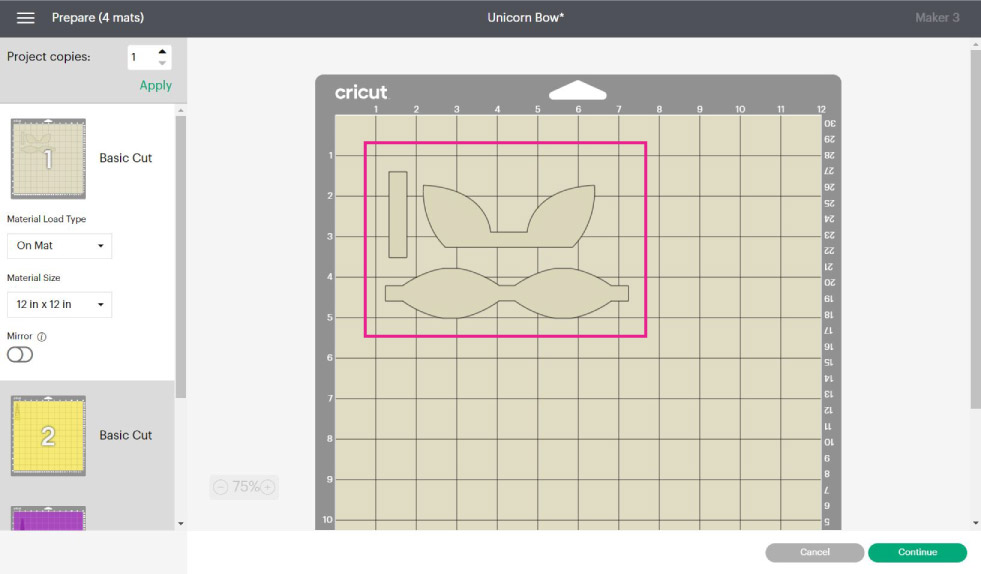

There are two mats where you need to mirror the image if you are using faux leather and iron-on because you will be placing them pretty-side down.
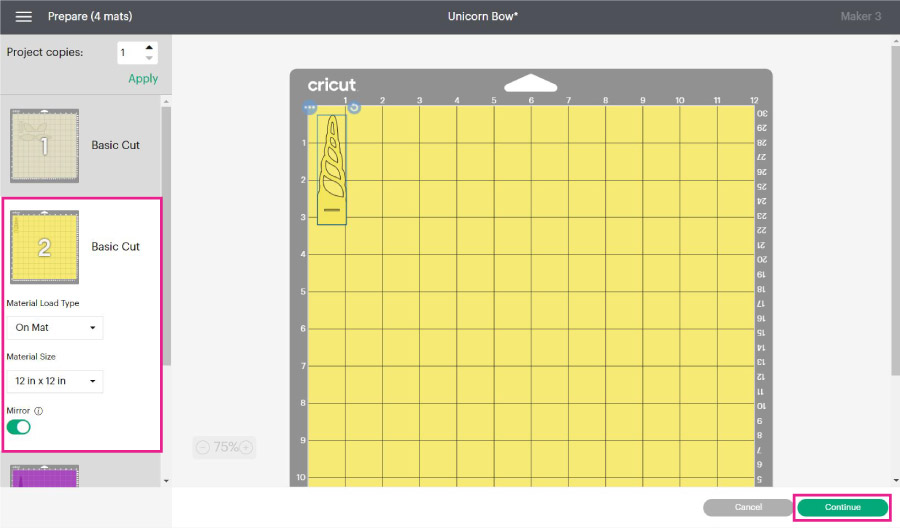

Once you check all of the mats, go ahead and click on continue to select the materials.
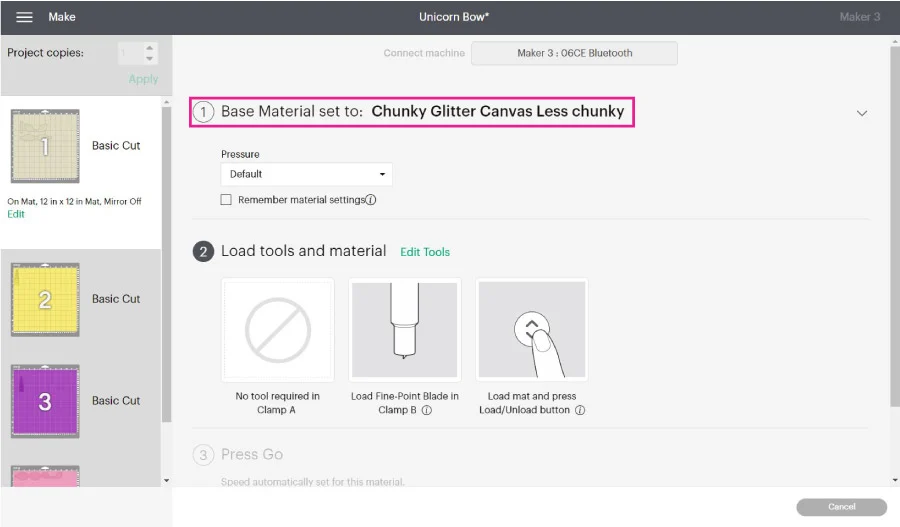
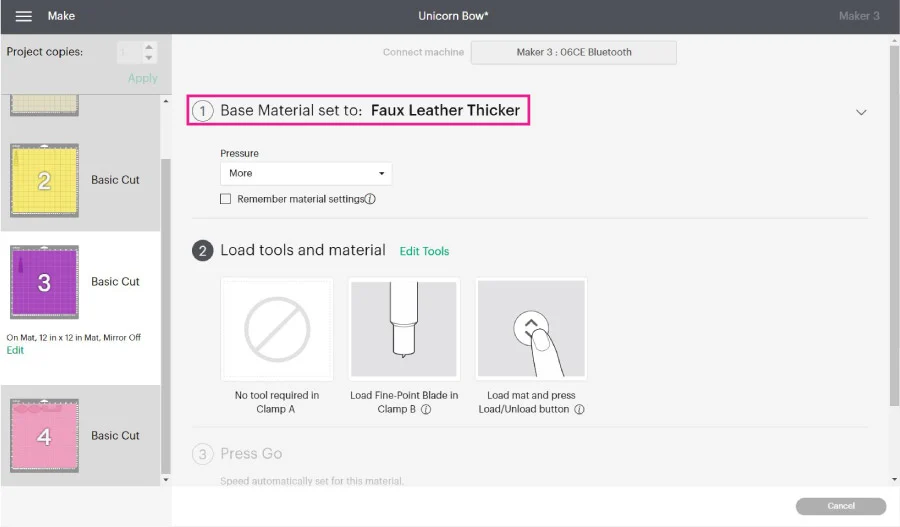
Material Settings for bows in Cricut Design Space
Cutting glitter canvas and faux leather that you buy online it’s quite tricky. I tested multiple options to find the sweet spot.
Those materials don’t exist in Cricut Design Space, so to make bows, we need to create a new material.
It’s quite easy!
On the “Set material” section, click on “Browse all materials.”
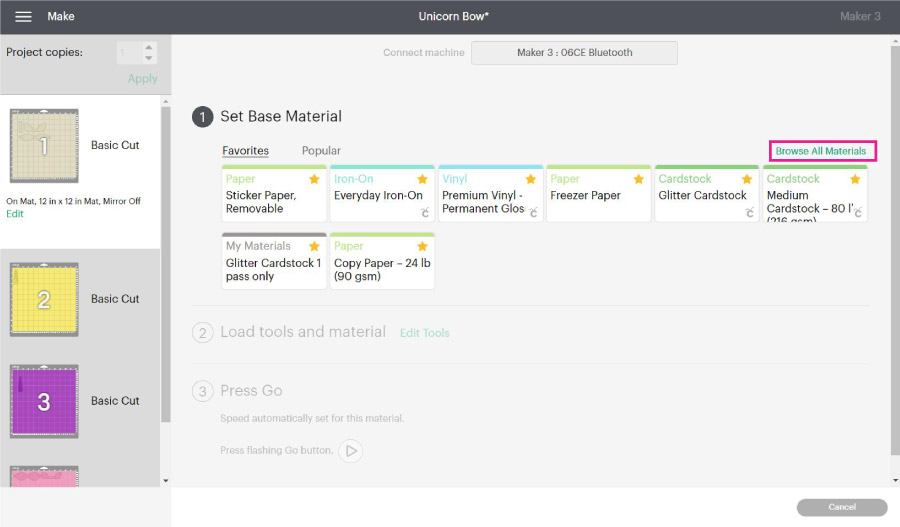

A new window will open with the most common materials.
Click on “Material Settings” to add a new material.
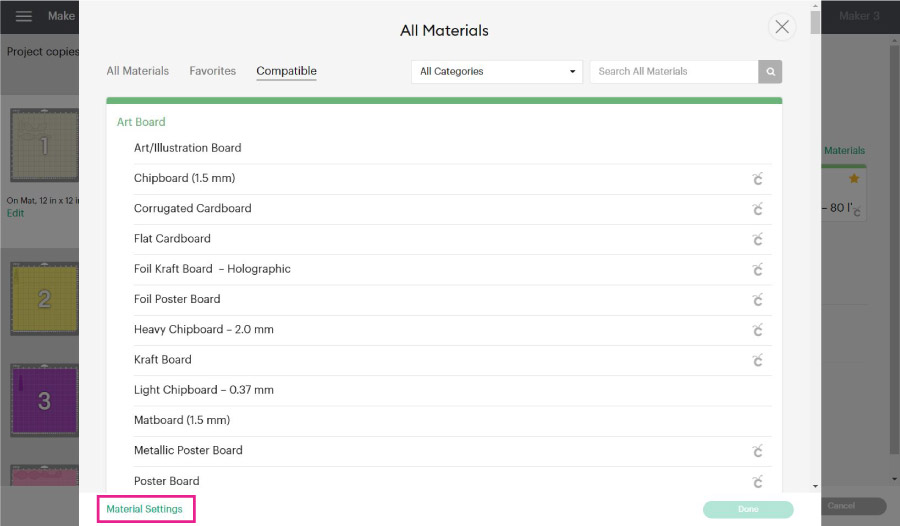

The information you’ll see is quite interesting!
Here you can see the exact pressure and number of passes your Cricut will perform on each material.
To come up with the settings I am about to show you, I looked at different materials and just played around with them.
Before we create the first material, let’s take a look at all the different materials we’re going to use for this bow.
As a reference, a fine glitter canvas sheet can be cut when you select the option “Faux Leather Paper Thin” (an existing material in Design Space) and move the pressure to “more.”
But, as we move in thickness, we need to adjust the settings.
- Chunky Glitter Canvas (less chunky): It’s the typical glitter that is larger in size. The depth of the glitter is a bit more than fine glitter.
- Chunky Glitter Canvas: It’s a combination of fine, chunky, less chunky, and really really chunky glitter, it has a lot of texture and hard surfaces. Some of the super chunky glitter sheets can’t be cut with the Cricut (Especially animal printed ones).
- Faux Leather Thicker: The option in Design Space for paper-thin leather. Most sheets I bough were thicker than paper.
To create a new material type in the name in the “New Custom Material” box and click on save.


Upon saving the new material, you’ll be able to edit it. For chunky glitter (less chunky) canvas, move the pressure to 350, 3x (number of passes), and select the fine point blade.
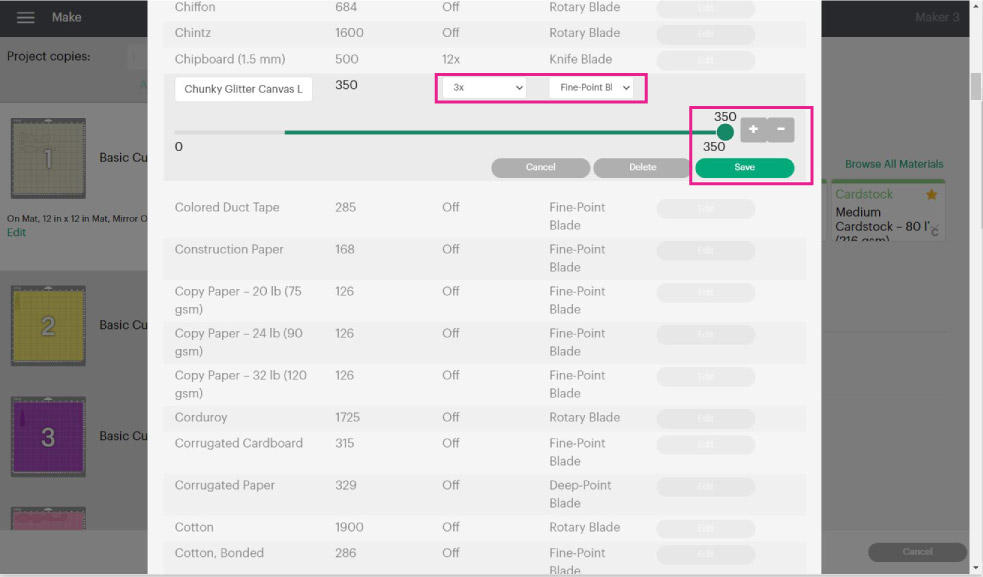

For a thick chunky canvas sheet, you’ll need the Deep point blade, move the pressure to 350 and add six passes. Very thick chunky canvas sheets can be quite hard to cut. Before you commit yourself to a large project, do a test cut.
Check out my guide on how I make test cuts with my Cricut Machine.


For faux leather, you need the fine point blade at 350 in pressure, and there’s no need for extra passes.
If you are using Cricut’s faux leather, use the paper-thin material in Design Space.
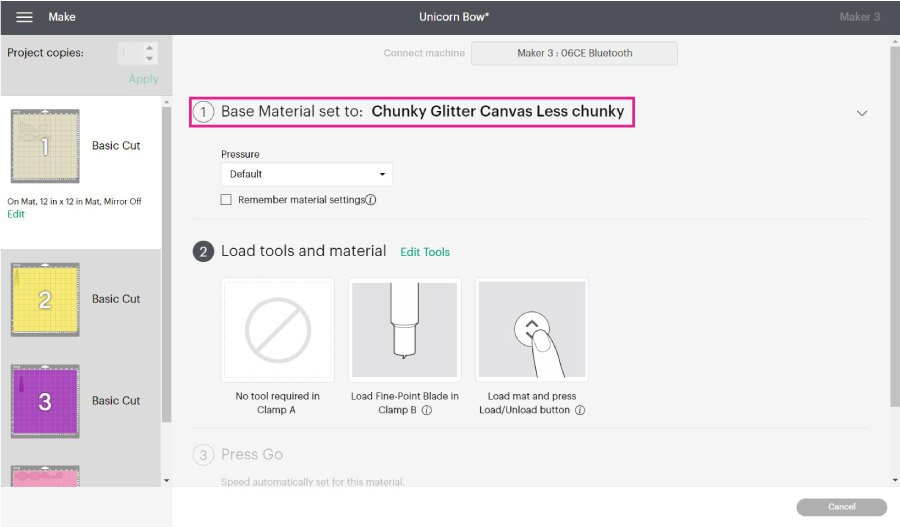
After creating the new materials, close the window, go back to browse materials, and select the one you need according to the mat you’re on.
Sometimes, there are chunky glitter canvas sheets that are a little bit extra chunky, if that’s the case move the pressure to “more.”
Let’s start with the cutting process!
Cut Bow with your Cricut
There are two mats where I am cutting Chunky Glitter Canvas (Less Chunky). So I selected from Design Space.
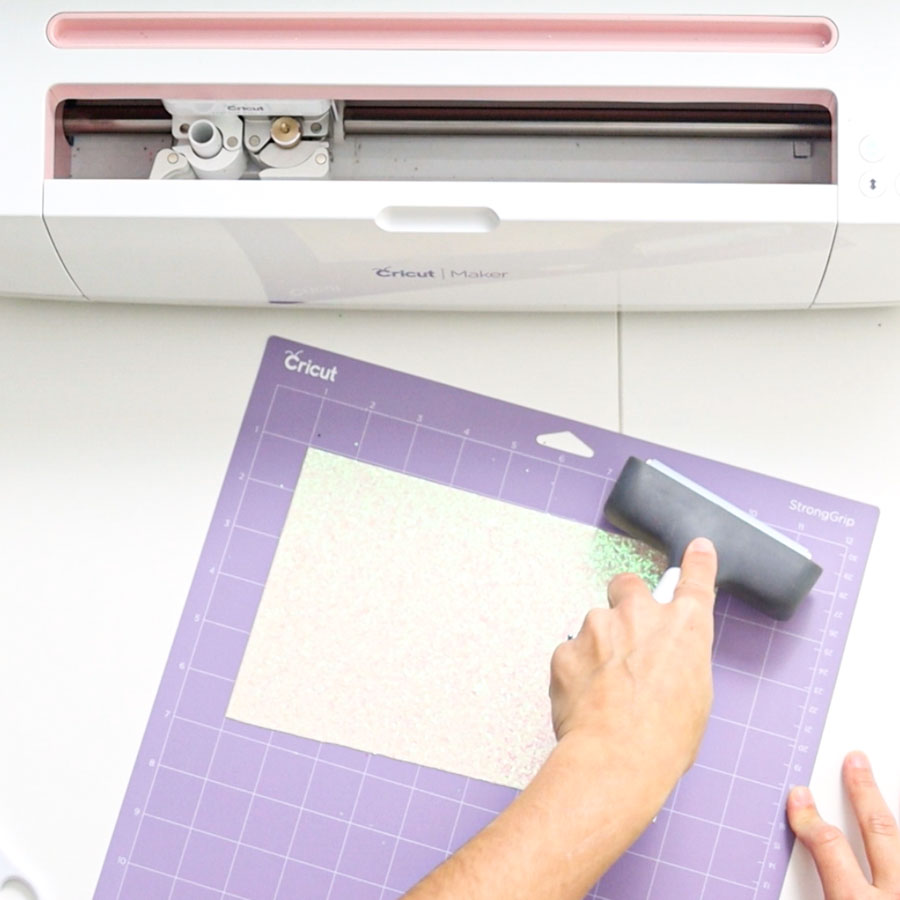
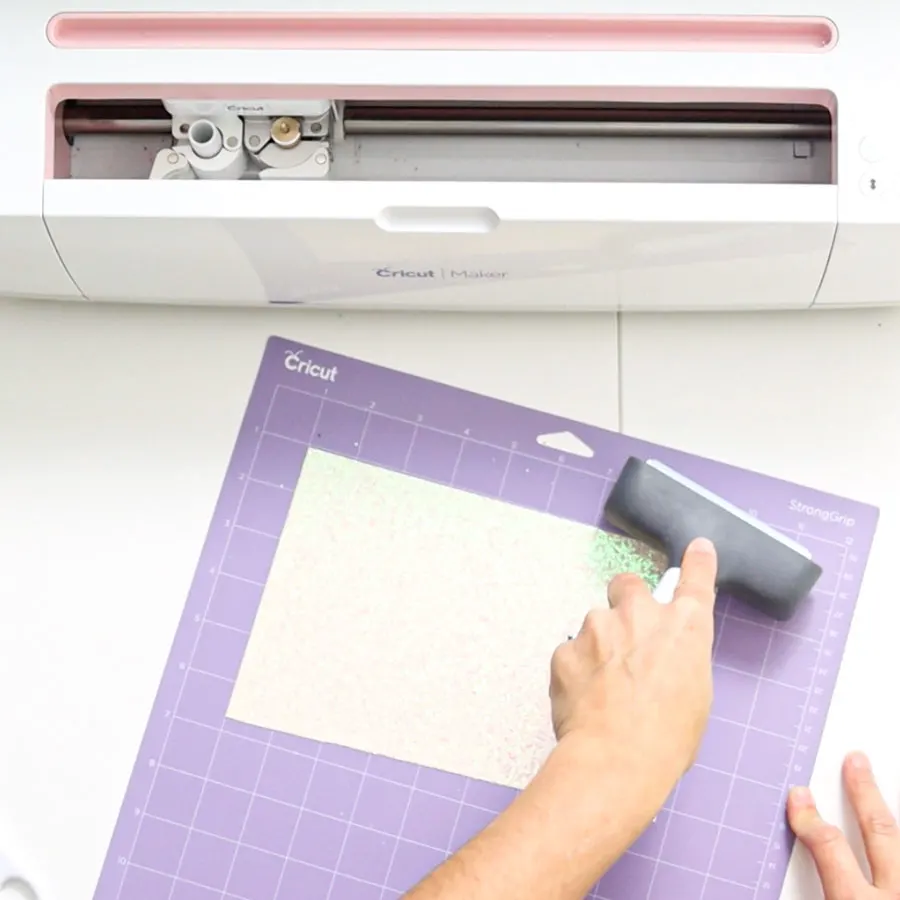
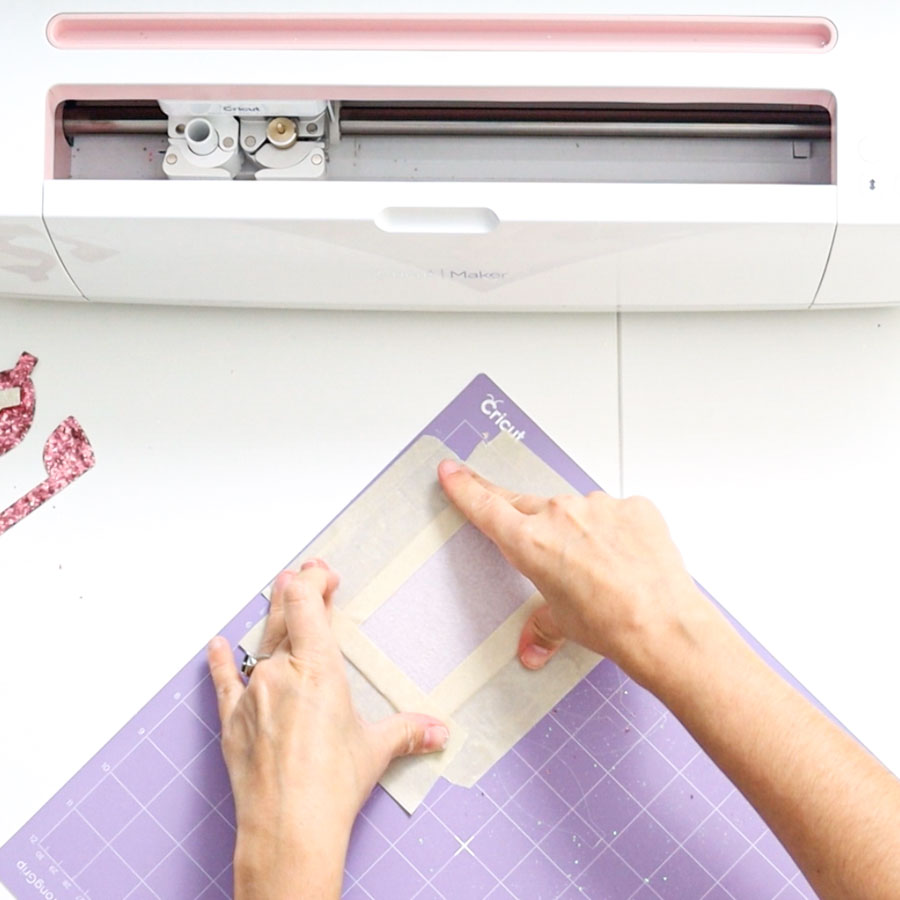
Now we are going to organize the material on the mat.
Remember, we move the material one from the left and the top? Do the same thing on the mat.
It’s important to mention that you need a lightly used or brand new mat when making bows out of chunky glitter canvas. Otherwise, the material can move and get ruined.
IMPORTANT: Masking tape needs to be away from the blade. Make sure to place it away from the cut. Otherwise, your bows won’t cut through.
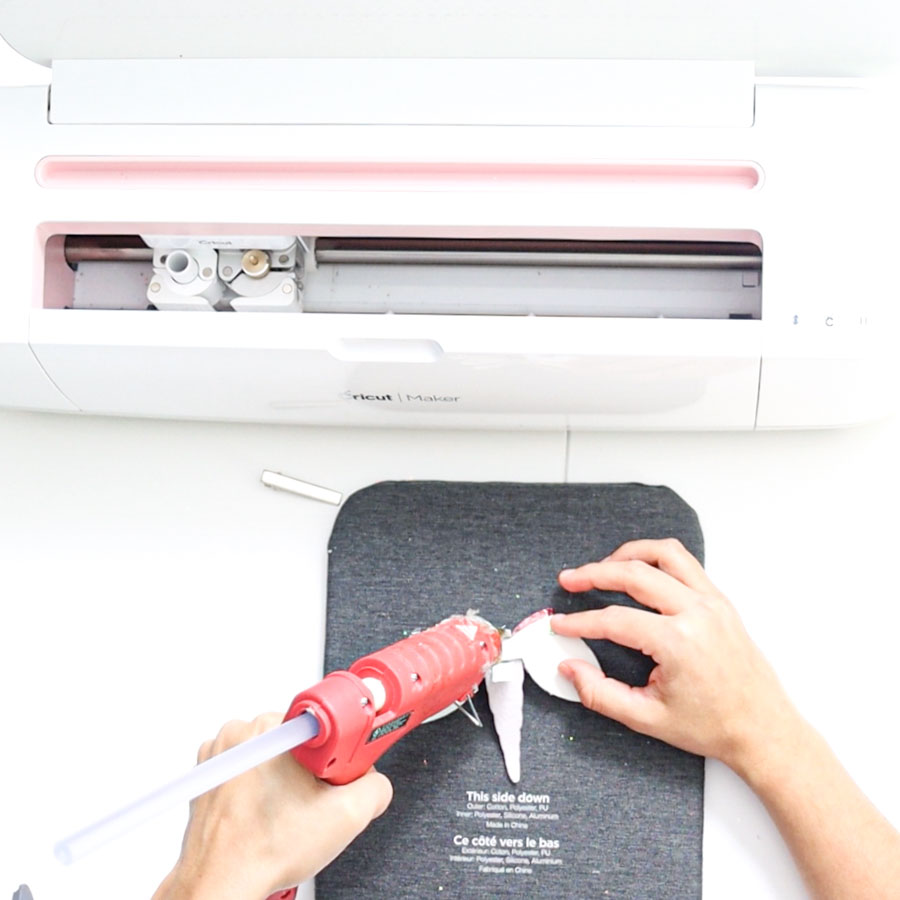
The brayer is also very important to stick the canvas sheet to the mat.
You don’t need tape for fine glitter sheets, but the chunkier the glitter is, you may want to add masking tape to add extra security to your project.
Masking tape will be pretty handy if your mat is not that sticky.
I am sure you don’t want to buy a mat for every bow you make.
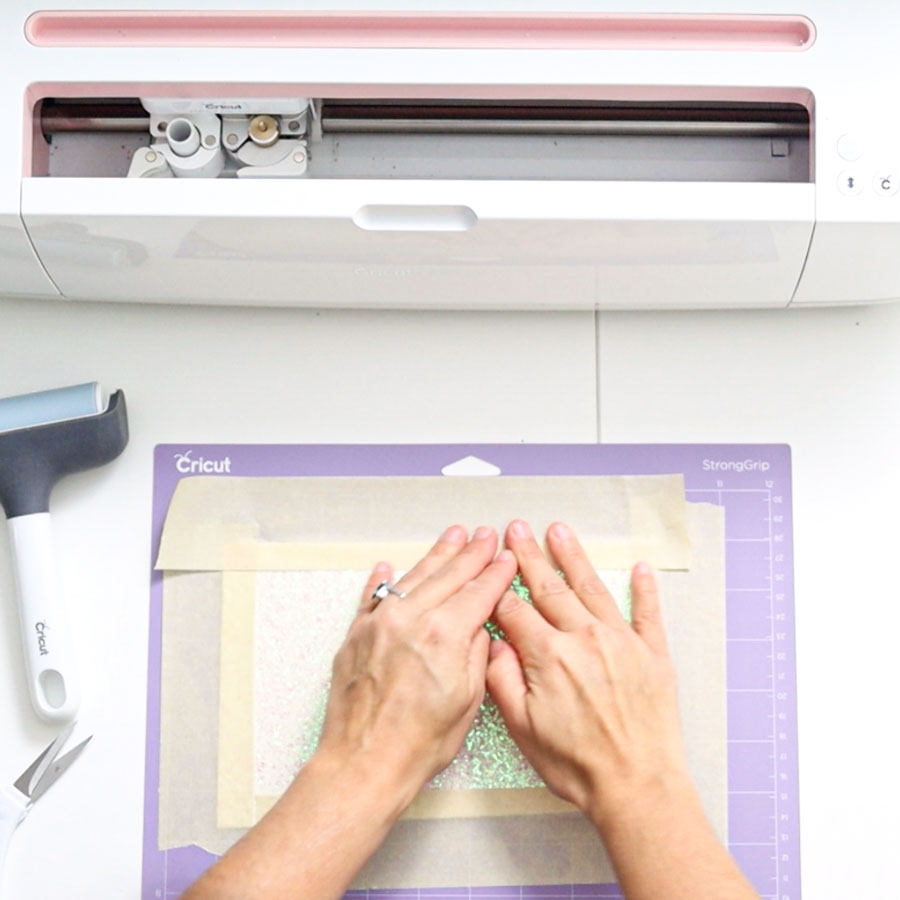


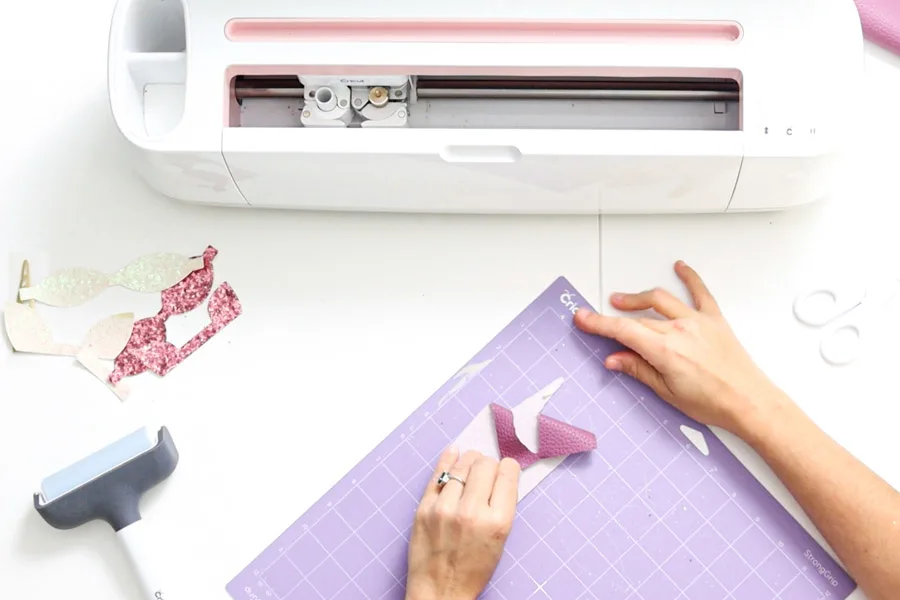
Once you’re done arranging everything on the mat, feed it to your machine and tap on the flashing “Go” button.
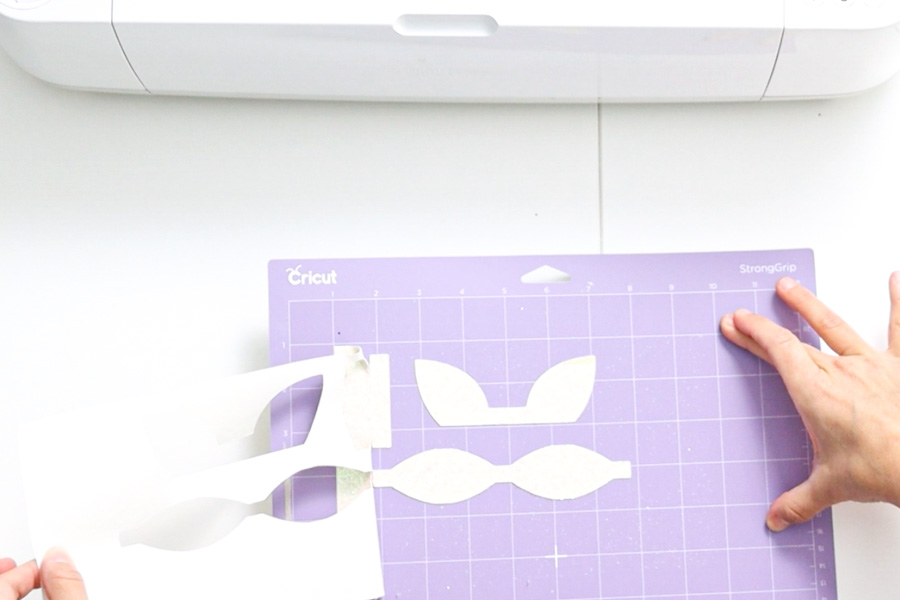
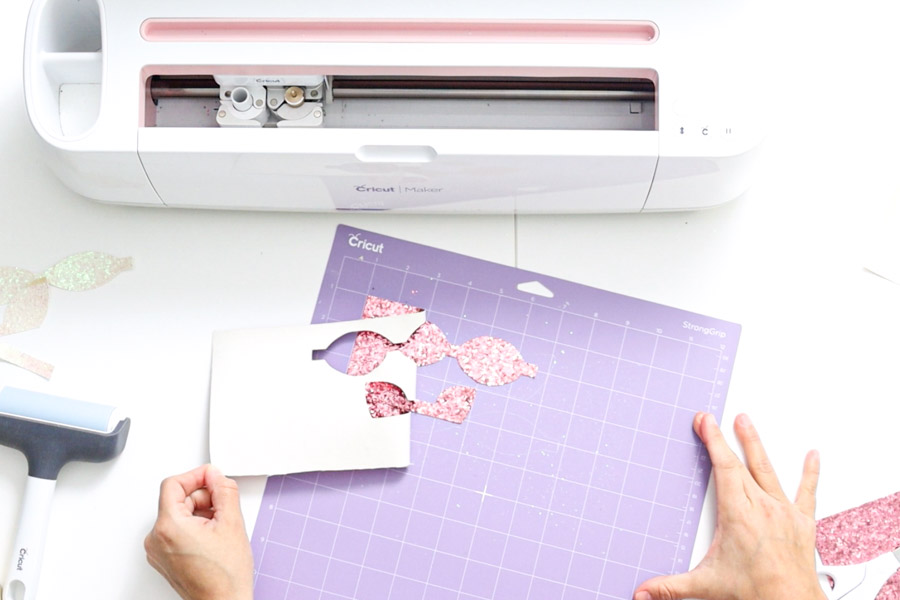
Unload mat, remove the tape, and cuts from the mat.

Here’s the other mat using the same settings.


It’s not that hard!
Now let’s cut Foil-Iron On.
Select the material in Cricut Design Space (check mirror is on).
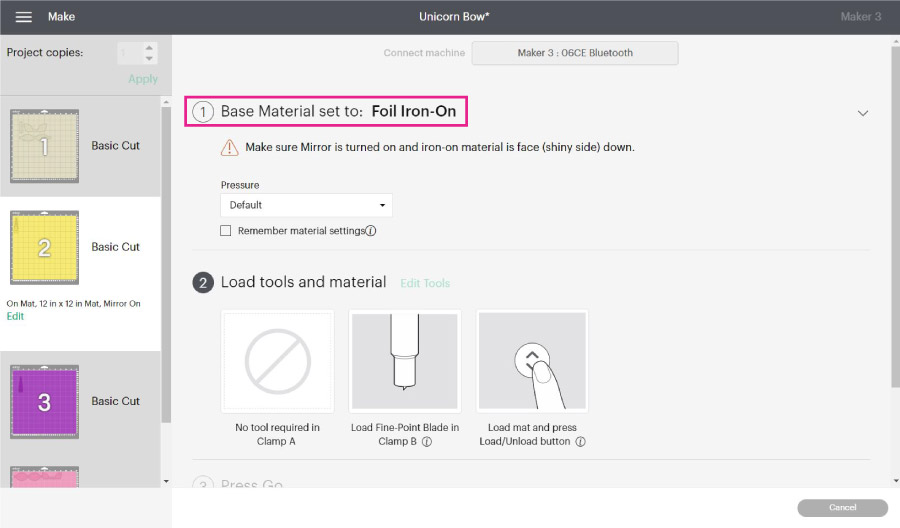

Place it on the mat “pretty side” down, then load, cut, and weed it!
This tutorial is not an Iron-On tutorial, so I won’t go into detail on how to work with it. But if you are curious, you can check my “How to work with Iron-On tutorial.”


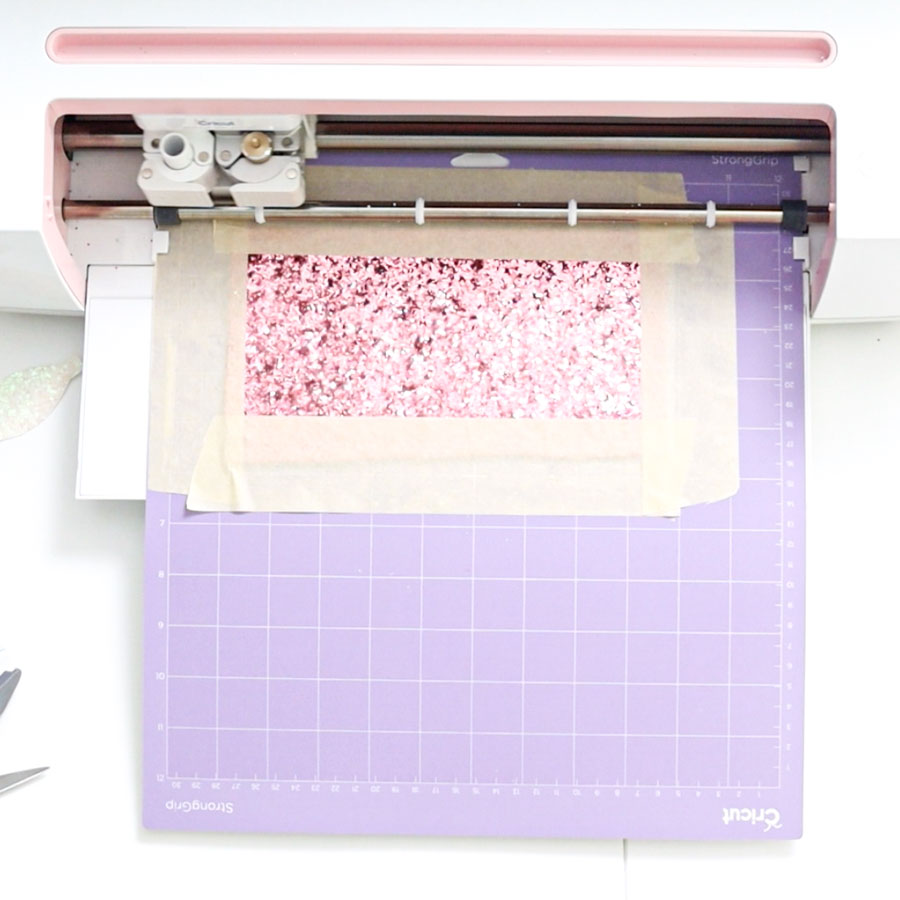
Now it’s time to cut the faux leather!
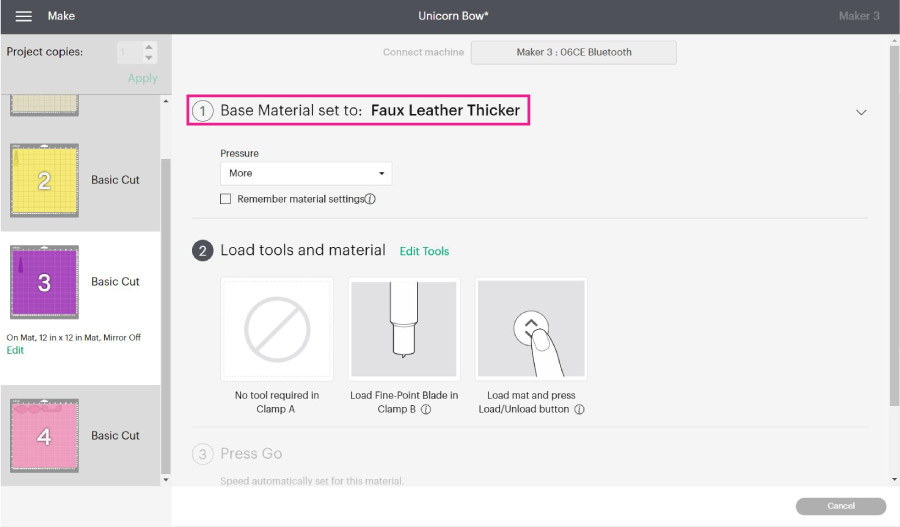
Once you select the material in Design Space, place the faux leather pretty/pattern/color side down (make sure mirror is on).
If your mat is very new, you don’t need masking tape. If it’s used, I recommend you use it.
Again, avoid placing tape where the blade will cut through.


Load your mat to the machine, cut, and remove cut from the mat.
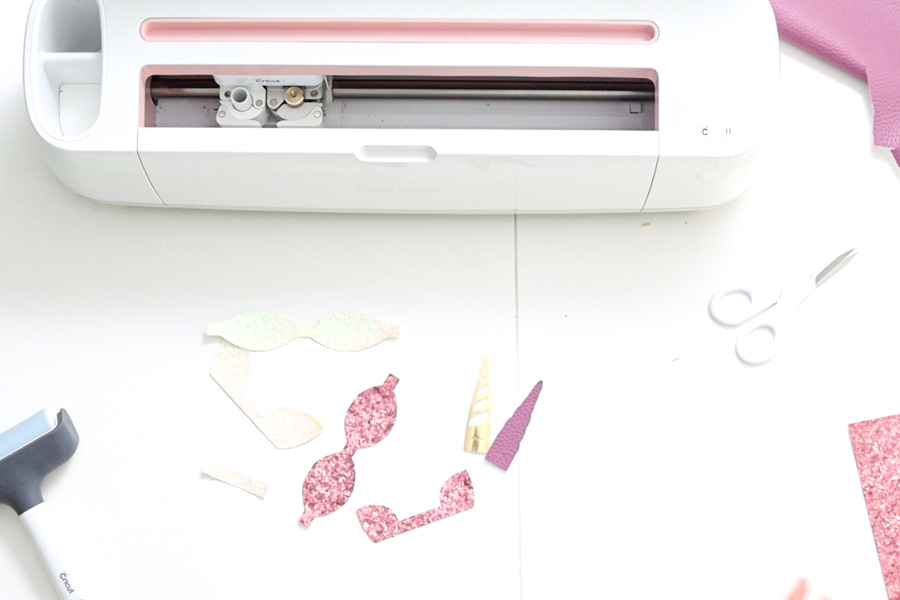
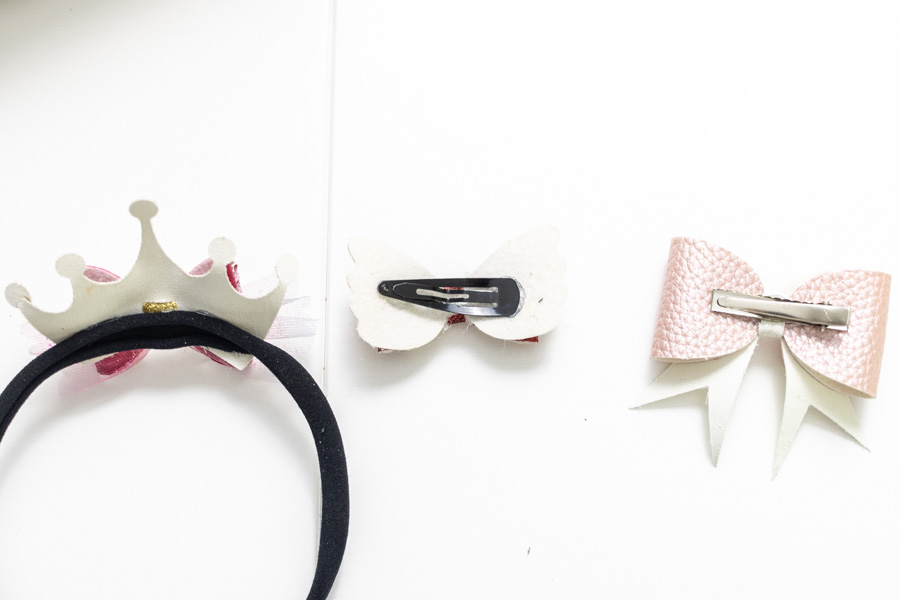
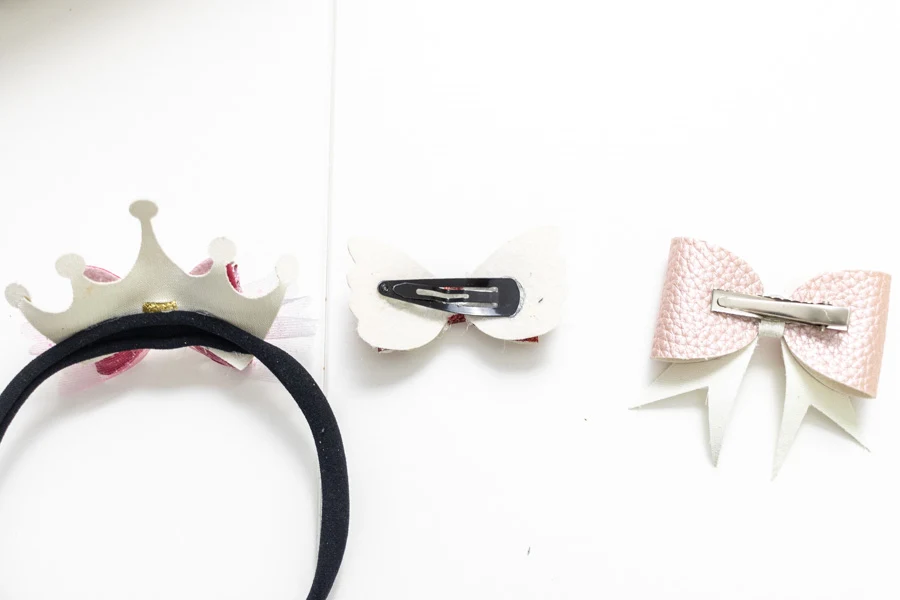
Here are all the pieces we cut.
Are you ready to put the bow together?

Assemble Hair Bows
Assembling hair bows is the easiest part and most fun part. The only thing you need to consider is the order of each piece.
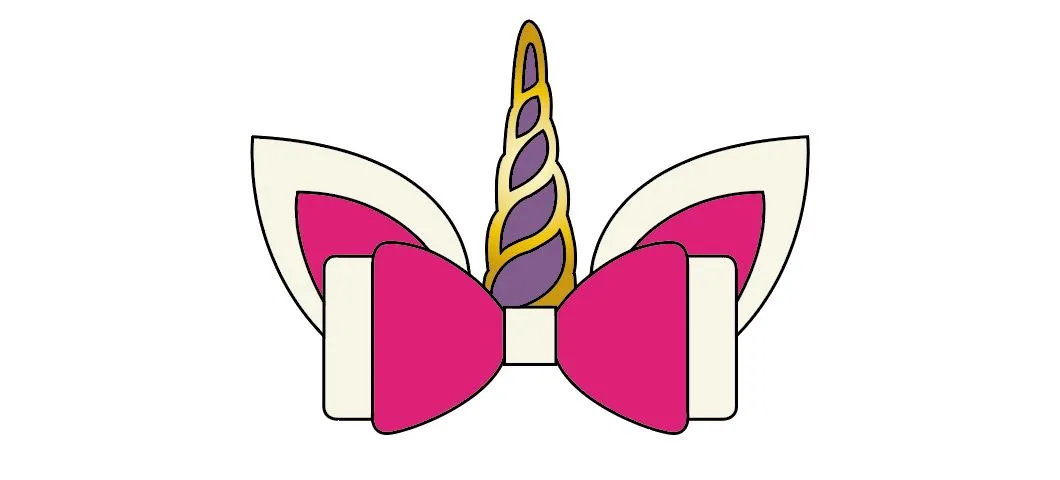
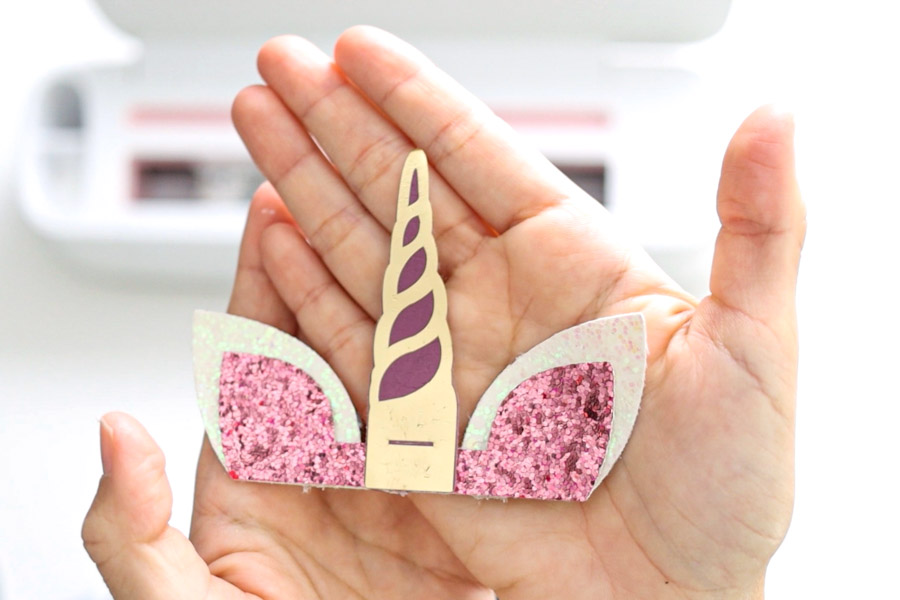
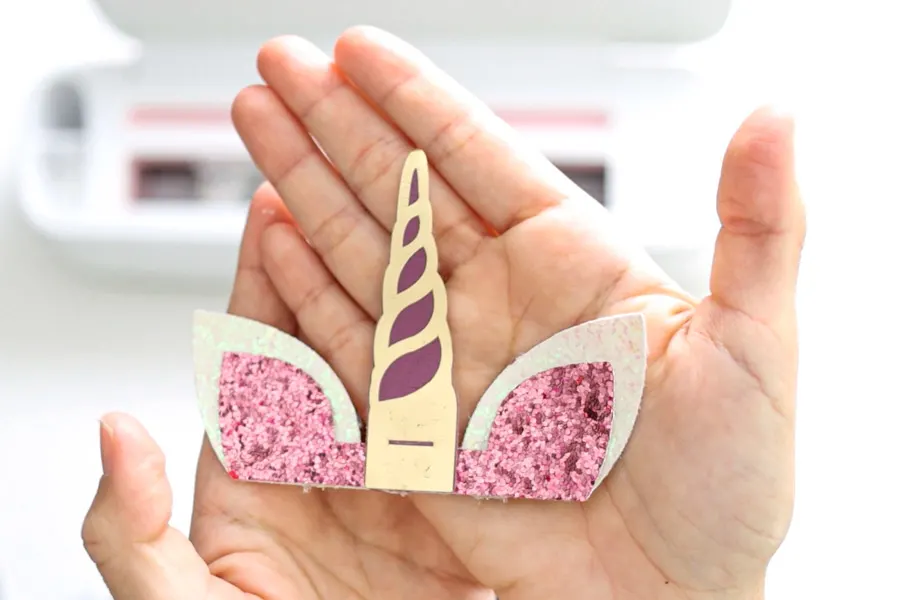
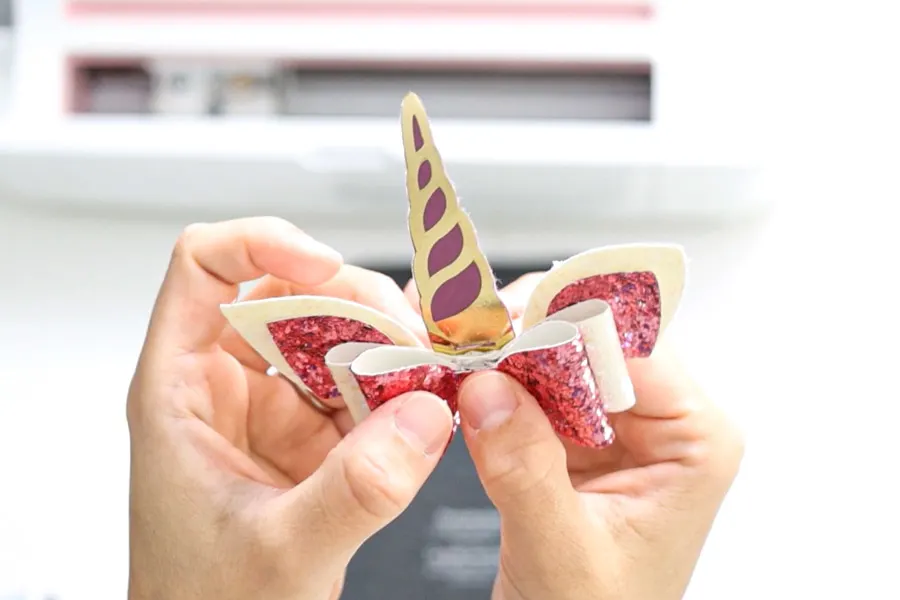
Here’s a little preview of how the bow should look like.
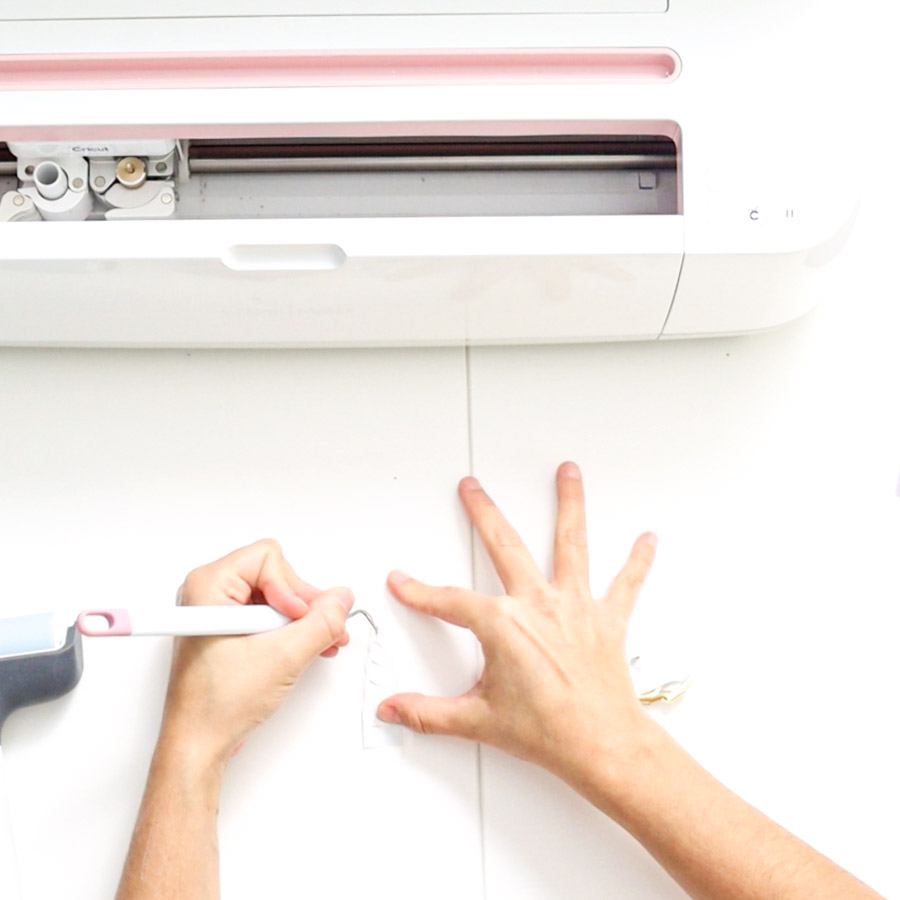
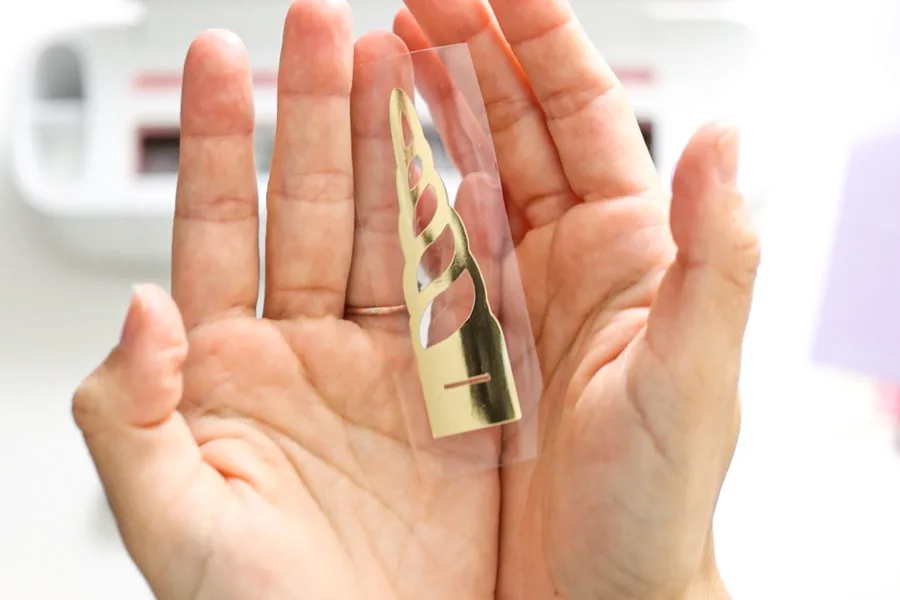
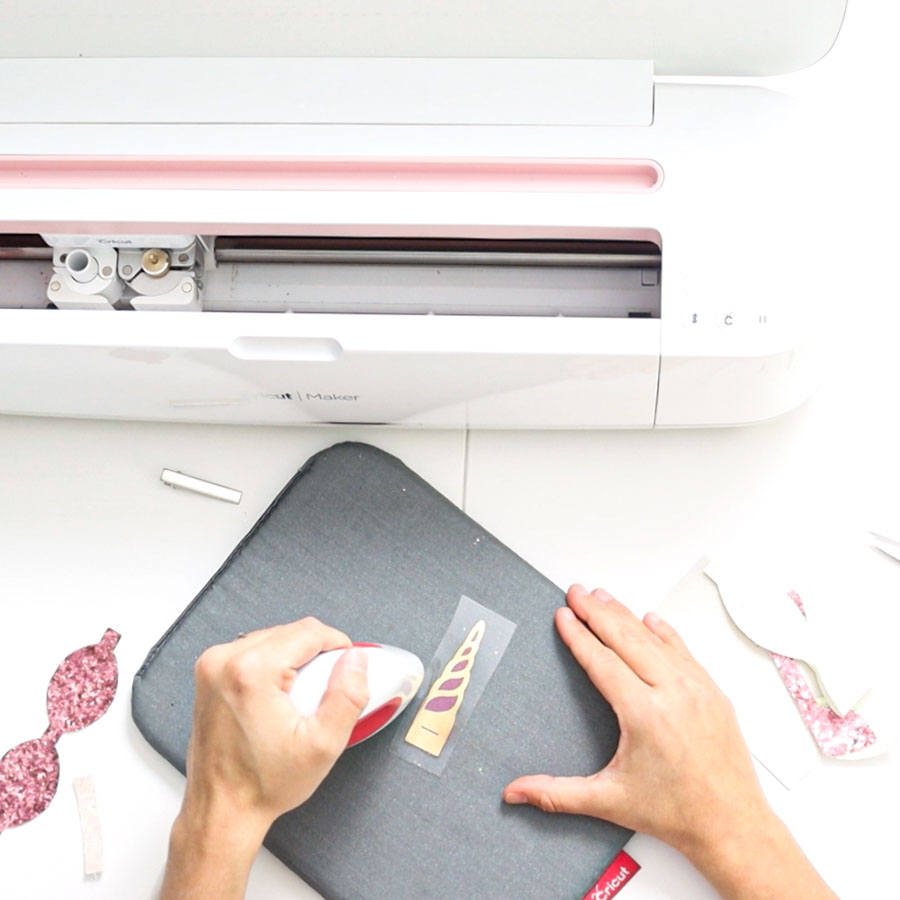
First, I transferred the foil iron-on to the horn. I used the Easypress Mini and followed Cricut’s heat guide.
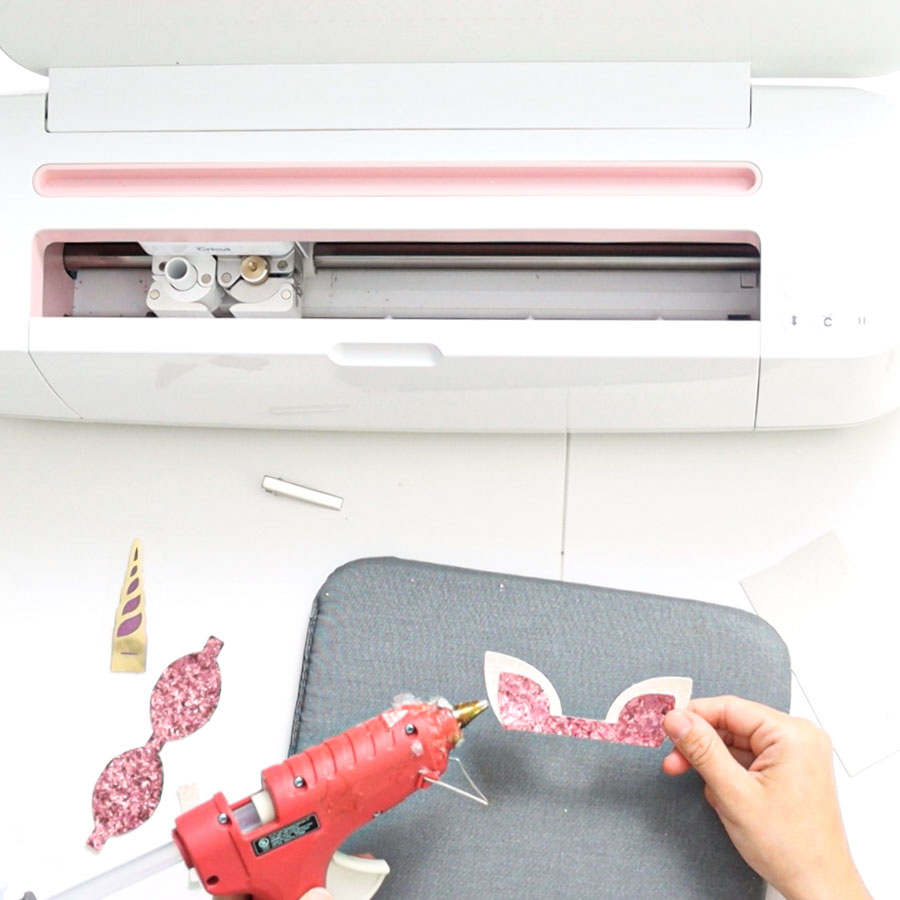
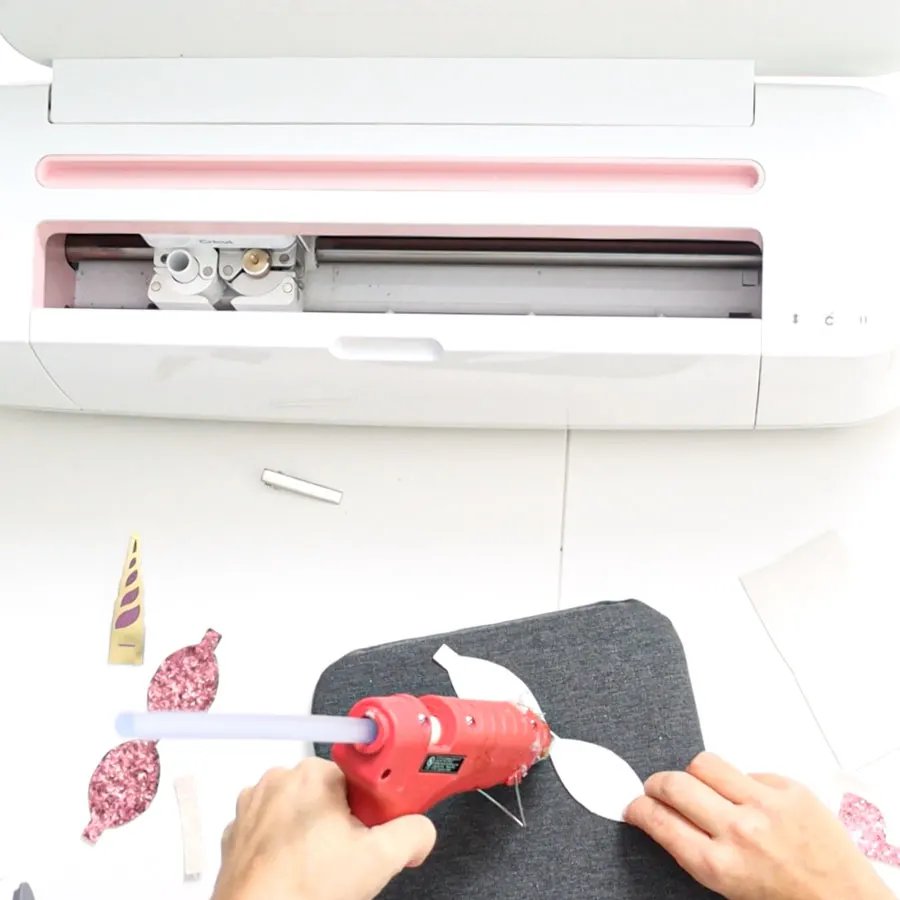
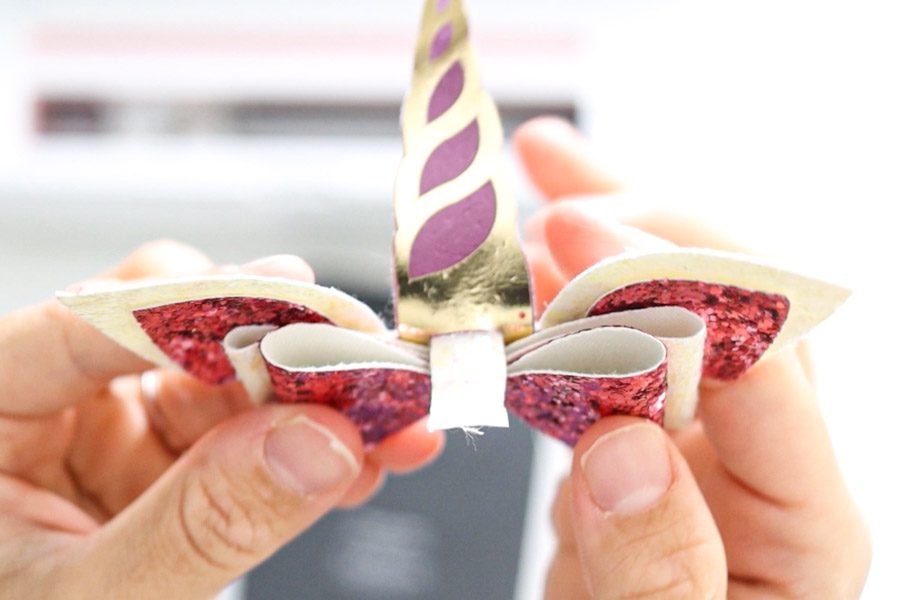
Secondly, I glued the inside ears with hot glue, then stuck the horn to the ears.
Necessary: Make sure the little cut on the horn is not glued.

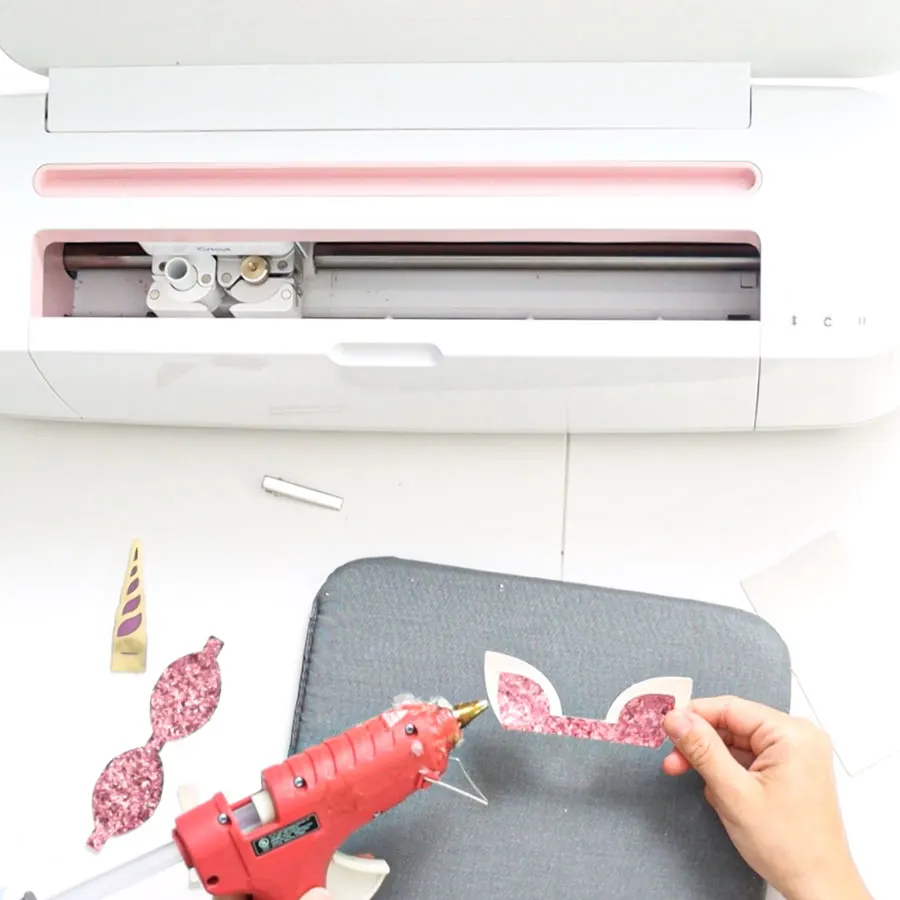
It’s time to glue the bows!
Flip them and add a little bit of hot glue in the middle of them, then carefully close the bow.
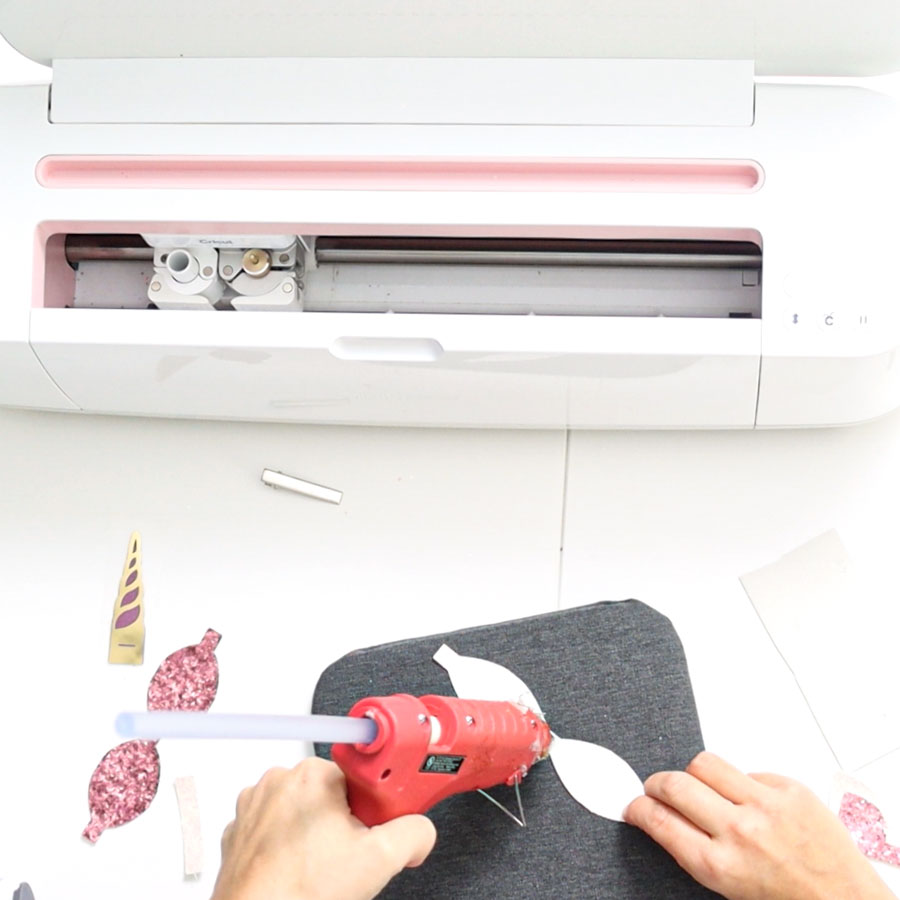
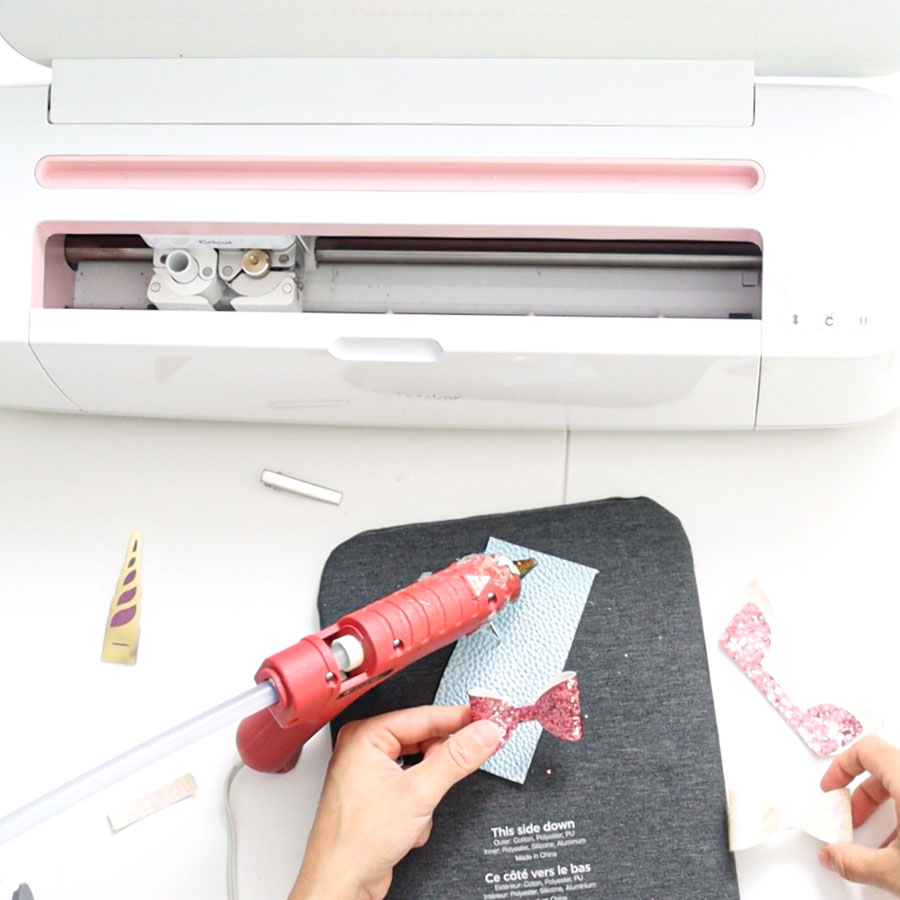
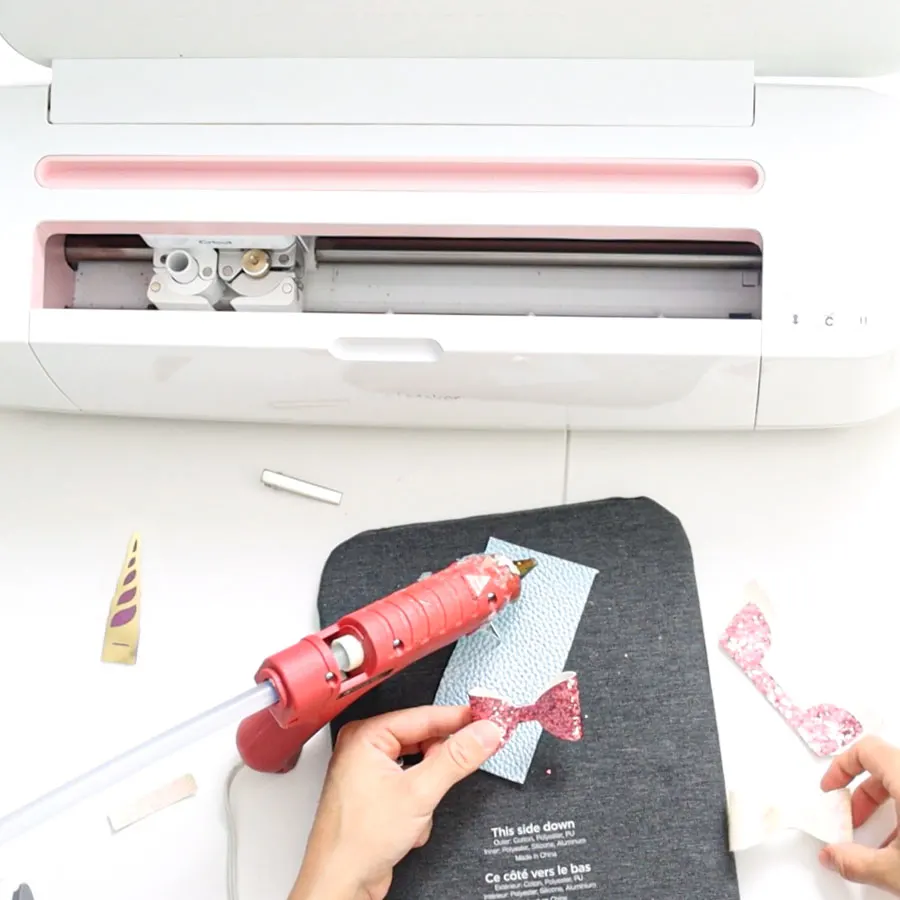

Now glue the long bow to the ears, and finally, glue the shorter bow. At all times, keep the small cut on the horn visible.
Insert the little rectangle through the horn cut and glue it on the back to close the bow.

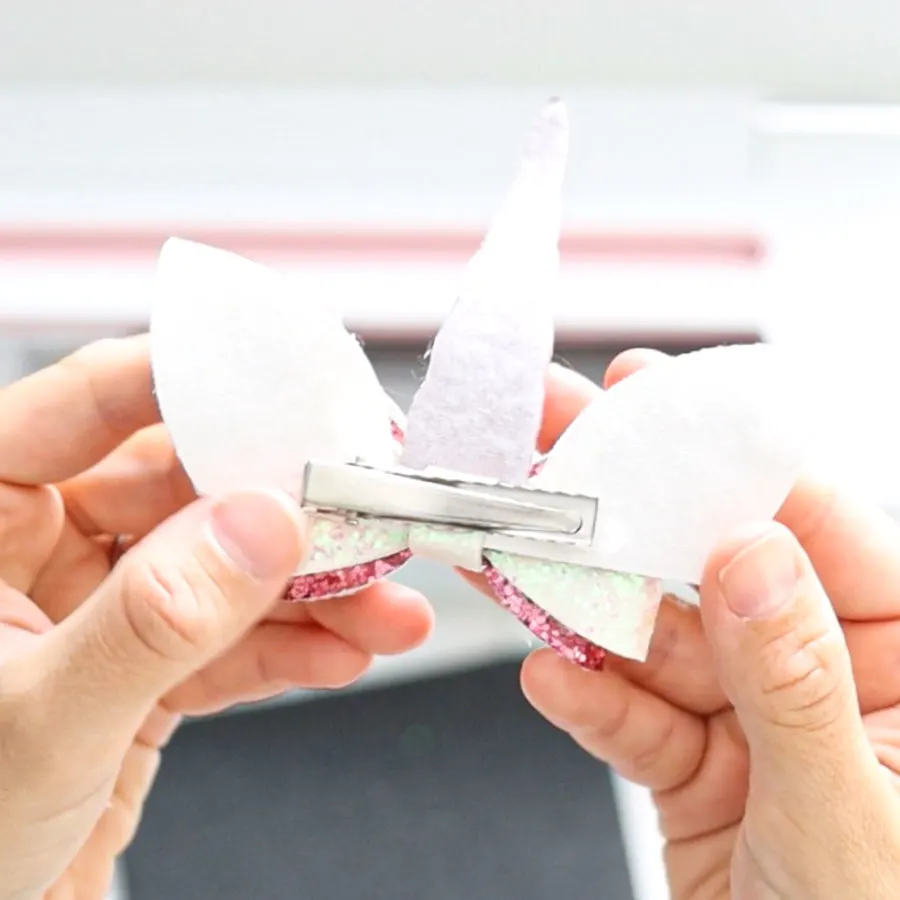
Finally, glue a hair clip to complete your bow.


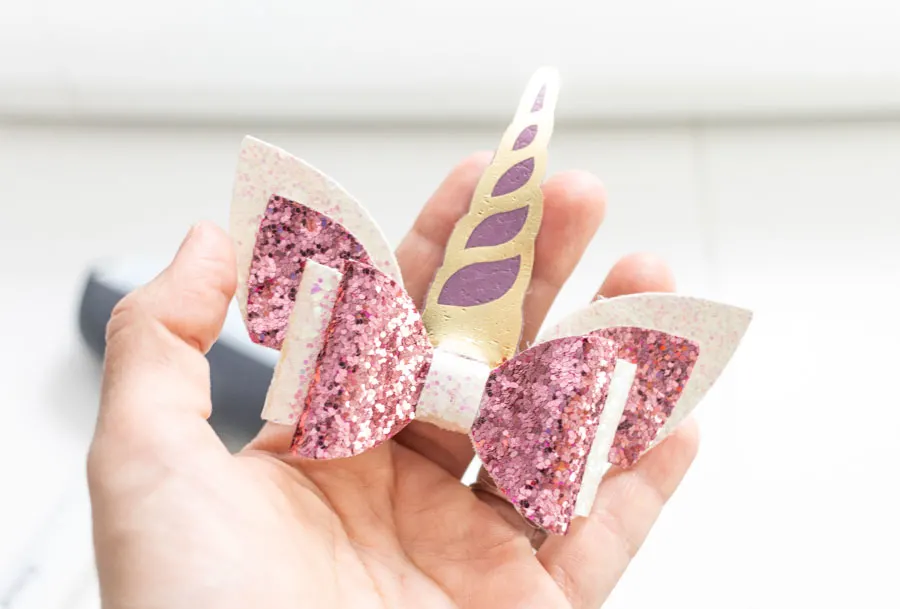
Doesn’t it look lovely?
Any girl would love to wear this cute little bow.
Try using different types of hairbands, snap hair clips, etc.!
There’s no limit to creativity.
Free Hair Bows SVG Templates
Here are 18 bows you can use for your personal use! My great assistant helped me with the designing process.
Isn’t she so creative?
There’s one for any occasion and season!
To download the file(s), you need to be on a desktop or laptop and click on the button to trigger a download file on your PC. However, I’ve noticed that I can also download them from my iPhone.
Depending on your browser settings, your PC sometimes asks where to save the file, although most files will be in your download folder.
If the image opens in a new window (this may happen because of your browser settings), right-click on it, select the option “Save Image As,” and choose where you want to save the file.
SVG files look like web page files when you download them.
Oh!
Just so you know, I also have a library full of free SVG files and Printables for all my subscribers, a.k.a. Daydreamers. You can see a preview right here or get access by filling out this form.

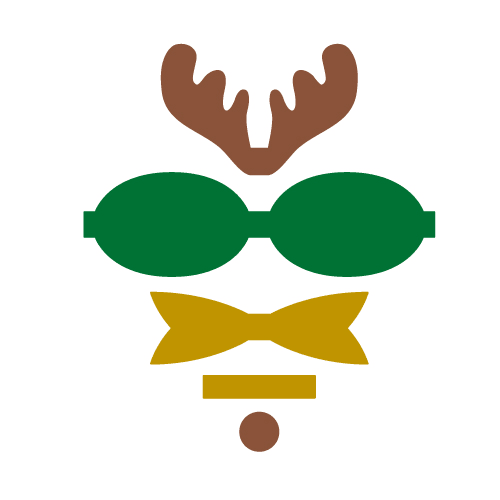


You can use the Reindeer one for Christmas.
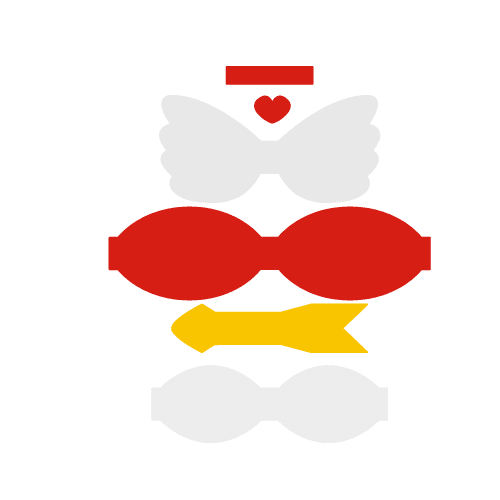
Important: Princess and winter bow have a square meant to represent a very thin fabric like tulle.
If you have a Maker machine, you can use the rotary blade, and if you have the Explore, you will need to use a heat-and-bond sheet and pink blade (or fine point blade dedicated to fabrics only).
Here’s a little graphic with the order of each bow in case you have any doubts about how to assemble them.

Which one is your favorite?
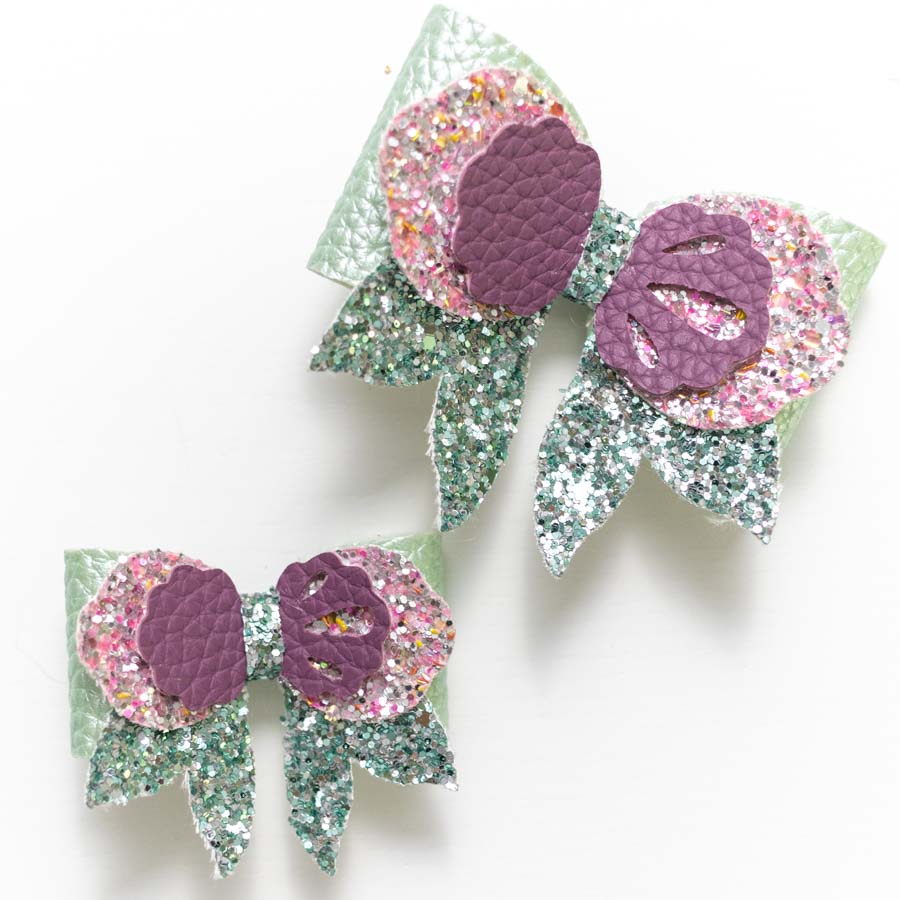
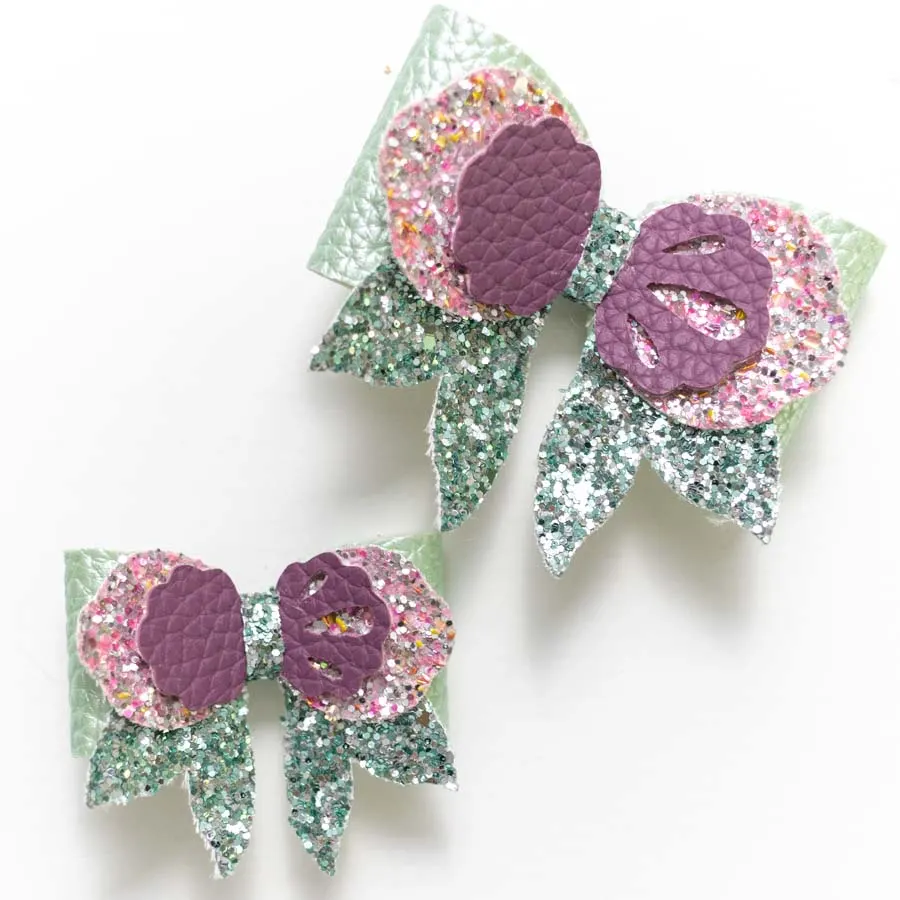
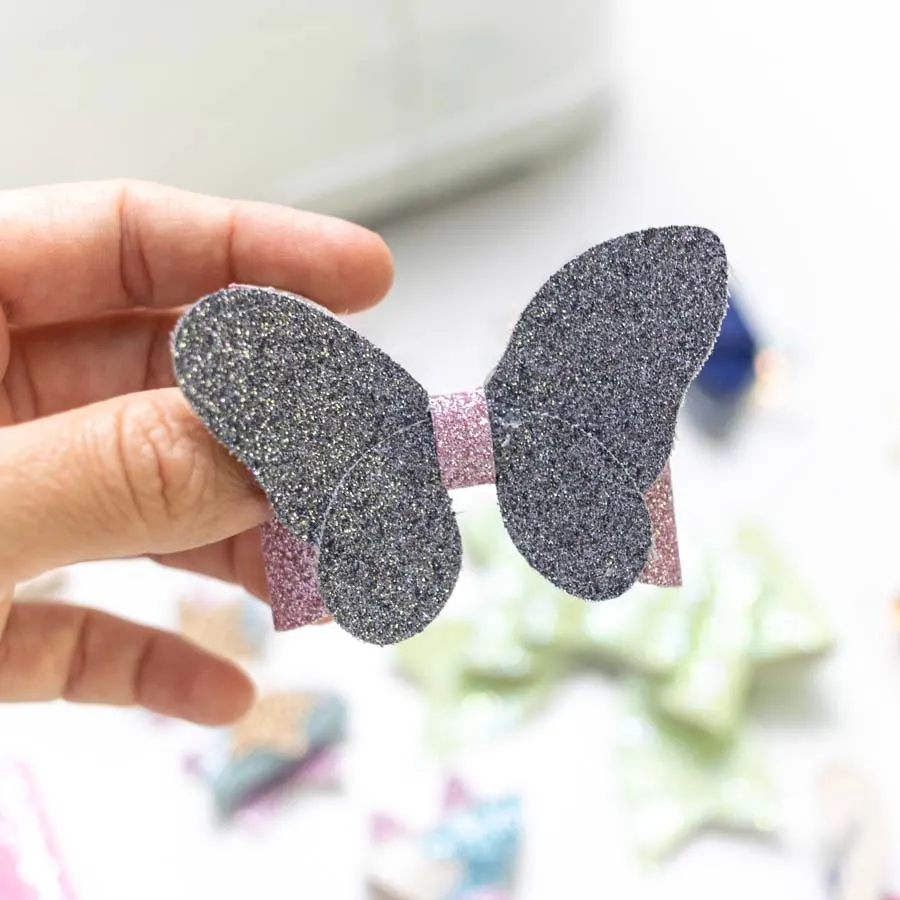
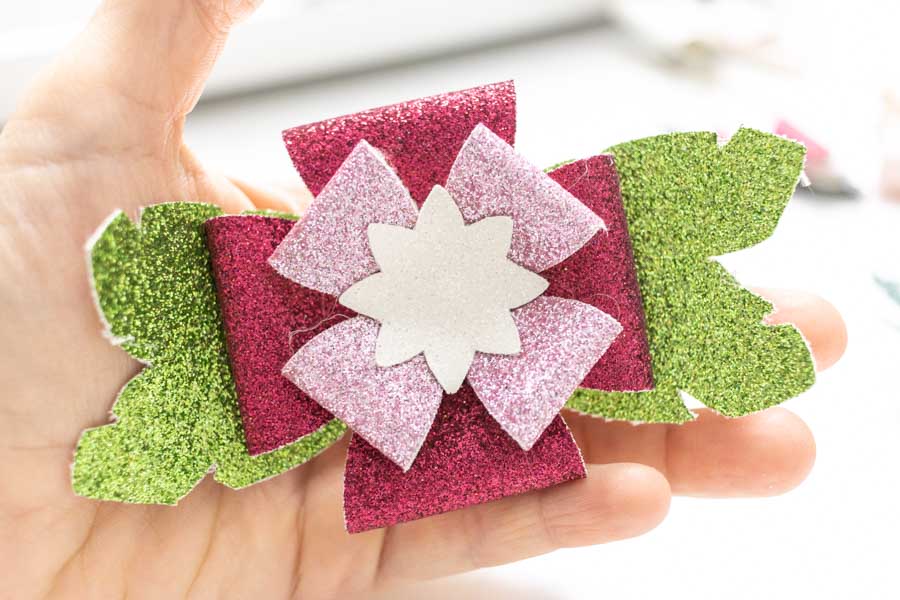
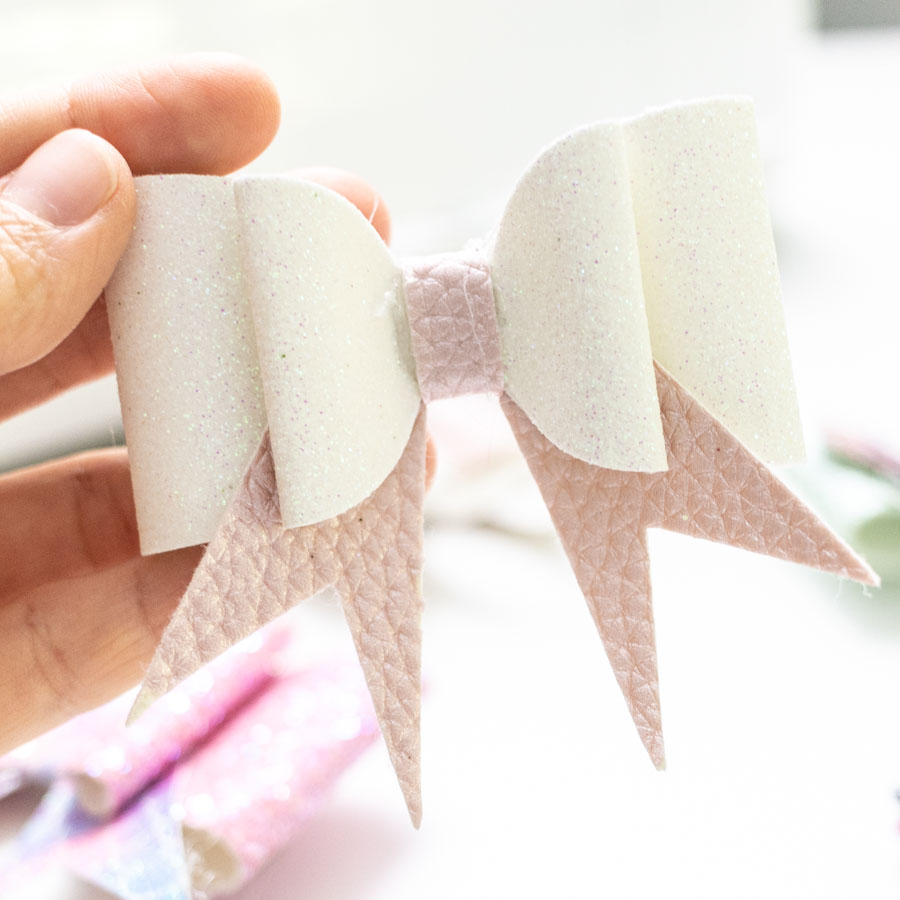
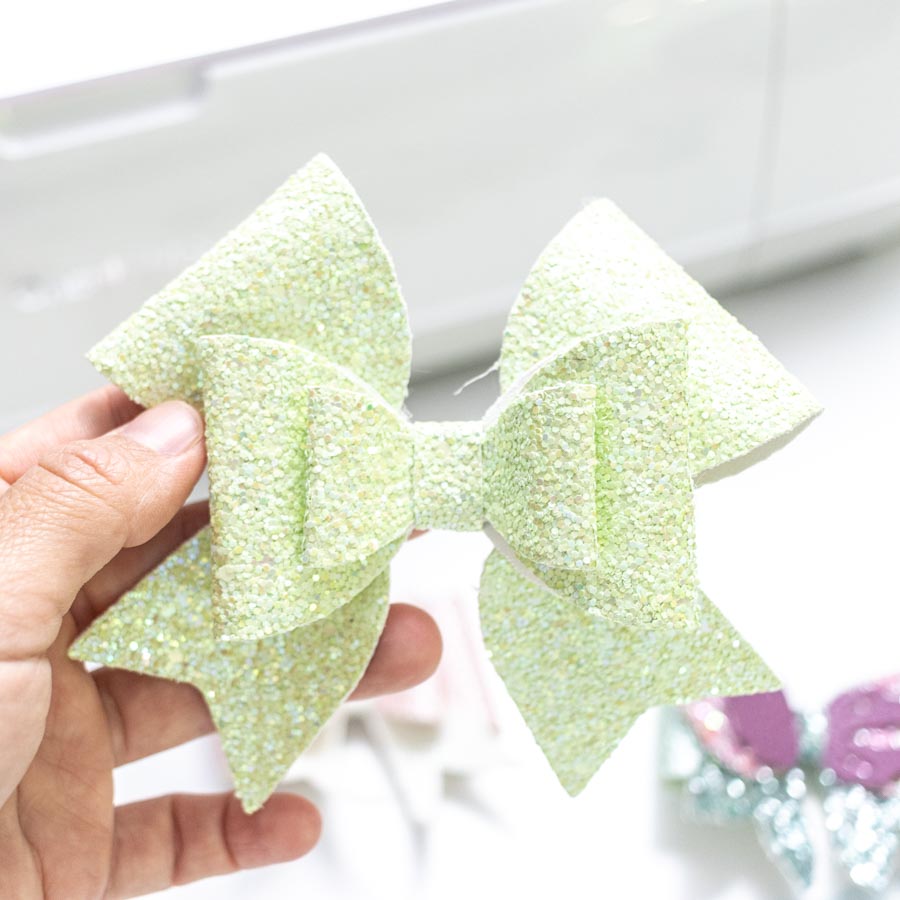
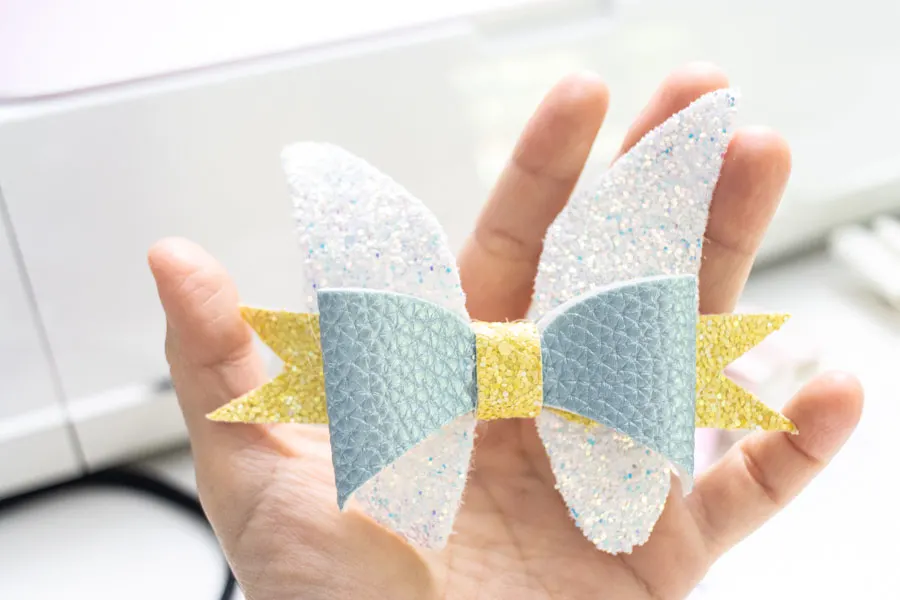
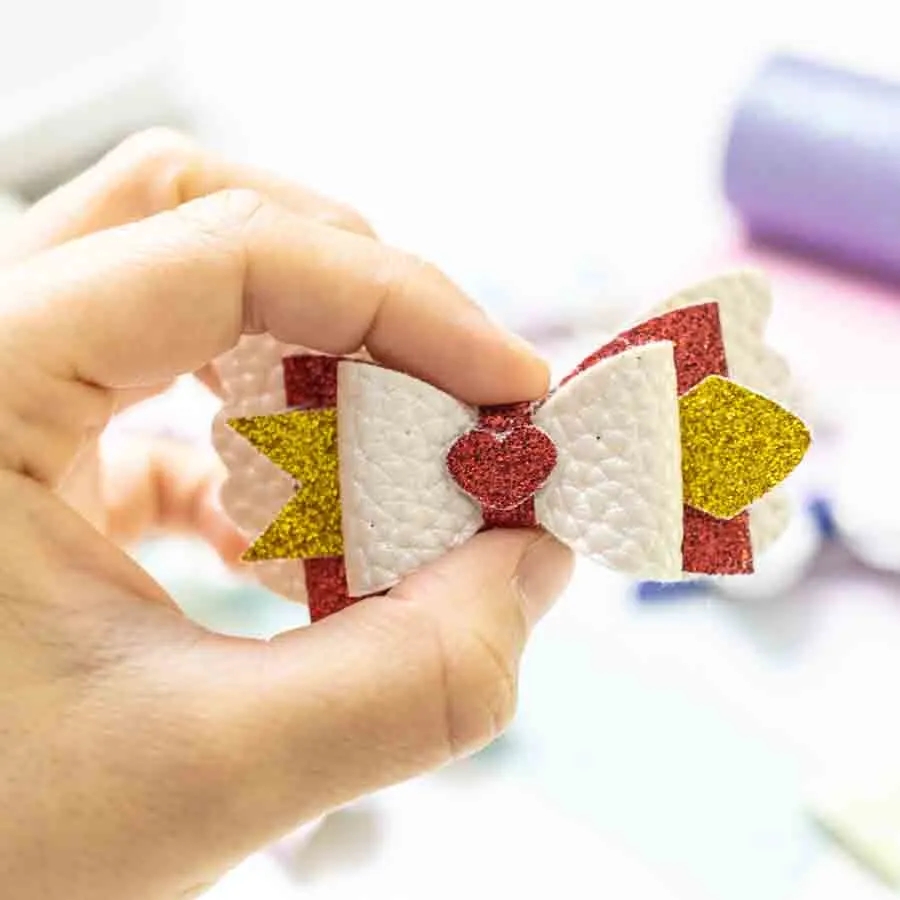
Look how some of these bows look once cut and assembled.


For the mermaid bow, I used super chunky glitter canvas. Can you see the texture in the photo? Those sheets have small pieces of colorful plastic or something thick I can’t quite tell.
Also, I would never use glitter canvas for the purple piece in the mermaid hair bow; the cut is very intricate.


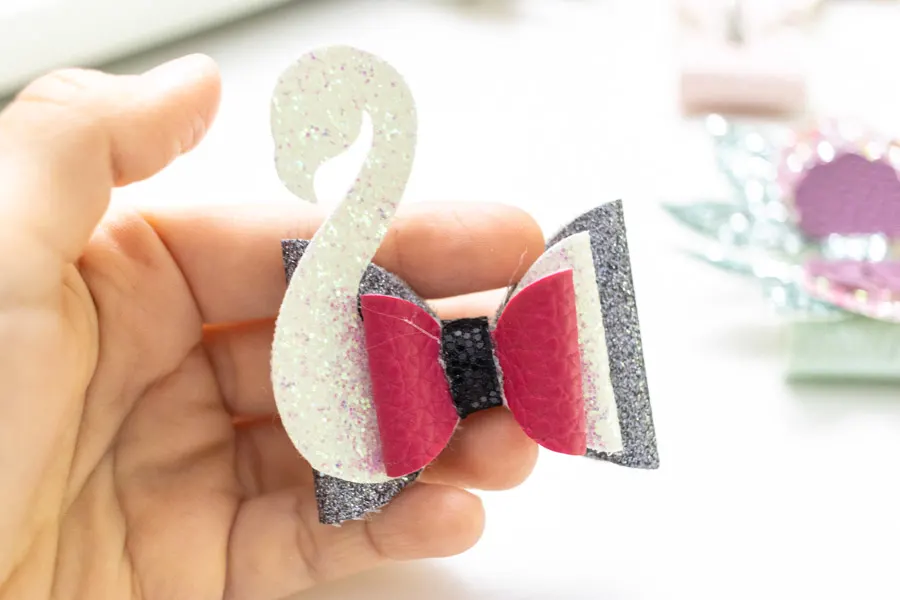
Swan Hair Bow 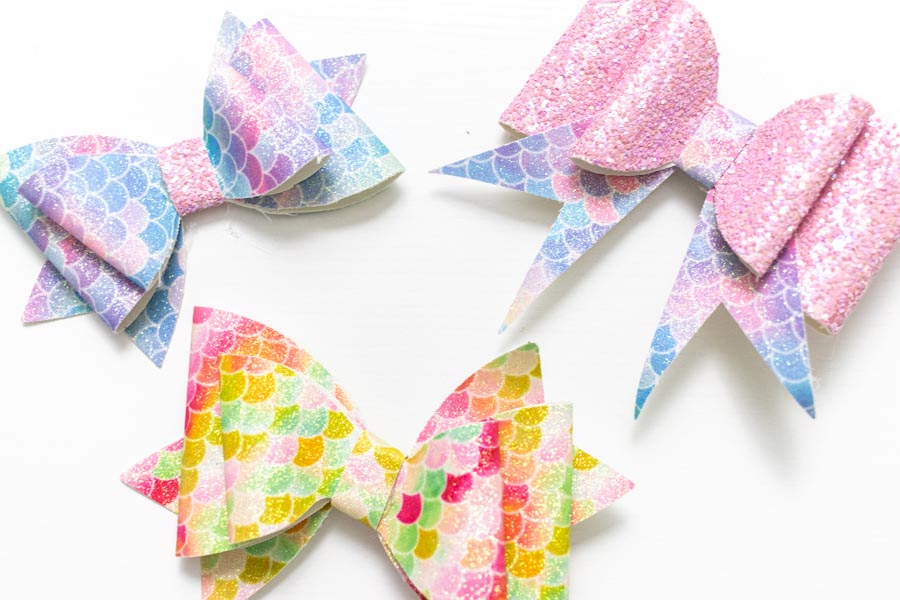

Using Mermaid Glitter Canvas
With mermaid scales glitter canvas, you can give any bow a magical mermaid touch.
Play with different textures and colors!


Fairy Hair Bow
If you look carefully at the winter and princess bow, you will see the tulle.
It’s so classy and different.

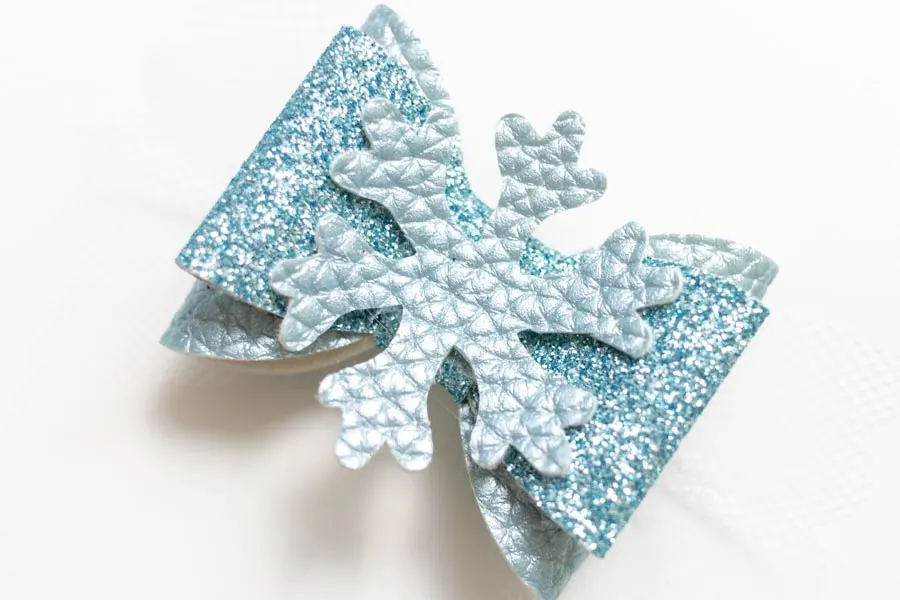
Winter Hair Bow 
Cupid Hair Bow 
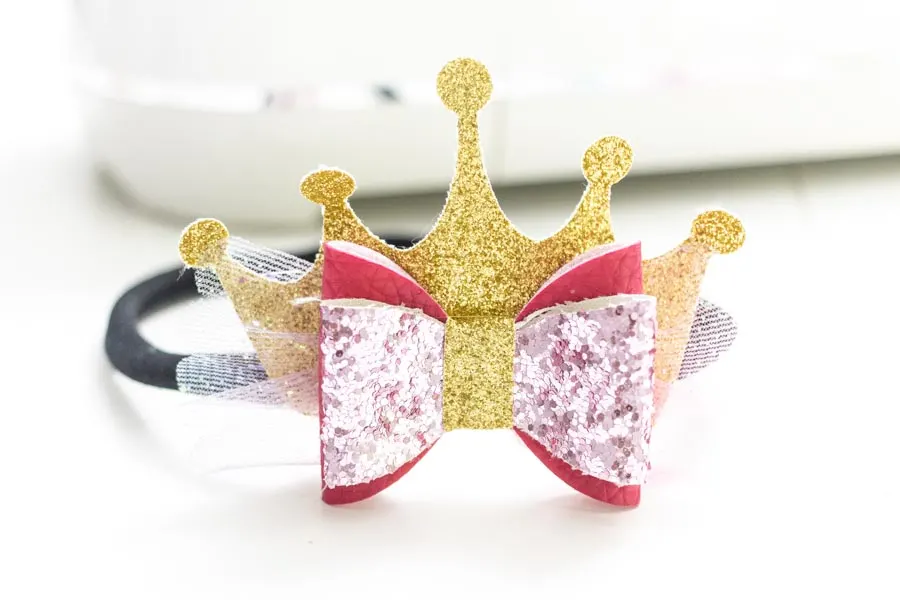
Princess Hairband
If you make any of these bows, make sure to tag me on Instagram. And I would also appreciate a follow!
Don’t forget to pin this tutorial.
I’ll see you in my next article.
Sandy
Monday 25th of March 2024
Thank you very much I can't wait to make these for my granddaughters they will love them
Kristy
Monday 27th of November 2023
Thank you so much! I can't wait to make these for my granddaughter!
Sandra
Tuesday 21st of November 2023
Thanks for the great designs!
Maria
Friday 25th of November 2022
Thank you…
Rachael
Tuesday 4th of October 2022
hi i hope your well. as a newbie im getting so confused with the measurements do you have size guides for them all please. i keep messing up and cutting things to short. thank you for your help this is a beautiful site.