
Hello Daydreamers!
I am ready for Christmas, and I hope you’re too because, in today’s tutorial, you will learn how to make the most impressive and gorgeous Christmas cards with your Cricut machine.
I will be providing you with 12 Free Christmas SVG Card Templates, so I got you covered, no matter your taste regarding cards.

This Christmas card tutorial will be based on one of the templates I designed for you to download. However, if you want to learn how to make a card from scratch in Design Space, check out my Card Making Tutorial with Cricut.

Since I don’t want you to get lost, here are the topics I will cover so you have an idea of what I will be teaching you today:
- Materials
- Cricut Design Space steps
- Cutting Process (I will give instructions for the Explore and Maker machines)
- Assemble Process
- Other ideas and Design Space tips for making Christmas cards with the SVG files in this article
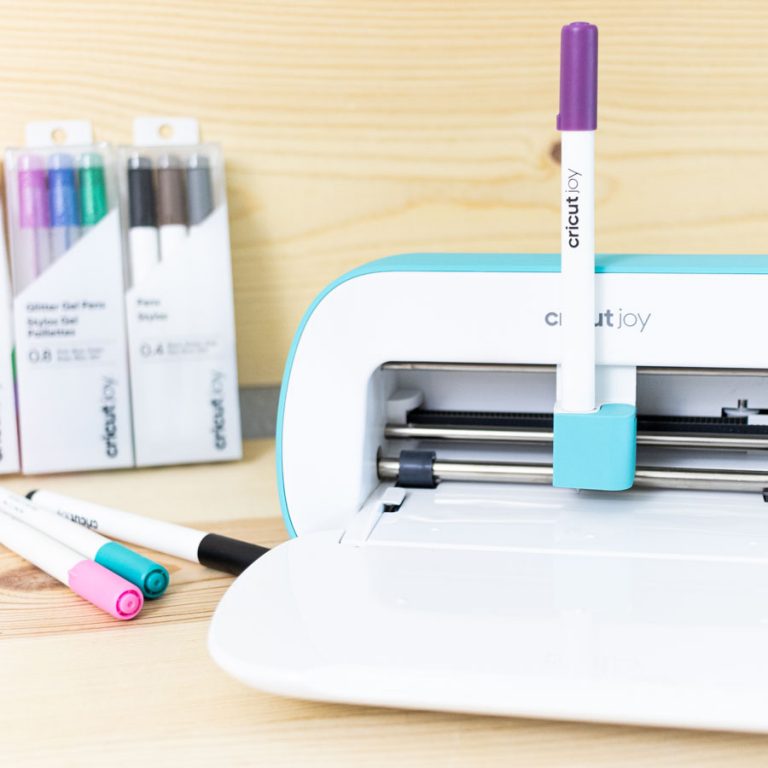
If you have a Cricut Joy, you can adapt some of the templates using the “Contour Tool” and following my Card Joy Tutorial and CardMat Tutorial.
This tutorial’s design, testing, editing, etc., took me over 50 hours of work or more, so I hope you enjoy it and make beautiful cards for your loved ones!
Are you ready?
Let’s Daydream Into Reality!
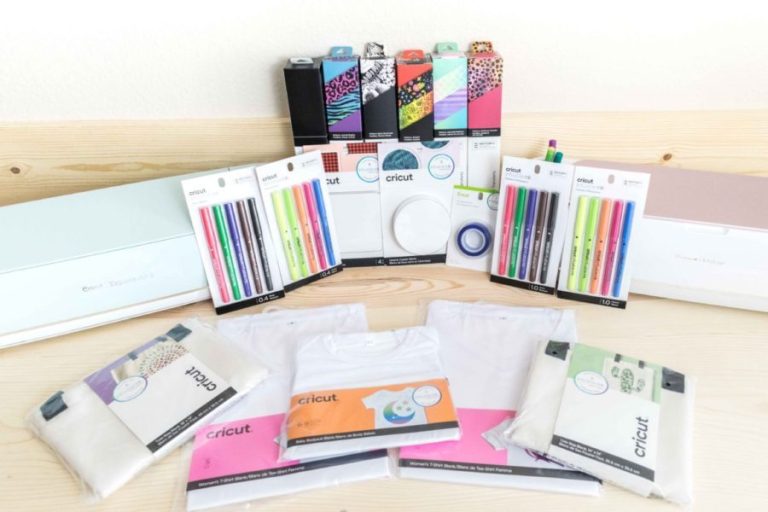
Materials & Tools for Christmas Cards
- Cricut Machine (Any of the Maker or Explore machines).
- Fine Point Blade
- Scoring Tool (Stylos or Explore and Maker, or Wheel for Maker only)
- Standard Grip Mat¹
- Cricut Pen²
- Brayer & Tweezers³
- Paper – 3 high contrast and Christmassy colors⁴
- High-quality glue⁵
- Dual adhesive foam dots⁶
- Practice File (You can download it at the end of this tutorial, along with the other SVG files) – No, you don’t need to subscribe!

1. Most Christmas cards included in this article have very intricate cuts. If your mat isn’t sticky enough and you decide to use thick or glitter cardstock, your materials may get ruined. I recommend you have a very clean mat.
2. Optional (for writing inside the card): I accidentally used a marker first, and the text wasn’t quite readable. I suggest using a fine-point pen instead. Also, if drawing on dark-colored paper, choose gold or silver gel pens.
Check out my pen tutorial if you don’t know a lot about Cricut Pens.
3. A brayer will help you stick your material to your mat. It’s optional but recommended if you’re working with glitter cardstock. Tweezers are helpful for assembling the card.
4. I used navy blue, white, and yellow cardstock. The quality and final look of your card will depend on the type of paper you choose. Just so you know, it takes me a while to pick the right colors. Therefore, take your time on this step!
Repeat after me. I will only use high-quality paper. Cheap paper will make cheap-looking projects. Michael’s has a great selection of beautiful papers, and they also go on sale, so make sure to keep an eye out for those good deals.
5. More important than high-quality paper is high-quality glue. Kids’ glue will make your paper wet and bubbly once it dries. I love using crafter’s tape for gluing larger pieces and a glue pen for gluing tiny little pieces.
6. Foam dots will add a 3D pop-up finish to your card, and after using them, I don’t think I could ever go back. They are optional but super recommended.
Card Overview
Please take a look at the card we will be making today. When making a new project with your Cricut, I recommend, sometimes, starting with the end in mind.
The white glitter cardstock is for the card itself, and the blue cardstock is for the inside of the card, where we will be writing. Finally, the yellow glitter cardstock is for the little ornaments.

If you look close enough, you’ll notice the 3D pop effect on some of the stars, the letters, and the card. As I said before, they are optional, but they make the card look ten times better.
Step 1. Edit Card in Cricut Design Space
Open Cricut Design Space and click on “New Project” to open the canvas area. Make sure to save your project because Cricut doesn’t have autosave.
Step 1a. Upload File
Download the practice file from your PC, then click on the “Upload” button on the left panel of the canvas. Then, go to “Upload Image,” follow the prompts, select the image from the “Recent Uploads” view, and click on “Add to Canvas.”

Step 1b. Organize Christmas Card
There are a couple of things we need to do before we continue with our project.
First, select the entire file from the canvas area and resize your card using the lower right corner of the selection or the top menu.
Since I wanted an exact measure, I changed the size from the top menu. I used the width as a reference (keep the proportions locked) because the “score lines” are a little bit larger than the card.
The “W” is 9 inches because I wanted my card to be 4.5 inches wide once folded. This card has very intricate cuts, and this is the smallest size I would recommend.

After resizing, ungroup (top of layers panel) the file and weld the yellow layers (stars, text, and ornaments) to have everything on a single layer.
Tip: Press shift on your PC at all times to select all layers.
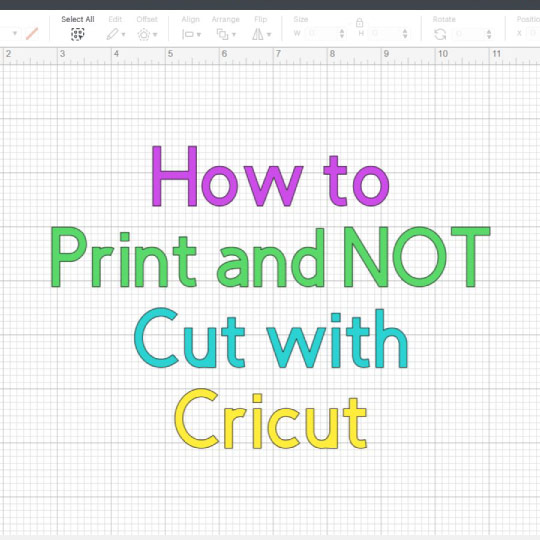
Important: When you first add the card, the line in the middle is set to “Cut.” It’s crucial to change the operation to “Score.” Otherwise, your Cricut will cut right through your card.
Don’t move the line as it is aligned to perfection.

We need to tell our Cricut where to score!
Select the card (white layer) and the score line and click on “Attach” at the bottom of the Layers panel.

Step 1c. Write inside the Christmas Card
If you have a Cricut, I’m almost 100% sure you’ll want to write inside your card!
Especially if you are making a Christmas card!
Click on the “Text” icon on the canvas’s left panel and type in the text you want to write. Initially, your text will look huge in proportion to your card, and the operation will be “Basic Cut.” After typing, resize the text to fit one of the navy blue rectangles.

Now, let’s have a little chat about the right fonts for writing on a card.
In Cricut Design Space, you have your system fonts and Cricut fonts. Your system fonts don’t have a writing effect; instead, if you choose to use your Cricut Pens, they will look outlined.
However, many Cricut fonts DO have the option for “Writing;” they were designed with that purpose in mind. So, if you want to write like the screenshot below, you must use Cricut Fonts.
Here’s the problem: They usually cost money. You can buy them individually, or they come with Cricut Access.
I have a helpful article that will help you find fonts to recreate “writing fonts” for Cricut.

I used the font “DTC Cottage Style” for this particular card, and I selected “Writing” for the style.
If you use a system font, make sure to change the operation from “Basic Cut” to “Draw – Pen.” Since I am using the glitter pen, I also changed the color box next to “Operation.”
I noticed there was a sad little space for this card, so I decided to add an image to make things even better.
This mini step is optional, and it will require you to pay or have “Cricut Access.” you can also use hearts or stars.
Click on images on the left panel of the canvas, then on “Filters,” click on “Operation Type” and select “Draw Only” to see images explicitly designed to be used with Cricut Pens.
I typed in “Christmas” on the search bar to filter even more and selected a cute little present (code M10DFC3A2). When you find the image you want, select it and click on “Add to Canvas.”

This is how the text and image look on the rectangle. I made a copy of the gift and rotated them both a little bit.
Note: Don’t forget to change the pen color. I used the same one, but you may also want to use multiple colors.

Again, we must tell our machine where to write!
Select text, rectangle, and images and click on “Attach.”
Step 1d. Sent Card to Cut “Make it.”
This is how the final card should look. There are two attachments: the score line with the card and the text with the images and inner rectangle.
To send your project to your machine, click on “Make it” in the upper-right corner of your window.

Step 2. Christmas Card Cutting Process
Newer machines will bring a “pop-up” asking how you want to load your materials to your device. Select “On Mat.”
If you have a machine with a “Smart Set Dial,” move it to “Custom” so you can follow along.

Older machines will bring you right to the following screenshot.
Step 2a. Turn Mirror On
Any time you make a card, it’s always a good idea to score on the inside. Therefore, to have an easier time folding, mirror the mat with the score line. Also, if you’re using a one-sided color or textured material, ensure you place it pretty side down on the mat.
Super Mega Important: I used glitter cardstock, and this particular brand was quite challenging to adhere to the mat (I usually don’t have any problem) pretty side down.
If you have no experience cutting glitter cardstock pretty side down, l recommend you break some rules, place glitter side up, and leave mirror off.

Click on continue to select materials.
Step 2b. Cut Card
I usually don’t mind the order Cricut brings up on the mat. However, this card has many details, and the assembly process would be challenging if I didn’t cut those details last.
I suggest you leave the text and the little ornaments for last as well.
Click on the white mat (card) and select the material you’ll use. I chose “Glitter Cardstock” and set the pressure to “More.”
If you have a Cricut Maker, the scoring wheel will be the default option; if you want to change it for the “scoring stylus,” click on “Edit tools” to select it.
When using the Wheel & Cricut Maker, you need to install it in clamp “B” and score first. Design Space will notify you to install the fine-point blade.
For this tutorial, I used the “wheel.”

How about some real pics?
Prepare the mat by placing the material facing down and use the brayer with a vengeance lol if using glitter cardstock. I had to use masking tape to secure the material to the mat.
This glitter cardstock was very thick. More like posterboard!
Important: Don’t place tape where the blade is supposed to go when cutting the card.


For the wheel, install it on clamp “B” and press the flashing go button to start the scoring process. When the Cricut stops scoring, install the fine-point blade and press the flashing button again.

If you are using the Scoring Stylus, go ahead and install it on clamp “A” and the fine-point blade on clamp “B.” Then, press the flashing go button.

When the cut is complete, unload the mat and bend it to release material.
Step 2c. Cut Inside of the Card and Write
If using a different material, don’t forget to make the respective changes in Design Space.
For the next mat, I will be using navy blue cardstock and a gold glitter pen. (I wish I had a silver one, but I couldn’t find it!).

Install pen in Clamp A, load mat, and start the writing and cutting process by pressing the flashing go button.


Step 2d. Cut Card Embellishments
Finally, the last mat!
I am using glitter cardstock (don’t forget to change your settings if using a different material).

These are very intricate cuts, so if you’re using very thick cardstock, make sure to use the brayer or your hands to stick your material to the mat.
Load the mat and press the flashing go button to start the cut.


Important: Bend the mat and leave behind the details for the card.
Step 3. Assemble Card
It’s time to put the card together!
Have all the pieces ready and the glue next to you. (Including the foam dots).

I always like to start with the inside of the card, and I used crafter’s tape.


After gluing the rectangles, I started gluing the little details for the front of the card.
The advantage of leaving those tiny pieces on the mat is that you can see where everything goes as you assemble the card.
The ornaments and some of the stars were tiny, and I couldn’t use the foam dots, so I used the glue pen and the tweezers to place them on the card.
Whenever I had a chance, I used the foam dots!


Here’s the final look!
Isn’t it amazing?
The pen picture doesn’t show as good as it looks. Believe or not, taking professional pics on these type of projects is a little bit hard.


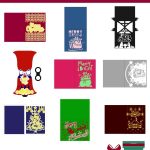
12 Free Christmas SVG Card Templates
As I promised here are the SVG files to make Christmas Cards!
To download the file(s), you need to be on a desktop or laptop and click on the button to trigger a download file on your PC. However, I’ve noticed that I can also download them from my iPhone.
Depending on your browser settings, your PC sometimes asks where to save the file, although most files will be in your download folder.
If the image opens in a new window (this may happen because of your browser settings), right-click on it, select the option “Save Image As,” and choose where you want to save the file.
SVG files look like web page files when you download them.


Oh!
Just so you know, I also have a library full of free SVG files and Printables for all my subscribers, a.k.a. Daydreamers. You can see a preview right here or get access by filling out this form.
Cricut Christmas Card Ideas
All the cards you are about to see here are in the “download section” right above. You don’t need to go chasing other pages, hoping you’ll find a file.
I put so much love and thought into all of these Christmas cards. I designed some of them myself. I did have help from my super-talented cousin Andrea, and she’ll be helping me get more files from now on.
Most of the cards can be made by following the same tips and instructions I gave in the step-by-step tutorial right above.
However, some cards will need a little explanation for some of the score lines or other details.
If you’ve never made cards with your Cricut, please, please don’t skip the tutorial; you may ruin your materials.
Ready to get inspired?
1. Manger/Nativity Pop-Up Card
The main reason I celebrate Christmas is Jesus!
This nativity pop-up card will amaze everyone. This card one was the clear winner for pretty much everyone.


I used the foam dots on baby Jesus and the text.
In Cricut Design Space, there are a couple of things to keep in mind.
After uploading and resizing, change all the horizontal lines to “Score” and leave the vertical lines as “Basic Cut.” Don’t forget to attach them to the manger card.

2. Christmas Gift Card
This adorable card in the shape of a gift is adorable.
You can place a gift card with double-sided tape or write a meaningful small message inside. The “A Blessed Merry Christmas Gift” phrase is very intricate. Make sure to have a very sticky mat for it.


Make sure to glue the bow in a way that doesn’t interfere with the card’s opening.
After uploading, resizing, and regrouping, change all the horizontal lines to “Score,” don’t forget to attach them to the green layer.

3. Christmas Bell Card
This card is one of my favorites! It’s just super beautiful!
Don’t you think?
I love the combination of colors, and it’s so unique that everyone will love it!
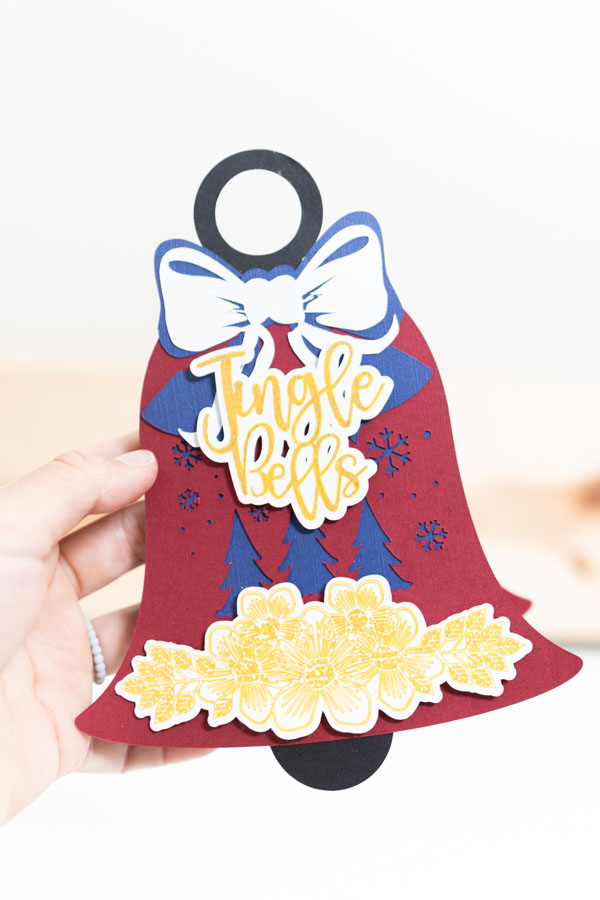


I colored the “Jingle Bells” with the Cricut Pen I used because I dislike the “bubble effect.”
There are a couple of things to do in Design Space for this card.
- Upload, resize, and ungroup
- Change horizontal lines to “Score”
- Attach score line to bell handle
- Attach score lines to bell
- Change the operation of the flowers and Jingle bells from “Basic Cut” to “Pen” and attach.

4. Santa Hat Christmas Card
How about this super cute Santa hat card?
It has so many details! Don’t you think?


There are three different attachments you have to do!
After uploading, resizing, and regrouping, change all the vertical lines to “Score.” Attach one of the lines to the black layer, the other line to the red layer, and the last line to the yellow layer.

Easy Peasy!
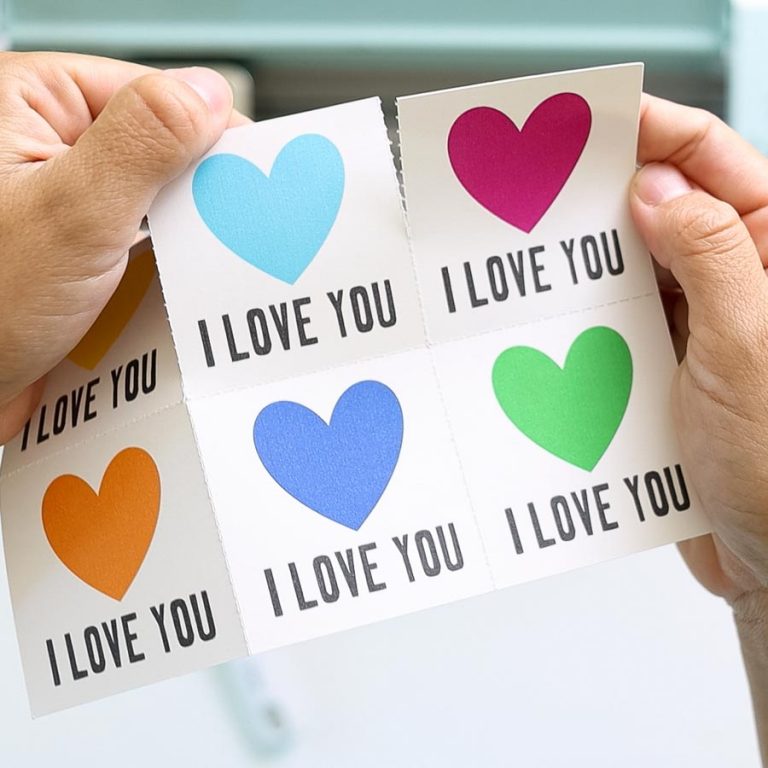
5. Easy Christmas Cards
If you’re in a hurry, these are the most accessible cards you can make!
I tested the “Merry & Bright” with a width of 9 inches (4.5 when folded) and the square card I tried at 4.5 inches in width.


6. Merry Christmas Card with “Christmas Lights”
How about this super cute Christmas card?
This card, in particular, has very intricate cuts. I used glitter cardstock and a lightly used green mat. Gluing the little Christmas lights was a little tricky.
Be patient and use a glue pen.


Tip: You don’t have to glue all the little lights, just the edges and areas where it makes sense. Lifting some of the little lights gently adds a “pop” effect to the card.
7. Merry Christmas Card with Santa and Reindeer
This card melts me!
It’s one of my favorites. I love all the little gifts around Santa’s sleigh and the reindeer.


Plus, do you see that beautiful 3D effect when using the double-adhesive foam dots?
8. Tis the Season Christmas Card
Christmas is also a great time to be all cozied up at home with yummy food.
This card reflects that sentiment 100% percent.


I love the combinations of colors as well.
9. Merry Christmas Card with Candle
Want a majestic Christmas card?
This card is so elegant and beautiful. I love the floral details that leave the edges of the card—it’s unique!
Again, there are very intricate details, so make sure to have a clean, sticky mat and a sharp blade.


10. Let it Snow Christmas Card
Last but not least, check out this “Let it Snow” card!
So simple but elegant at the same time. The decoration of this card is only on the front.
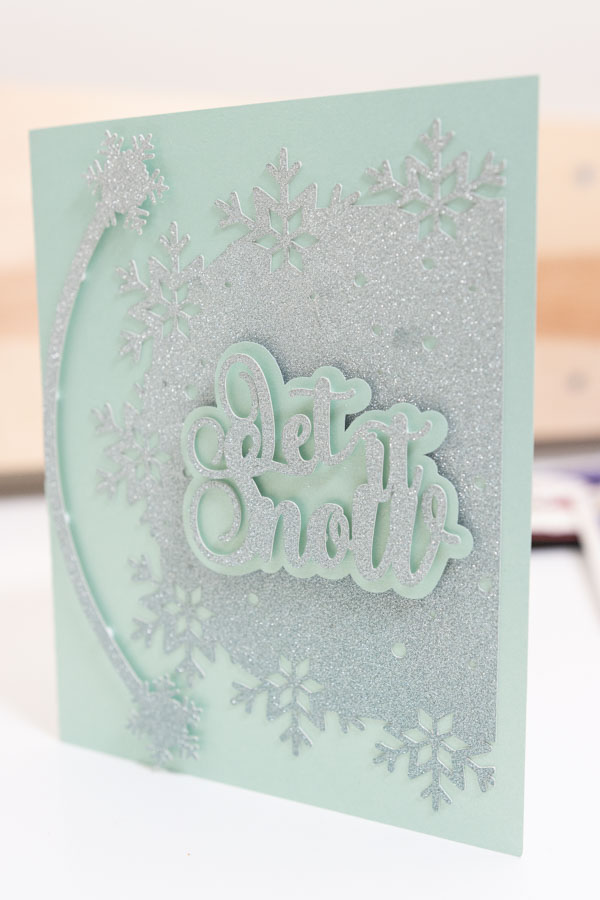

I certainly love it!
Which one is your favorite one?
Let me know in the comments down below!


I’d love to make several of these, but wondering about this ‘Download to use extension (Free)’ button. I don’t want to load up my new laptop with a bunch of things I won’t ever need again. Is this necessary?
You just need to save the file to your laptop there’s no need to install anything new.
Your page is wonky.
Fixed! 🙂
I’m still finding the page isn’t loading properly.
It’s Carolyn again. All is good! I just had to enable cookies. Thank you for your beautiful designs!
I cannot find where to download these templates
There’s a download section.
I have 2 favorites. The nativity and the present gift card. How do I get to them?
Click on the download buttons on the files section of this article.
cant wait to make these
Thank you so very much for sharing.
Thank you so much for sharing
These are terrific.
Can someone help me do the contour on card in Cricut Joy. I dont’ see the contour button highligted.
You need to select the card on the canvas.
Thank you so much for sharing ❤️????
Thank you soooo much!
Your cards are stunning! I try to do as much as as I can for Christmas during the summer months so I am excited to get started making things for my family. I do have one question, do you allow crafters to sell the cards made from your designs? Some designers allow crafters to sell the finished product but not the actual SVG files created. I hope I am not offending by asking. Thank you.
Not really, I am working on a commercial license for my designs. But cut as much as you want for friends and family!
Thank you for y our beautiful designs and informative tutorials.
Hi, thank you for sharing these amazing Christmas cards. I am new to cricut and trying to make the Merry Christmas card (green, red and white). There is a basic cut showing up but I can’t figure out what it is supposed to be on. My design studio is putting it on a separate mat and not showing what paper it goes to. Thank you so much for your help!
Maybe is the cut line that needs to be changed to “Score.” And then attach.
Thank you for these. I made the pop up Manger card and added a gold glitter star. They are lovely!!
Where do i go to download these?
They are on the article, just click download.
Thank you so much for your very detailed tutorial. I cannot wait to try these!
Can you provide the steps on how to make the Merry Christmas Card with Santa and Reindeer?
It’s about the same ones I followed on this tutorial.
Cannot wait to try these!
Thank you for the files, your instructions and all the work you put into these. I am fairly new at cricut. I picked and made two of these so far. Want to make a couple more. Blessings to you.
These are BEAUTIFUL. I saved 3 to make and started your Santa Hat tonight. What am I doing wrong that I cannot get Happy Holiday to not be a cut torn up mess. Used blue mat, intricate cut setting.
Use a a green mat and brayer to stick material to the mat.
Make sure your card isn’t too small either!
You can also increase the size of the “happy holiday” a little bit more!
@Catalina,
Thank you. I’ll try that too. Is there a size card that’s would allow make these intricate cuts work best?
How did you get the “Happy Holidays” from the Santa Hat card to cut so nicely?! I’ve tried so many different ways (even with new blades) and it still gets shredded to pieces!
Very sticky mat! You can also increase the size, don’t make a very small card either!
Thank you so much! I’m new to Cricut and glad to find your website and tutorials. They are fantastic! Blessings to you!
Thank You for all the help you give us. Job well done. Your help is greatly appreciated
First of all, I’d like to thank you for sharing the Xmas card
templates. Next I want to compliment you on your posting that you are a follower of Jesus. Not enough of mankind is capable of admitting that. Cudos to you.
You’re very welcome! God bless you!
Oh wow, too many to chose a favorite from! So awesome you shared all these amazing cards. I downloaded, resized, and saved them. Will be going into Christmas card making right after Thanksgiving. Cannot wait to make several of these: santa hat, nativity, gift, tis the season, and more! Do you have a simple envelope that would work for resizing all these cards to 9 inches as you suggested? Your tutorial for that first card was so instructive and all the notes for the subsequent cards was very helpful. Thank you so much. Lots of work went into this project!
You’re very welcome 🙂
Love your cards!
Thank you so much for these wonderful cards and tutorials. So much work you
have done for us! Greatly appreciated!!
Your card designs are beautiful, i would love to be able to make them.