Hello Daydreamers!
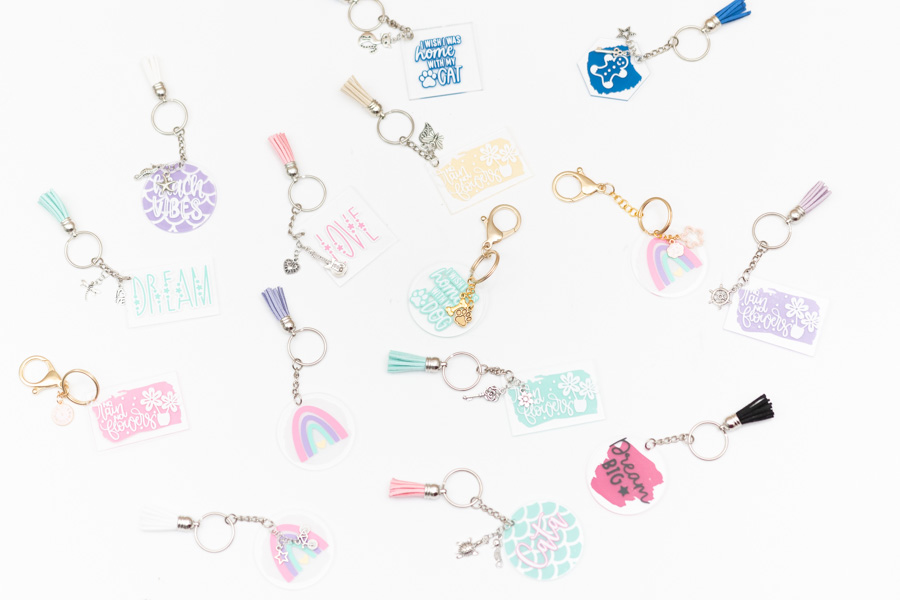
Today’s tutorial will teach you how to personalize acrylic keychains with your Cricut machine using adhesive vinyl. Since keychains are tiny and we are using vinyl, this project is compatible with all machines (insert happy dance).
This post is full of golden tips that will empower you to make keychains for any occasion. Also, at the end of the step-by-step tutorial, I have 12 free SVG files for you to make keychains until your heart is content.
Tip: This tutorial builds upon the skills I teach in every step. If you’re just starting with your machine, I suggest you read and follow each step.
Before we go into the nitty-gritty, and, since I don’t want you to get lost, I wanted to mention the topics I will be covering:
- Tools and materials
- Steps to personalize a keychain. Design, cut, and assembly
- Layer adhesive vinyl for keychain
- Free SVG files
- More cool ideas for keychains
Are you ready?
Let’s Daydream Into Reality!
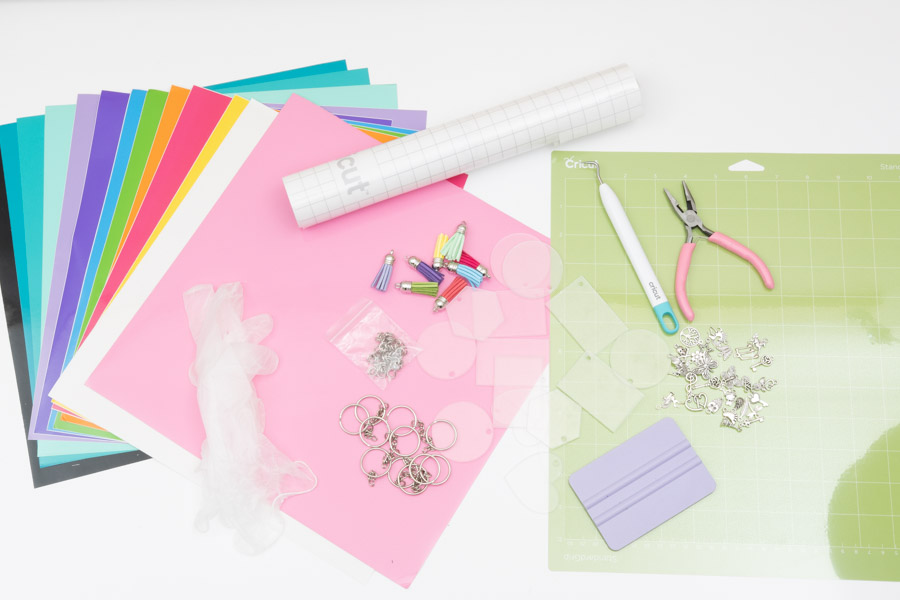
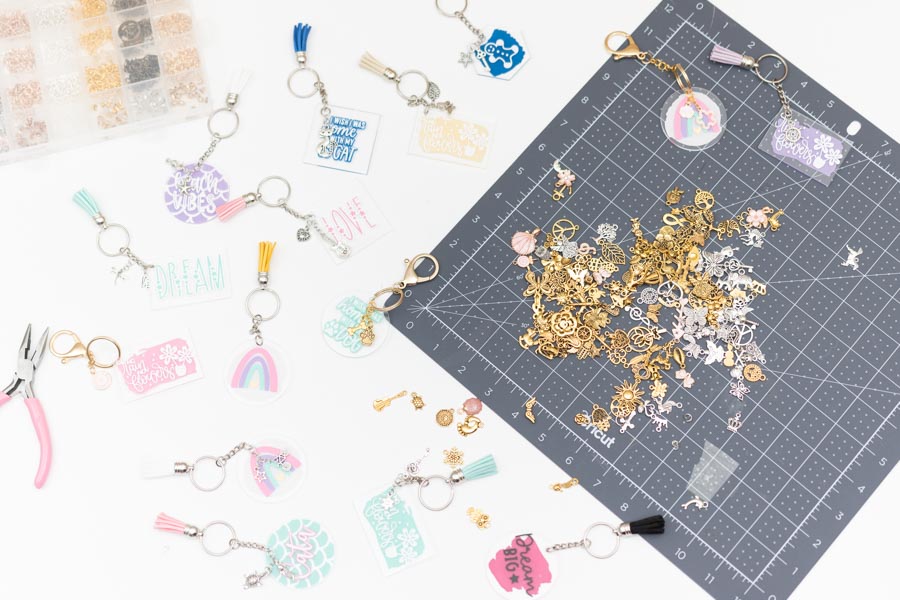
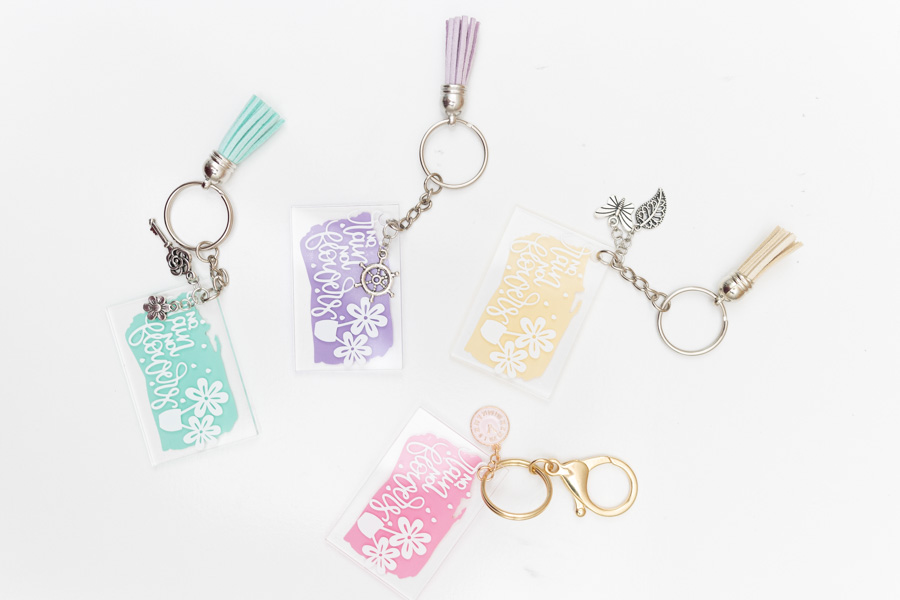
Tools & Materials
- Cricut machine
- Fine point blade
- Blue or green mat
- Weeder
- Squeegee¹
- Permanent adhesive vinyl²
- Transfer tape
- Acrylic keychain blanks³
- Pliers
- Jewelry charms & jump rings (optional)⁴
- Gloves (optional)⁵
- True control knife
1. I don’t recommend Cricut’s squeegee for this project because the vinyl wasn’t 100% smooth and since you are working with transparent blanks you need perfection.
I recommend a squeegee with a felt edge; it makes things pretty much perfect and smooth.
2. I recommend using permanent adhesive vinyl because it stays on the surface for much longer when applied correctly. I used Oracal 651. I bought a pack with tons of beautiful colors, and it was perfect for this project. It seems expensive, but it comes with so many sheets that it was worth it for me. You can also try Cricut’s permanent vinyl.
Important: You also want to use vinyl where the color is the same on the front and the back because we will be placing elements on both sides of the blank.
3. There are tons of acrylic blanks for keychains you can buy on Amazon. Avoid hearts or shapes that can’t be recreated easily in Design Space.
Also, if you like the tassels, the ones that came in the kit I bought felt relatively cheap, so you may want to search for metal tassels or something that feels extra sturdy.
4. Jewelry charms and jump rings (to connect the charm to the keychain) will make your project look lovely. You can get a gigantic pack of charms for less than 10 dollars.
5. Most acrylic keychains come in a plastic wrap that protects them from getting dirty and scratched. The number one enemy of these blanks is your fingerprints. For the first two keychains, and while you get used to this new blank, it may be a good idea to put on some gloves to add some extra protection, so you don’t apply vinyl right over your fingerprints.
I used it for only two keychains because it’s annoying, but after building up my confidence that I wasn’t going to touch the keychain in the center before applying vinyl, I was ready to take them off.
Step 1 – Measure Keychain
Before you move to Design Space, go ahead and measure your blank.
Also, keep track of the little hole where the keychain ring goes is at all times, so you plan your design around it.
The main idea is to keep significant design pieces off of the hole, but don’t stress too much either; I will show you what to do if you apply vinyl on it.
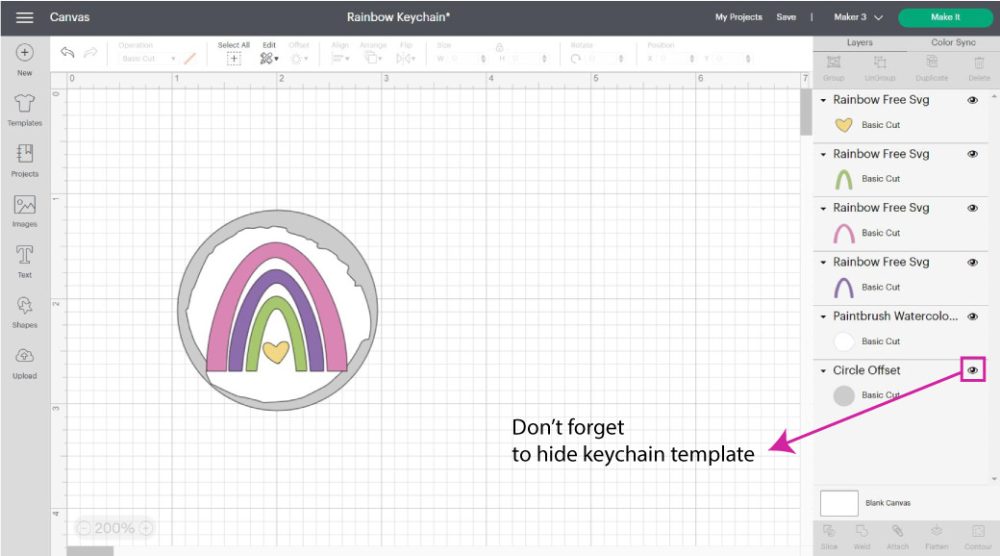
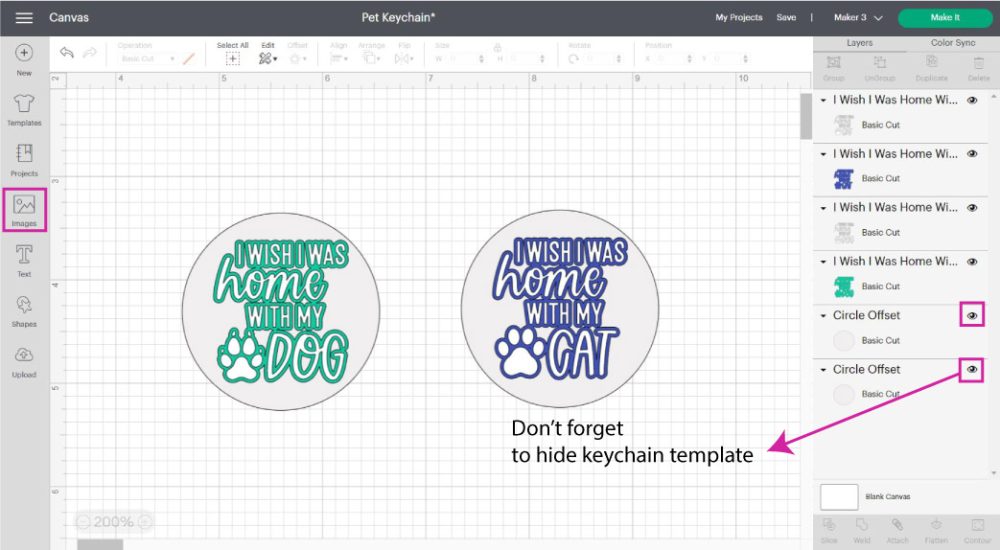
Step 2 – Make a Keychain Template and Size it
Before adding design elements, I always like to recreate where I will place my cut.
Click on “Shapes,” then add the ones you’re working with and resize them according to your real-life keychain.
Tip: Since you exact measure, click on the shape and resize from the top menu. If you click on the little lock in-between width and height, you can unlock the proportions to make a rectangle.
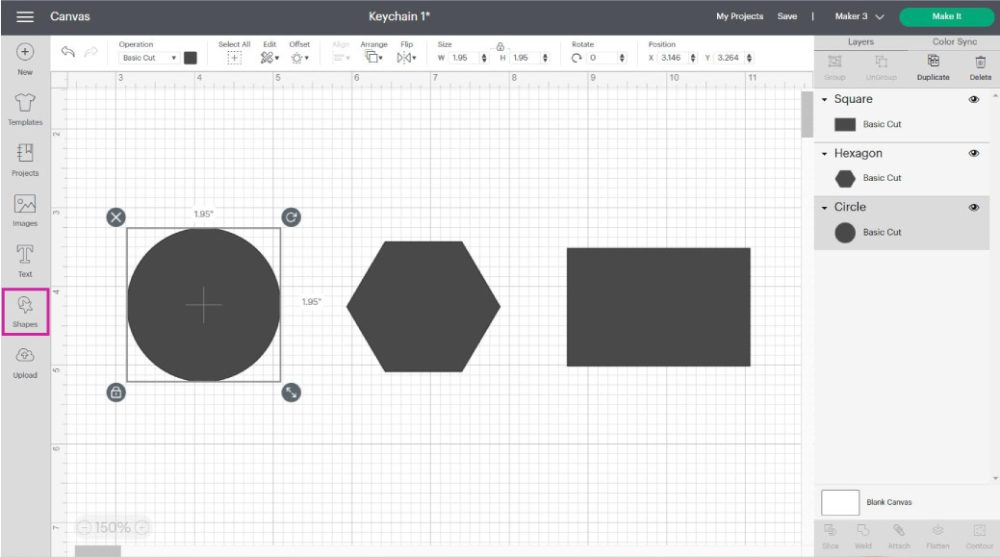
Let’s continue this tutorial using only the circle.
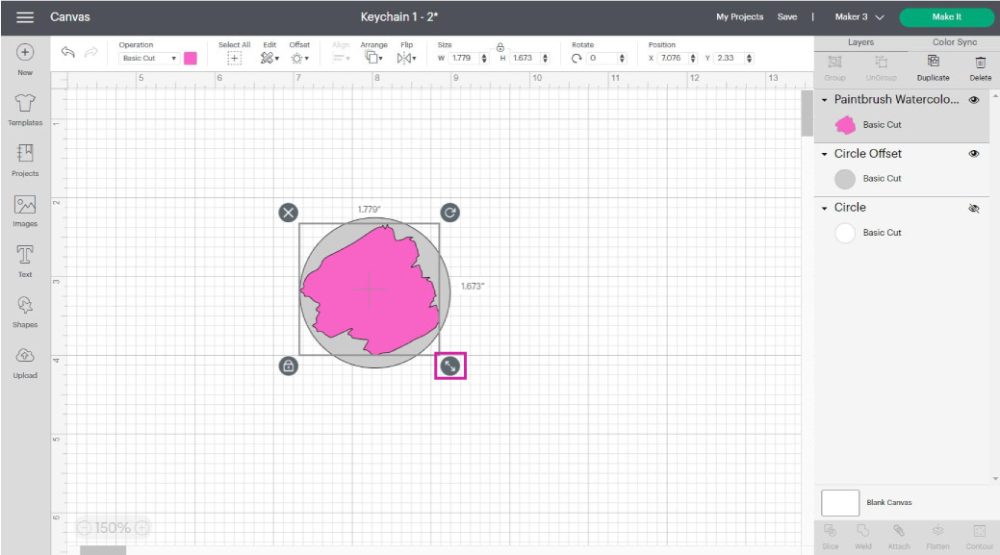
The initial circle is resized to the exact size of your keychain. However, I like to have a slight margin of error, especially if I am applying vinyl right at the edge of the keychain.
To finalize the template select the shape (circle), click on the offset path tool, add a tiny inset (-0.02 in), check the square corner, and click on apply.
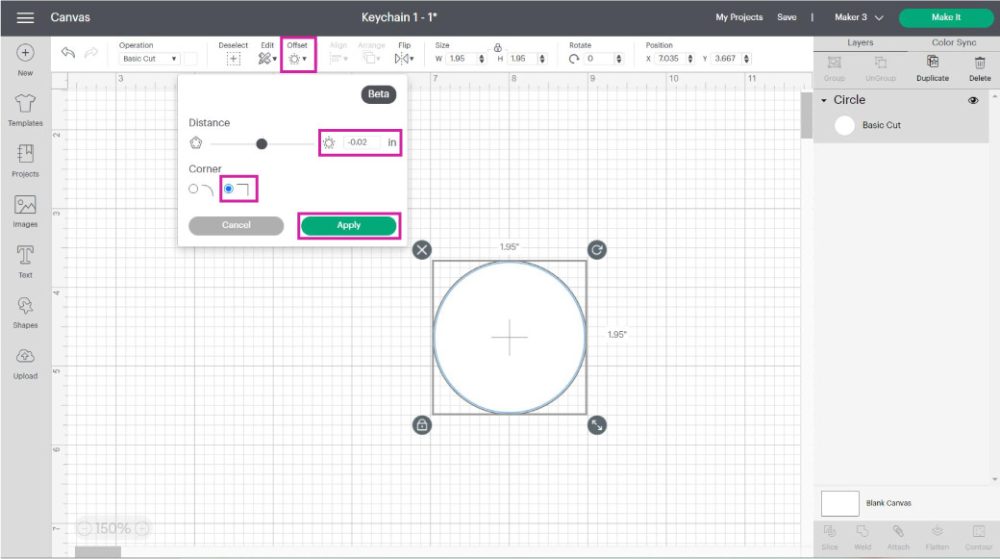

From now on, the circle template I am working with is the inset we just made.
Step 3 – Add Paint Brush Effect
It’s time to personalize our keychain!
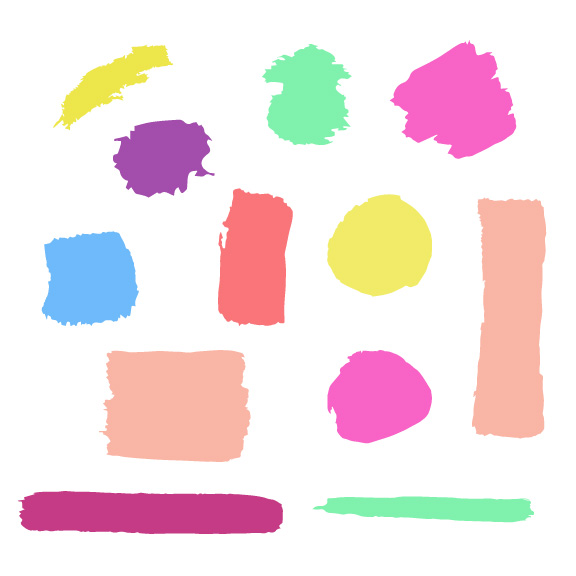
Brush strokes are super hot right now, and you can download them at the end of this step-by-step tutorial, along with the other excellent files.
Once you download the files you want, go to “Upload,” then click on “Upload Image” and follow the prompts. The file will be available under “Recent Uploads.”
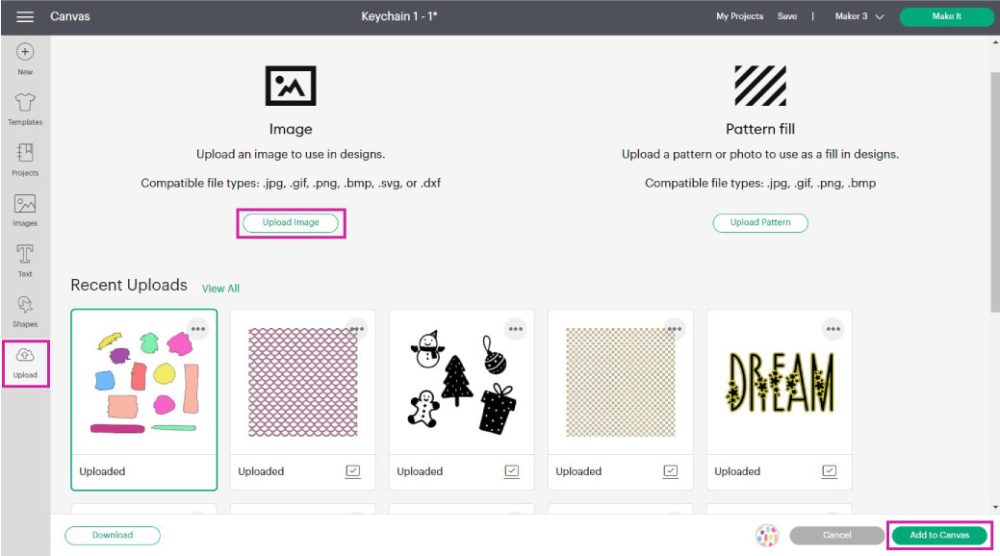
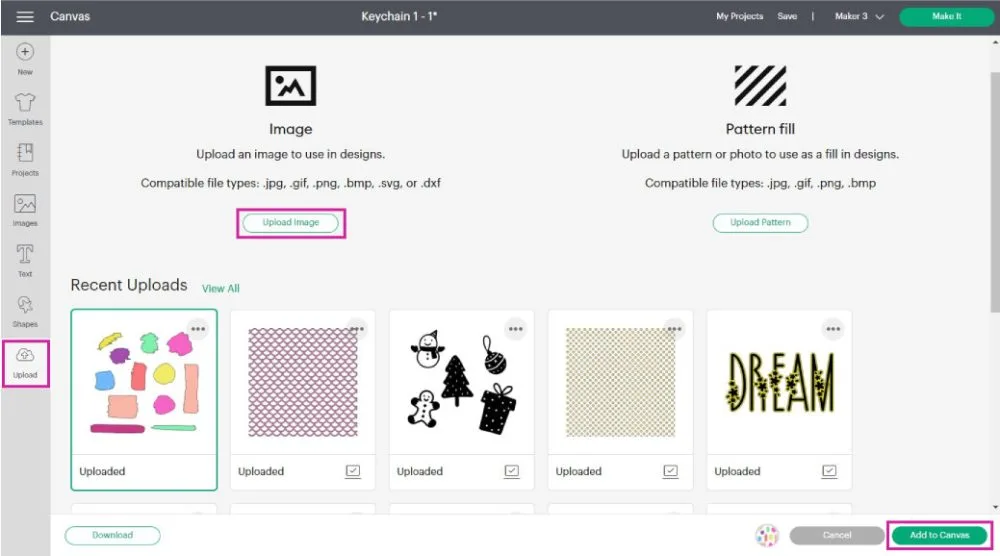
Click on “Add to Canvas.”
Here are all the brush finishes you can use! Before you select the one you like, you need to click on “Ungroup” on top of the layers panel.”
I picked the stroke on the upper right corner.

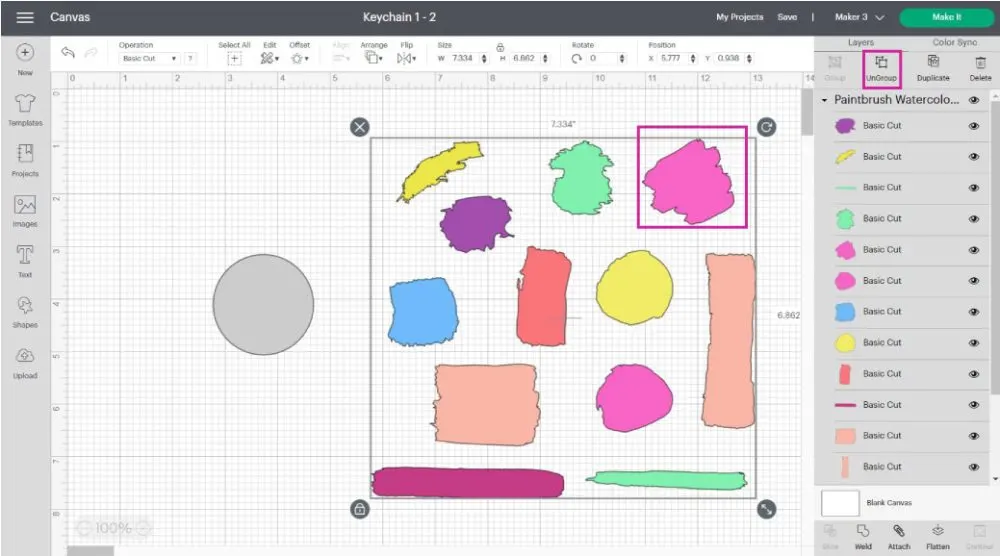
Delete the other strokes you don’t want to use, place the one you want in front of the keychain template and resize it to fit.
Now, let’s have a little chat.
The pink stroke is just a stroke; no letters or essential elements interfere with the keychain’s hole. If I were using letters, I would pay more attention to where the keychain ring goes.
This design didn’t touch the opening after transferring, but I have another example that will show you what to do in that case.
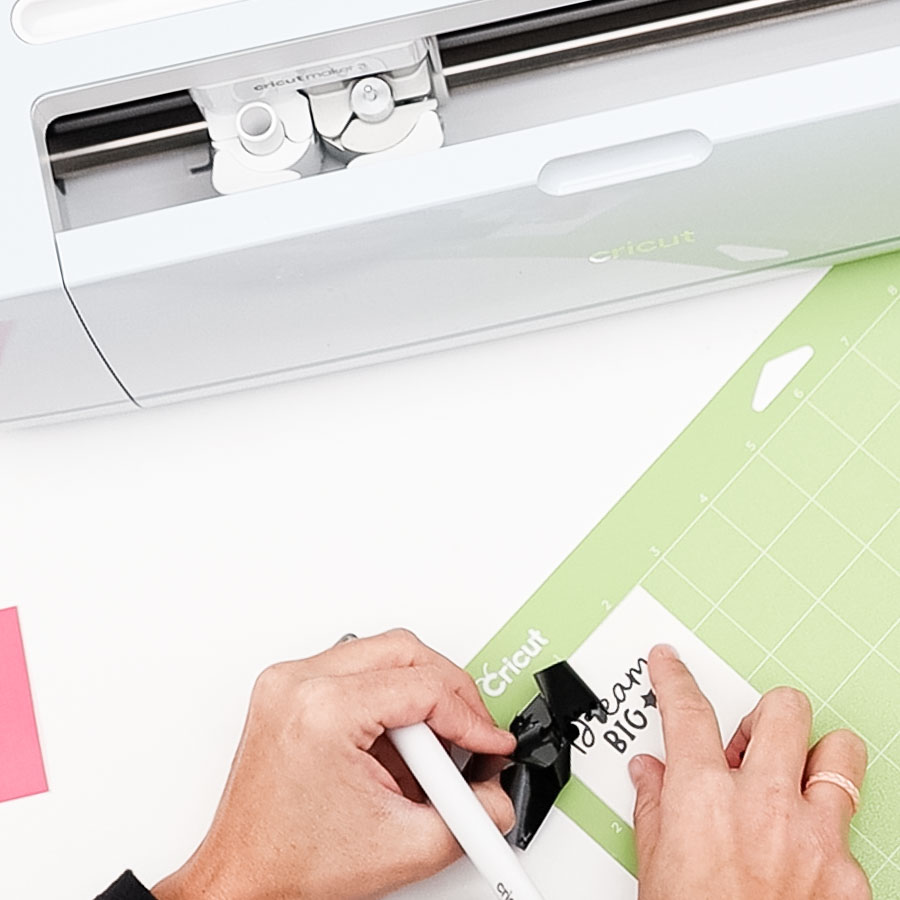
Step 4 – Add Text
Most likely, you want to add text to your keychain!
Click on “Text” and add what you would like to keychain to say.
I did two different lines of text and fonts, plus I added a star to spice things up a little extra.

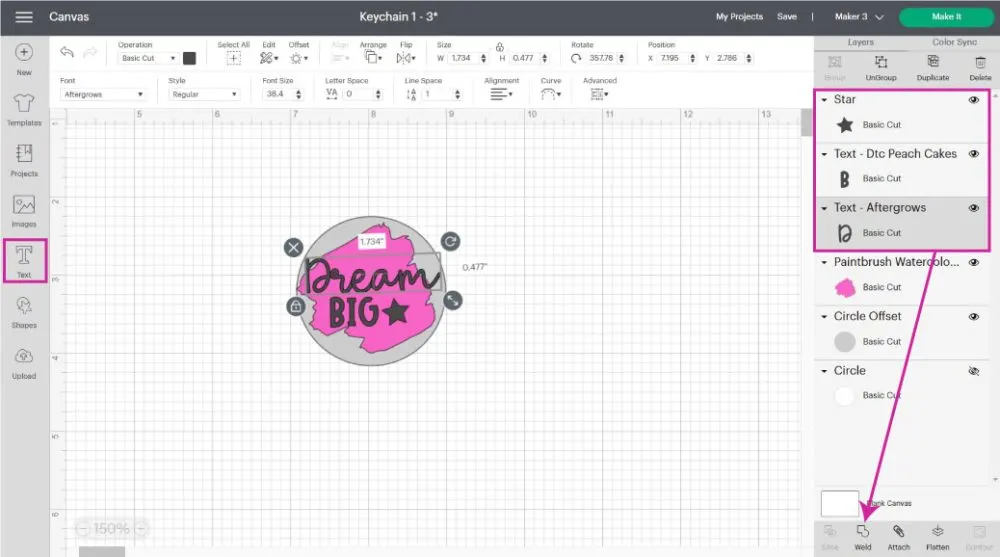
If using the same color for the text and other elements, you decide to put on your keychain, select them all and click on “Weld” or “Attach” to keep everything together on the mat.
If you’ve never worked with text before, become a pro by reading my Cricut text tutorial.
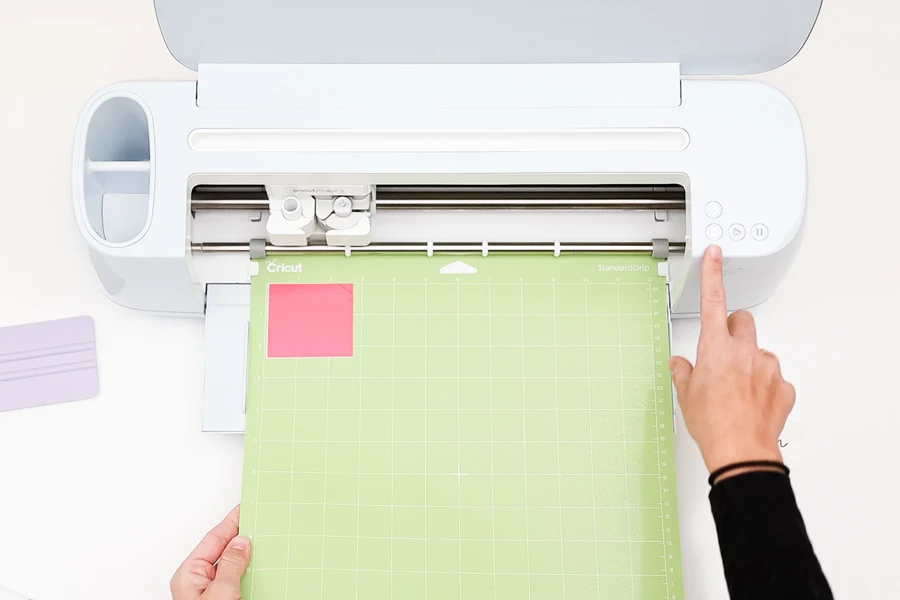
Step 5 – Send to Cut
Isn’t that super easy?
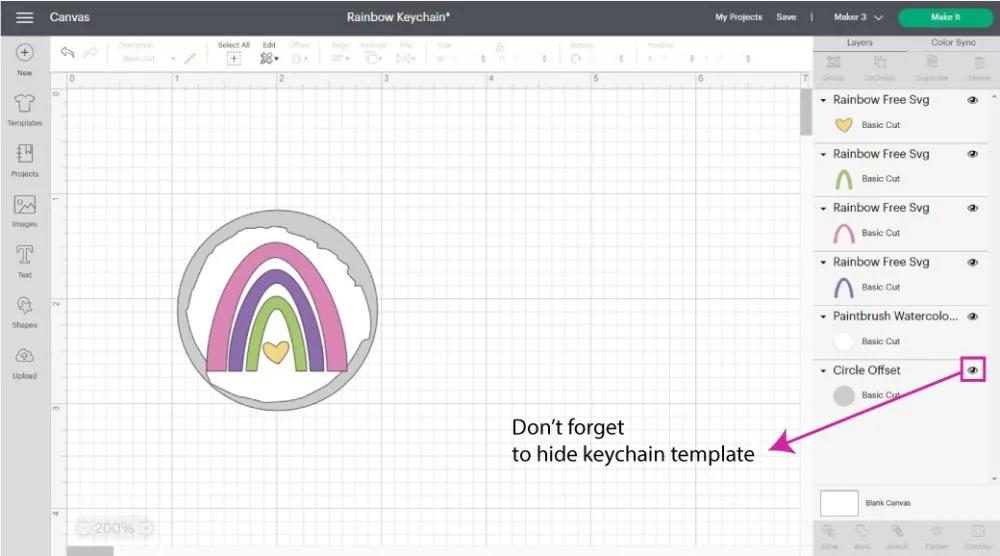
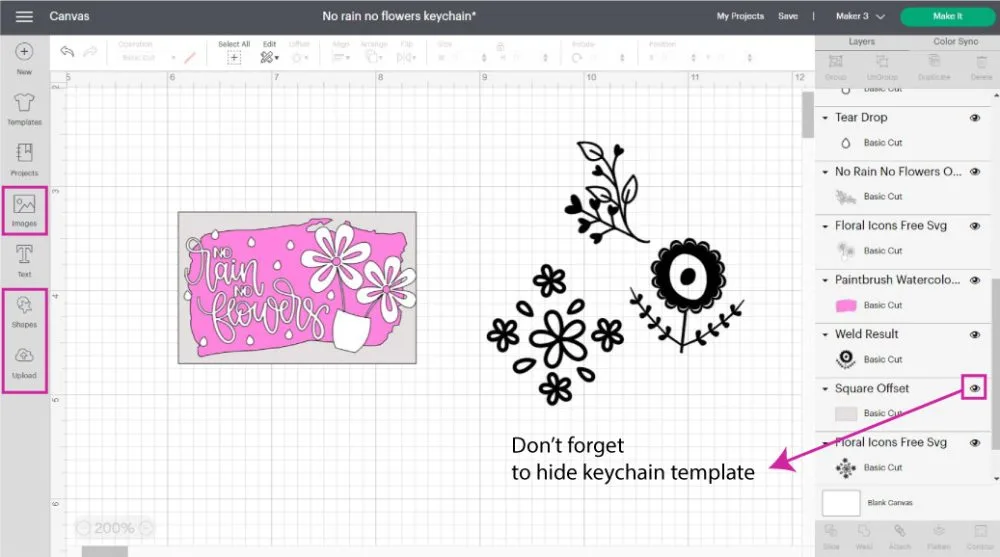
At this point, we don’t need the template anymore, so you can delete or hide it by clicking the little eye on the layers panel.
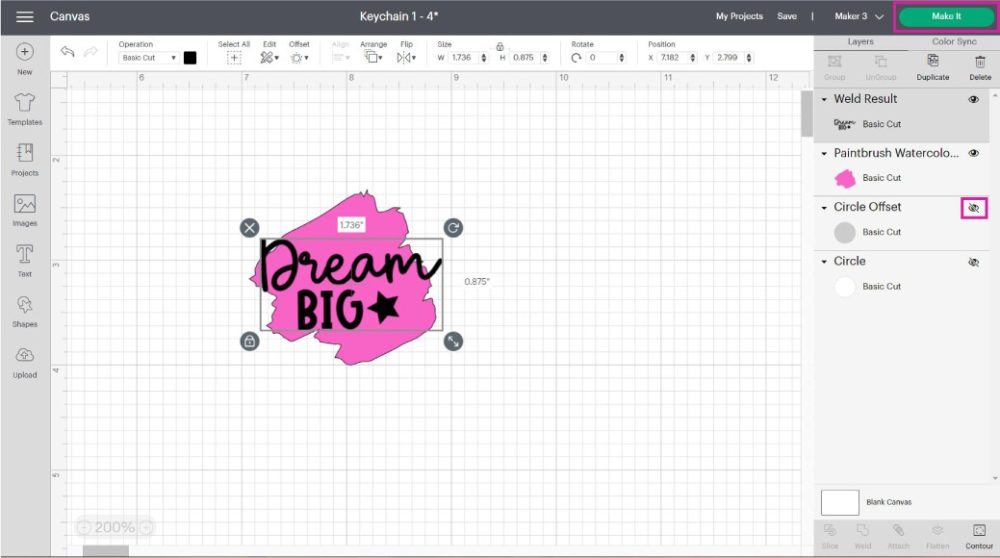
Click on “Make it” to send your project to cut.
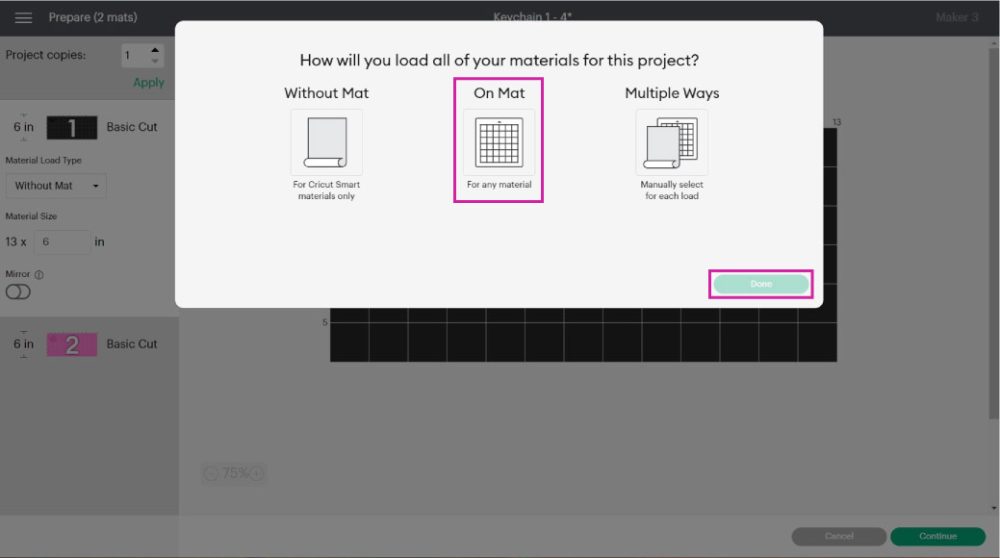
Newer machines will bring a “pop up” to ask how you want to load your materials to your device.
Call me old school, but I like using my mat, especially for tiny cuts like this one; otherwise, there would be so much material waste.
If you have a machine with a “Smart Set Dial,” move it to “Custom” so you can follow along.
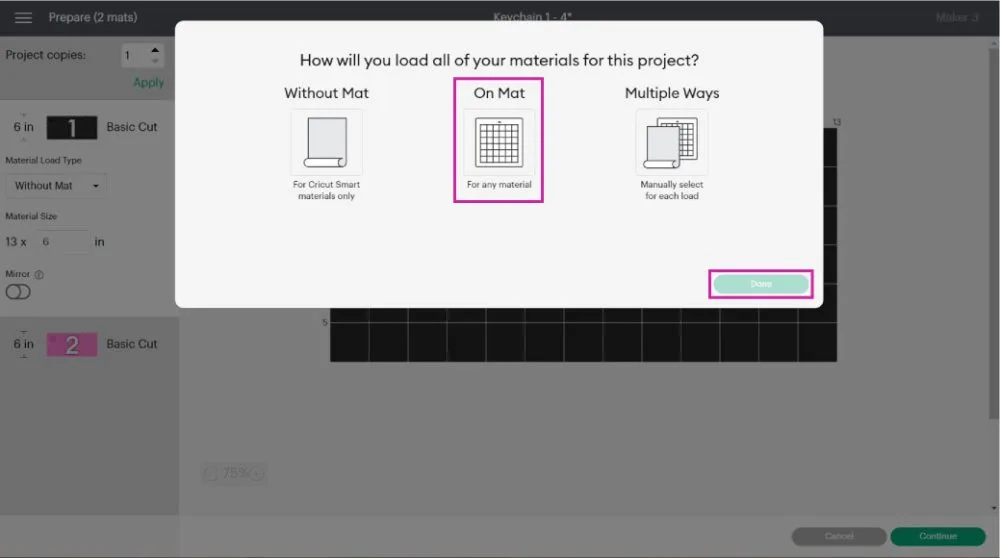
These are the two mats we will cut.
- Black: letters
- Pink: Brush stroke
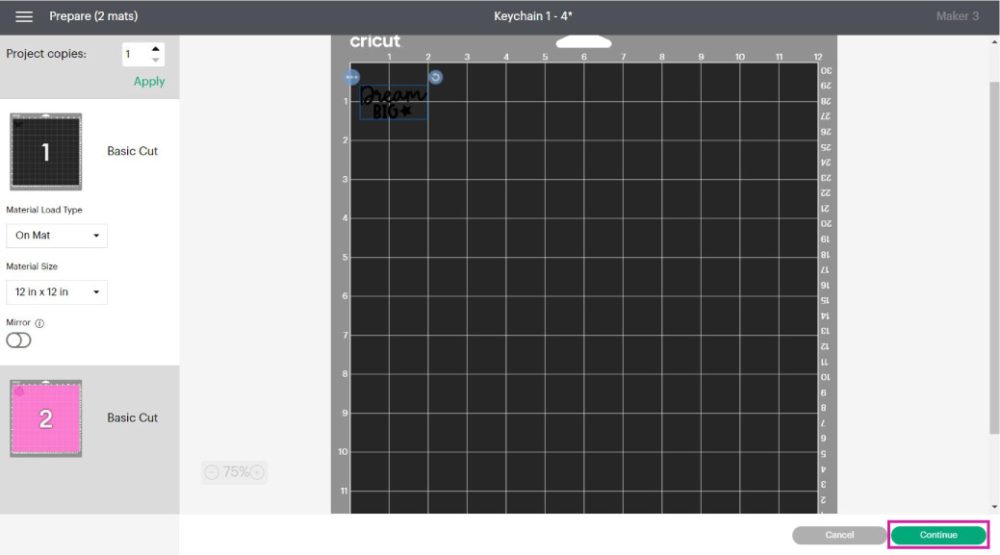

Click on “Continue” to select materials if everything looks in order.
Step 6 – Cut & Assemble Keychain
Although I used another brand for vinyl, everything looked just fine on my side. Anyhow, I always set the pressure to more when I cut vinyl. It makes a difference.

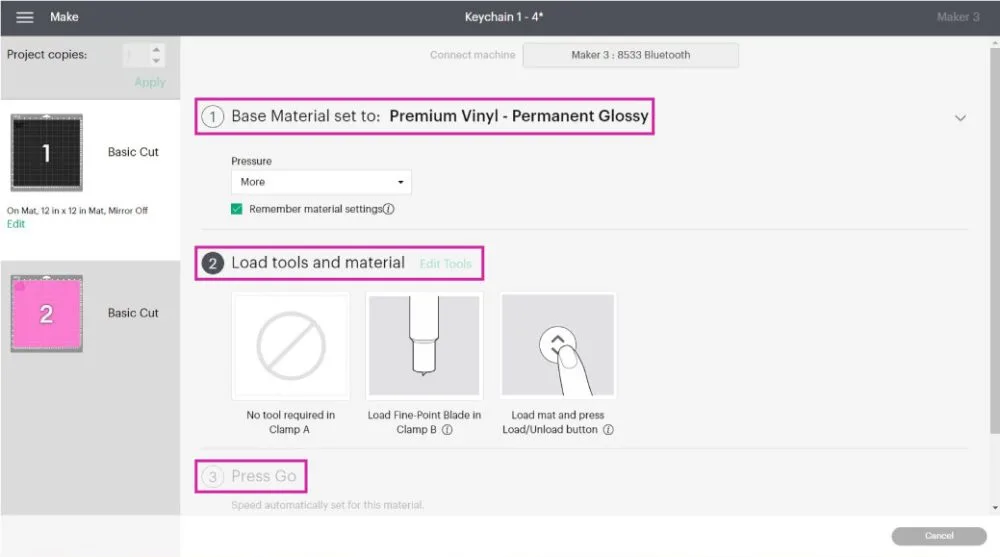
Ensure your fine point blade is installed, and let’s move on to real-life pictures!
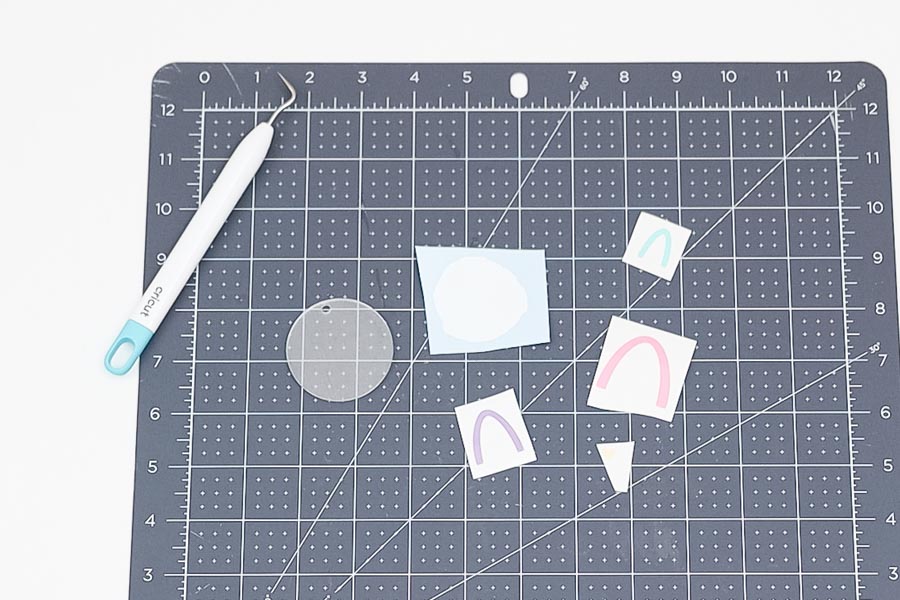
Cutting Process
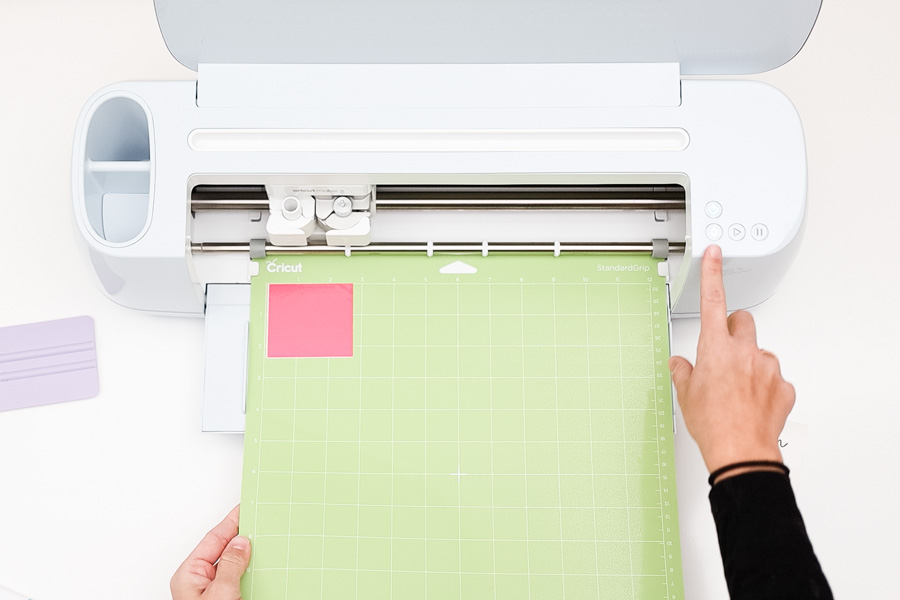
If you have scraps of vinyl, these are the type of projects that are a perfect match. If not, you can trim your vinyl sheet or put the whole thing on the mat.
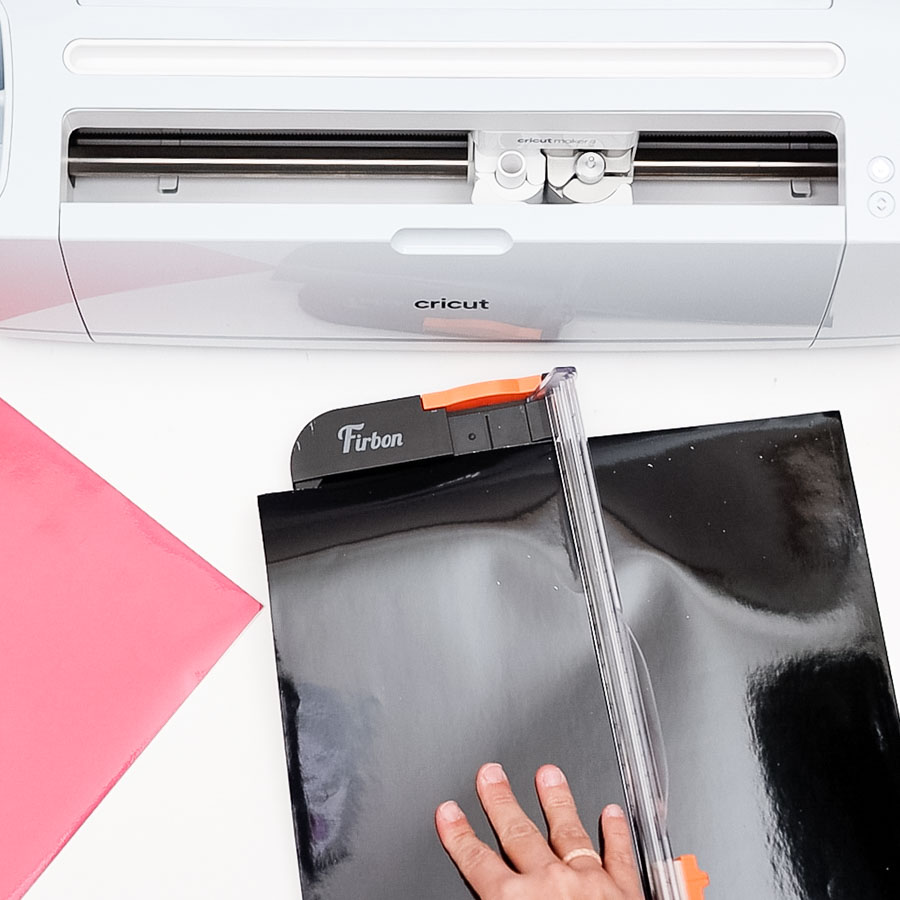

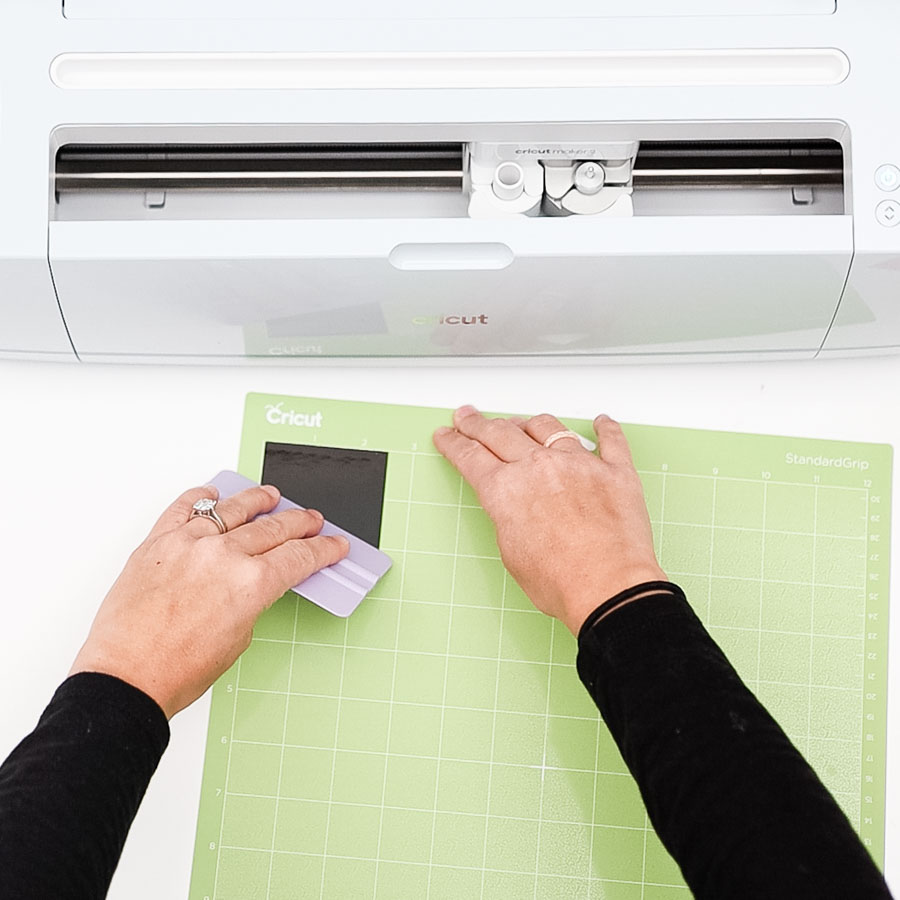
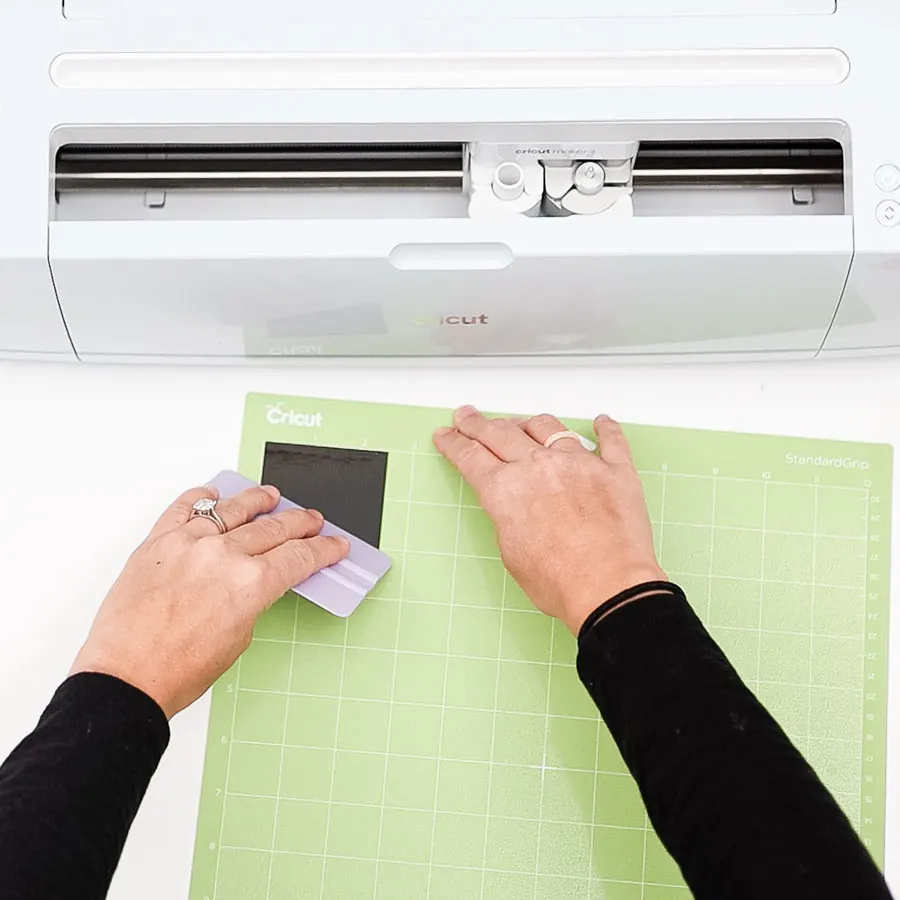
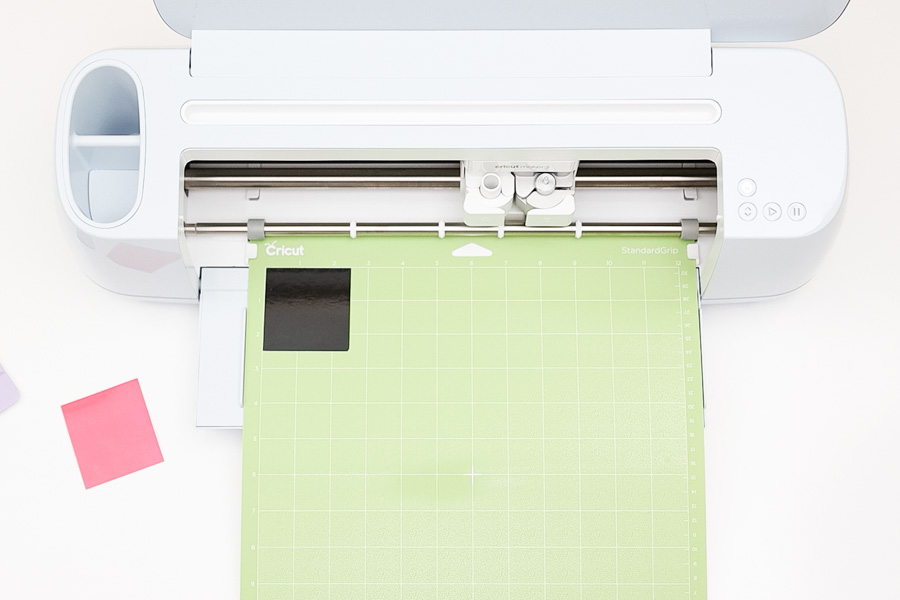
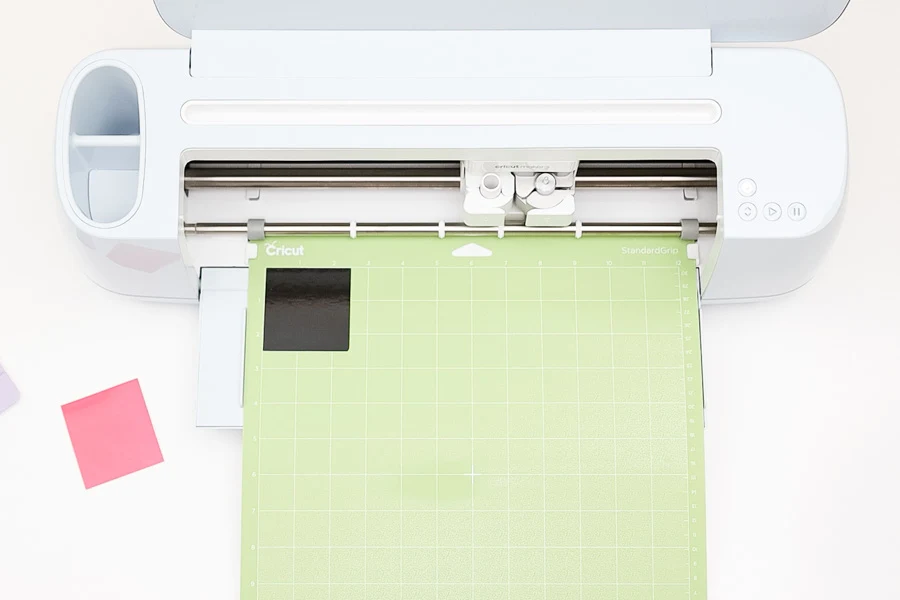
Place vinyl on the cutting mat and smooth it out with a brayer or a squeegee, then load it to your machine and press the “flashing go’ button to start the cut.
Note: For Cricut Joy, start the cut in Design Space.
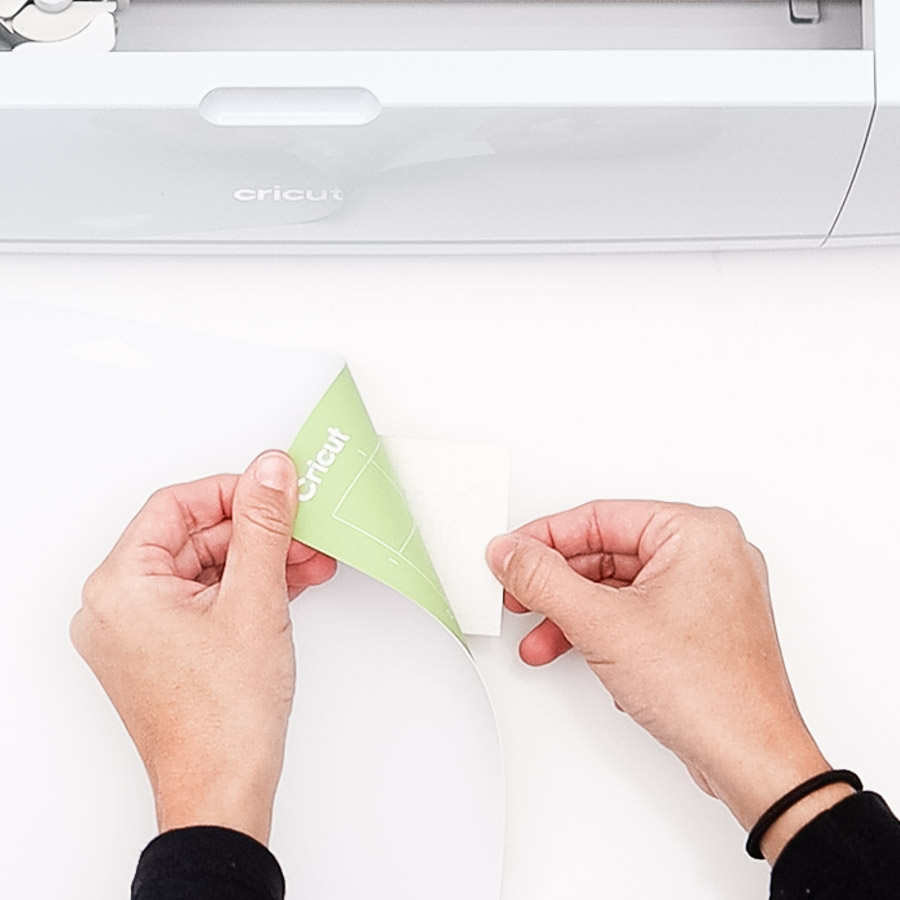
Once the cut is done, unload your mat.
It’s time to weed!
I love weeding from the mat, it’s way easier, and the mat holds the design for you. After weeding, bend your mat and carefully let the design fall from it.

Repeat the same process, only this time with the brush stroke element.
Assembly Process
It’s time to assemble our keychain!
If you’ve never worked with vinyl before, it may feel a bit intimidating, don’t fear; we all make mistakes, and as you gain experience, things will become easier and more manageable.

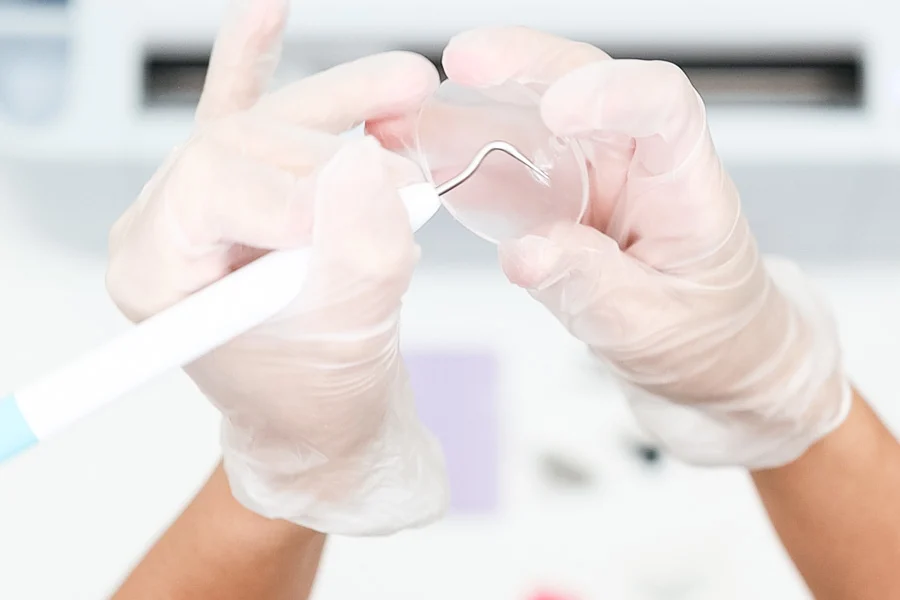
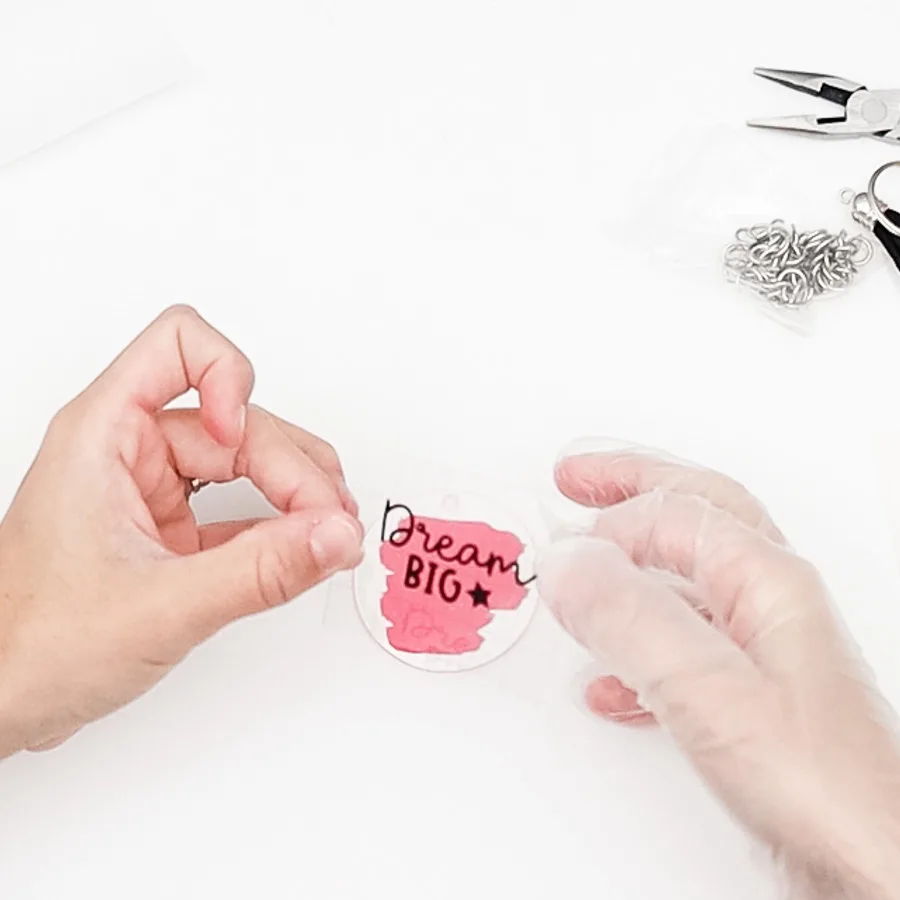
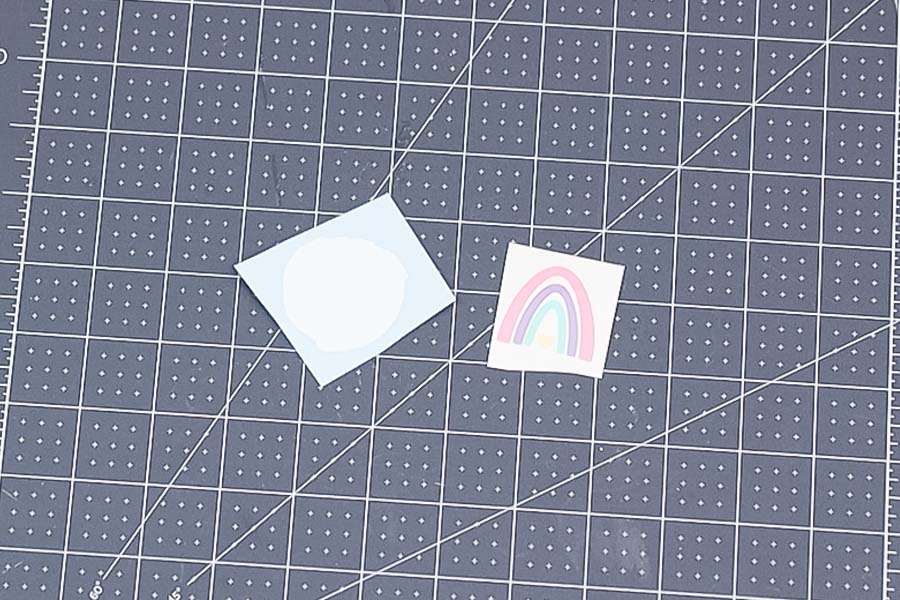
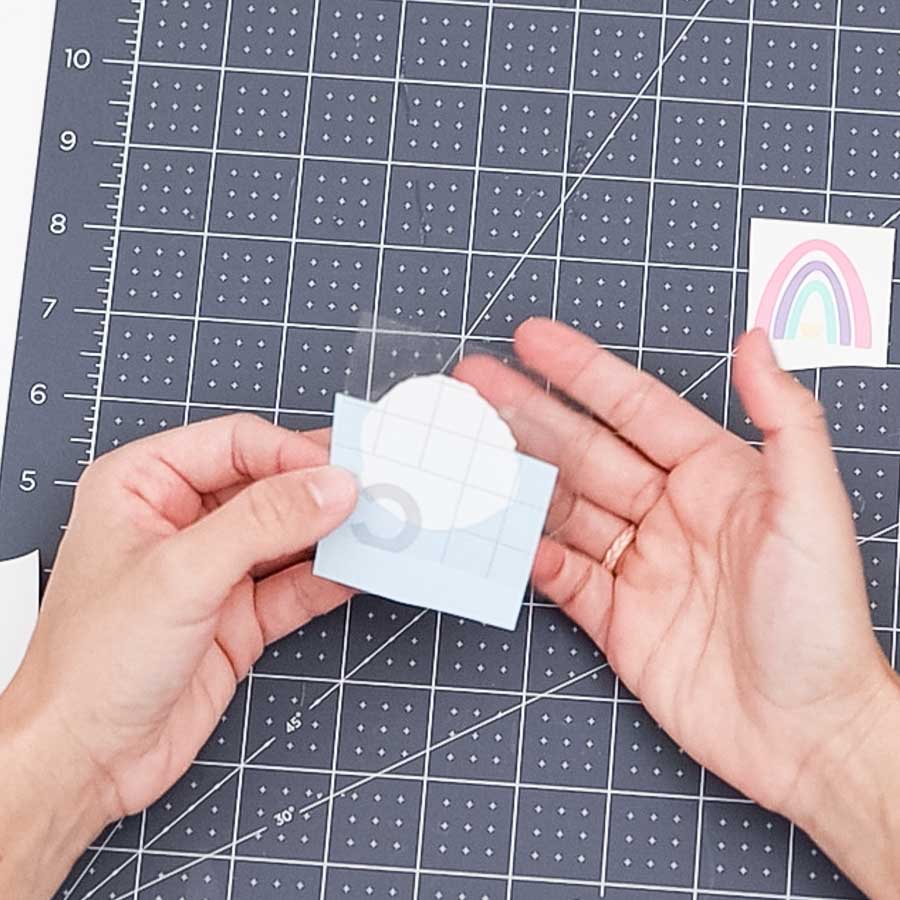
A. Use the weeder to make a small hole in the keychain and remove only one side of the liners. Your blanks may vary. If they don’t have liners, I encourage you to wipe them clean with an alcohol wipe first.
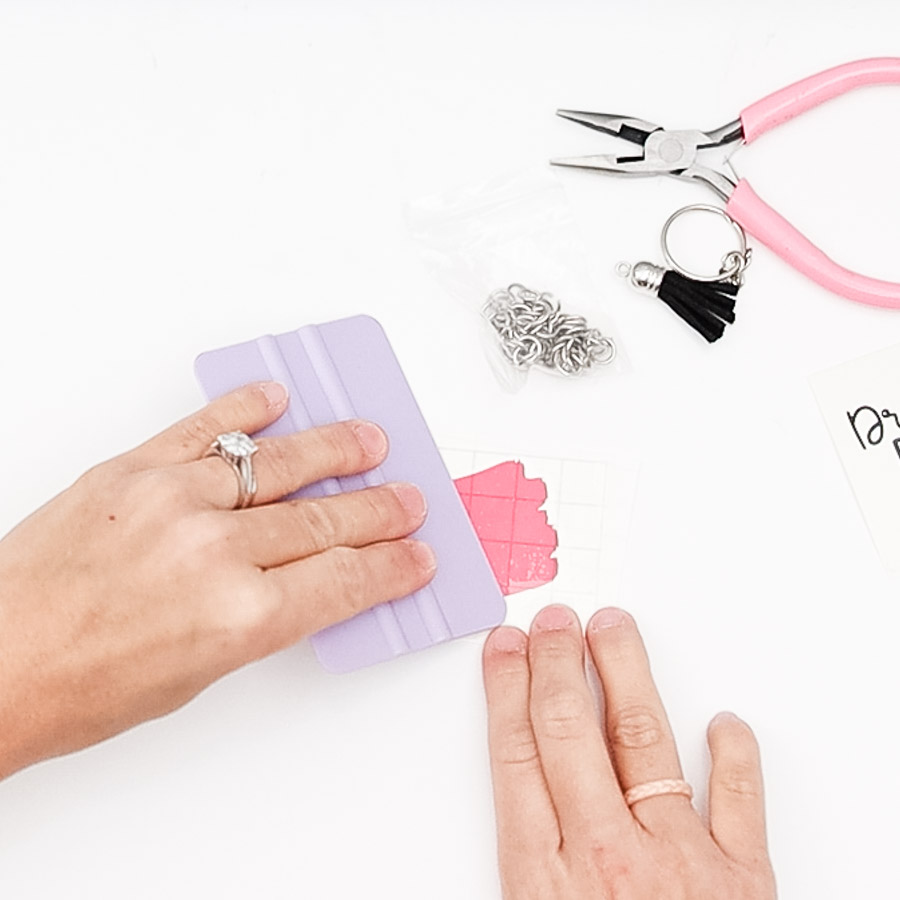
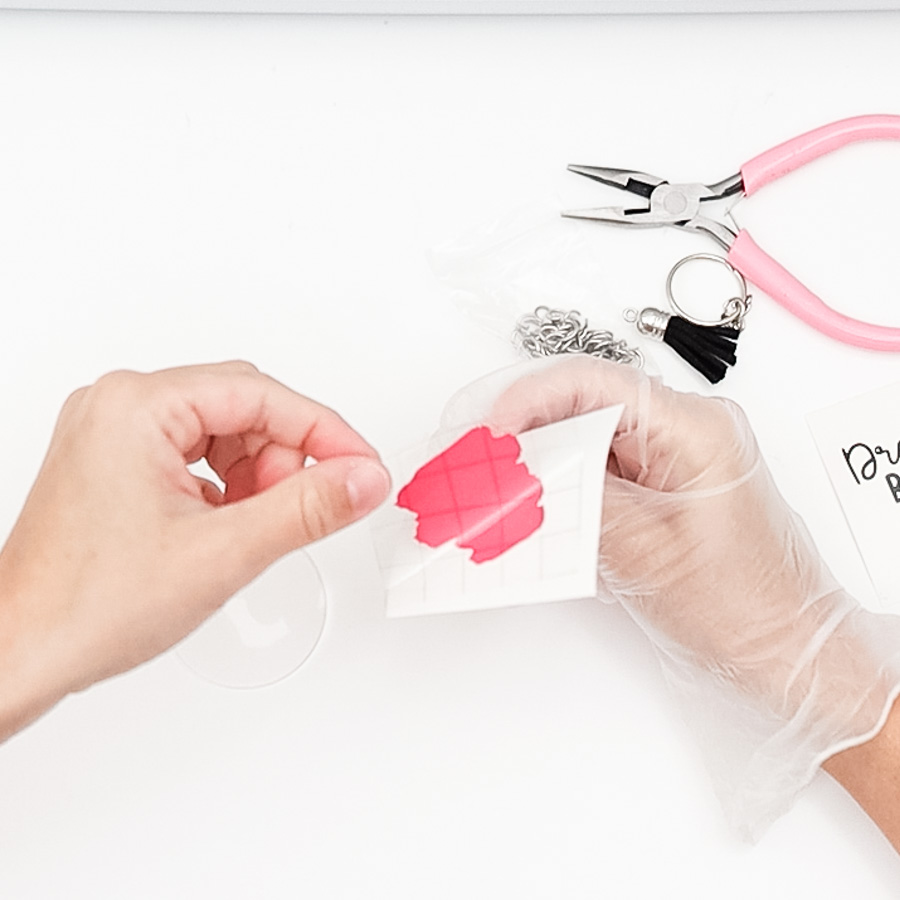


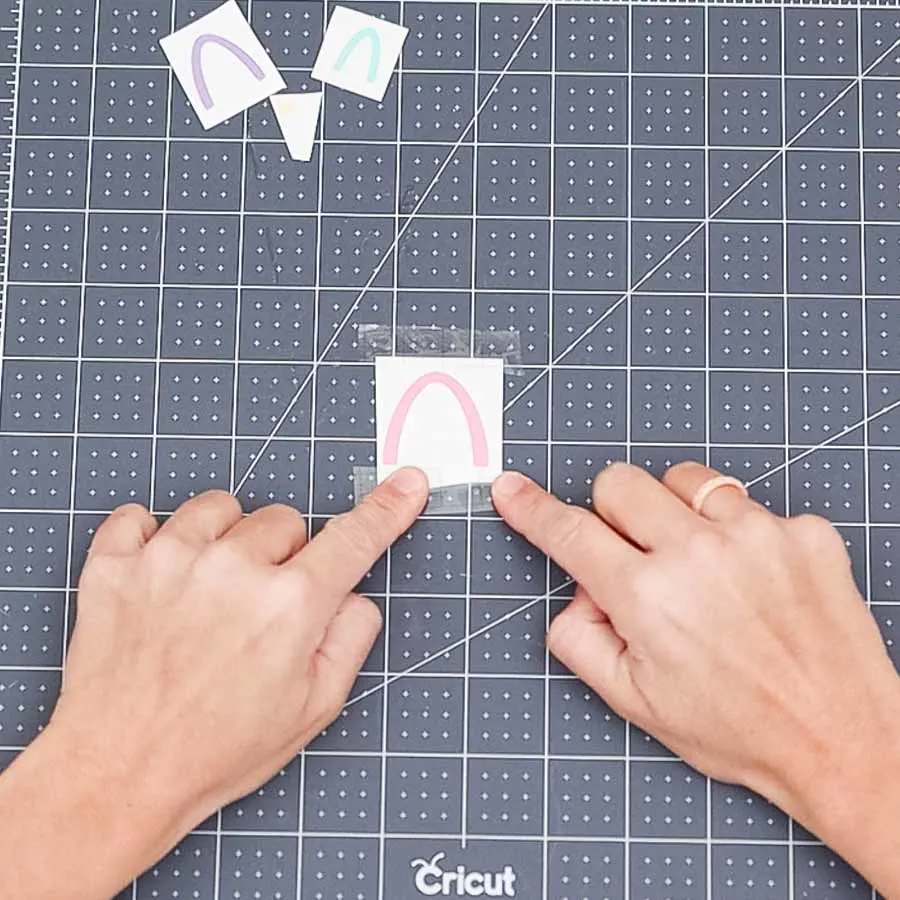
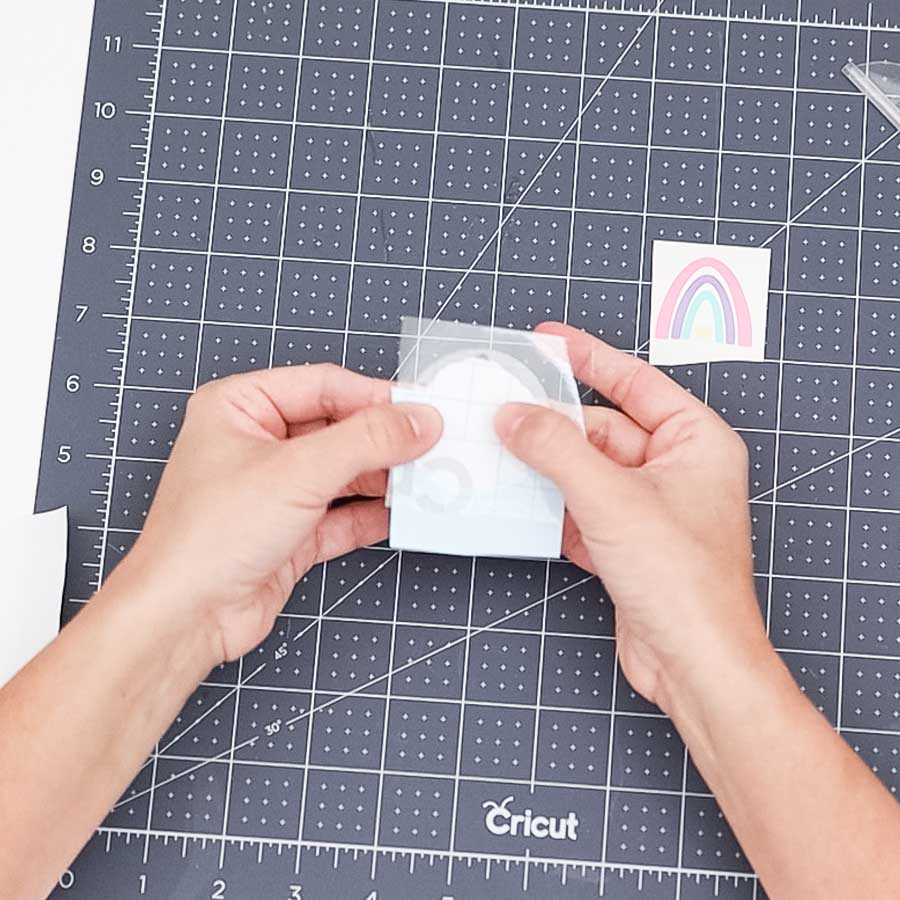
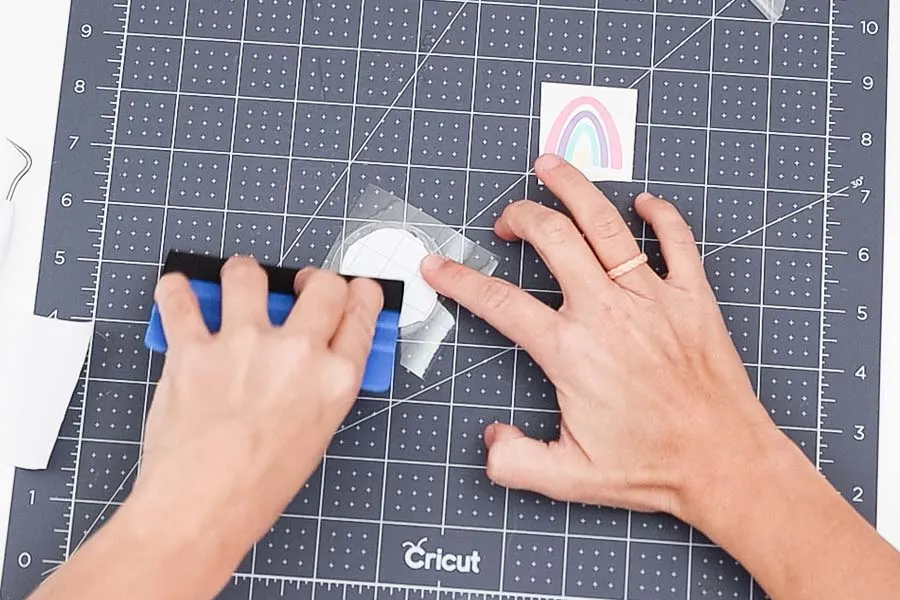
B. Cut a little bit of transfer tape, place it on the pink layer, and rub it back and forth with the squeegee.
C. Lift transfer tape and place it on top of the keychain; the transfer tape may get stuck to your glove, so you have to be careful. Remember, they are optional but encouraged for two or three keychains, so you don’t get fingerprints on anything.
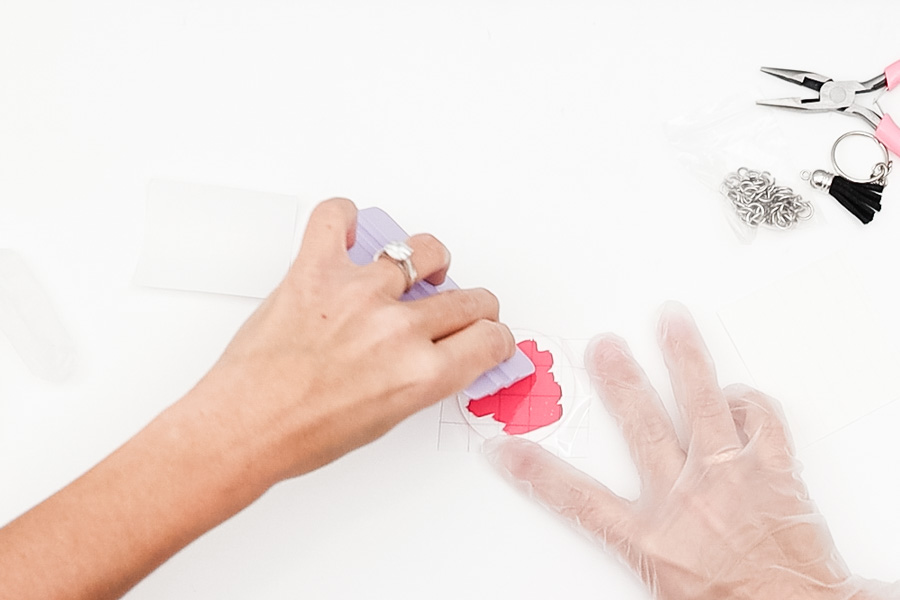
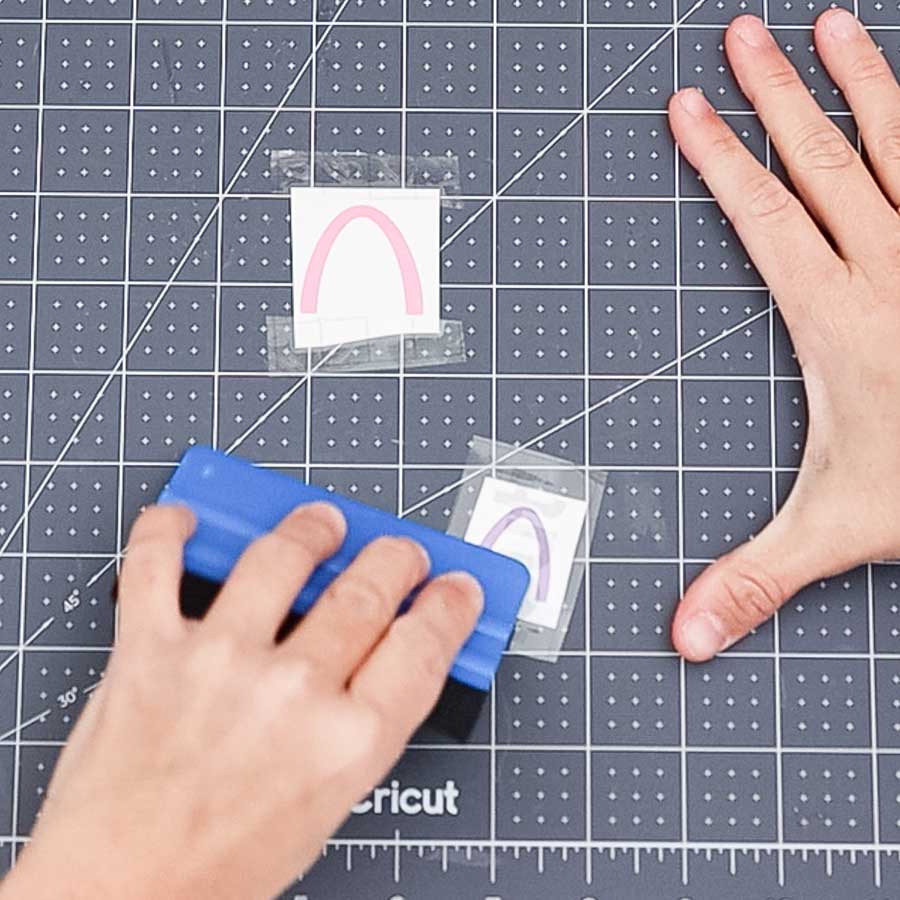
With the squeegee, smooth out the vinyl making sure there are no bubbles. Unfortunately, I was not using a scraper with a felt edge at this moment.

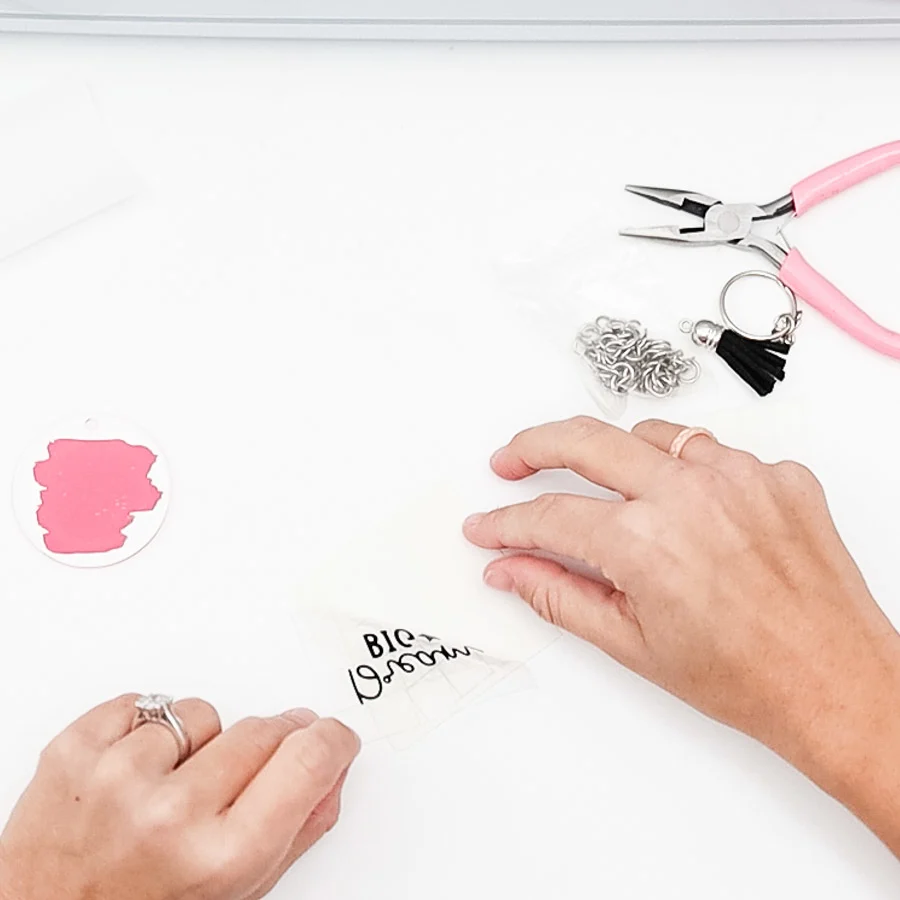

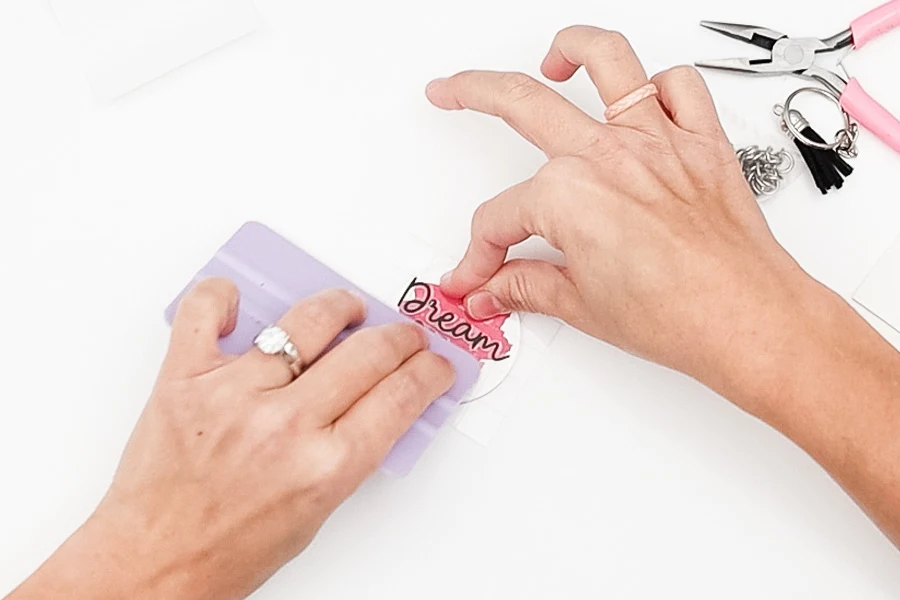
D. Remove liner of the other side of the acrylic keychain (I didn’t get a pic for that, sorry!) Use transfer tape and squeegee to pick up letters from the vinyl carrier sheet.
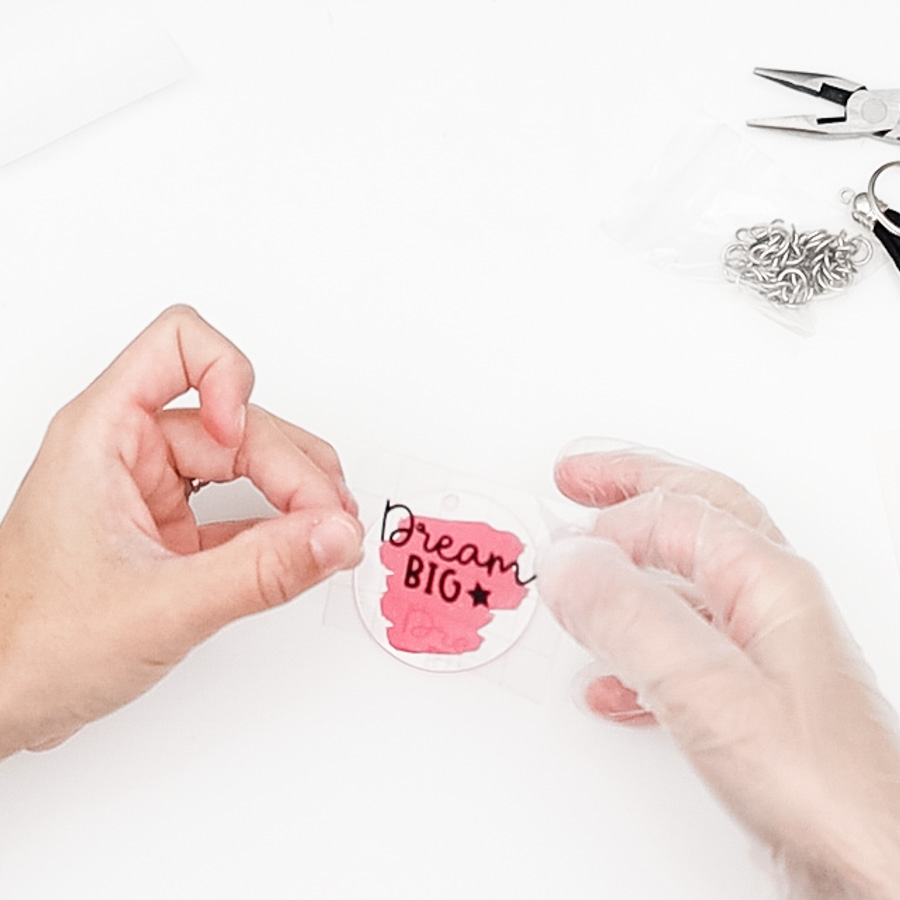
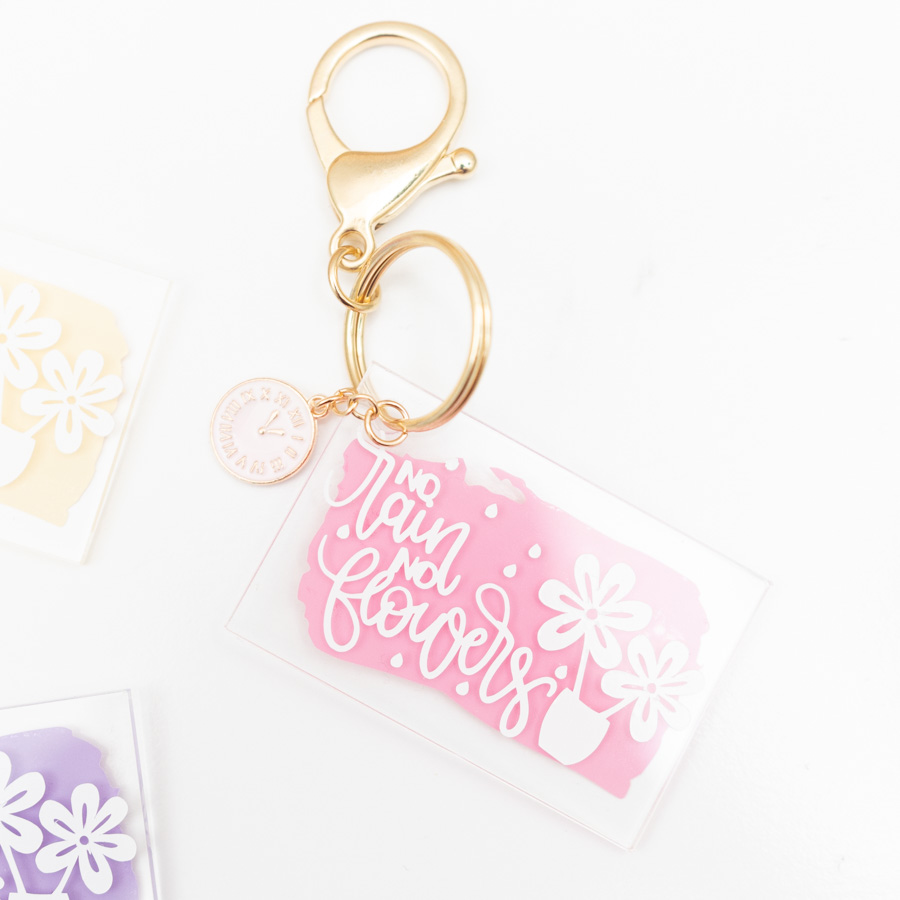
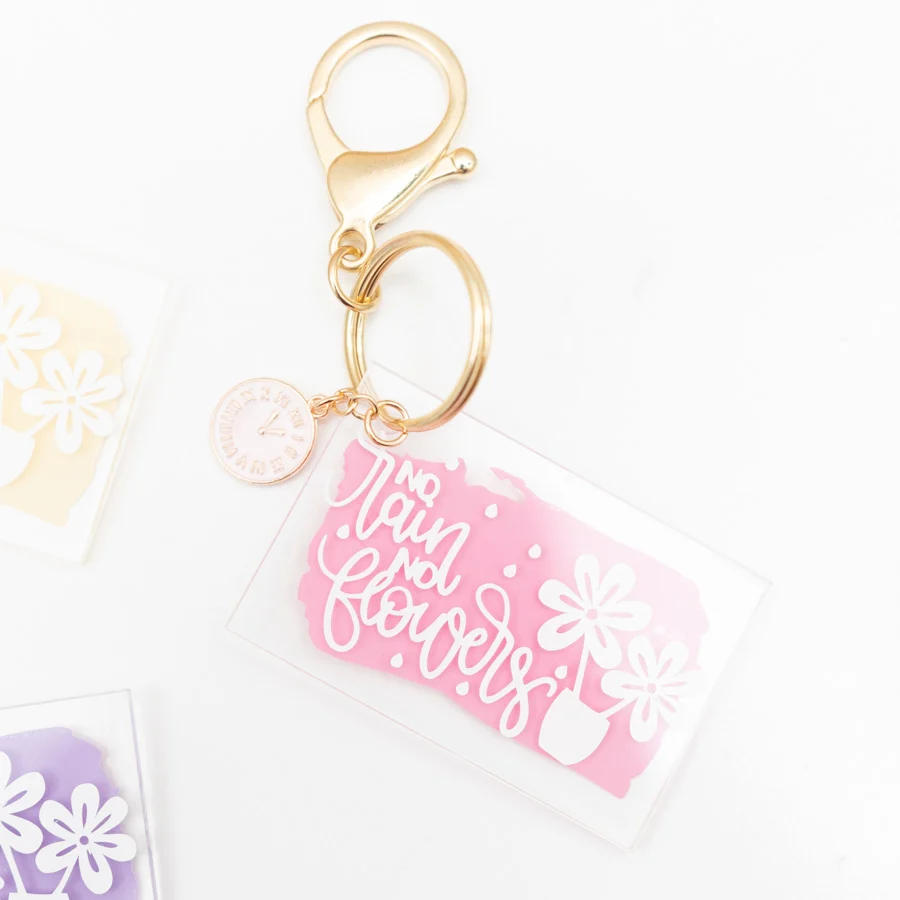
E. Take your time to find the right spot for the design, be decisive and careful. We are transferring on the other side of the blank. This will create a beautiful shadow/depth effect.
F. Use a squeegee to finalize the transfer.
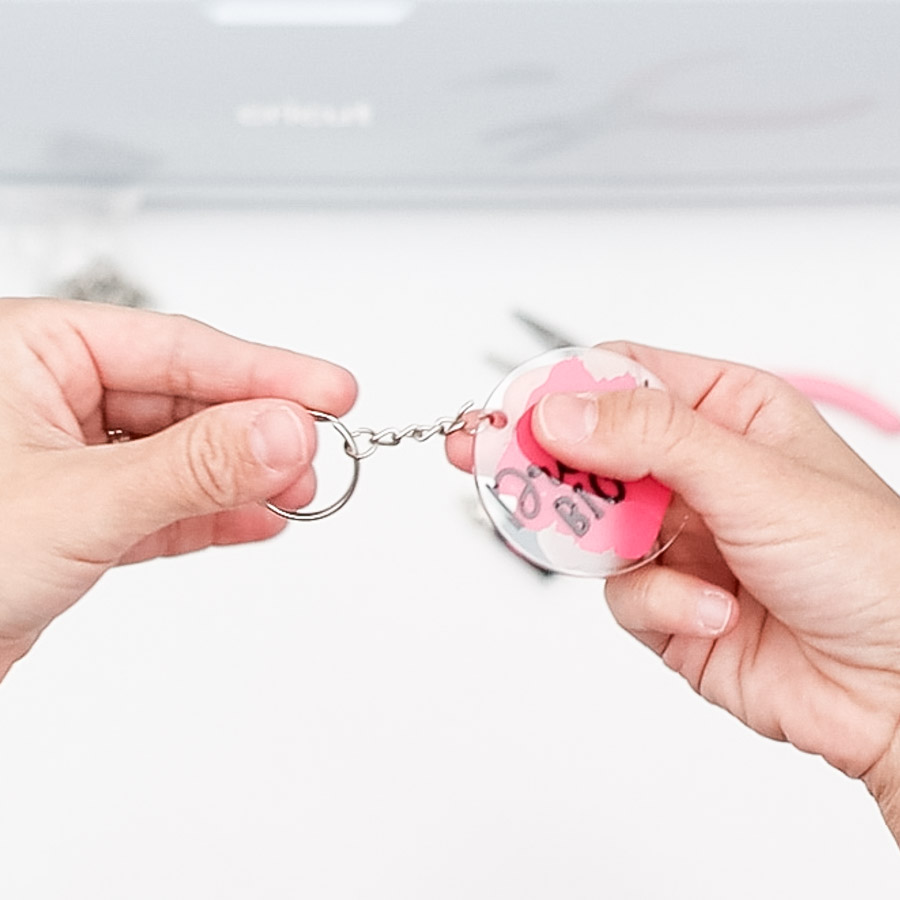

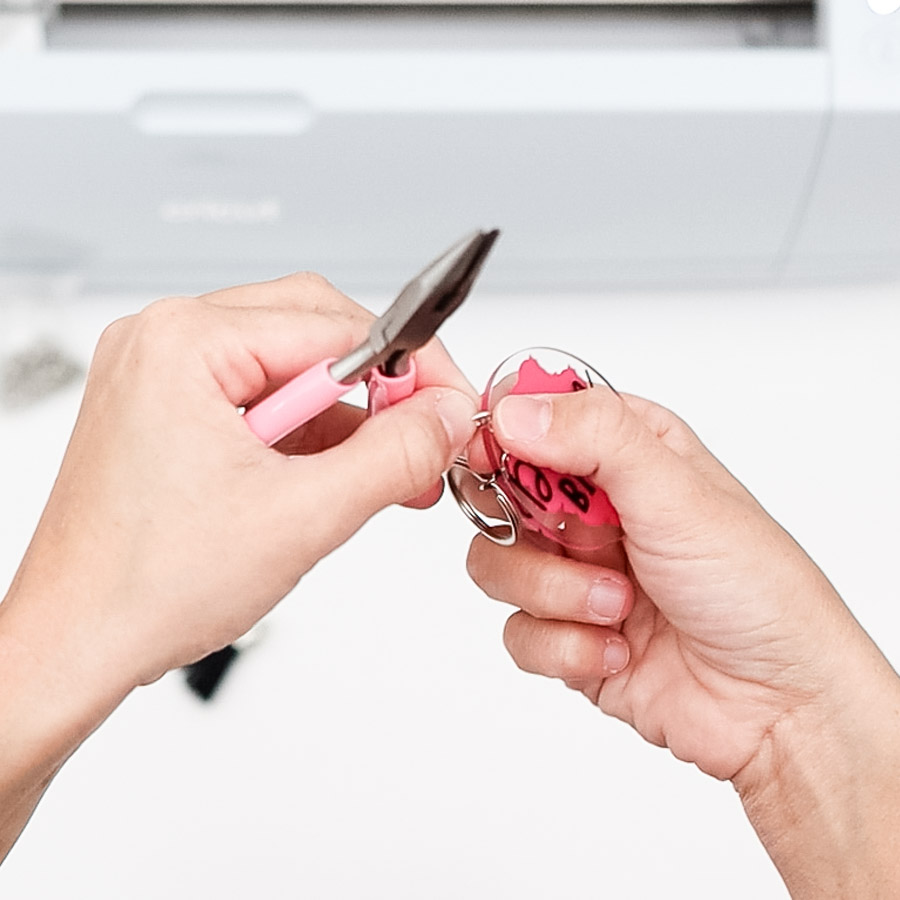


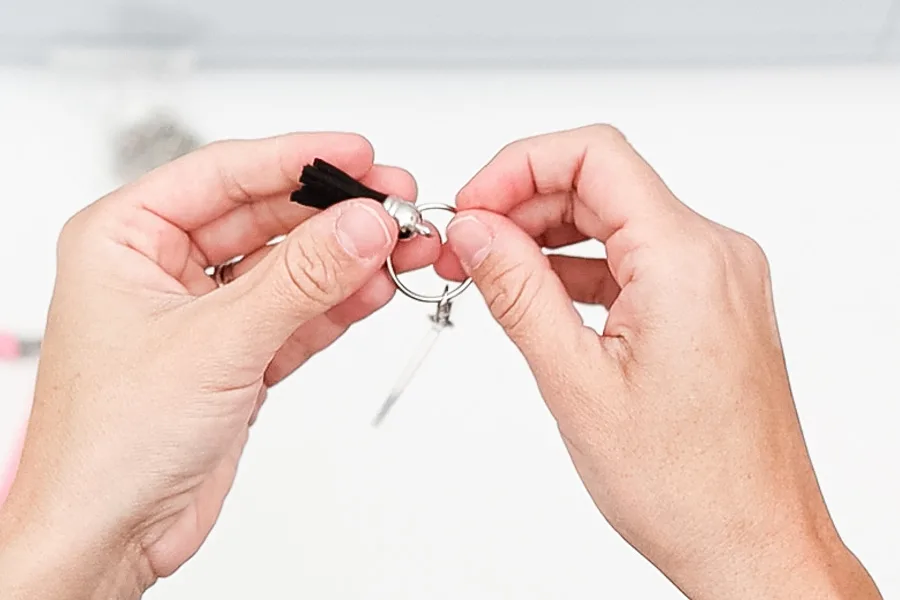
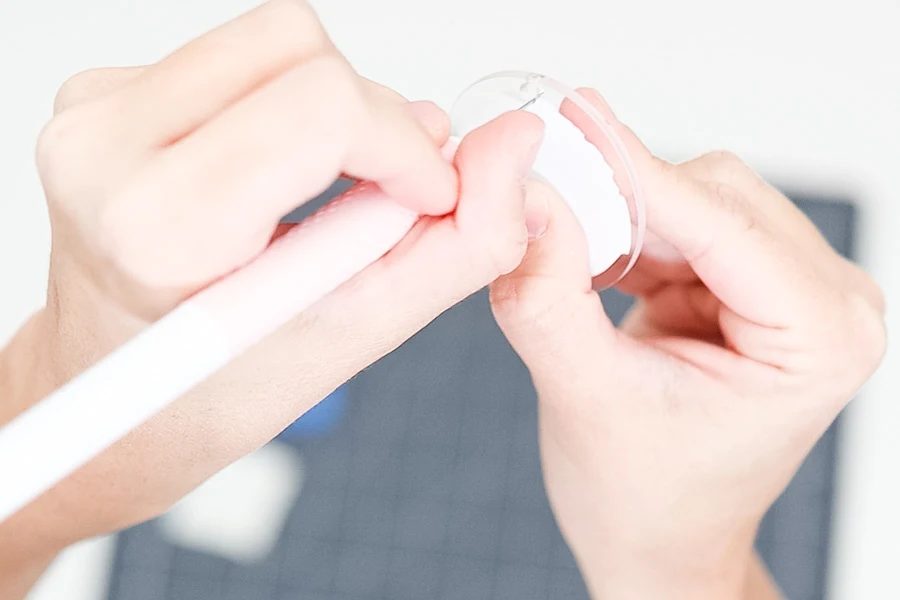
G. Grab a jump ring and a keychain ring and connect them using the little hole on the blank.
H. Close jump ring with pliers.
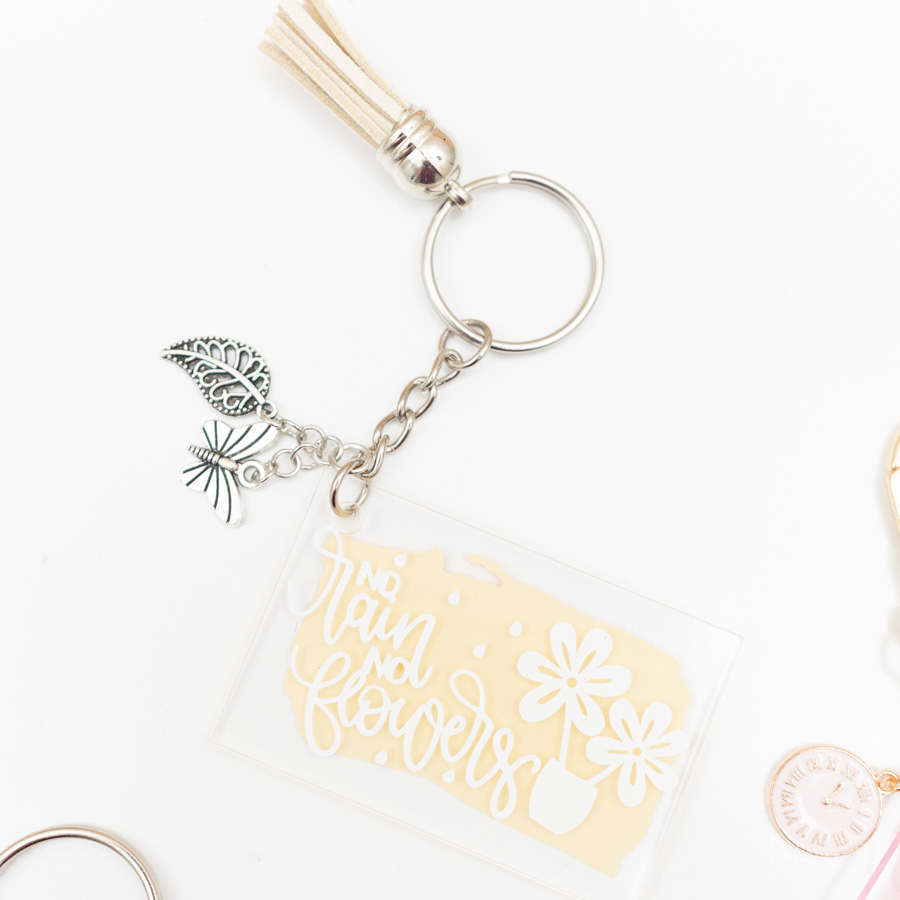
I. Add a tassel to the keychain ring.

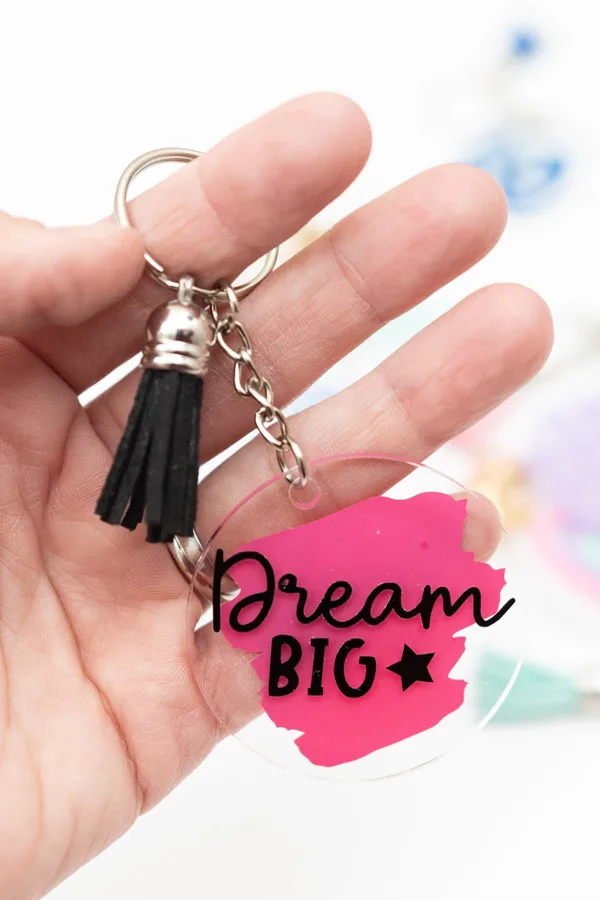
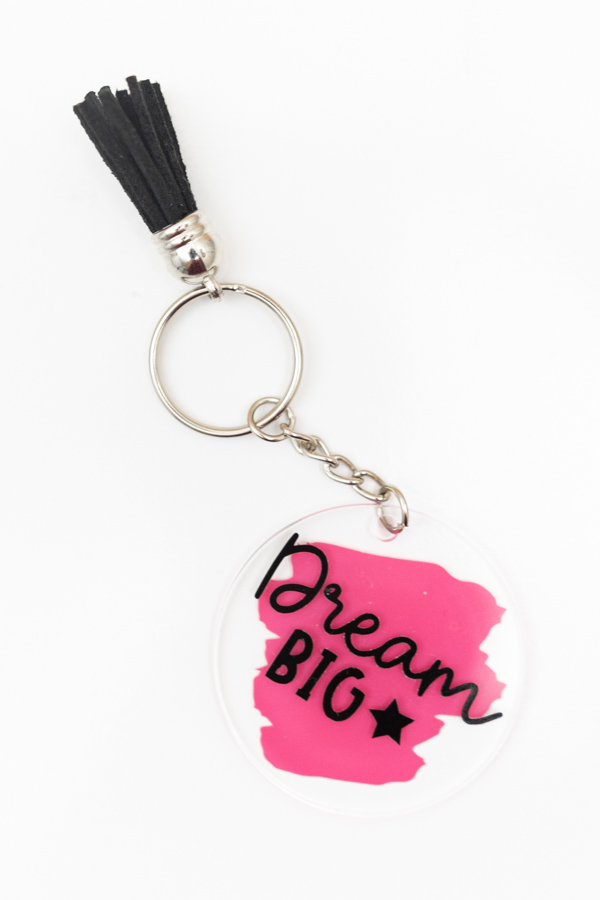

That’s it!
Doesn’t it look fantastic?
Layer Up Vinyl for Keychain
It’s time to complicate things a little bit more!
We just made a keychain with two different colors. However, most likely, you’ll want to use multiple colors.
Say no more!
I will teach you how to layer up vinyl for a keychain.
Here’s the design we’ll be transferring. I won’t cover the cutting process again because it’s identical, and I don’t want to be repetitive.

Cut and weed every piece, and grab some extra tape. Also, for this keychain, I used a felt edge squeegee.

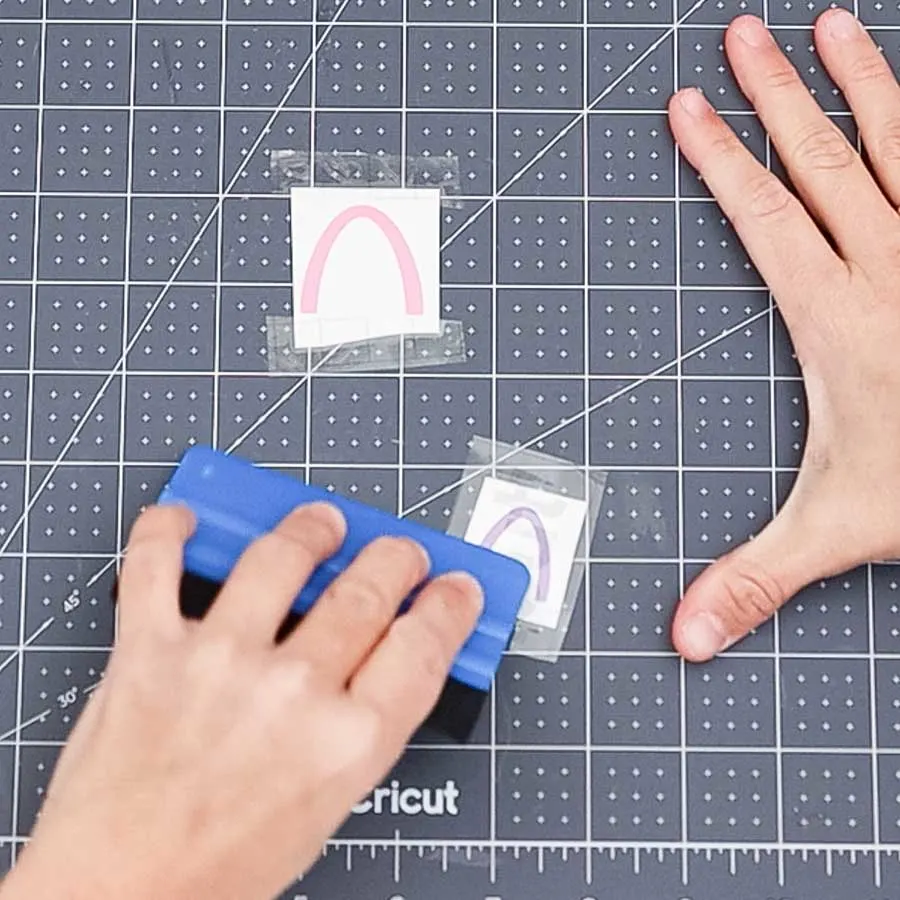
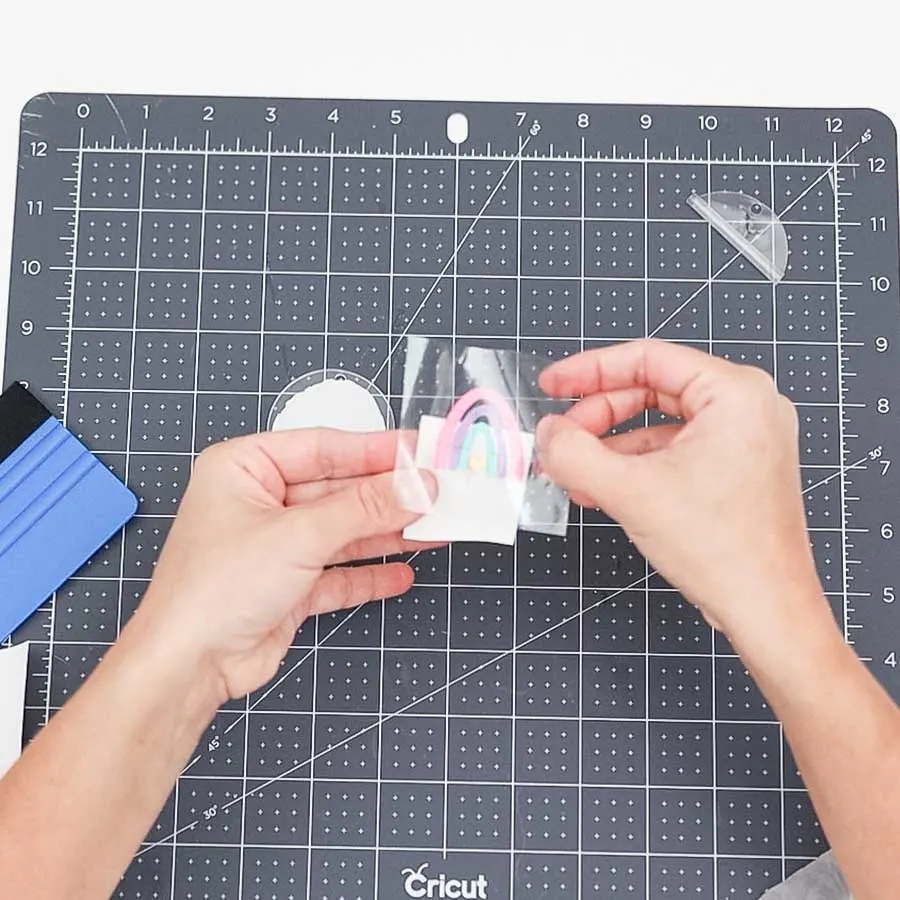
A. Tape down the cut that goes in the background (usually largest); there must be enough space for you to place all the other cuts. Tape can’t be where other elements go, so you need to pay extra attention.
B. With some transfer tape, pick on the element that goes next and pick it up from the carrier sheet.
C. Place element again on the carrier sheet (make sure you do it on the right side), only this time leave a small area exposed so you can layer up the vinyl.

D. Try to line up vinyl to the best of your ability. The good thing about this method is that you adjust as you go. Once you find the right spot remove the remaining backing sheet and lightly press to adhere a new layer to the taped one
Important: don’t use too much pressure when layering vinyl because your transfer tape will pick up the bottom layer.
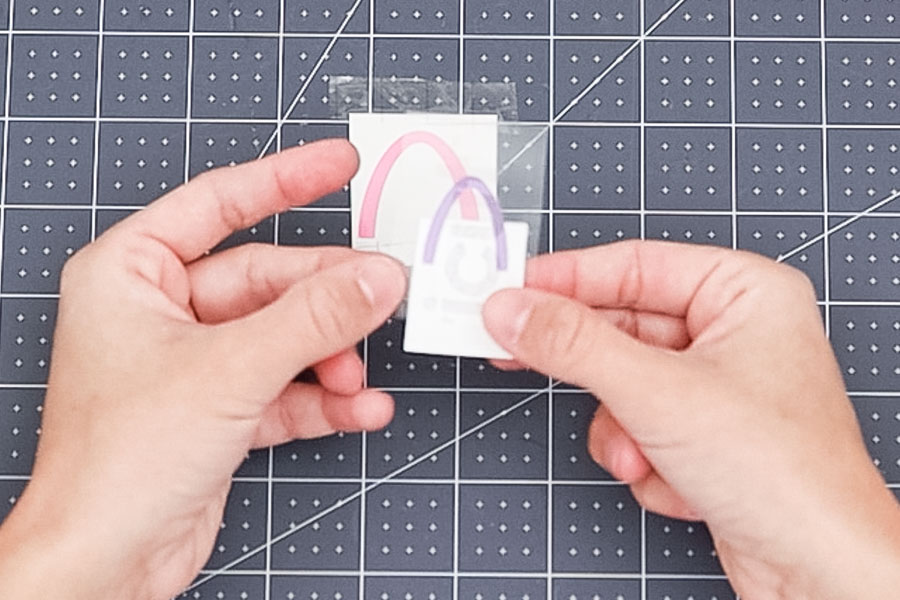
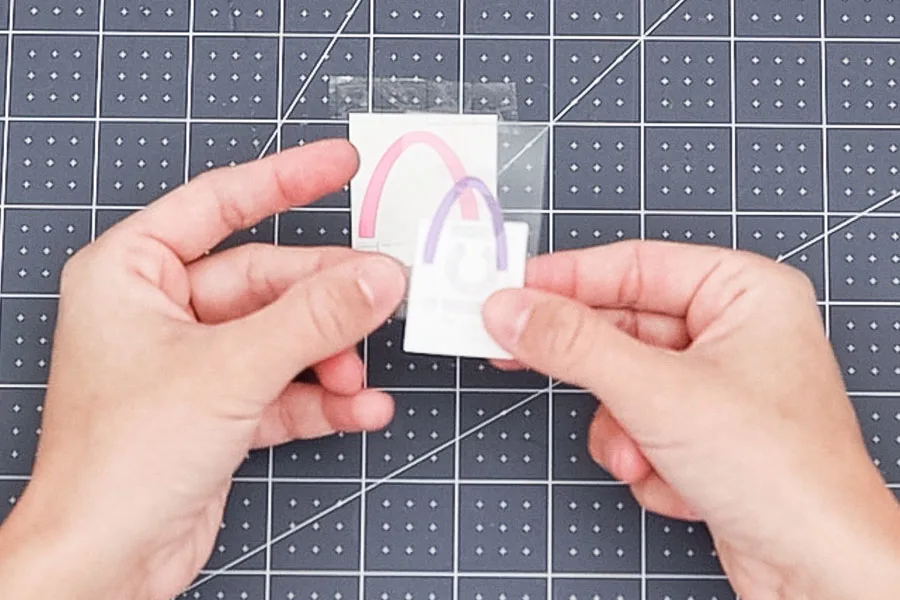
E & F. Repeat steps B, C & D as needed.
If your design is very intricate or has many pieces, you can do this from the keychain itself; remember to be mindful of fingerprints.
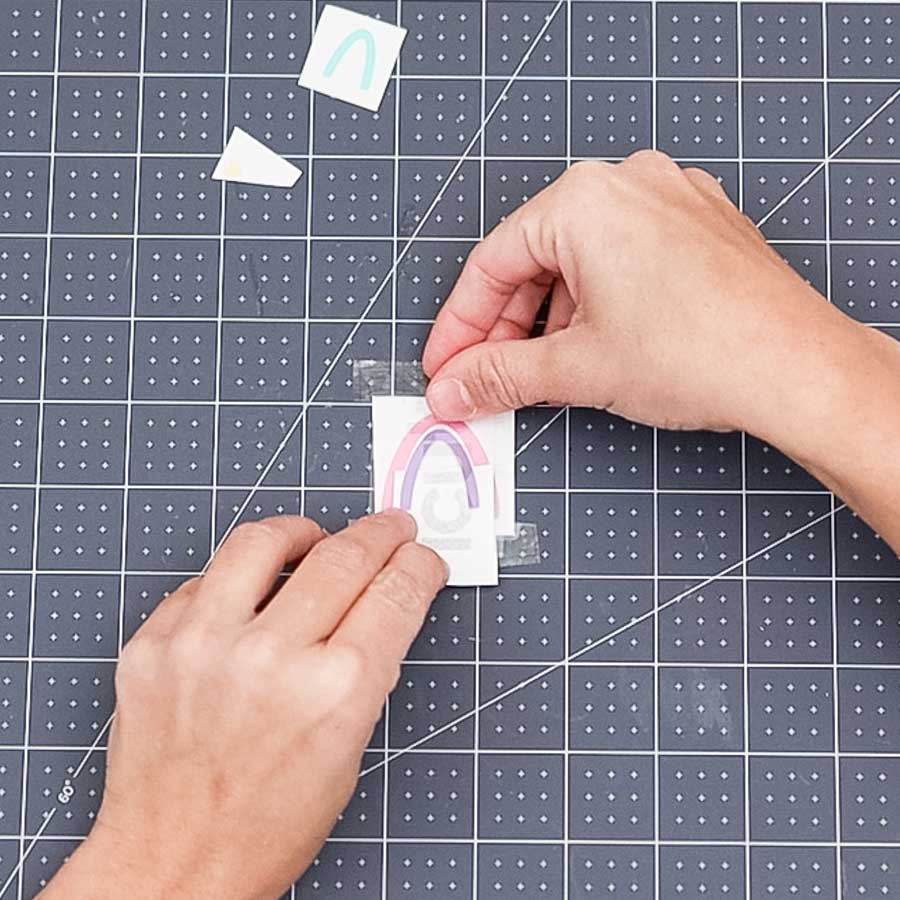
G. Let’s put it together!


H & I. You can also use the method I just explained to transfer the brush stroke to the keychain blank.
J. Use the felt edge squeegee for perfect transfers.

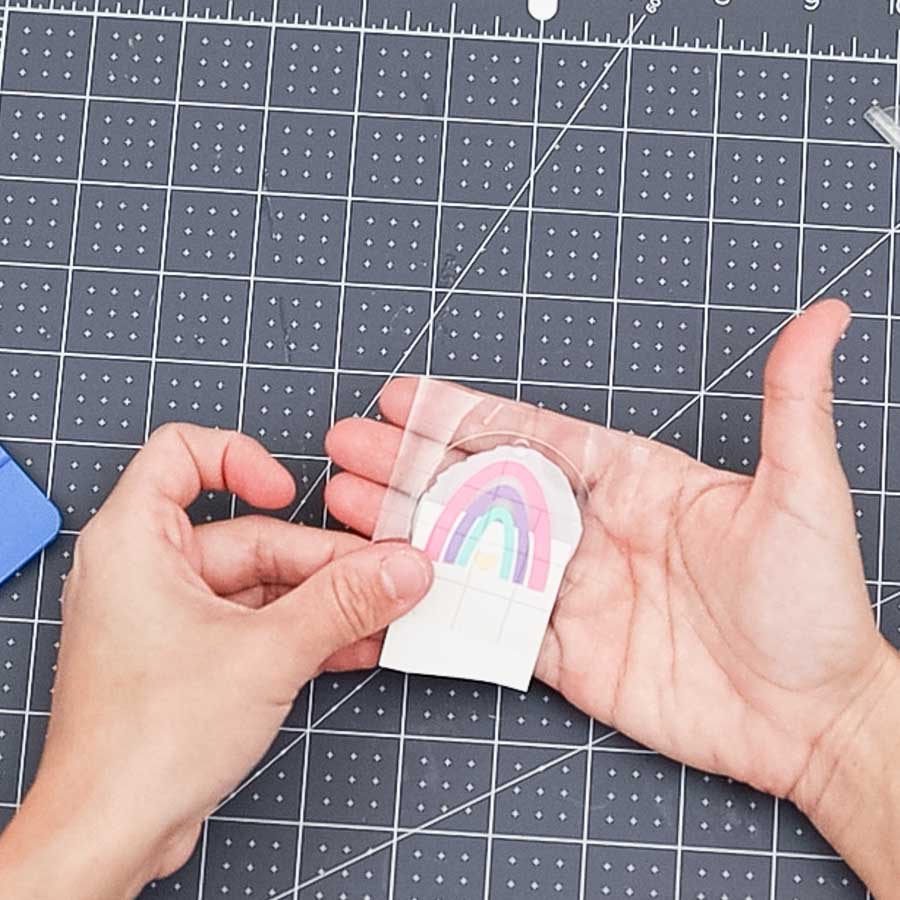
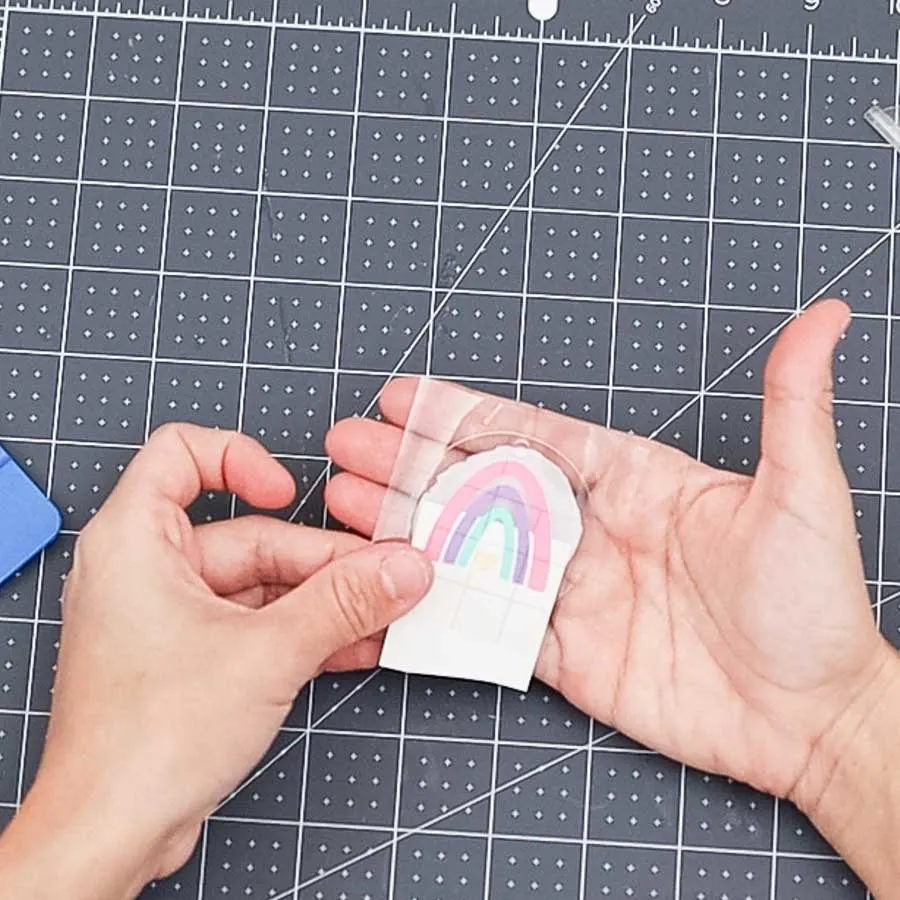

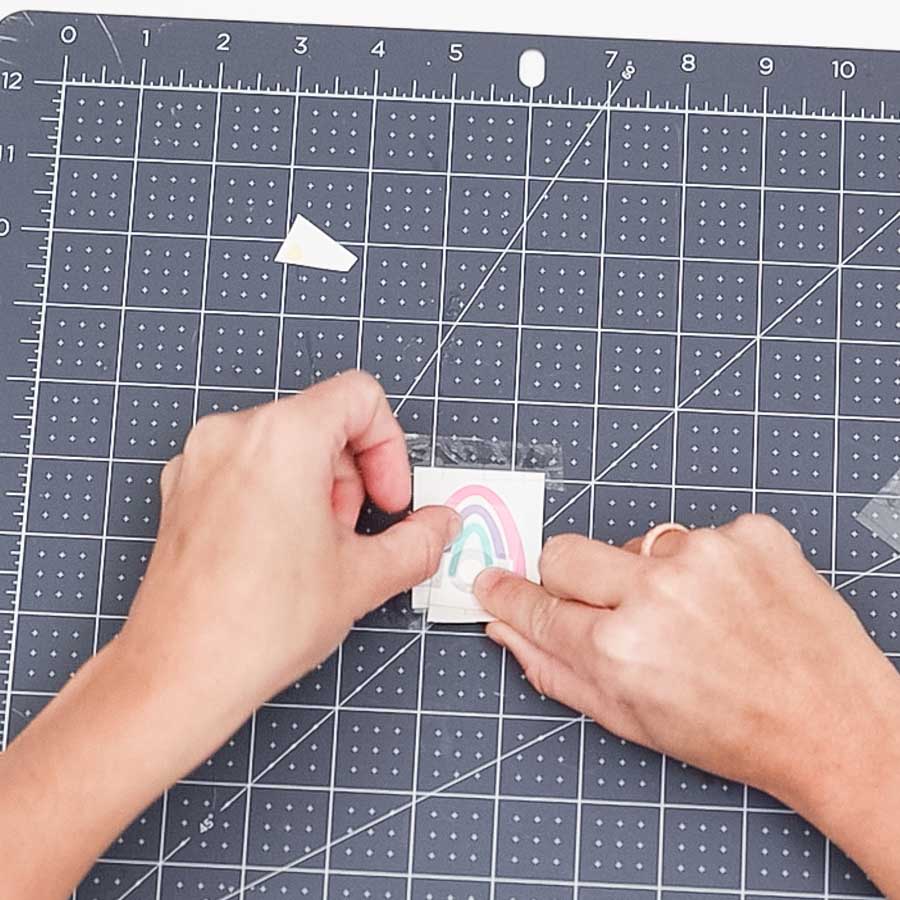
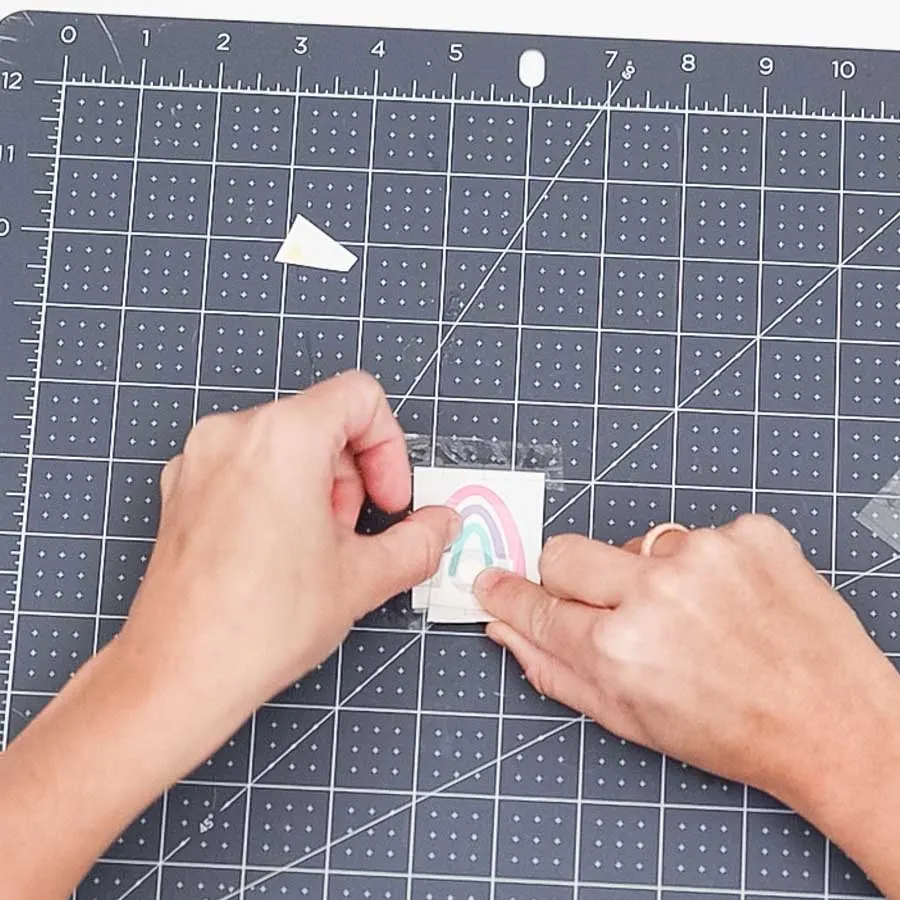
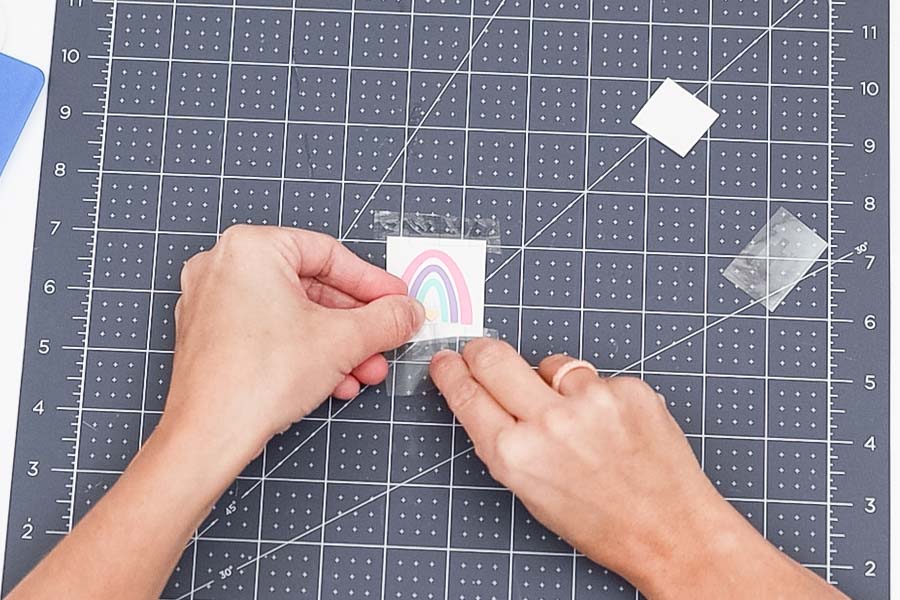
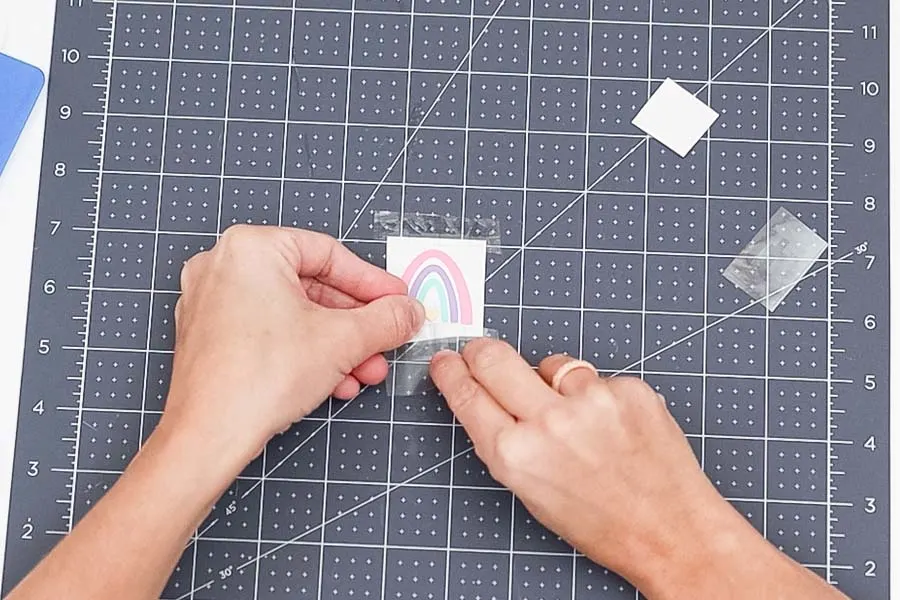
K & L. Again, the same method to transfer the rainbow. It gives you more peace of mind because you can quickly reposition your vinyl if you make a mistake.
Don’t forget to transfer on the other side (empty one).
M. This time, the brush stroke got in the way of the keychain hole! Very easy to fix with a true control knife cut out the access.
Look at it!
I added a silver keychain ring and also a gold clip!
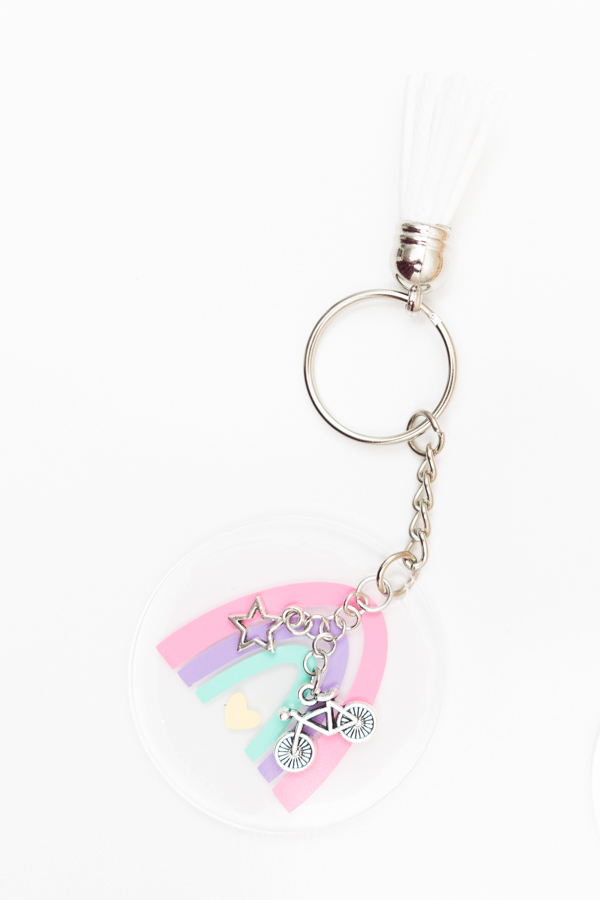
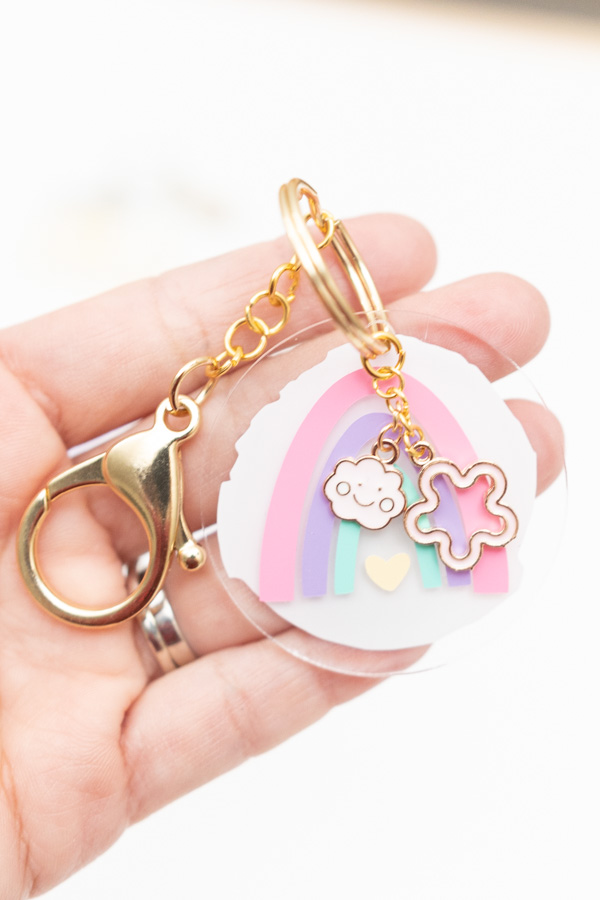

Also, do you notice those super cute jewelry charms?
They add a different vibe!
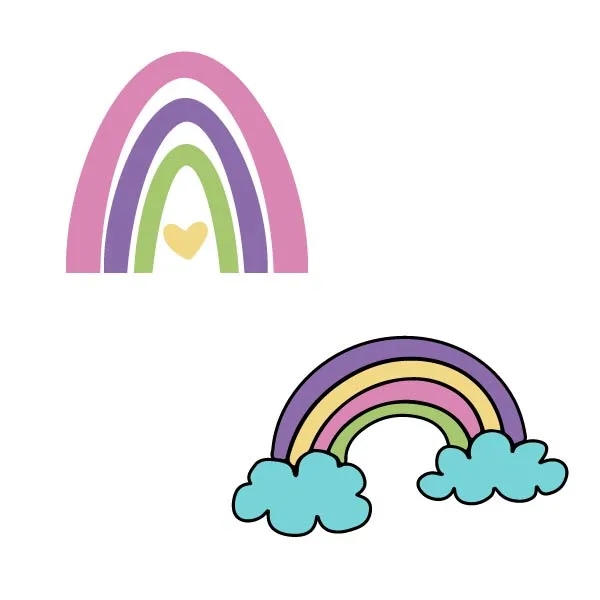
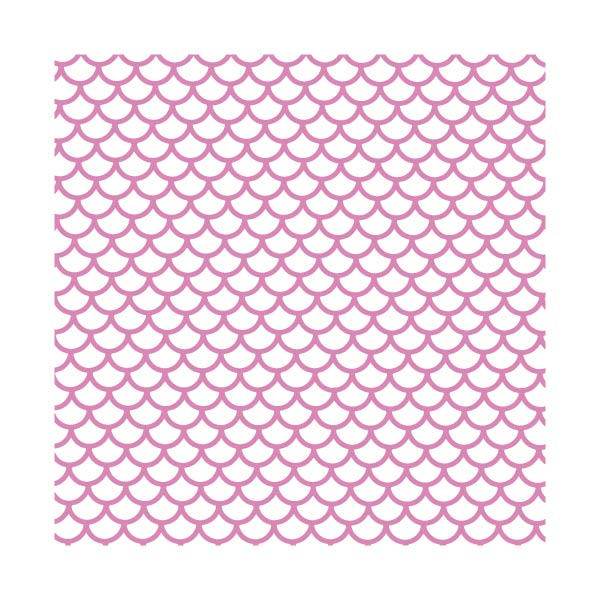
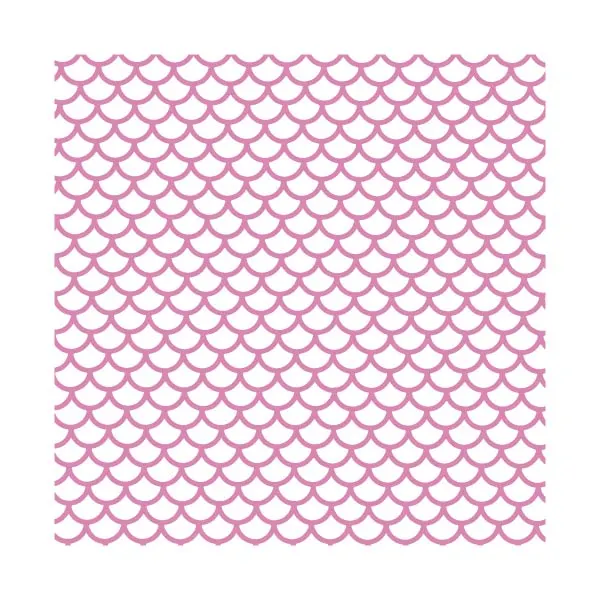
Free SVG Templates for Keychains – Paint Strokes, Flowers, Patterns, etc.
As I mentioned before, here are all the files for you to download and use on your keychains. In the next section, I’ll show you how to use some of them, so you feel extra prepared to make some awesome keychains.
To download the file(s), you need to be on a desktop or laptop and click on the button to trigger a download file on your PC. However, I’ve noticed that I can also download them from my iPhone.
Depending on your browser settings, your PC sometimes asks where to save the file, although most files will be in your download folder.
If the image opens in a new window (this may happen because of your browser settings), right-click on it, select the option “Save Image As,” and choose where you want to save the file.
SVG files look like web page files when you download them.


Oh!
Just so you know, I also have a library full of free SVG files and Printables for all my subscribers, a.k.a. Daydreamers. You can see a preview right here or get access by filling out this form.
Cricut Keychain Ideas
Ready for other cool keychain ideas?

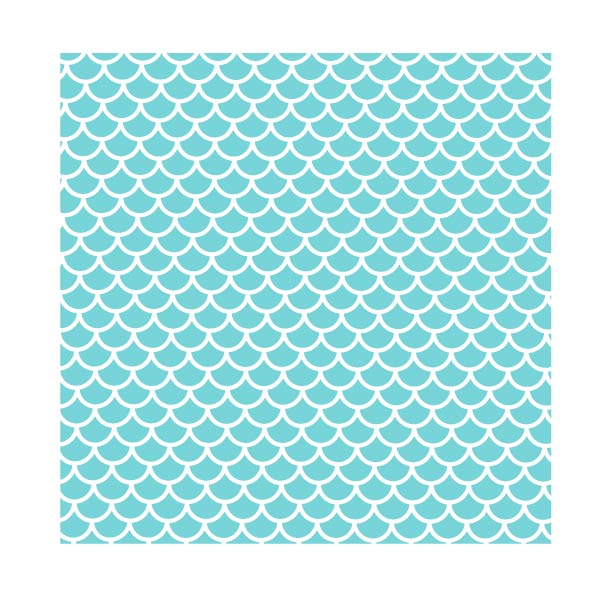
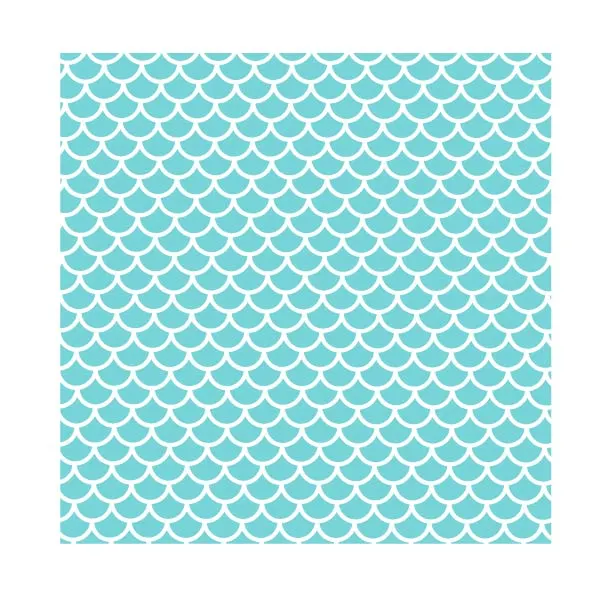
Mermaid Keychains
Upload one of the mermaid scales and slice it against your template (step 2).
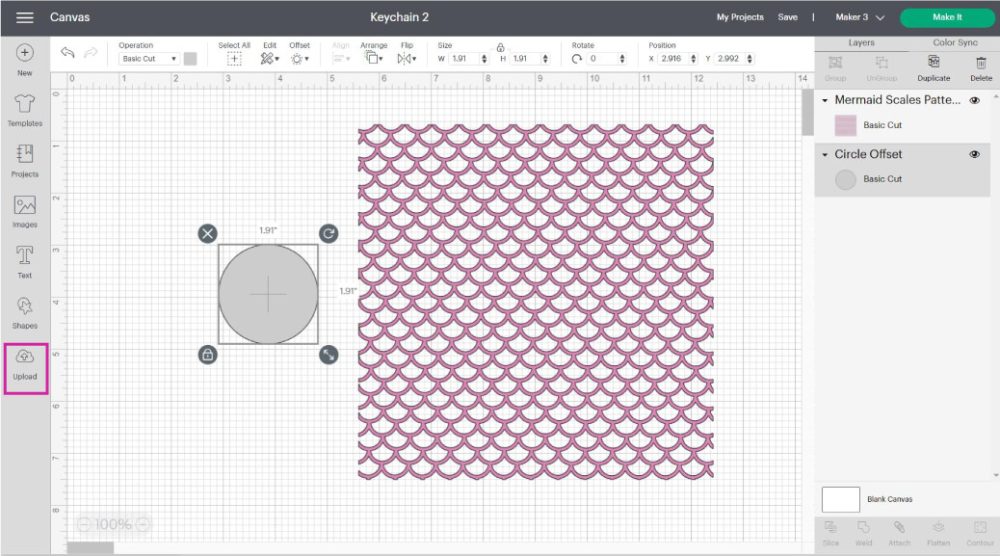
Keep one of the “Slice Results” and delete the rest.

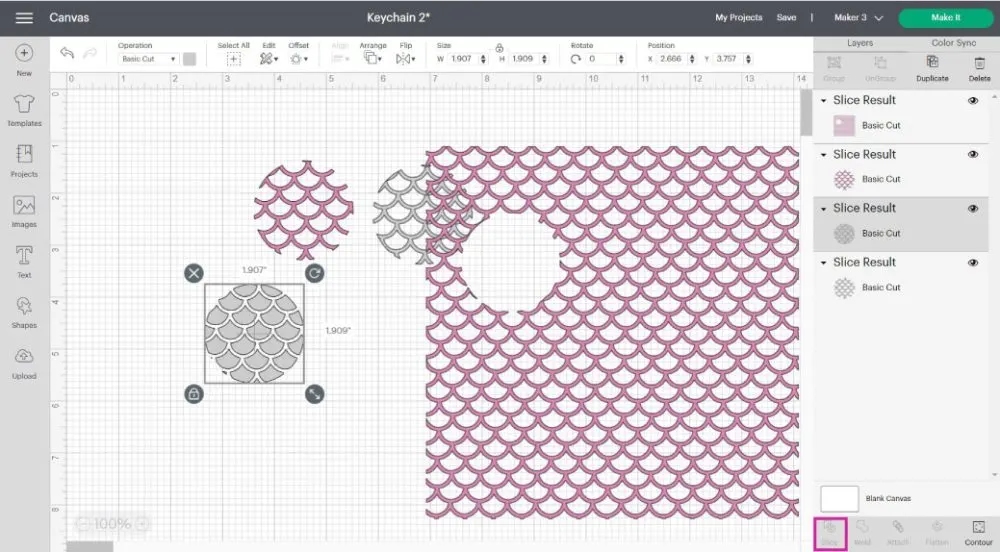
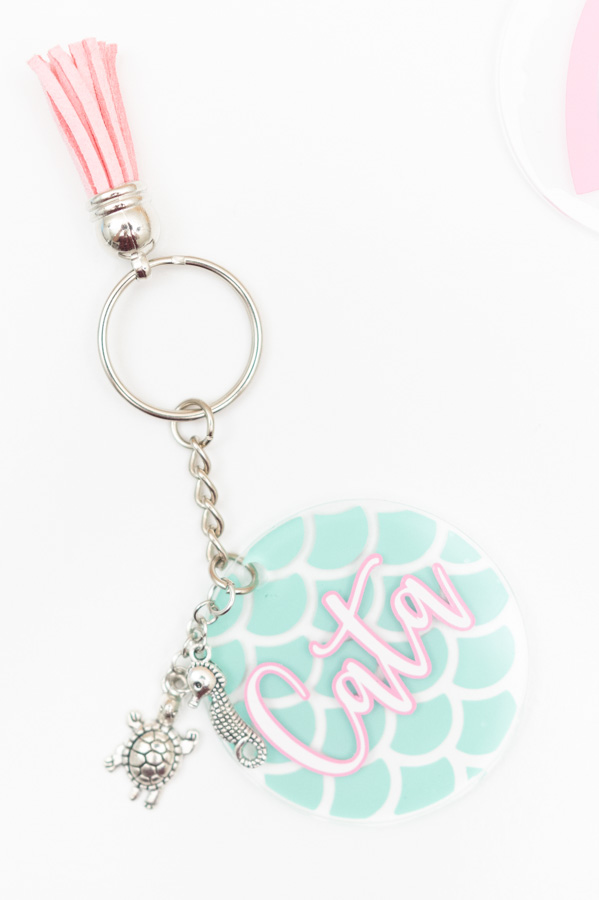
I duplicated this design and did two different styles.
In one of the styles, I typed my name and used offset to add an extra pop, and, on the second one, I added a Cricut image (Beach Vibes – #M26A1B980).

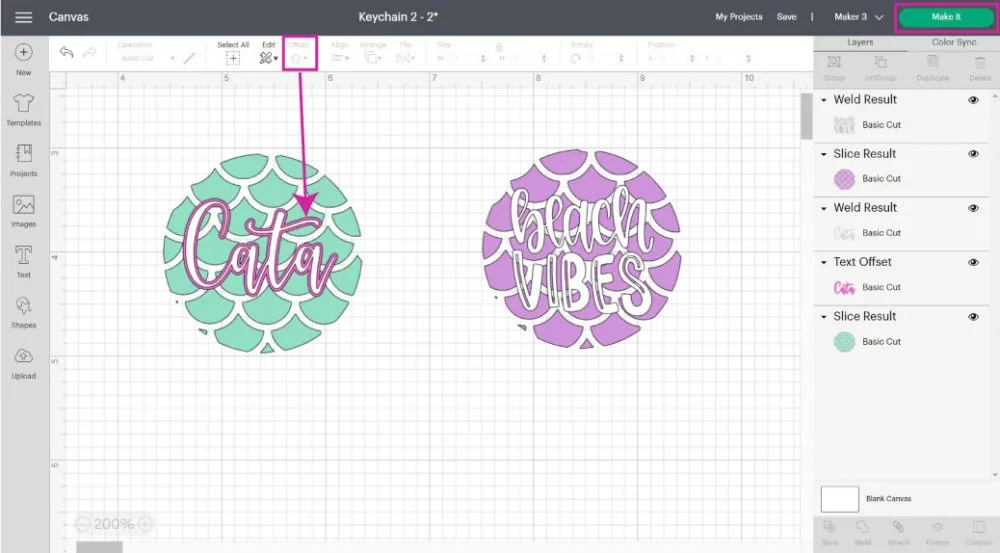
I used the exact transfer method I showed you before too.
However, the margin of error for designs that go from edge to edge is bigger. If you look close enough, you’ll see it’s not 100% centered.
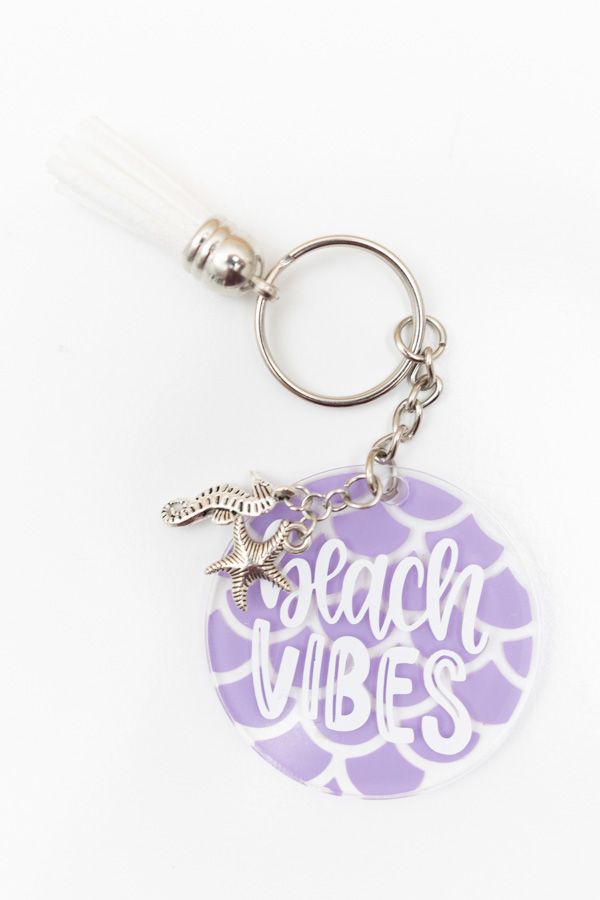

You get better as you go, your first couple ones will be far from perfect, but they’ll get better as you go!
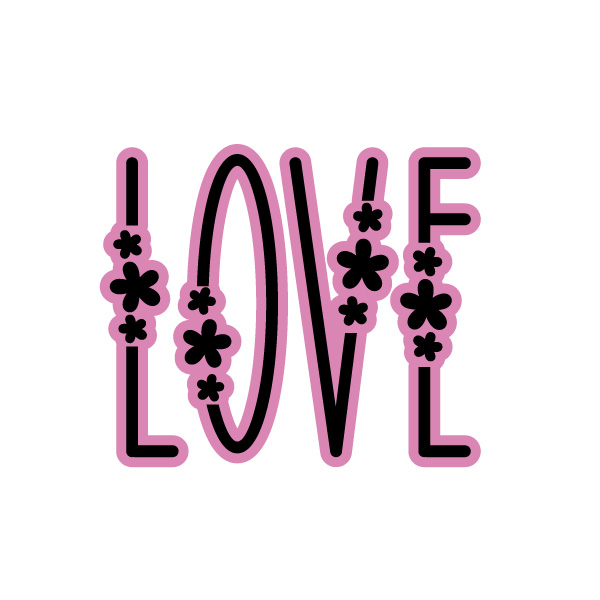
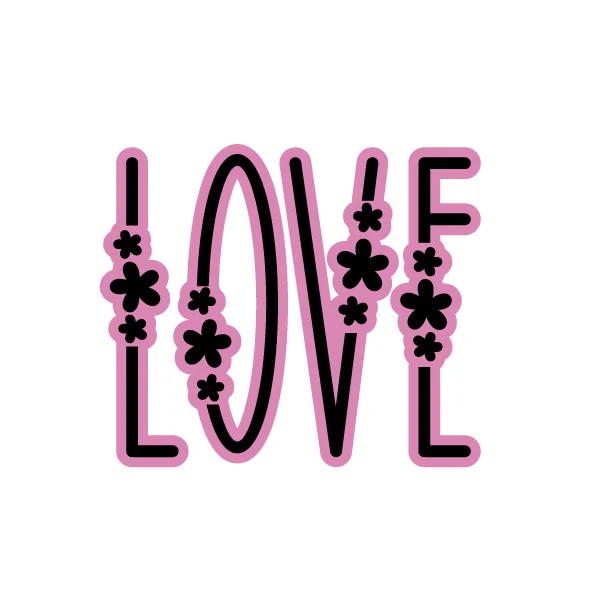
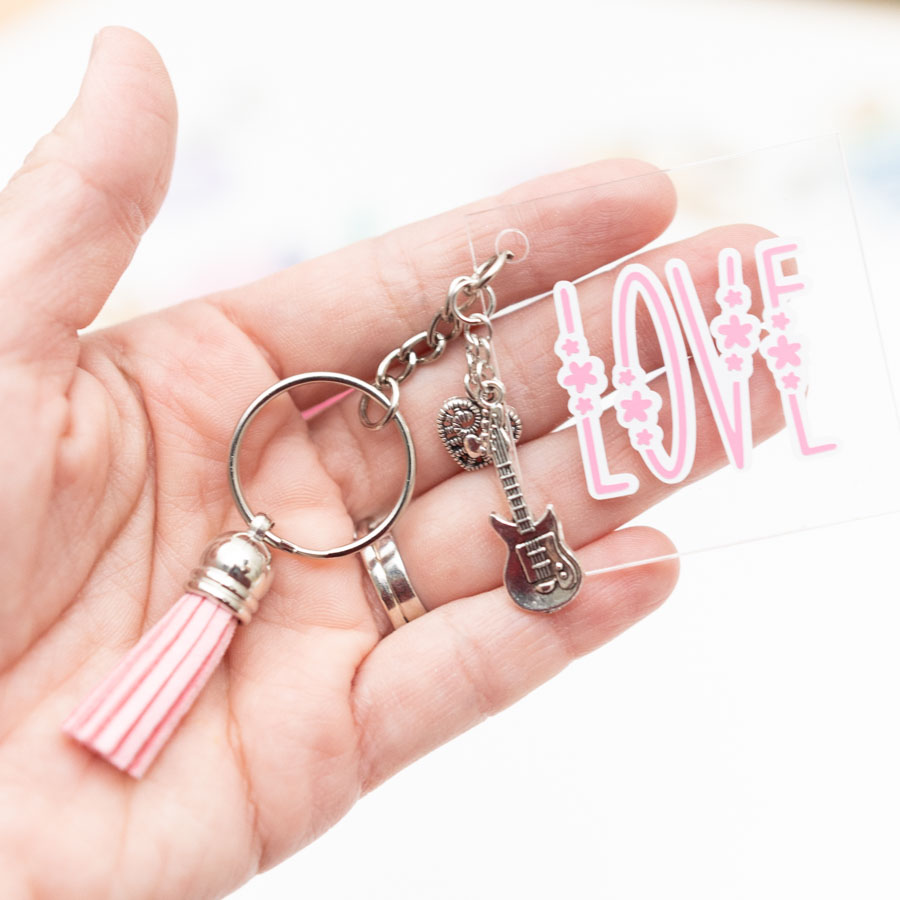
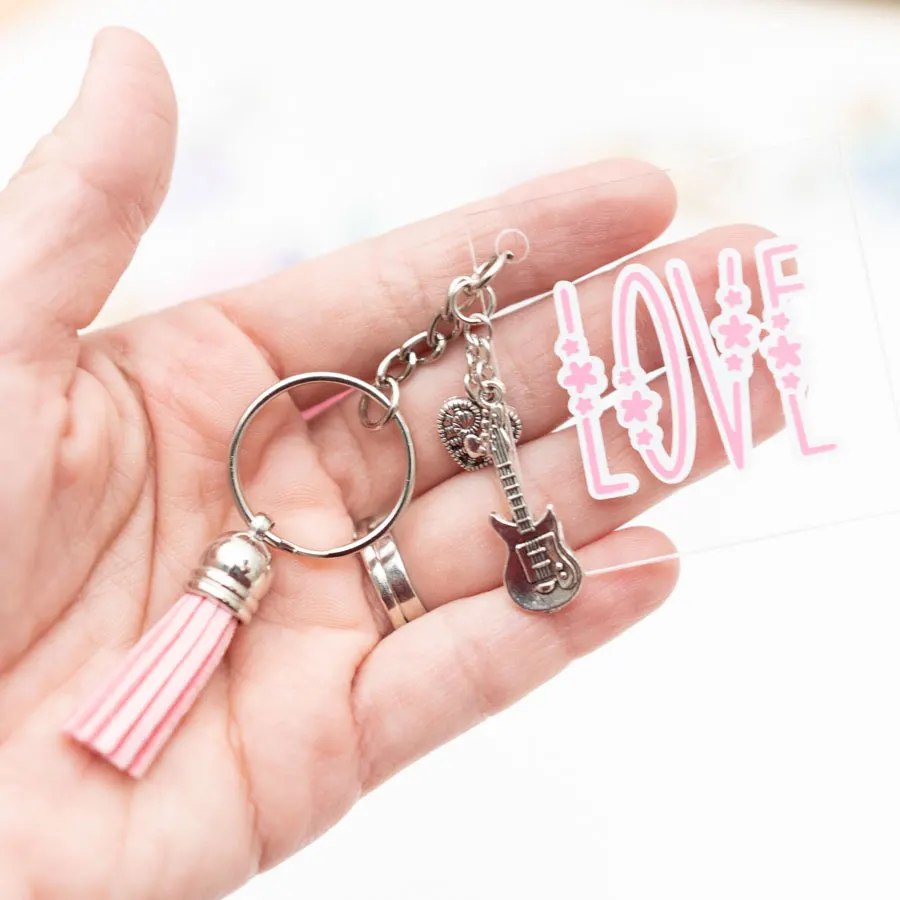
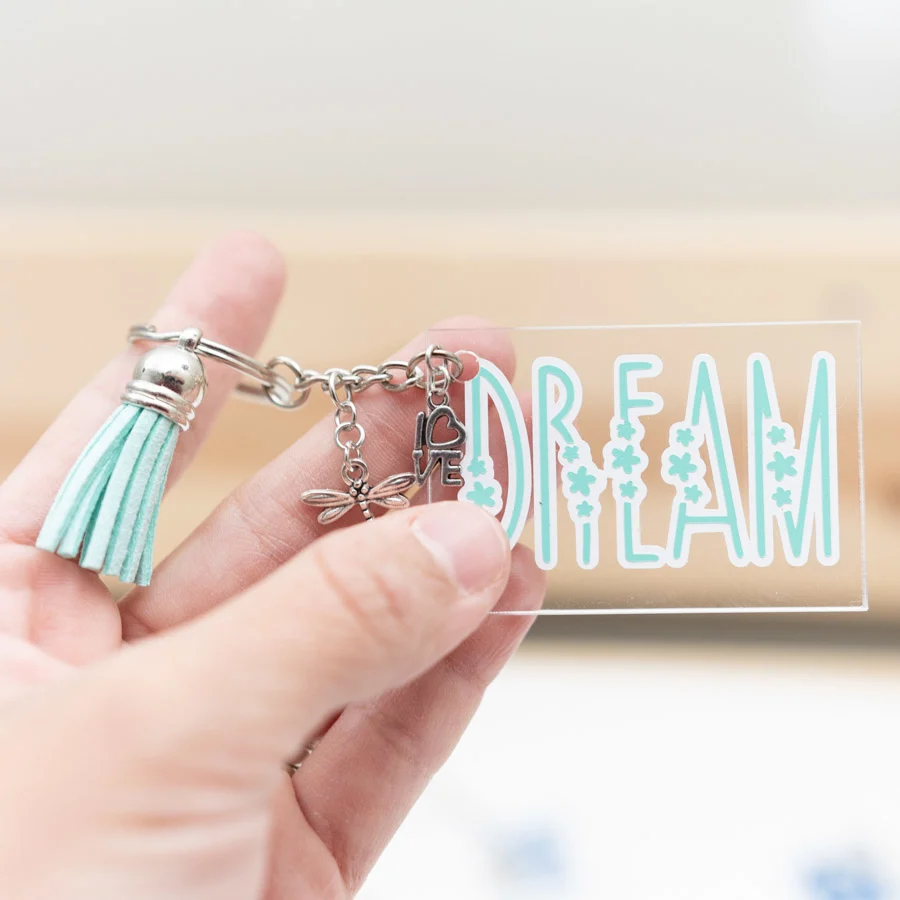
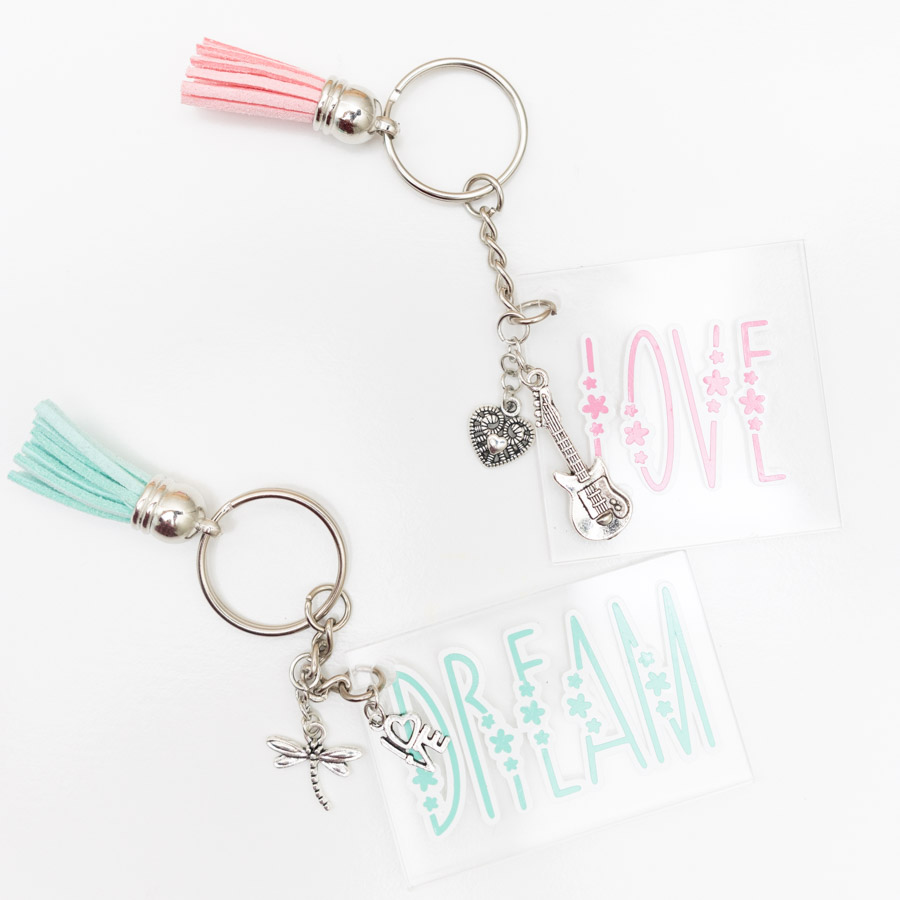
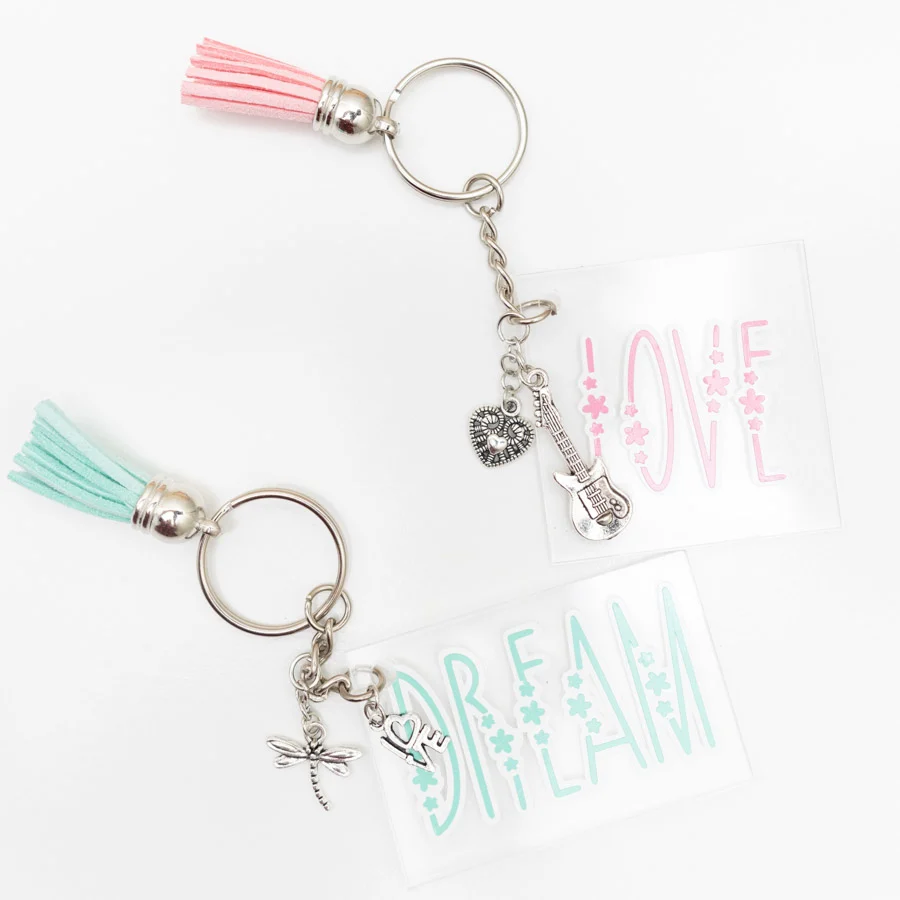
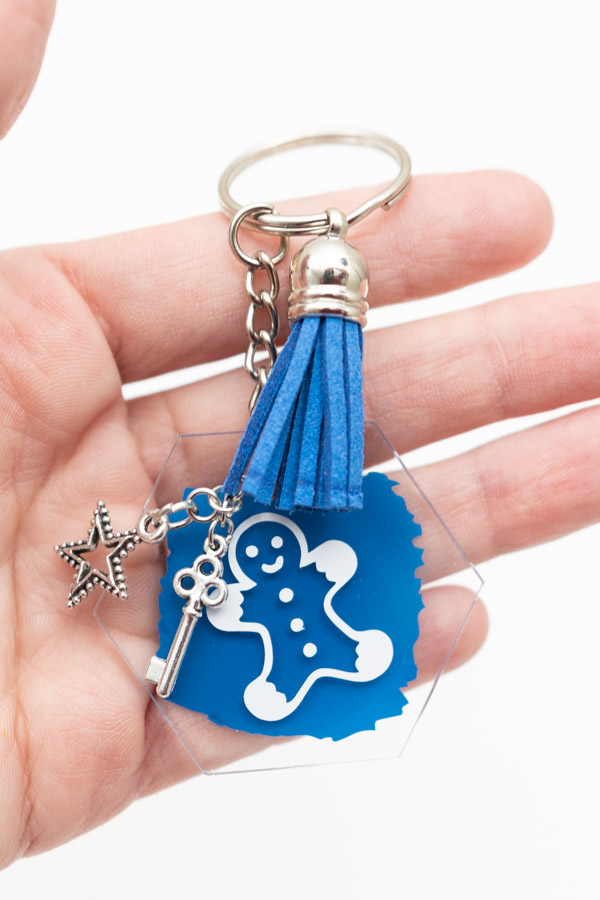
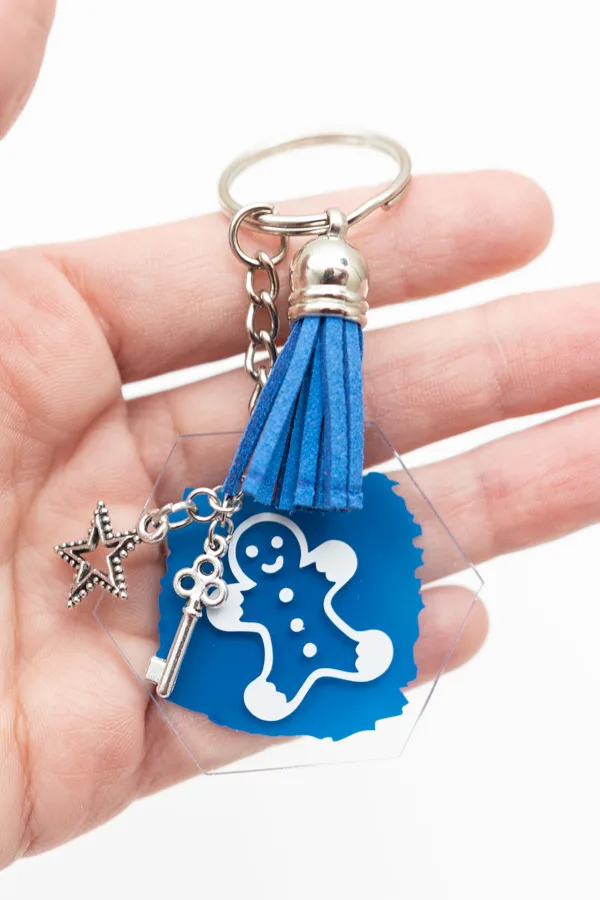
Love & Dream Keychains
Look at these beauties!
Don’t make them super tiny because you can lose some details when you weed.
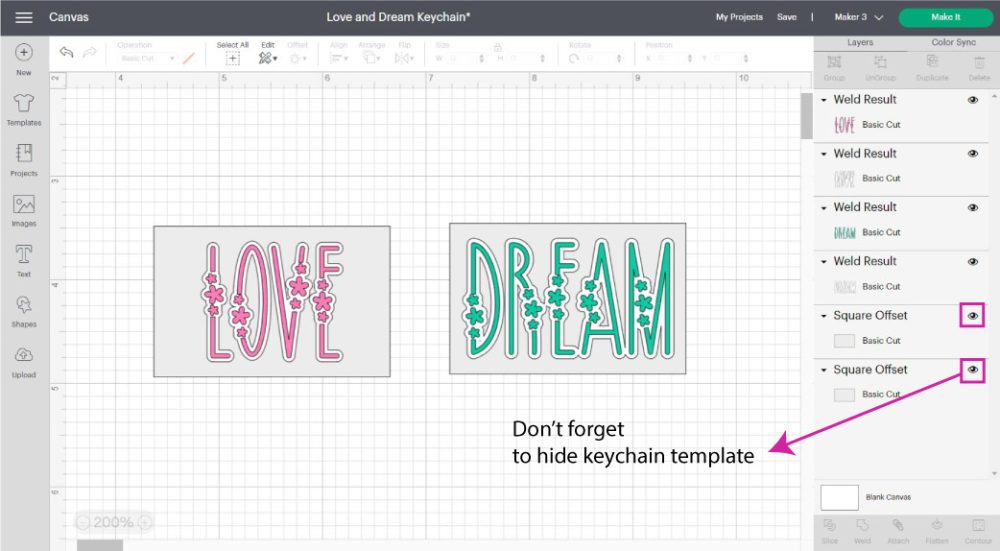
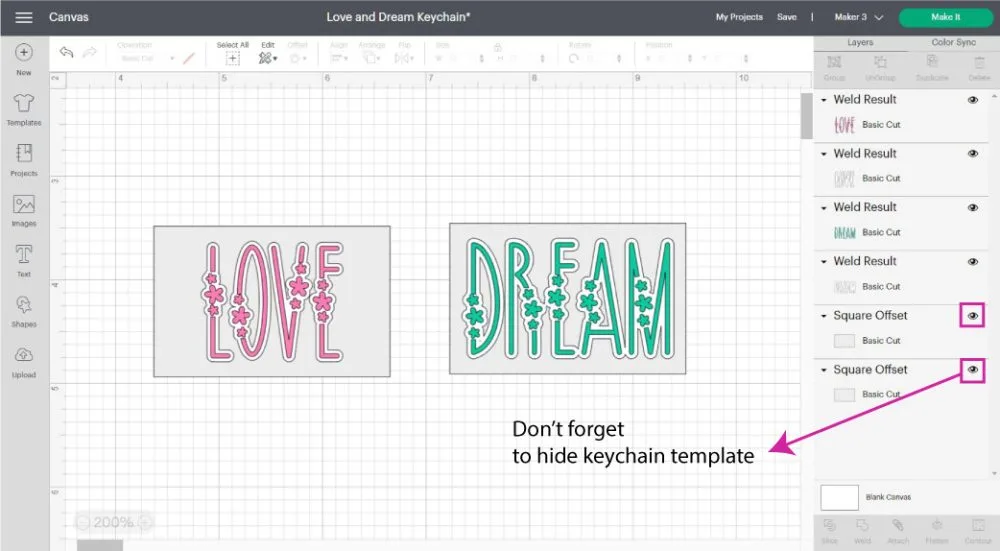
I had to cut the “D” from the dream a lot because it got in the way!
Sometimes you have to make decisions, that design had to be big enough because of the small details, so I decided to try it either way and was quite happy with the result.

Floral Keychain
I combined some of the elements I provided you with a Cricut image (#MA165E4A) and a teardrop shape for this next keychain.
It goes to show that the possibilities are endless!


I love the colors. I just wish I had more keys!
Pet Keychain
Now, if you love pets and miss them when you’re out and about, this keychain will be for you!
I used two Cricut images (#M28C4D62F, #M28C4D61D).

Layering these keychains was a little complicated but not impossible. I actually did line by line.
Also, I lost the details for the dog’s paw :/
I wanted to point out the mistake because they do happen!
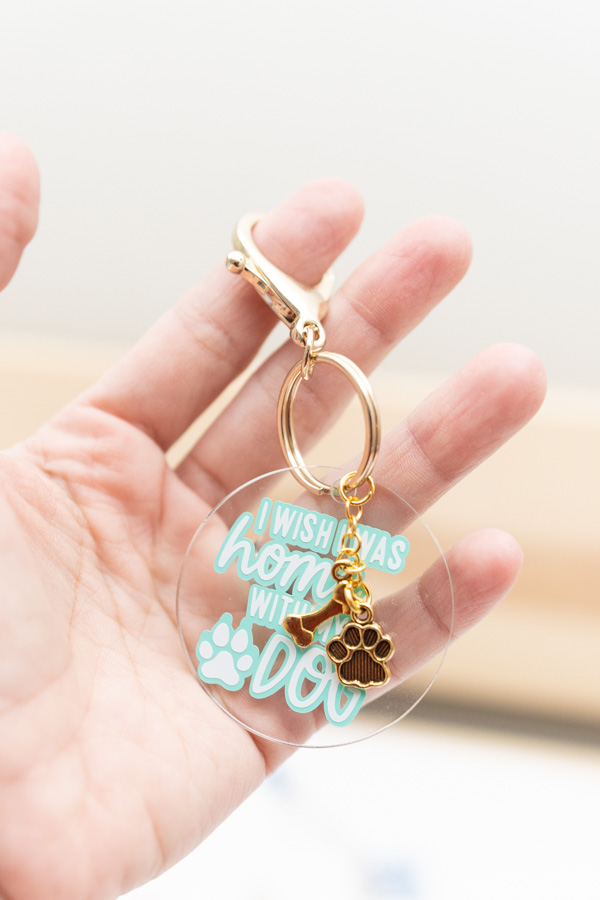

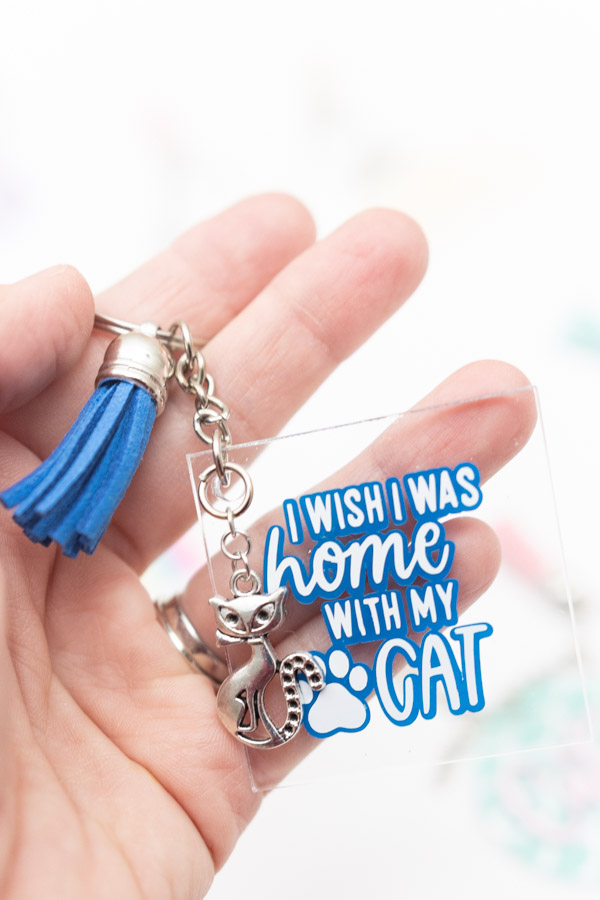
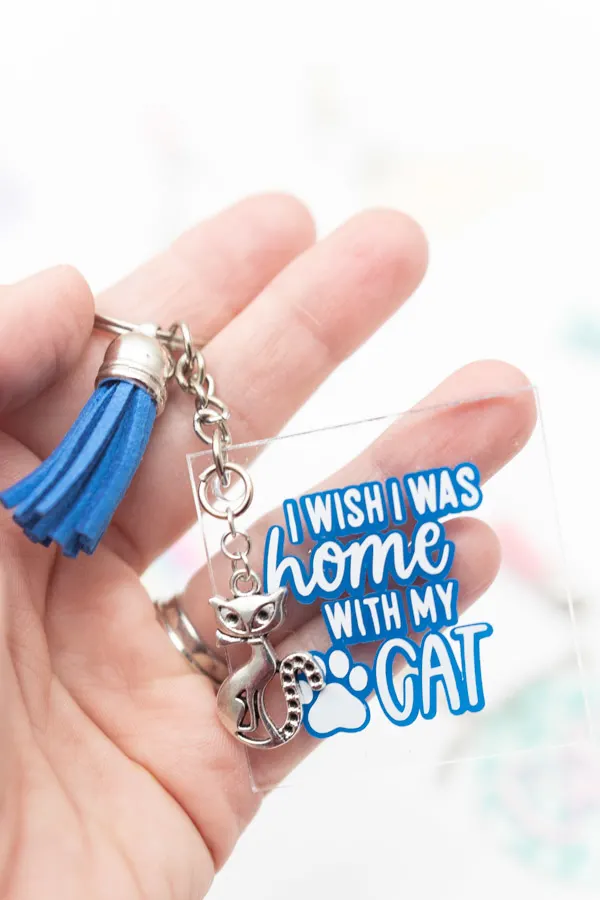
Aren’t they precious?
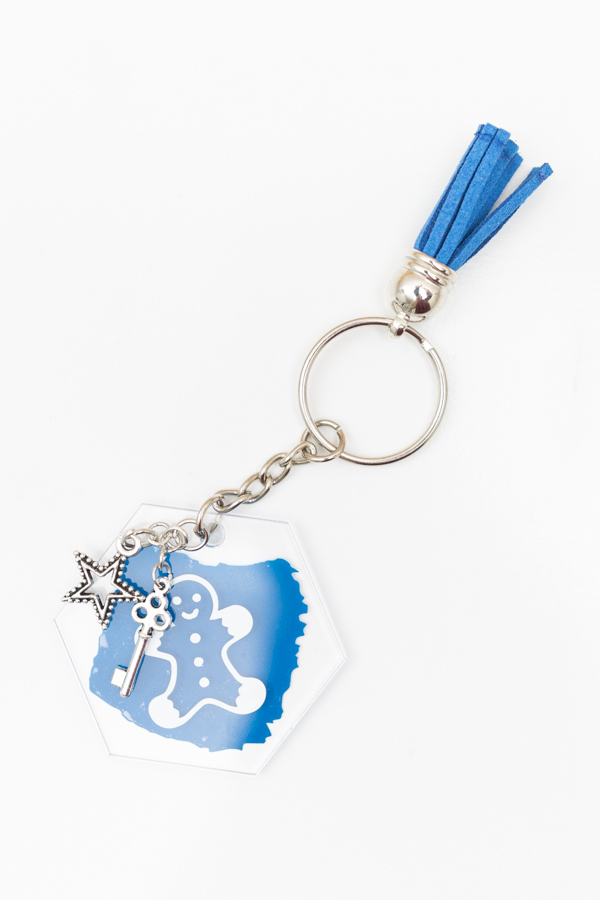
Winter/Christmas Keychain
Last but not least, you can personalize your keychains for any season.
Here’s a cute example!

You can get extra creative and make keychains as small presents for Valentine’s or Mother’s Day; the sky is the limit!

Which keychain was your favorite?
FAQ
Here are two extra questions you may have regarding this project.
Should I use paint for the brush stroke instead of vinyl?
No, you shouldn’t.
Paint cracks and gest scratch very easily, I tried using pain first and the keychain looked quite ugly. Maybe another type of paint would work.

Should I seal my keychain with epoxy?
In a perfect world, yes!
In a practical and safe one, not really.
Epoxy or resin is a whole mammoth to tackle because it produces harmful vapors for your health, so you would need to buy not only the materials for this project but also protective equipment suited to work with this toxic material.
If you’re planning on selling or making a living out of these keychains, maybe it’s a good idea to learn how to seal them. However, if you’re making them for a personalized gift, trust me, they look fantastic and adorable.
Do you know it takes me over 25 hours to complete a single Cricut article? I know it’s wild, but I want to make sure you understand everything!
I would appreciate your support on Instagram , Pinterest , and YouTube as I try to grow my audience and continue producing great content!
au
Tuesday 5th of March 2024
thank you, i will try to use your templates.
Toni
Thursday 24th of November 2022
Thank you for the free templates.
pamela
Wednesday 3rd of August 2022
thank you so much for this designs !! God bless your work
Catalina
Thursday 4th of August 2022
You're very welcome :)
Deana
Wednesday 13th of July 2022
Love how easy you explained everything. Thank you for doing this.
Catalina
Monday 25th of July 2022
You’re very welcome :)
michelle blackford
Friday 13th of May 2022
thank you so much you have helped me so much