Hi Guys!
If you know me, you know that I love designing printables. One of the things I love the most is when an idea comes to my mind and I am able to design it from start to finish.
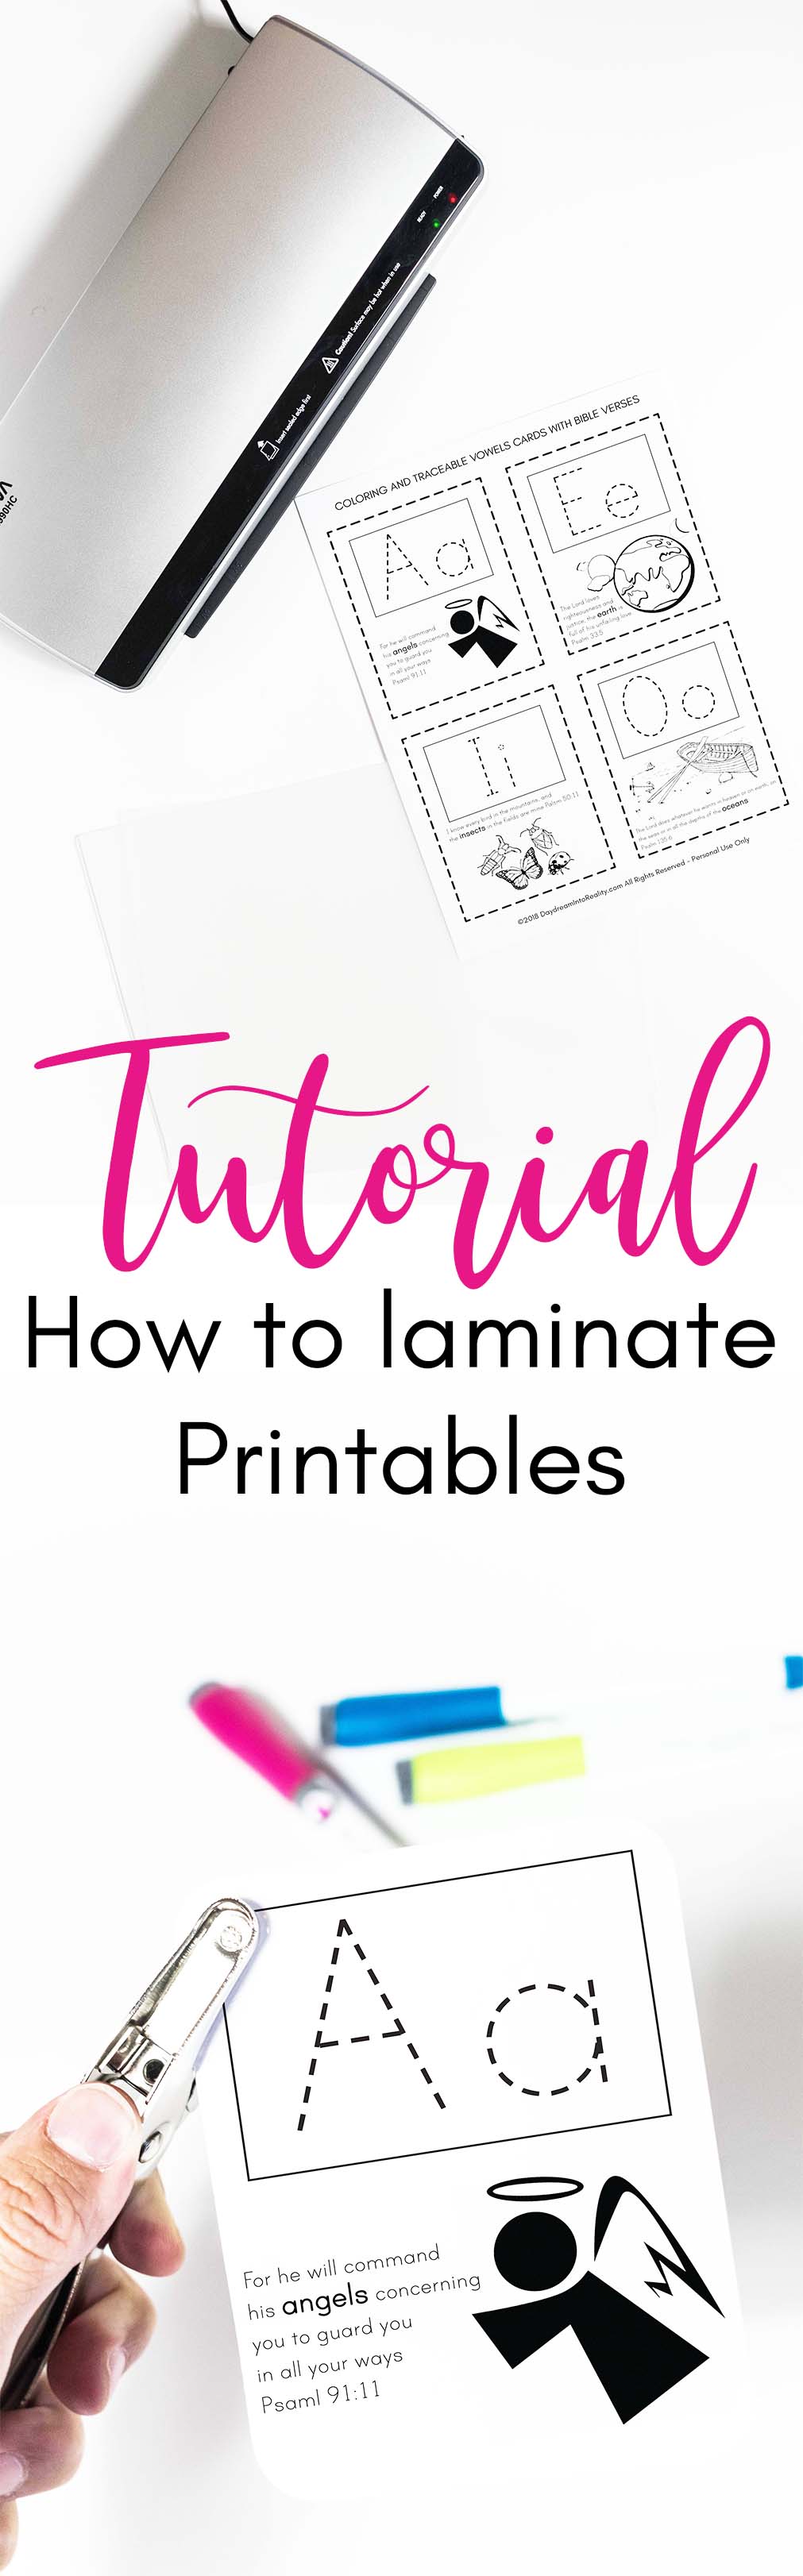
I have been thinking a lot lately about taking care of my printables and find ways to do more stuff with them, finally It came to my mind. So, today I want to teach you How to Laminate and Make Printables more Durable.
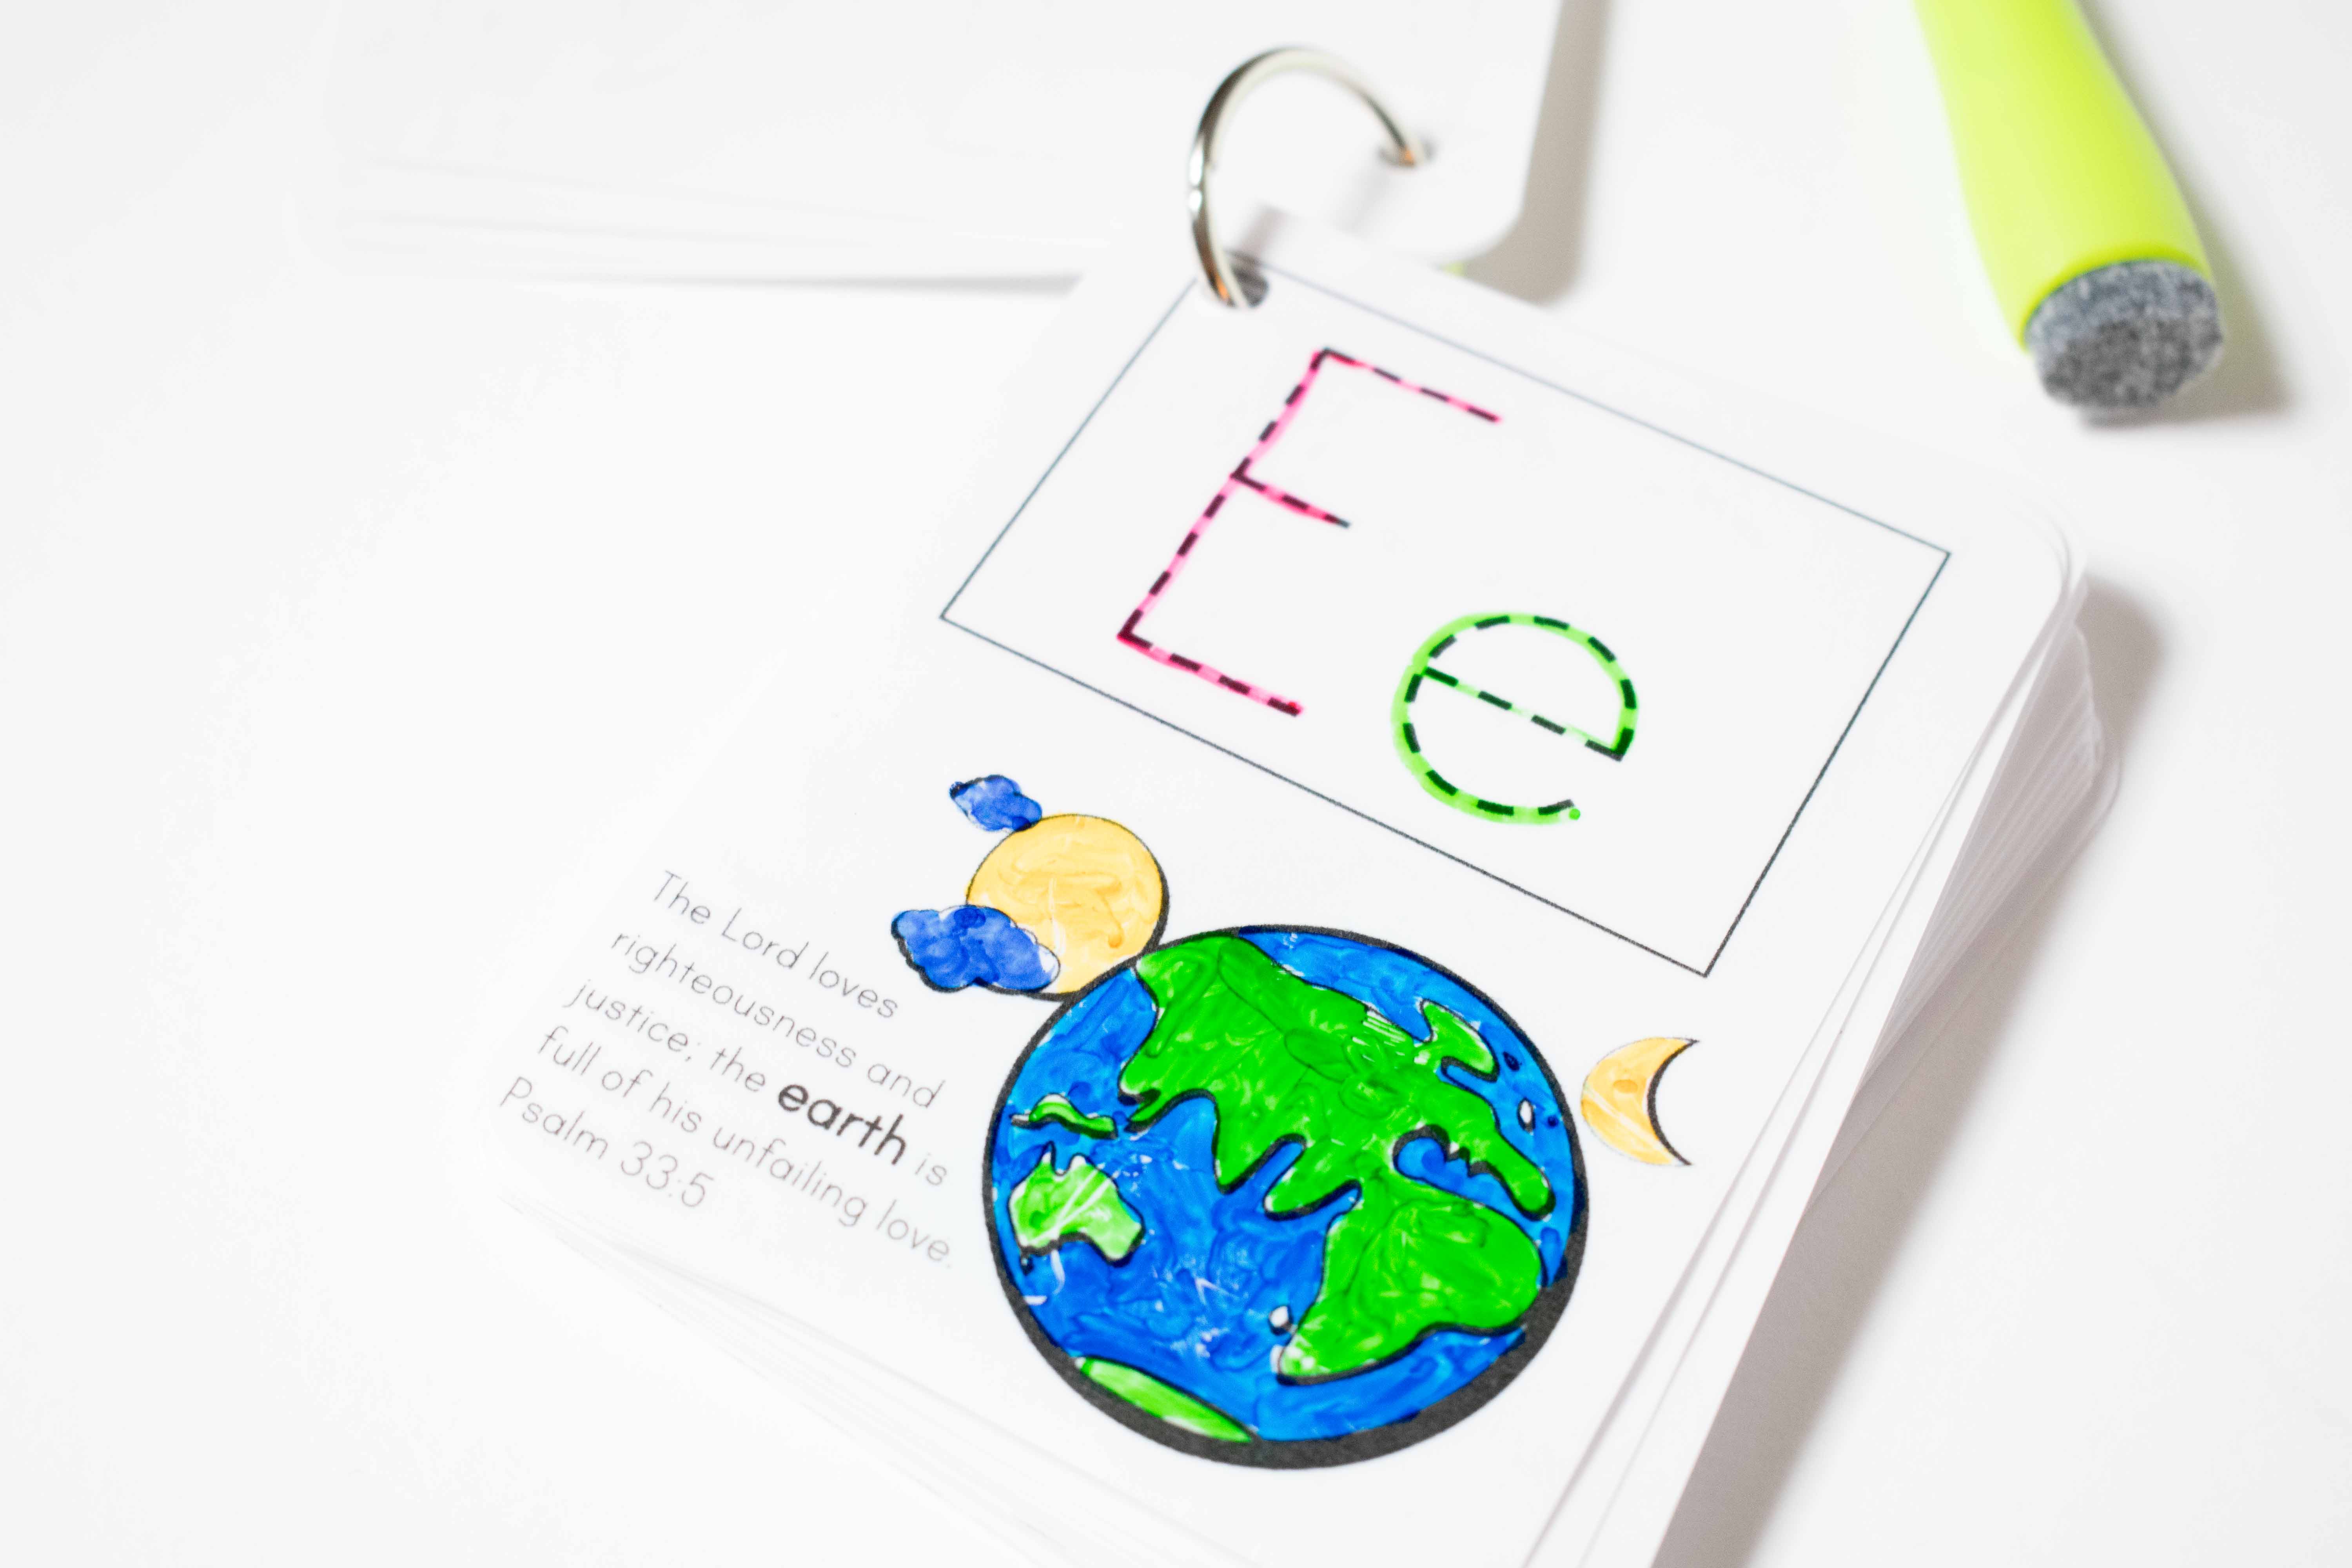
This a step to step of how I laminate some of my printables. For this case I used my Free Traceable Vowels with Bible Verses. However you can get creative and add or omit steps along the way so your final product fits all of your likes.
Are you ready?
Let’s go ahead and get started YAY!!!
How to Laminate and Make Printables more Durable
I love designing bookmarks, wall arts, homeschooling resources and more.
Right now I am in a homeschooling rage and I will be creating tons of printables that will help moms and teachers to teach their little ones some good stuff.
On this tutorial I will walk you through the products I use and how I do it. Plus other ways you can do it as well.
Materials
The materials I use are very simple. Some you may have on hand, and some of them you may have to go to the store or order online. Either way I guarantee you that your printables will be so durable and versatile after your are done.
For Laminating
- Hot and Cold Laminator Machine
- Thermal Laminating Pouches
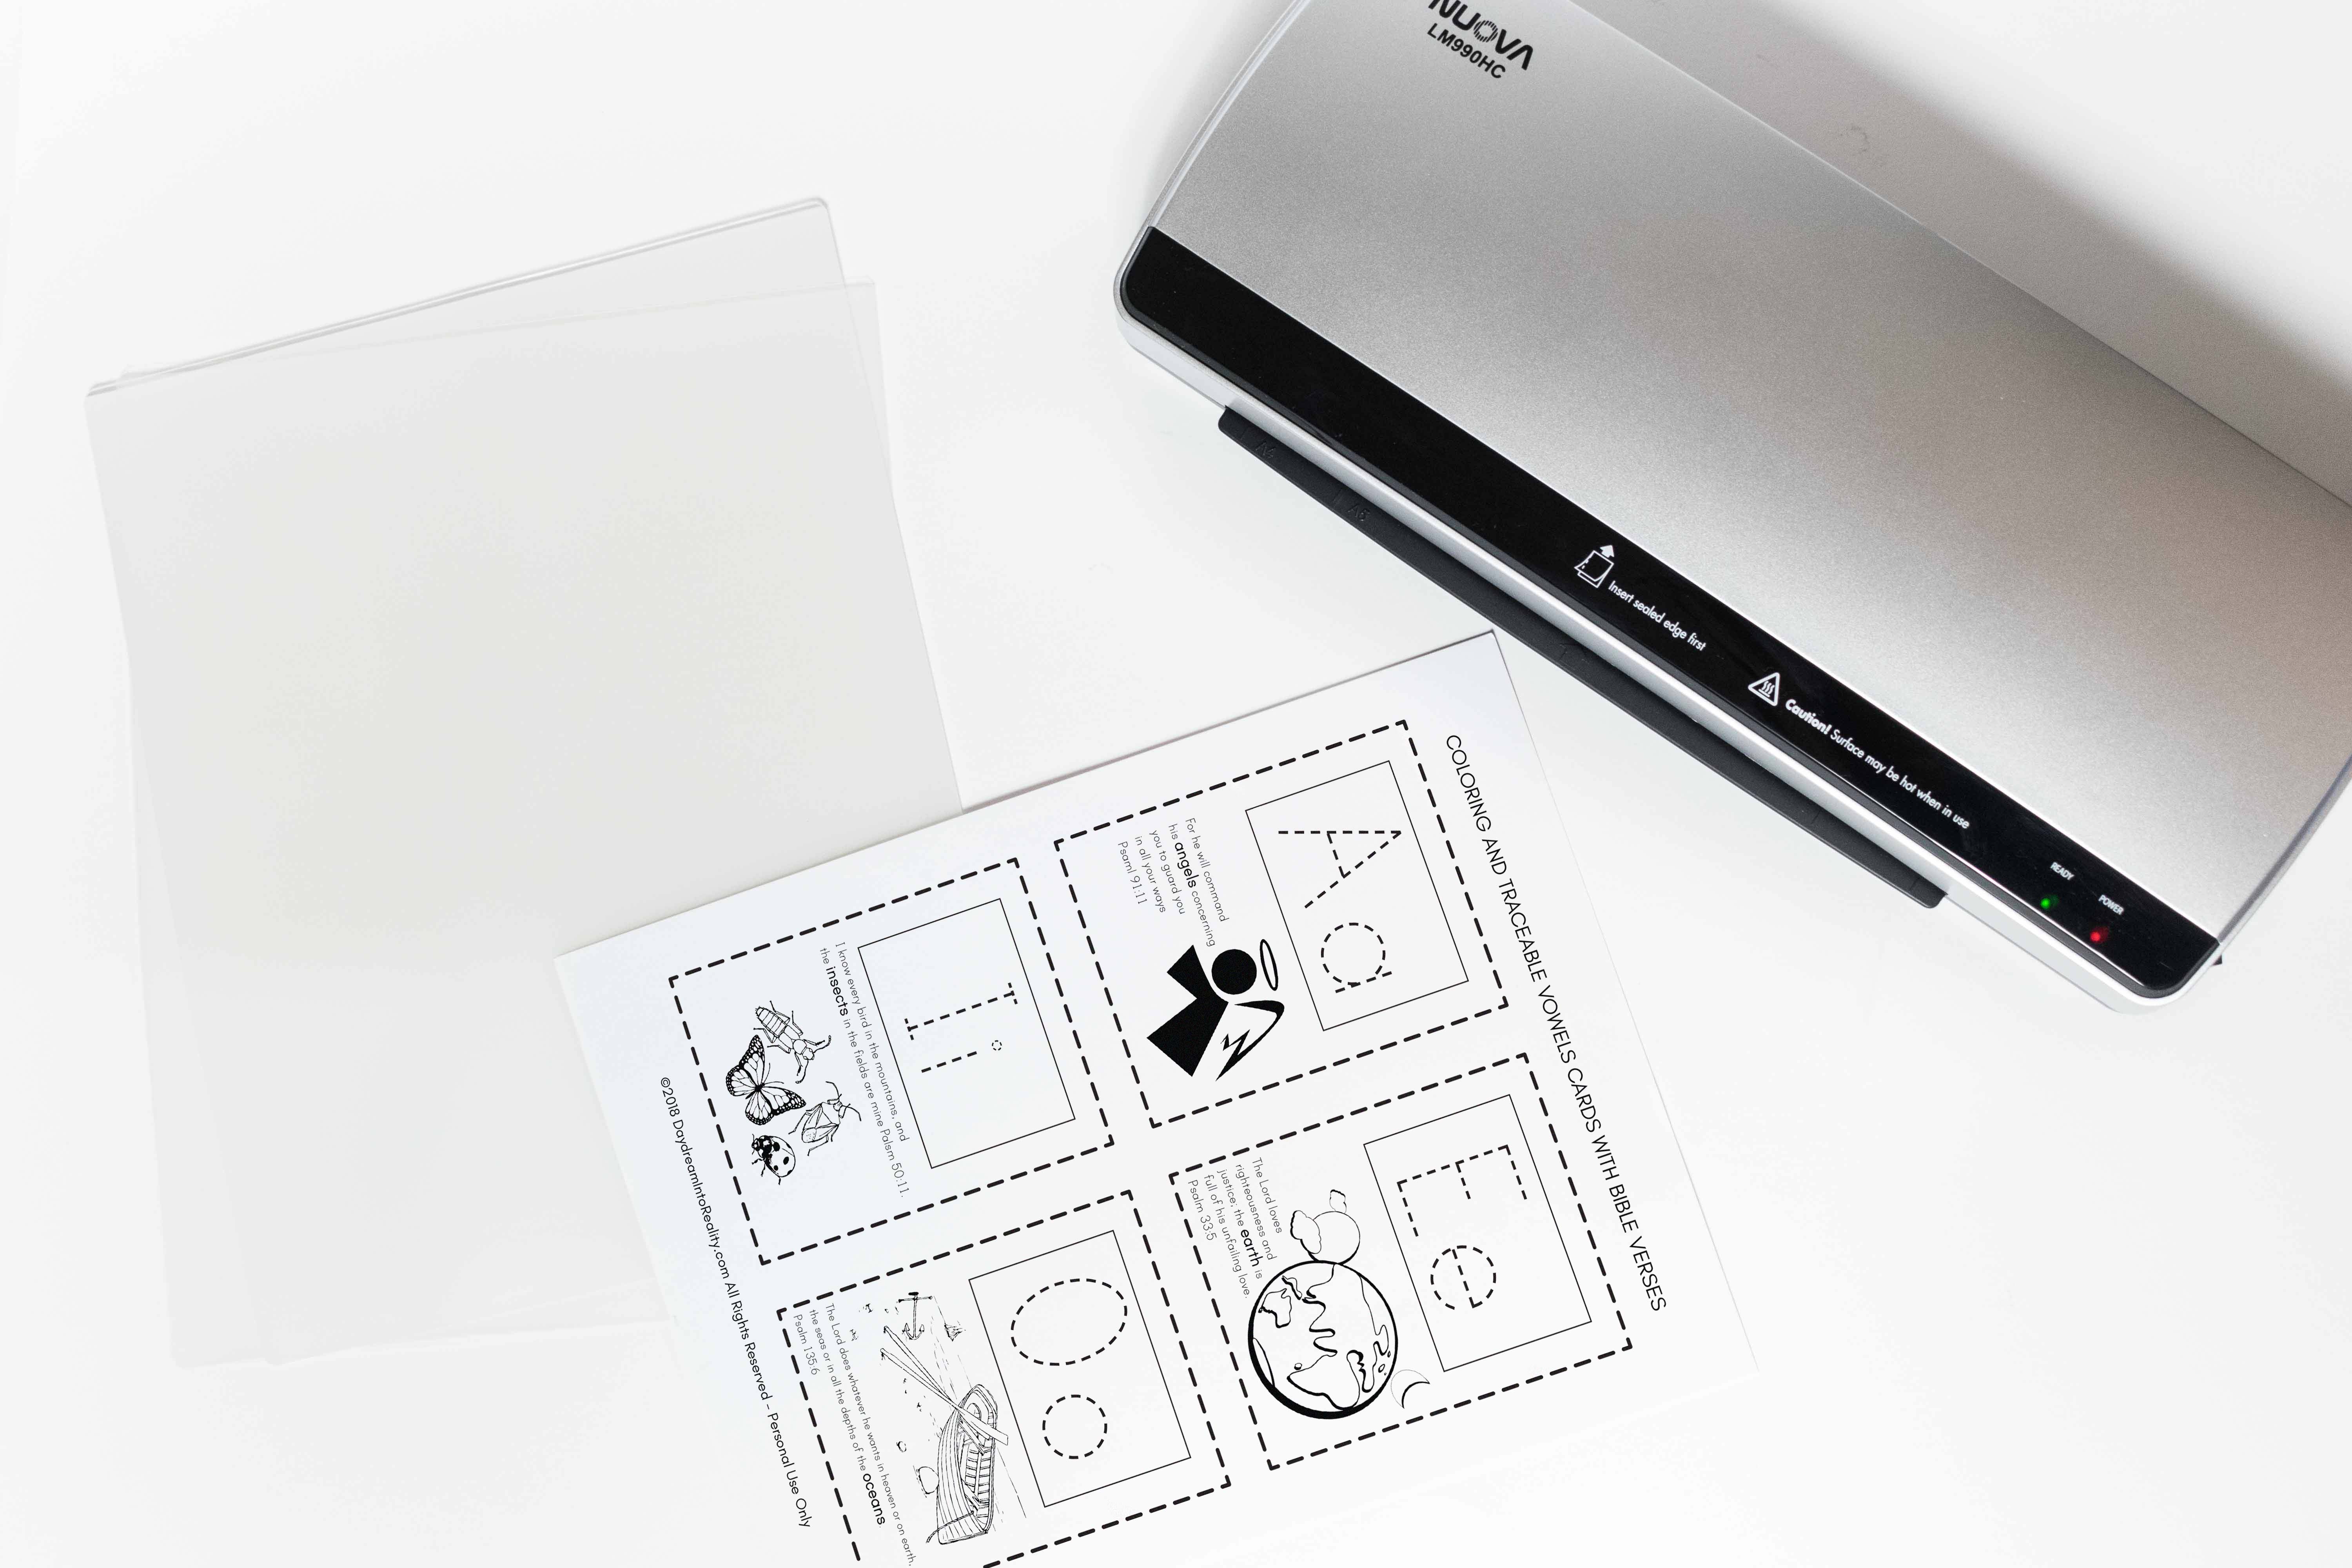
- Printable that you want to laminate. You can get hundreds for free in my FREE PRINTABLES LIBRARY
- Transparent contact paper (If you don’t want the machine)
After Laminating Materials
This depends on the nature of your printable. If it’s one sheet you will be done right after laminating. But, for this printable in particular I will be using the following products:
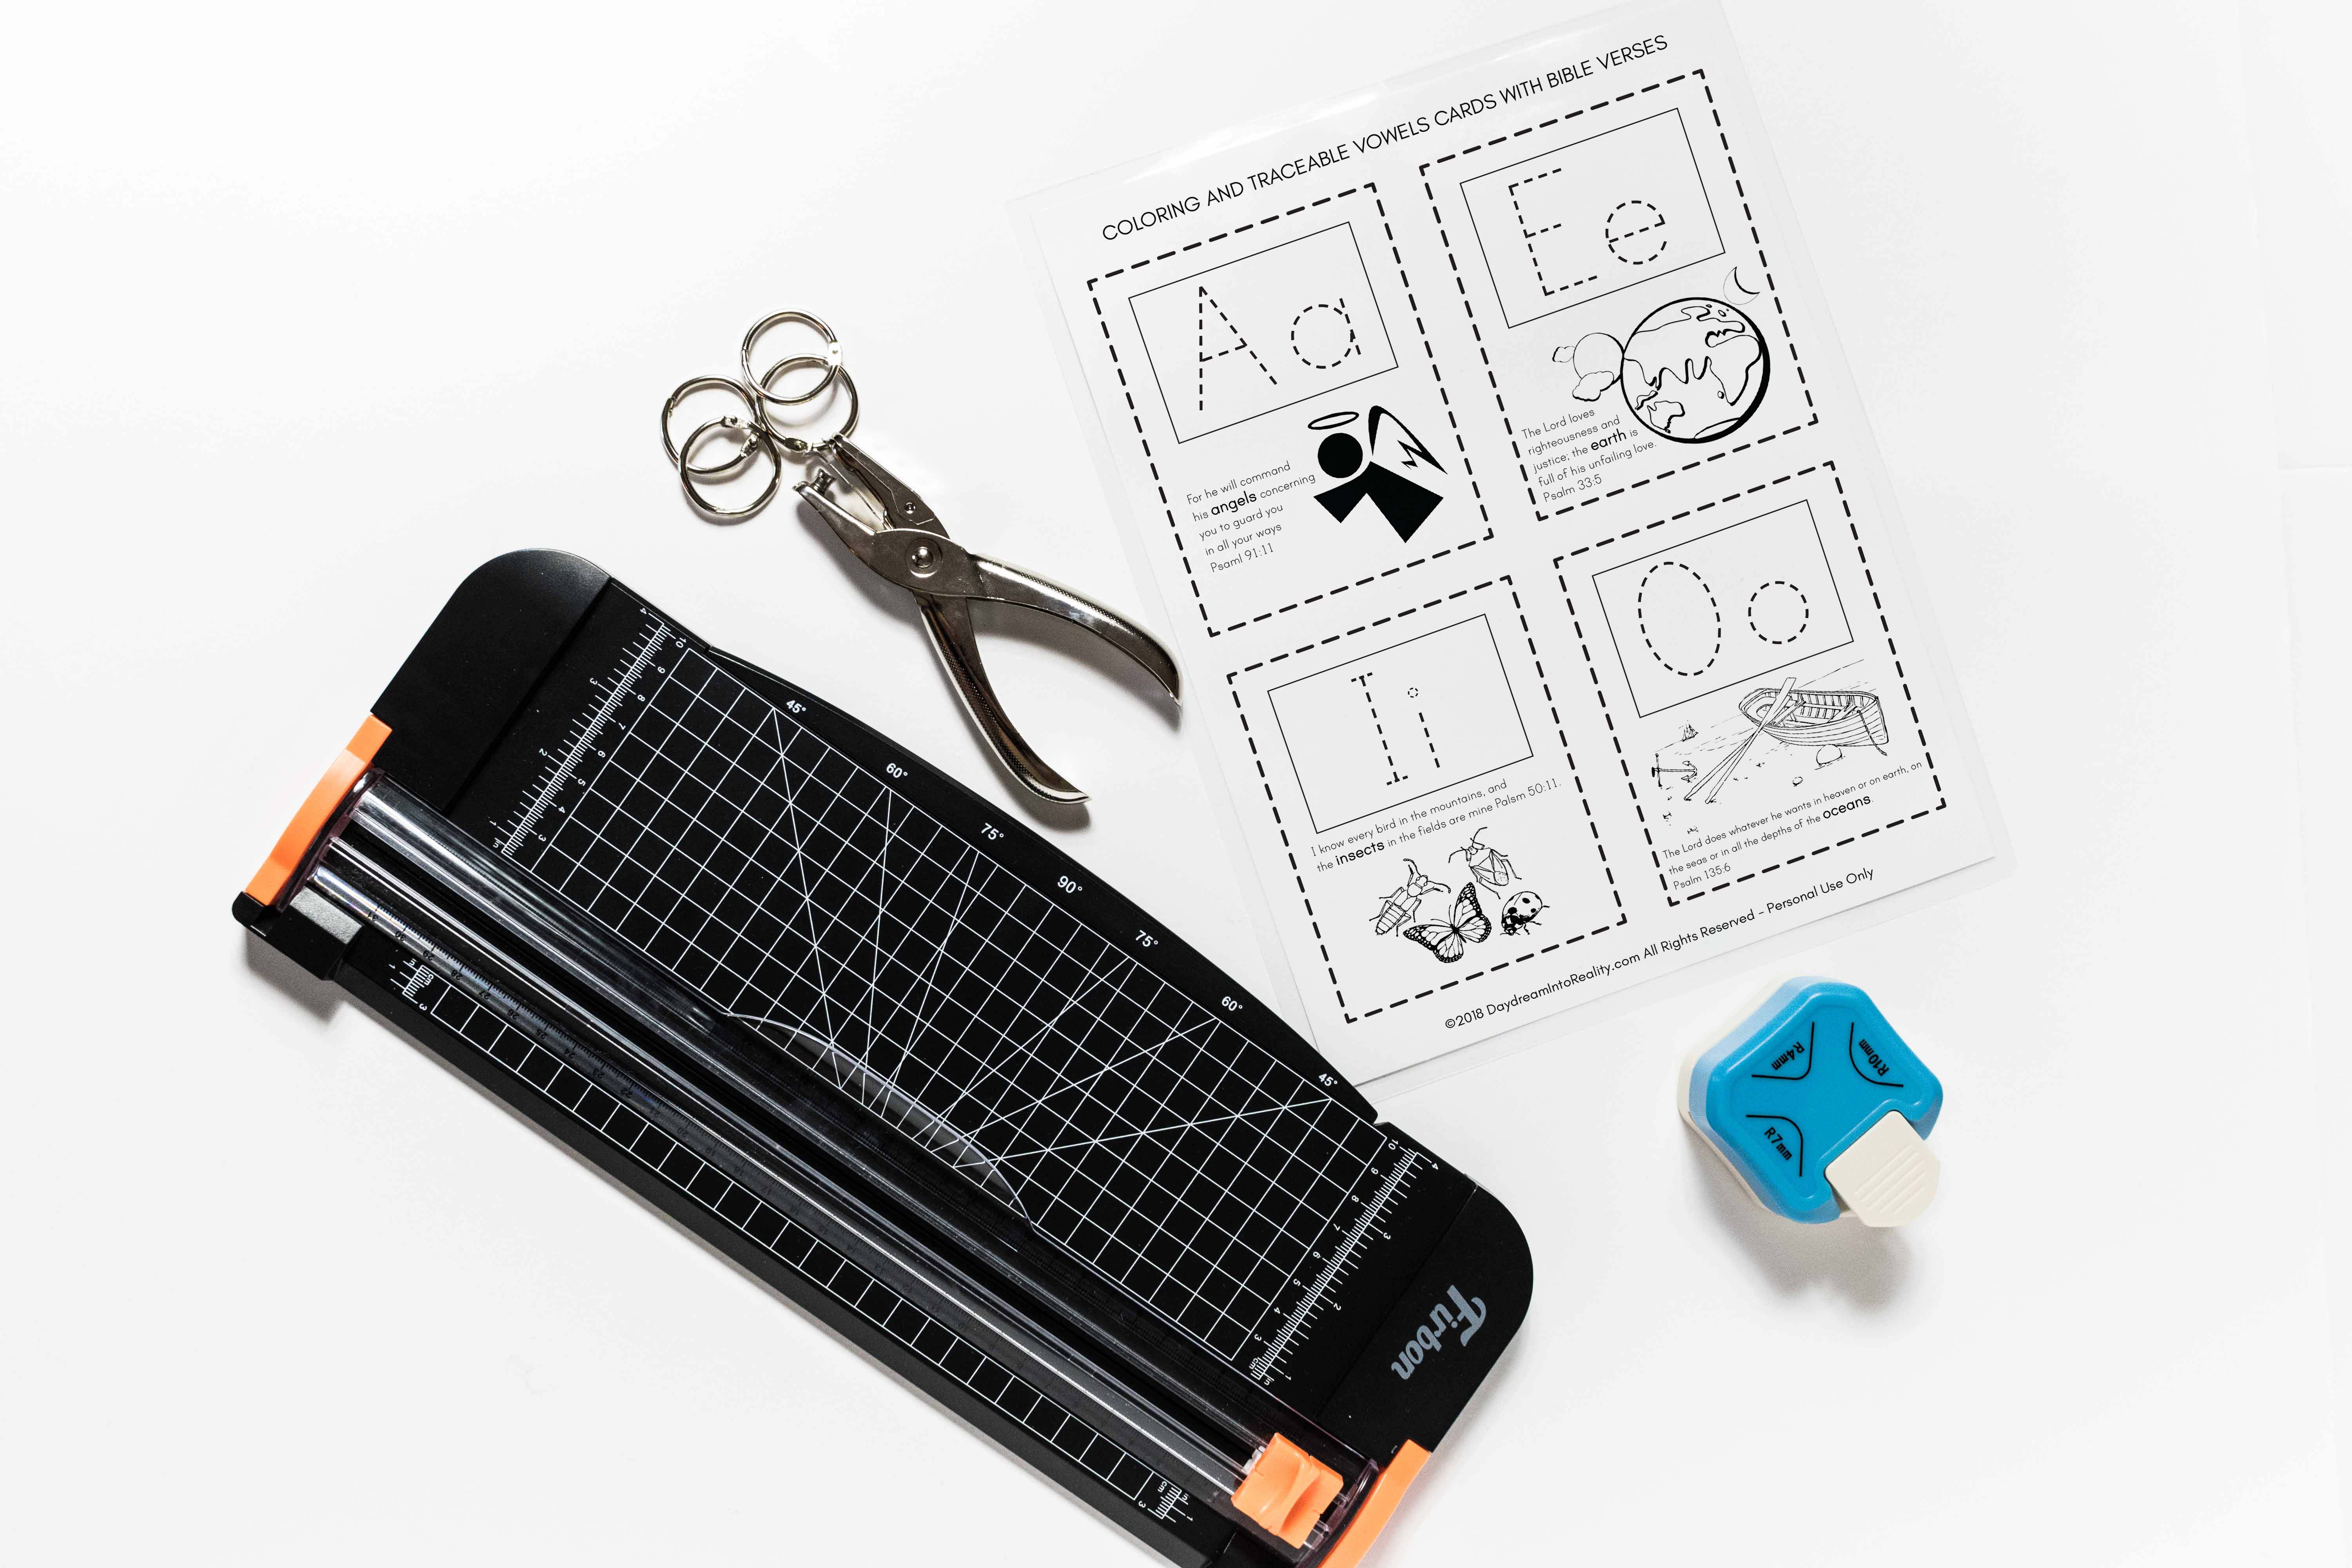
- Paper Trimmer
- Corner cutter
- 1 Hole Punch
- Loose Leaf Rings
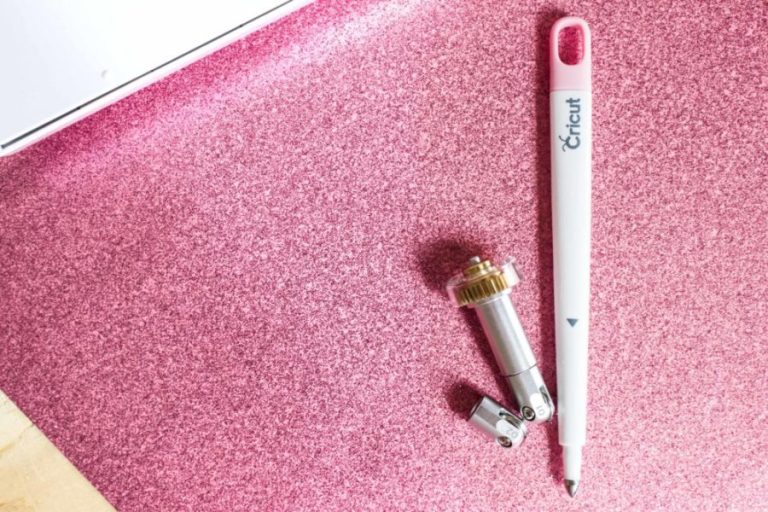
- Dry Eraser Markers
Step 1 – For Laminating
First you need to decide how do you want to laminate your printable. You can do contact paper, but I prefer a laminating machine.
Why?
I don’t like fighting with things. I feel that with contact paper thing you are more likely to get your printable all wrinkly. However just choose what you like.
I bought this Hot/Cold laminating machine and I really like it. It’s easy to use, plus it comes with 50 laminating pouches! If you have one just follow your machine instructions and there you go!
For this case. You turn it on on the side and choose whether you want to laminate in the cold or hot – Depending on the printable you might need to change this option – I used the hot option and waited for it to be ready. (a green light will light up)
In the meantime, place your printable inside the laminating pouches. Once the green light appears, just feed it to the machine WITH the sealed edge first and wait for the magic to happen and cool down too. I don’t want you to get burned!
TIP: For printables that you need to cut afterwards like this one, or bookmarks, you can cut before hand and place them all separately in the same pouch. This is and extra step but it works great if you want to have some sort of transparent edge around the printable.
Also, If you plan on writing on the printables afterwards and want an easy clean up – just running under water – I totally recommend you to do it in this way.
I thought of this idea after I was done with the whole tutorial – What a Bummer!
Step 2 – After laminating
As you can see the printable is nice and laminated and now I will show you how to have it ready for you or your little one’s enjoyment.
First you need – and depending the kind of printable you have – cut all the different parts that are meant to be cut. I love having a paper trimmer, It seriously makes my life so MUCH easier.
Life is too short to spend time trying to cut straight (especially for a lefty like me)
Second, this is VERY IMPORTANT!
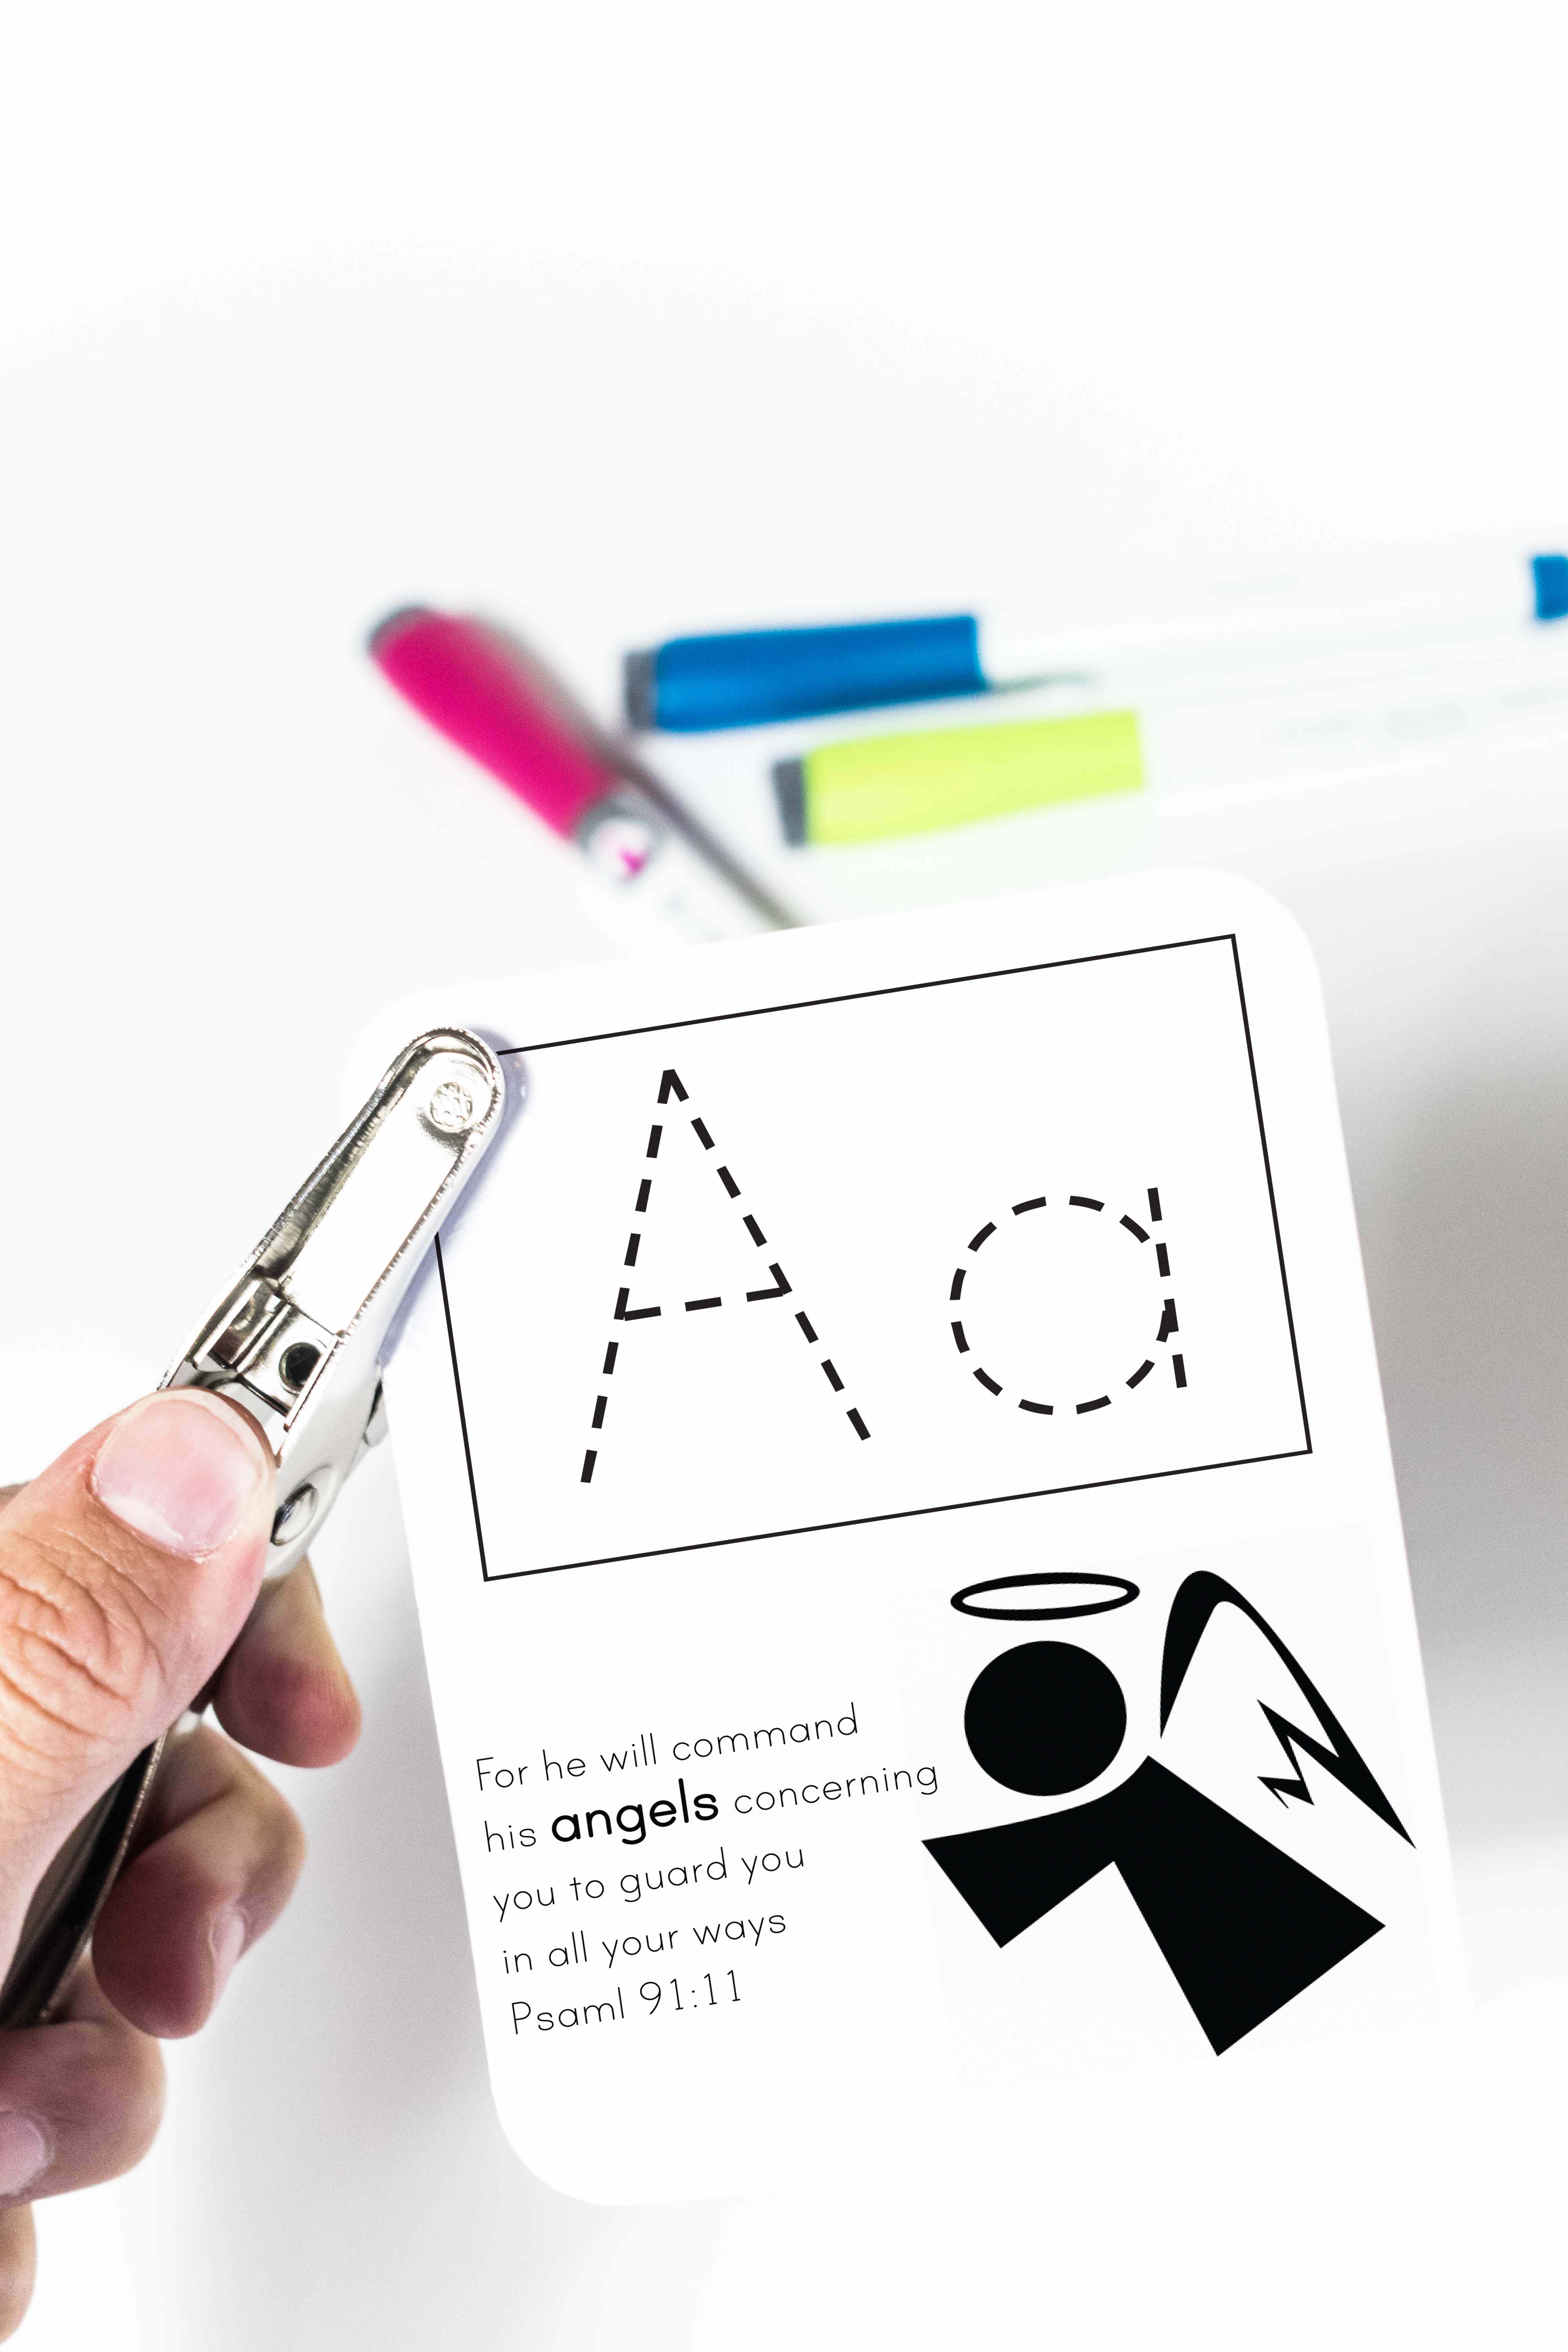
If you have little ones – or even for you – cutting the corners of your printables is a MUST! They will be sharp and they can cut your child’s hands or even poke an eye. Don’t skip this step
You can do it manually, but unless you have a cutting degree there’s just not way for you to cut all corners the same way. – and If you can, let me tell you that you have a very special gift!
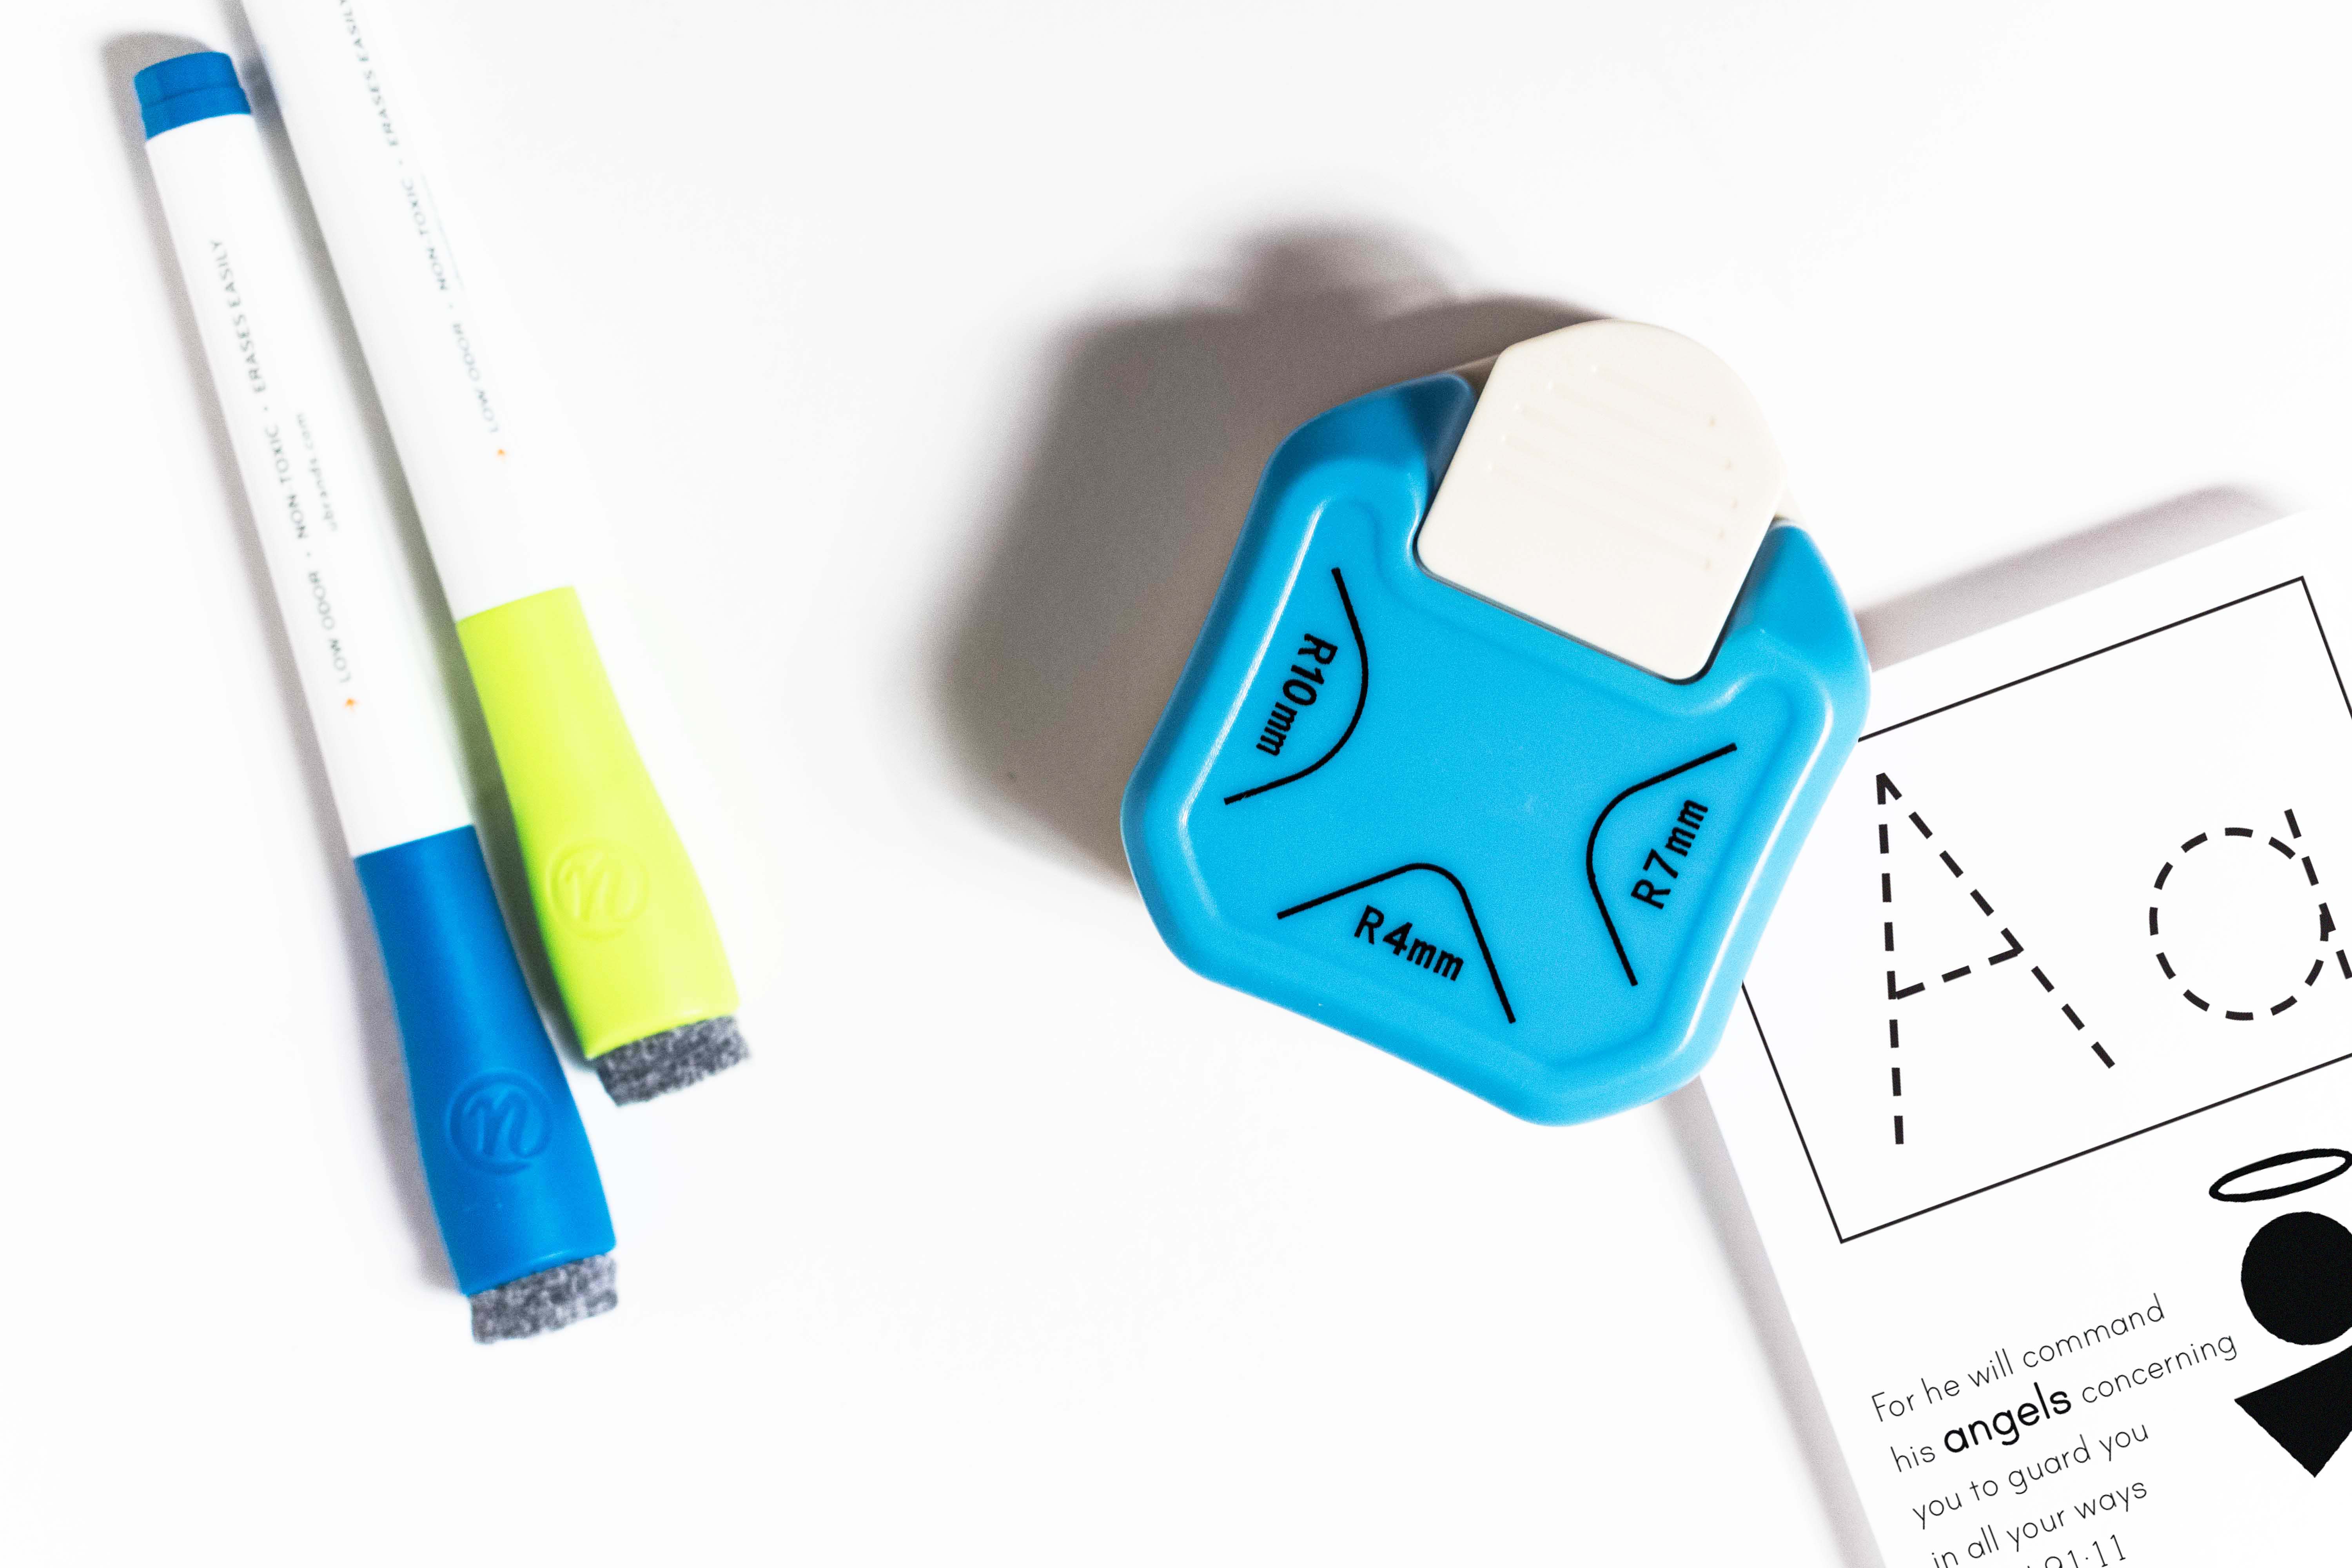
For this tutorial I used the 7 mm option. It’s so easy; just stick the corner in and the press the grey button and that’s it. Now you have beautiful and safe corners.
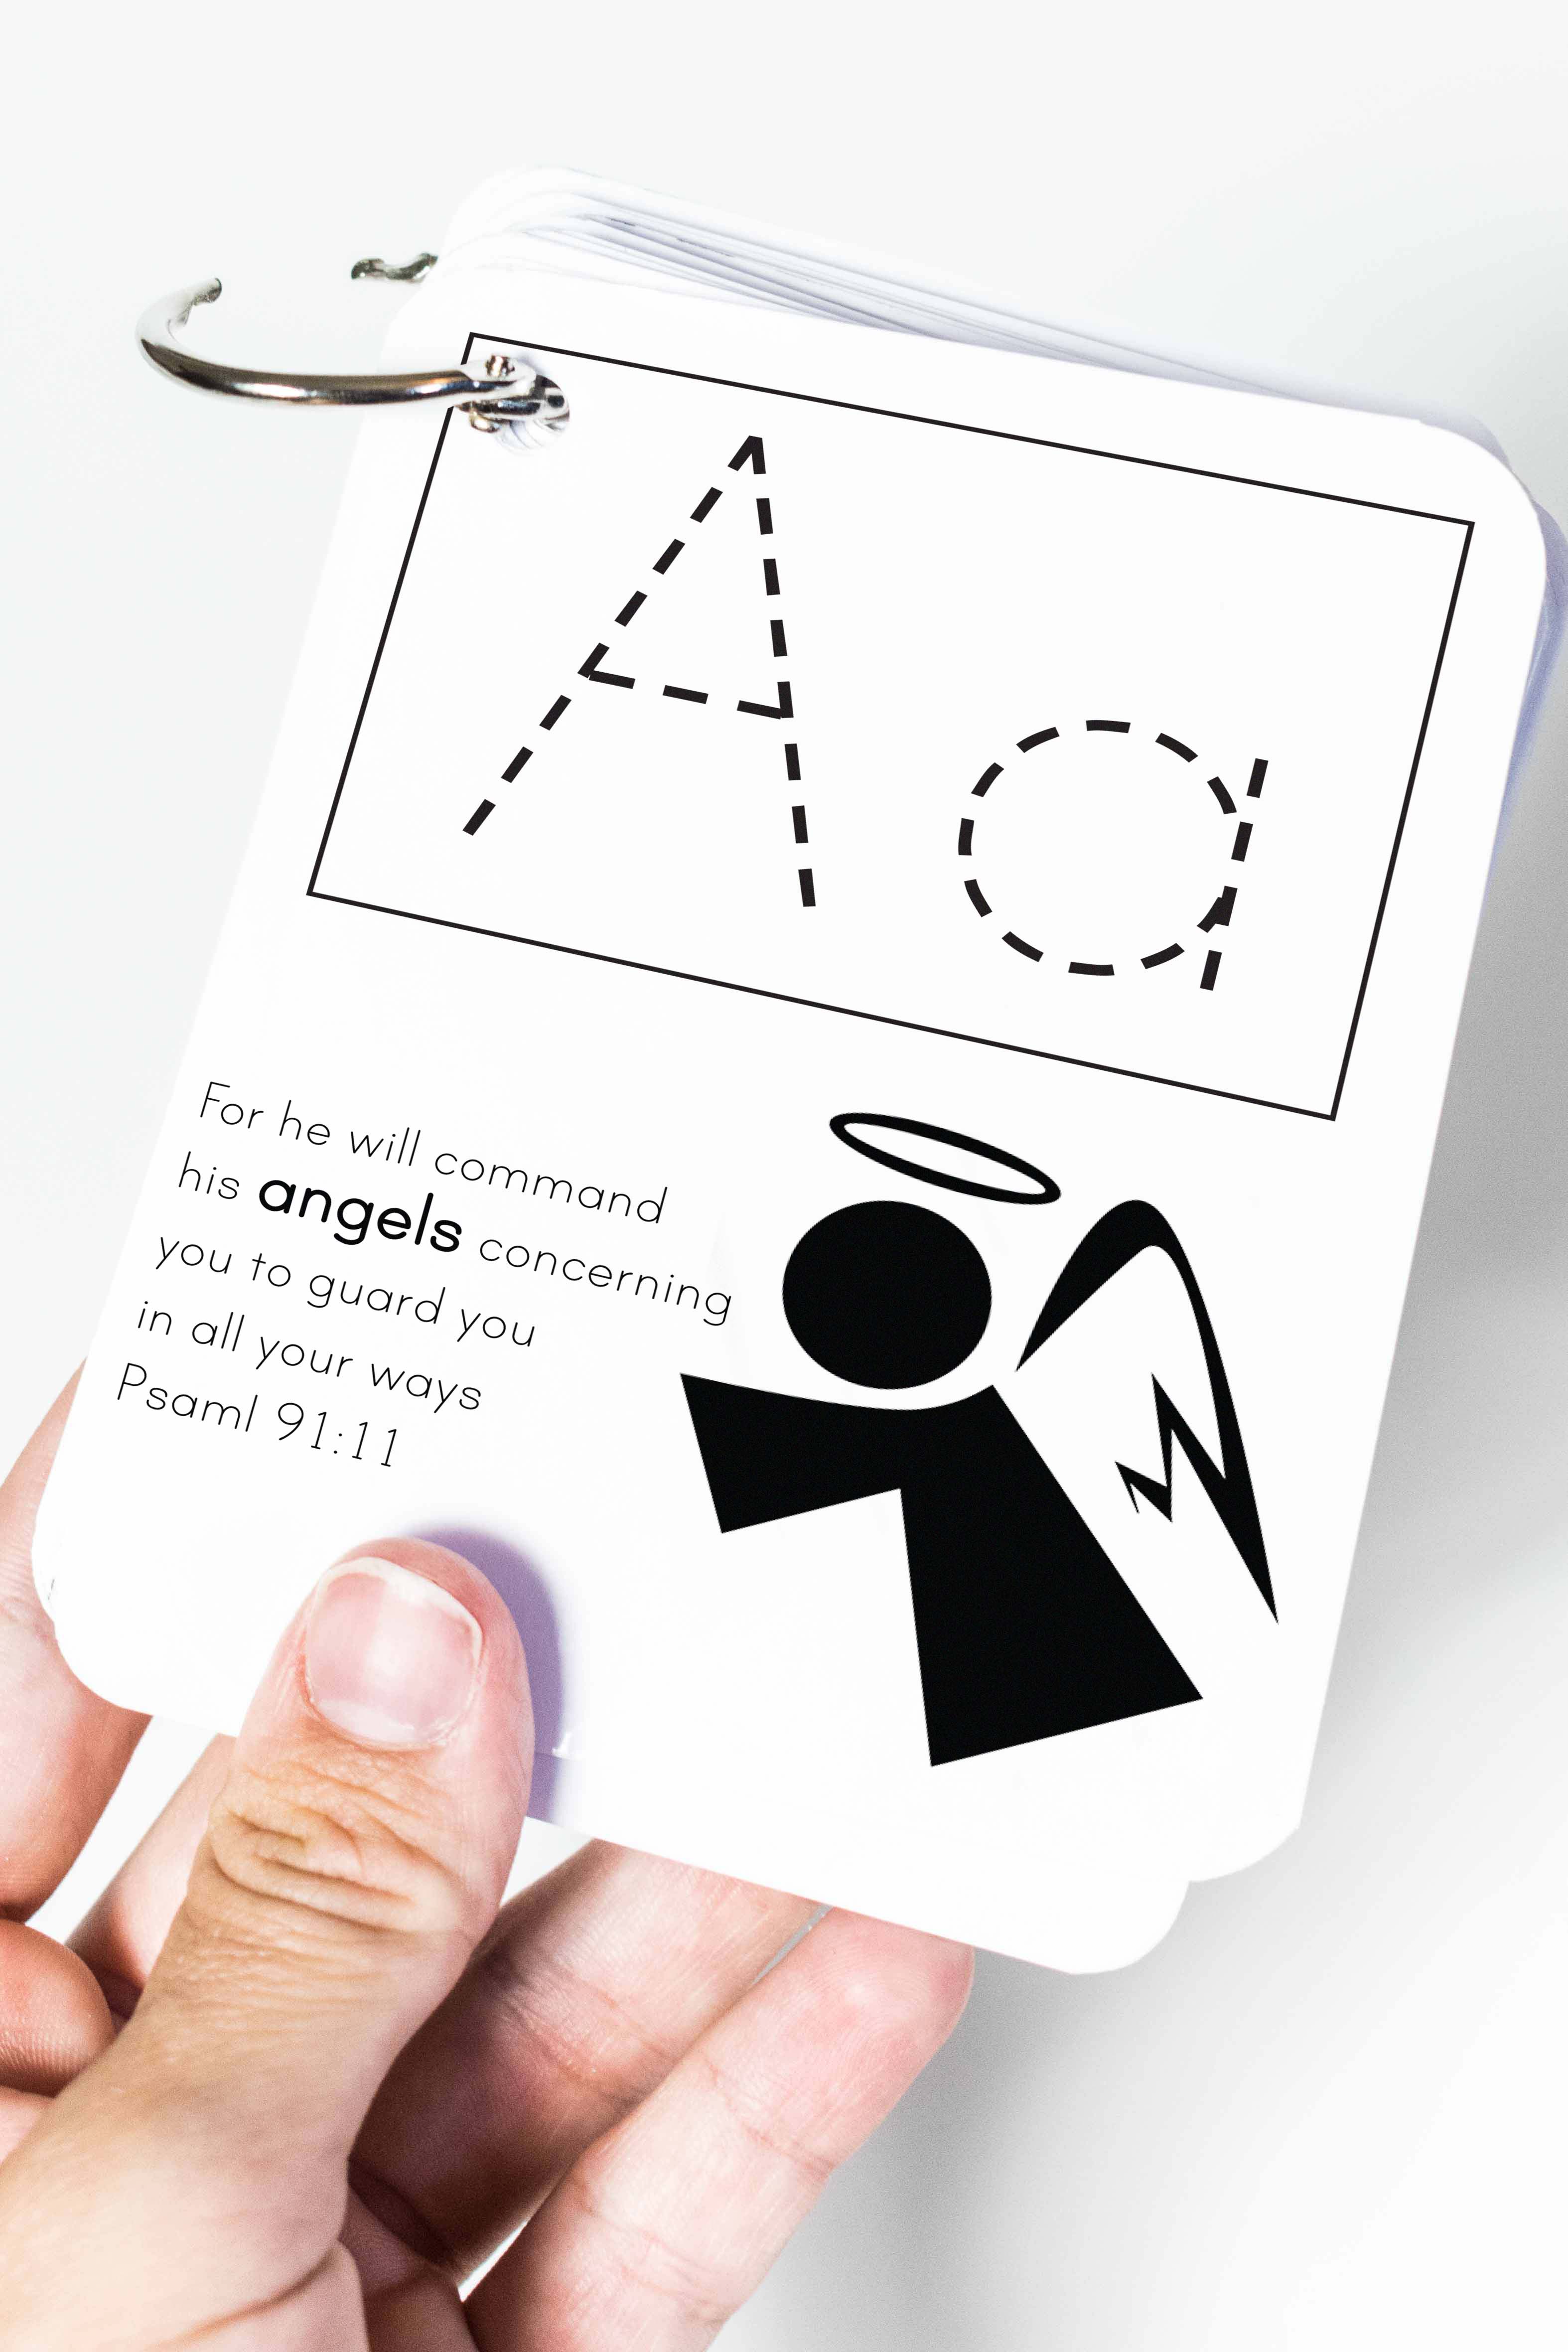
For printables that are a set like this example I recommend your to do a hole with a punch. And insert them inside a loose leaf ring.
NOTE: If you want the easy clean by running it under water. The hole MUST BE in the transparent edge. NO PAPER! Otherwise, the water will get into the printable an will ruin it!
Finally, this is the last step and my favorite.
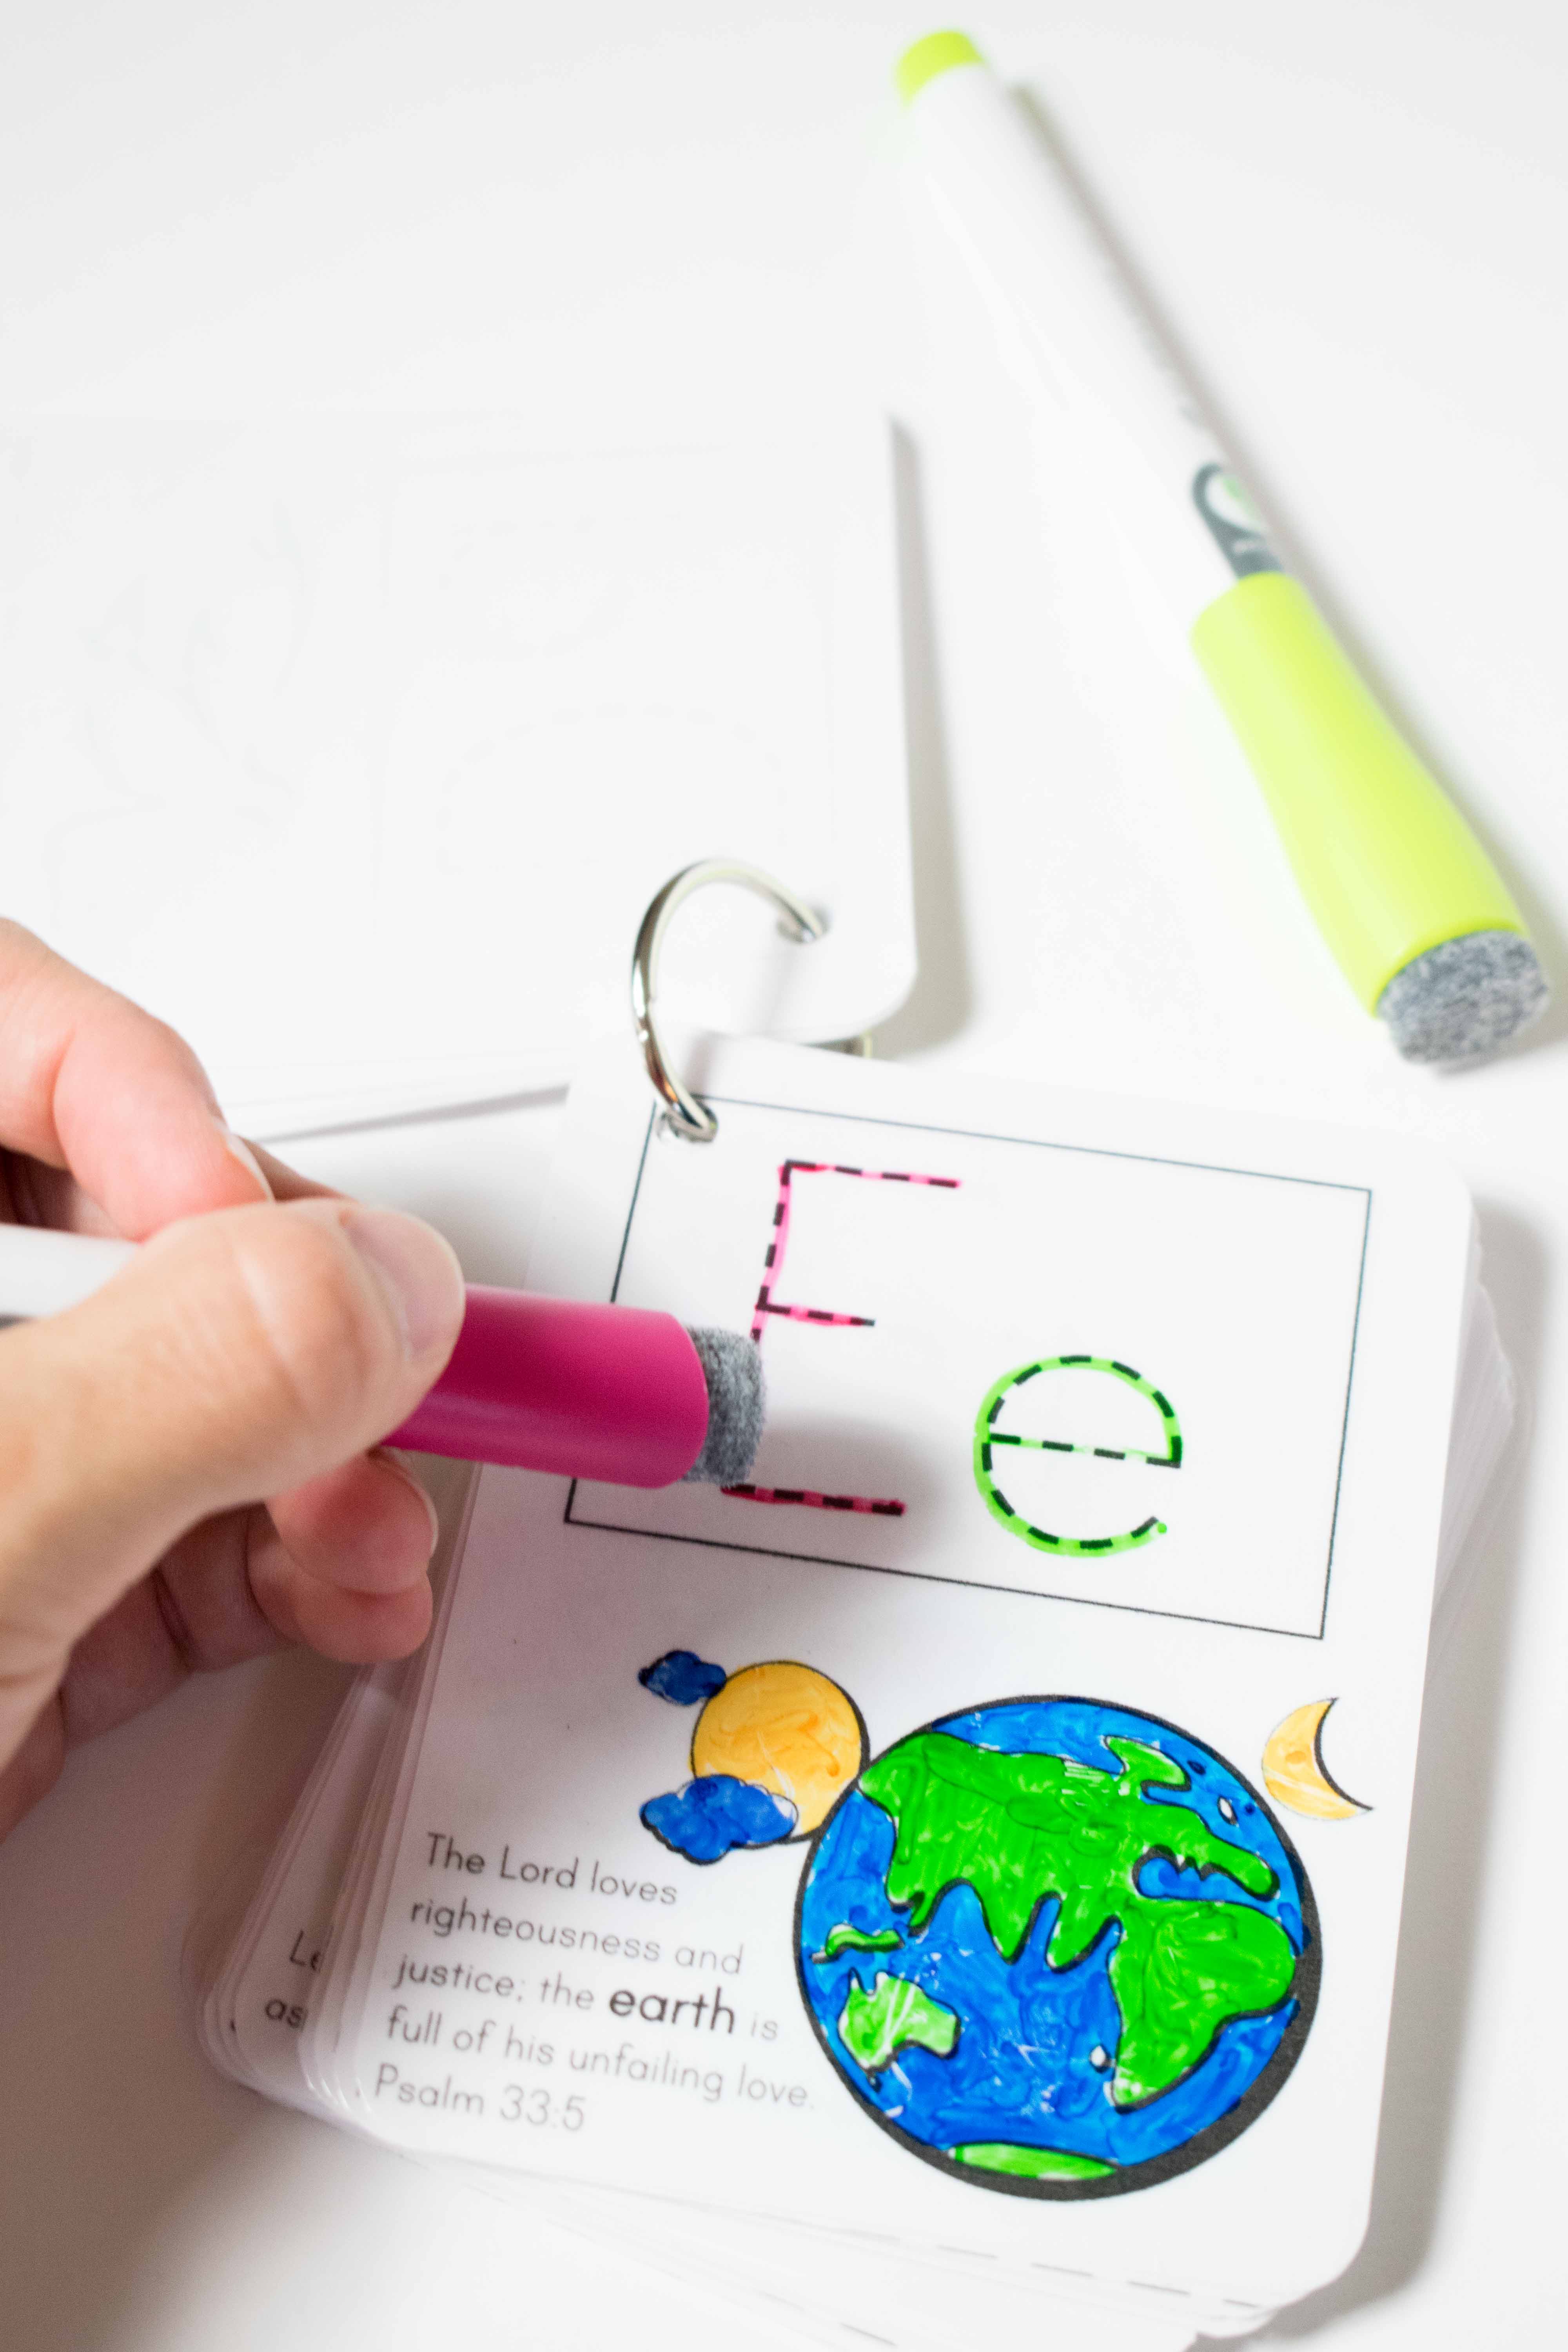
With Dry Eraser markers you can re use the printable as many times as you want. And just clean up after you’re done with a dry marker eraser or a damped cloth!
Isn’t it cool?
The sky is the limit!
You can laminate a weekly or monthly calendar. A fitness routine you plan for the week. Anything you can think of.
So…
What did you guys think?
I hope you learned how to laminate your printables, if you have any questions let me know in the comments below I will love to get back to you.
Don’t Forget…
To visit my store for really cool printables!
And if you like it free just like me, you may also like these ones.
- Watercolor Summer Bookmarks Free Printable
- Children are a heritage from the Lord Free Wall Art
- Practice your ABC with Bible Verses – Free Printable