Hello Daydreamers!
In today’s tutorial, you will learn how to use Heat Transfer Vinyl (HTV/Iron-On) to perfection.
I am going to cover this material from every angle, and I will be showing you all kinds of examples, so you feel empowered to make any project leaving behind all self-doubt.
But first, what is Heat Transfer Vinyl?
HTV, also known as Iron-On, is a type of material that adheres to a wide variety of surfaces. Unlike “Adhesive Vinyl” that has a sticky side, HTV needs heat to be transferred.
Iron-On is mainly used on fabric, but you can also use it on wood, paper, and other materials!

There are many types of Iron-On out there. Some of them are easy to work with, other ones are a little bit tricky; don’t worry about this, though!
In a nutshell, these are the topics I will be covering today.
- Heat Transfer Vinyl overview
- How to cut and Weed Iron-On
- Test Cut with Cricut
- How to transfer HTV to a surface
- Peel Cold vs. Peel Warm
- Can I layer up Iron-On?
- Holographic Iron-On on white and black
- How Does Iron-On look on wood?
- How Does Iron-On look on paper?
- Can I use Iron-On on Ceramic Mugs?
- Frequently Asked Questions regarding HTV
Note: Learn the overall tips, tricks, and differences, between “Adhesive” and “HTV” in this guide I wrote.
Heat Transfer Vinyl Overview
As I mentioned at the beginning of this article, Iron-On is a type of material that needs heat to be transferred. It’s mainly used to personalize t-shirts and fabric.

Tip: Don’t be confused, Iron-On and Heat Transfer Vinyl is the same thing!
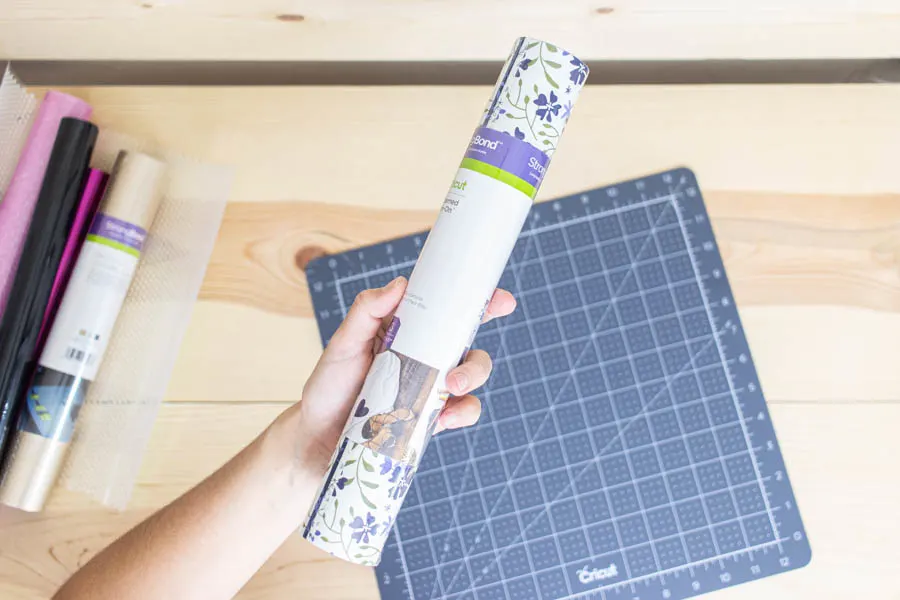
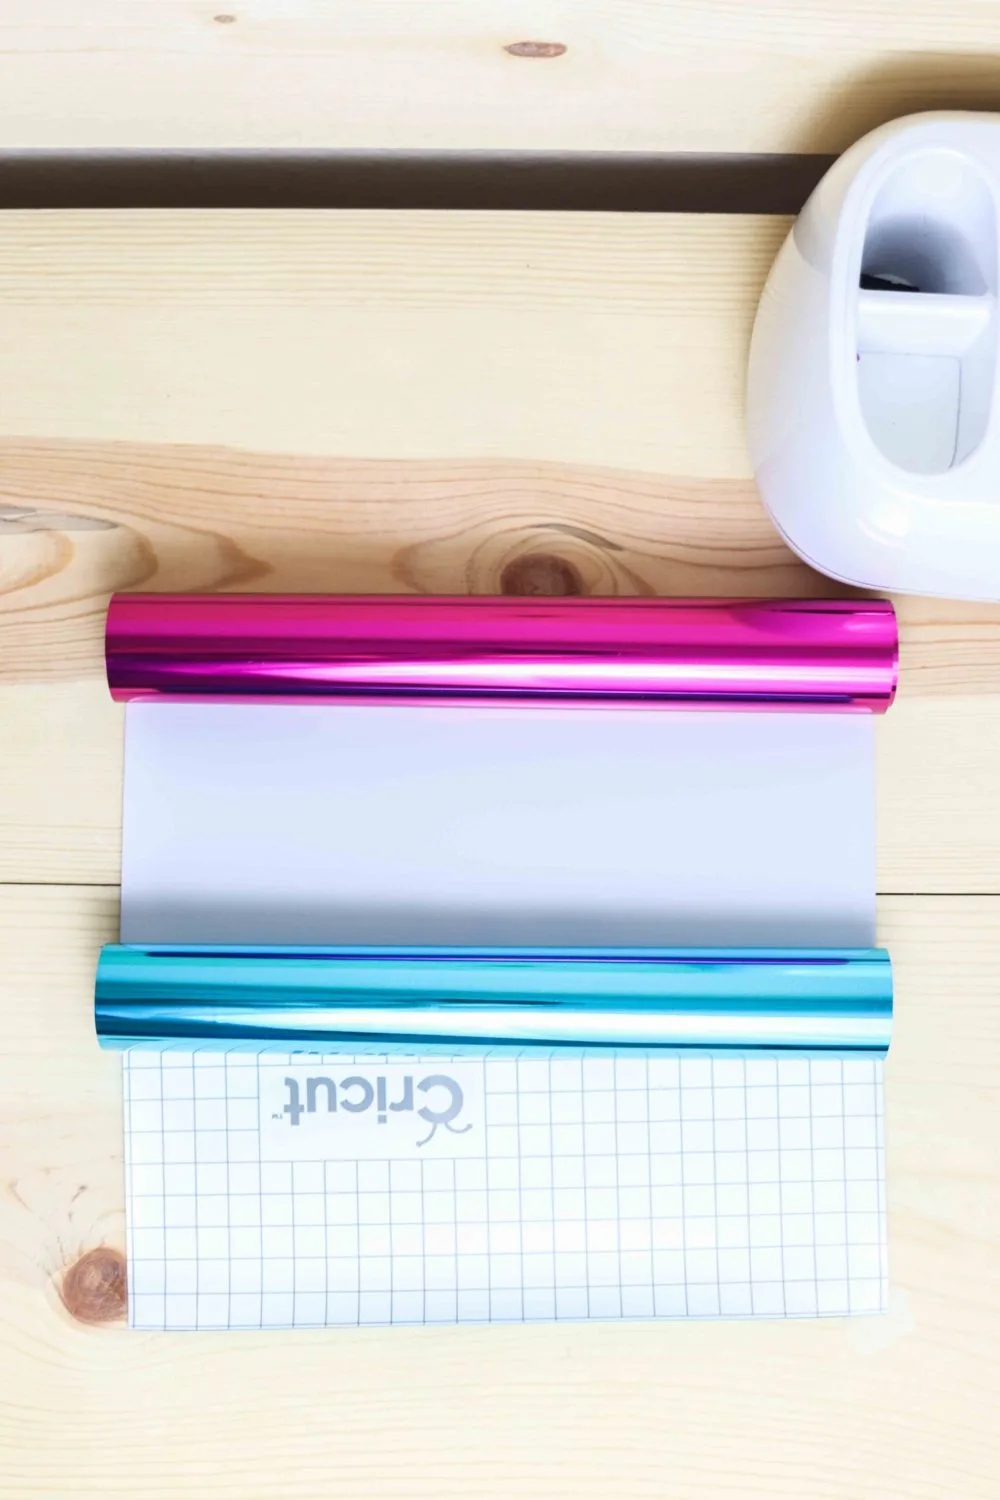
Iron-On usually comes in rolls and individual sheets.
- Rolls: The overall width of a vinyl roll is 12in, and the length can go from 12in to 20 and even 40ft. There’s less variety on large rolls, but tons of it when you buy anywhere from 12x48in.
- Individual Sheets: They are sold in different sizes; the most common ones are 12x12in and 12x10in. The cool thing about individual sheets is that you can get a single package with all kinds of colors.
HTV is attached to a backing sheet that keeps the material in place when you cut and transfer it. Backing sheets are transparent in color, and 99.9% of the time, very easy to tell apart because they are shiny.
There are two FUNDAMENTAL steps when cutting HTV you need to remember.
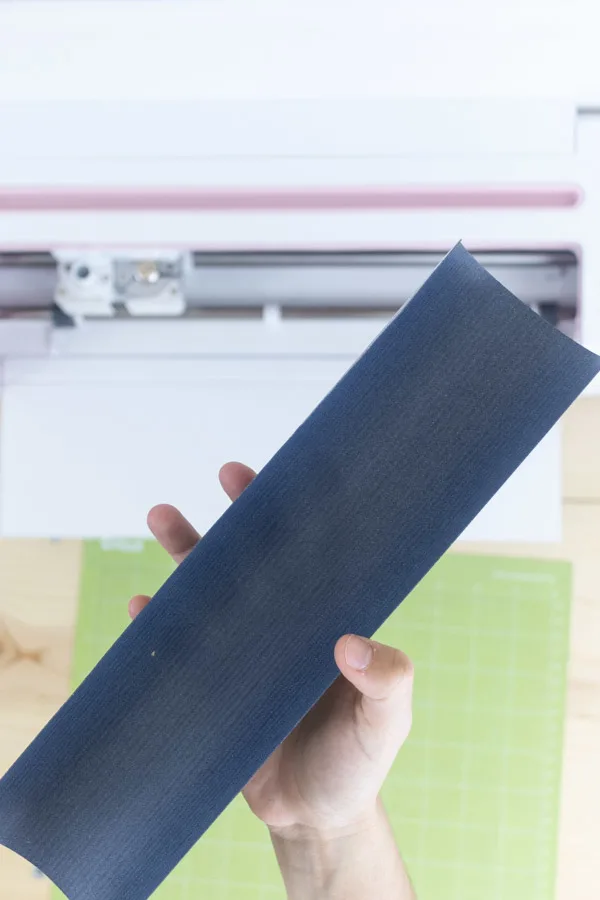
The first one is that when cutting Iron-On, you need to place it shiny (or pretty) side down on the mat; otherwise, you’ll cut the backing sheet.
The second thing to remember is that you need to “Mirror-On” your image because when cutting vinyl, you are cutting from the back, not the front, so If you don’t, “Mirror” your image will look backward.
I can’t stress enough how vital these two things are. Not to worry you, but to caution you. I will show you more of this later in this article.

Shiny Side 
Dull Side 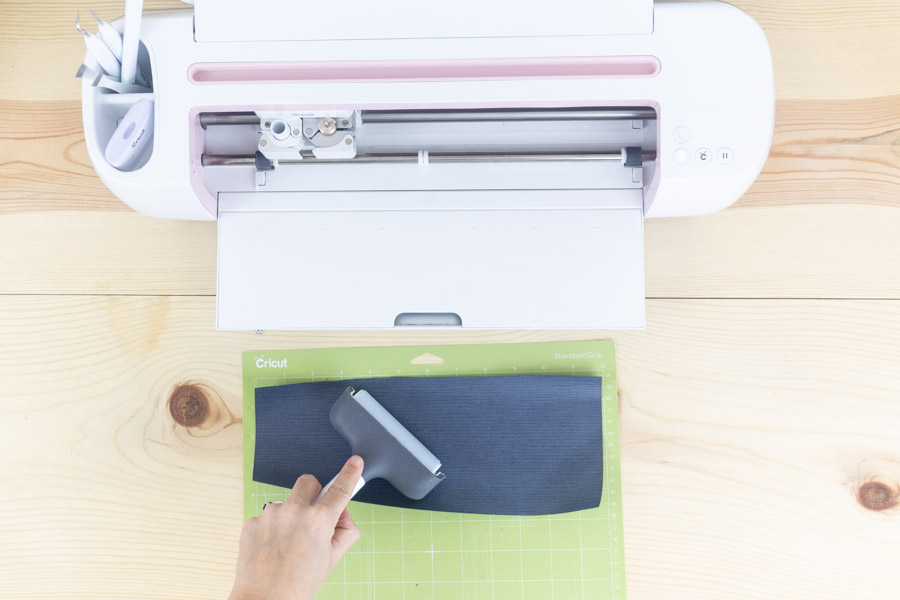
Always place HTV “Pretty Side” down
Not all HTV is made the same way.
There are many styles, that, no matter how picky you are, you’ll find the type you like. The following styles I am about to mention come in a wide variety of colors as well!
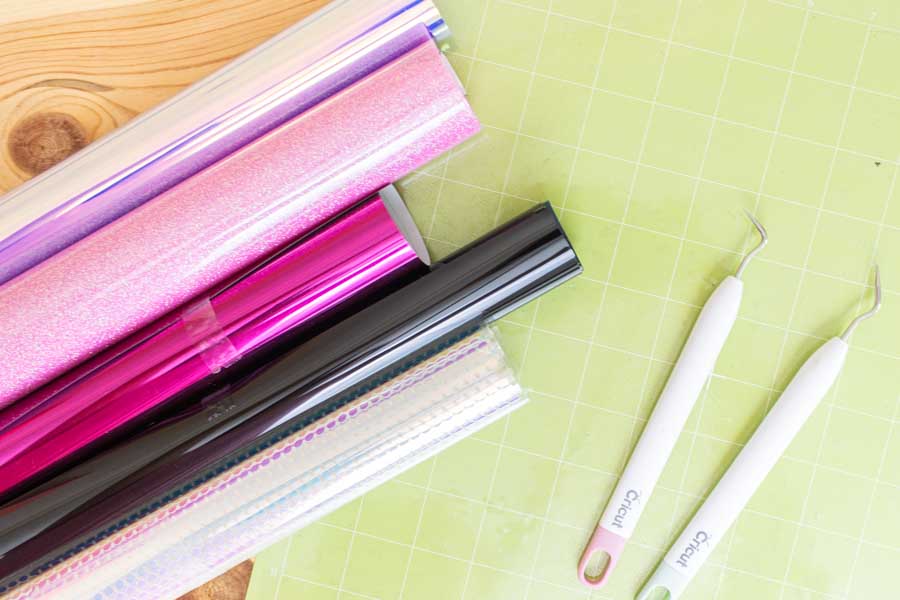
Different Types of Iron-On
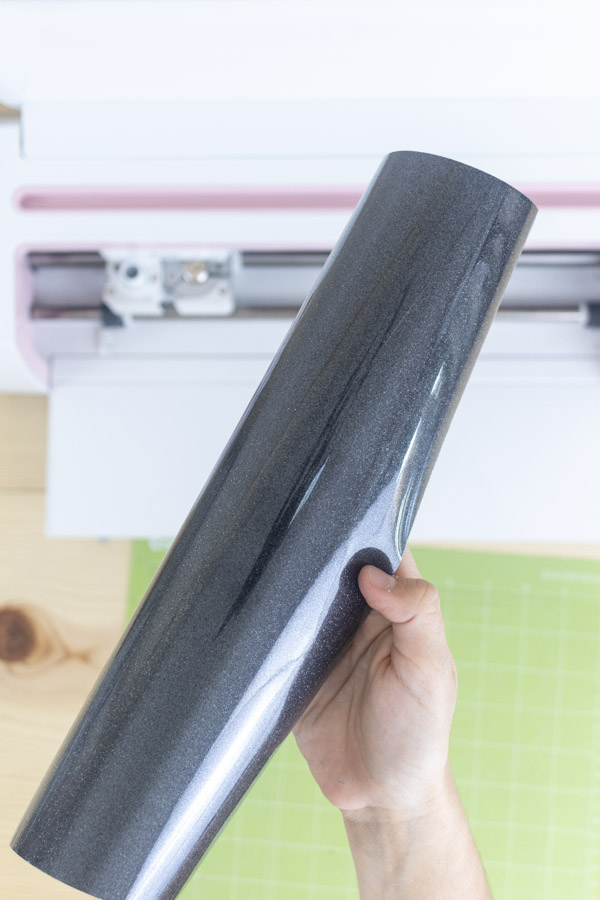
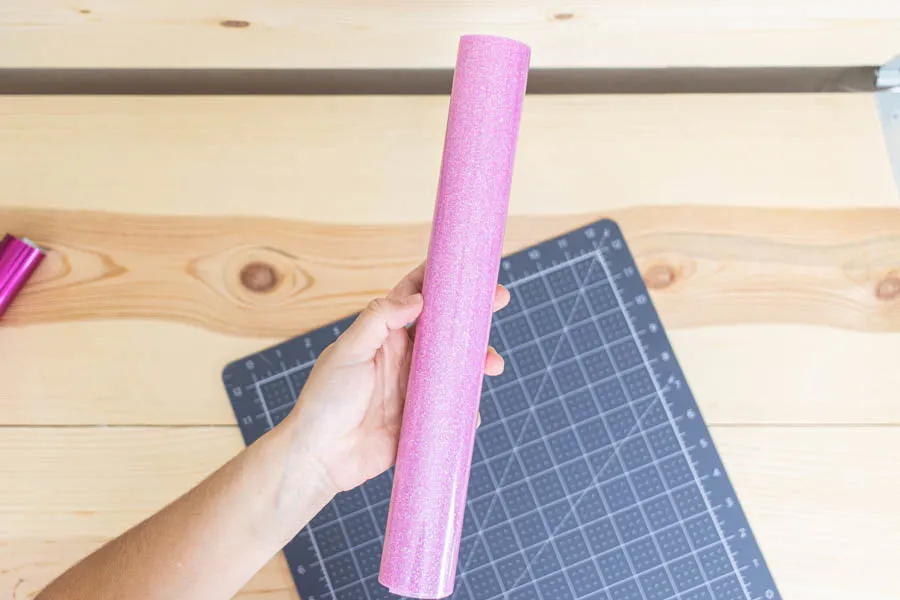
Glitter: you can find multiple colors with this option. The sky is the limit. Glitter vinyl is tough to weed, and sometimes tricky to cut on your machine.
If you love working with Glitter Iron-On, I recommend you do it with great daylight or purchase Bright Pad for easy weeding.

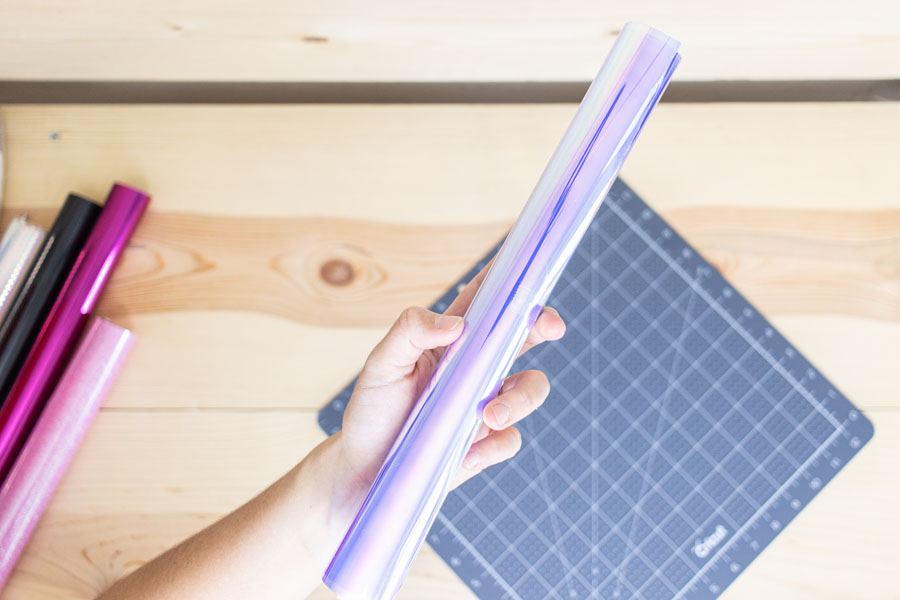
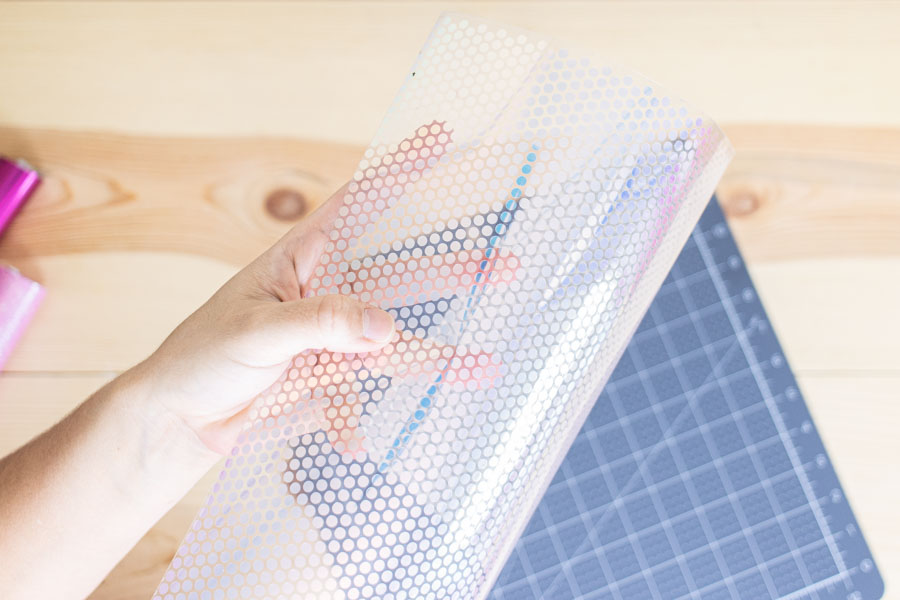
Holographic: Holographic vinyl changes in color depending on the angle you are looking at. There’s a big caveat though, the color of your fabric will determine the final color of this Iron-On.

Regular (Solid Color): The most common HTV. You can find any solid color out there, including neon colors.

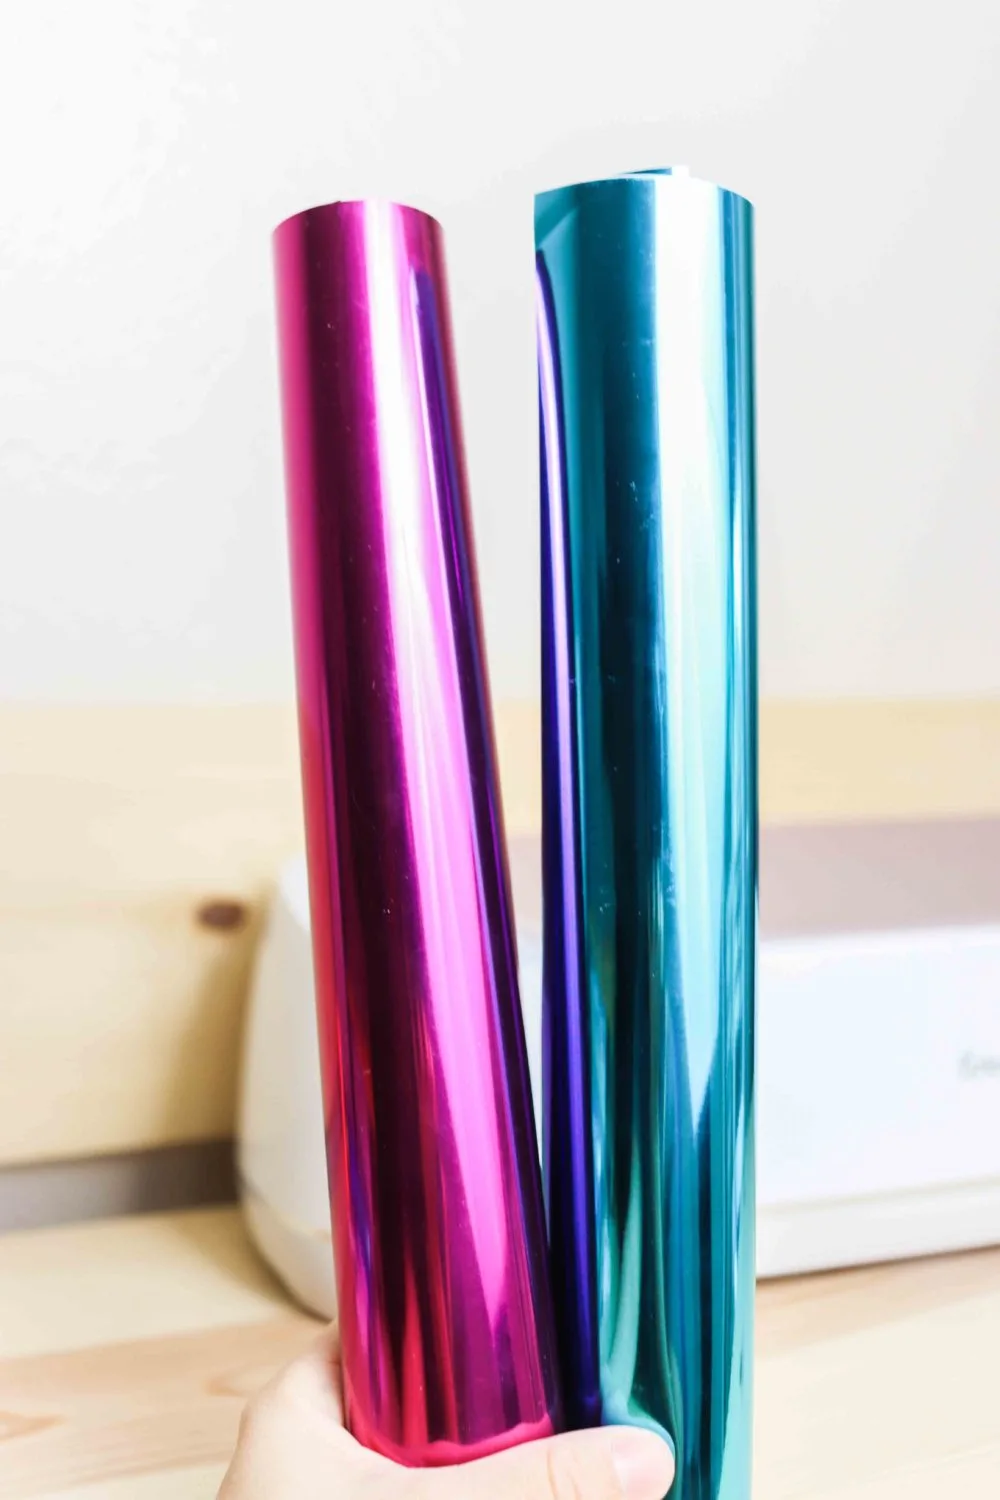
Foil: it comes with a glossy finish, and it’s simply stunning, and one of my favorite types of Iron-On. Although beautiful, Foil HTV is a very delicate material, and you need to follow to the tee all of the instructions.

Patterned: there’s a lot of variety, and great styles for patterned HTV, most common ones are florals. However, if you shop Cricut, you can find beautiful Disney and holiday-themed options.
Metallic: This HTV is your typical gold and silver color. They have a mate finish.
Mosaic: This is quite a unique type of vinyl, and Cricut makes it. Unlike a regular sheet of vinyl that is a solid material, mosaic vinyl sheets are made of small circles, squares, stars, etc.

SportFlex Iron-On: This is a type of HTV that will stretch with your fabric. It’s perfect for use on nylon, neoprene, and polyester fabrics; this is the vinyl you will want to use on your swimsuits and pregnancy clothing.
Smart Iron-On: It’s a type of vinyl that is designed by Cricut, and it’s meant to be cut with the Cricut Joy and without a “Cricut Mat.” It comes in most of the styles I just mentioned.
How to Cut Iron-On with Your Cricut Machine
Iron-On is not a cheap material. Little by little, everything adds up. Therefore, to truly take advantage of HTV, you want to use a cutting machine.
Yes, you can cut Iron-On with scissors, but not with a lot of details and cool effects as if you were using a Cricut or other cutting machines.
As you know, I love Cricut (not sponsored); therefore, the following screenshots are using this beautiful machine. If you have a Cameo, check out this Youtube video.
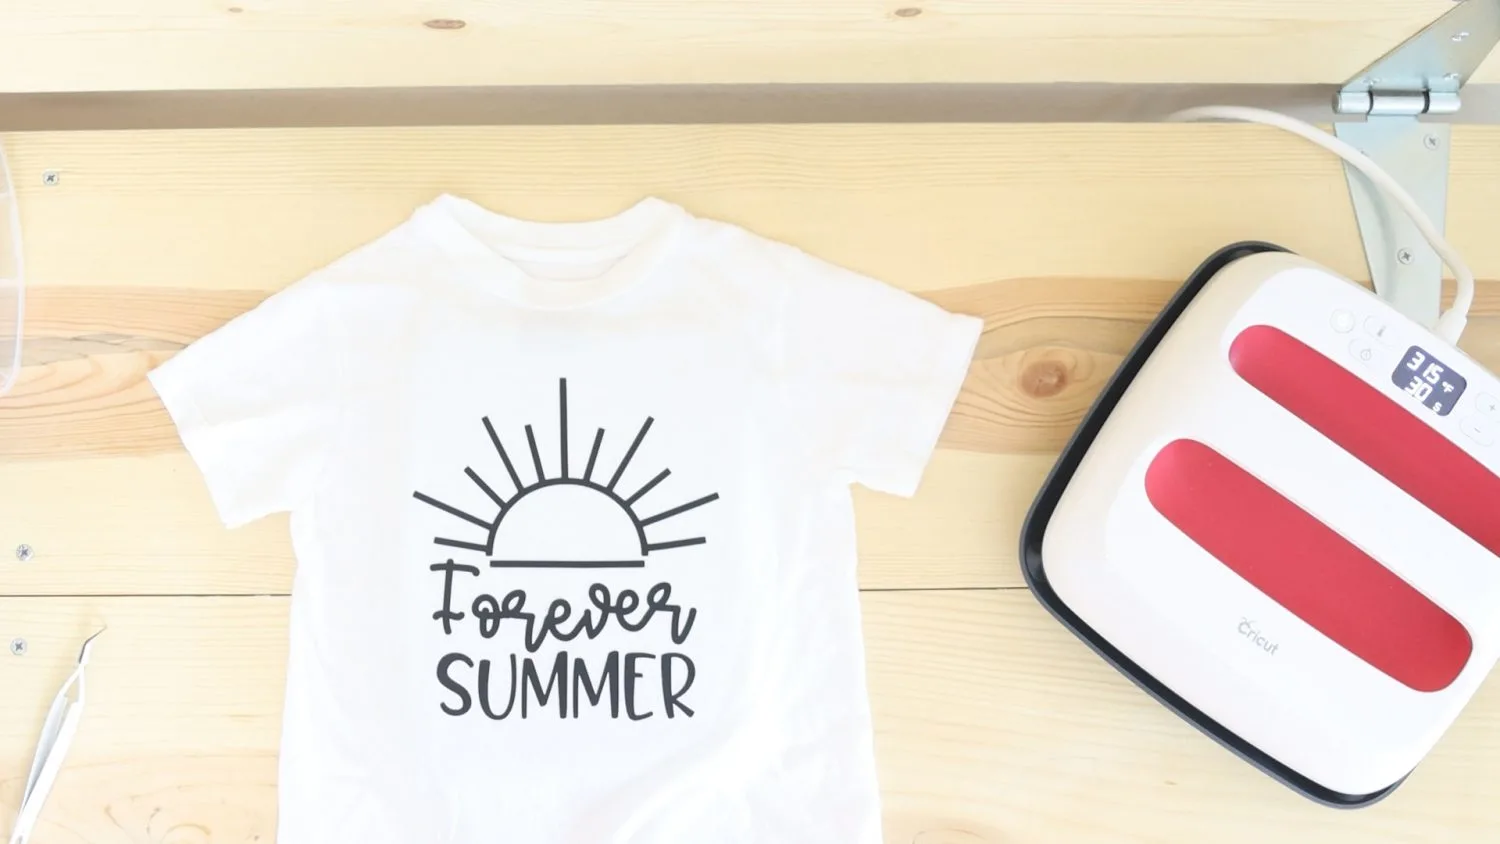
In the next few sections of this article, I will cover the cutting, weeding, and transferring of the “forever summer SVG.” However, on some of the segments, I will show extra pics of other designs and tips so I can cover more information.
If you want a plain tutorial of how to make t-shirts with your Cricut, check out my tutorial.
Materials:
- Iron-On (Any type)
- Fine Point Blade – Always use this blade when cutting HTV
- Cricut Machine (Maker, Explore, Joy)
- Blue or Green Mat. For Glitter Iron-On, I recommend StandardGrip Mat (green).
- Download the SVG file to follow along. (Yellow button)

Oh!
Just so you know, I also have a library full of free SVG files and Printables for all my subscribers, a.k.a. Daydreamers. You can see a preview right here or get access by filling out this form.
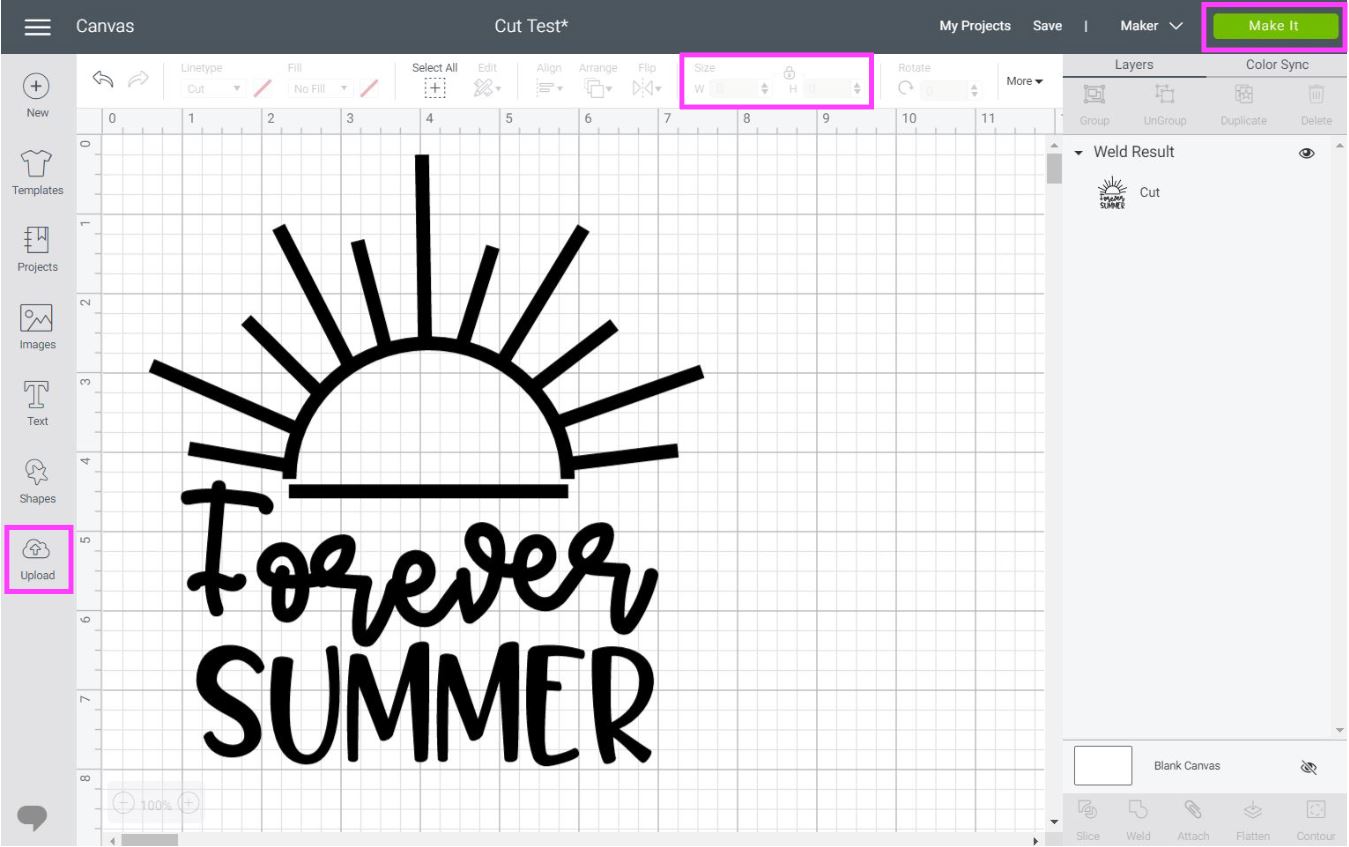
Step 1 – Add Design to Cricut Design Space
Everything you want to cut with your Cricut starts in Design Space!
If you want to follow along, download the SVG file I provided right above this title and click “Upload” on the left panel of the canvas.
Follow the prompts and insert the image in the designing area, then select all everything on the canvas click on “Weld” located at the bottom of the Layers panel to have everything in one single layer.
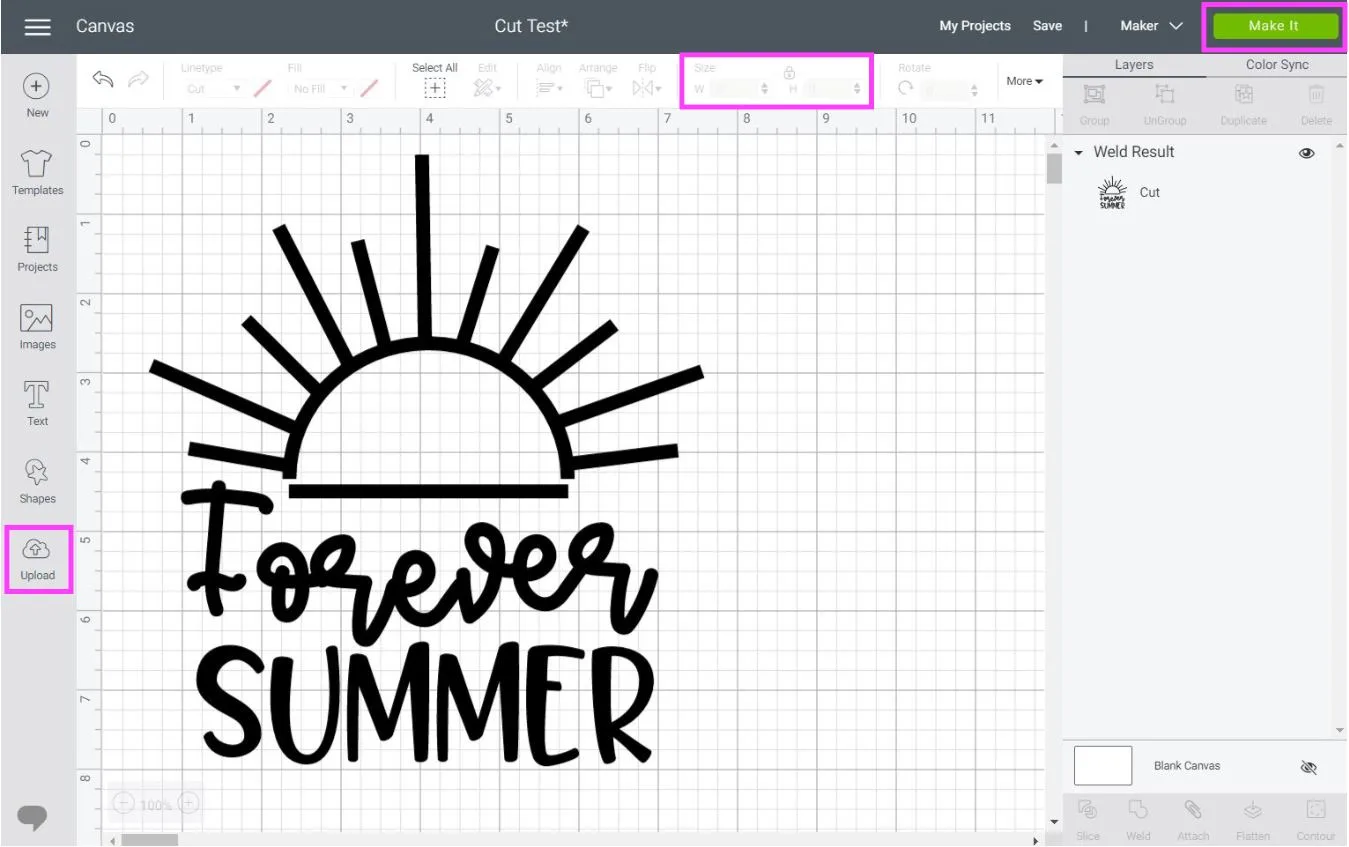
At this point, you need to resize your file, so it fits your project. In my case, the size is 7×7.6in.
When you are done with the design, click on “Make it” (Upper-right corner) to start with the cutting process.
Step 2 – Mirror Iron-On in Design Space
One of the most important things when working with HTV is mirroring! If you don’t mirror your image, you’ll have to repeat the process.
Not fun, right?
To mirror Iron-On in Cricut Design Space, click on the small toggle of the mat thumbnail. It should look green once it’s on, and the mat preview should reflect this change.
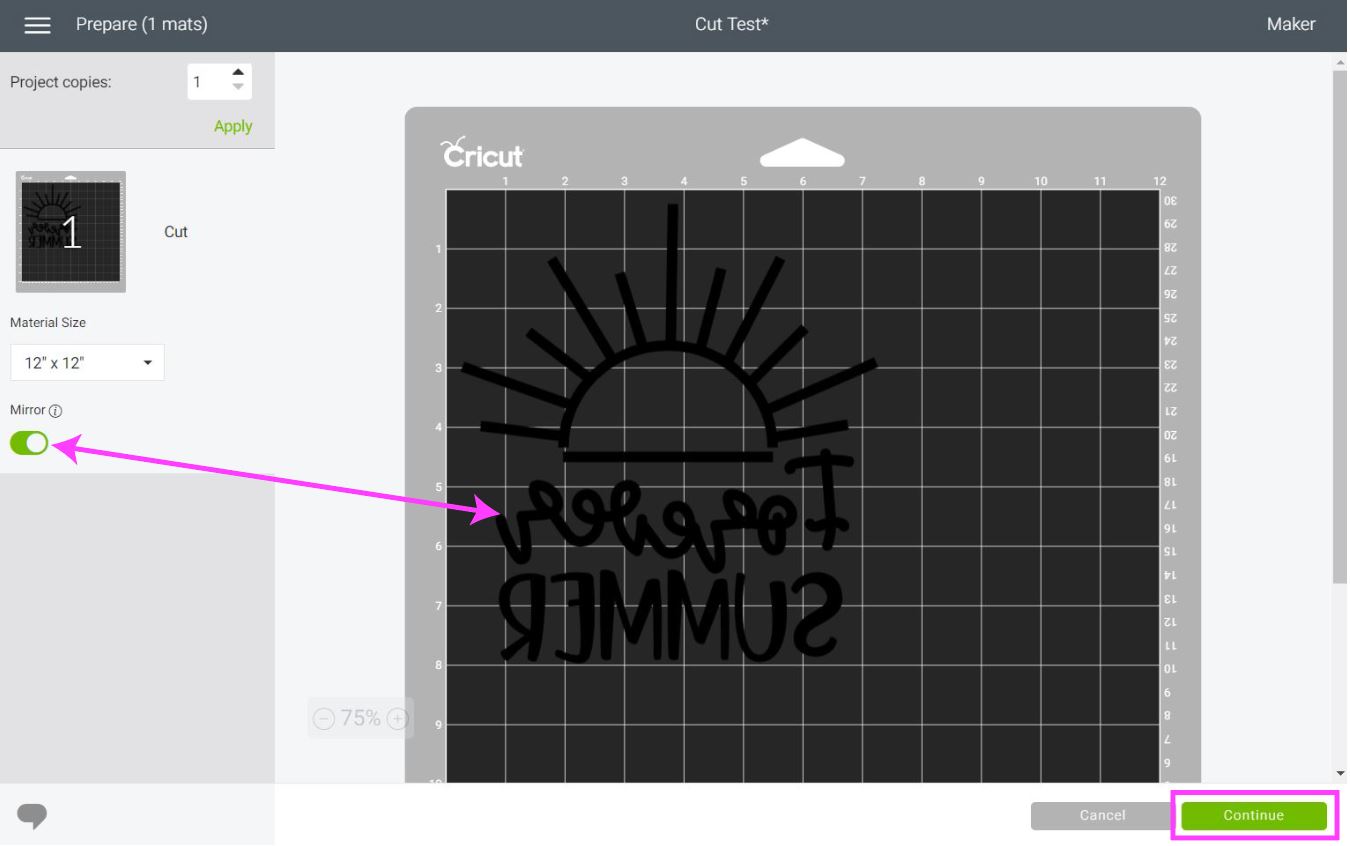
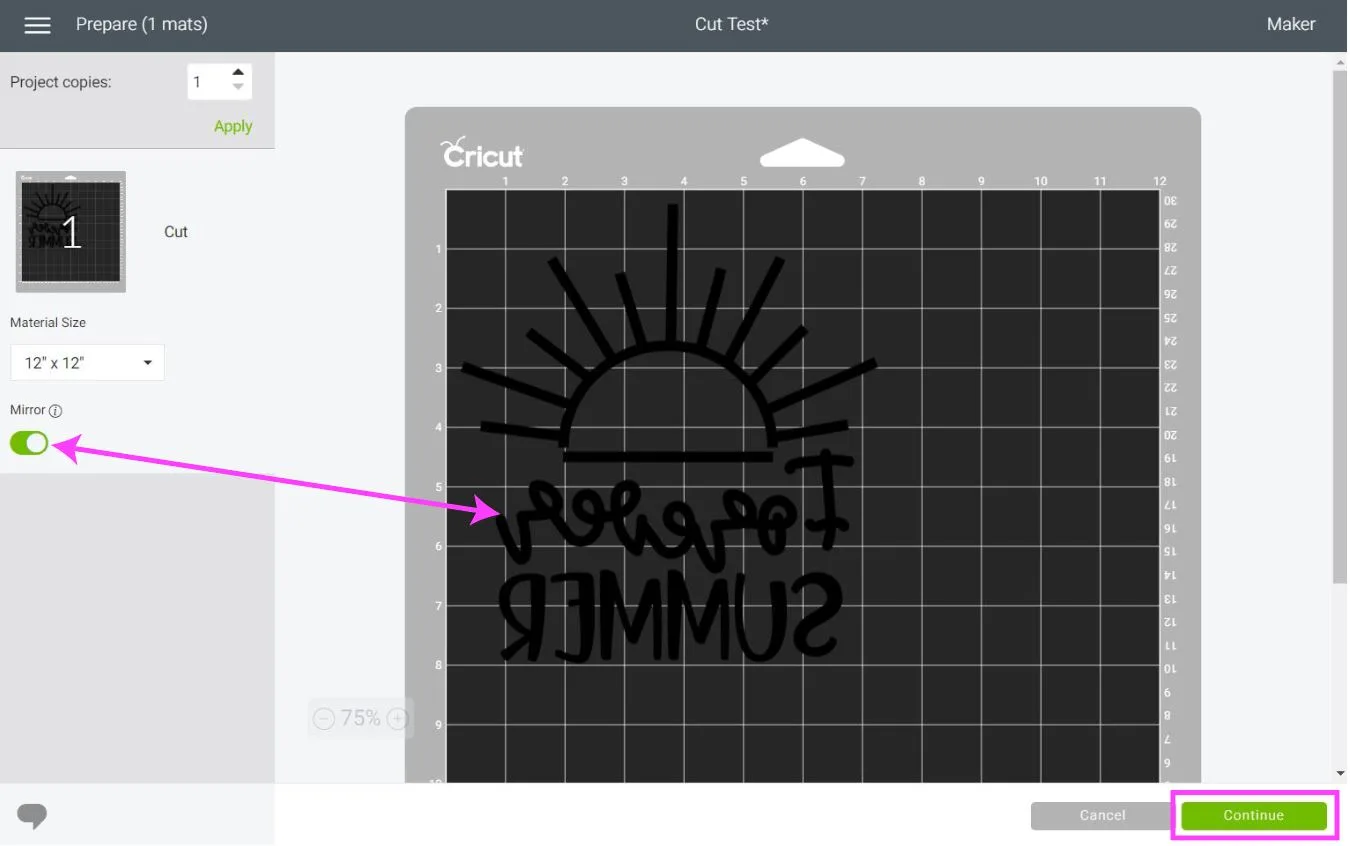
After mirroring your image, check everything looks in place and click on continue.
Note: Finding “Mirror” on Cricut’s App is a little bit tricky. Check out this tutorial I wrote if you can’t see it.
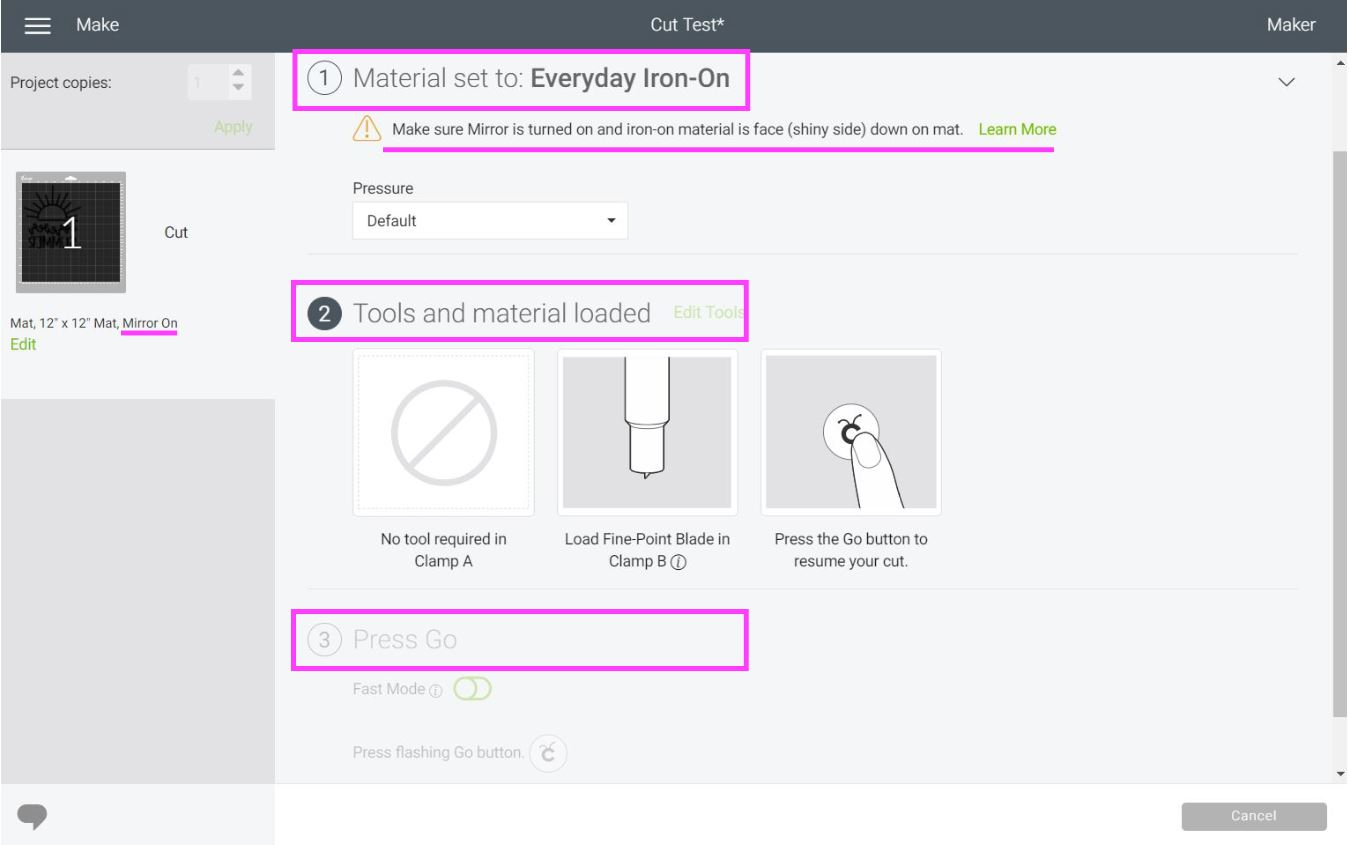
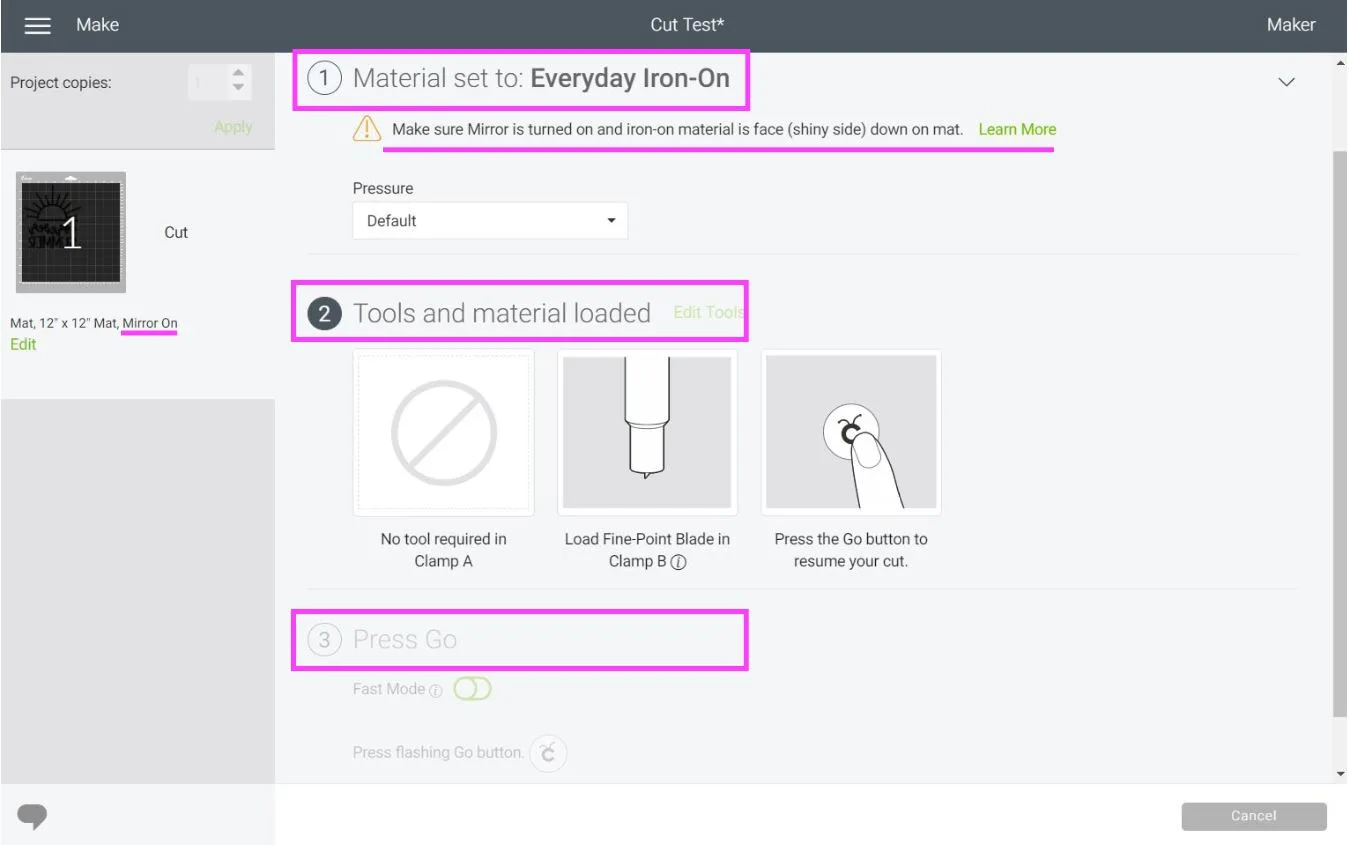
It’s time to select your material. Remember, there are many types of HTV. Many of them have different thicknesses, so make sure you choose the one you need to cut.
I am cutting, “Everyday Iron-On.”
If you have a Cricut Maker, you can choose the material from Design Space. However, if you have an Explore machine, you will have the option to move the Smart Set dial to Vinyl or Vinyl +.
If you have an Explore, I recommend you always leave the dial on “Custom” and search for the type of Iron-On you are working with.
Once you move the Smart Set Dial to custom, click on “Browse all Materials” and type in “Iron-On.”
Do you see all of those options?
All of them are fine-tuned for each type of Iron-On.
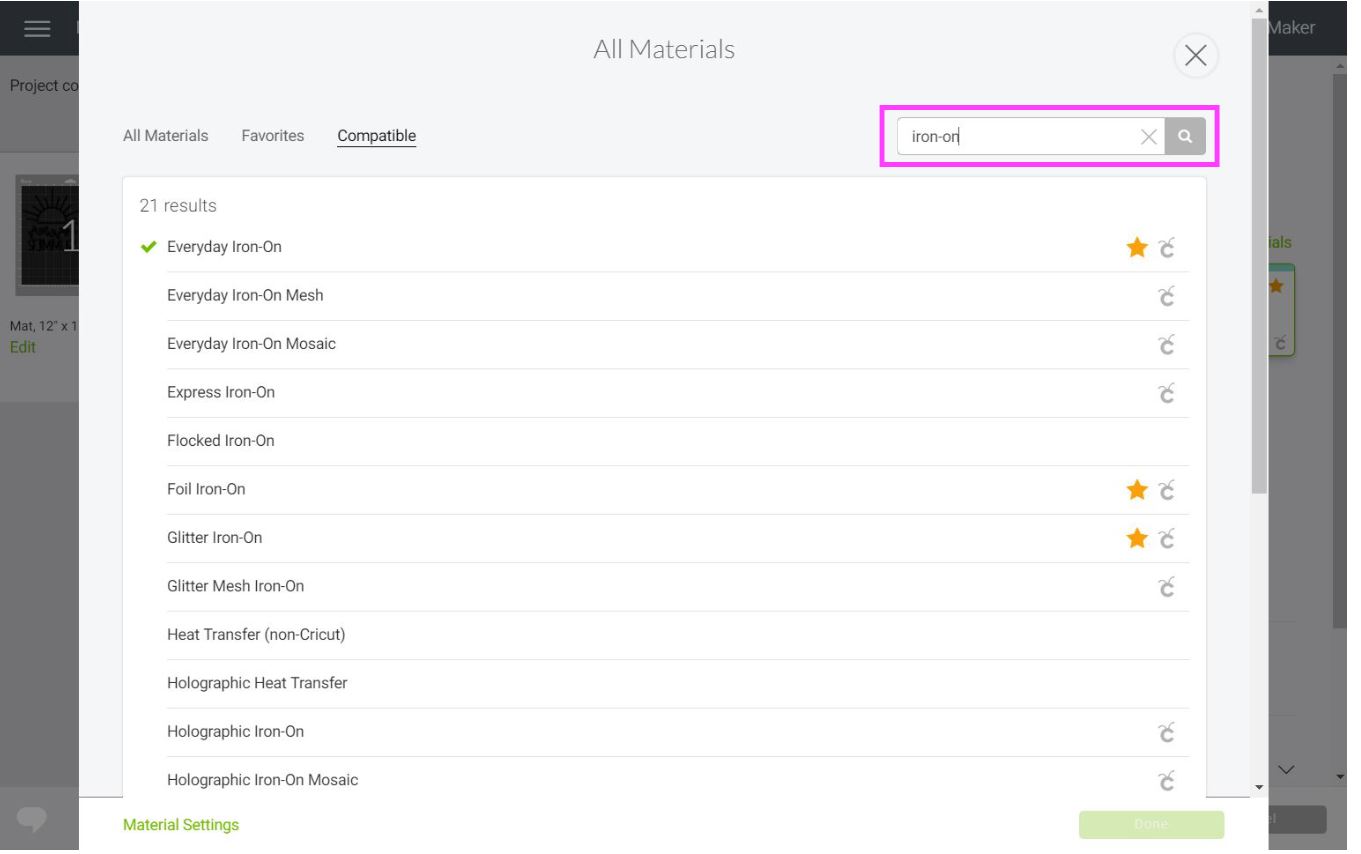
Tip: It’s easy to find the settings for the vinyl you want to cut when using “Cricut” brands. If you bought a different brand, check out their instructions. They usually have a specific setting you need.
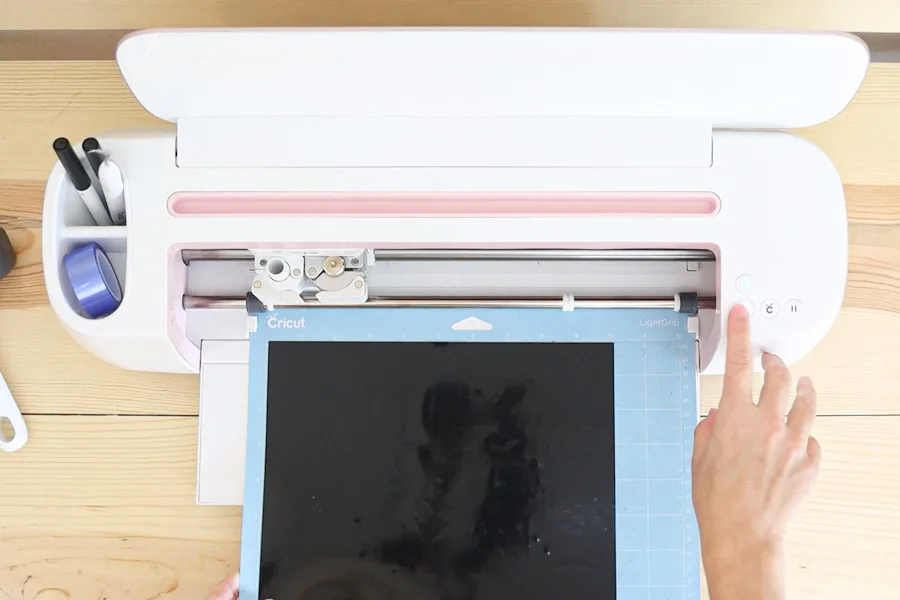
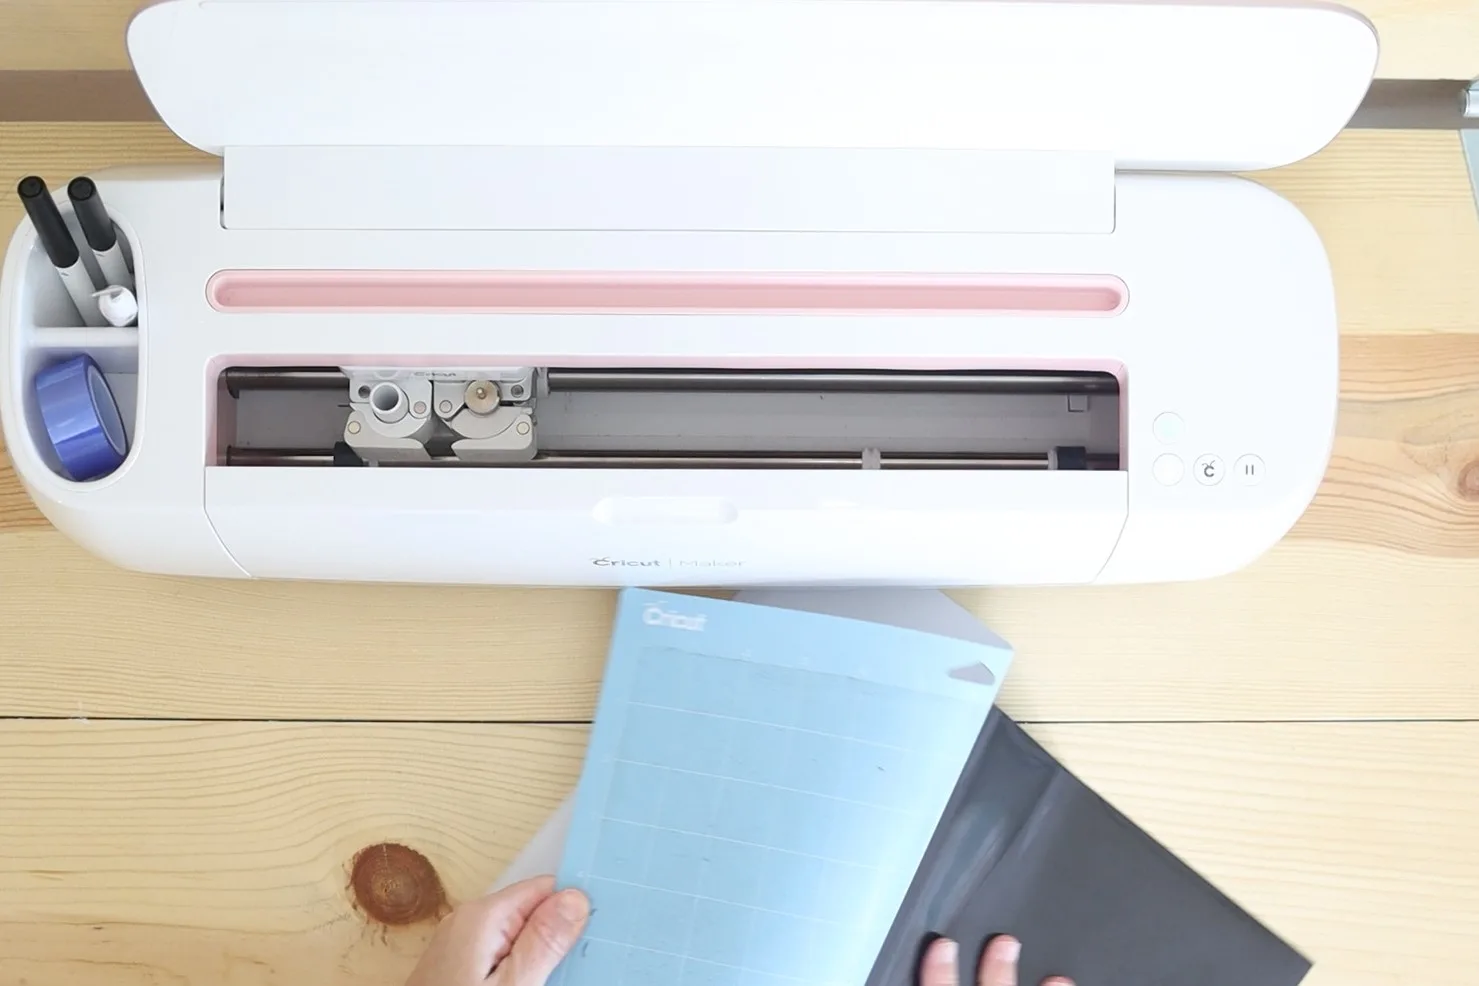
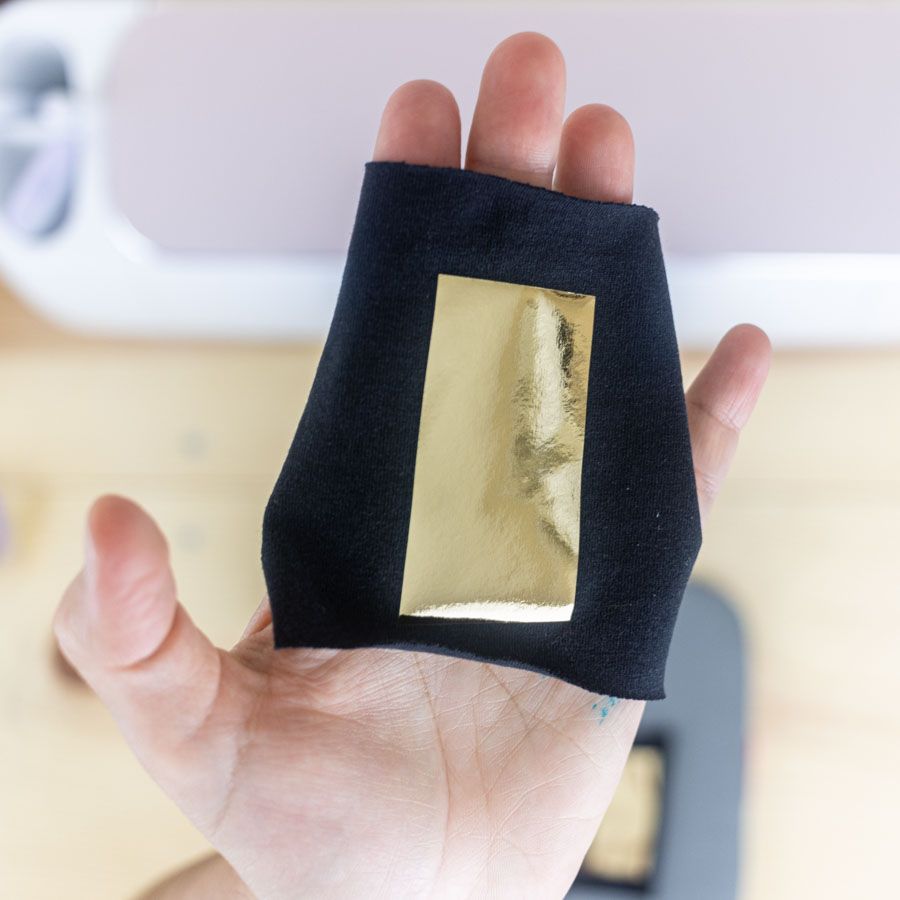
After selecting your material, install “Fine Point Blade” and place HTV on your mat.
Remember that vinyl needs to be shiny or pretty side down on the mat!

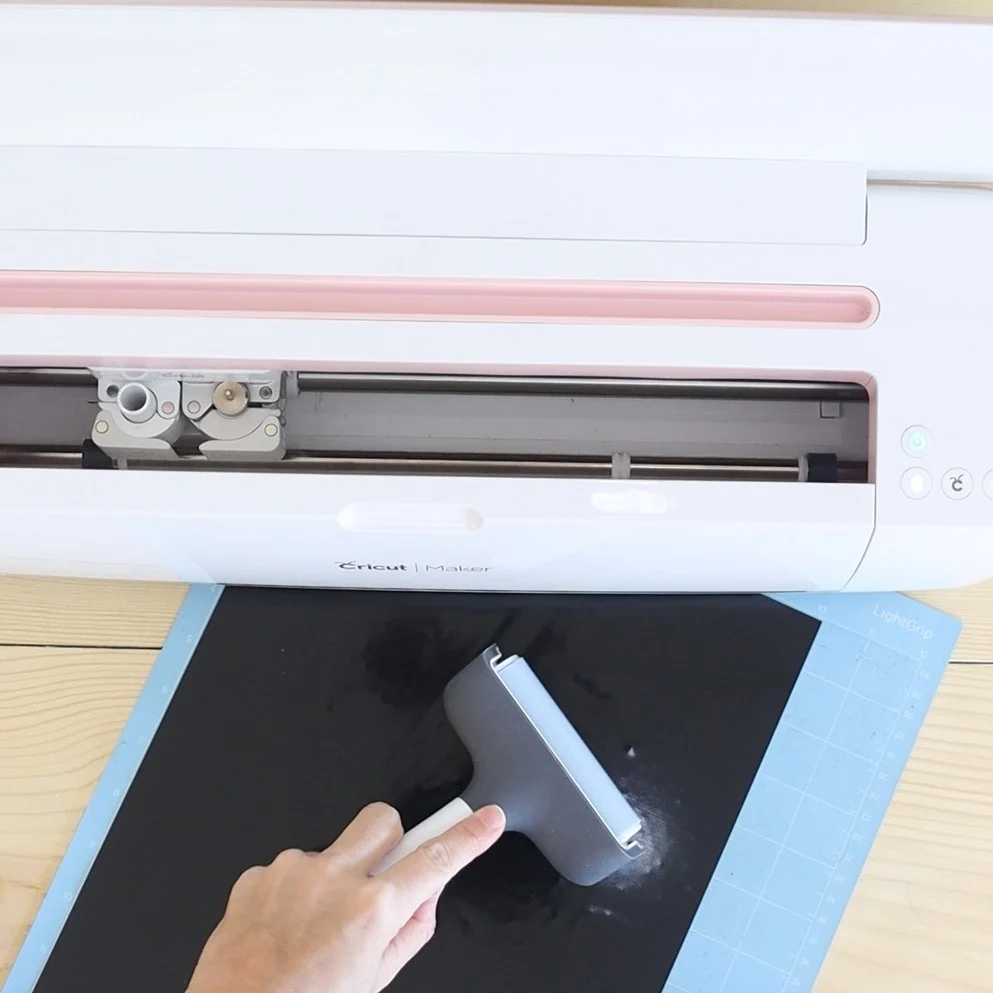
HTV on Mat 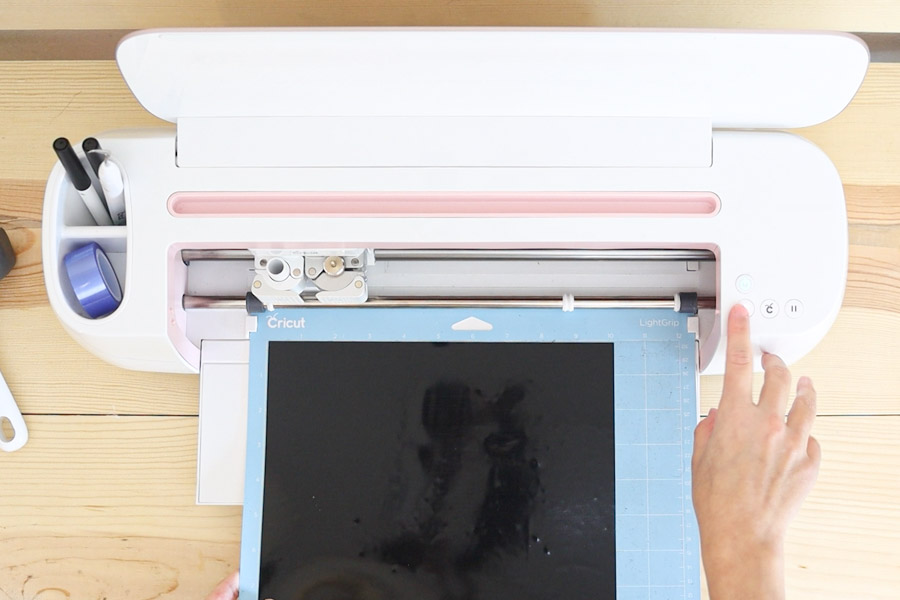
Load Mat 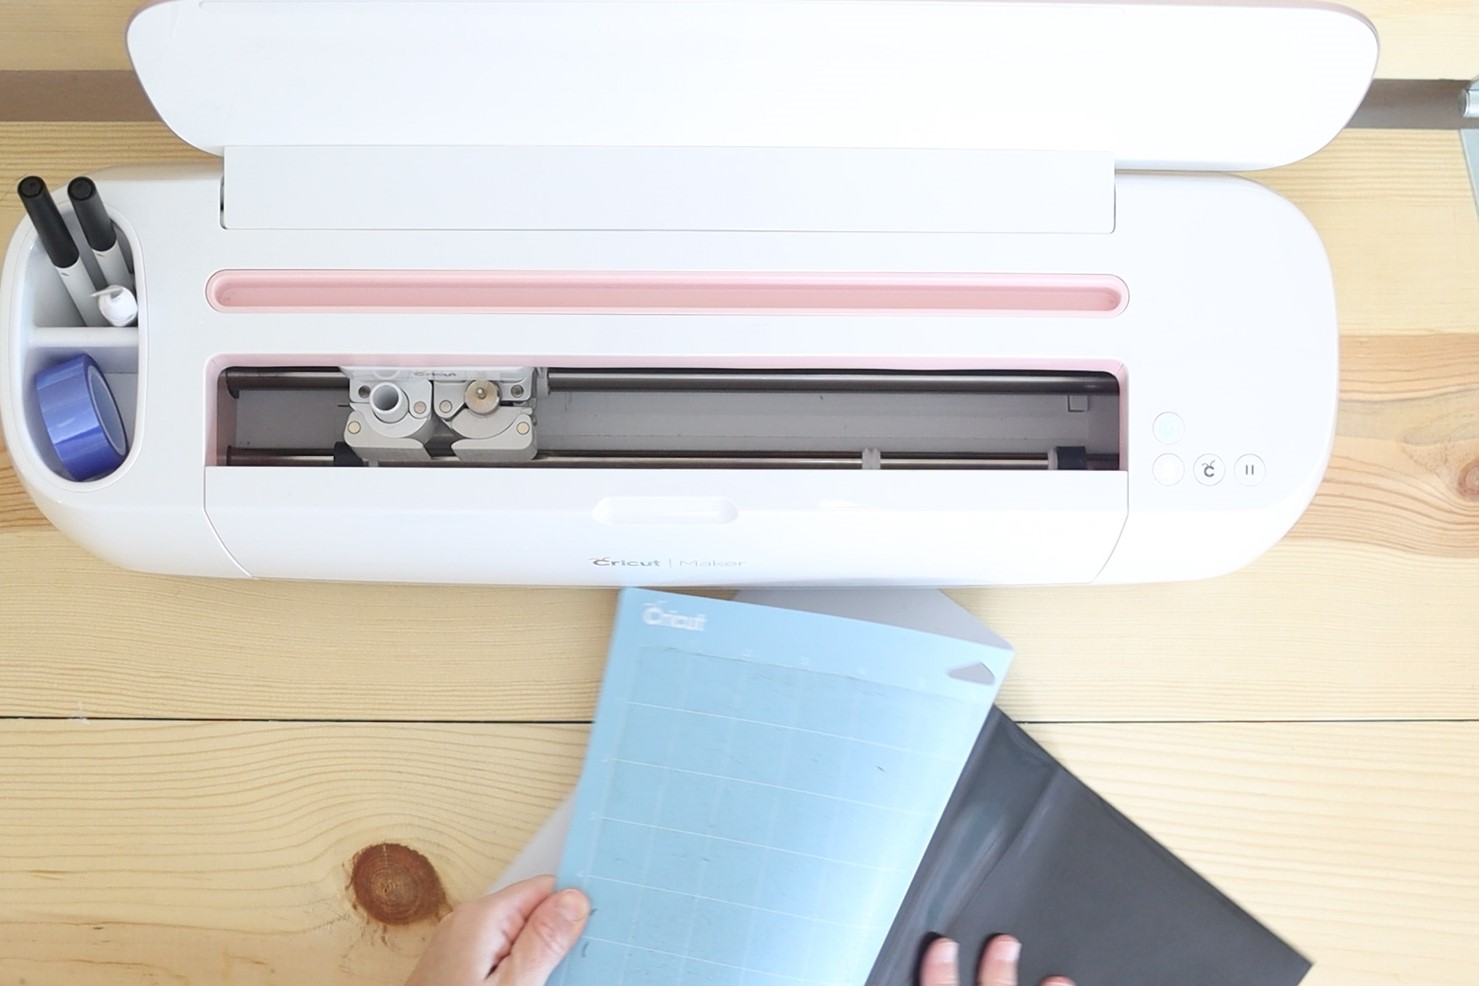
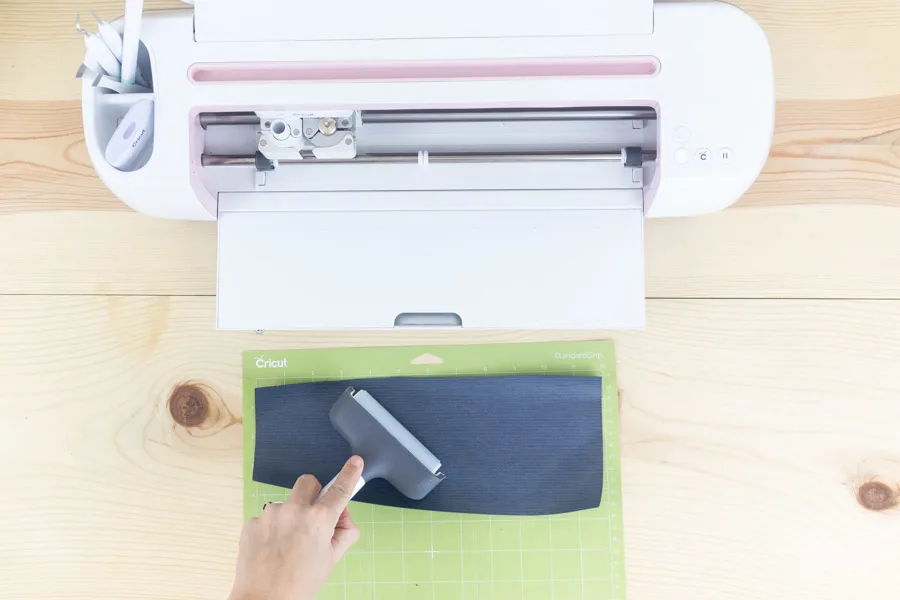
Remove HTV from mat
Load the mat to your device, and press the flashing-go button to start cutting!
When your Cricut is done cutting, unload the mat and remove Iron-On from it.
The best way to remove HTV from your mat it’s by bending it and pull the material down.
How to do HTV test Cut with Cricut
If you are using a brand of vinyl you’ve never worked with, or if it’s your first using Iron-On, I recommend you do a test cut to see if your machine is cutting everything right.
Sometimes, Iron-On projects can be quite large, and if you aren’t sure about your settings, well…
Your project will look good…
In the trash!
I have to say that I am so guilty of not doing this, and many times, I’ve wasted so much Iron-On. In other words, don’t be like me.
A test cut will take just a 1 x 1in. of your entire HTV sheet (small price to pay).
Go to shapes and add a 1 x 1in square, then add a circle and a star inside of it. Once you are done, select the three layers and click on attach to keep everything together.
Tip: If you are cutting something very tiny, make all of the shapes little too. So instead of 1x1in square do a 0.3×0.3in.
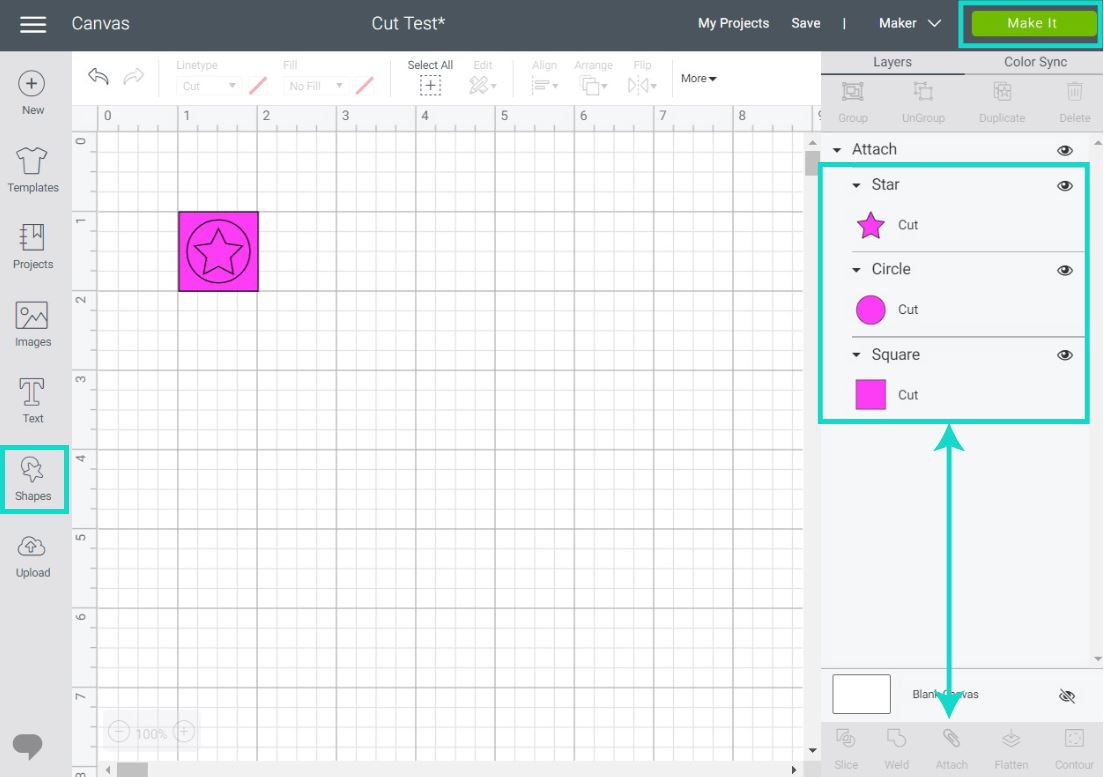
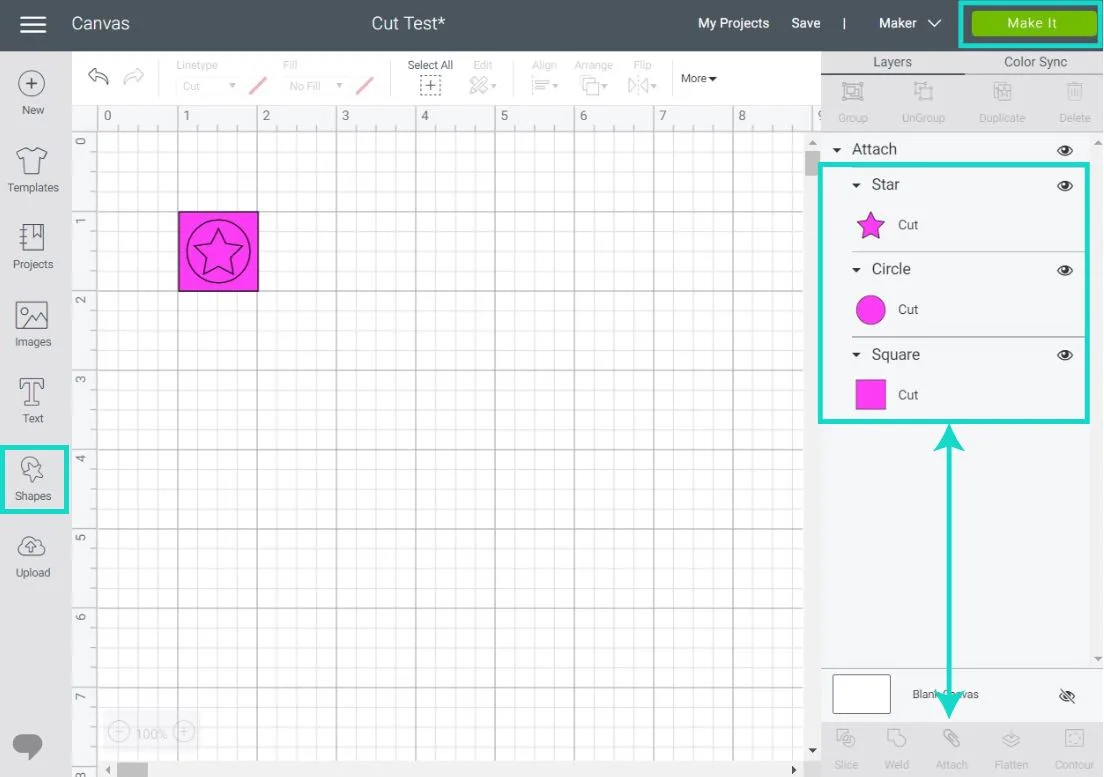
Click on “Make it” and follow the cutting instructions I wrote in the section above.

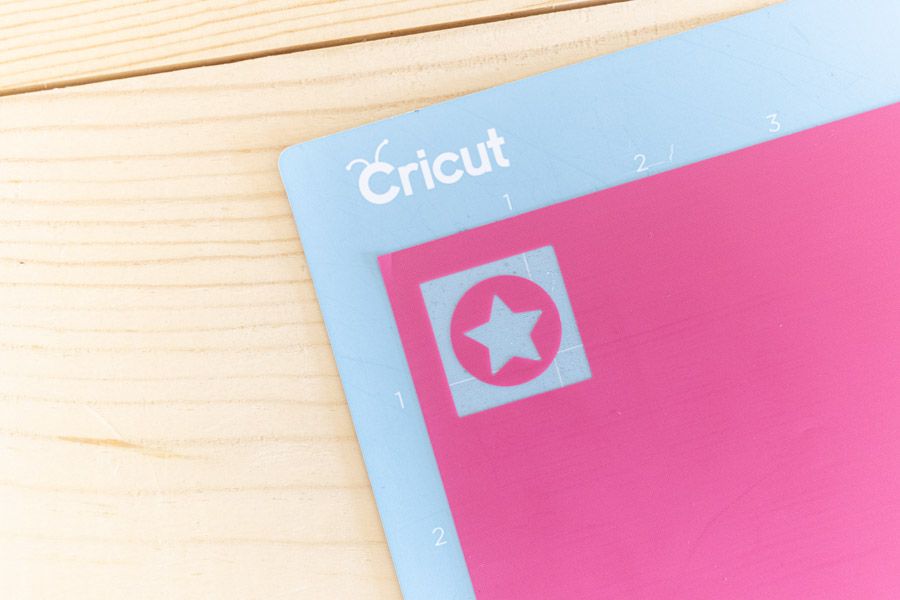

Once the cut is ready, make sure that everything weeds smoothly. For this example, I removed the star and the square. You could also remove the circle.
Again, most HTV providers will give you settings to follow when cutting this type of material.
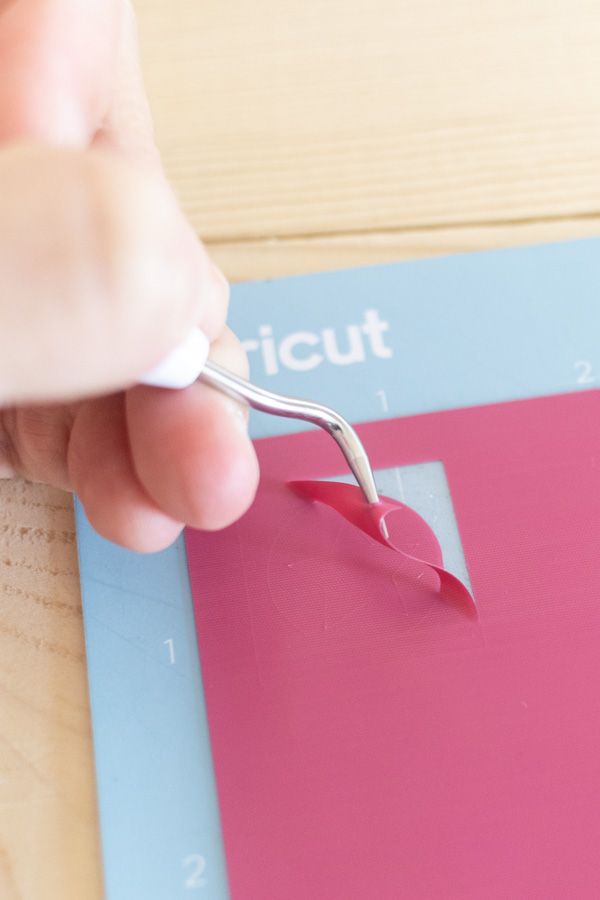
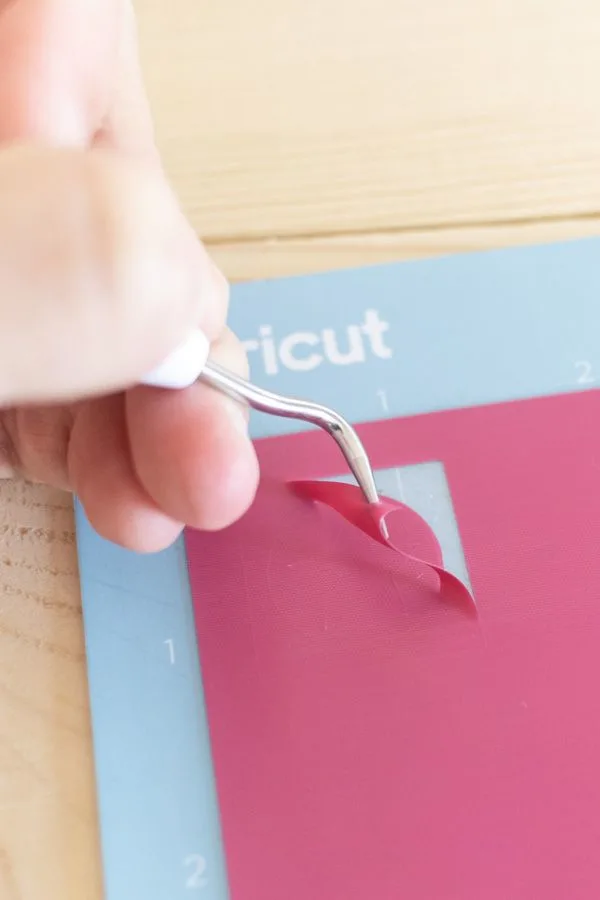
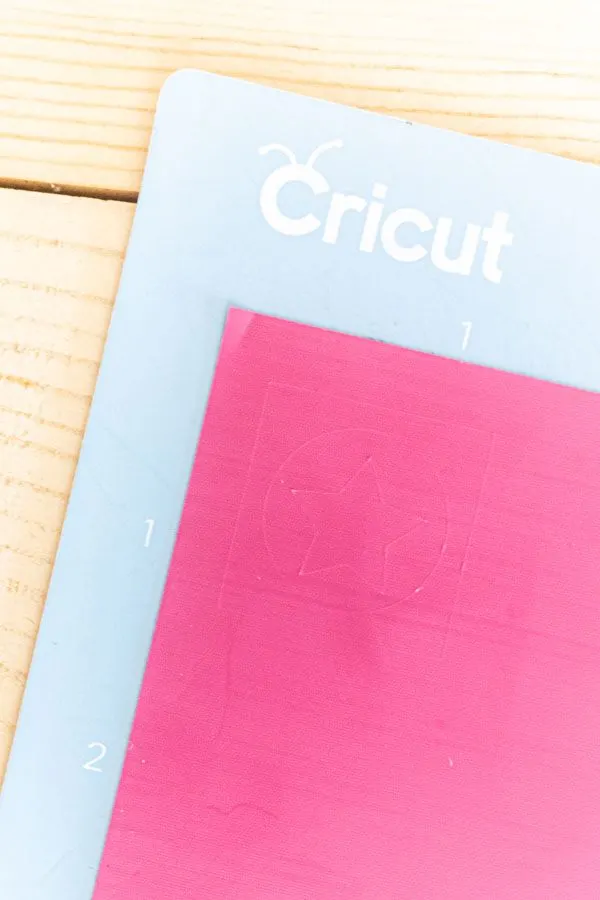
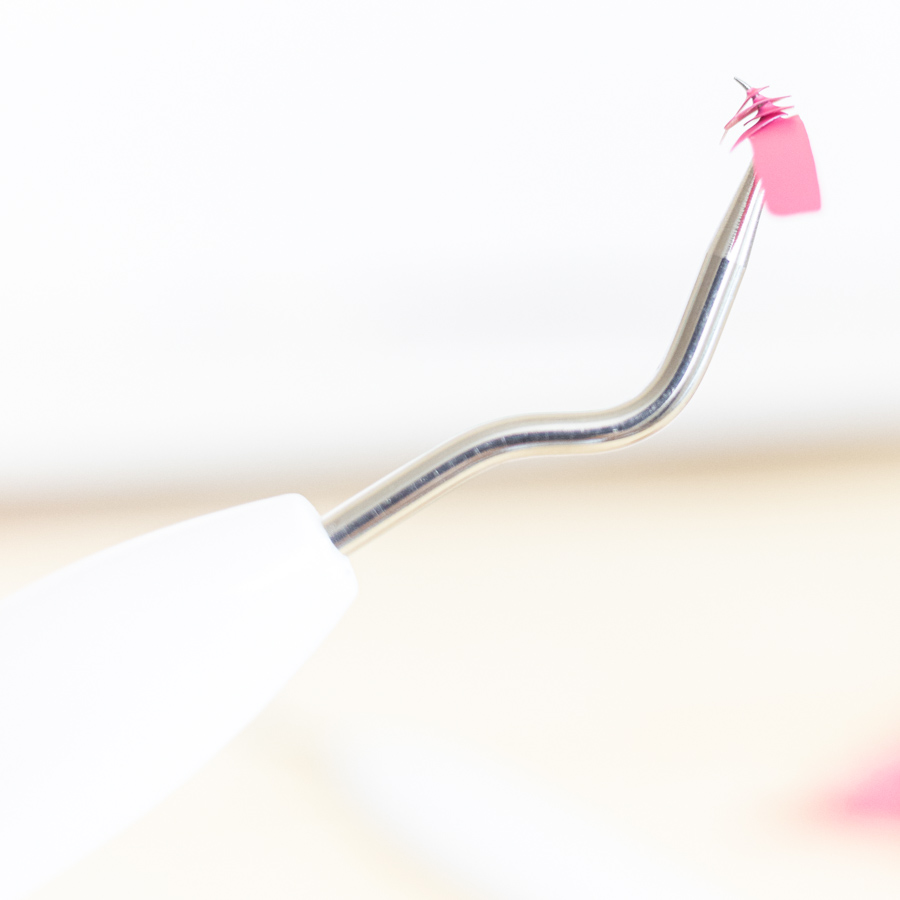
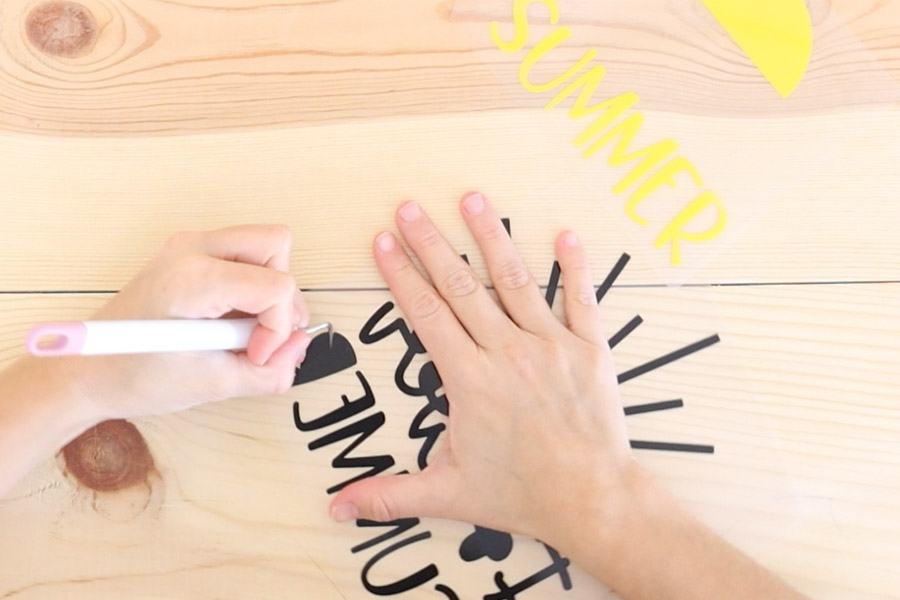
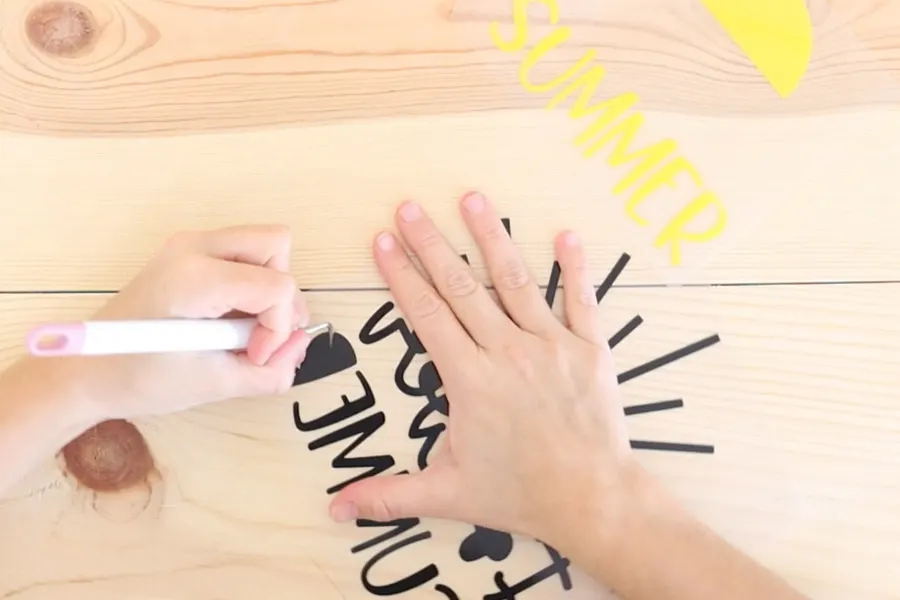
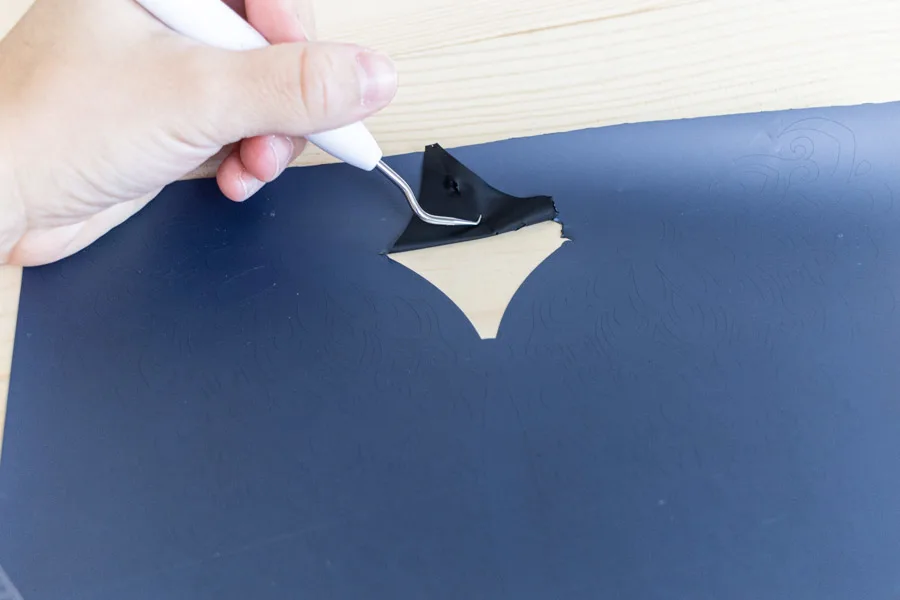
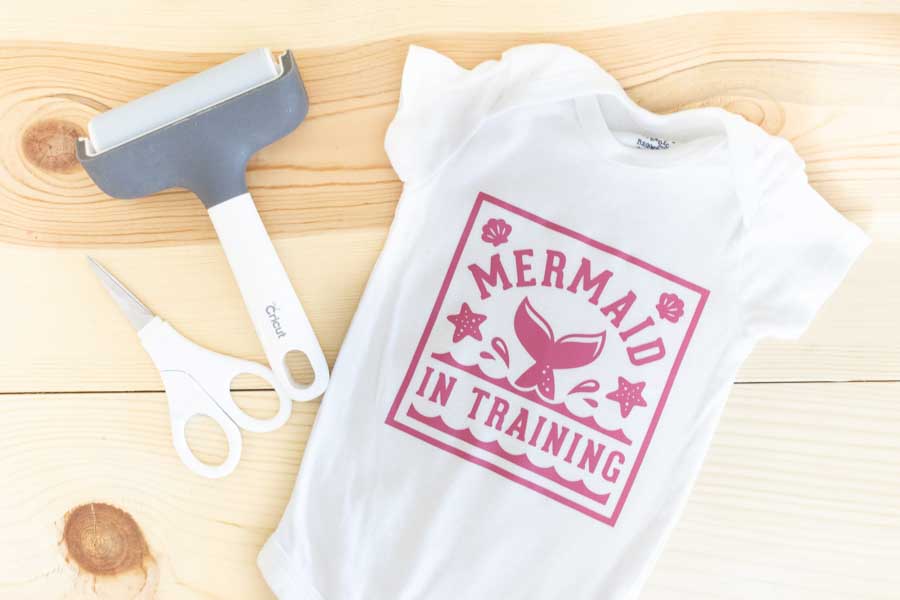
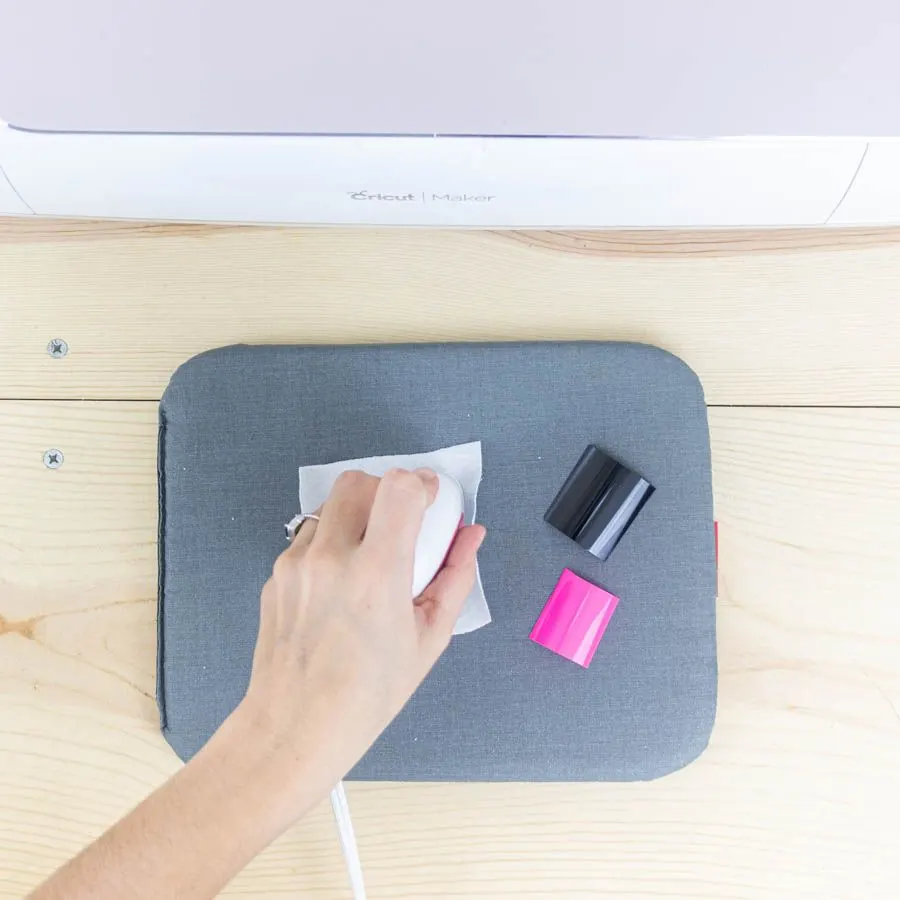
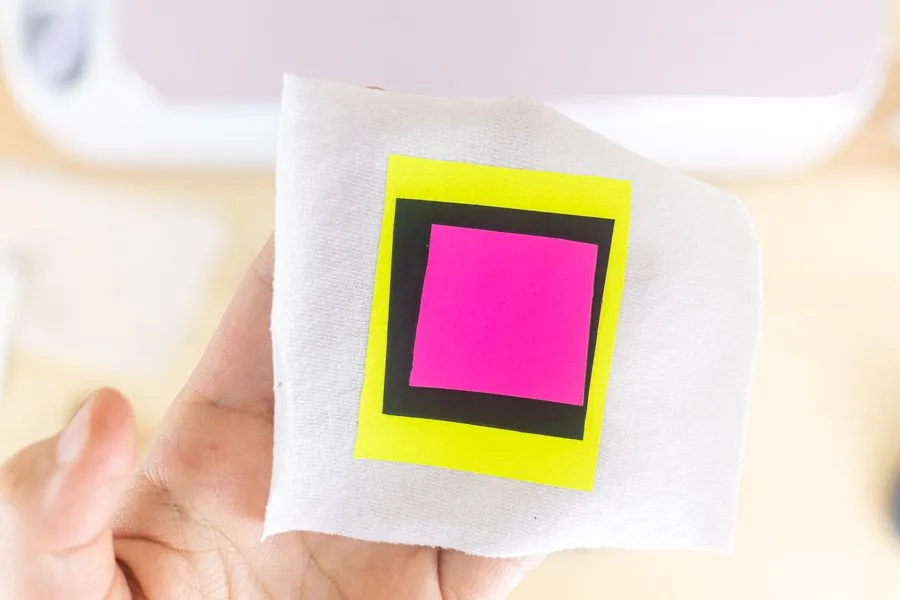
How to Weed HTV?
Weeding is the last step before transferring your project!
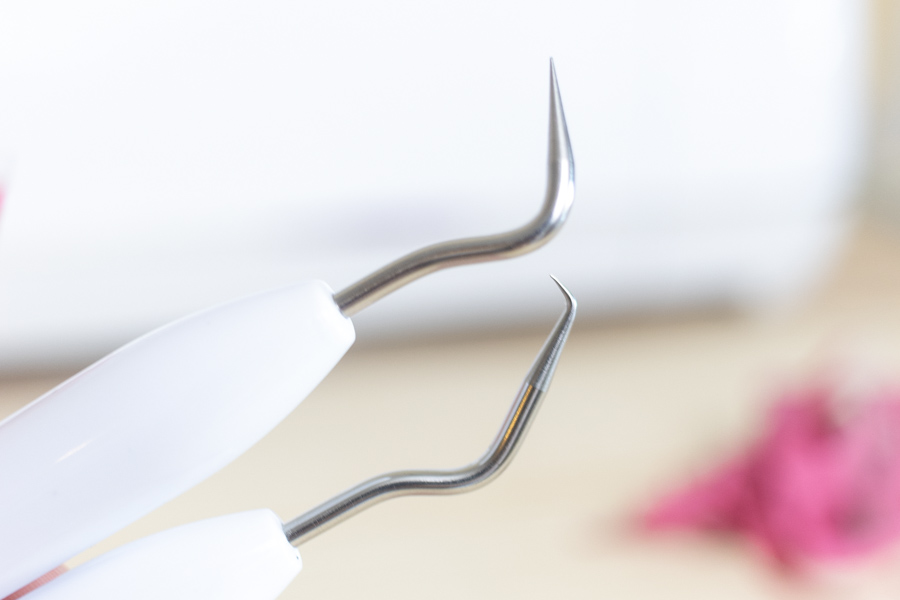
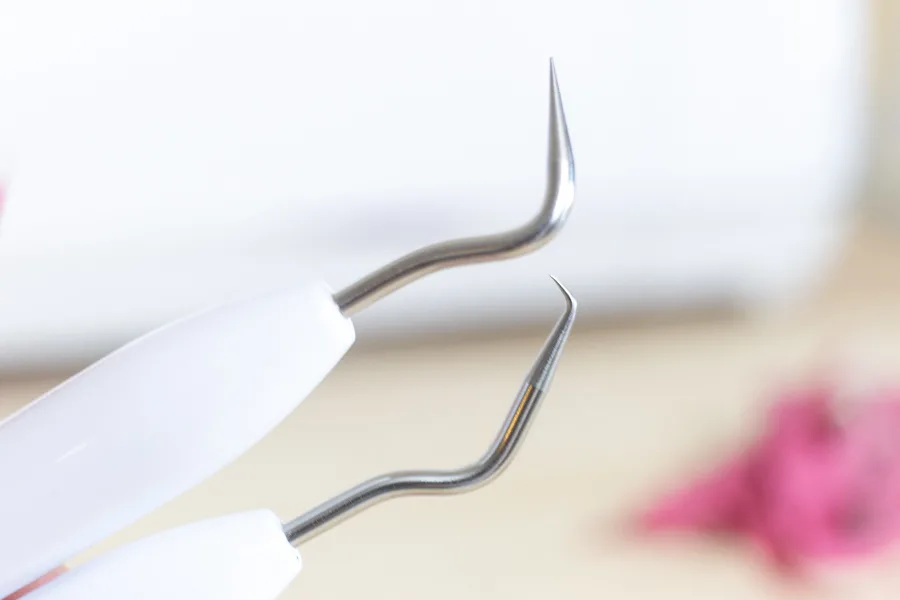
Weeding, in the cutting world, means to remove the parts that don’t belong to your design. Cricut sells this handy weeder tool, but sometimes even cheap dentist tools can work as well.
However, if you plan on working with Iron-On a lot, I recommend you get Cricut’s weeding set.
I love the weeder with a “curved hook” because when weeding tiny pieces, I can stack them in the little hook, instead of putting my weeder down after every single piece.

For the “Forever Summer” design, I used the regular weeder.
This design is pretty easy to weed. There are no complicated parts that you can get lost.
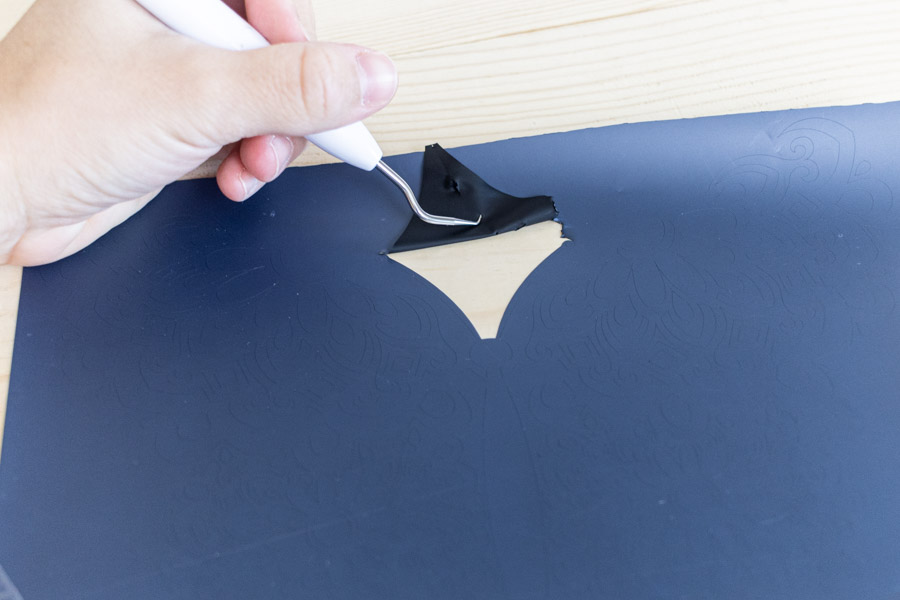
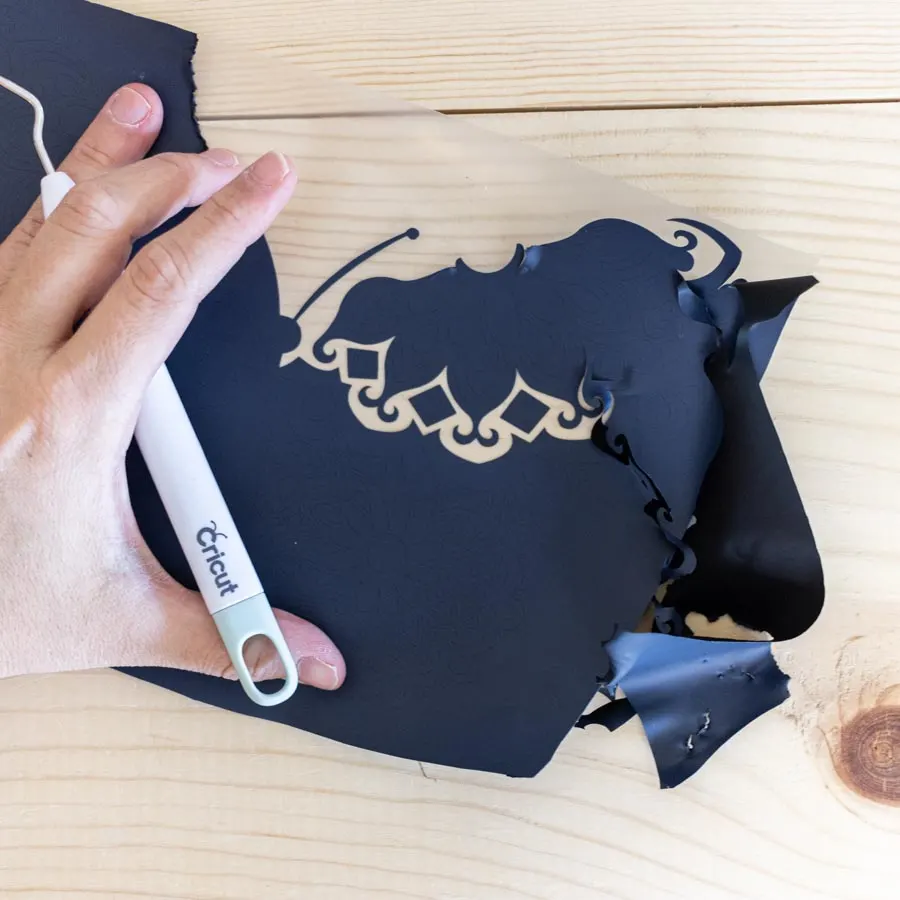
Nonetheless, some designs can be a little tricky! One mistake, and you’ll have to repeat the entire process.
Check out the following butterfly (you can find it in Cricut’s library under the code #MAA7FC9C).
It’s beautiful, but it’s also very complex!
When weeding a complicated design, you can’t trust your memory! Been there, done that.

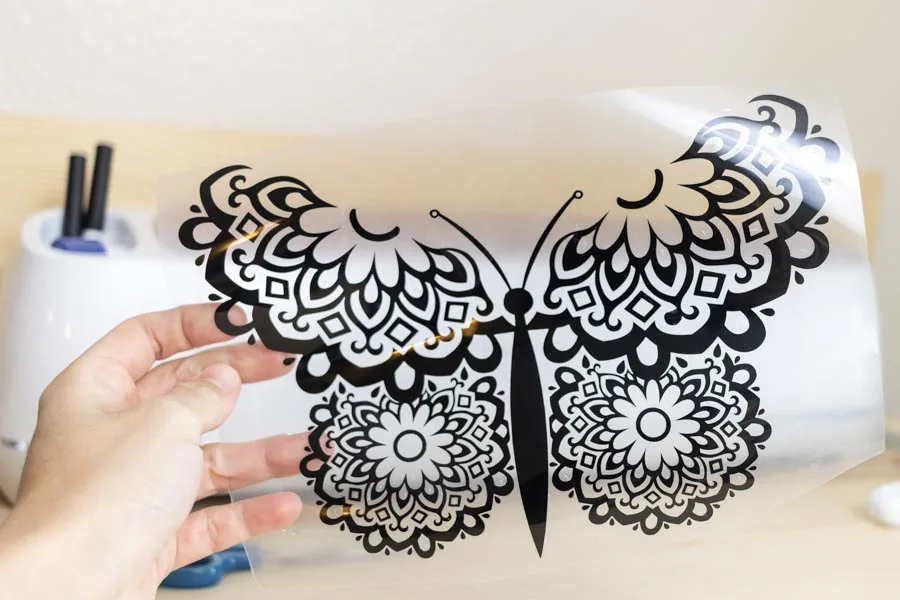
The best way to avoid mistakes is by looking at your computer and make sure you are weeding out the right areas.
Some people like to weed from the inside to the outside. Starting with little details, they can miss if they aren’t careful enough.
Other people like to work from the outside to the inside. I love doing this first. Although, sometimes, it can be very invasive and go into the center of the design.
This is very common when you work with mandala projects.
That’s why I start weeding from the outside and tear out before I go into an area I don’t feel comfortable weeding right away.
For instance, in the next gallery, on the second photo, I realized the vinyl was going right into the center. Since I wanted to leave it for last, I kept splitting the vinyl before I went into those intricate areas.


What works for me, it may not work for you. Sometimes I weed in unregular patterns because I get bored.
It’s not an exact science!
As long as you know what you need to keep behind and what to remove, just follow your instincts.
How to transfer Heat Transfer Vinyl?
Transferring your project is just as important as cutting and weeding it. Before you were only risking the Iron-On sheet, now are also risking your blank.
Again, I am not trying to scare you but to caution you!
As I mentioned at the beginning of this tutorial, Iron-On requires heat to be transferred. This material has a particular glue that melts and sticks to the surface once it encounters the right temperature.
There are many ways to transfer HTV!
You can use a heat press, and Easypress, and a regular household iron!
I happen to have an Easypress and regular household iron, so I am going to cover how to use them both!
Check out this Youtube video for a heat press tutorial.
Note: If you are curious whether you should wash or not wash your fabric, check out the FAQ questions at the end of this tutorial. As for me, I always wash first.
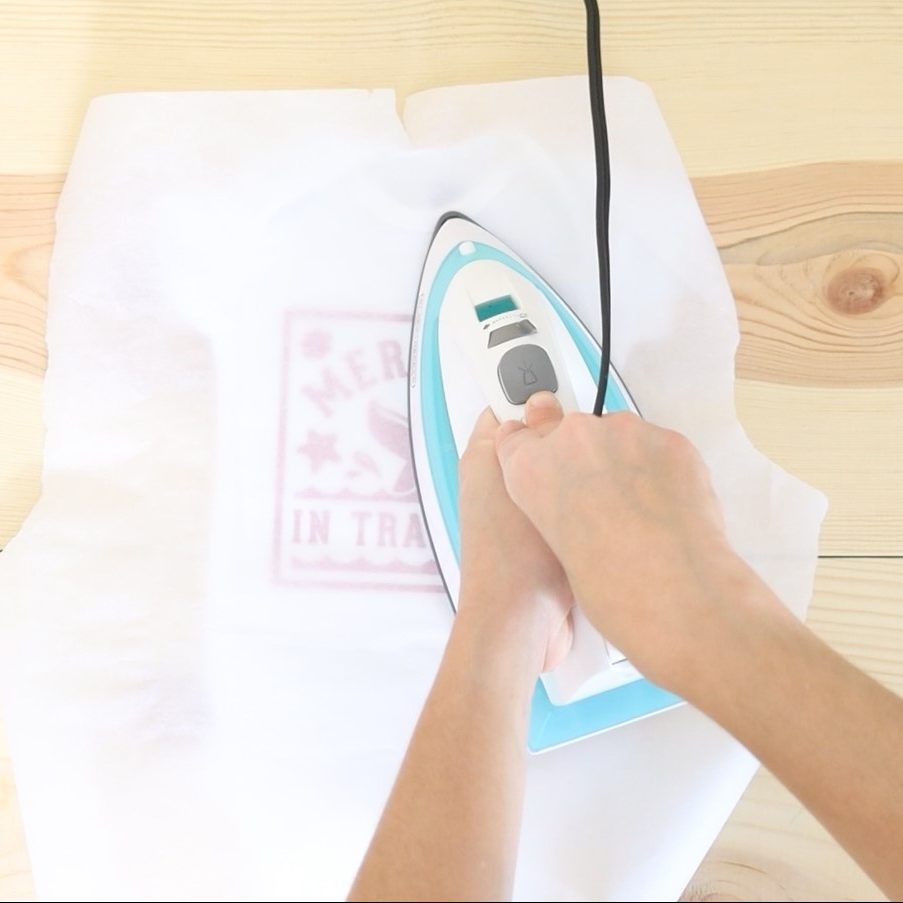
How to transfer HTV using a Cricut Easypress?
One of the best investments I’ve made ever since I got my Cricut was The Easypress 2.
Yes, you can use an iron and have excellent results as well; but, not all vinyl is made equal!
You see, sometimes you need different types of heat, and the Easypress (read my review) can take care of all of that with an even temperature.
One of the coolest things about the EP is the Cricut’s Heat Guide.
To check the exact temperature, you need and special instructions, select the type of Iron-On you’re cutting and the base material you are working with.
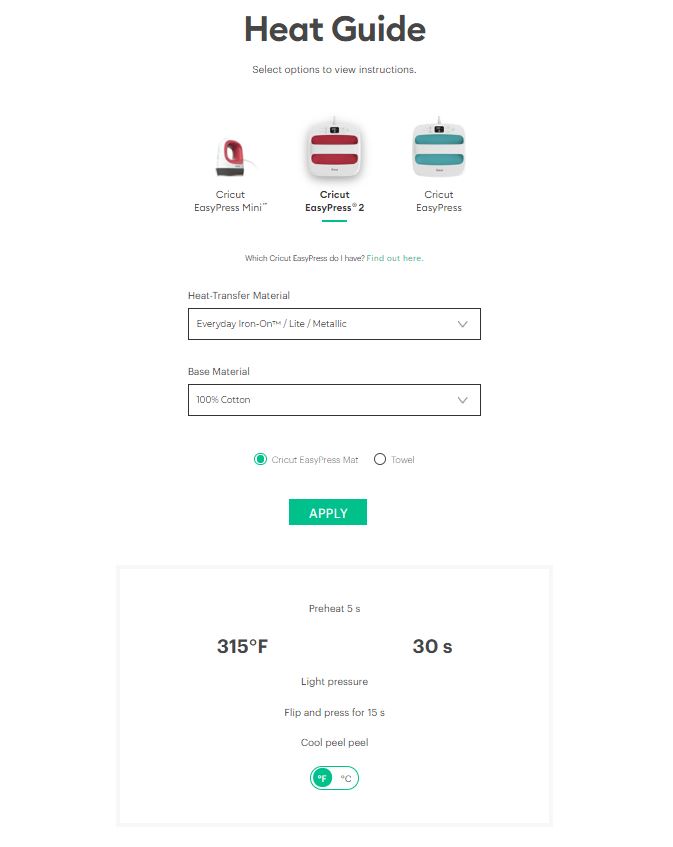
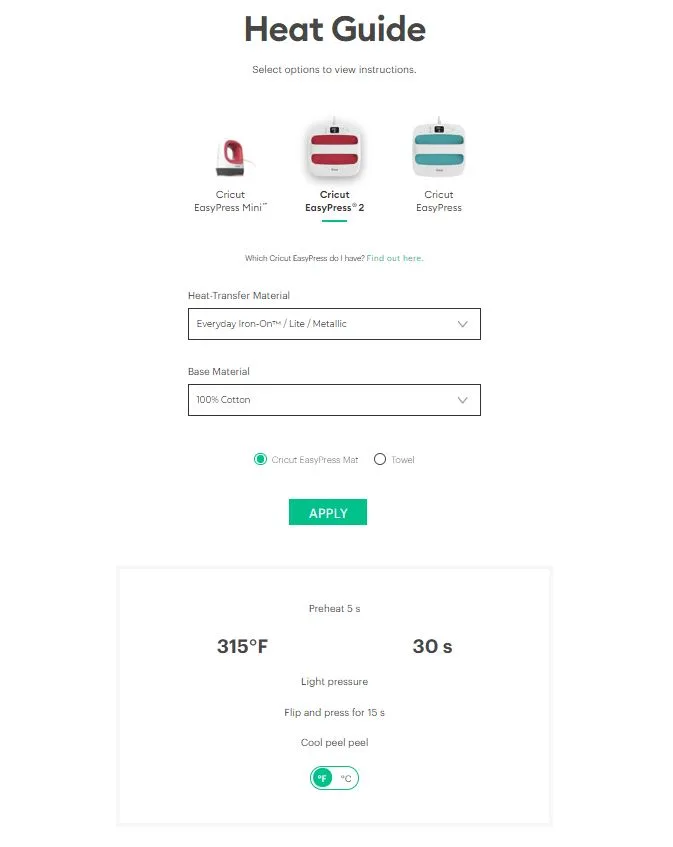
In this case, I used “Everyday Iron-On” as the material and “100% Cotton” as the base material. I also used the “Cricut EasyPress Mat.”
Tip: If you don’t have a mat use a towel. Don’t skip this; using a heat mat or towel is just as important.

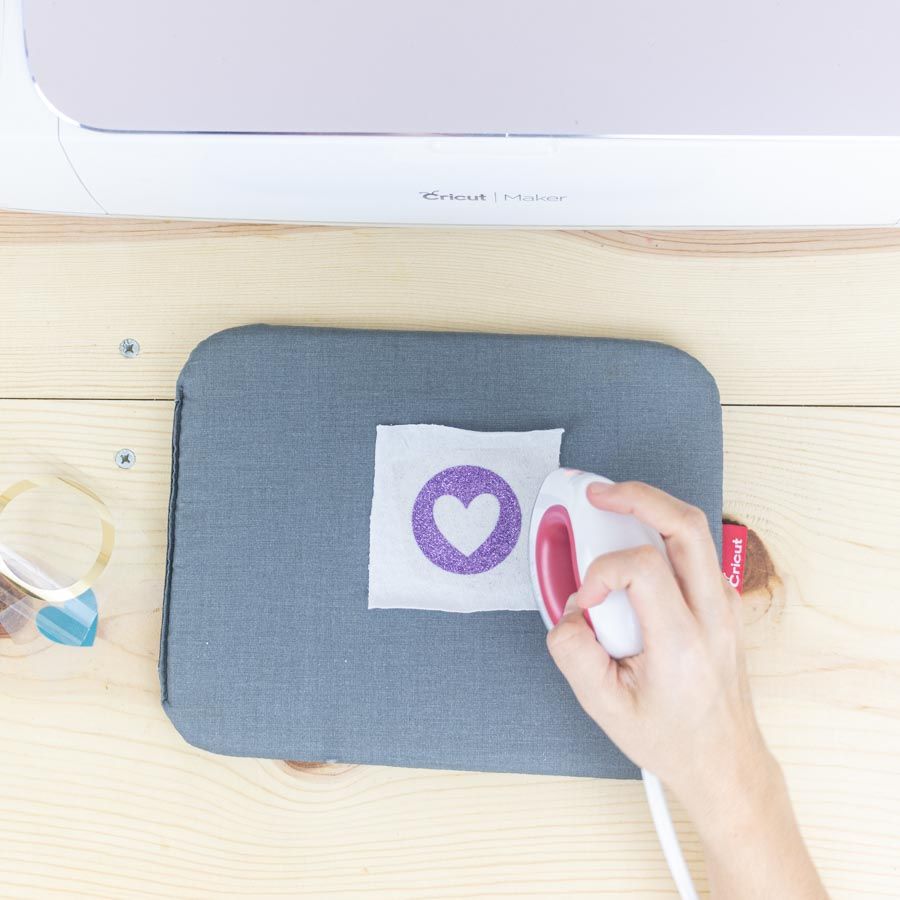
Step 1 
Step 2 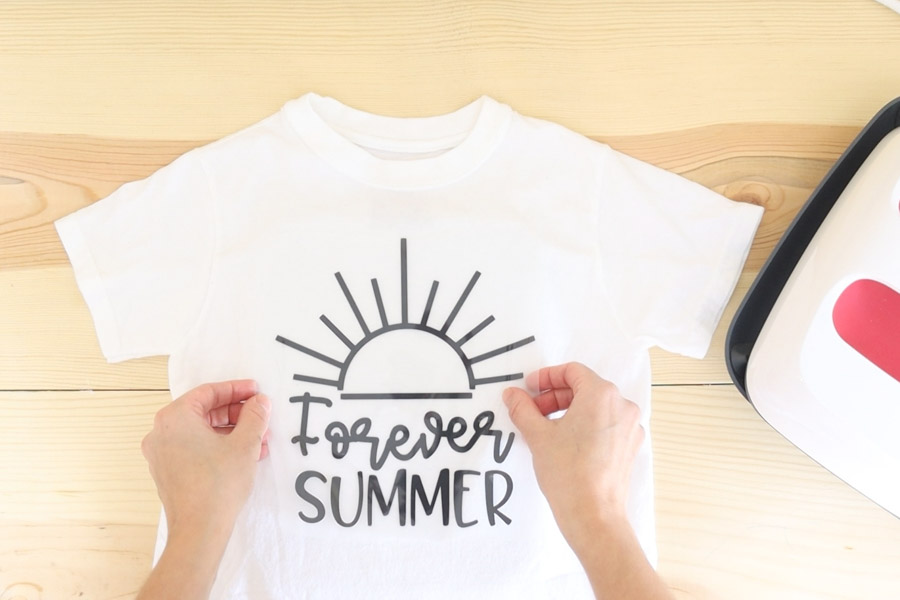

Step 3
Step 1
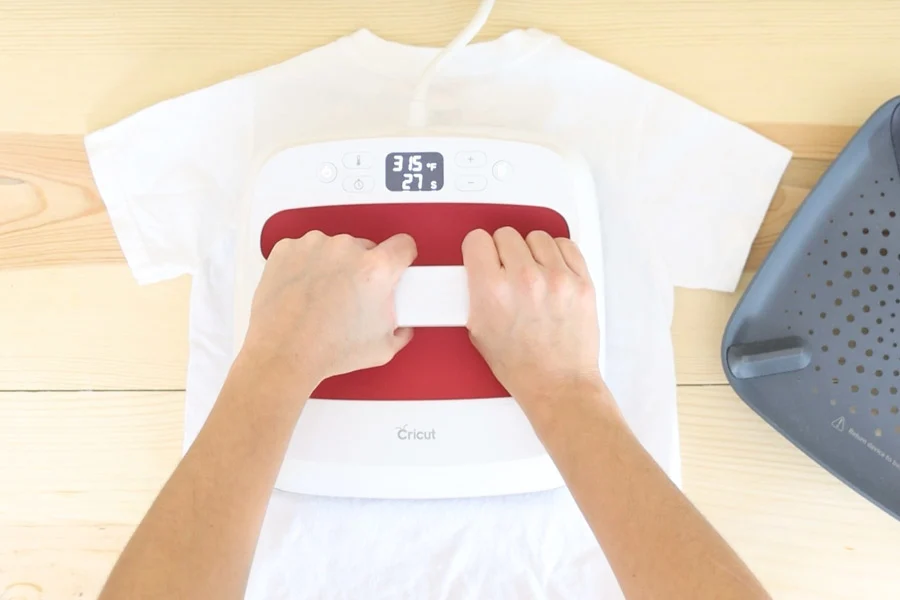
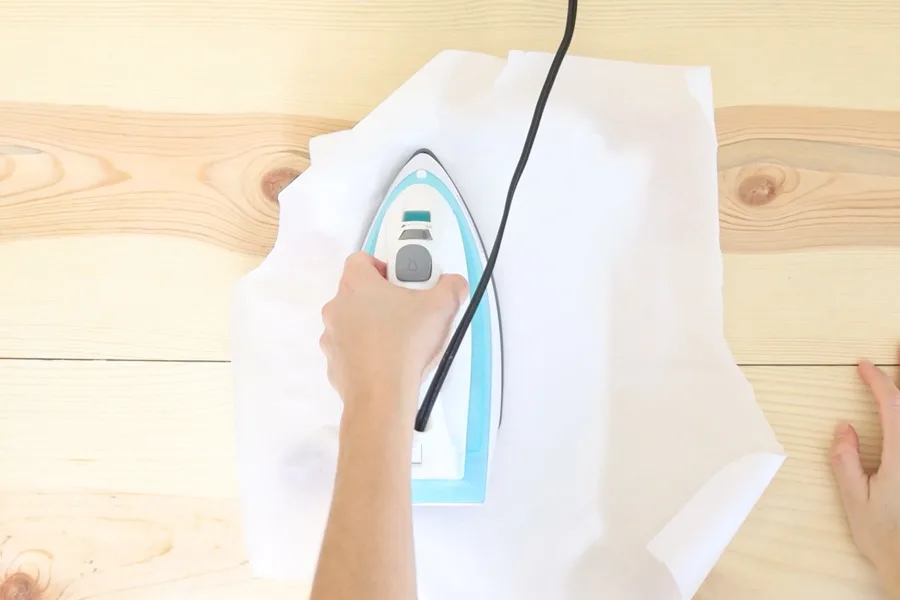
Preheat Easypress, according to Cricut’s Heat Guide. In this case, it was 315 °F then.
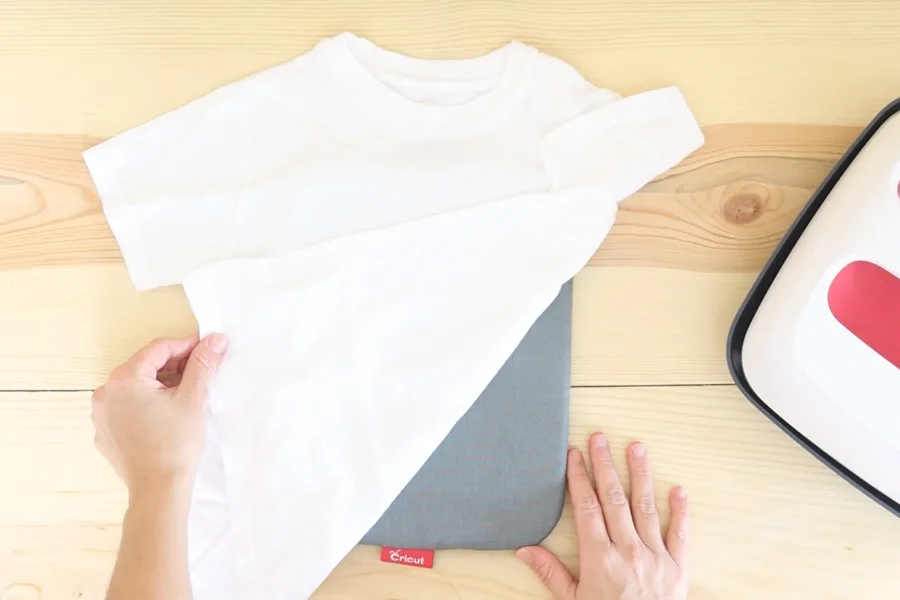
Place Cricut’s heat mat or a towel (evenly folded) underneath or in between your shirt. Make sure to isolate any seams.
Step 2
Preheat the area for about five seconds and get rid of any visible wrinkles and moisture.
Step 3
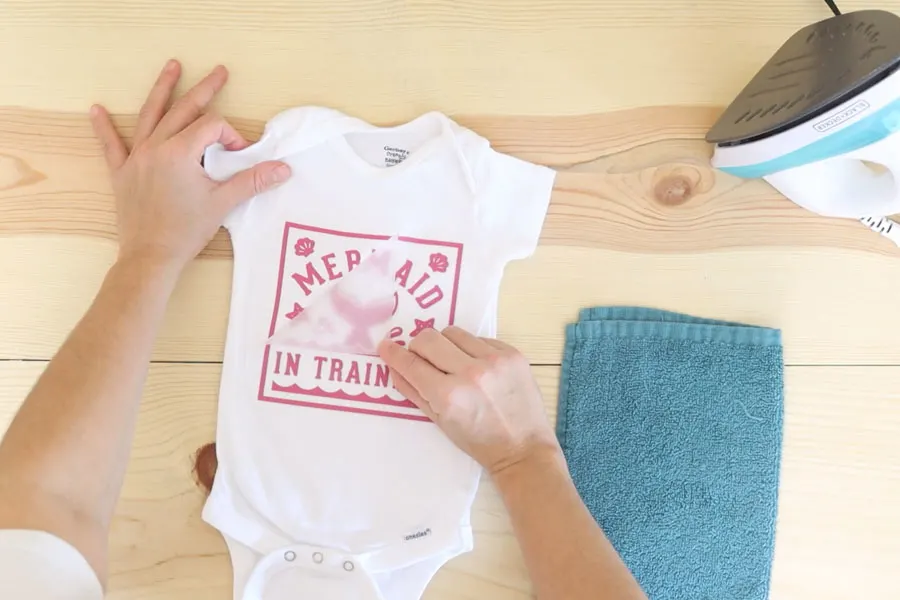
Place design on your t-shirt. Please take your time to find the perfect location for your image.
I can’t tell you how ugly some of my first t-shirts looked because I didn’t take the time to check out the location.

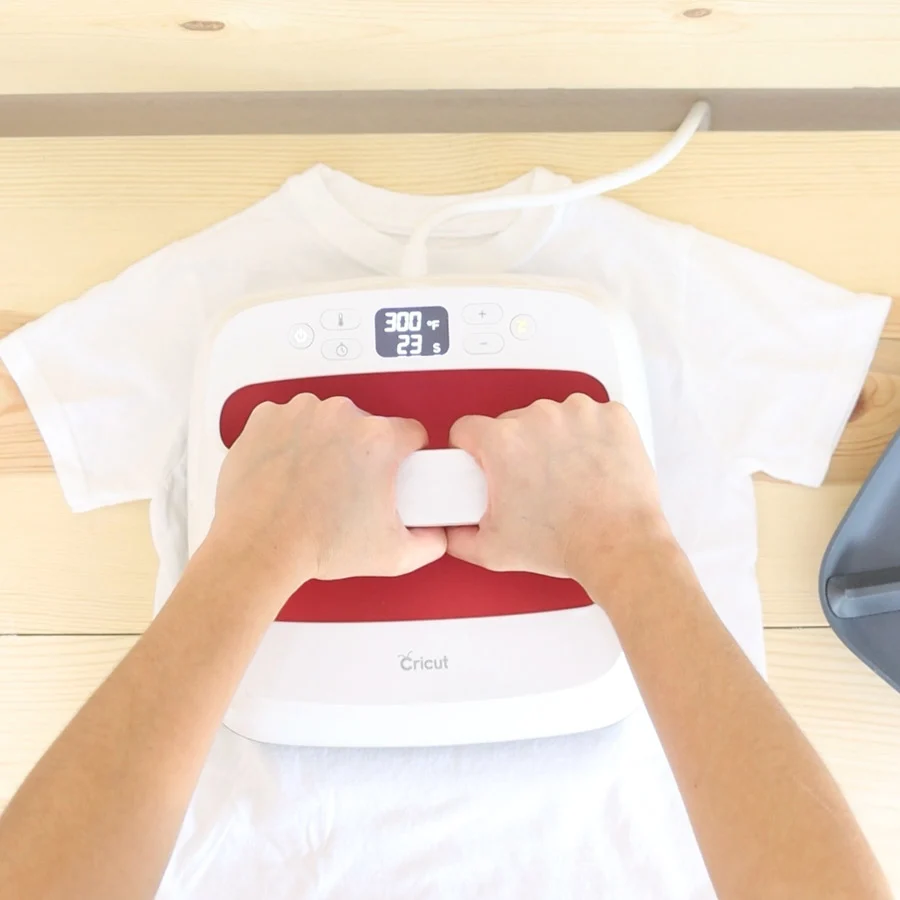
Step 4 

Step 5 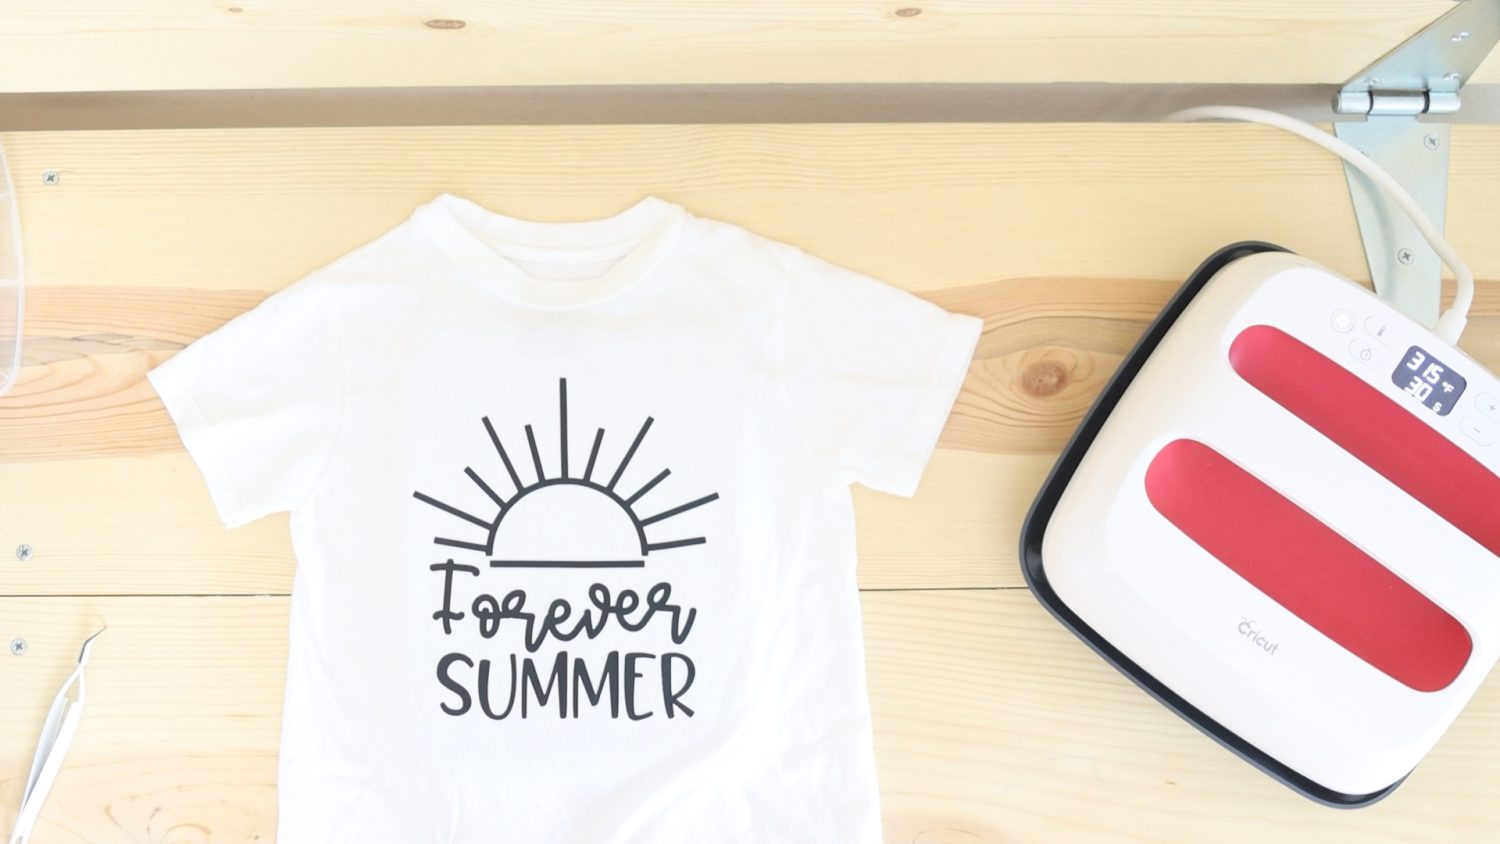
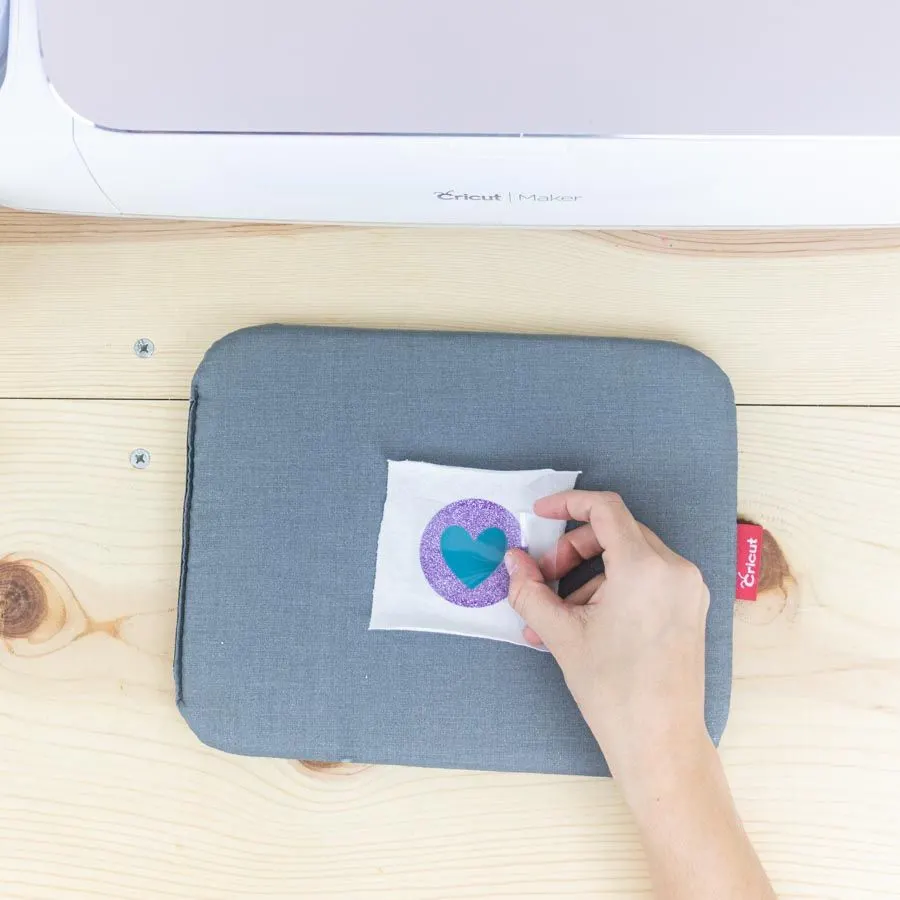
Final Result
Step 4
Gently apply pressure for 30 seconds on your design.
Step 5
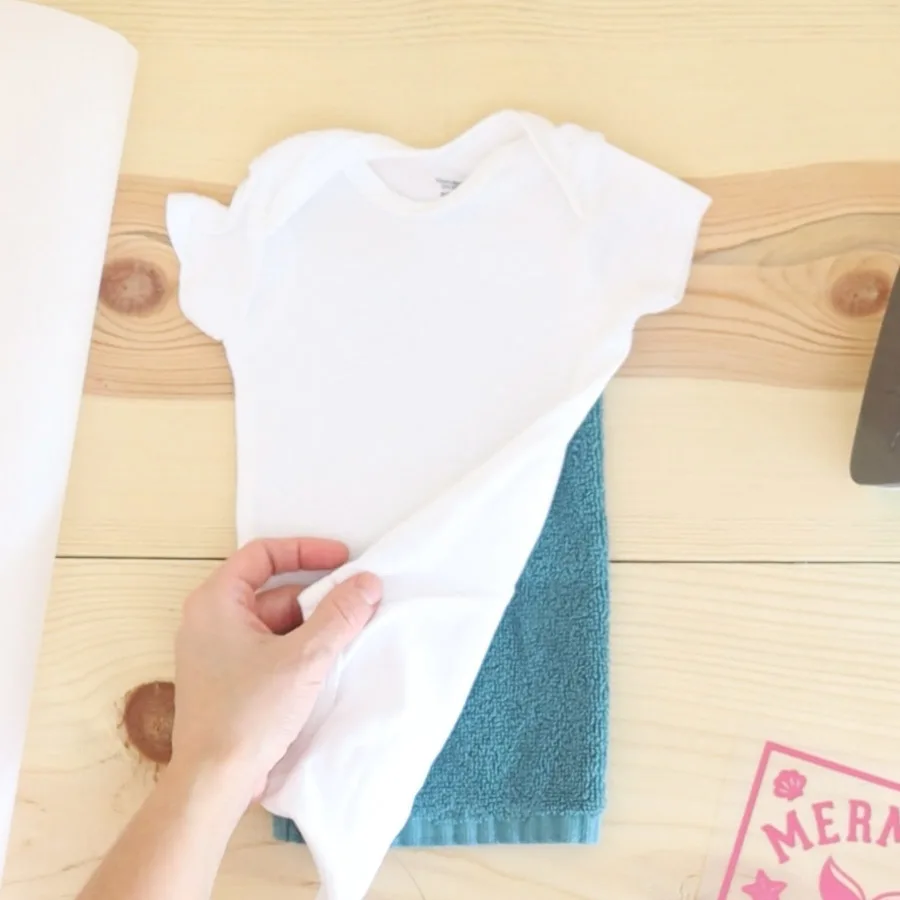
Wait a couple of seconds until the design has cooled off enough, and then peel it off while it is still warm to the touch.
How to transfer HTV using a Household Iron?
Yes, you can use a regular household iron to transfer your projects.
When I first started my Cricut journey, I had terrible experiences with my iron. Projects would take forever to transfer, and the vinyl would get melted.
Although I mainly use my Easypress, I recognize that not everyone has the opportunity to get their hands on one of them because they can be quite expensive.
That’s why I’ve mastered transferring Iron-On with a household iron, and today I’ll share all my tips.
Keep in mind; there are many varieties of irons out there. Some of them can get hot, and some of them have little holes, and some of them not.
I have a cheap Black & Decker iron.
If you want to get a more accurate measurement of the heat that’s coming out of your iron, I recommend you buy this affordable laser heat thermometer and follow Cricut’s heat guide to find the sweet spot.

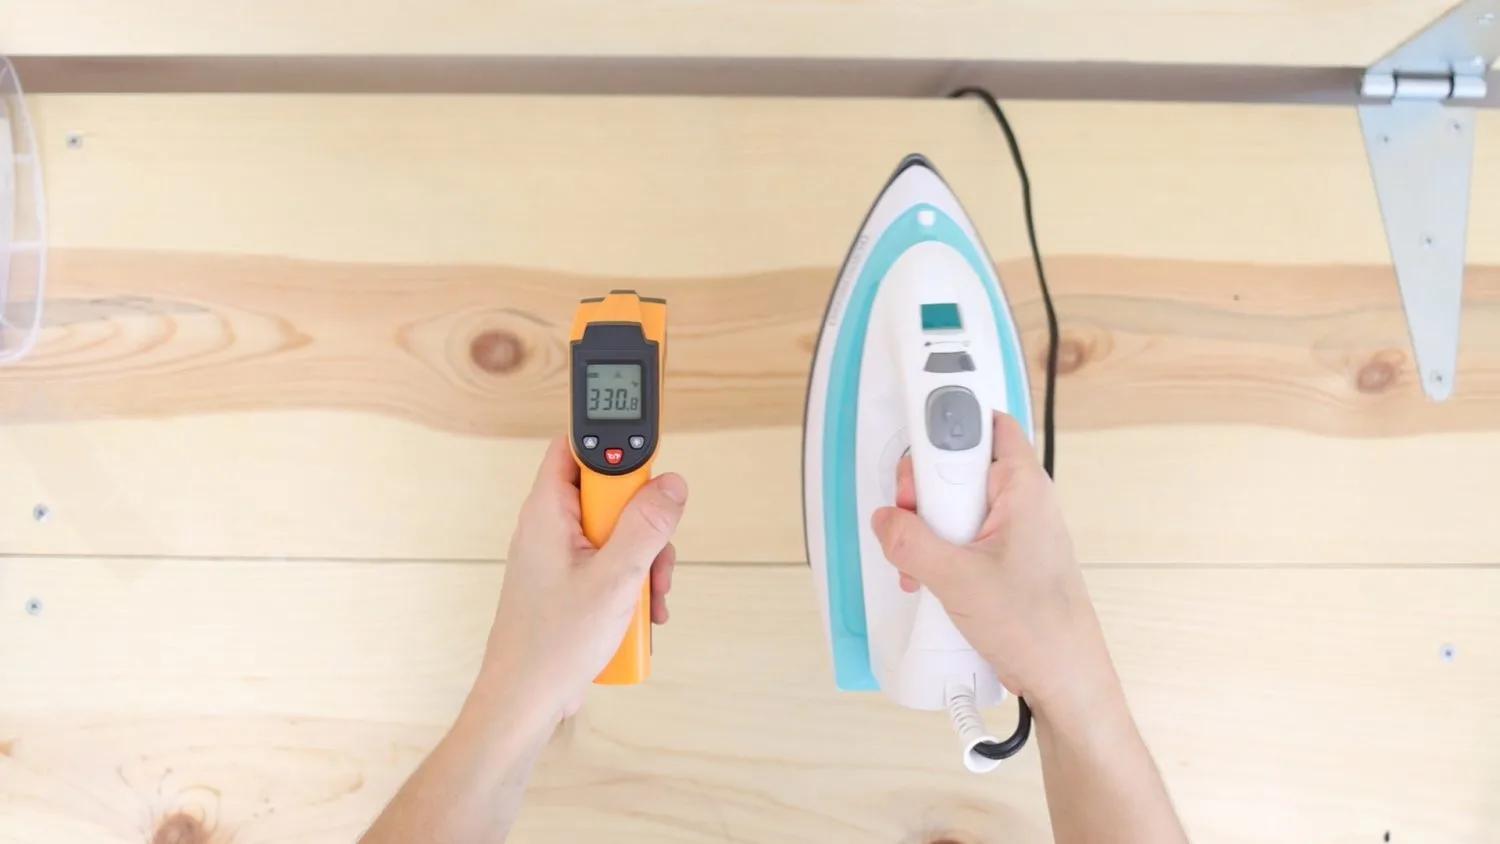
If you can’t invest in the little tool, I just mentioned (just get it, it’s cheap), for pressing HTV on my garments I usually go between the highest heat and also two to three notches down (most of the time).
The key to a perfect iron-on transfer with a household iron is a towel and proper isolation of seems.
Check out the following steps.

Step 1 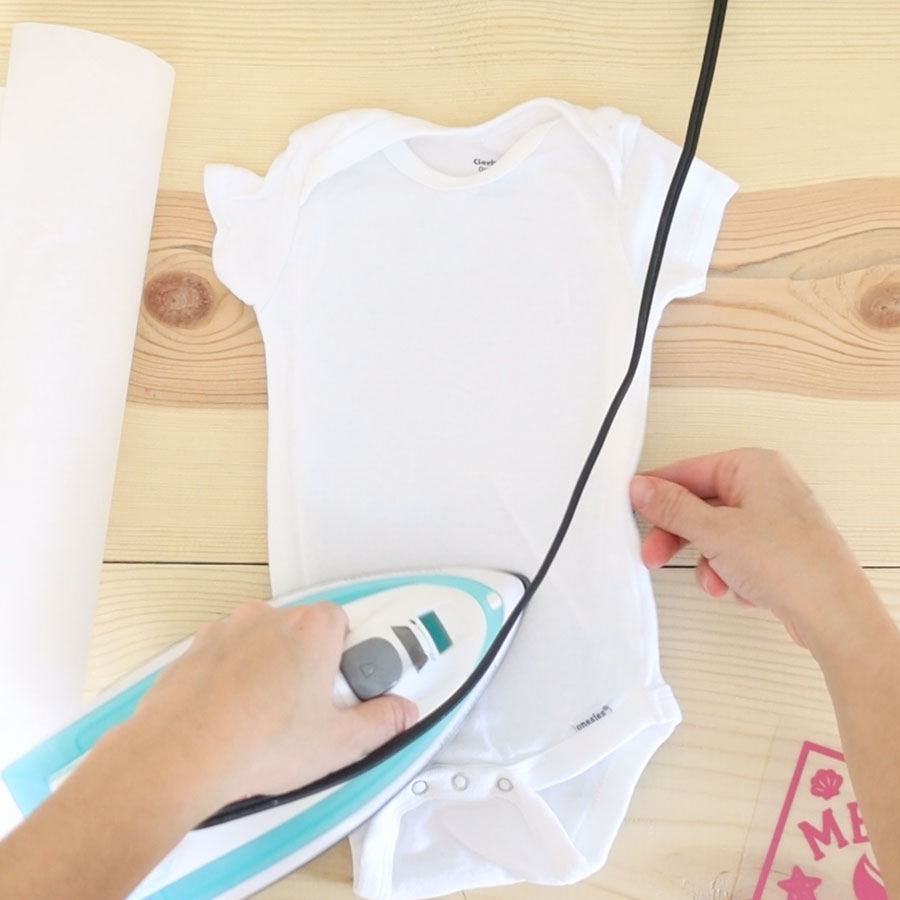
Step 2 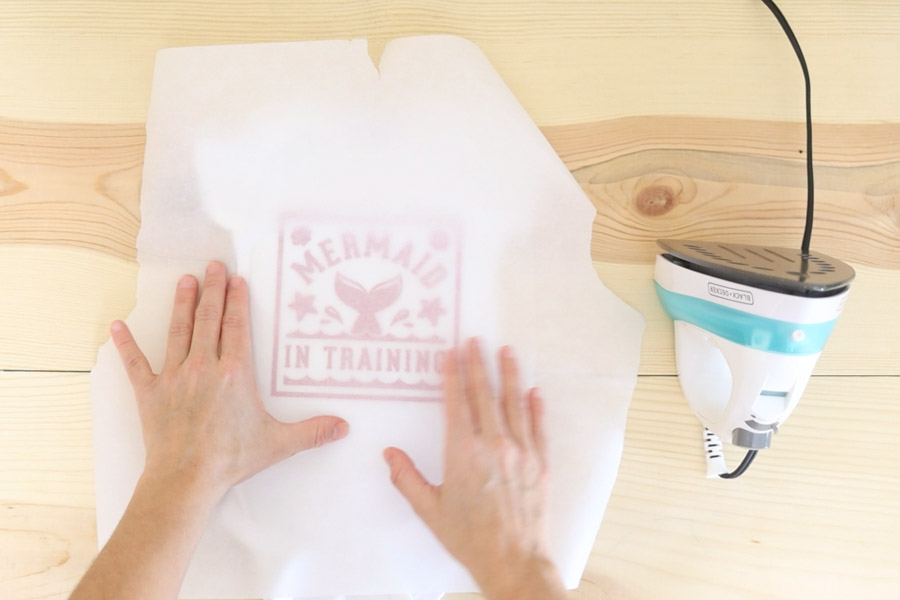

Step 3
Step 1
Preheat iron two notches down from the highest heat setting and place a towel underneath or in between your t-shirt.
The towel has to be evenly folded, and it needs to be small enough to avoid any seams and big enough to cover the entire Iron-On cut.
Tip: Even if you just have an iron check out Cricut’s Heat Guide for extra information that can help you achieve a better transfer.
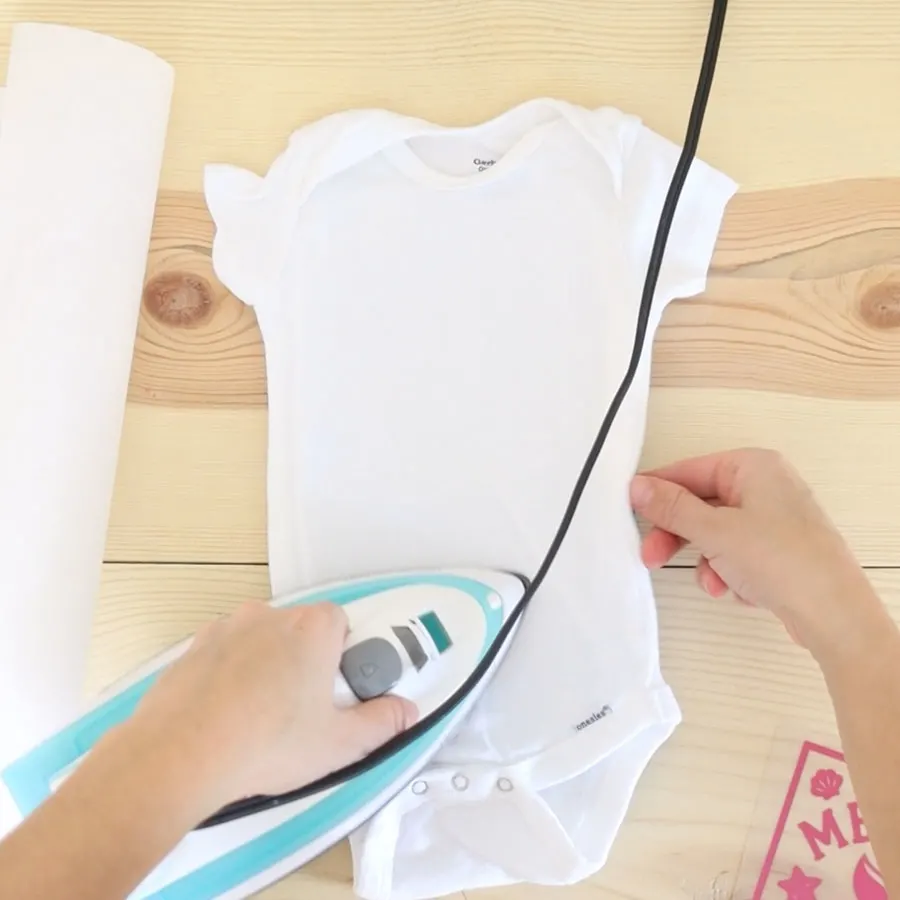
Step 2
Preheat your surface for about five seconds and get rid of any visible wrinkles and moisture.
Step 3
Place HTV on the area you want to place and cover it with parchment paper.
The parchment paper will protect your fabric because, in my experience, you usually need more passes with a household iron.
Note: Take your time to find the right area to place your design. There’s nothing worse than a crooked project.

Step 4 
Step 5 
Step 6
Step 4
When using an iron, I like to press all parts of the design in order, so I know every part of the HTV will receive heat.
I like to move my iron vertically and horizontally.
For instance, in this case, I did four presses each one of them for about 25 seconds.
- 1st press: Vertically on the left side of the design
- 2nd press: Vertically on the right side of the design
- 3rd press: Horizontally on the top of the design
- 4th press: Horizontally on the bottom of the design
Ever since I started using this technique, all my projects apply on the first try.
Step 5
Flip the t-shirt and press for 15 seconds.
I usually like to divide the design as well. Therefore I press the 15 seconds on the left side and, other 15 seconds on the right side.
Step 6
Peel carrier sheet when it’s still warm to the touch. Doesn’t it look fantastic?
This is a Cricut image, and you can find it under code #MD47EE91.

Tip: Preheat your iron and use a scrap of fabric and a little piece of the type of HTV you want to use and see how the vinyl performs using the following steps, I just explained.
As you move along this article, you’ll notice more examples of different base materials. The main concepts (cut, weed, transfer) are the same; you just need to visit Cricut’s guide to fill in the gaps.
How to take care of Projects made with HTV?
Taking care of your projects is just as important as making them in the first place!
Always allow 24 hours before you wash your brand new T-Shirt. Cricut recommends you tumble dry inside out.
To extend the life of your project, also follow washing and drying instructions of delicate fabrics.
Never Bleach!
Peel Warm vs. Peel Cold
When you read the instructions on how to transfer HTV, you’ll see that it says peal warm, or peal cold.
Peeling is the act of removing the backing sheet from the vinyl once the transfer is complete
These instructions are essential, especially when you are working with “peel cold” materials like SportFlex and Foil iron-on
Note: I didn’t see a difference when “peeling cold” HTV that was supposed to be “peel warm.”
With “peel cold” materials, you need to exercise your patience muscle! Because if you “peel warm” a “peel cold material,” the iron-on will distort and look quite ugly.
To show you, I decided to use foil iron-on (peel cold material), one of the most delicate materials to work with.

Peel Cold Foil 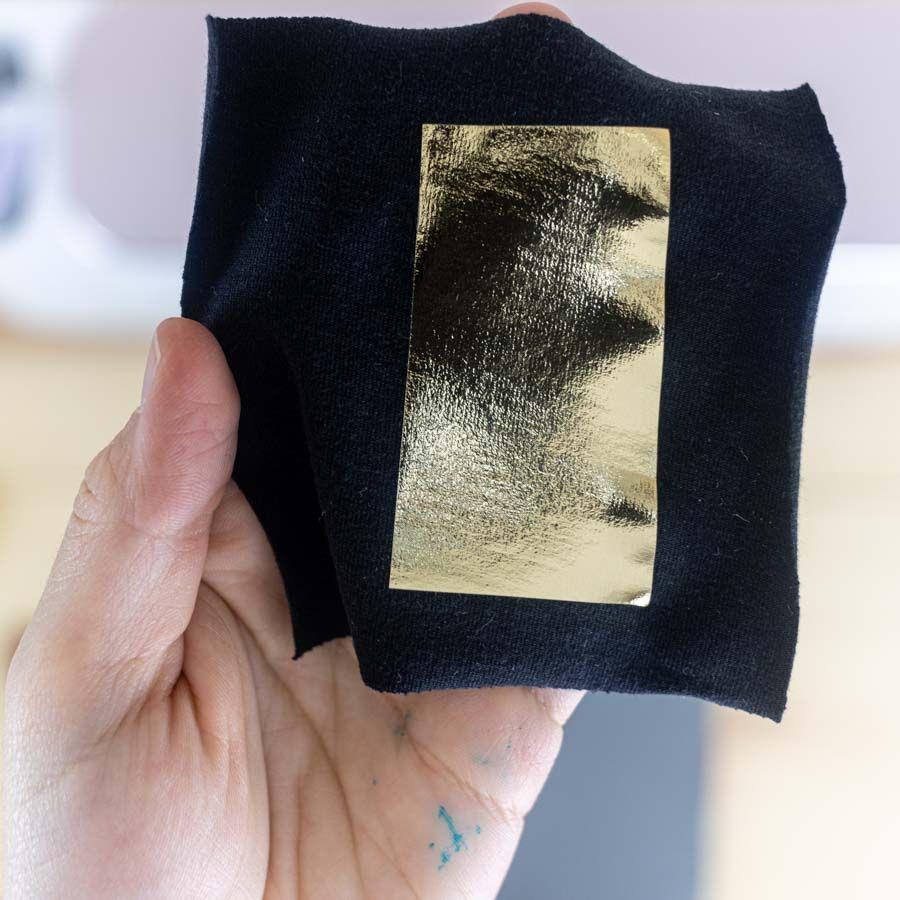

Peel Warm Foil 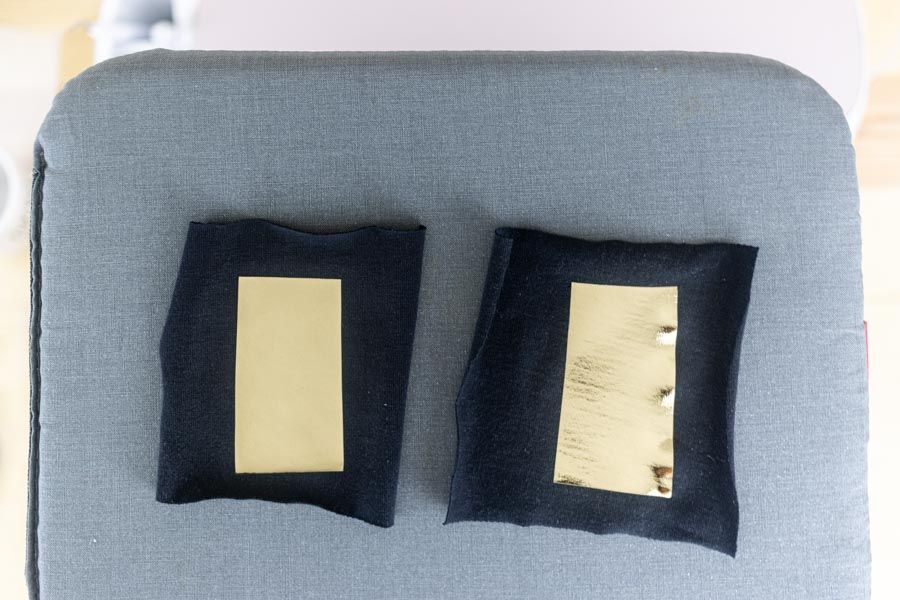

Peel Cold vs Peel Warm
On the first photo (on the left), I peeled cold, and as you can see, everything looks smooth. However, on the other picture, you can see how the material distorted on the right side.
It’s more evident when you compare them next to each other.
Whether you transfer your project with an Easypress or with a household iron, always go to Cricut’s heat guide for a guide on whether you should peel warm or cold.
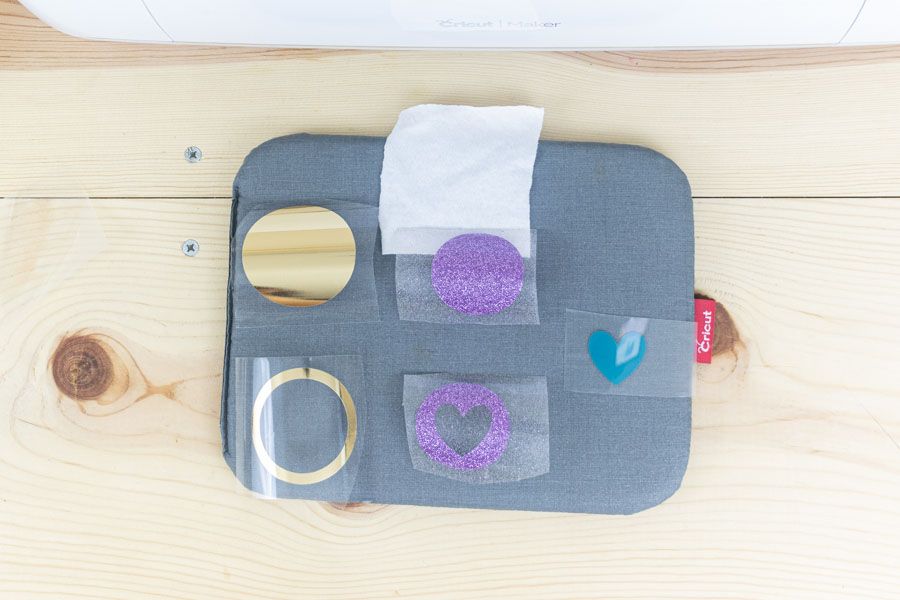
Can I layer Heat Transfer Vinyl?
Yes.
You can layer Heat Transfer Vinyl!
Layering iron-on is a topic that, to cover all the possibilities, you need an article on its own (which I am going to write very soon).
Don’t lose hope, though!
I am going to cover the main principles of layering iron-on in this tutorial.
- If you are planning to layer on top (like stacking), use up to 4 layers of HTV.
- Use glitter iron-on, holographic, holographic sparkle, and foil iron-on as the top layer. (These are called specialty vinyl)
- Sportflex Iron-On should be layered on Sport-Flex iron-on, only.
Vinyl and fabric (especially cotton) tend to shrink a little bit during the transferring process.
This shrinking isn’t a big deal when:
- You have a single layer design
- The layers you want to use aren’t touching
- You have a shadow layer that can contain your other layers (a small heart inside another heart).
Shrinking is a big deal when you are layering “hollow” layers. Let’s say you want to have an outline for a letter. Or you want to layer up specialty vinyl.
Another significant consideration when you are trying to layer vinyl is the amount of heat your vinyl can resist.
Specialty vinyl (except glitter iron-on) is very delicate and can’t withstand so much heat. Therefore it has to be the last layer you apply.
Glitter iron-on can withstand heat, but you can’t layer anything on top of it because the grittiness wouldn’t make a permanent bond with the other layer.
To avoid shrinking and exposing your vinyl to unnecessary heat, you need to make an initial bond between your fabric and base material. So, instead of pressing for the entire amount, you will press very firmly for 2-5 seconds. (Check Cricut’s heat guide for temperature).
As you move from one layer to another one, protect the already pressed iron-on with some parchment paper.
On your last layer, follow the regular transfer settings I covered earlier in this article.
Note: I don’t recommend layering up HTV with a regular household iron. Especially if you are working with “hollow” designs and specialty Iron-On.
However, rules are meant to be broken! Grab some scraps of fabric and vinyl and experiment.
Layering Regular (Everyday) Iron-On
Always start simple!
Since I am using tiny pieces of vinyl, I am using the Easypress Mini.
There are three solid squares, and my goal is to have on top of the other one (nothing fancy).

Step 1
Follow Cricut’s heat guide on temperature, but not time press firmly the first layer for 2-5 seconds to create an initial bond.
Note: Don’t press on the backside.
Step 2
Remove the carrier sheet when warm to the touch and place the second layer and repeat step 1. Remember to protect the already pressed vinyl with some parchment paper.
For the third layer, follow Cricut’s Heat Guide to the tee to completely set all the layers.

Step 1 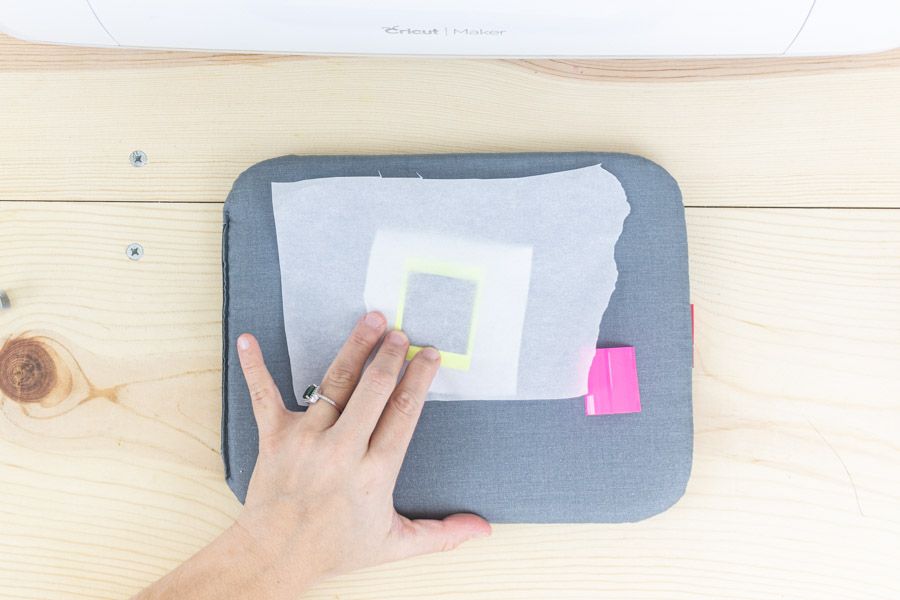

Step 2 
Final Result
Designs tend to get bulky when you layer up iron-on. Although you can stack them up to four times, I recommend you limit to three.
Layer Up Specialty Vinyl
As I mentioned before, specialty vinyl can be tricky to layer up!
Not only you need to layer at the top, but you also need to make sure you avoid unnecessary heat and HTV shrinking.
Those are a lot of variables.
So here’s a way for you to be able to layer up:
- Glitter Iron-On
- Regular Iron-On
- Foil Iron-On

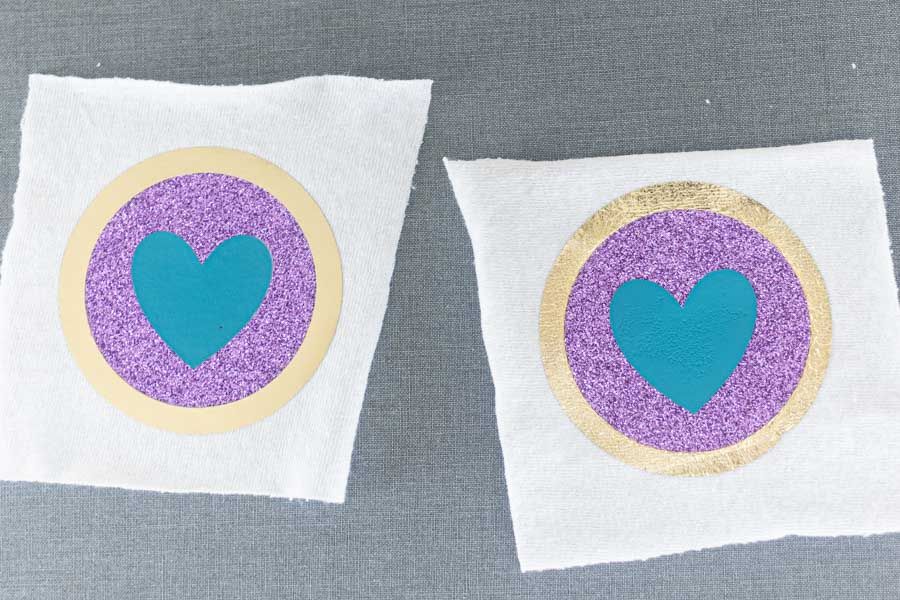
In the photo right above. I have two examples. The first one is using foil as a solid bottom layer, then glitter HTV, and last a small heart made with every day Iron-On.
Can you tell me what’s wrong with those options?
A lot!
- First of all, foil iron-on is a specialty material and should be the top layer.
- Secondly, if you layer the little heart on glitter Iron-On, the bond won’t be permanent, plus, the glitter can add an unpleasant texture to the last layer.
The best way to layer up, in this case, is by using the Slice and Set method in Cricut Design Space. (read my tutorial).
You’ll use slice to create “hollow” shapes where the smaller layers can fit in.
When using “slice & set,” it’s EXTREMELY IMPORTANT that you minimize Iron-On shrinking.
If you don’t do this, your layers won’t match, and there will be ugly gaps between them.

Step 1 
Step 2 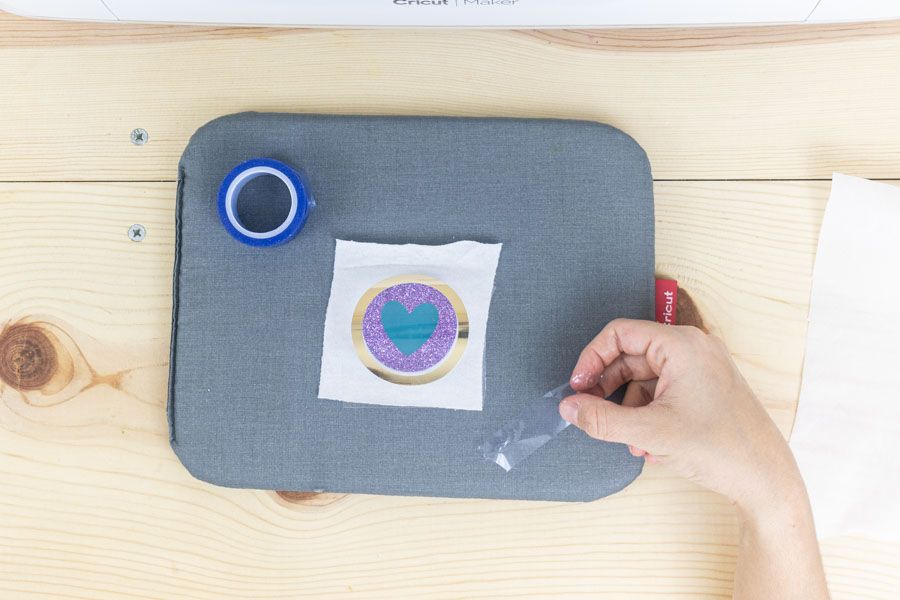

Step 3
Step 1
Follow Cricut’s heat guide on temperature, but not time press firmly the first layer for 2-5 seconds to create an initial bond.
You can start with either “Everyday Iron-On” or “Glitter Iron-On.”
Note: Don’t press on the backside.
Step 2
Remove the carrier sheet when warm to the touch and place the second layer and repeat step 1. Remember to protect the already pressed vinyl with some parchment paper.
Step 3
For the third layer, follow Cricut’s Heat Guide to the tee to completely set all the layers.
Tip: Sometimes, If I feel my design can move, I like to use heat resistant tape (don’t touch the design) to keep it locked.
Left (Right Way) – Right (Wrong Way)

Now check out how it looks the right way and the wrong way!
Can you notice the difference?
Using Holographic Iron-On
Holographic HTV is beautiful.
The way it shines and looks at different angles is something that I still try to comprehend.
With all of the tips and sessions of this tutorial, you should have pretty a good idea on how to cut it and transfer it.
However, there’s something fundamental you need to keep in mind!
Holographic Iron-On has a certain level of transparency. Hence, the final color will change depending on the base material you are using.
The following photos show the same kind of “Holographic Iron-On.” Can you spot the differences?

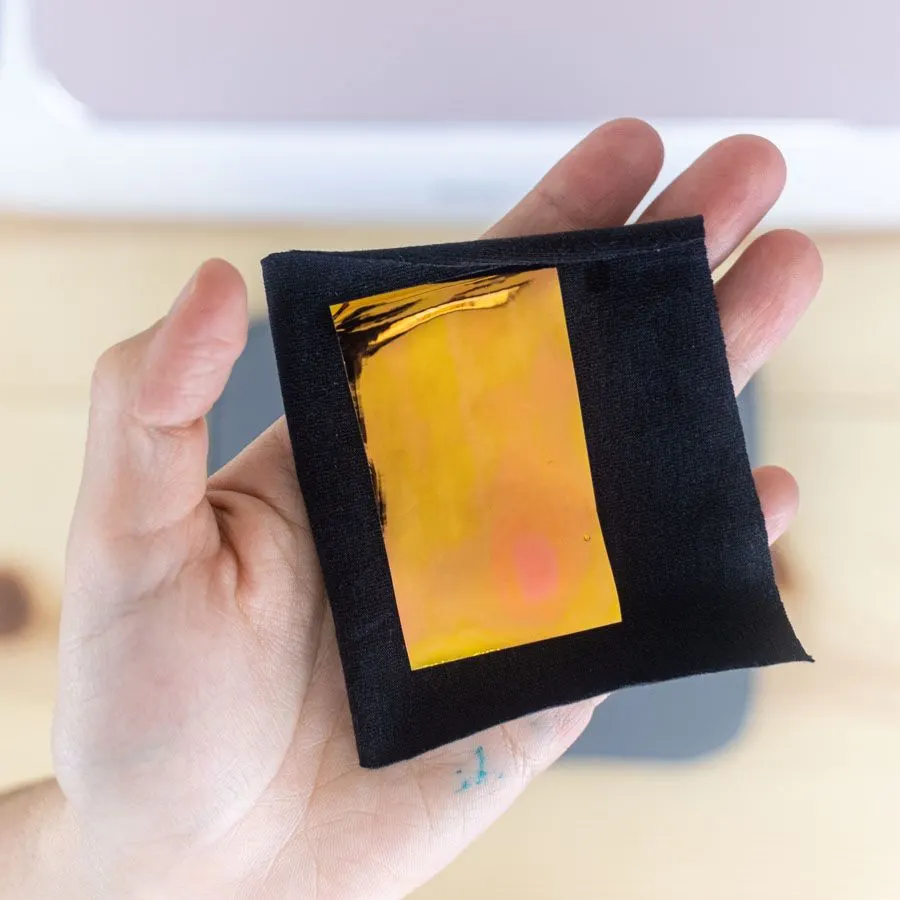
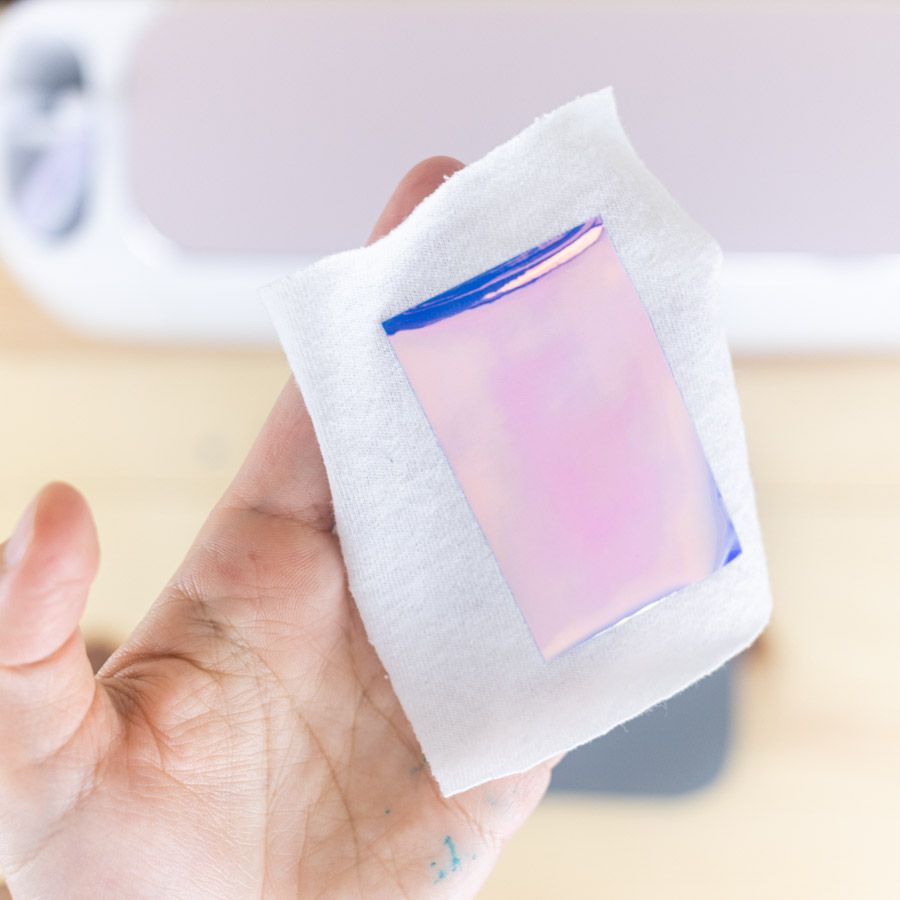
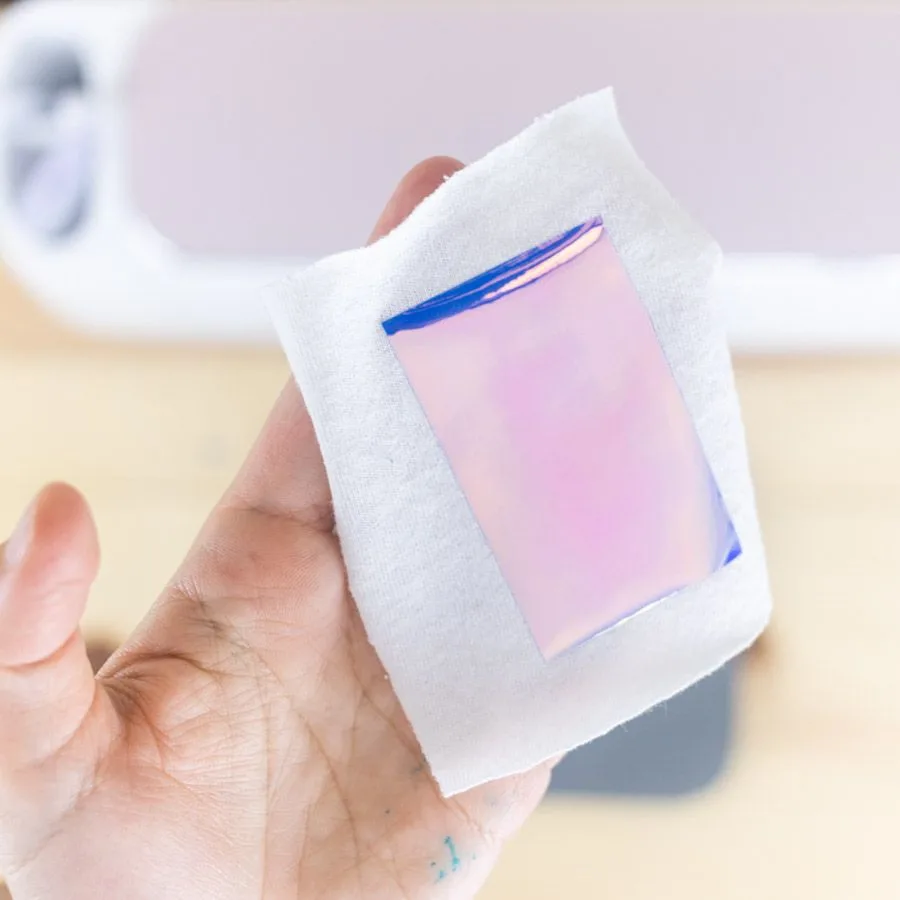

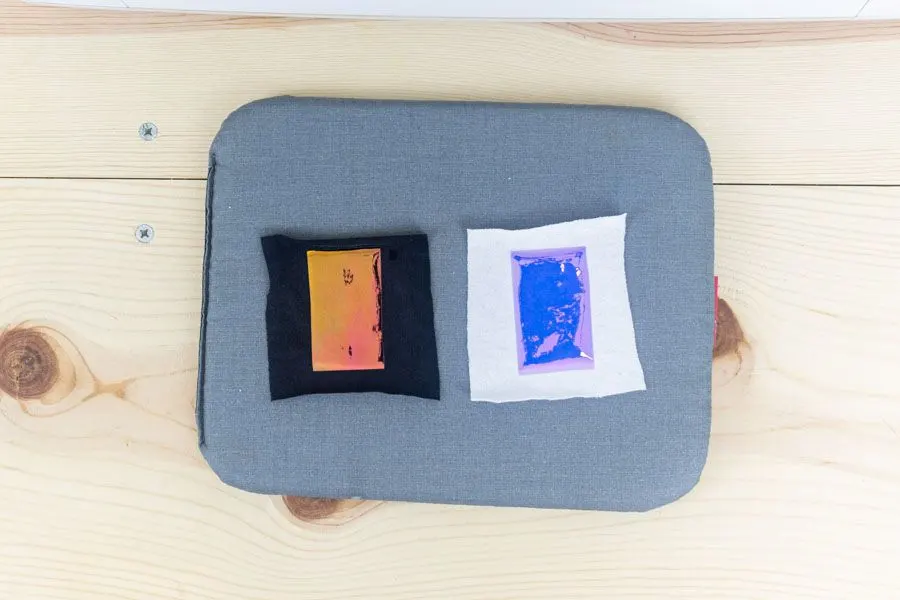
When using dark fabric, the Iron-On changed entirely. It’s like a reflective orange. But when I applied it on a piece of white cloth, it looked perfect.
If you are planning on use of this material, try it on scraps of fabric first so you can get an idea of how it looks on different base colors.
Using HTV on wooden surfaces
Did you know you can use Iron-On on wood?
HTV on wood it’s so much better than adhesive vinyl (it can fall off very quickly), and it’s quite easy to do.
You can do it with your household iron or the Easypress as well. If the carrier sheet is not sticking to the wood, I suggest you tape the corners with some heat resistant tape.
Remember always to measure!
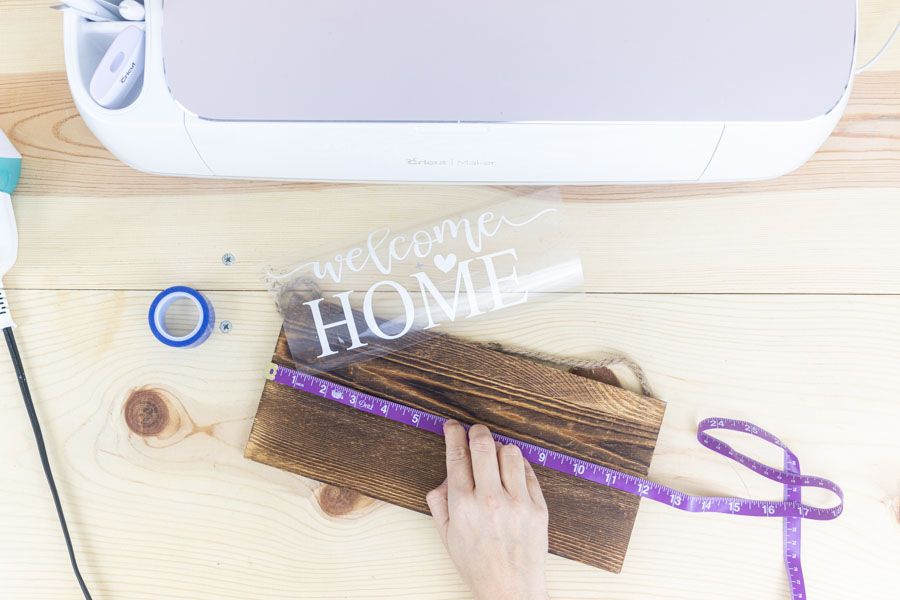
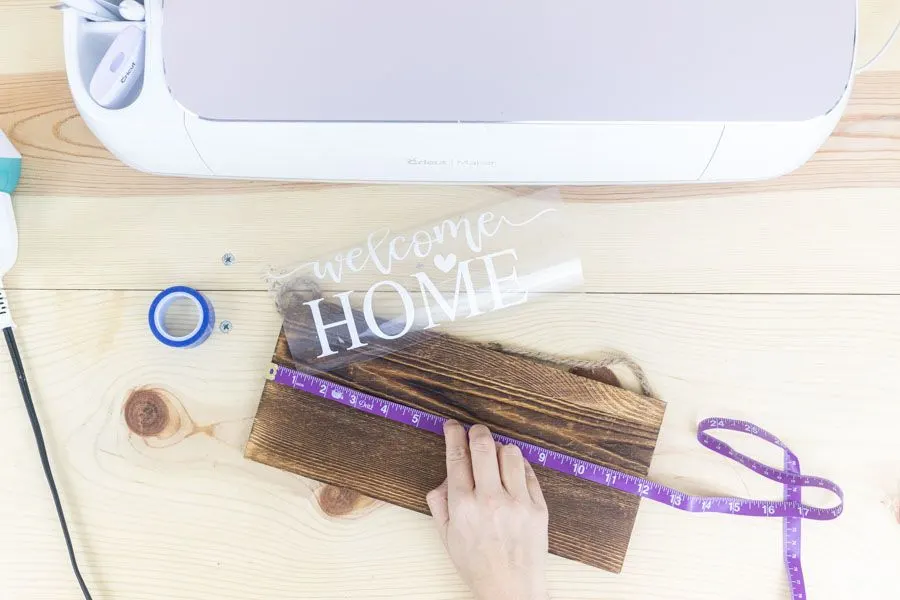
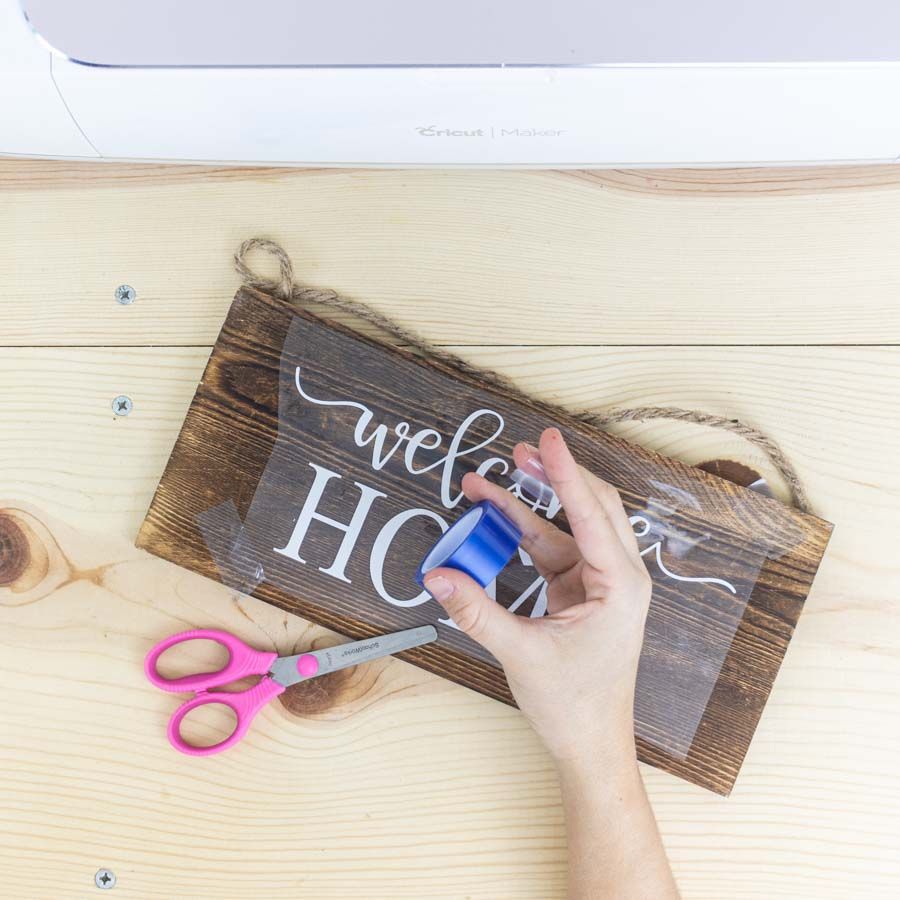


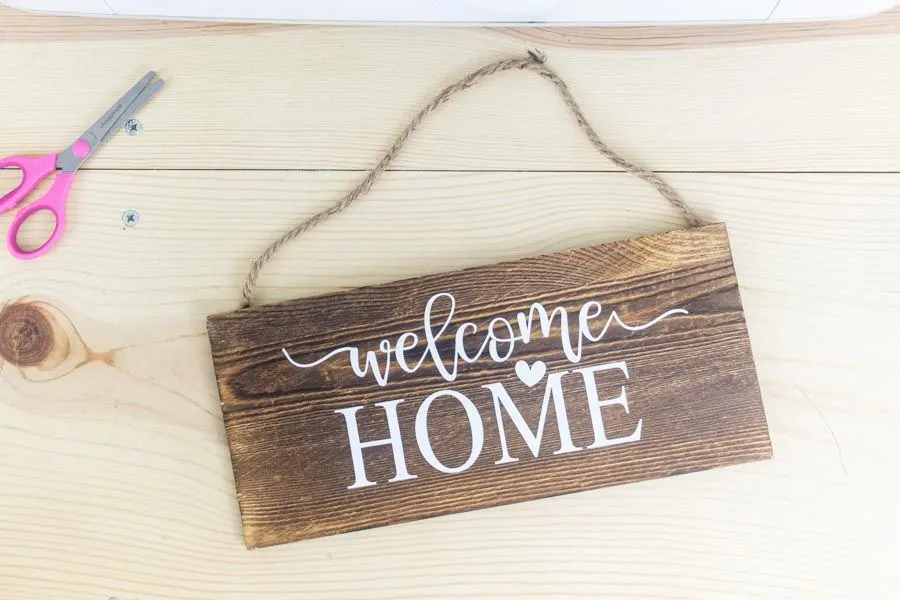
For specific Iron-On settings, check out Cricut’s heat guide and the tips I gave you for either iron or Easypress.
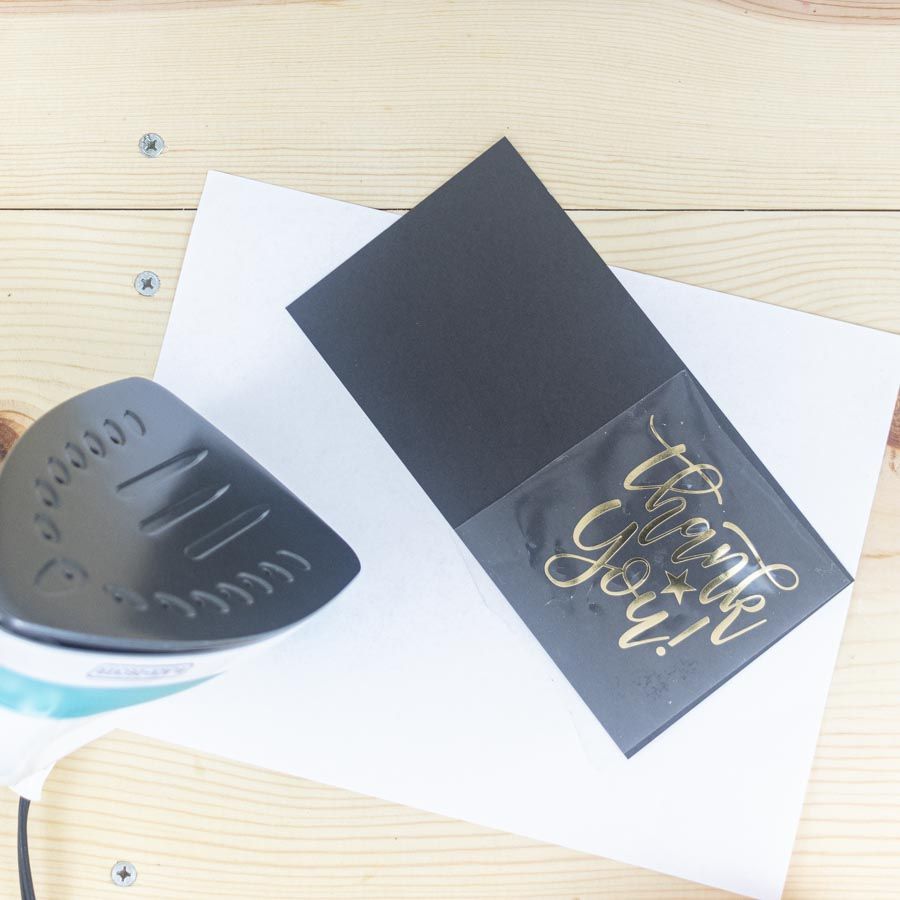
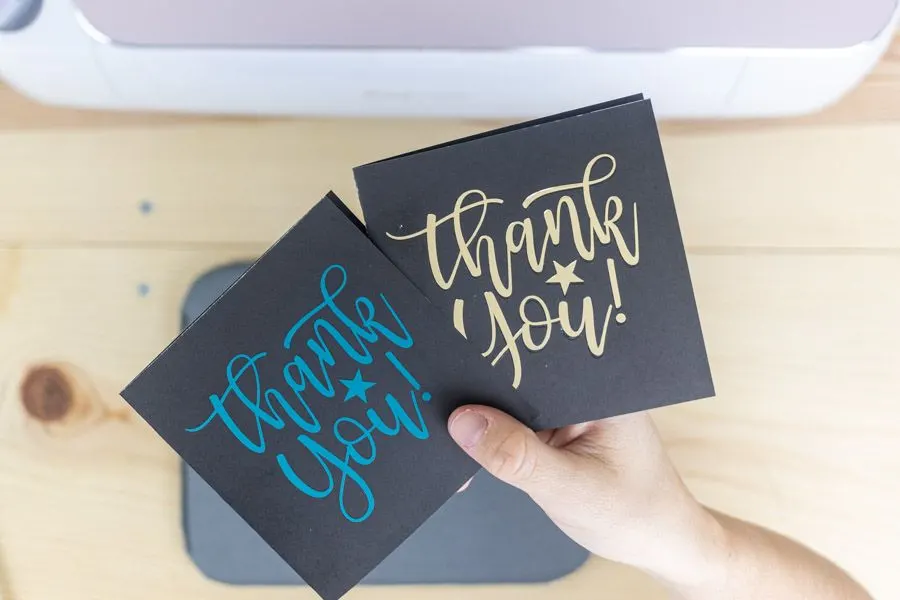
Using Iron-On on paper
Using HTV on paper is one of the uses I like the most about this material.
Materials like foil and holographic Iron-On will add a type of sparkle that you can only find on store-bought cards.
These two thank you cards were made using foil and iron-on.


I have a beautiful Photo Booth Prop tutorial that shows beautiful examples of using HTV.
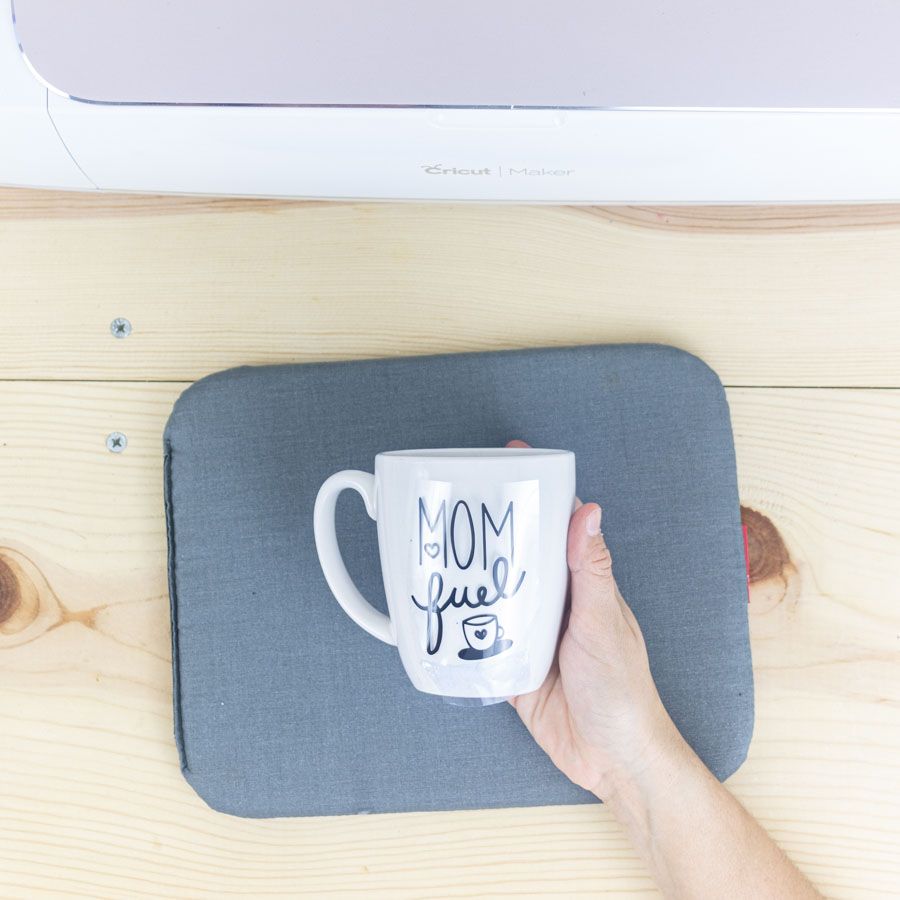
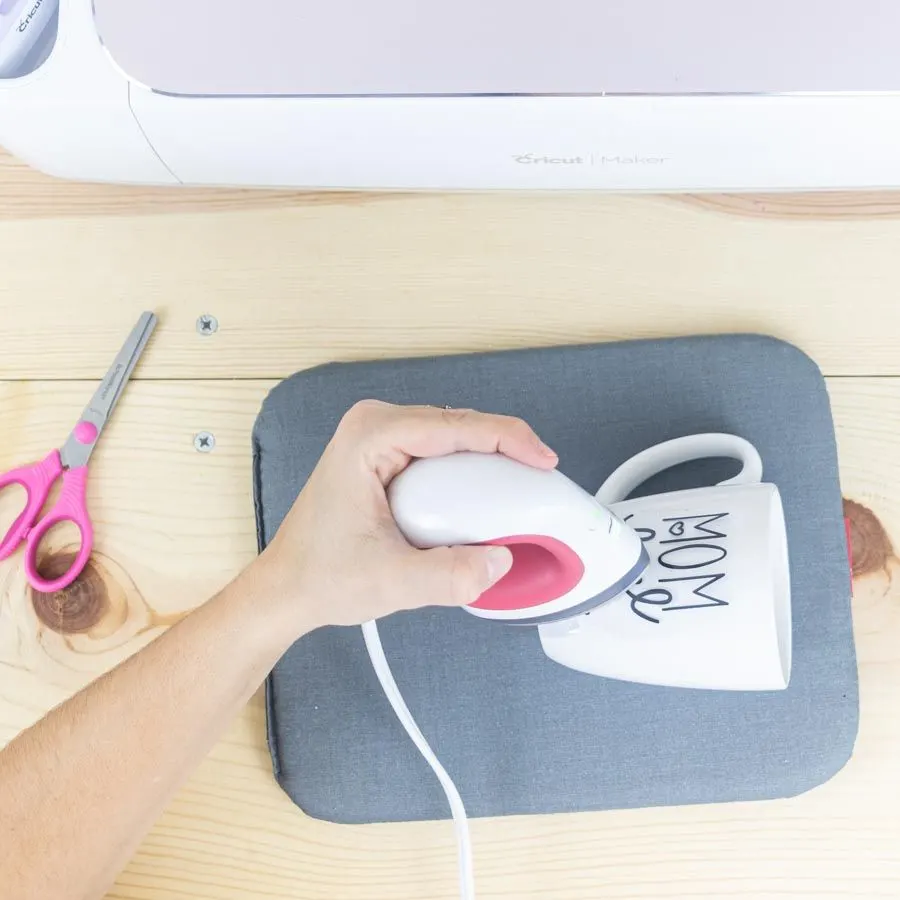
Using Iron-On on a Mug?
Here are some cute pictures of a mug I made with using Iron-On, I taped it, and then I used the Easypress Mini to protect my hands from a regular iron.
It looks lovely, right?
Photos can be deceiving, and here’s why!
I care a lot about the quality of your projects and the ease of them. I’ve seen countless people using Iron-On on mugs, and I thought it was the right way to do them.
But it took me over 10 minutes to transfer the HTV to the mug. And even then, It was tough to get it to adhere.
Maybe I did something wrong?
My glass was clean; maybe I should’ve used alcohol, but still…
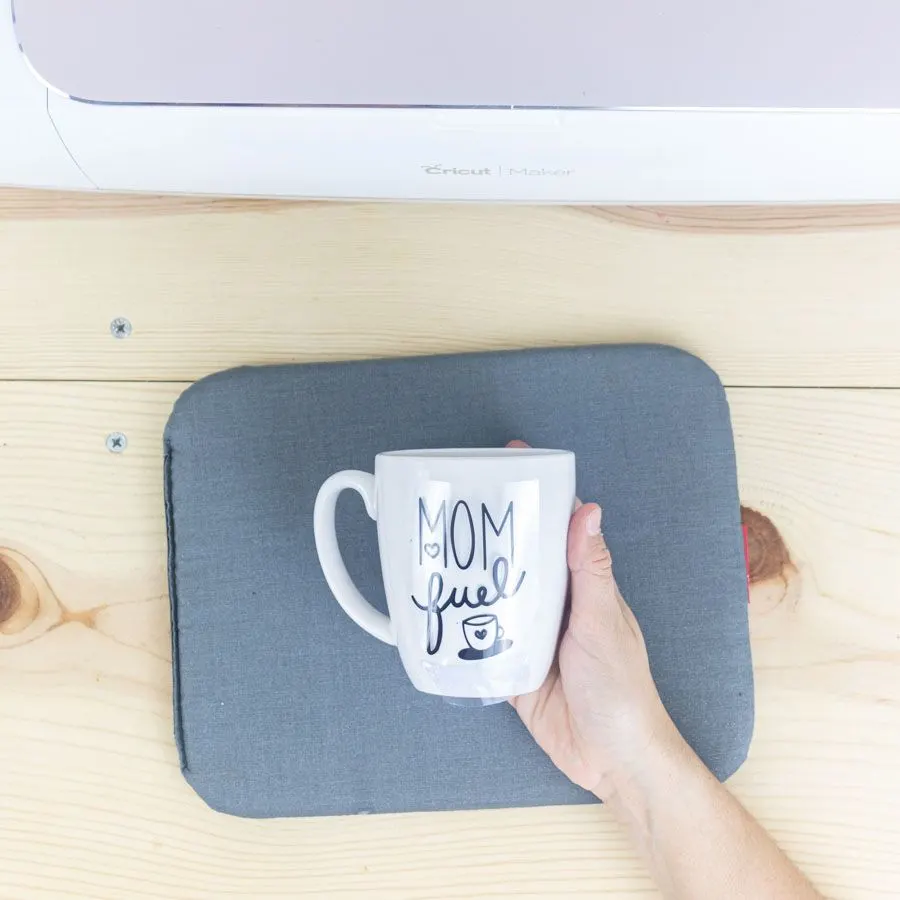


So I got the Iron-On finally to transfer, and you won’t believe what happened next.
I had some water and ice inside the mug (the same day), and the condensation made the whole thing come off.
Maybe it fell off because it was the same day?
I know, I am weird for having water and ice in a mug, but I think Iron-On is not the best solution for cups.
If most of your questions haven’t been answered, here’s a list of some of the most frequent questions that beginners and also advanced users regularly have.
Frequently Asked Questions about Iron-On
If most of your questions haven’t been answered, here’s a list of some of the most frequent questions that beginners and also advanced users regularly have.
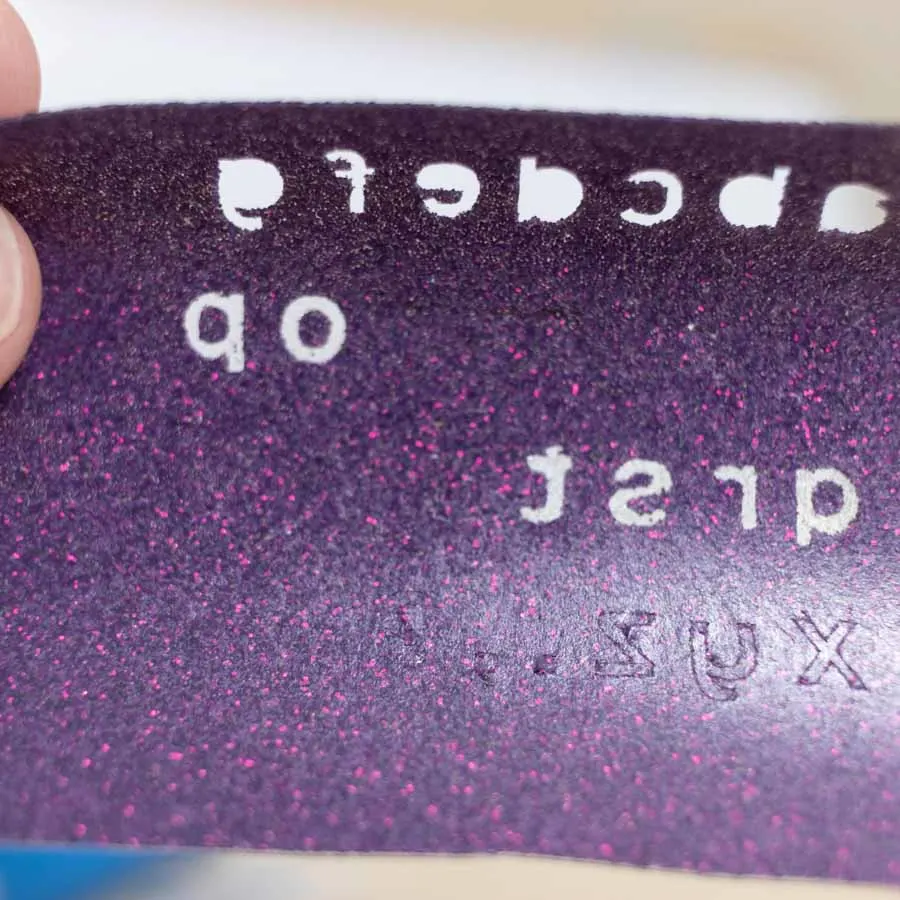
How do I tell from Iron-On and Adhesive Vinyl
From the front, Iron-On and HTV can look very similar, especially if you’re just learning about this material.
A quick look at the back of this material will solve this riddle.
Iron-On is attached to a transparent Carrier sheet on the “shiny side,” and when you look at the back, you’ll see a grey (when using some specialty Iron-On) or dull side with the color from the front.
On the other hand, Adhesive vinyl has the carrier sheet on the back, and when you look on the back of the material, you’ll see a white sheet with, in most cases, grid lines that’ll guide you in case you need to cut it with regular scissors.

HTV Left – Adhesive Vinyl Right 
HTV Top – Adhesive Vinyl Bottom
Do I need “transfer tape” when using Heat Transfer Vinyl?
Iron-On, on its own, comes attached to a carrier sheet. This carrier sheet it’s also called “Heat Resistant Transfer Mask.”
In other words, yes, you need it, but it comes attached to the material.
Don’t confuse “Heat Transfer Mask” with “Transfer tape.”
“Transfer tape” is used along with adhesive vinyl, and you need it to transfer your project to your desired surface.
How Intricate can I cut HTV with my Cricut?
As a crafter, we always want to test the limits!
The intricacy of your projects will depend on the type and quality of the HTV you buy.
When you design a project and weed it, you have two options:
- Weed out the intricate cut and let the HTV left behind reveal what you created.
- Weed out the majority of the vinyl and have your design left on the carrier sheet.

Option 1 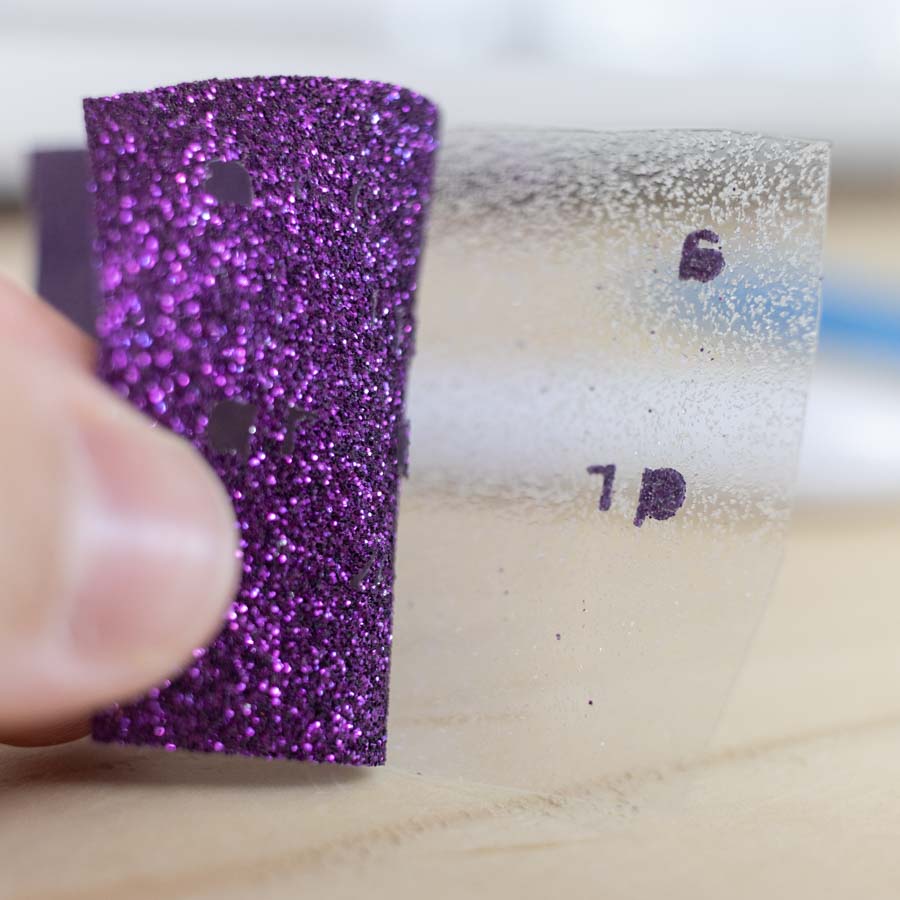

Option 2
Usually, “Option 1” it’s more permissive than “Option 2.”
However, if you are trying to cut letters or images that have a cut within the cut, you need to rethink if your Cricut can cut it.
Weeding very intricate letters can be very time consuming, and a lot of times, you can be disappointed with the results if you don’t do a test cut, as I explained at the beginning of this article.
Personally, and as far as I’ve tested, I don’t recommend cutting HTV with an intricate cut smaller than 2.5 x 2.5mm (0.1 x 0.1in). Including and intricate cut within another one.
Example: the letter “e” has a small “counter” (small hole) that can get lost as you weed. That “counter” shouldn’t be smaller than 2.5 x 2.5mm
Nonetheless, try a test cut and see if you can cut smaller projects!
To improve the quality of your intricate cuts, follow these tips:
- Use high-quality Iron-On
- Make sure your material is very well secured to your Cricut Mat. Don’t use very old mats
- Use a sharp blade
Do I need to wash my t-shirt before I apply Heat Transfer Vinyl?
Cricut recommends you prewash your fabric before you transfer any type of Iron-On.
Many people don’t wash their clothes, and they are okay with the results.
If you made it through the end of this tutorial, you know I like to test everything.
Although I am still in denial, I did notice a slight difference when not washing before transfer.
I love cotton, and that’s pretty much all I wear, it’s not a surprise that cotton shrinks when you put it in the dryer. In that shrinking process, I noticed the vinyl didn’t look as smooth as the initial transfer.
If you sell the t-shirts you make, then it’s something you may want to test on your own. You want to present your clients with your best!
Even if you don’t sell them, and if you want to make a lot of things with Iron-On and fabric, go ahead, invest in some new 100% cotton practicing materials.
Baby clothing is quite affordable on Amazon. Make the same project twice; the first one using prewashed garment, and the second one using new clothing.
Wash them as you would do, and then compare the results.
There are no workarounds on mastering a technique, success and failures are both valuable.
The best things I’ve learned with my Cricut are after multiple mistakes.
You got this!
What fabric is best for Iron-On transfers?
As a rule of thumb, you should use smooth clothes. Avoid applying HTV on bumpy or textured fabrics. Those bumps will prevent a continuous press.
Also, keep in mind that not all HTV is designed for all types of clothing. For instance, SportFlex Iron-On is not compatible with cotton.
These incompatibilities happen when you are using specialty vinyl.
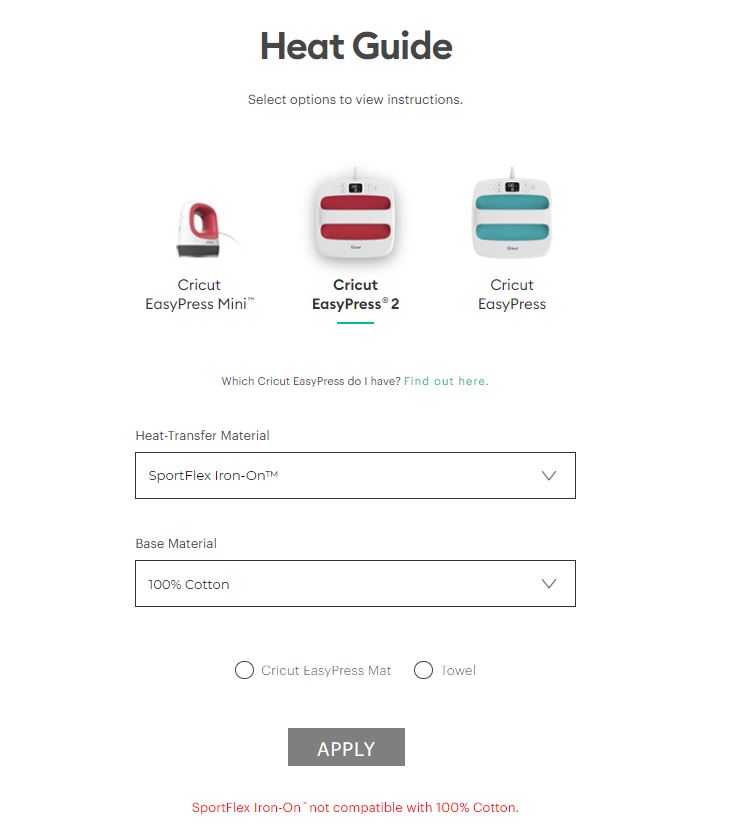
Tip: Cricut’s heat guide will give you a warning if the heat-transfer material isn’t compatible with the base material.
Why is my Iron-On coming off?
There are a couple of reasons why your Iron-On may be coming off your shirt.
- You didn’t prewash your fabric.
- The heat and amount of time you pressed your design onto the fabric wasn’t enough.
- You didn’t use a towel or heat pressing mat during the transferring process.
- There wasn’t enough time (24 hours) between the transfer and the first wash.
- You didn’t use high-quality HTV.
If your Iron-On is coming off, place parchment paper on top of it and repeat the transfer process following the steps I explained at the beginning of this article.
Warning: designs made with Foil Iron-On may show unwanted texture when trying to re-transfer.
How long does vinyl last on shirts?
It depends on the care you give to the entire t-shirt as a whole. That includes not using bleach or rough detergents and following the t-shirt washing instructions.
Cricut guarantees 50+ washes with their Iron-On when you follow their instructions.
Also, keep in mind that with designs that are very thin like lines tend to crack with time. I’ve seen this on many of my son’s clothing that I purchased online on Amazon, Target, etc.
Can regular vinyl be used on shirts?
Only Heat Transfer Vinyl (HTV/Iron-On) can be used on T-Shirts. Adhesive vinyl is not meant to be used on fabric.
Is all vinyl heat transferable?
No, there’s also a type of vinyl called “Adhesive Vinyl,” and that particular material has a sticky side that adheres to most hard surfaces like plastic, glass, walls, etc.
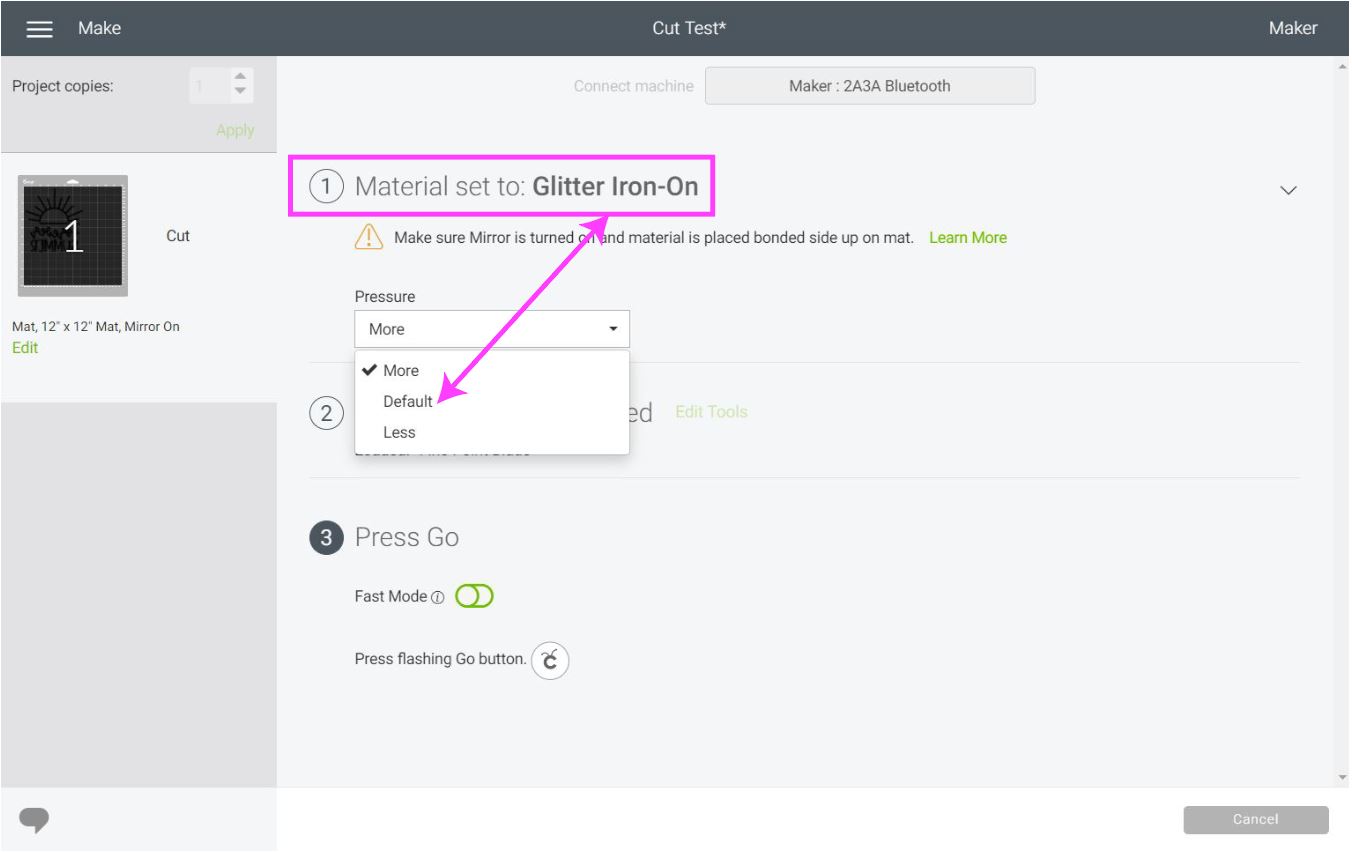
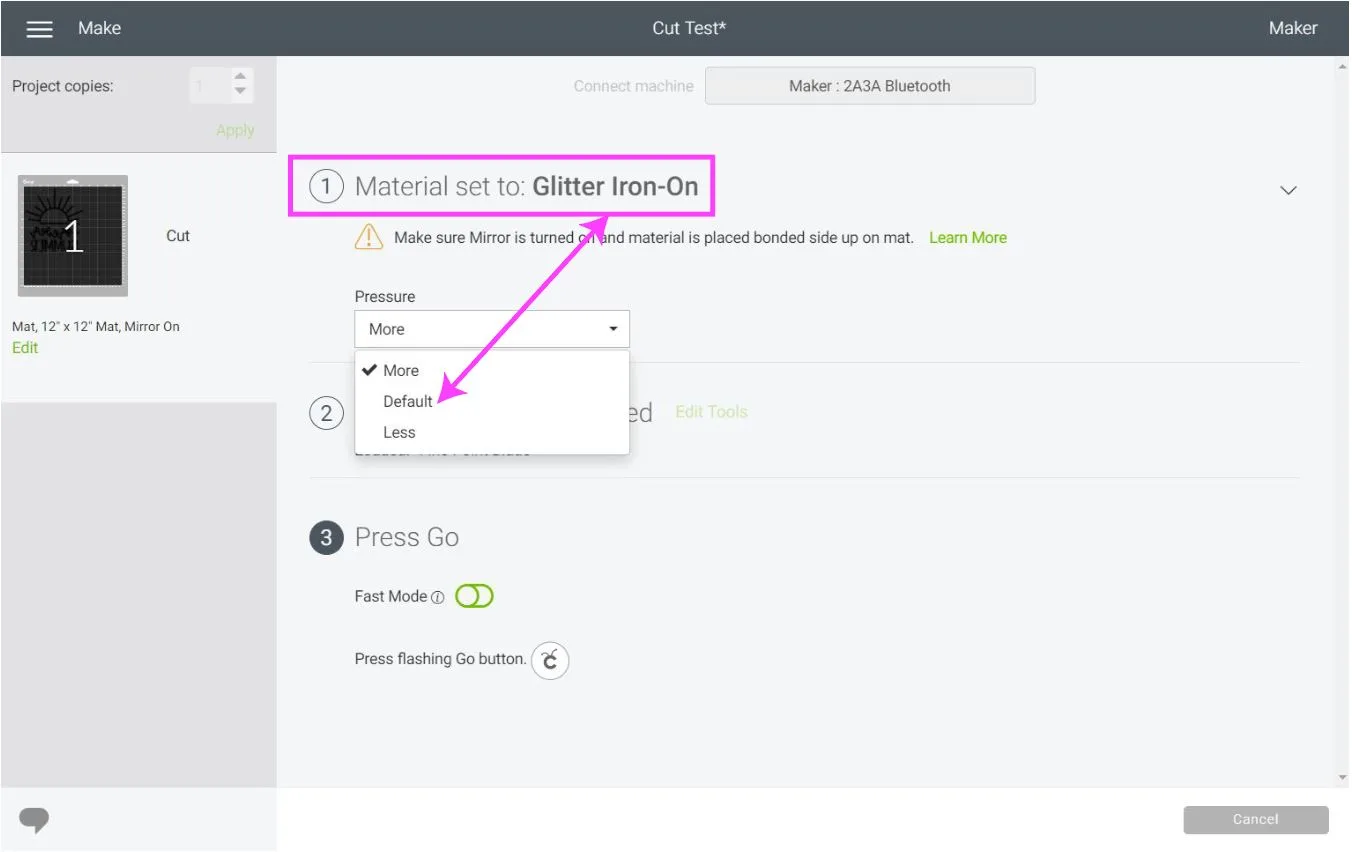
Glitter Iron-On is not cutting through
Glitter Iron-On is one of the hardest materials to cut and weed!
If your blade is not cutting well this material, first check the sharpness of it. If the blade is sharp enough, try increasing the blade pressure to more in Cricut Design Space when you are selecting your materials.
I hope this tutorial solved all of your HTV questions!
If there’s something I didn’t cover, make sure to leave a comment down below! I’d love to answer your questions.
Do you know it takes me over 25 hours to complete a single Cricut article? I know it’s wild! But I like to make sure that you understand EVERYTHING!
I would appreciate your support on Instagram / Pinterest / YouTube / as I am trying to grow my audience to keep producing great content!
Majo
Saturday 28th of May 2022
Wow, great job putting all your knowledge together with photo. Thanks for this post, was very helpful
Kristine
Wednesday 5th of January 2022
This is one of the most helpful blogs I have ever read! Thank you so much for taking the time to put this information together!
Lauren
Friday 15th of October 2021
What vinyl can I use to put a design on a polo shirt?
Catalina
Wednesday 3rd of November 2021
Everyday Iron-On will work just fine.
stacy
Sunday 4th of April 2021
Your detail to training is awesome. How can I print out your instructions? Do you offer PDF's?
Catalina
Saturday 17th of April 2021
Not yet! Working on an info product.
Aurora
Friday 30th of October 2020
Thank tou so much! I got my Expression out of the closet and have ordered the software kit so I can try vinyl. You have given me so much information and rips. Again thank you
Catalina
Monday 9th of November 2020
You're very welcome :)