Hello Daydreamers!
In today’s tutorial, you’ll learn everything about the 2×2 card mat and how to make easy cards with it, and hold and behold; I am also providing six free corner cuts SVG files so you can make cards on each side without needing Cricut Access.
One of the most incredible inventions Cricut has ever come out with is the 2×2 card mat.
The 2×2 card mat is a cutting mat that allows you to make four different cards at the same time on any Maker or Explore machine.
If you’ve read my blog, you know I am super into cardmaking, and I plan to have cards for all occasions; and for the ones I already have, I have to make them compatible with this excellent mat.
Tip: This tutorial builds upon the skills I teach in every step. If you’re just starting with your machine, I suggest you read and follow each step.
Since I don’t want you to get lost, let’s have an overview of the things I’ll be covering in this tutorial.
- 2×2 card mat guide
- Materials
- Ready to cut card from Design Space (also writing inside it).
- Cutting multiple cards on the 2×2 card mat
- How to properly use the SVG files I include in this article
- Make a card from scratch using other images, and your own paper
2×2 Card Mat Guide
The 2×2 card mat is the new addition to the cutting mats family.
The concept of making a quick card with your Cricut was introduced with the Joy, and now users with bigger machines can make not only one but four cards simultaneously.
The mat size is 13 x 16.25 in. A bit bigger than the other 13 x 13 in cutting mats.
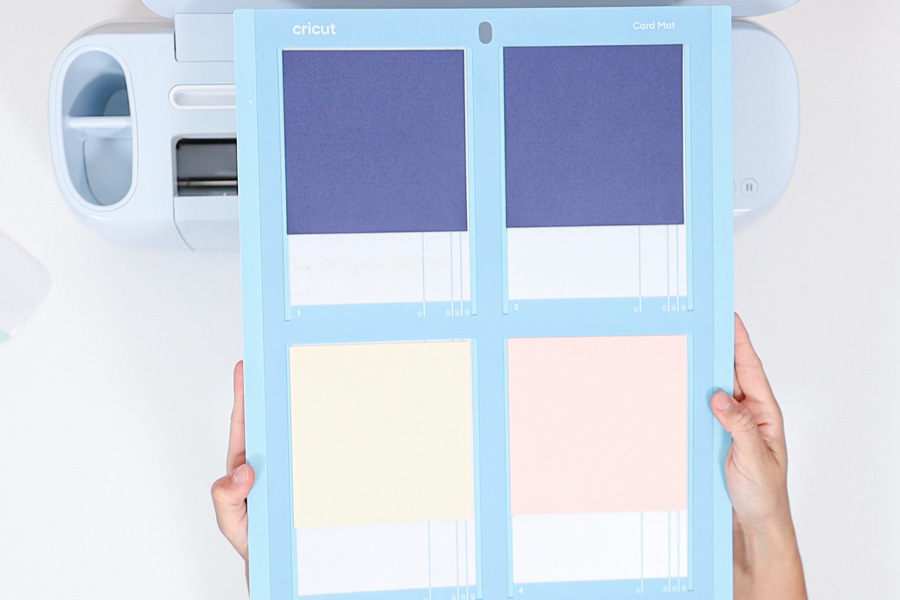
The card mat has four slots, each marked with the different card sizes Cricut has released. Instead of having one large protective cover, the mat has two small covers that protect two slots.
Tip: Don’t throw away the protective covers of your mat. When you are done cutting, always cover it to protect it from hair and other dust particles. Covering your mat will extend its life and allow you to make more cards.

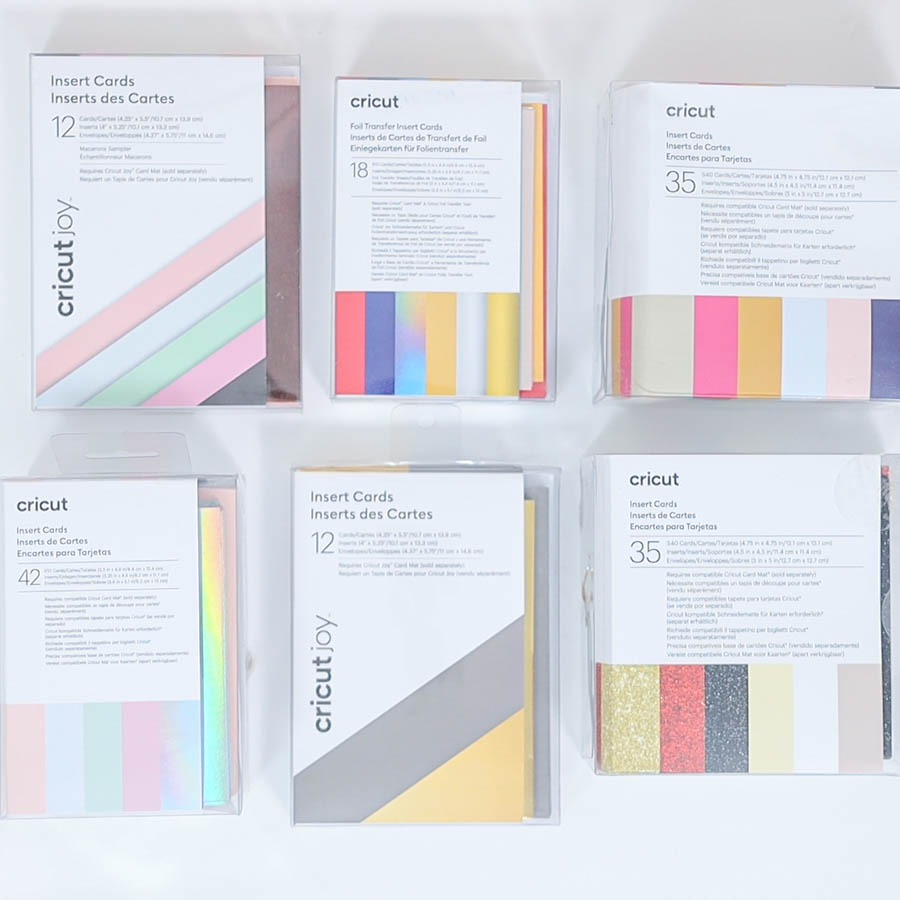
There are five different card sizes Cricut has released. These are not standard-sized you find at the store. So basically, to make beautiful cards, you either need to buy their “Insert Cards” or cut and score your paper to fit the mat.
Some of the cards come with different materials or ways to be personalized. There are cards that come with foil sheets so you can add foil effects to them.
Cricut also came out with cutaway cards. These cards allow you to make all kinds of cuts without worrying about what will fall out once you finish the cut. I will have a tutorial for these cards as soon as I get some on my hands.
Card Sizes Table
Check out the following table and keep it handy if you want to cut and score your own paper or have compatibility questions.
| Card Name | Card Size | Insert Card Size | Total Card Size* | Max Project Size | Compatibility |
|---|---|---|---|---|---|
| R10 | 3.5 x 4.9 in | 3.25 x 4.6 in | 7 x 4.9 in | 3.25 x 4.625 in | Maker, Explore, Joy |
| R20 | 4.25 x 5.5 in | 4 x 5.25 in | 8.5 x 5.5 in | 4 x 5.25 in | Maker, Explore, Joy |
| R30 | 4.5 x 6.25 in | 4.25 x 6 in | 9 x 6.25 in | 4.25 x 6 in | Maker, Explore, Joy |
| R40 | 4.75 x 6.6 in | 4.5 x 6.4 in | 9.5 x 6.6 in | 4.5 x 6.375 | Maker, Explore |
| S40 | 4.75 x 4.75 in | 4.5 x 4.5 in | 9.5 x 4.75 in | 4.5 x 4.5 | Maker, Explore |
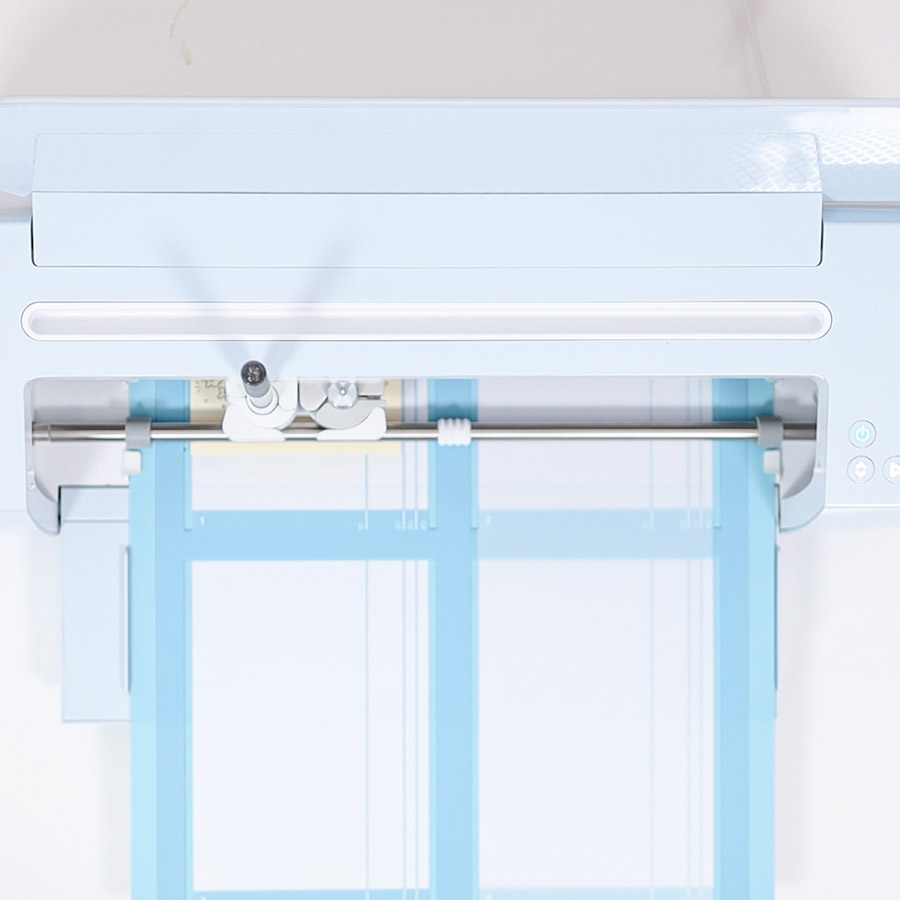
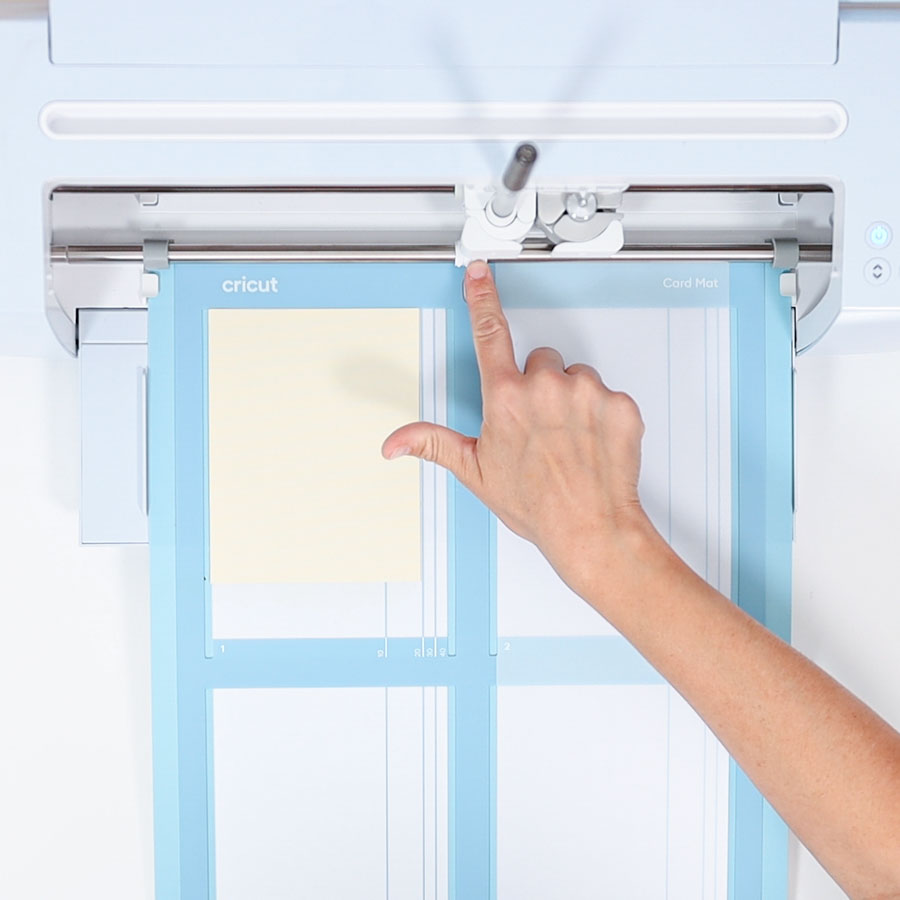
Important: The card mat is very thick; therefore, anytime you plan on using it, you must move the star wheels to the center of your machine, making sure they align with the center of the card mat. If you forget to move them, your projects will be marked.

Materials
The materials you will need to make cards with your Cricut are pretty simple.
- Cricut machine: Explore or Maker
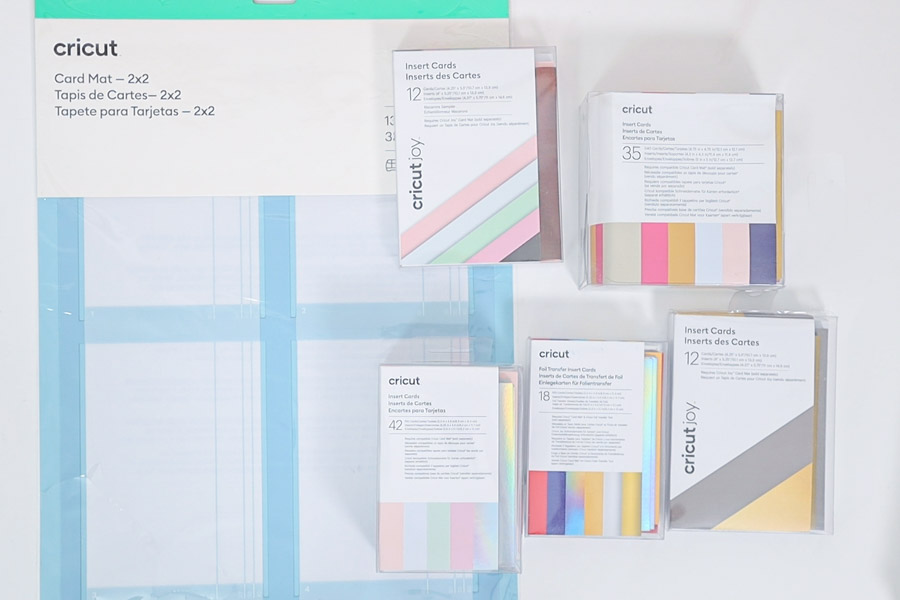
- 2×2 card mat
- Insert cards
- Spatula or Scraper
If you want to make your own insert cards, in addition, you’ll need:
- High-quality cardstock (two colors that look good together)
- Paper trimmer
- Scoring tool
- Ruler
Ready to Cut Card from Design Space
The easiest way to start is by making a ready-to-cut card from Design Space.
Keep in mind that these cards are “free” for Cricut access members. If you aren’t one, you’ll need to pay individually for each card (about 99 cents per card).
If you have Cricut Access or want to make the minor investment, keep moving forward, or you can skip to this section where I teach how to make insert cards from scratch using free everything.
Open Design Space and click on the “Projects” icon on the left panel, and from the drop-down menu, select “Insert Cards.”
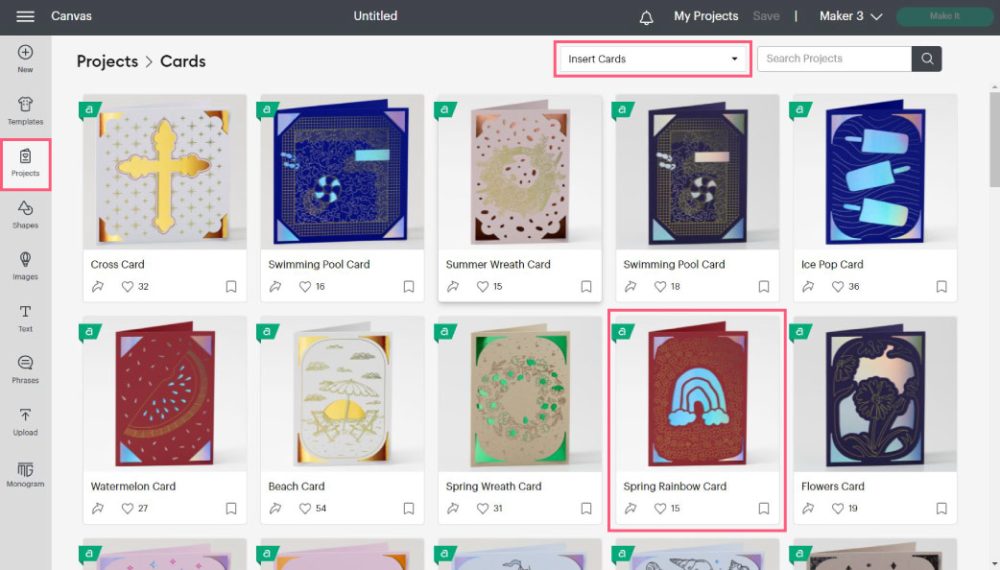
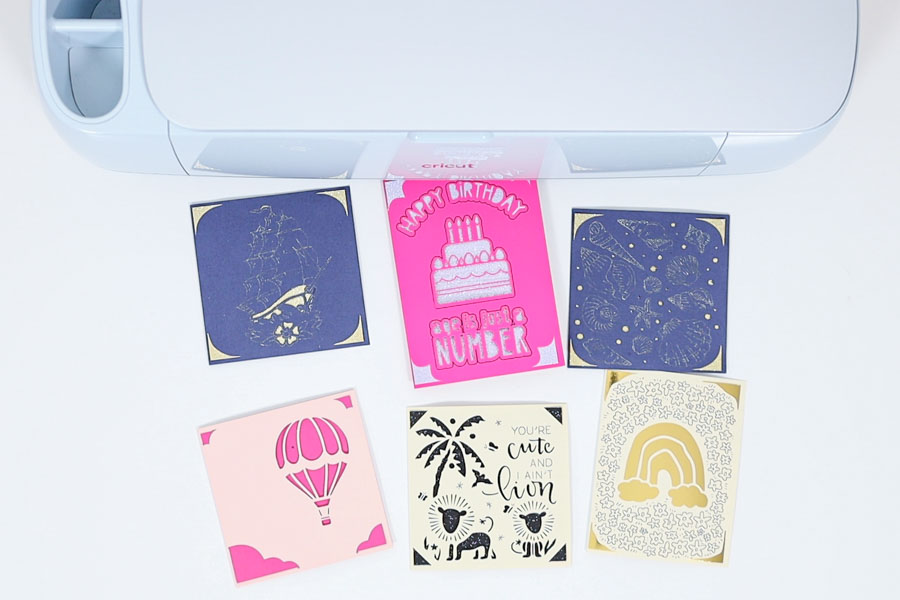
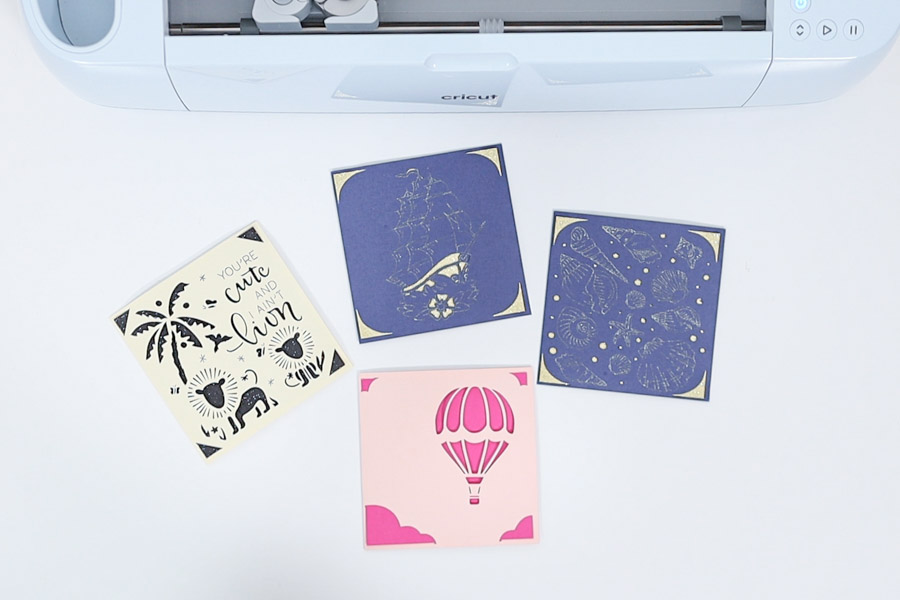
I decided to pick the rainbow and floral card for today’s tutorial.
When you click on a card, you’re prompted to select the “Finished Size” and whether you want to make the card right away or want to customize it.
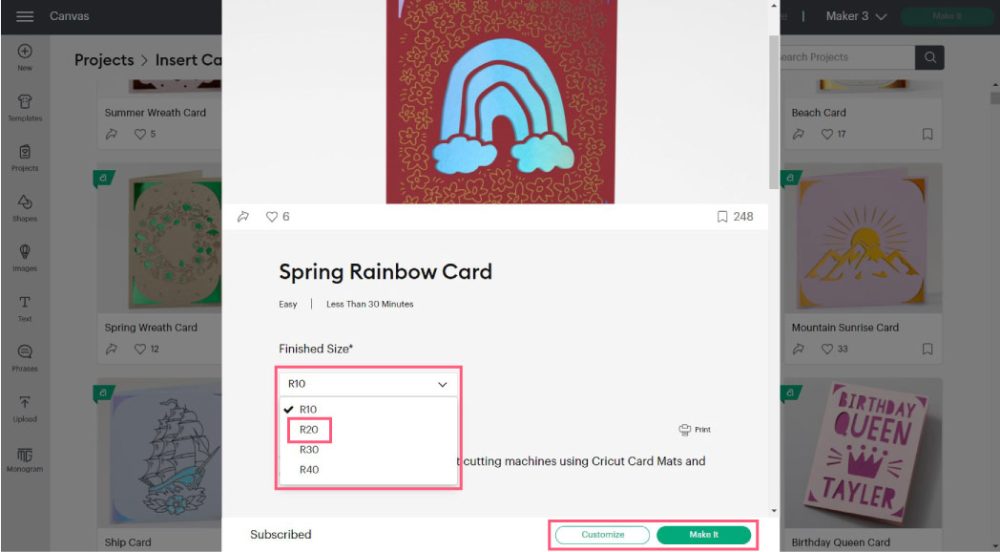
For size, I went with R20.
Now, this particular card is set to use the foil transfer kit; however, I want to use pens, and since I am also going to teach you how to write inside your card, go ahead and click on “Customize.”
Tip: Always remember to see the size of your insert cards. I can’t tell you how many mistakes I made because I got confused or kept forgetting to change the settings.
Here’s the card in Design Space.
It looks perfect, but I don’t want to use foil. Go ahead and click on the “Fine Foil” layer from the layer’s panel, change the operation to pen, and choose the one you want.
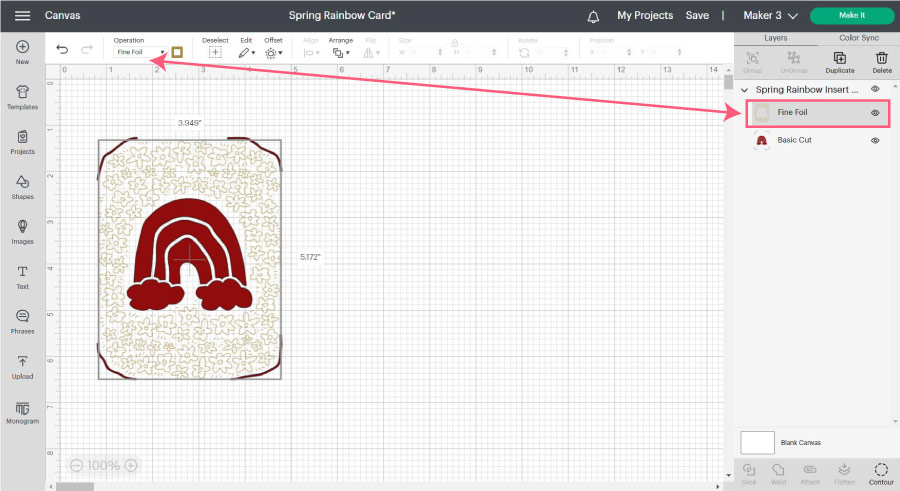
I choose to use the black pen.
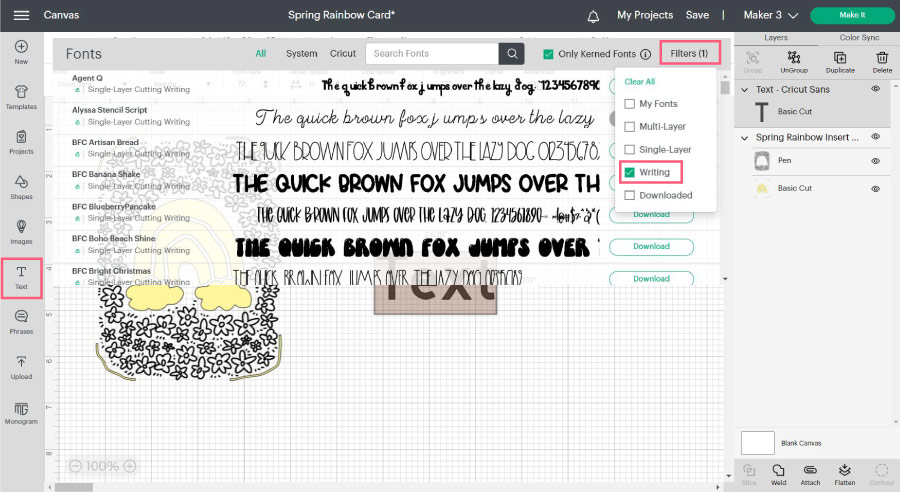
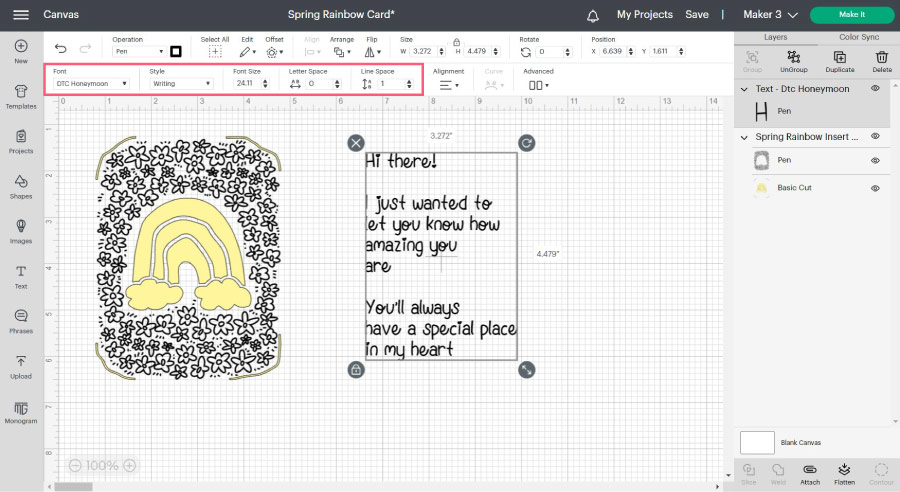
It’s time to add some text to our card.
Click on the “Text” icon on the left panel, then click “Font” on the top editing menu to choose your favorite font.
For writing cards, you will want to use a “writing font.” (Only available for Cricut Access members).
You can also use free fonts from the internet that can achieve a similar effect. I have a handy tutorial for this.
I used the font “DTC Honeymoon.”
You can see all the text settings I used on the red rectangle.
Tip: check my how-to edit text in Cricut Design Space if you still have doubts about this step.
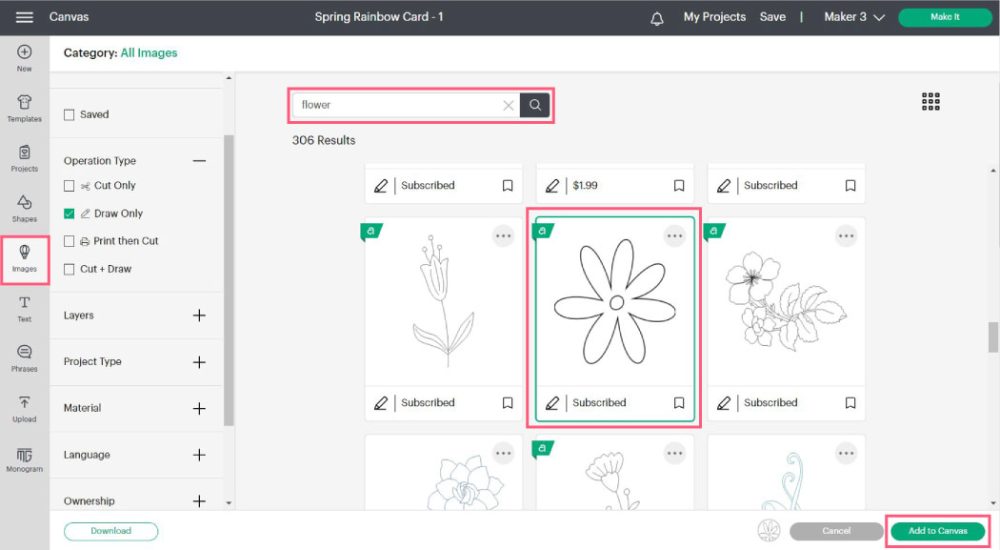
Once you write your text, you can also add an image.
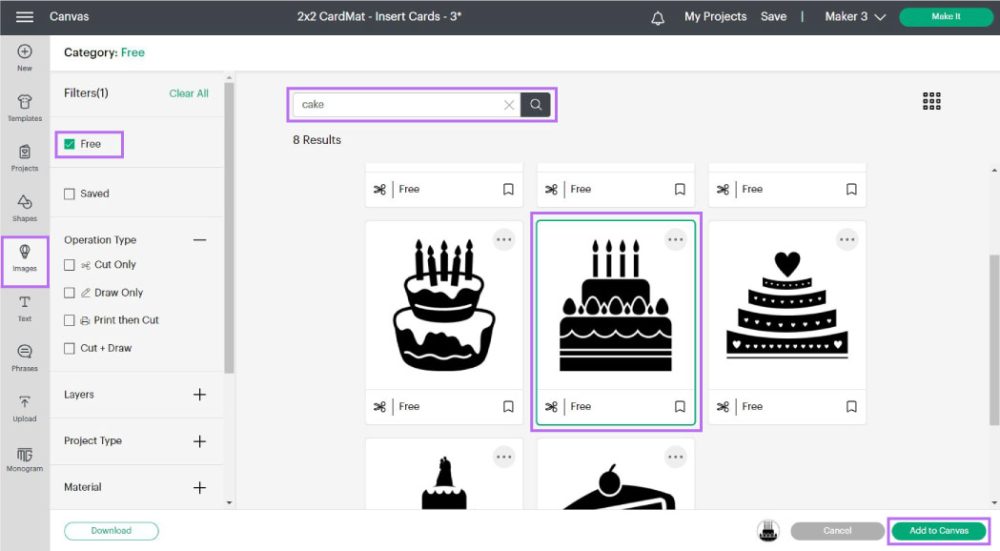
Click on “Images” and use the filters to narrow your search. I searched by “Draw” and typed “flower” on the search box.
When you find the image you want, select it and click on “Add to Canvas.”
Resize the flower and place it where you want it. If using the same pen, check that the flower matches the pen color of your text.
If you added an image or shape to your text, select both layers and click on “Attach” at the bottom of the layers panel.
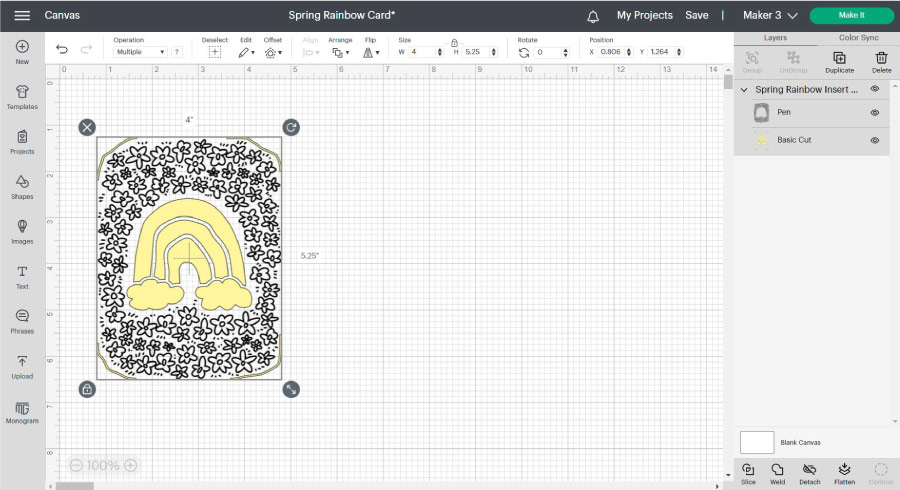
Before sending your project to your machine, confirm the size of your text using the information I covered at the beginning of this article.
In this case, and since we’re using an R20 card, the max project size is 4 x 5.25 in.
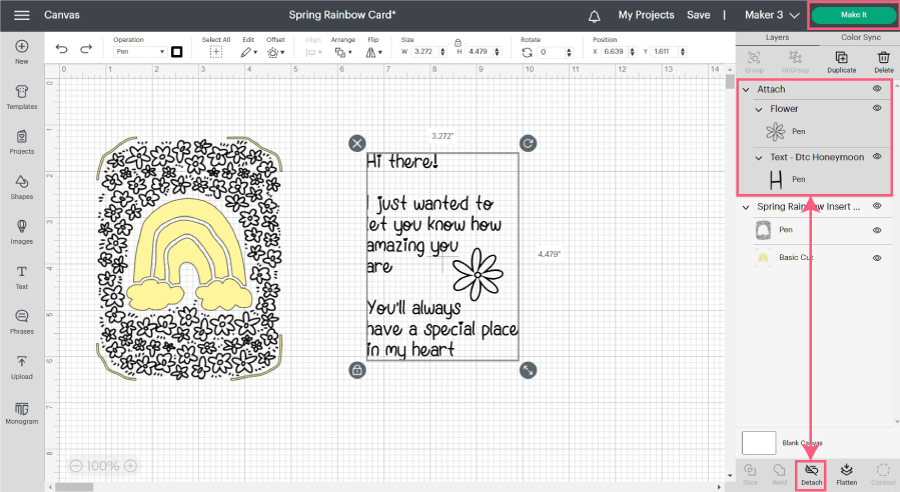
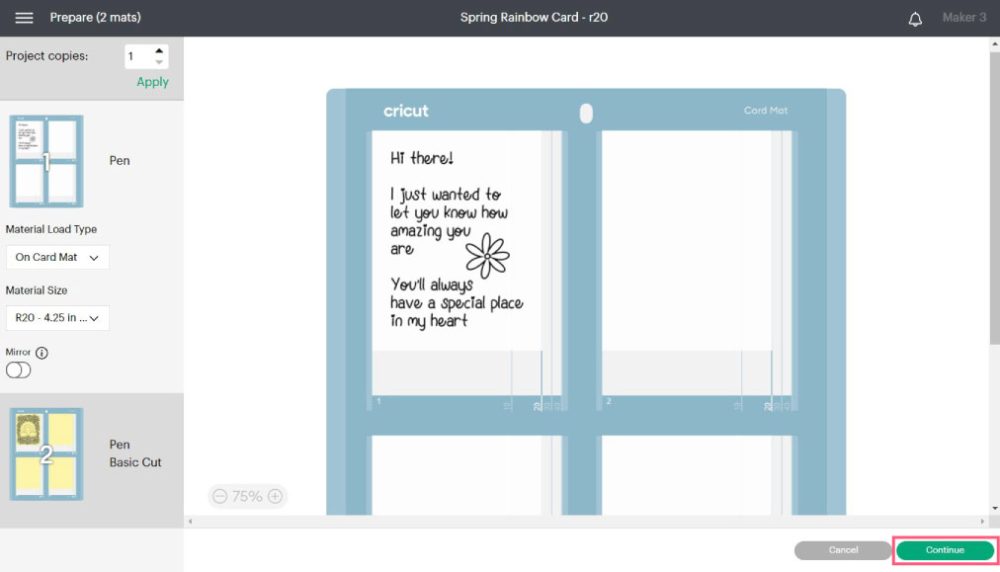
When ready to cut, click on “Make it.”
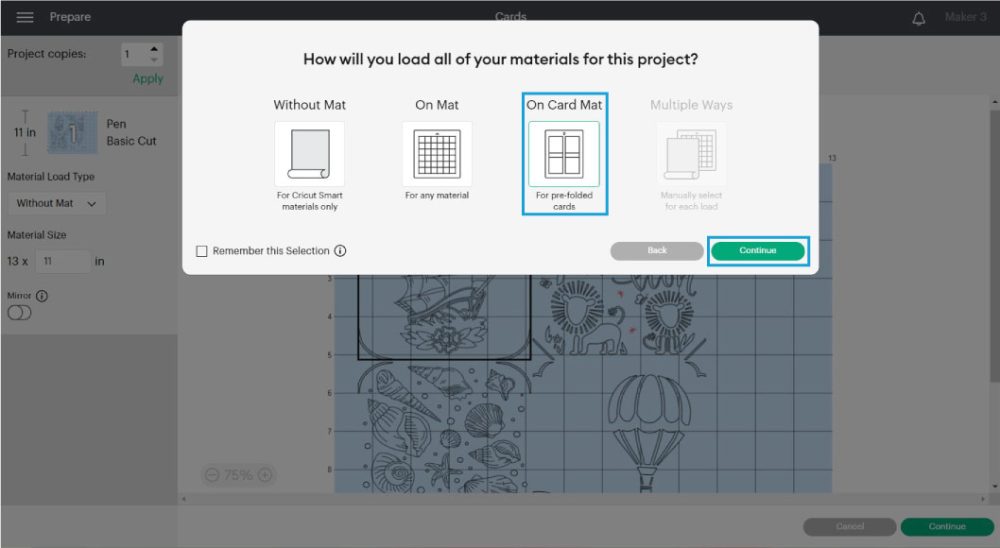
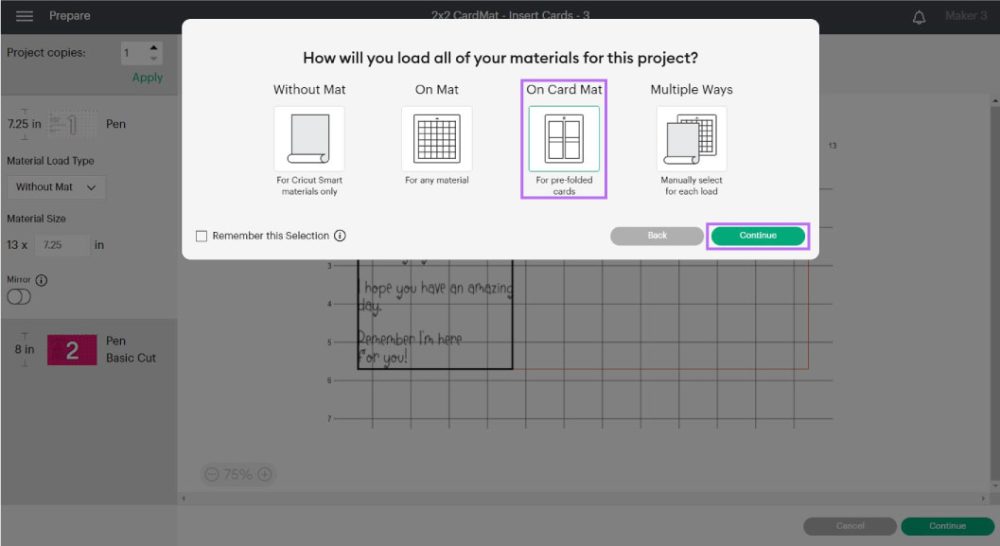
Depending on your machine, you’ll have different options to load your project. Select “Card Mat” and click on “Continue.”
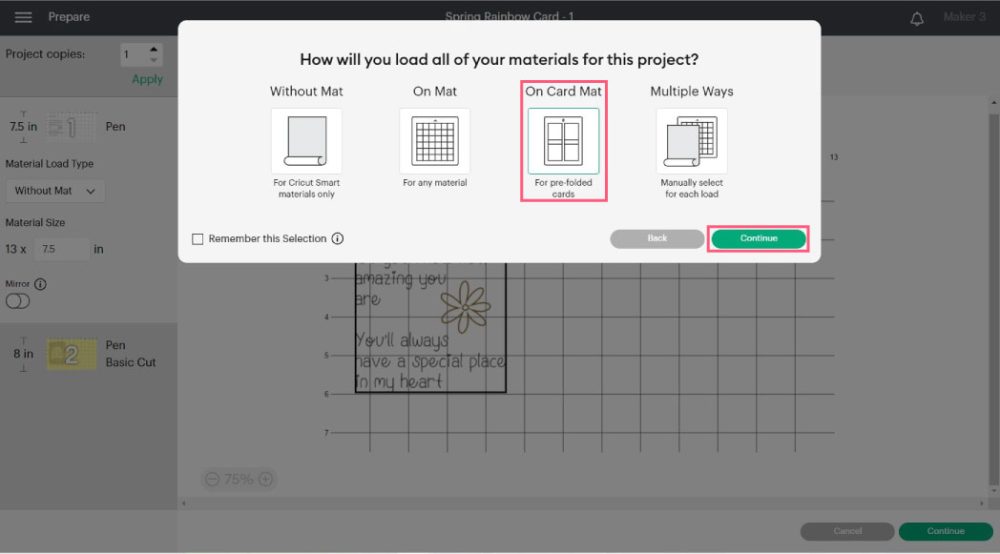
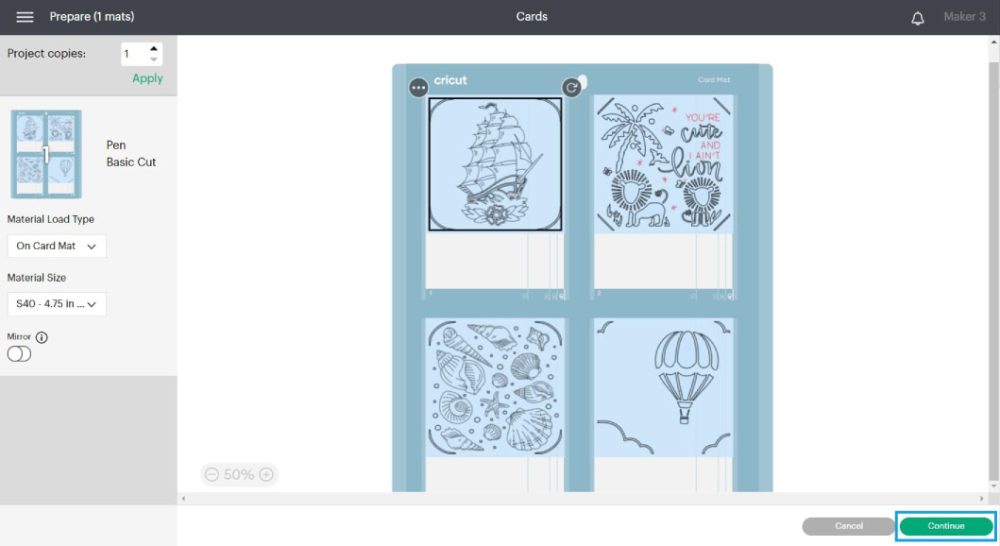
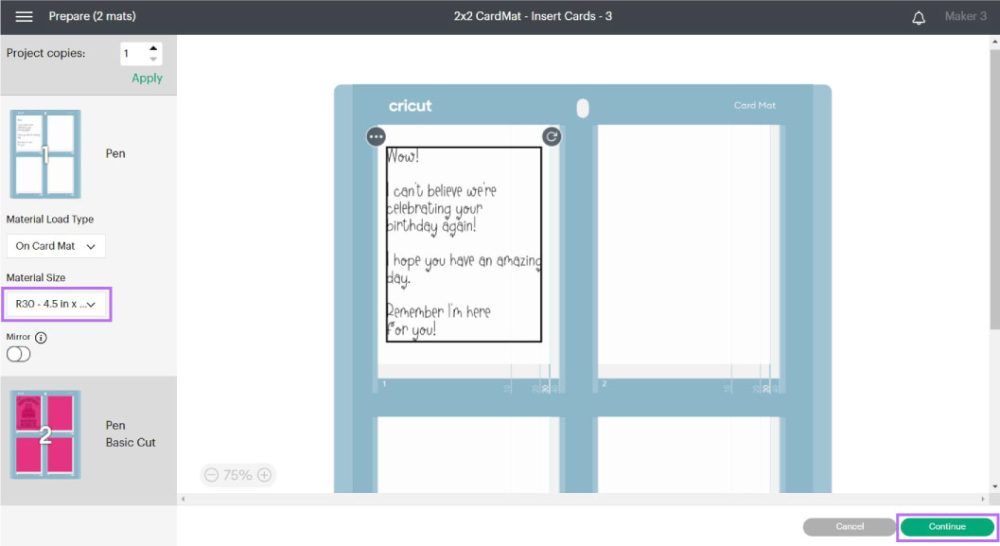
Verify the card size on the left panel and click on continue to select your materials.
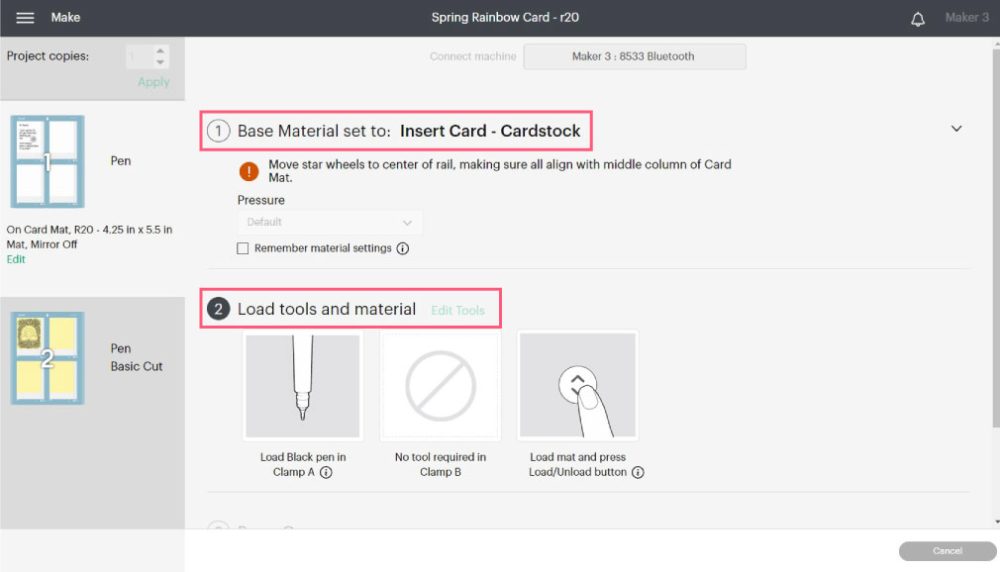
Cutting Insert Card
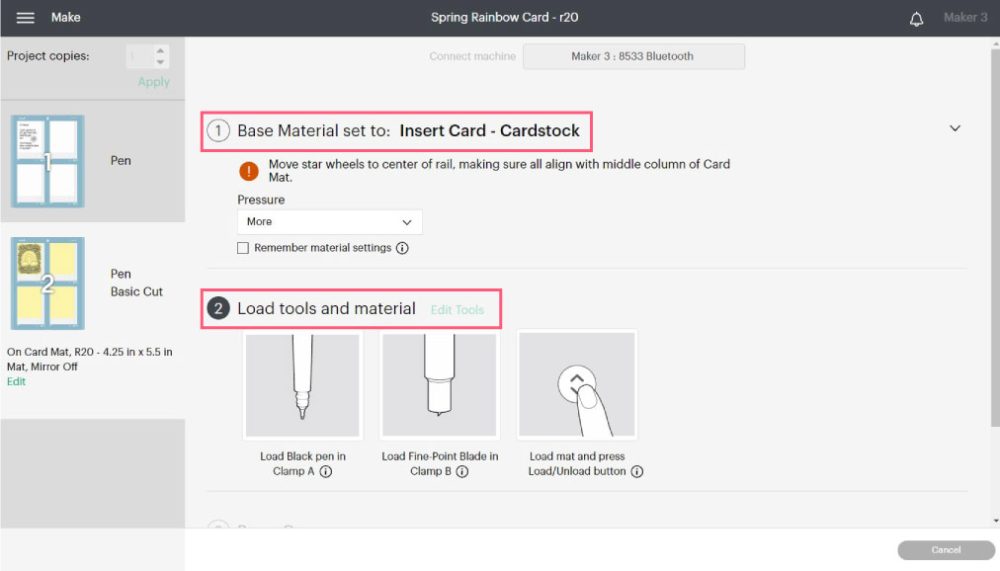
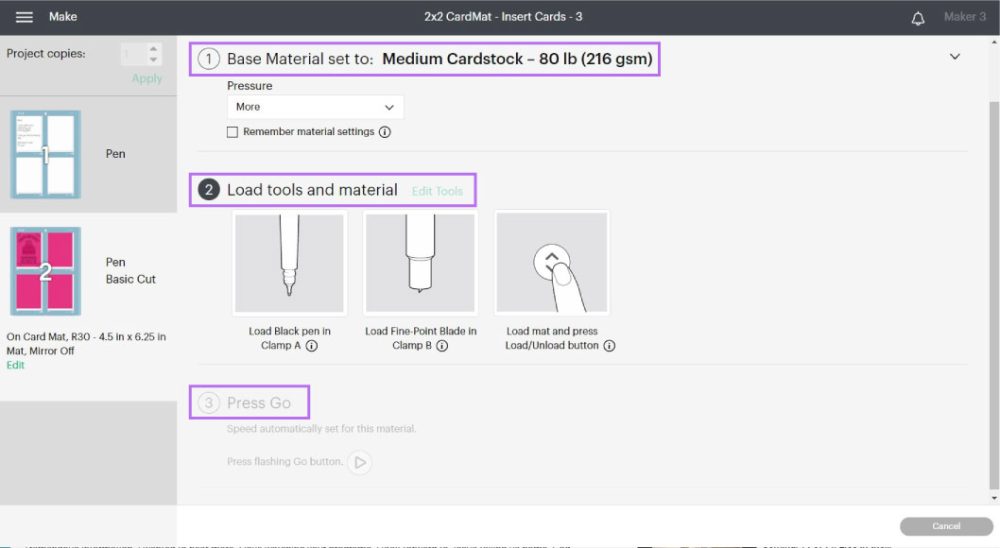
Set your material to “Insert Card – Cardstock,” and don’t forget to move the star wheels to the center of your machine. I also like to set the pressure to “More” because sometimes the cuts aren’t deep enough.
Tip: I started with mat #2 because it made sense for the progression of this tutorial. However, I recommend you write first and then cut your card.
Note: For smart-set dials machines, move to custom to select material from Design Space.
Time for real-life pics!
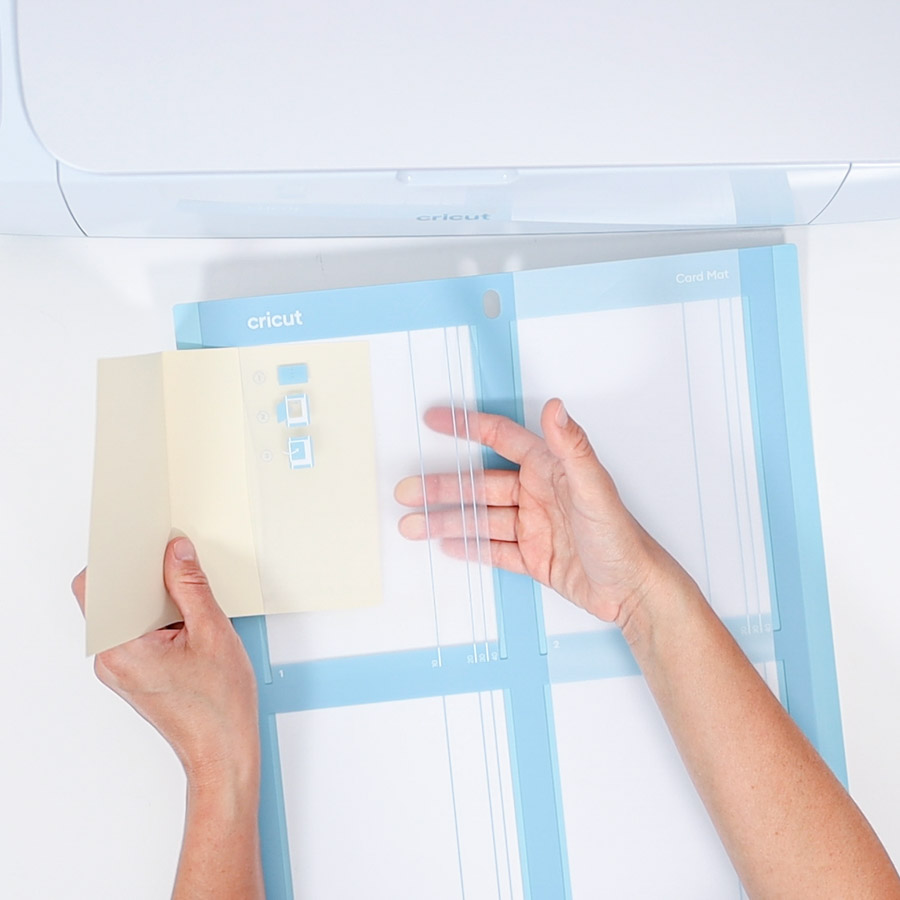
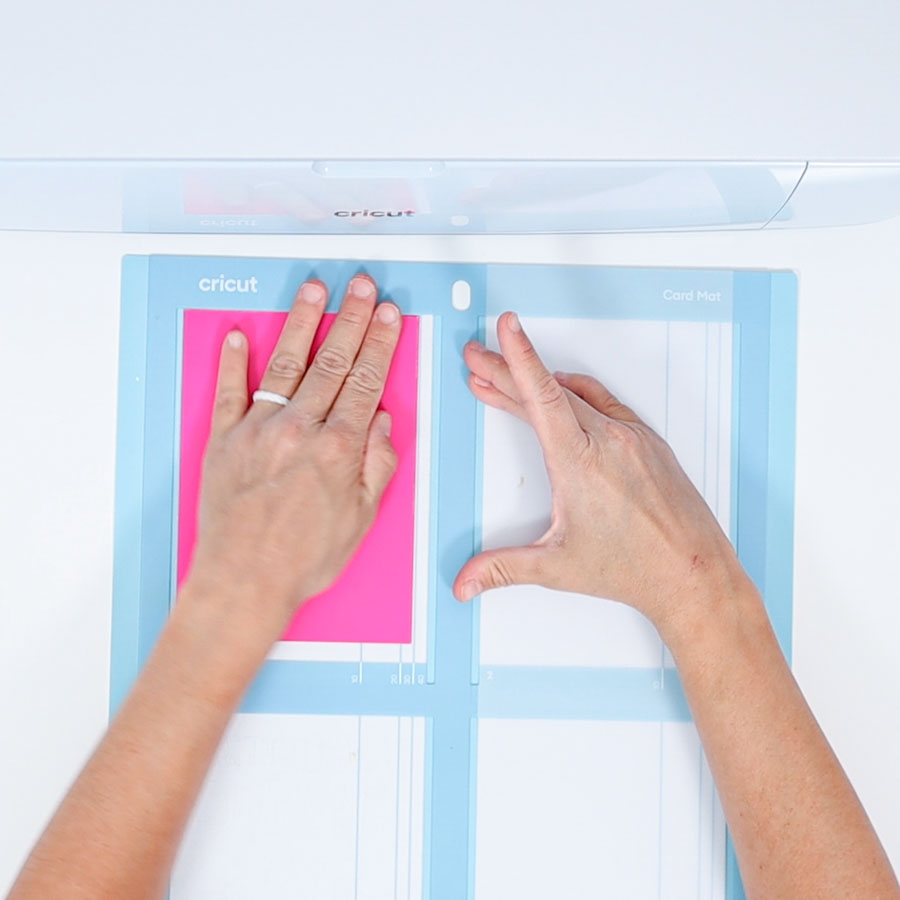
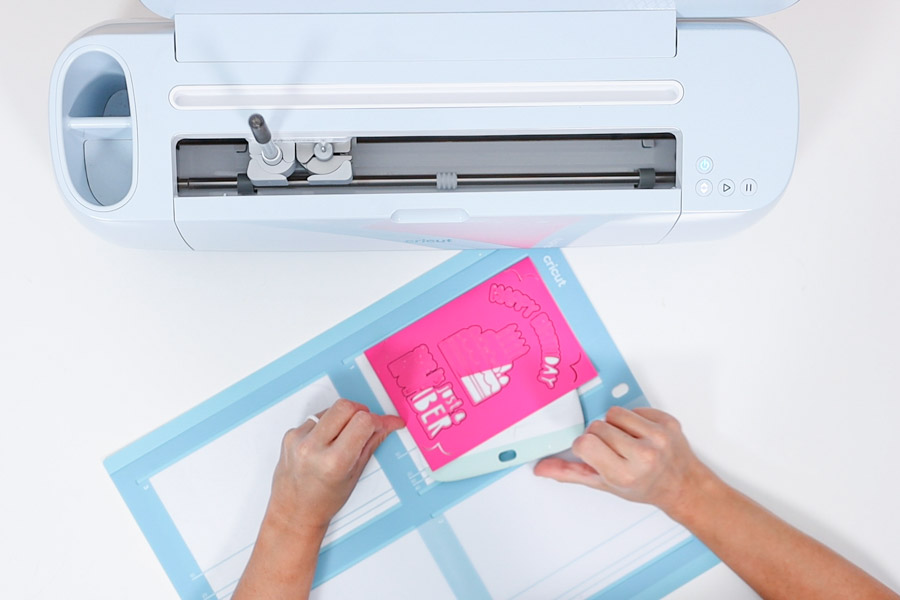
Lift the first slot of the card mat and slide the insert card. The card will pretty much reach the R20 of the line guides.
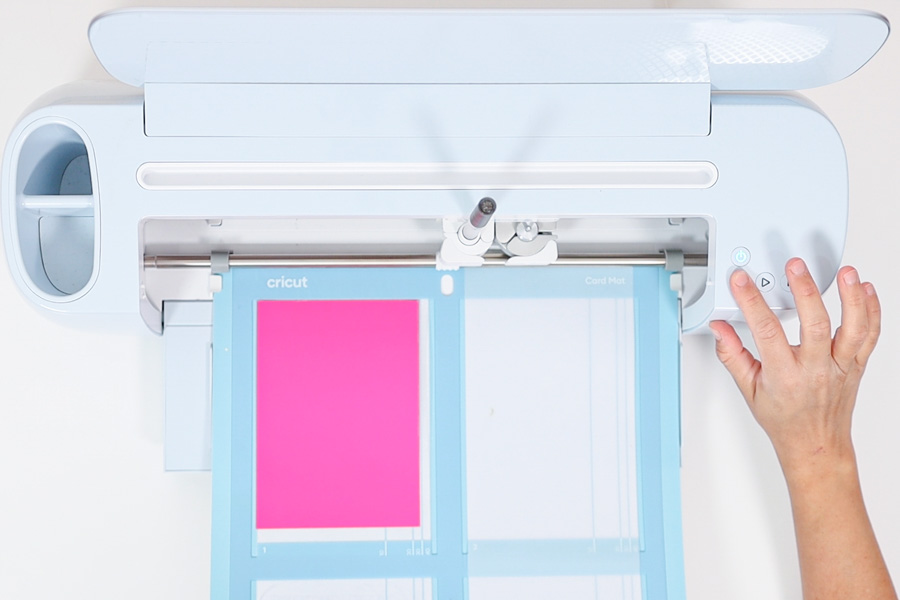
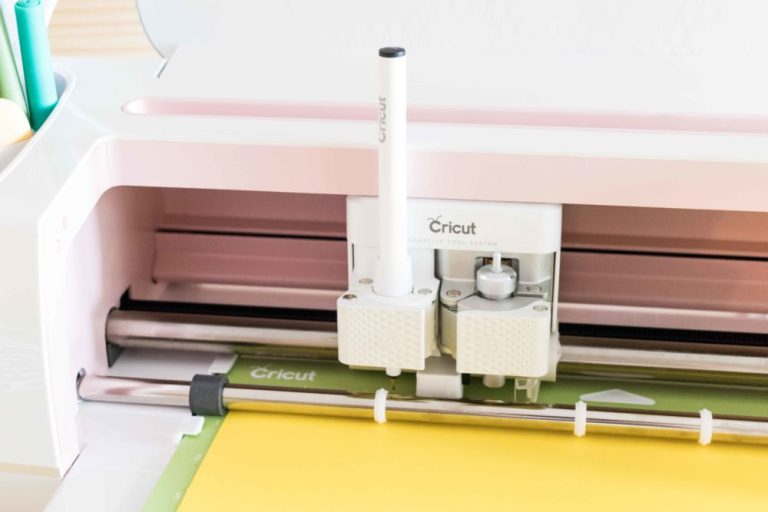
Install pen on your Cricut on “Clamp A” and fine point blade on “Clamp B;” load your mat, and press the flashing go button to start the cut.
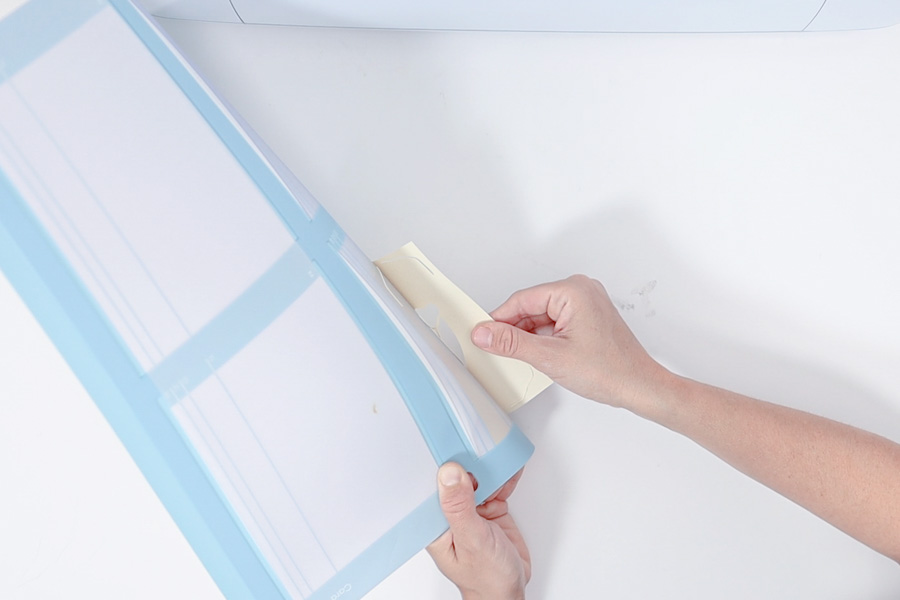
When the cut is done, unload the mat and remove the card from it.
You can try to bend the mat, but it’s a little hard to do; it requires a little practice. You can also use a spatula or a large scraper.
If your card mat is new, the first card will be tough to remove. You can remove it more easily by priming your mat with a small cloth and patting it onto the sticky part.
Writing Inside Insert Card
Ready to write inside the card?
Select the same material; we’re only using pens for this step.
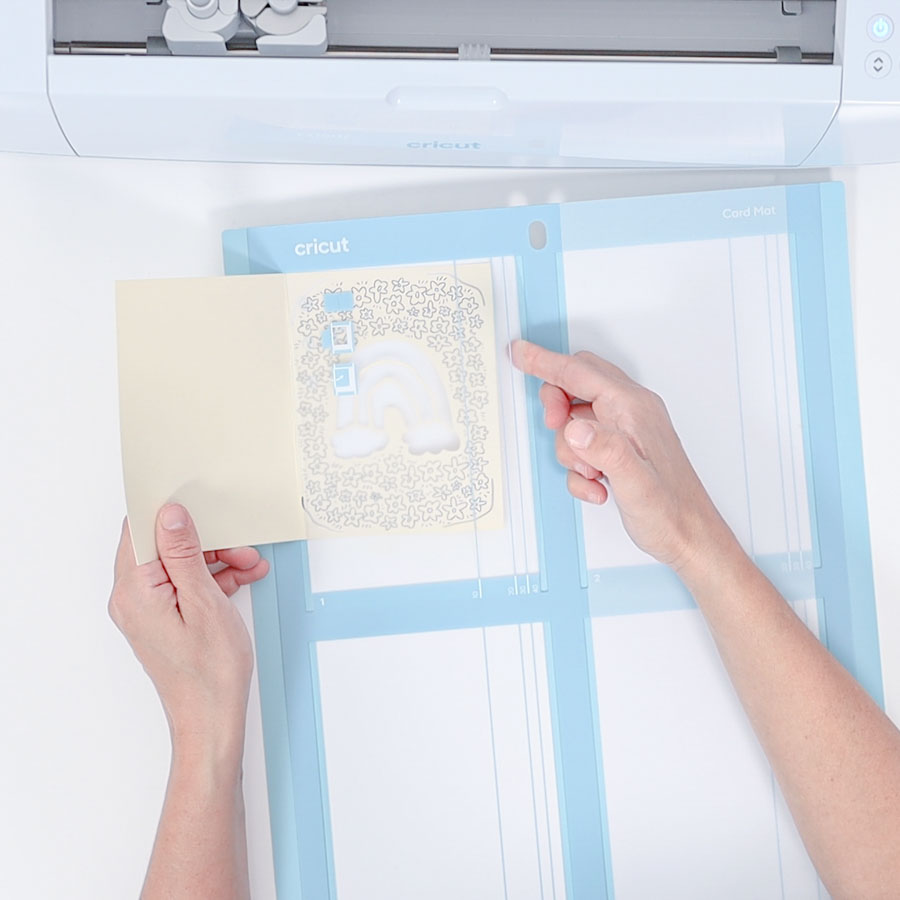
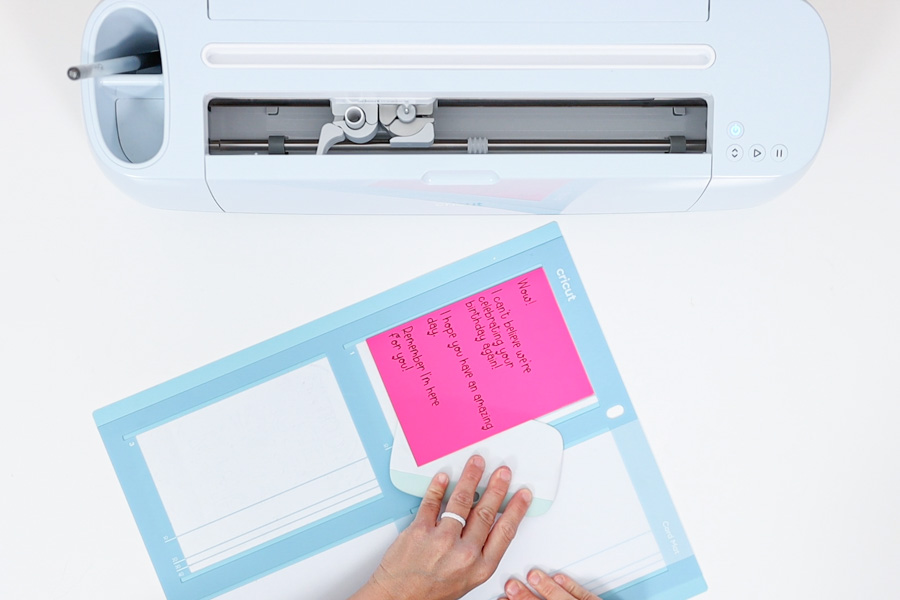
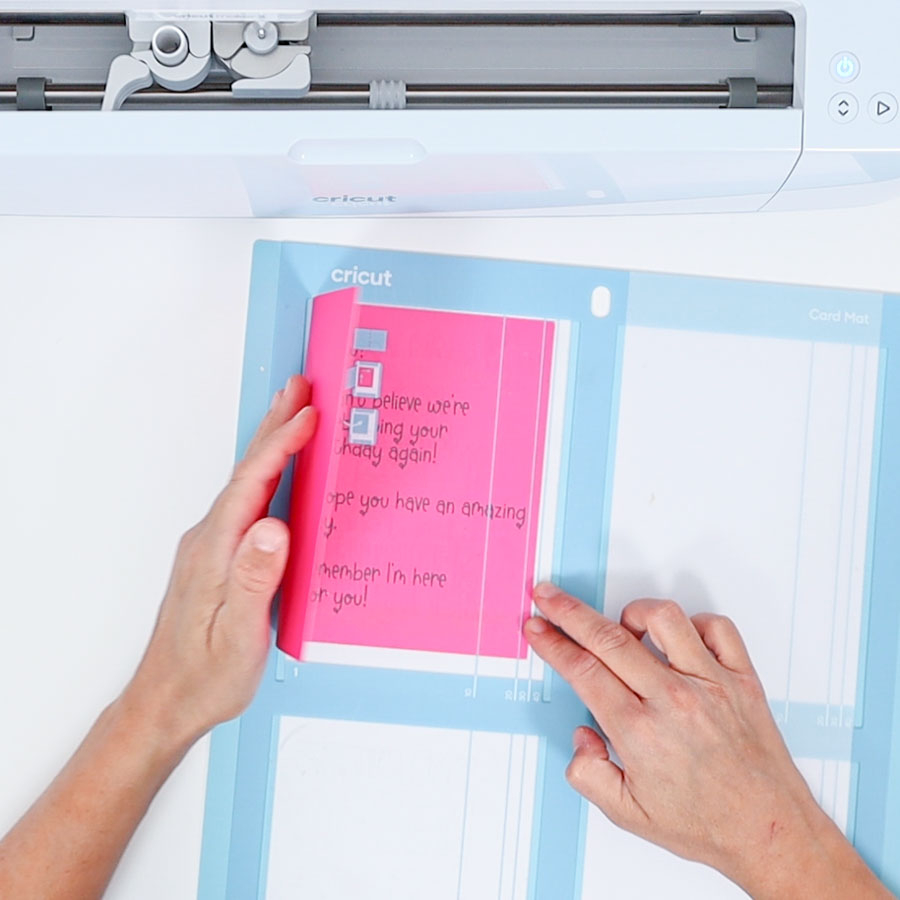
Since we are drawing inside a previously cut card, flip it inside out and carefully slide it on the card mat.
Watch out for intricate cuts because they can get trapped on the mat.
Install pen, load mat, and click “Go” in Design Space.

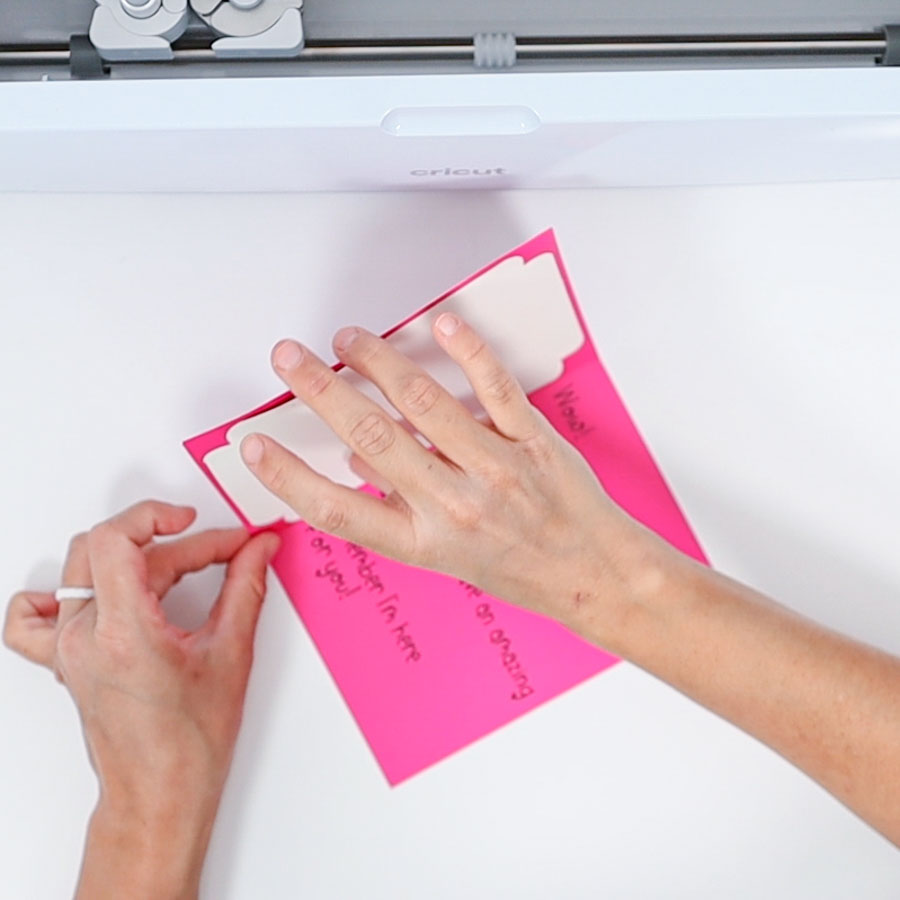
I decided to use my large scraper to remove the card from the mat, and let me tell you that it’s better than anything else!
You need to be super careful with intricate cuts.
Now, it’s time to place the insert on our card, and that’s it!
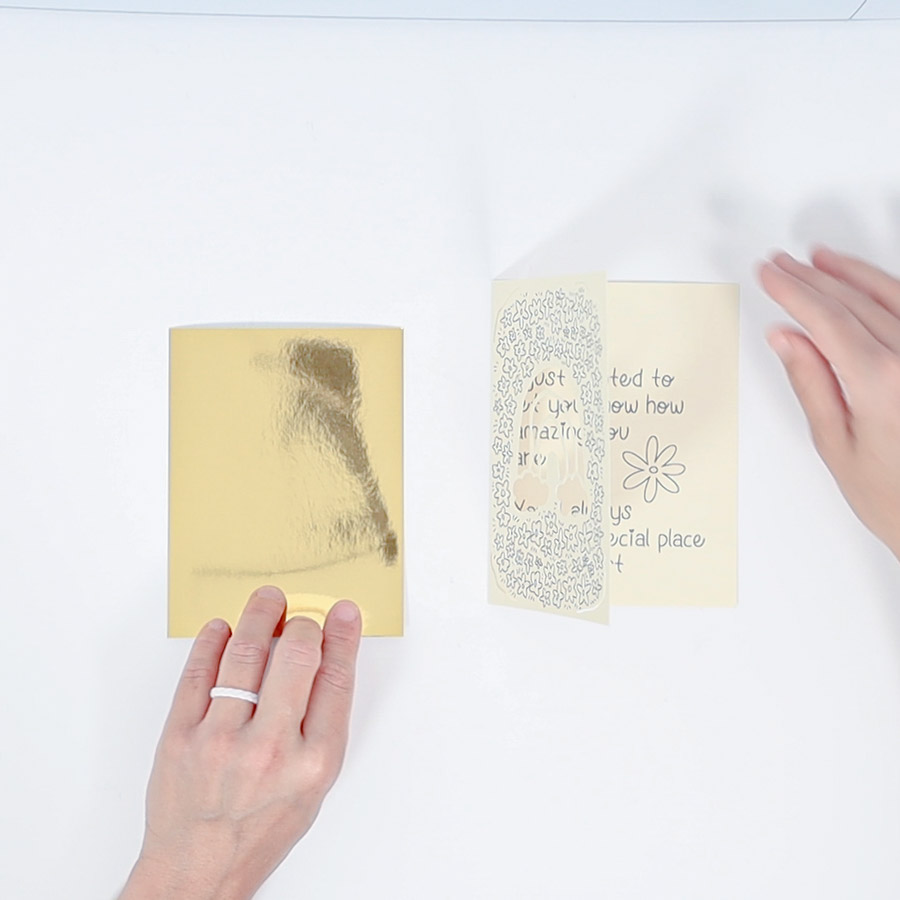

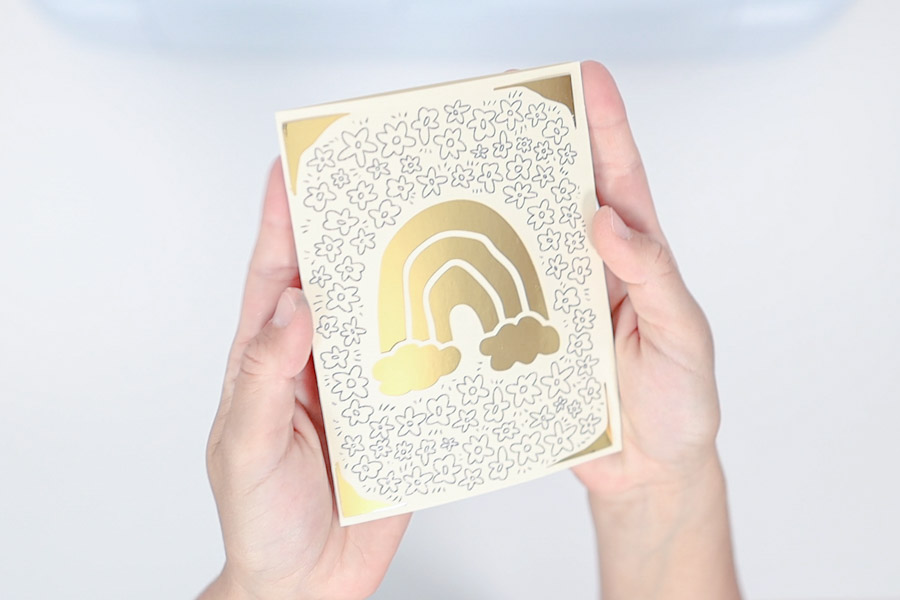
Isn’t it beautiful?
Cutting Multiple Cards on 2×2 CardMat
One of the great things about the 2×2 card mat is that we can cut four cards on the same mat.
Note: All cards must be the same size.
How do we do that?
If you want to cut the same card over and over, send to your machine a single card, and on the mat preview, increase the project copies and click on “Apply.”

When I took this screenshot, the software was glitchy, and I placed my S40 card on an R10. So double-check that you have the right card size.
Things are trickier if you want to make different cards on the same mat.
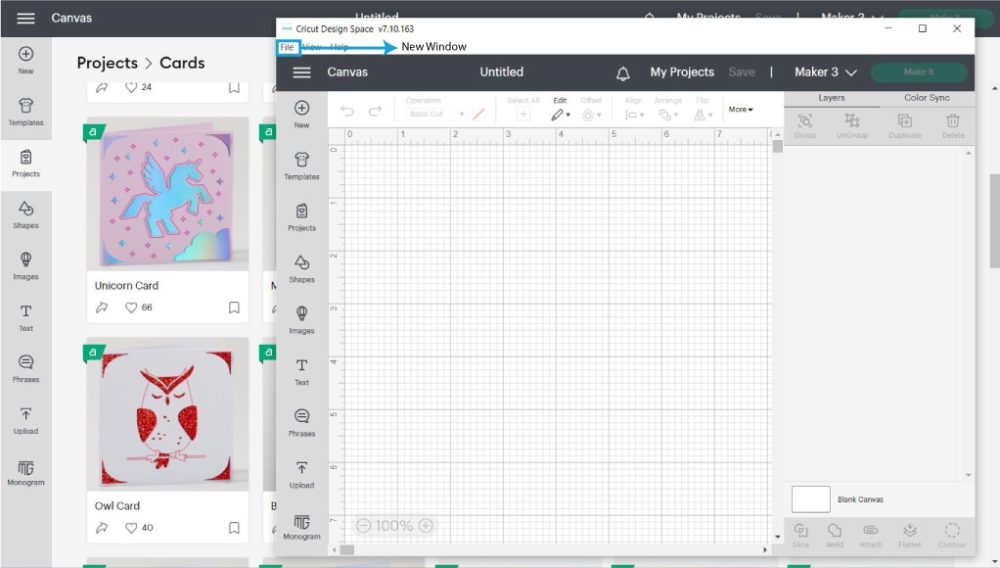
You need to open Design Space twice.
At the top of the window, click on “File” and select “New Window.”
We’ll open and copy the cards from one of the windows, and on the other one, we will compile them.
Open the card you want, then ctrl+c (or cmd+c) and ctrl+v (or cmd+v) on the new window.
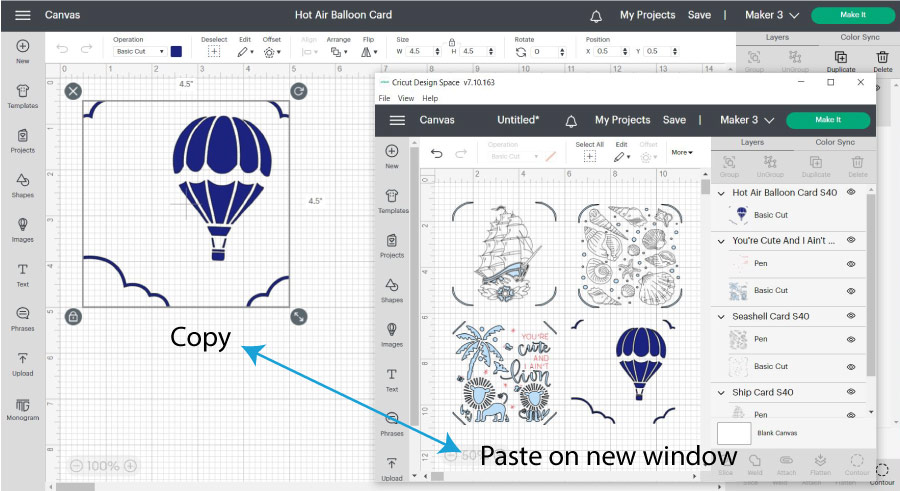
You’ll need to go back and forth between the “Projects” icon and the canvas as you copy your cards.
Most likely, the cards you want have different colors, so there’s an extra step to have the cards on a single mat!
You see, Cricut will have a mat for every color you have on the canvas area, but since we want to cut on the same mat, we need to change the colors.
You can do this from the color box next to “Operation” or use color sync in the tab next to the layers panel.
Select the rectangle representing each color from the “Color Sync” panel and drag it to the color of your preference.
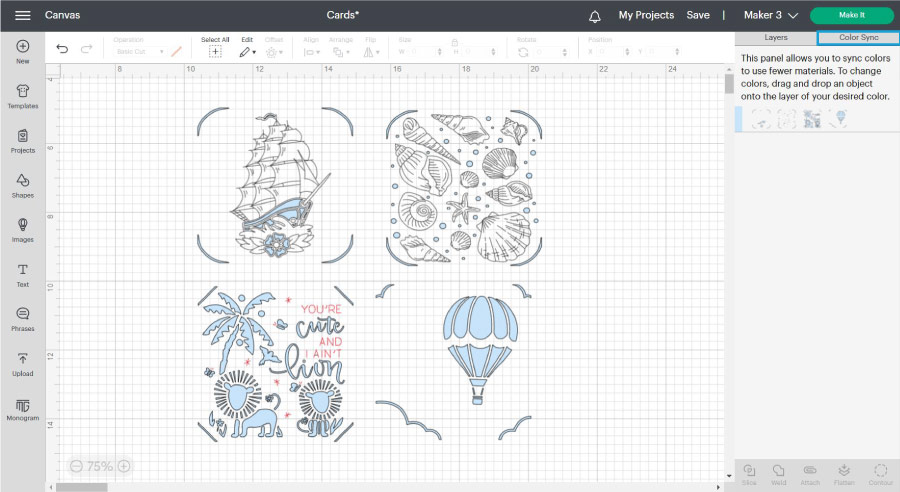
When you’re done, click on “Make it,” select “On Card Mat” to tell your machine how you’ll load your project, and click on “Continue.”
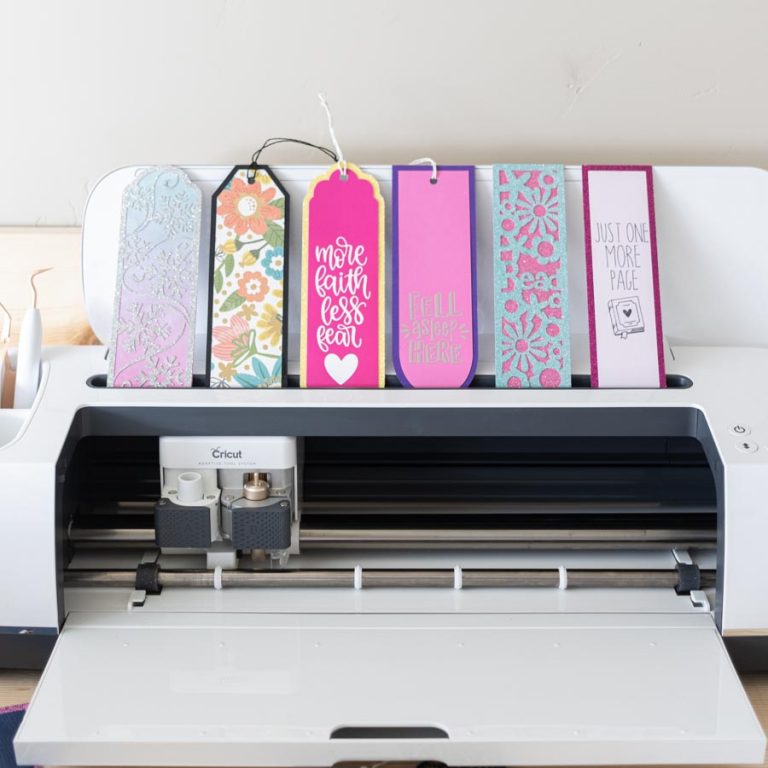
Every card is in a different slot!
The material selection and cutting process are identical, only this time, you’ll need to insert four different cards.
Note: If using pens, Cricut will bring a notification to change the pen on your machine.
Note: You can also cut multiple cards with your designs or card images from the “Images” icon in Design Space.
I tried to find insert cards as images, but all I could see were corners, and I didn’t want to spend a whole afternoon scrolling to find the right card.
Whatever card source you want to use, the concepts remain the same. If cutting a single card over and over, increasing the project copies will be enough. And if cutting different cards, the colors must be the same, and you need to use the same insert card size.
Corners Cuts Free SVG
As I mentioned, here are the SVG files to make cards on the card mat.
There are six different styles to choose from, and each comes in all five sizes Cricut offers for insert cards.
To download the file(s), you need to be on a desktop or laptop and click on the button to trigger a download file on your PC. However, I’ve noticed that I can also download them from my iPhone.
Depending on your browser settings, your PC sometimes asks where to save the file, although most files will be in your download folder.
If the image opens in a new window (this may happen because of your browser settings), right-click on it, select the option “Save Image As,” and choose where you want to save the file.
SVG files look like web page files when you download them.


Oh!
Just so you know, I also have a library full of free SVG files and Printables for all my subscribers, a.k.a. Daydreamers. You can see a preview right here or get access by filling out this form.
Making a Card Mat Card from Scratch in Design Space (Using your own paper)
This section aims to teach you how to make insert cards using your own paper and the corner-cut cards right above.
Step 1 – Cut paper
Making your insert cards is a walk in the park.
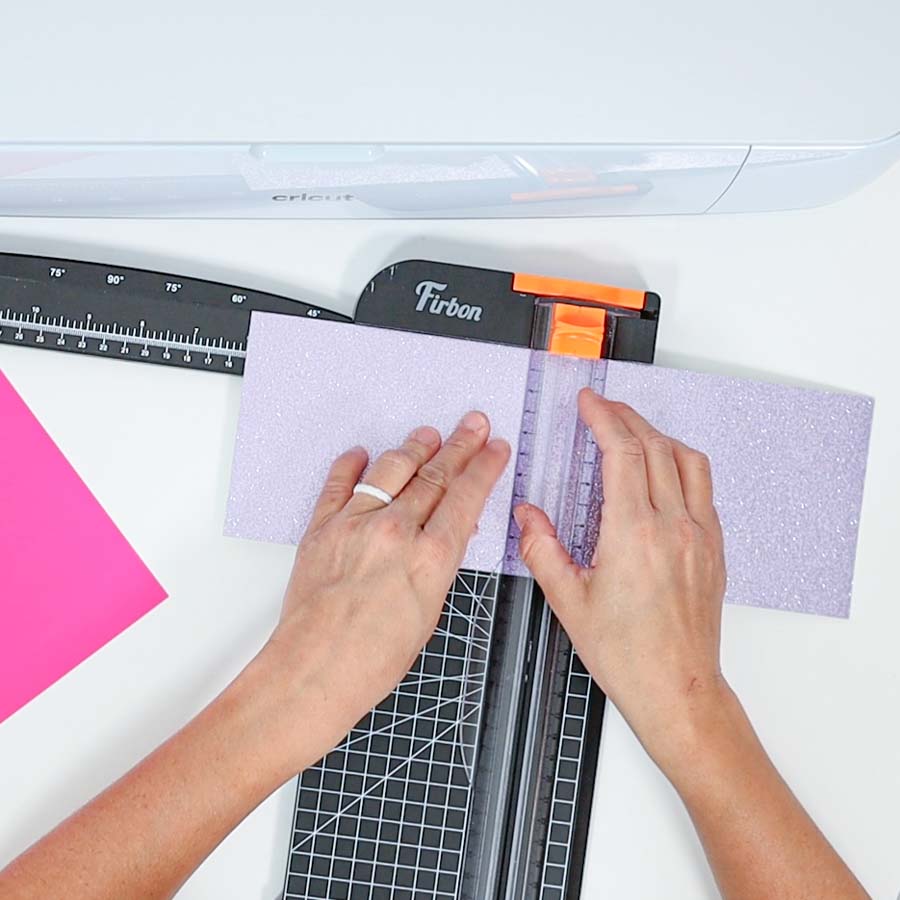
Choose two cardstock colors that look good together. For the card itself, use medium-weight cardstock; for the insert, you can get extra creative and use glitter cardstock, foil cardstock, etc.
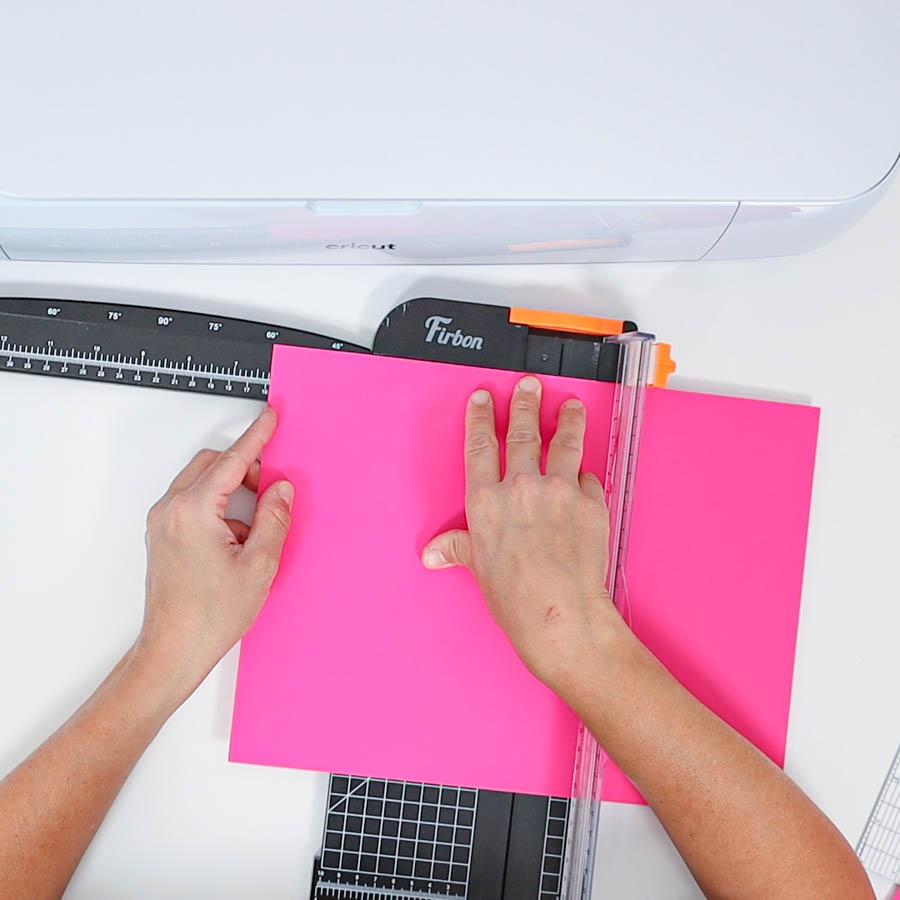
With a paper trimmer, cut your card using the sizing table as a reference.
Since I am doing an R30 card, the insert card size was 9 x 6.25 in, and the insert card was 4.25 x 6 in.
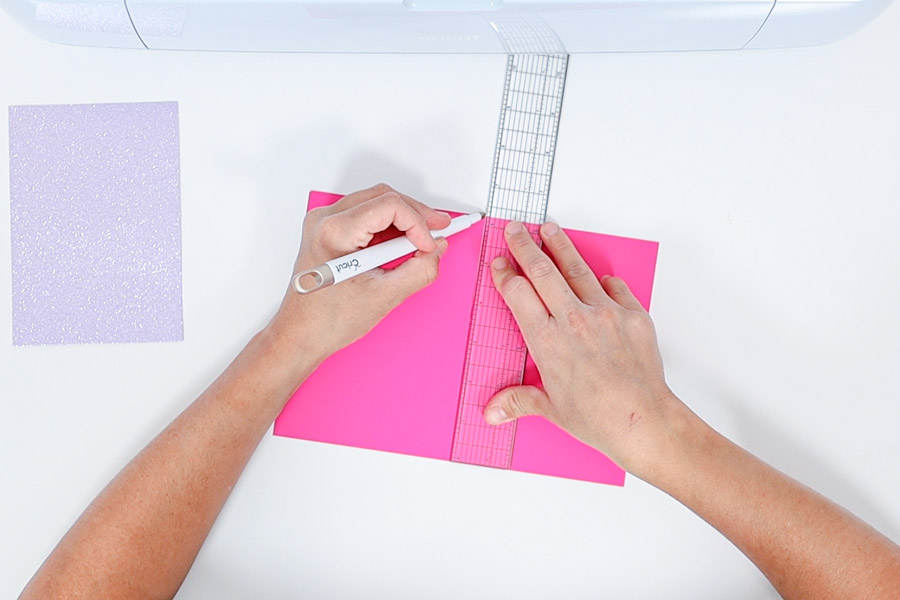
After cutting your card, grab a scoring tool (I used the stylus) and a ruler, and score the card right in the middle. I prefer to make multiple passes with light pressure, so I don’t tear the paper.
Fold the card, and set it aside.
Step 2 – Add Corner Cut
You can also use free corner cuts by clicking on “Images” and using the filters to narrow the search. First click on “Free,” then on project type check the option “Cards,” and on the keyword search, type the word corner.
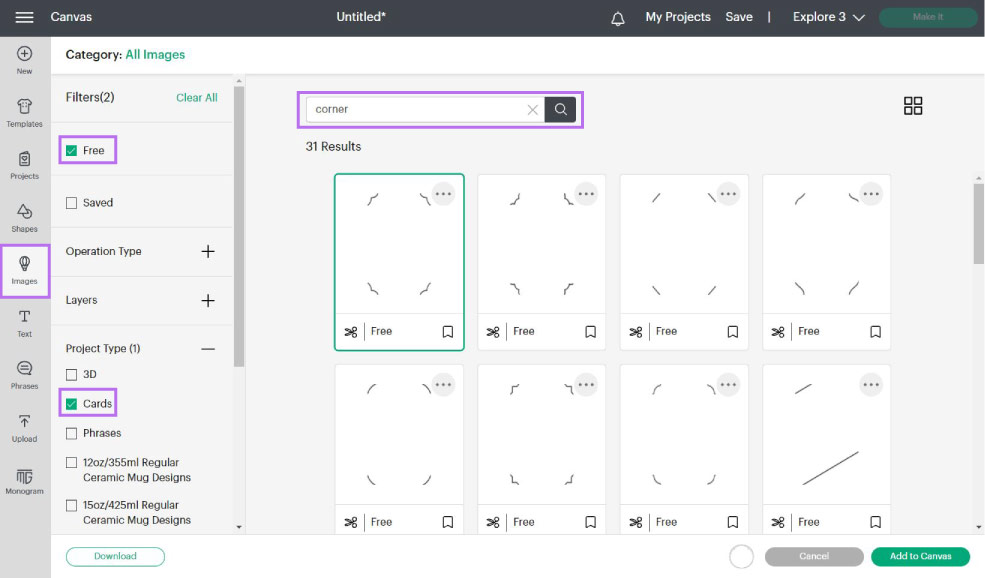
There are many options! However, all the options I checked at the moment only had corners for R20 cards; most likely, this will change in the future, but in the meantime, you can use my corner card cuts for any card size.
From the canvas, click on “Upload,” then go to “Upload Image,” follow the prompts and select the image from the “Recent Uploads” view, and click on “Add to Canvas.”
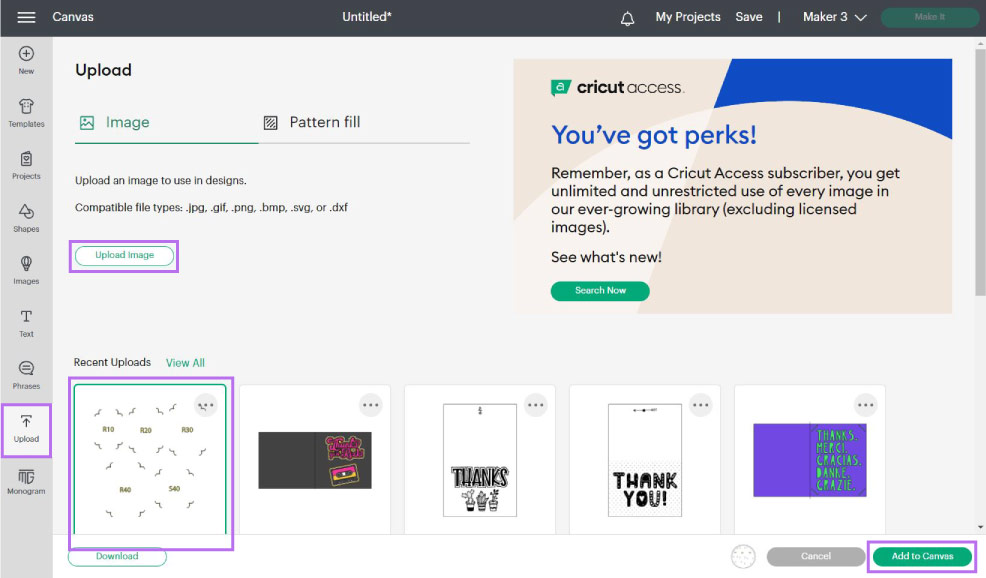
As you can see, the image has all the card sizes!
We need to do a couple of things before using the corner cut.
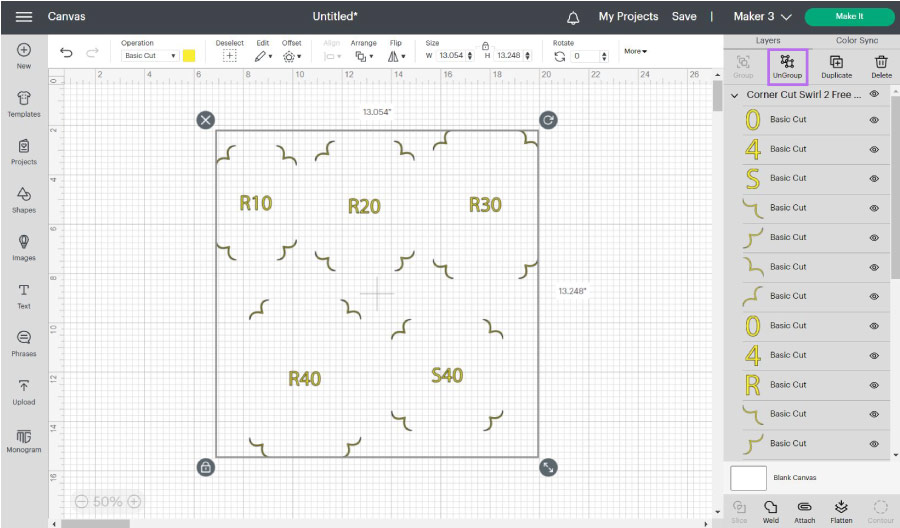
Start by ungrouping the file, then delete all the corners and numbers except the one you want to use. In my case, it was the R30 corners.
Be careful not to move any of the pieces you need.
Select all four pieces and click on “Weld” at the bottom of the layer’s panel to have everything in one single layer.
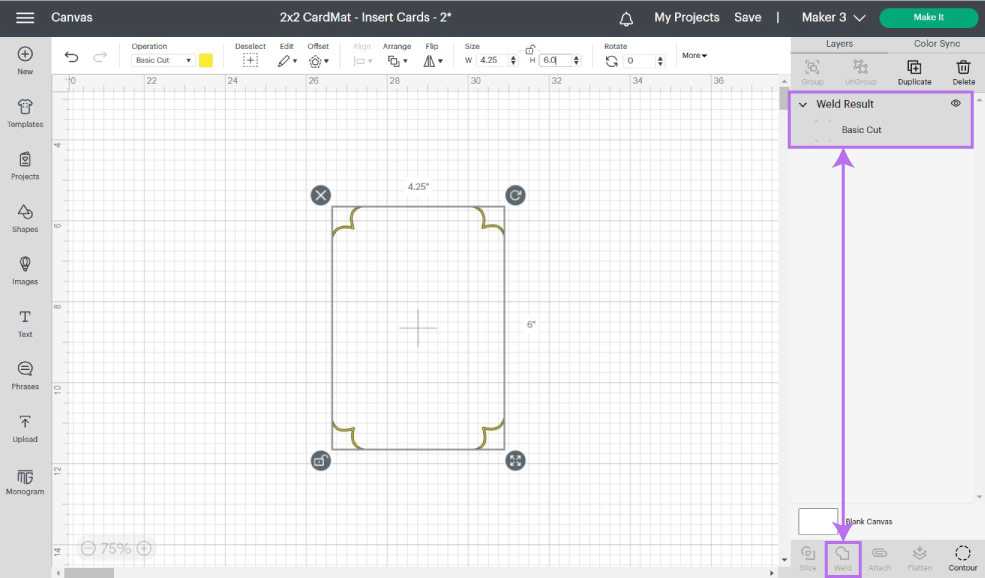
After welding, check on the size; although everything measures 100% exact on Adobe Illustrator, for some reason, some of the cards will have 0.01 in error, and sizing must be according to the sizing table.
Step 3 – Add Images and Text to Card
The cool thing about making your card is using your own SVG files or some from Cricut’s library!
The point of using different images is that you can make something that fits your needs or the occasion.
When looking for images, pick something simple, and try to visualize how that cut will work on your card.
When you’re working with paper, a lot of details get lost; therefore, pick simple designs that don’t have a lot of components inside of cuts.
For instance, I picked a free cake image (#M8772F47) because I saw that this particular illustration would look intact after finishing the cut.
I also added some text to the front of the card.
Notice how some details of the “Happy Birthday” letters will get lost once we cut; these details also increase the cutting time, and since we don’t need them, you can get rid of them pretty quickly.
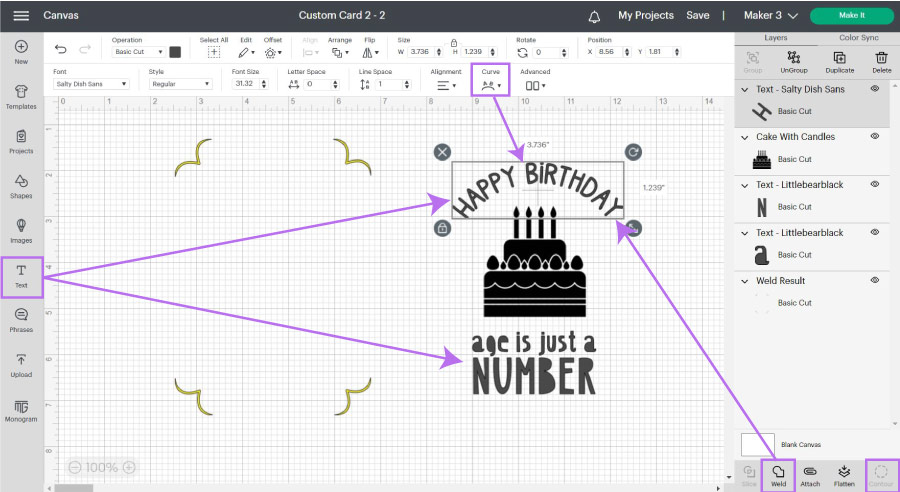
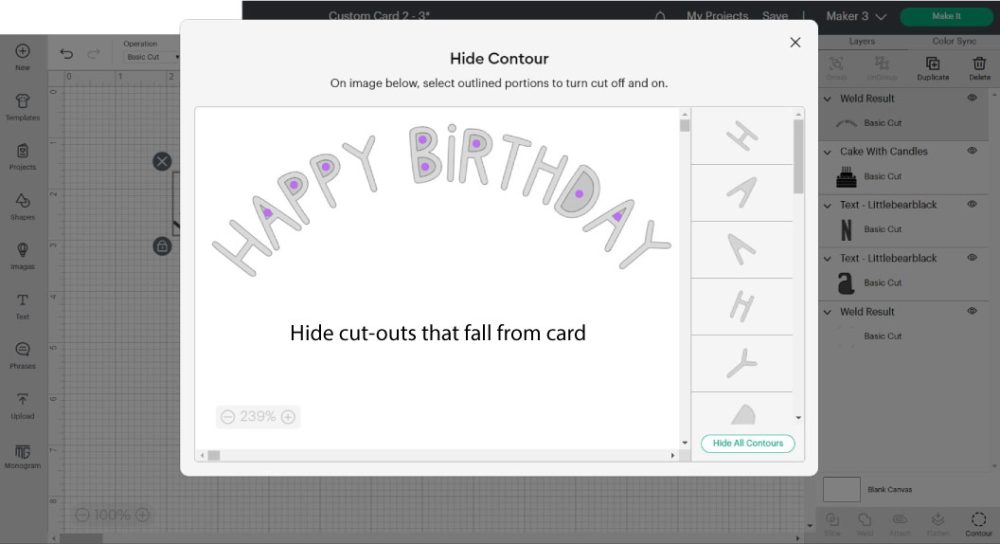
Select the text and click “Weld” at the bottom of the layer’s panel. After welding, click on “Contour” and hide all the cut-outs that will fall from the card.
The designing process is complete.
At this point, you can weld the design without the corner cut card and align the center.
Note: I didn’t weld and only aligned horizontally, but if I could go back in time, I would do weld and align center.

If you want to use pens on the front of the card, select your text and cake and add an offset path of 0.09 in.
After adding the offset, change the layer’s operation to pen.
Learn how to use the offset tool.
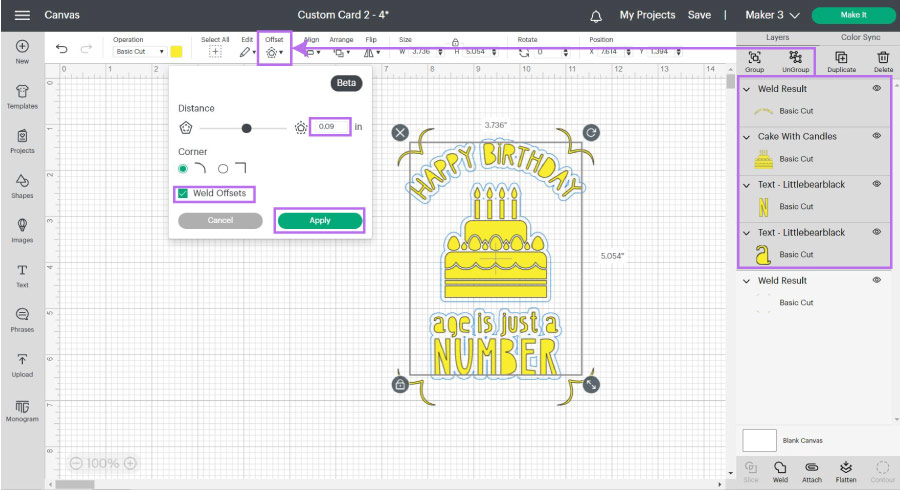
You can also add text, as I explained right above. Check out the following graphic to see all the settings I used.
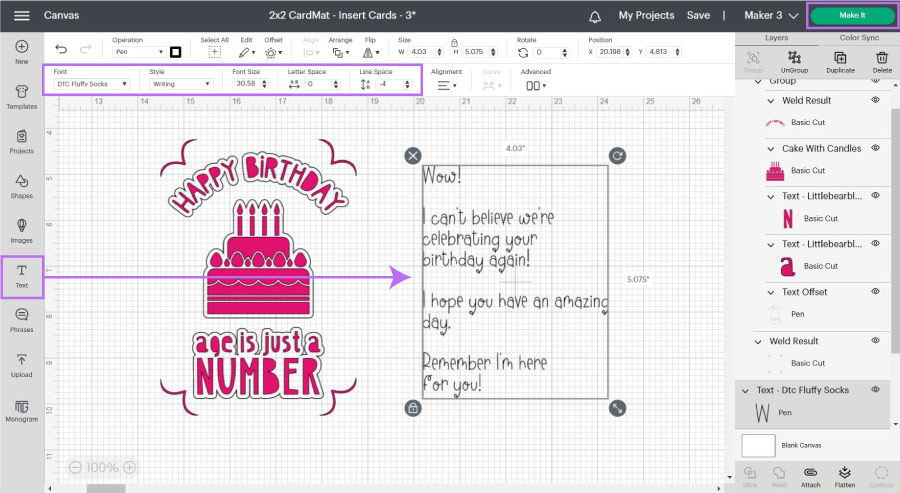
Before you send your project to cut, you need to attach all the elements that belong to the front of the card. If you add additional images or shapes on the inside of the card, you must attach those as well.
After attaching, click on “Make it.”
Step 4 – Cut and Assemble Card
For machines with a smart set dial, move to “Custom” to follow along.
Depending on your machine, you’ll have different options to load your project. Select “Card Mat” and click on “Continue.”
Verify the card size on the left panel and click on continue to select your materials.
Select the type of material you used for your insert card.
Important: Don’t forget to move the star wheels to the center of your machine. Since we’re not selecting insert card cardstock, you won’t have a warning!
Let’s start by doing the writing inside of the card.
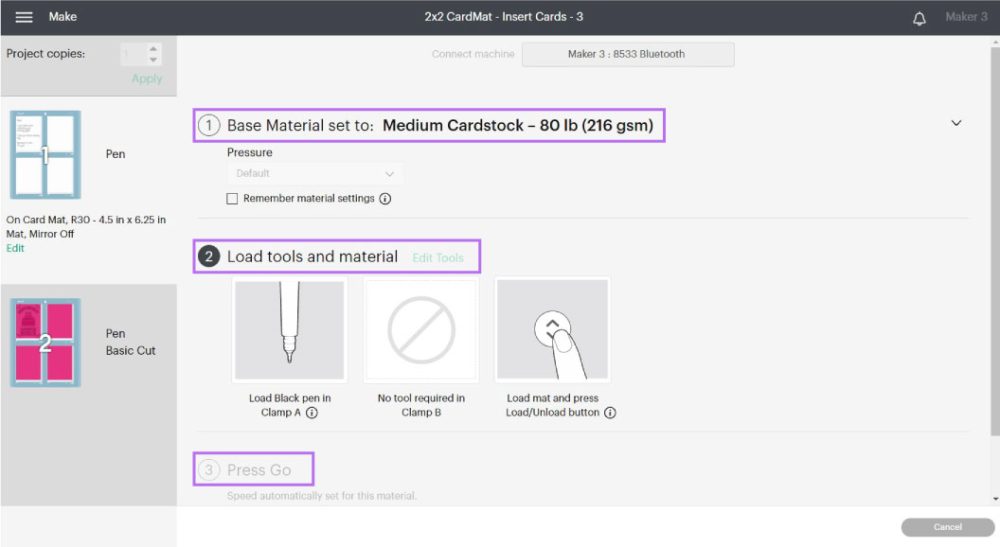
Install pen on “Clamp A” and fine point blade on “Clamp B.”
Get the card and insert it into the first slot of your card mat, then load it into your machine and press the flashing go button to start the project.
When your Cricut is done writing, unload the mat and carefully remove the card from the mat using a large scraper.
Tip: Some pens take a long time to dry on different types of cardstock.
Now, let’s cut the front of the card.
Flip the card inside out and carefully slide it on the card mat, then load it to the Cricut and start the cut.
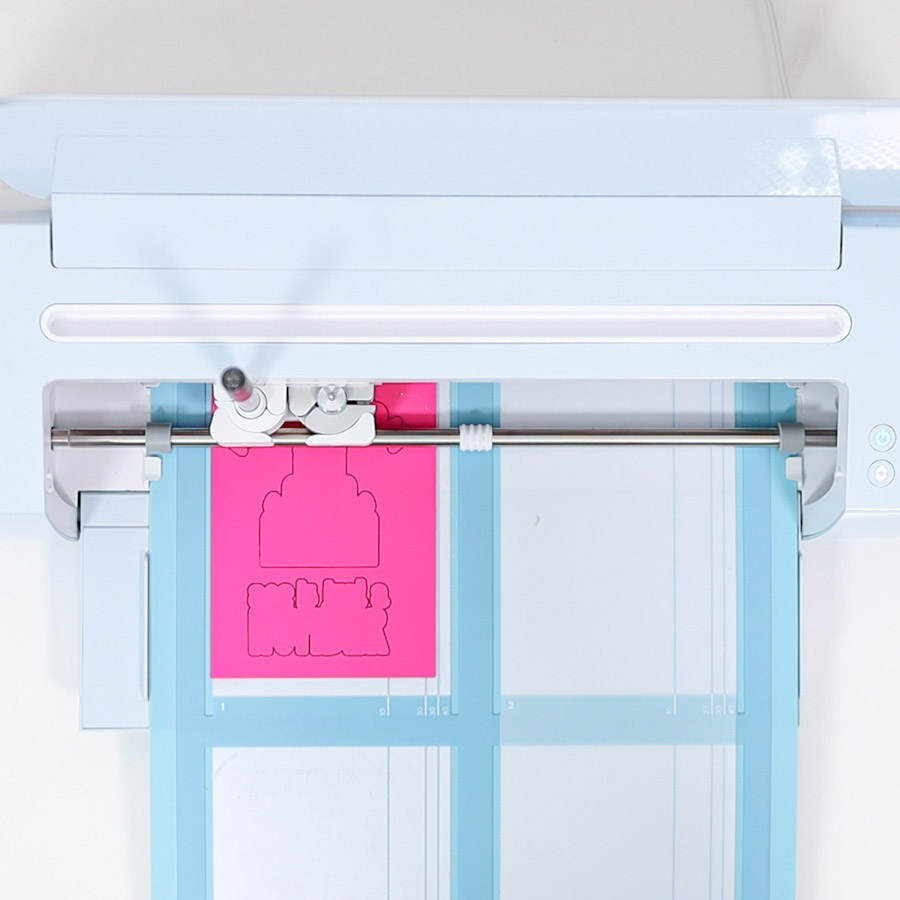
When your machine is done with the cut, unload the mat and carefully remove the card from the mat using a large scraper.
Place the card insert on the inside to finish the card.
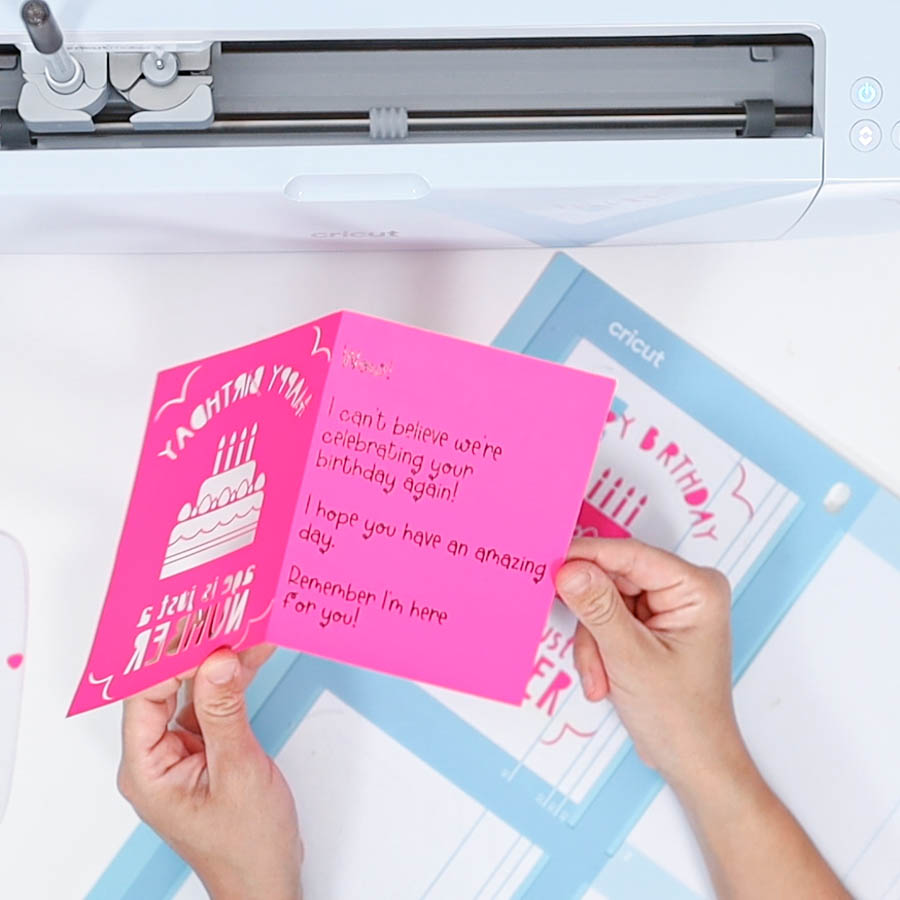

Voila!
We finished a beautiful card.
Share it
Do you know it takes me over 25 hours to complete a single Cricut article? I know it’s wild, but I want to make sure you understand everything!
I would appreciate your support on Instagram , Pinterest , and YouTube as I try to grow my audience and continue producing great content!

Catalina
You are amazing !!! You write the best, most informative and easy to understand tutorials that I have read yet (and I have read A LOT) . I love, love, love this one – and so many others. I have learnt so much from you – much more than I could from any book.
I follow you, have signed up for your newsletter and recommend you every chance I get to all I can on the many Facebook groups I’m in, especially the beginner ones as you’d be of immense help to them, as you are to me.
Thank you for all your hard work and the time you put into making these tutorials for us, they are so beneficial to us!!! I felt so well equipped to tackle my M3 when I tackled my first project and on my second I even knew that I should Weld and not Attach , on a Keyring that I designed because of one of your tutorials- you taught me that ! How can I ever thank you ???? .
Gina xx ????
Wonderful thank you so much. I would like to get this package.
thank you so much for this, it helps a new learner very much.