Hello Daydreamers!
In today’s tutorial, you’re going to learn how to make stunning coasters with Cricut Infusible Ink.
We are going to be using Cricut’s coasters (cork and ceramic) and also…
Drum roll please…
More affordable off-brand coasters you can get on Amazon. Yes, you can use infusible ink with beautiful results on other blanks.
But wait there’s more (read in infomercial voice), I will be providing you with multiple Free SVG templates for you to make your own coasters in Design Space.
Ideally, you will read this tutorial from the beginning because, as we go, we will be implementing the concepts mentioned in the previews steps.

In a nutshell, these are the topics I am going to be covering in this tutorial.
- Materials you need for making coasters
- Where to find coaster images in Design Space
- Sizing your coasters the right way
- Making a coaster in Design Space with infusible ink transfer sheets and also pens/markers.
- Layering infusible ink on coasters
- Infusible Ink Sheet Guide for coasters
- Using infusible ink with off-brand coasters
- Free SVG resources for making coasters
- More pics of beautiful coasters
Are you ready?
Let’s Daydream Into Reality!
Materials For Making Coasters with Cricut Infusible Ink
Infusible ink can be a disaster if you don’t have the tools and materials you need.
I don’t want you to worry, but I just want to caution you to have everything on hand before you start this project.
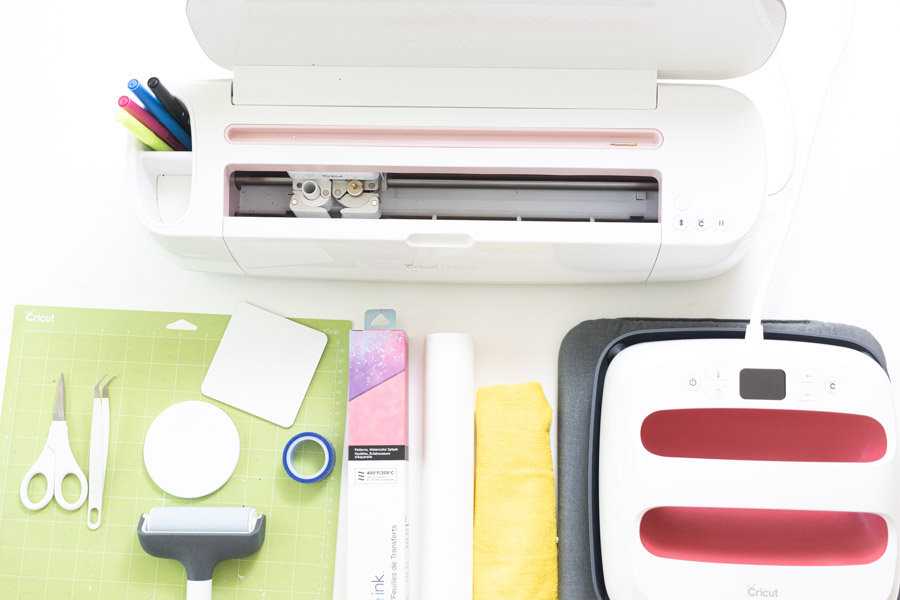
- Cricut Machine (Maker, Explorer, Joy)
- Standard Grip Mat (green in color)
- Fine Point Blade
- Brayer (highly recommended)
- Blank Coasters
- Easypress/Easypress 2
- Easypress Mat (Bigger than heat plate)
- Infusible Ink Pens/Transfer Sheets
- Laser Copy Paper if using Pens.
- White Cardstock Paper (80 lbs)
- Butcher paper
- Heat Resistant Tape
- Microfiber cloth
- Tweezers
- Free SVG Practice Files. (Download from yellow buttons)
Note: The rest of the resources can be found towards the end of this article.
Finding Coaster Images in Design Space
Before we start a step-by-step tutorial, I wanted to show you some of Cricut’s images for coasters.
These images usually cost money and are mainly available U.S.A customers. If you have Cricut Access, you’ll be able to use them at no extra cost.
To find them, log in to Design Space, open a new project, and click on the “Images” icon, then on the search box type in “coaster.”

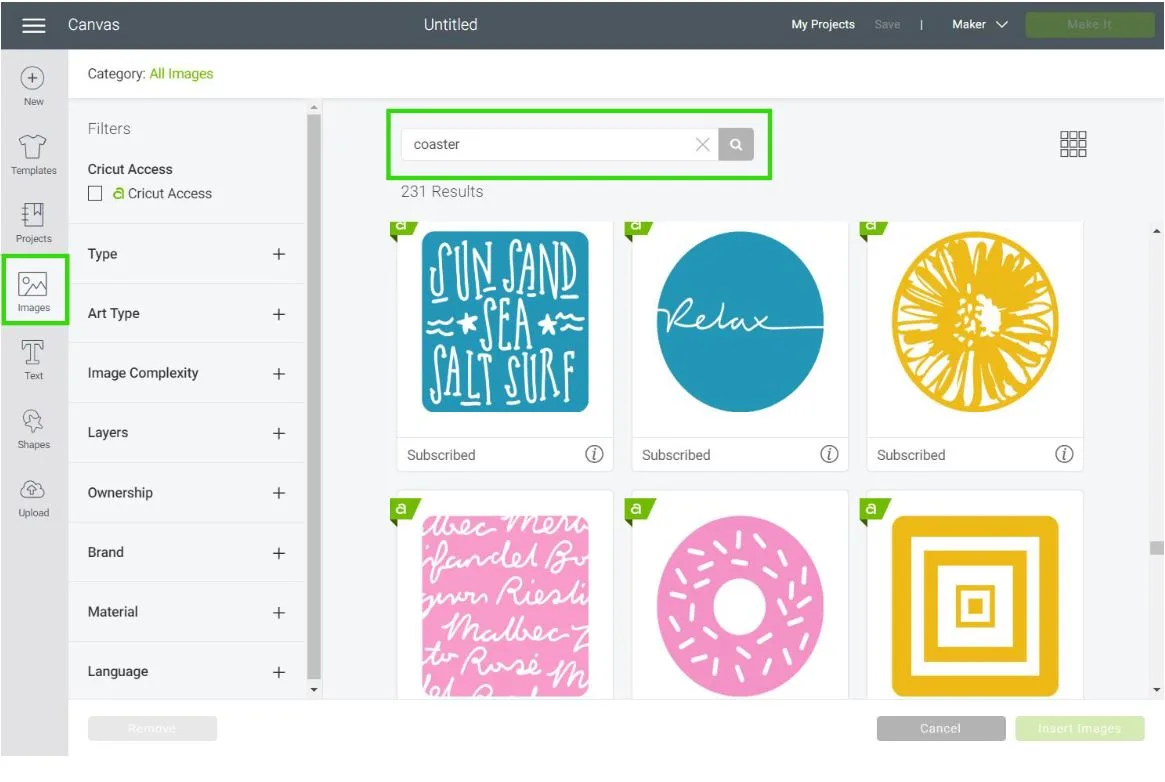
There are so many options to choose from, plus they keep adding more!
How to Size Coasters in Design Space
Sizing coasters in Cricut Design Space is one of the most critical steps, and that’s why I am covering this topic before I start the step by step tutorial.
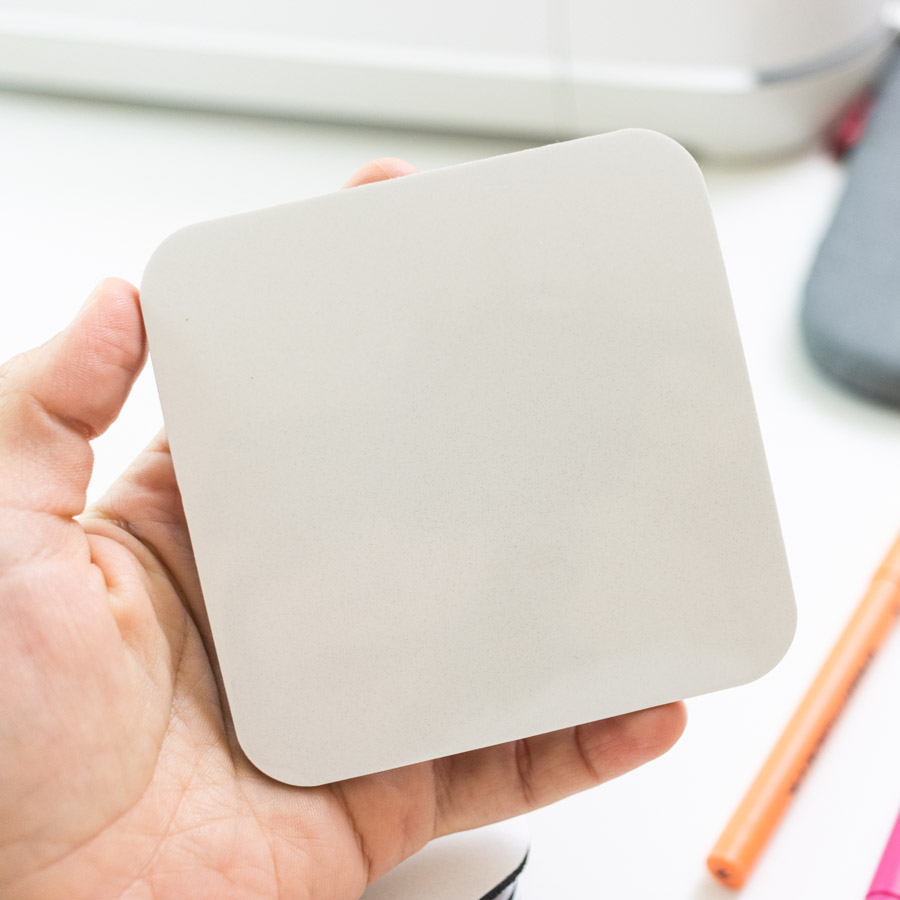
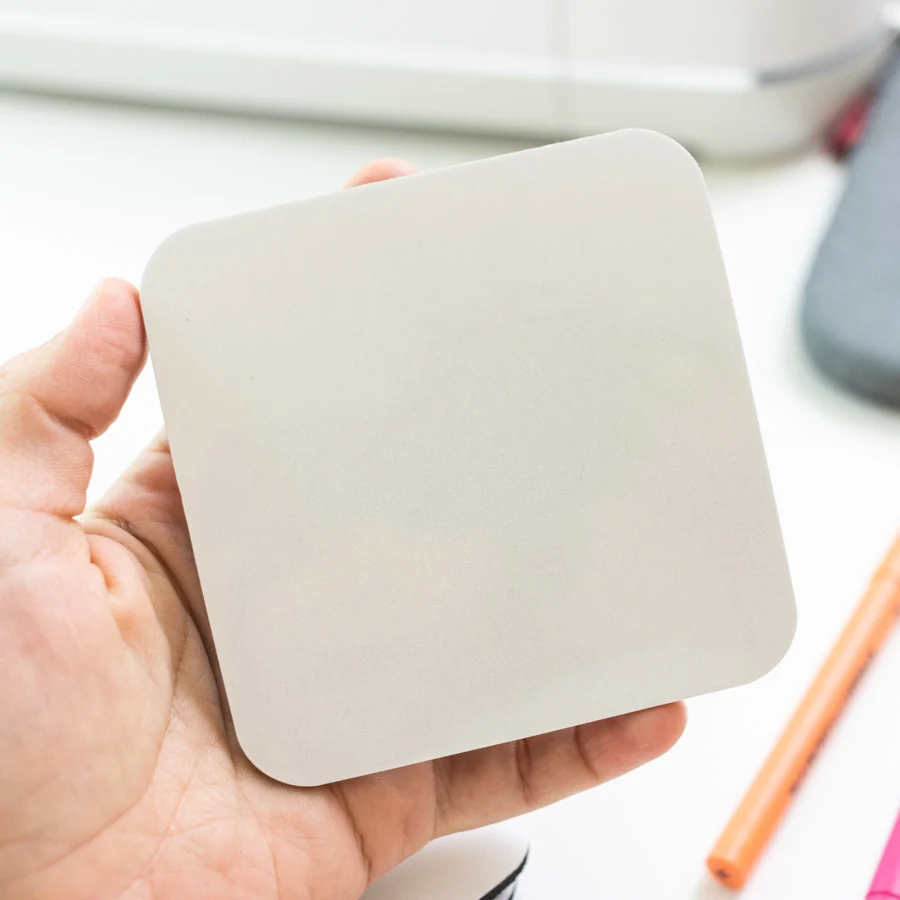
Take a look at both at the following photos.

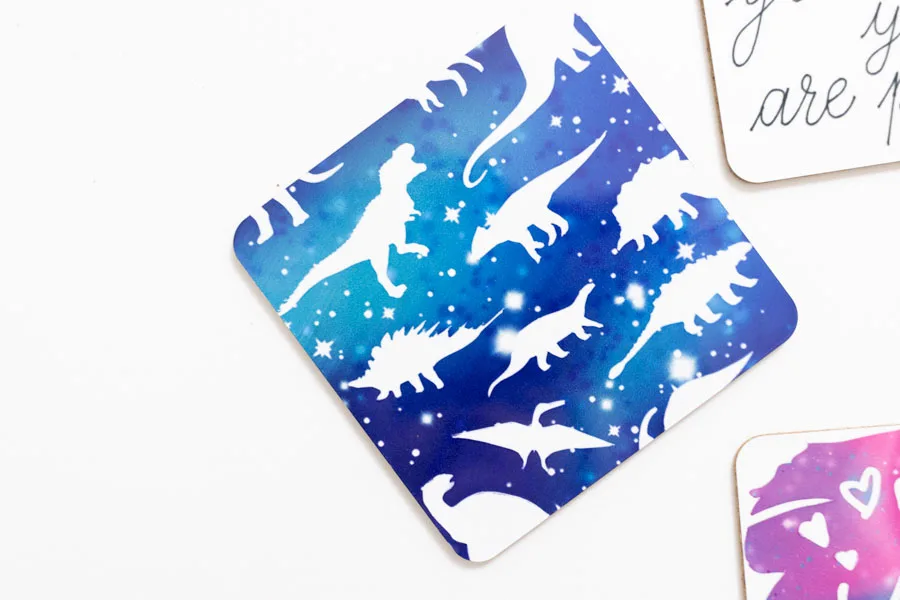
Design goes to the edge 
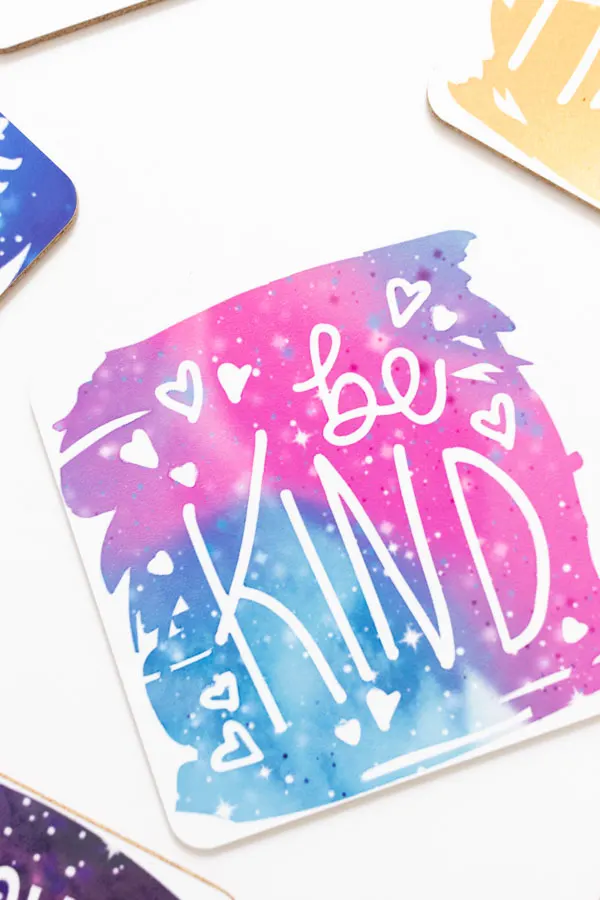
Design doesn’t go to the edge
When making coasters with infusible ink you will face many scenarios. However, you can classify them into two main categories.
- Design that goes to the edge: dinosaur coaster covers all edges
- Design that doesn’t go the edge: on the Be Kind coaster, there are blank spaces between the ink and the sides.
What is the big problem?
If your design goes to the edge, the transfer sheet can be misplaced and leave an undesirable white line on the coaster.
To avoid that, you need to size your project to perfection in design space.
If using designs that leave blank spaces between the ink and the edge of the coaster, size according to the coaster size.
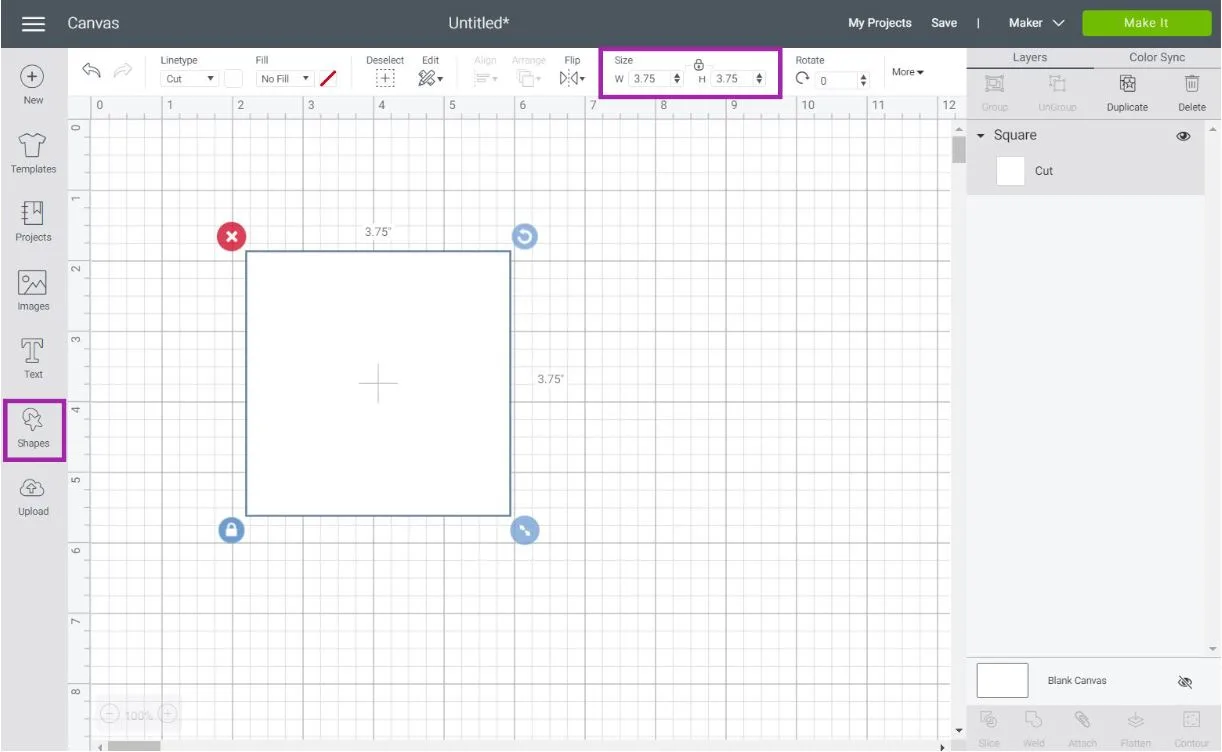
3.5″ x 3.5″ if using a ceramic one, and 3.75″ x 3.75″ if using a square (cork) coaster.
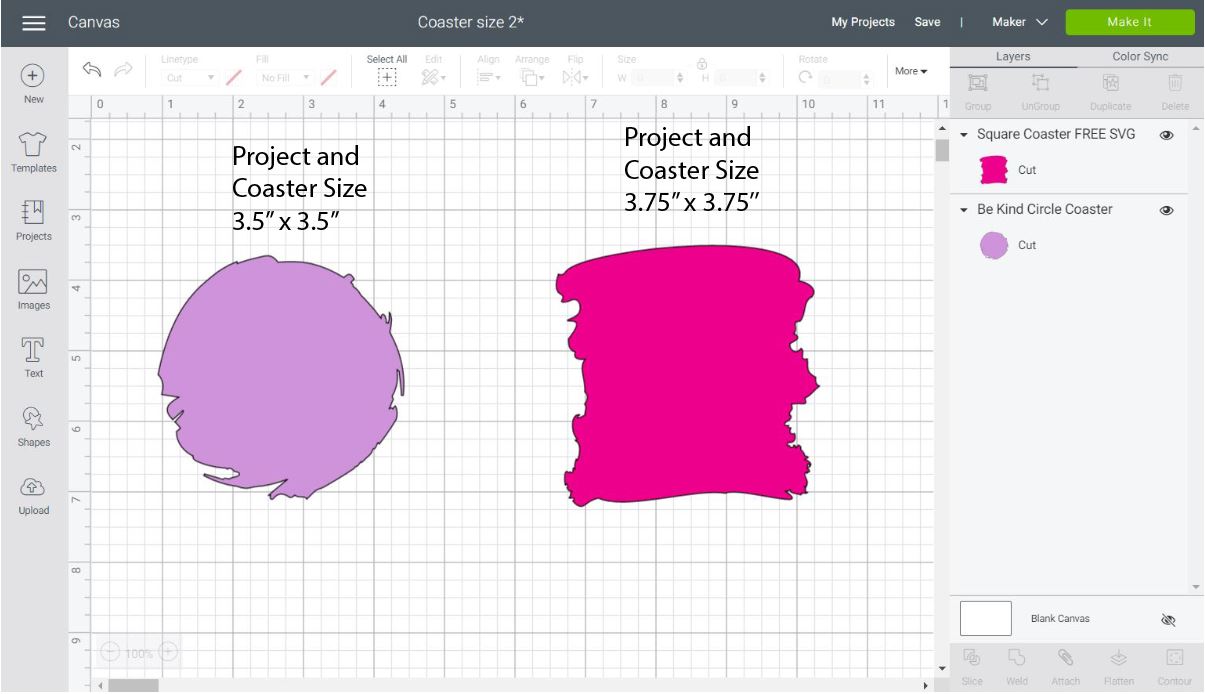
If your design is supposed to go along the edge of the coaster, I encourage you to increase the project size.
So, a circle coaster design would be 3.6″ x 3.6″, and a square design would be 3.85″ x 3.85.”
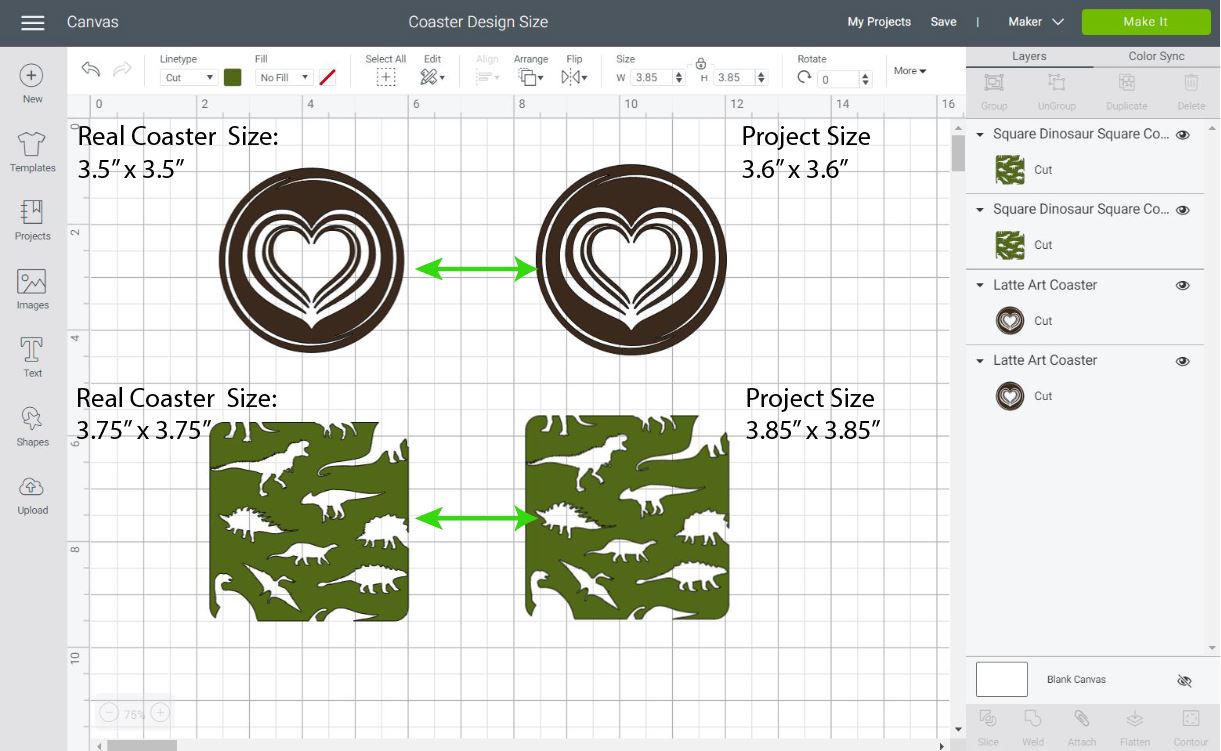
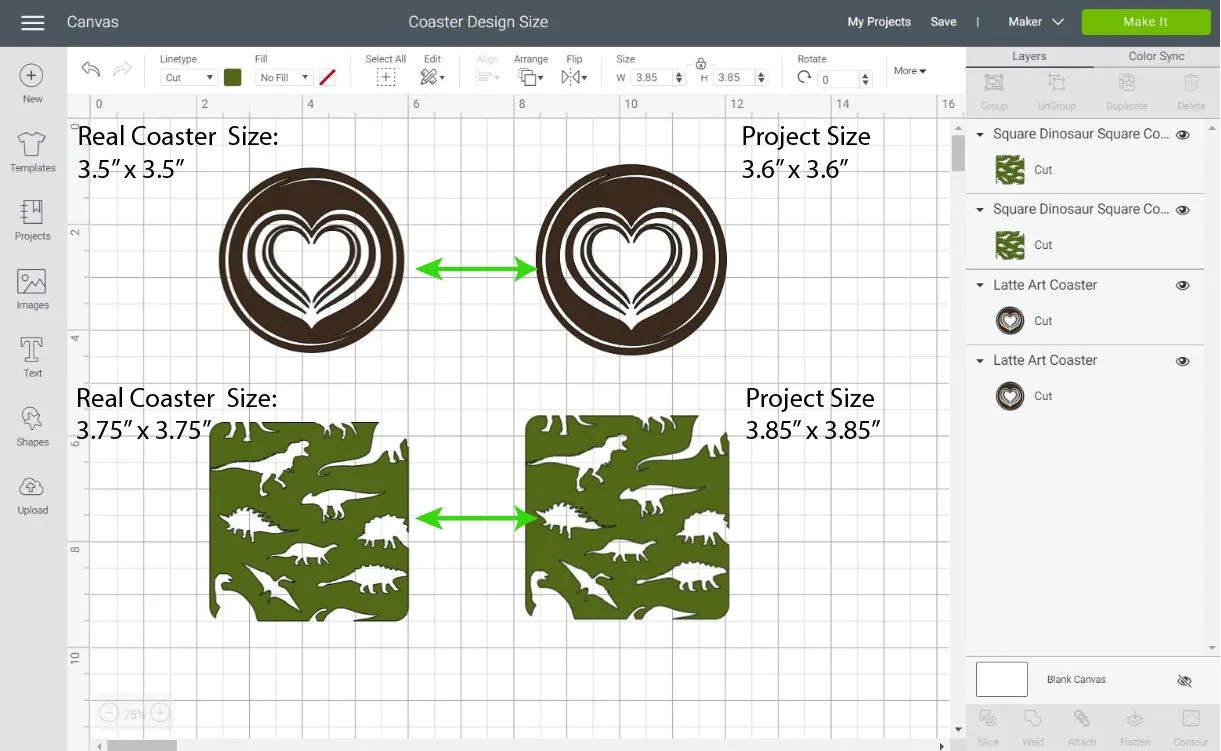
We are adding a 0.1″ to the diameter/length of the coasters to avoid white and ugly spaces on the edges.
This concept can also apply to off-brand coasters. If the ink goes to the edge, make your design a little bit bigger.
Now that the sizing is clear let’s make some coasters!
Coaster using Cricut Infusible Ink Transfer Sheets
First, we are going to make a square coaster!
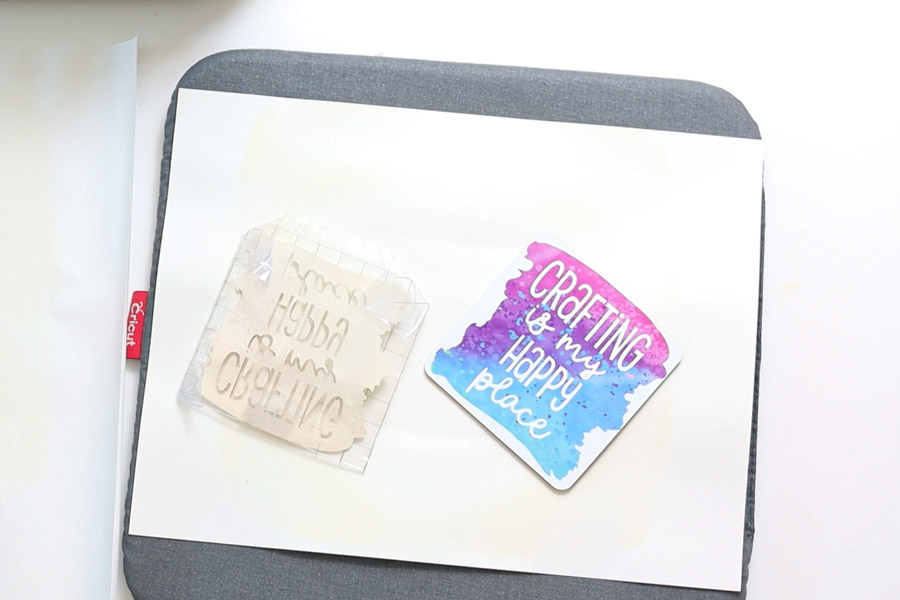
Open a new project in Cricut Design Space and click on the “Upload” icon on the left panel of the canvas.
Follow the prompts and upload the two practice files I provided you with when I listed the materials needed for this project.
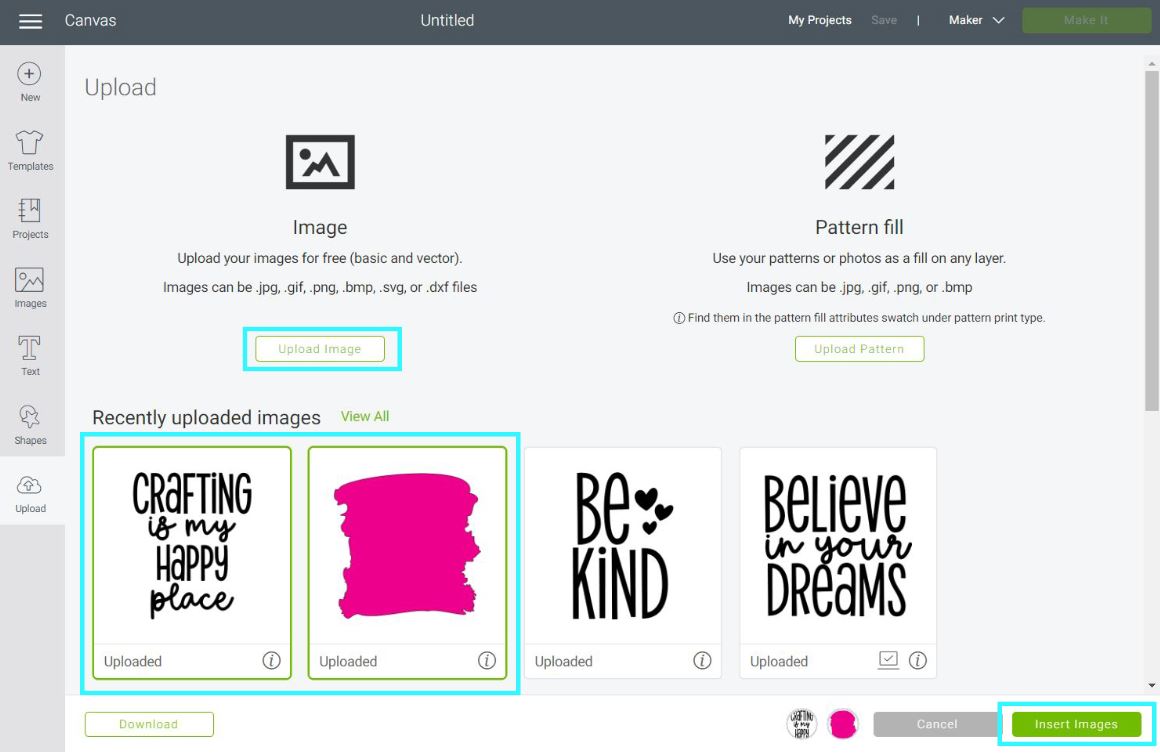
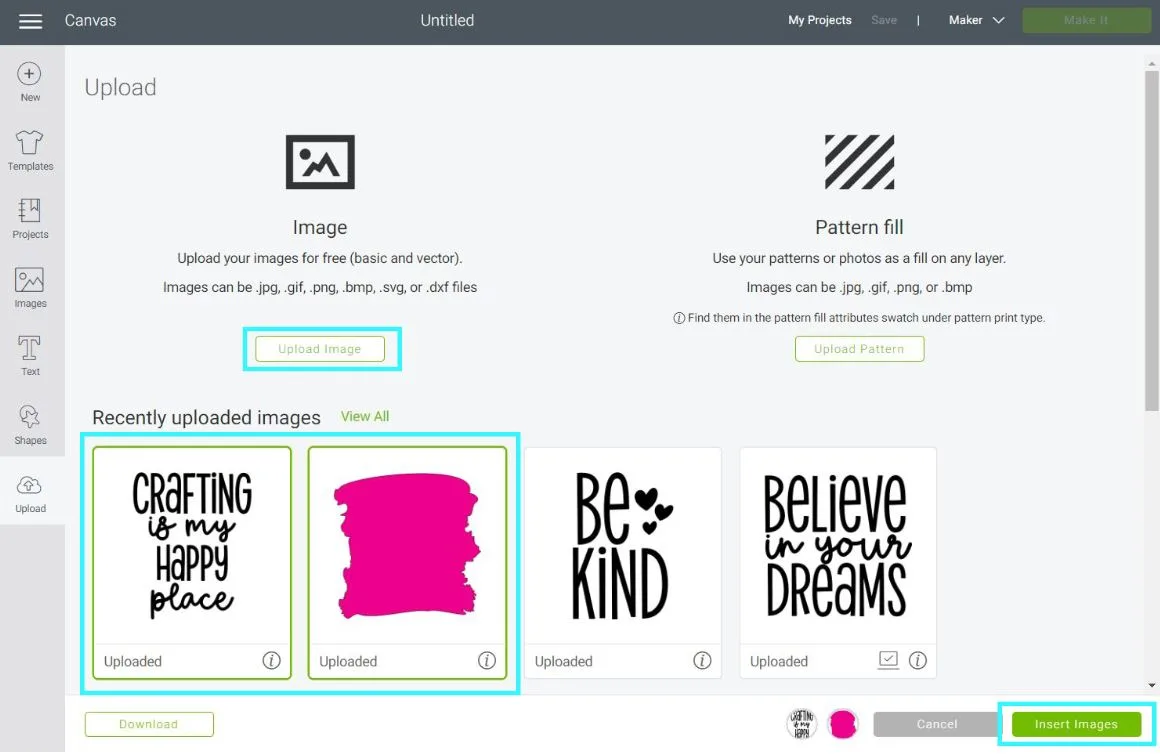
Once you upload them, select them from “Recently uploaded images” and click on “Insert Images.”
Now, let’s organize the files to make a coaster.
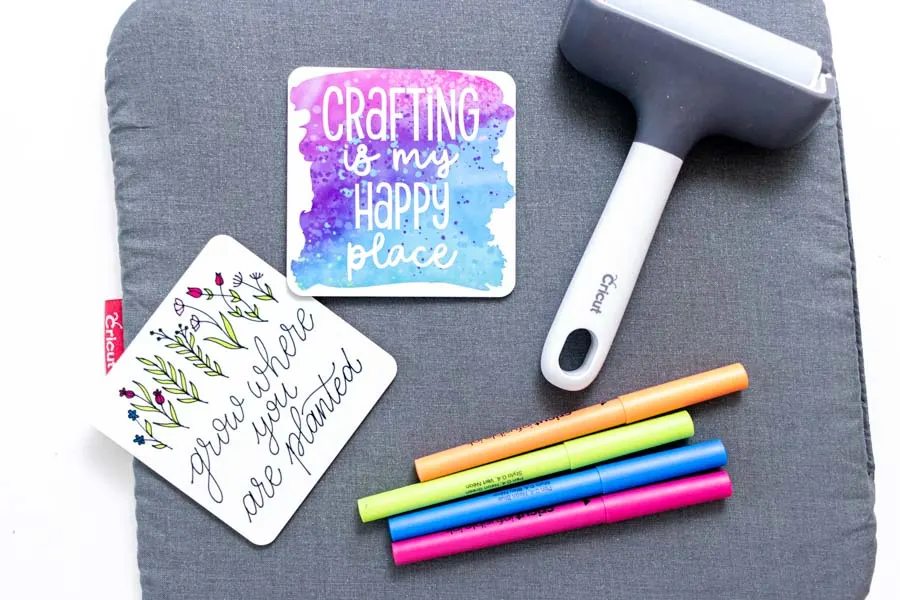
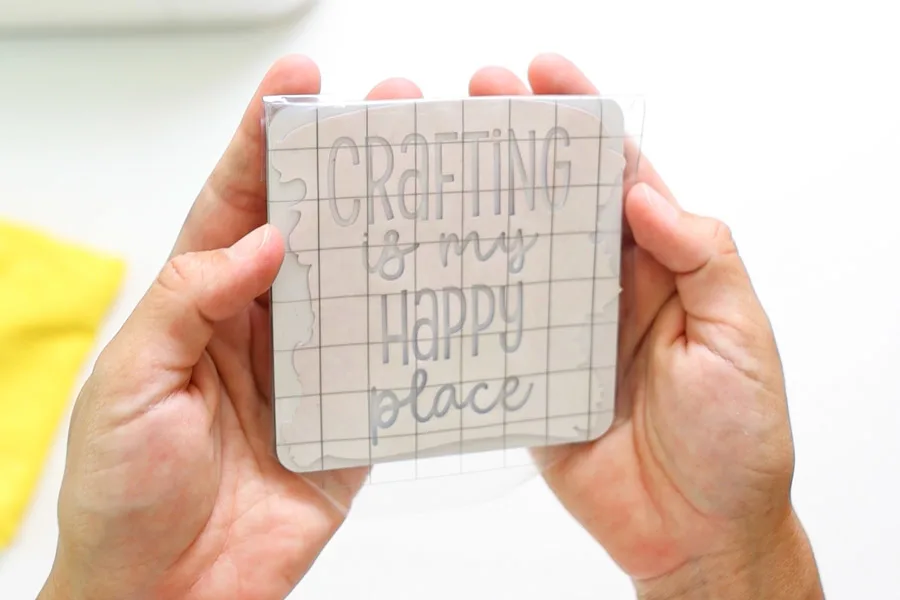
Select the “Crafting is my happy place” file and click on “Weld” at the bottom of the Layers panel to make the file into a single layer.

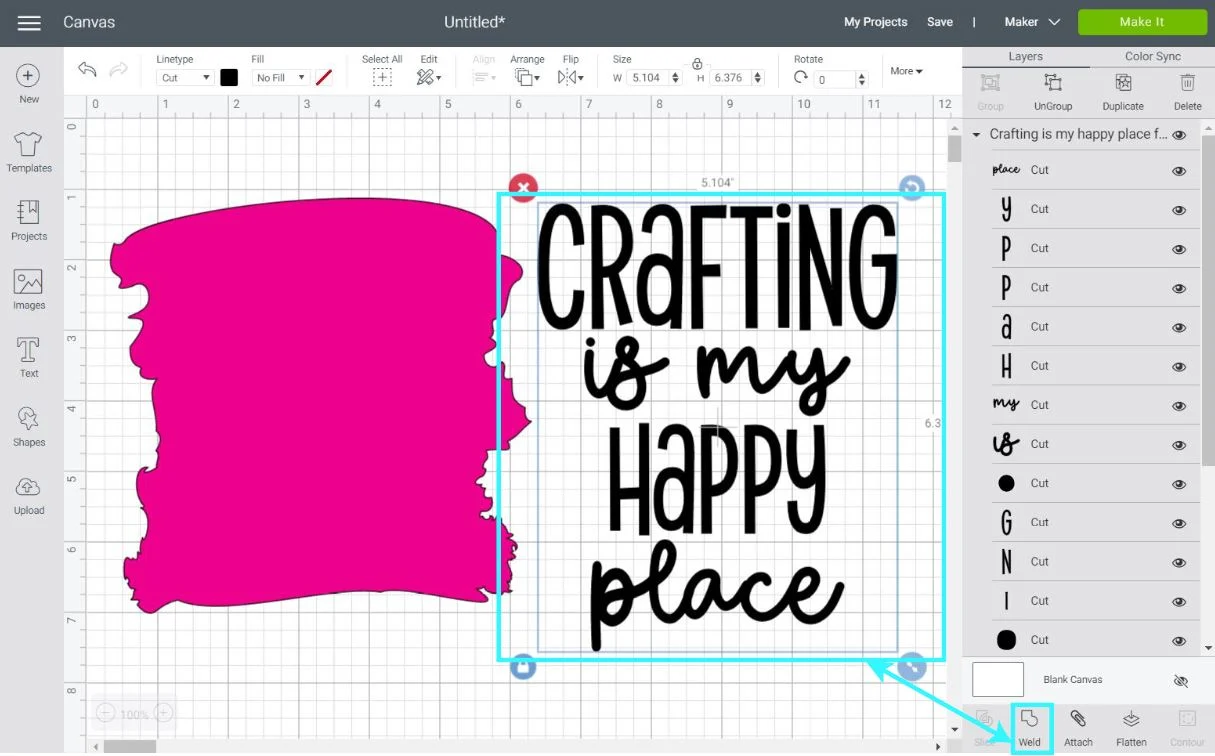
Resize it to fit in the center of the pink shape; then select both layers and click on “Slice” next to “Weld.”
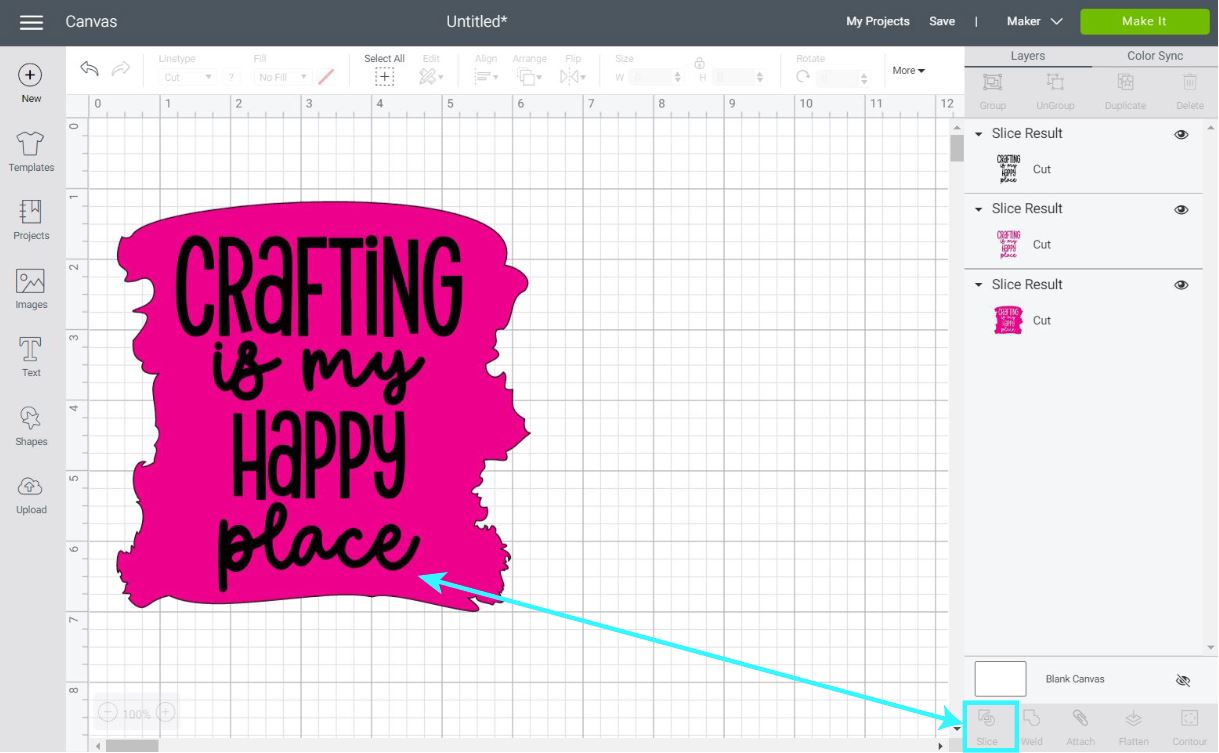
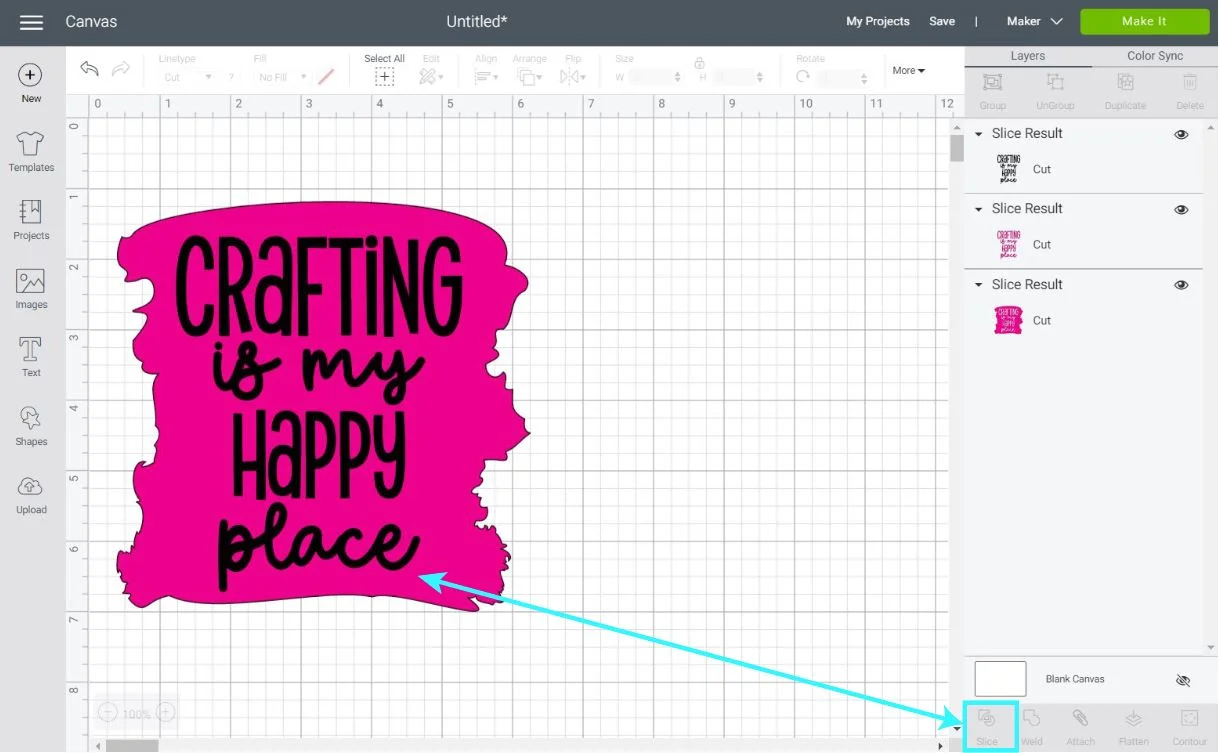
After slicing, you’ll have a couple of extra layers called “Slice Results.” Keep the layer that looks like the image down below.
If you are not familiar with “Slice” and “Weld” I invite you to take a look at the tutorials I wrote about these two powerful tools.
Now it’s time to resize the coaster.
Remember the two types of sizing I explained before?
This particular design doesn’t touch the edge of the coaster. Therefore I will resize the width of it to 3.75.” Since the proportions are locked, the height will be changed automatically.
If the height ends up being larger than 3.75″ in, start with the height and not the width.

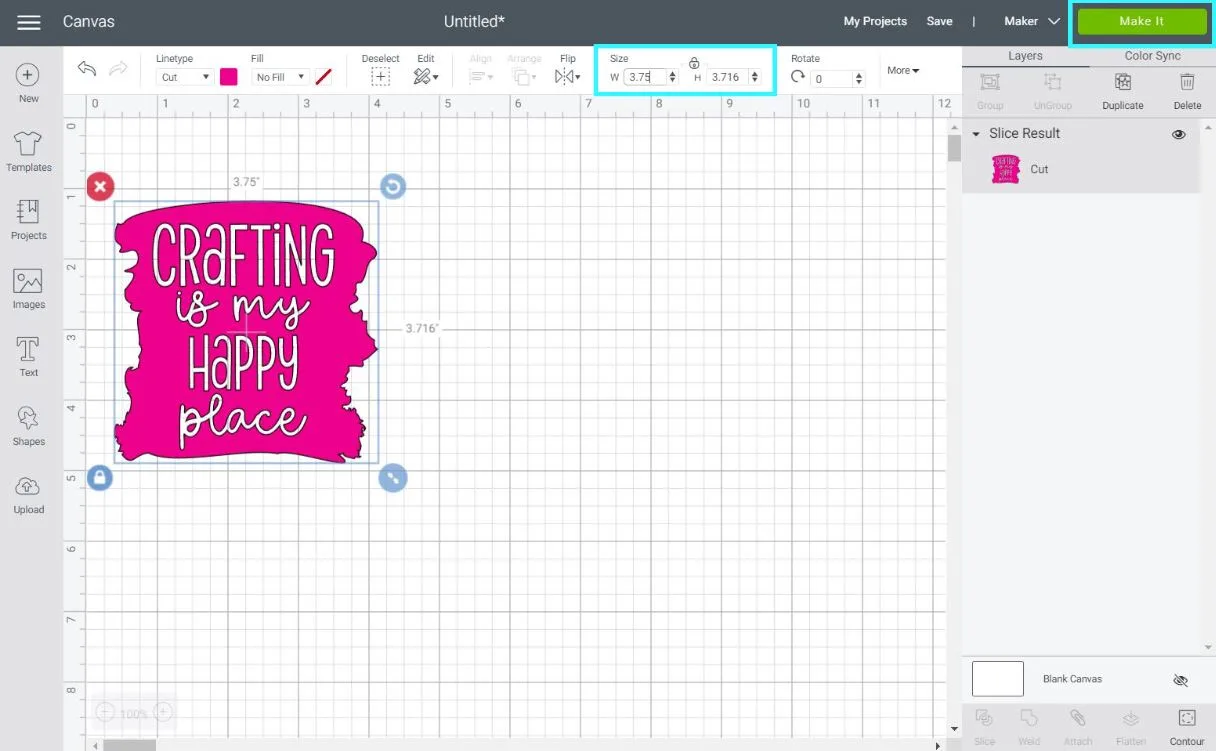
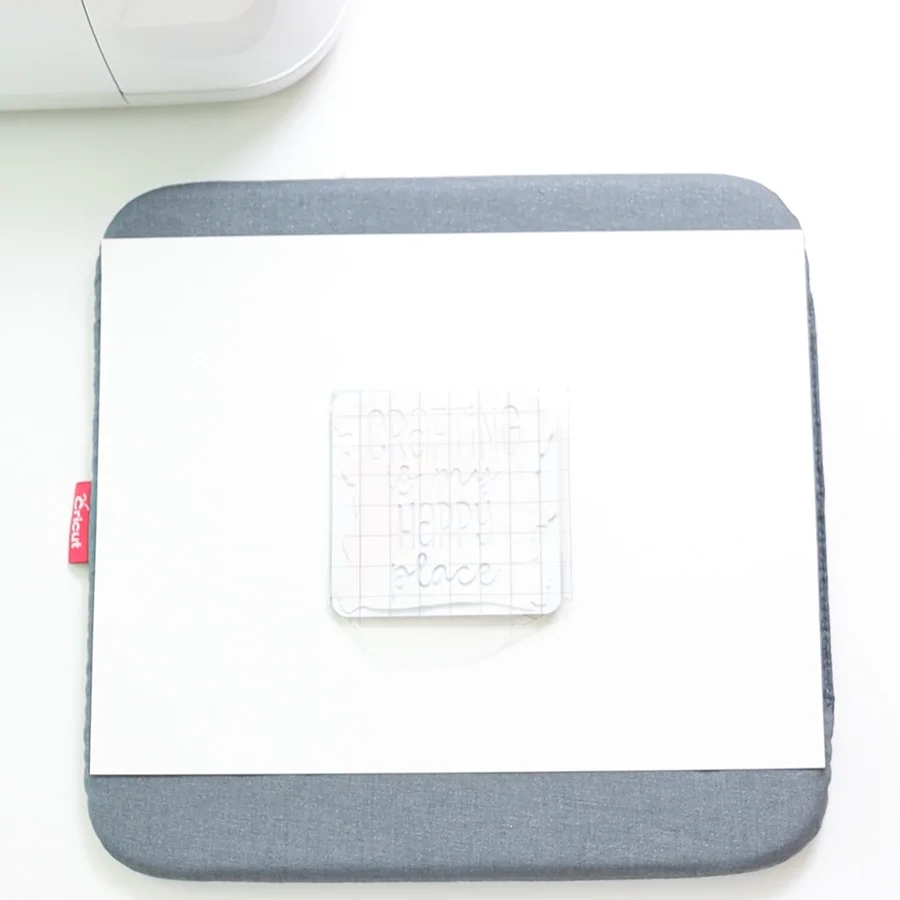
After resizing, click on “Make it” on the upper-right corner of the canvas to go the “Mat Preview” window.

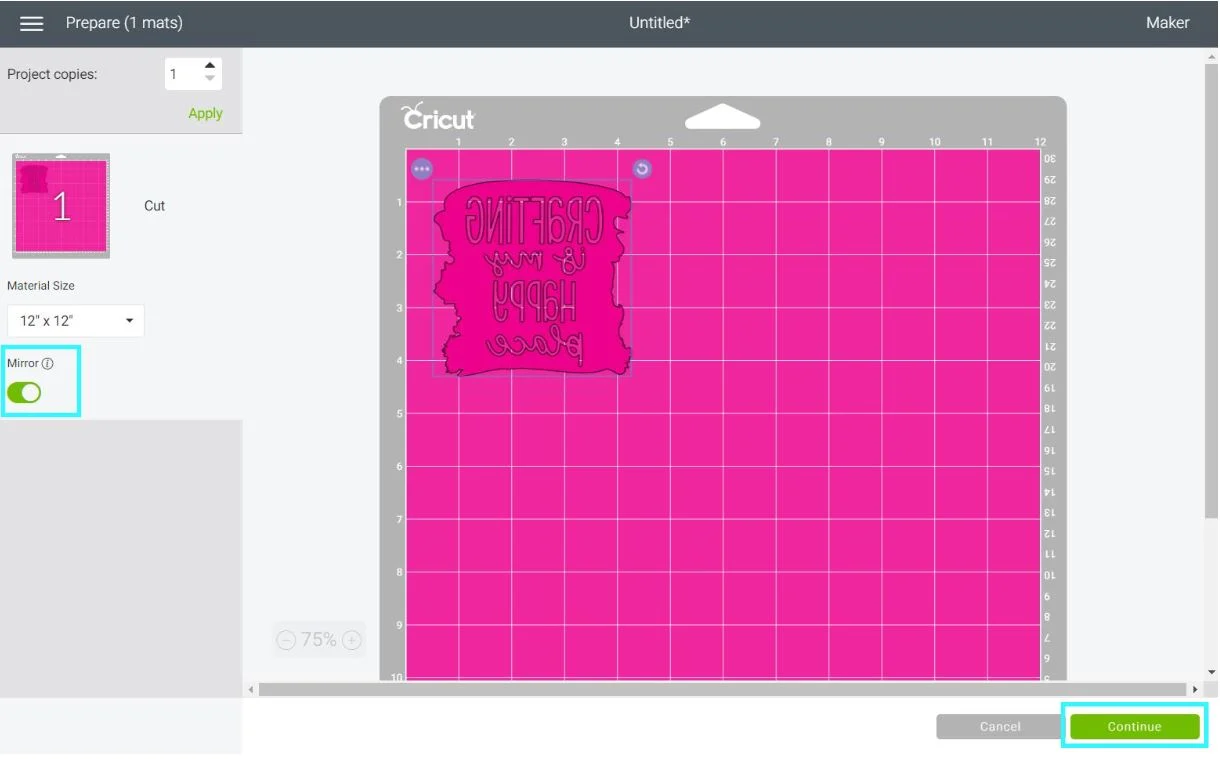
Anytime you use Infusible Ink, either pens or transfer sheets, you have to “Mirror” your image. If you don’t do this, your design will look backwards once you transfer it!
After mirroring your image, click on “Continue” to select the materials.
This project can be made with the Cricut Maker, Explore, and Joy!
You will most likely need to click on “Browse All Materials” and search for “Infusible Ink Transfer Sheets.”
If using the Cricut Joy, change the pressure from default to more. I found it easier to weed the project when I did this.
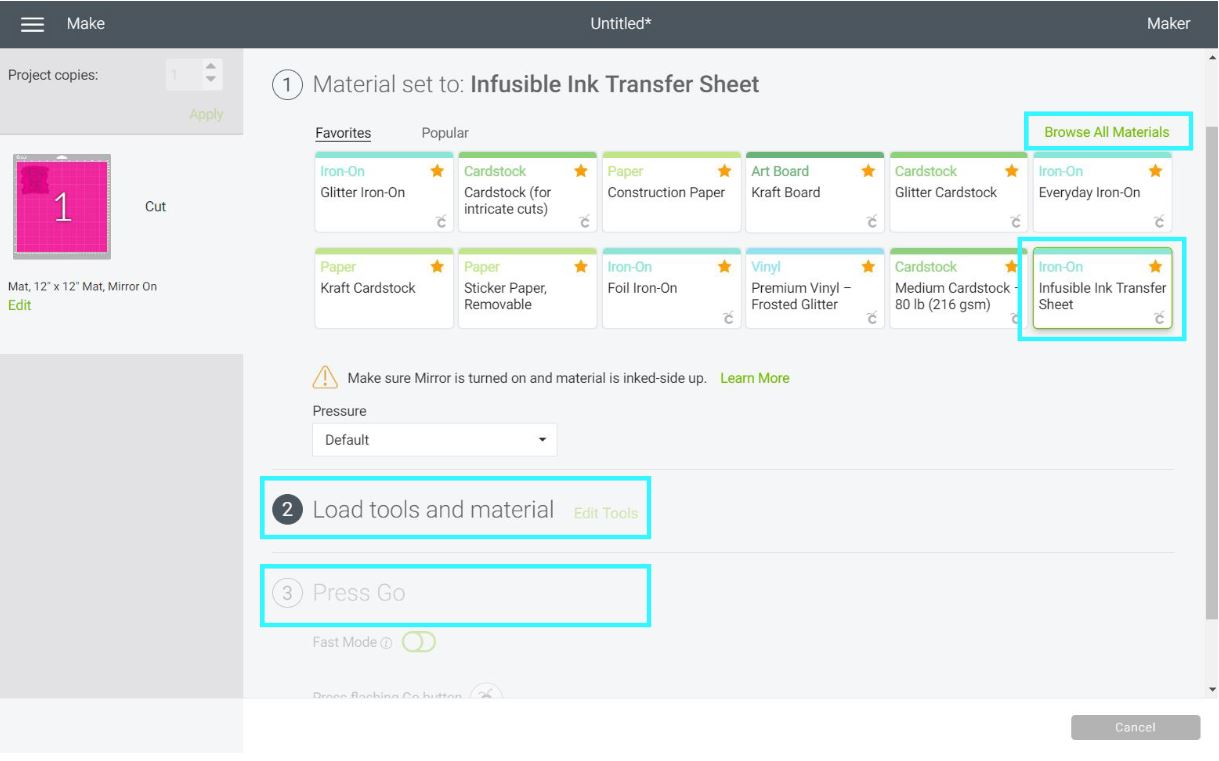

Install fine point blade, and now let’s move to real pictures.
Important: Before you manipulate the transfer sheets, go and wash your hands with soap and water, and dry them thoroughly.
Infusible ink will get ruined if it comes in contact with moisture from water, lotion, sweat. If your hands tend to sweet, some surgical gloves can help as well.
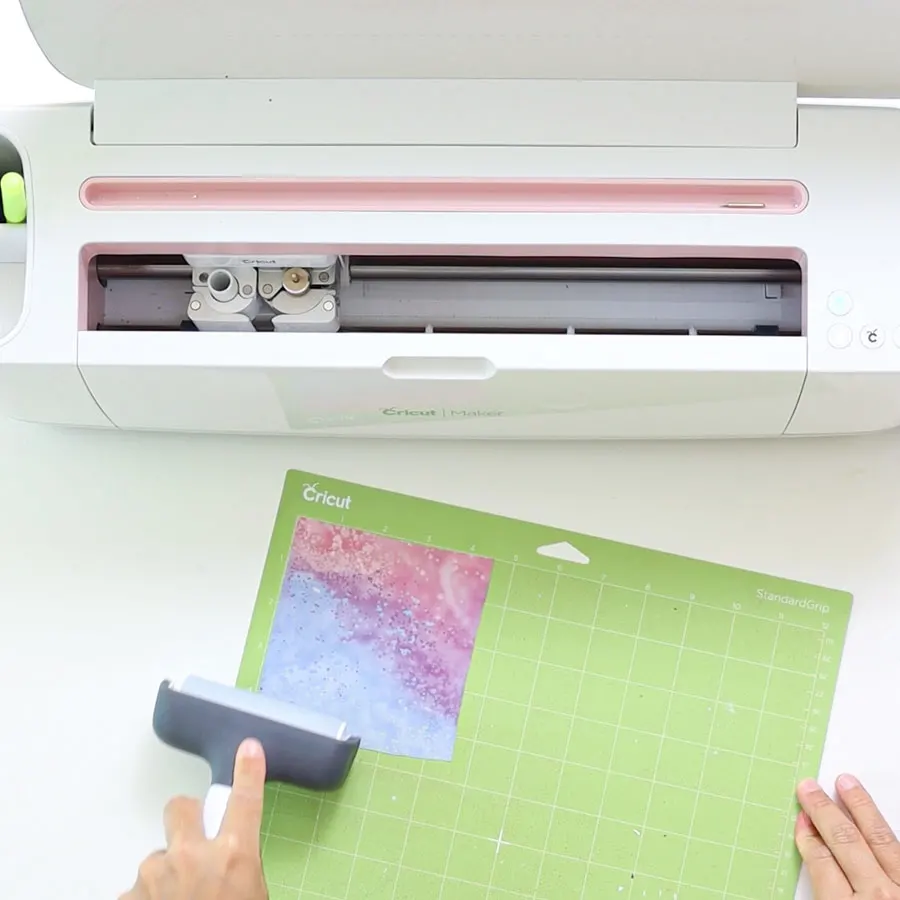
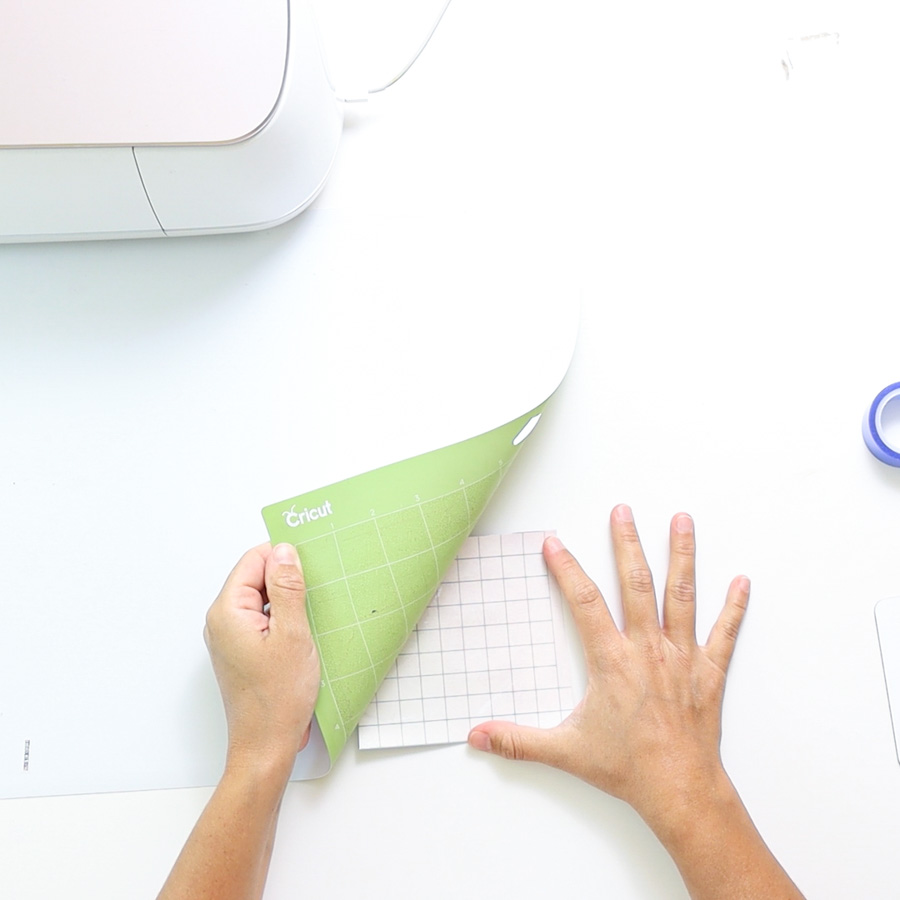
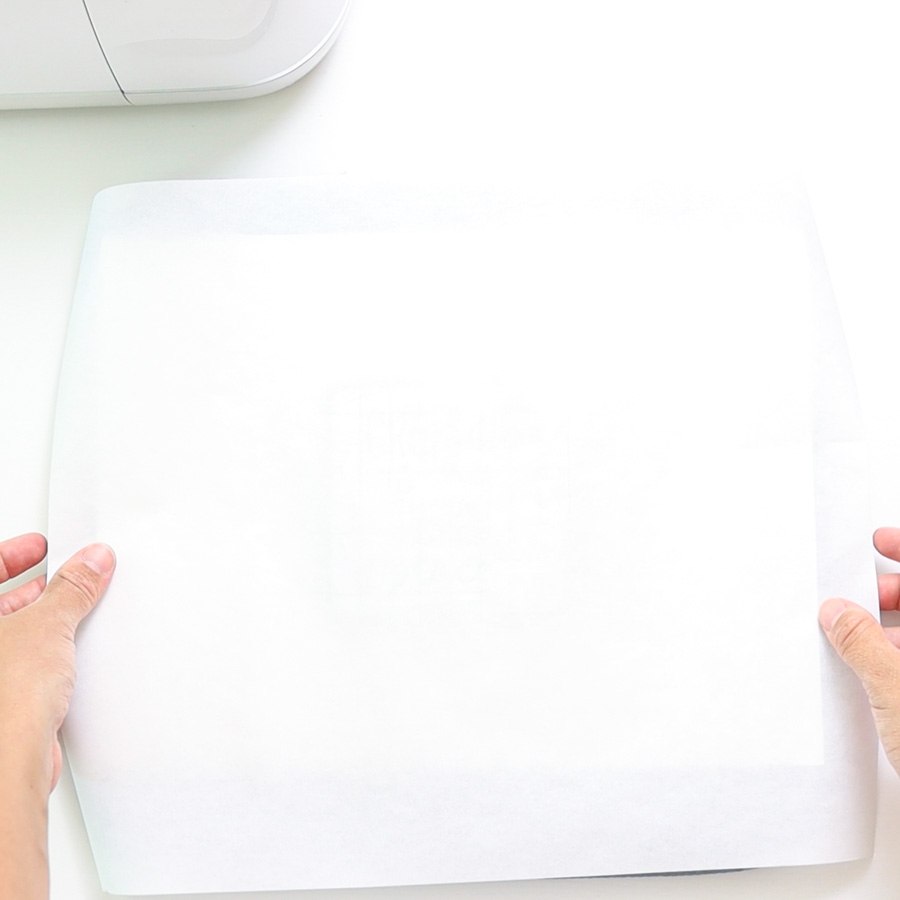
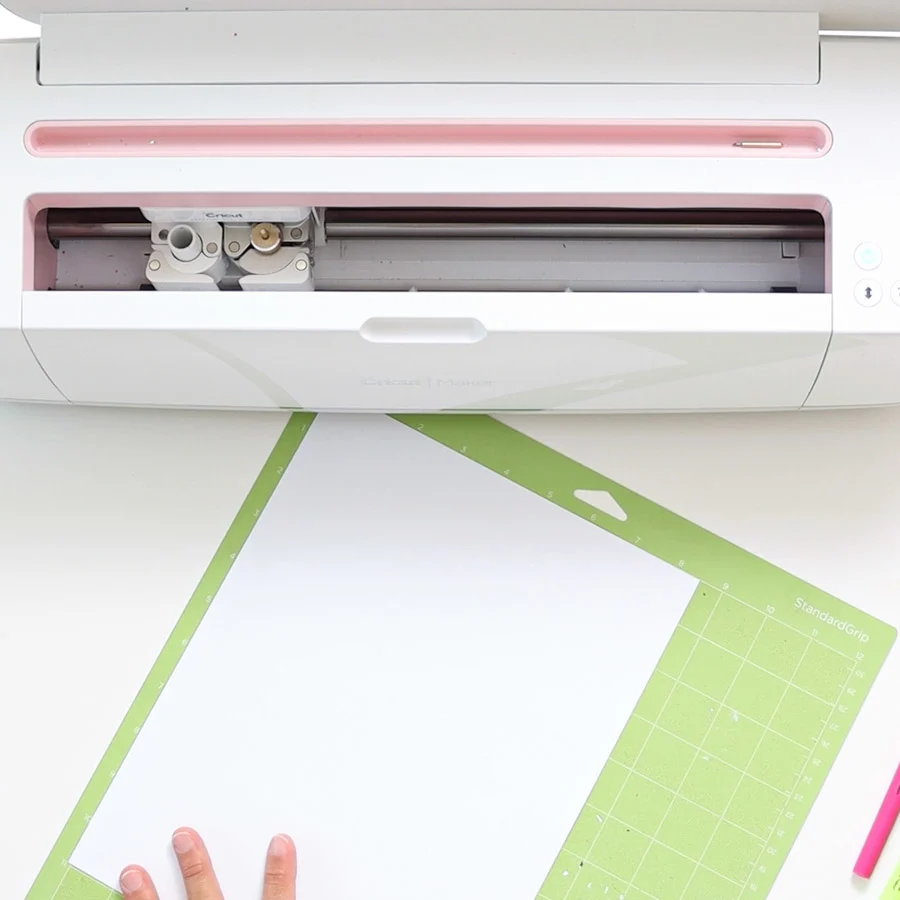
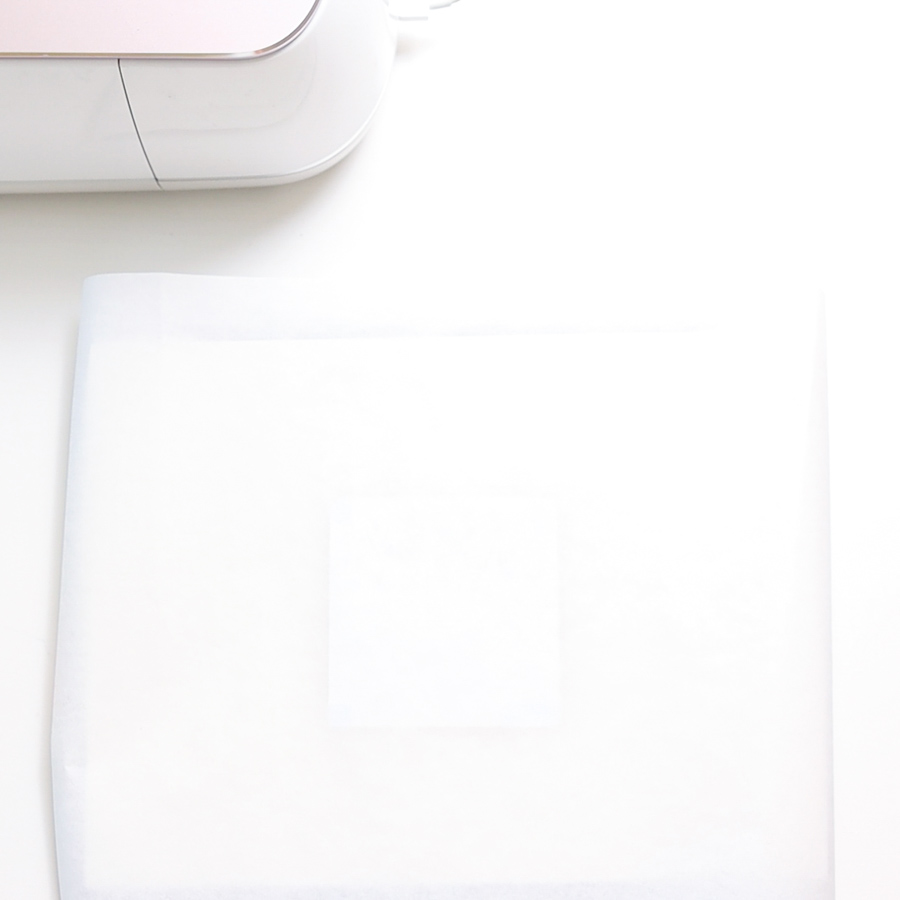
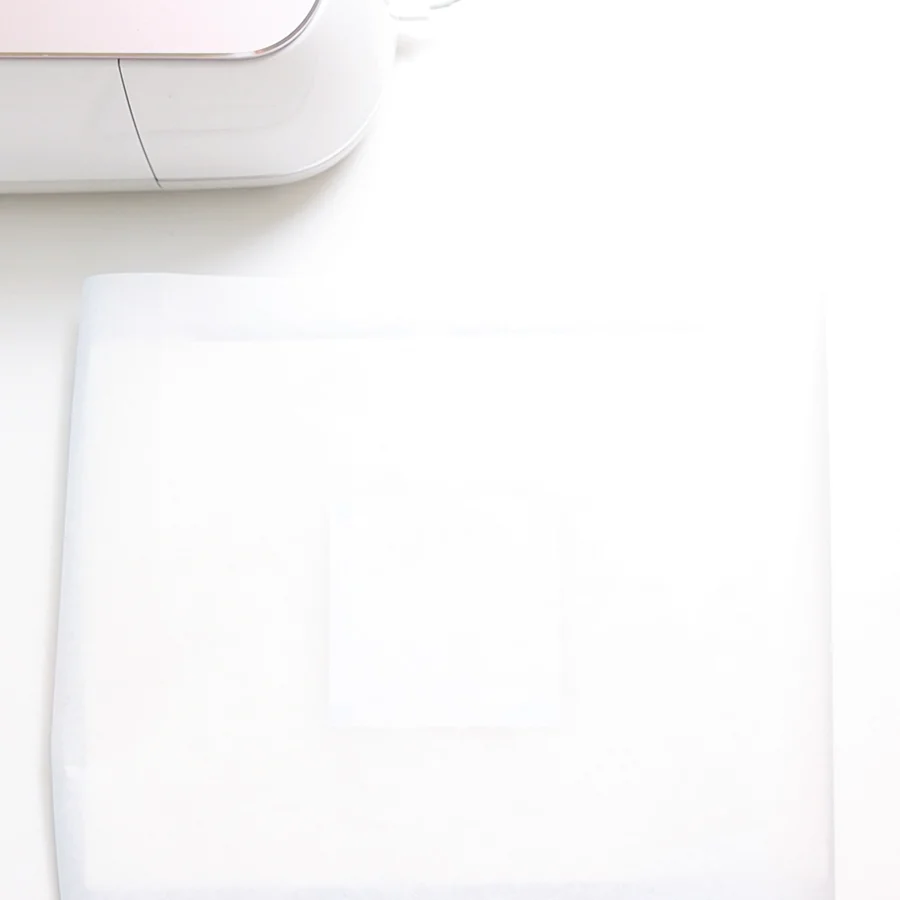
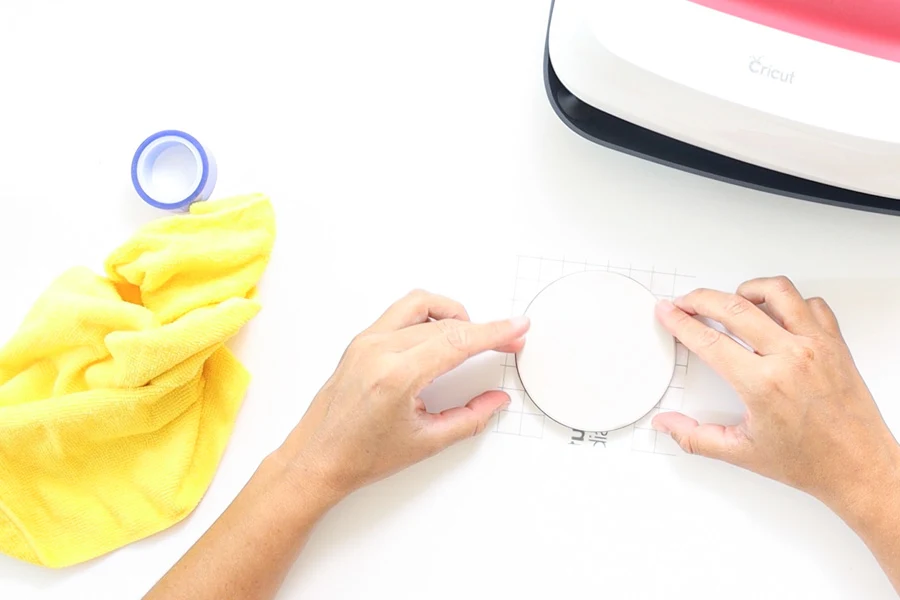
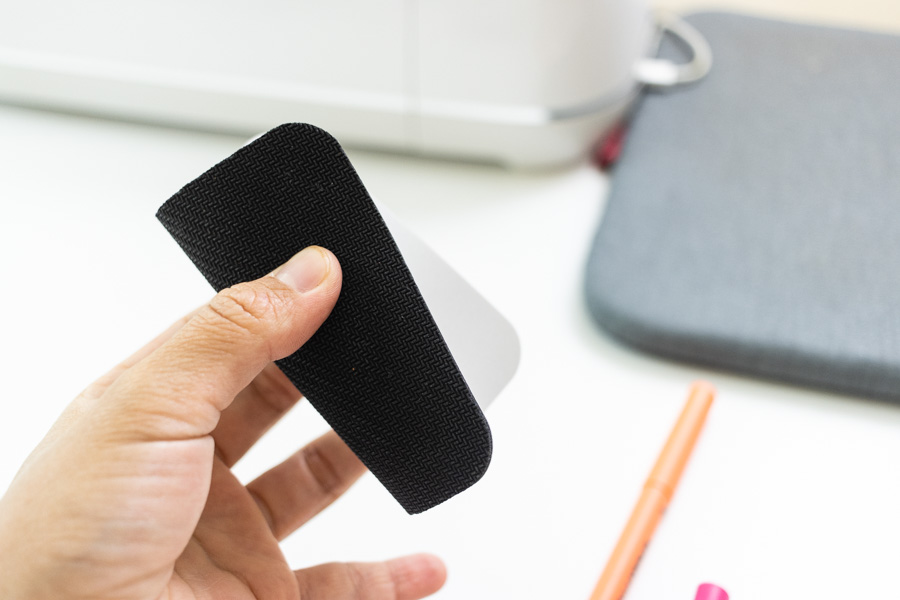
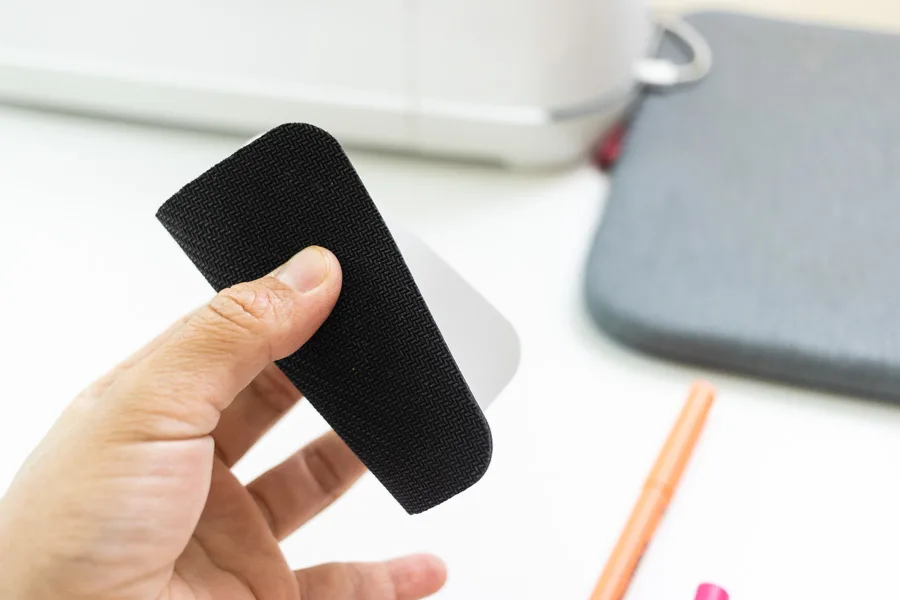
On your green mat, place the infusible ink transfer sheet. You can set the entire sheet, or just what you need.
Since I wanted to use a particular spot, I just cut around the sheet.
You can use your hands or a clean scraper to smooth out the sheet on the mat (it gets bubbly sometimes).
My favorite tool in the Cricut world is the brayer, and that’s what I used on this project.


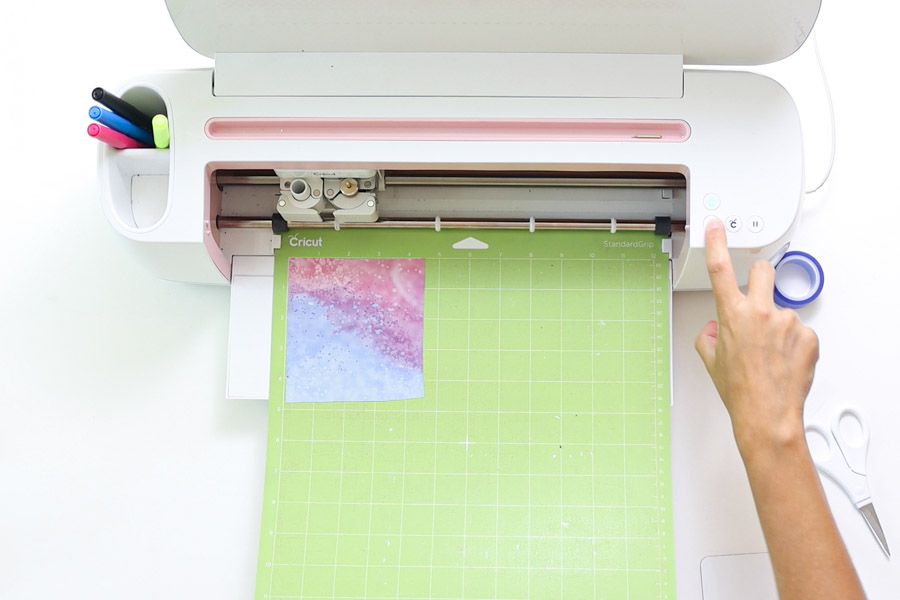

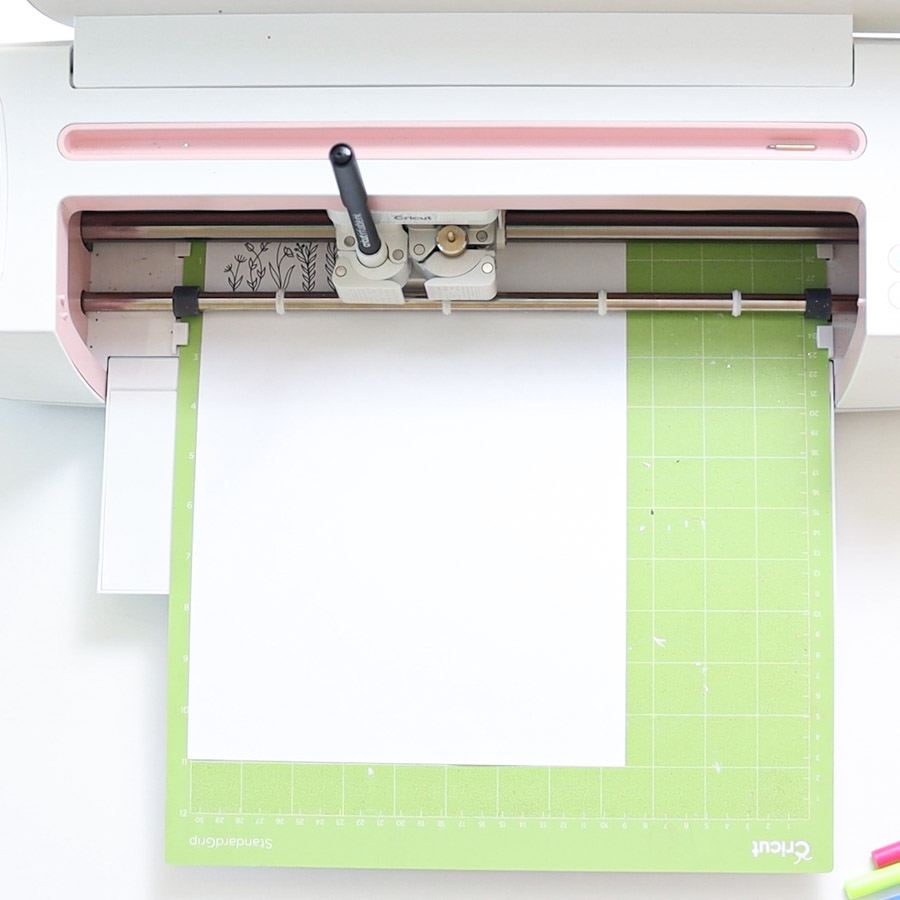
Load mat, and tap the flashing “Go” button to cut the design.
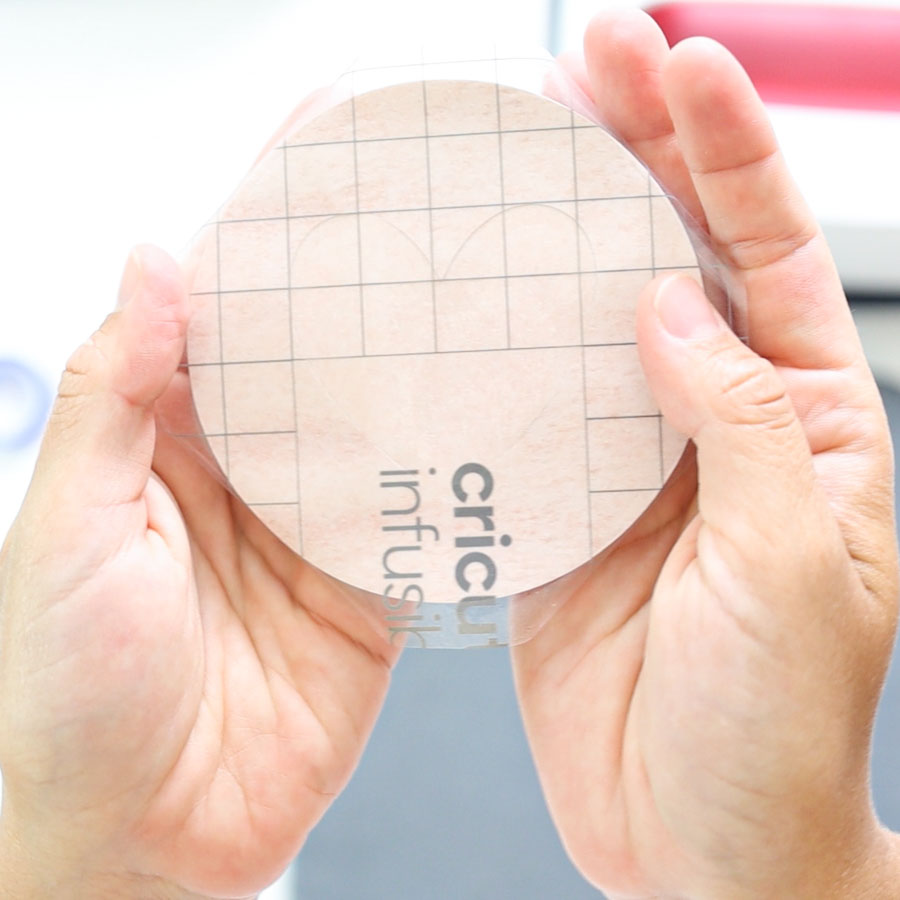
When the cut is complete, unload the mat and bend it to release the transfer sheet.
Now, it’s time to weed!


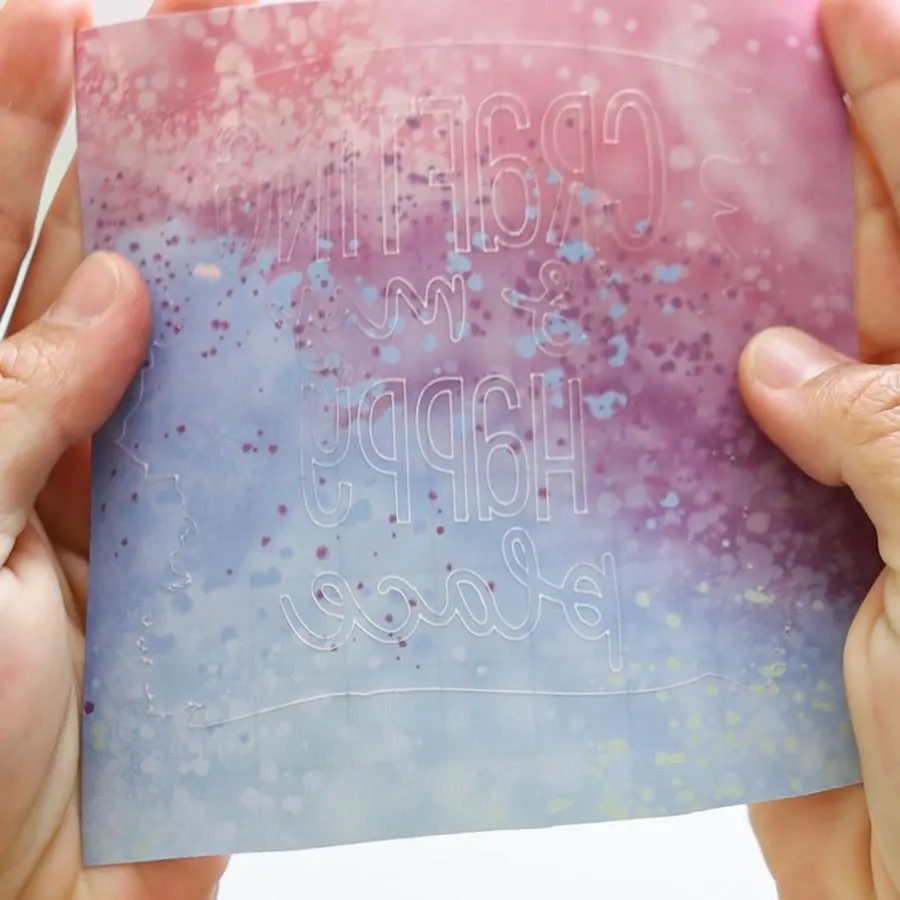
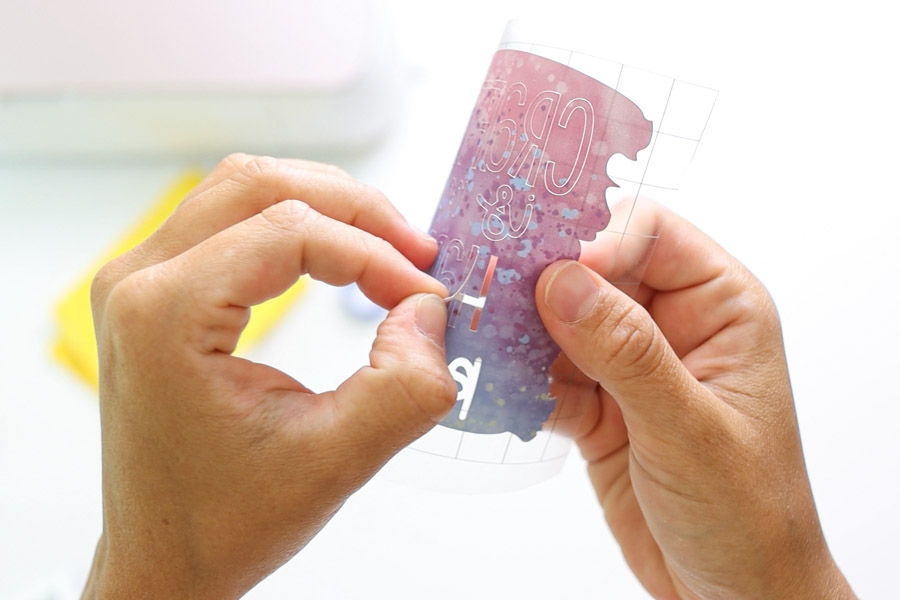

Unlike vinyl, you don’t need special tools to weed infusible ink transfer sheets.
Simply use your hands and start removing the pieces you don’t need. Once in a while you will come across to a hard to weed section, in that case, some tweezers will be your best friend.
Now let’s transfer to coaster!
Transfer Infusible Ink Transfer Sheet to Coaster
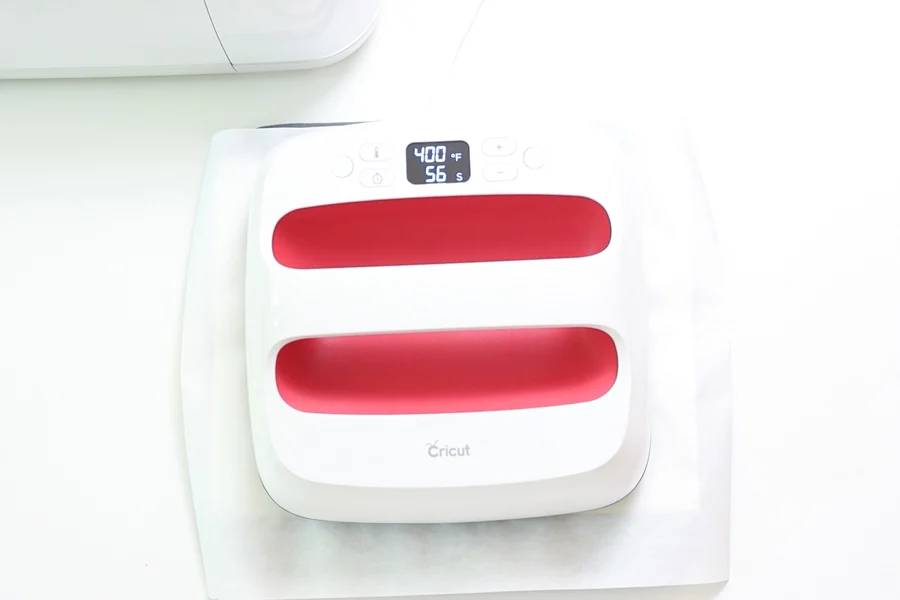
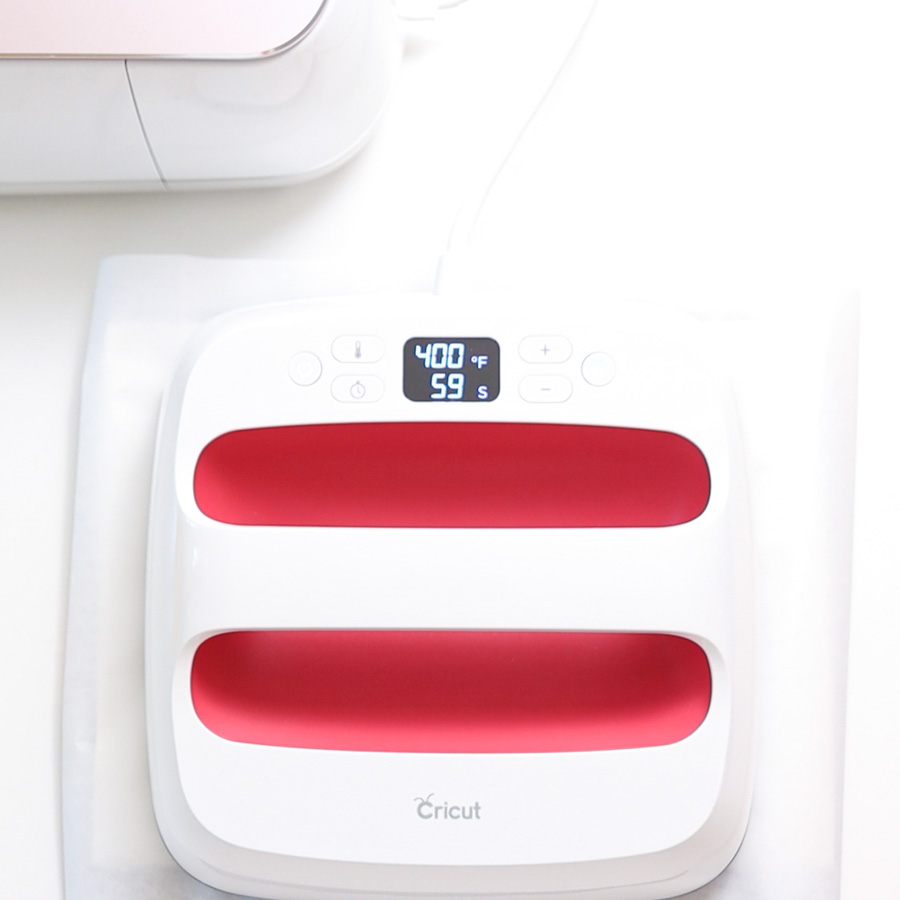
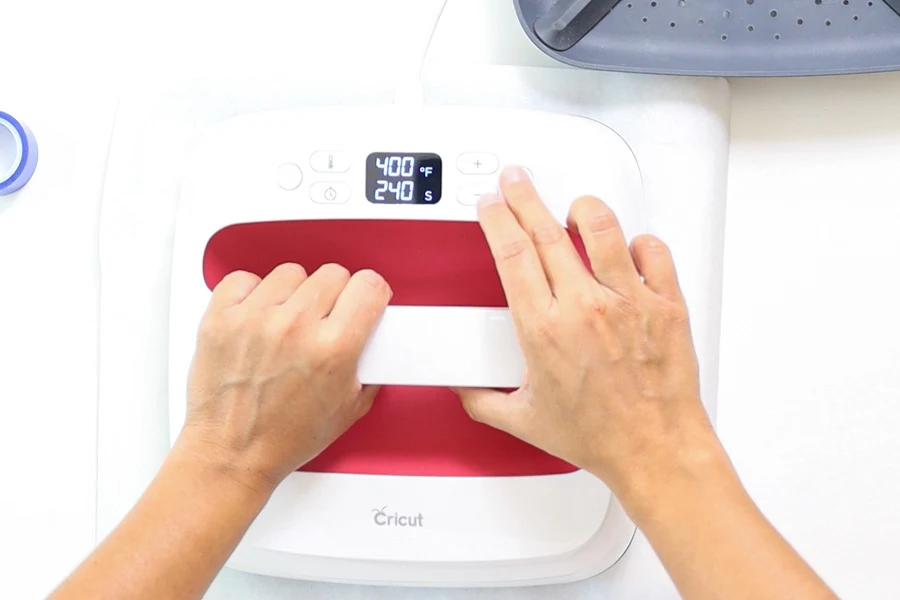
Preheat your Easypress 2 to 400°F (set timer for 60 s) or your Easypress to 360° F (set timer to 120 s).
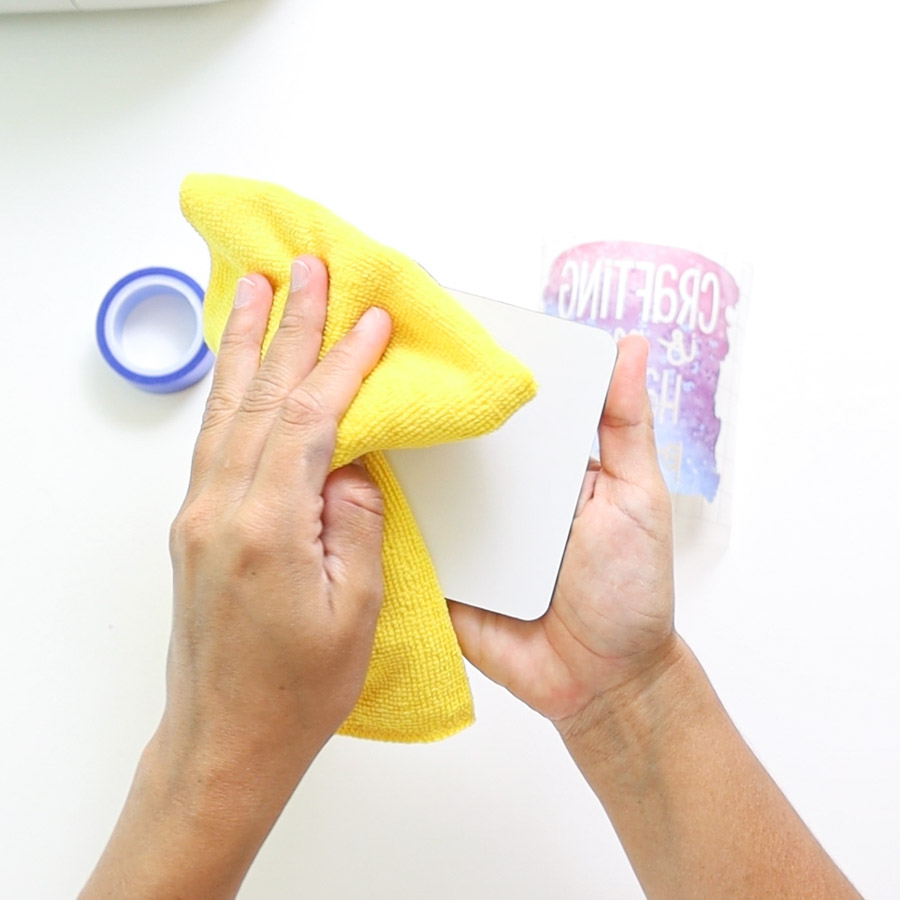
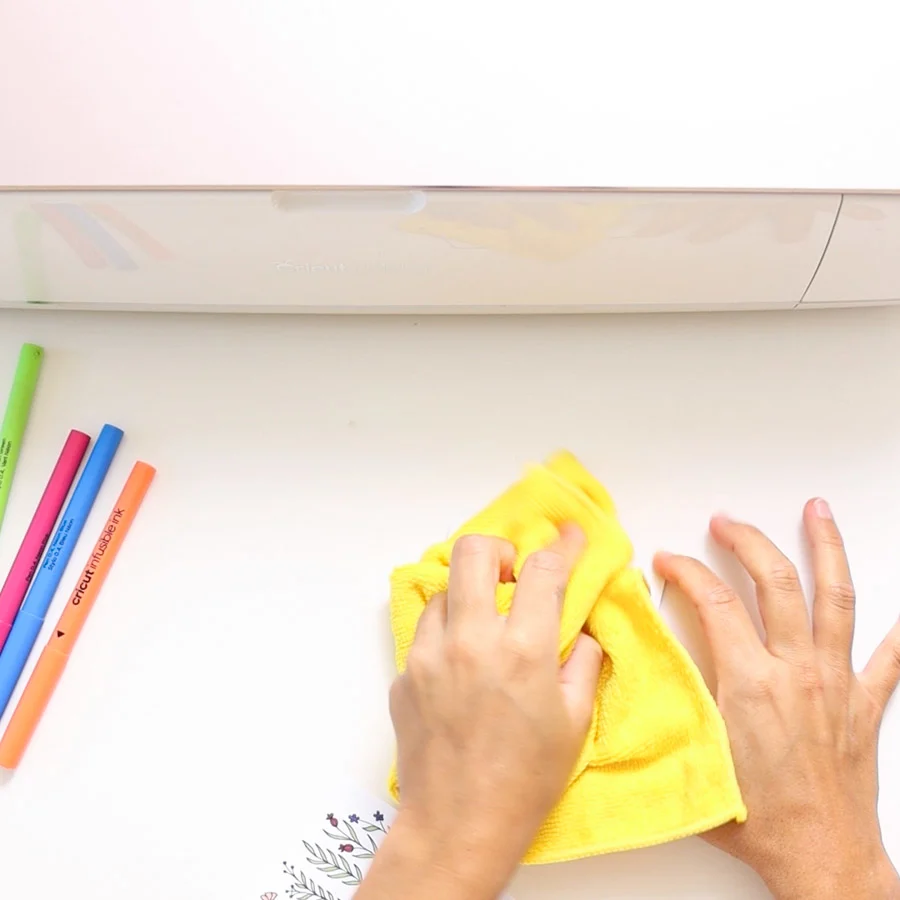
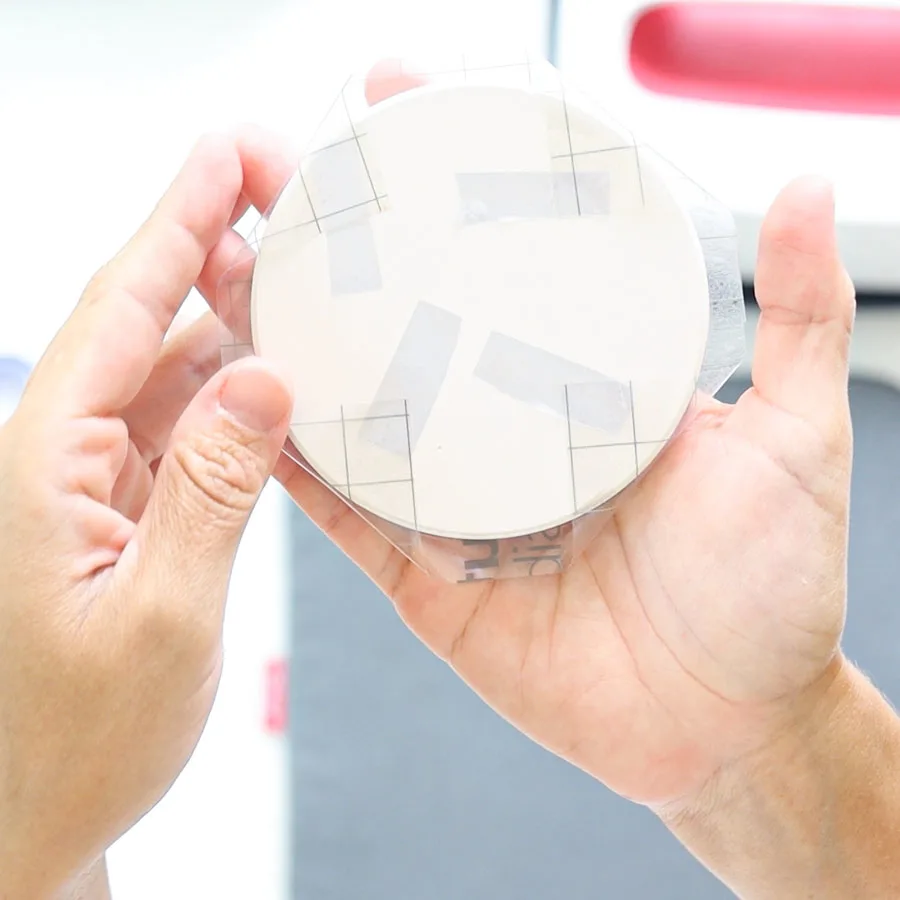
Wipe down coaster with a microfiber cloth to get rid of any possible dust or hair particles.
When using transfer sheets, Cricut doesn’t recommend transfer tape.
Well…
I tried it once without the tape, and I ruined my coaster, so I DO RECOMMEND heat transfer tape.
Avoid touching the transfer sheet with the tape; instead, tape from the carrier sheet to the cork.


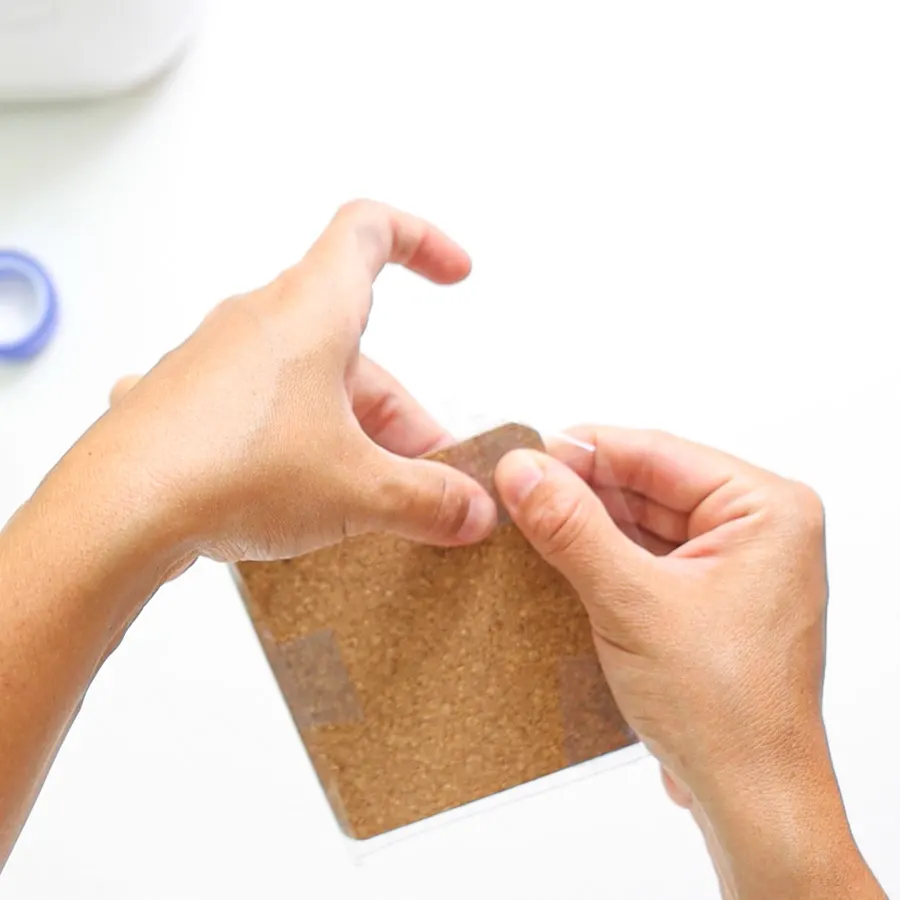

After taping, you need to form some sort of a sandwich, here’s the order of the layers.
- Easypress Mat (Bigger that the heat place)
- White Cardstock – 80 lbs (bigger than heat plate).
- Square coaster white side up with design facing down
- Butcher Paper
Important: Ceramic coasters are placed differently during the transfer process (I will cover this later on).


Place Easypress 2 on top of the “sandwich” very gently. When I say gentle, I mean it, don’t rush it!
Let go of the press and let it sit for 60 seconds (120 seconds if using the Easypress 1).
When the timer is up, very carefully lift the press and let your project cool off completely.
In my experience, square (cork) coasters, take about an hour to cool off. However, it’s your responsibility to be careful and make sure you don’t burn your hands.

Doesn’t it look so pretty?
This was one of my first coasters, and something I learned was to be more patient when taping. Notice how the design isn’t 100% centered. There’s more space at the bottom than at the top.
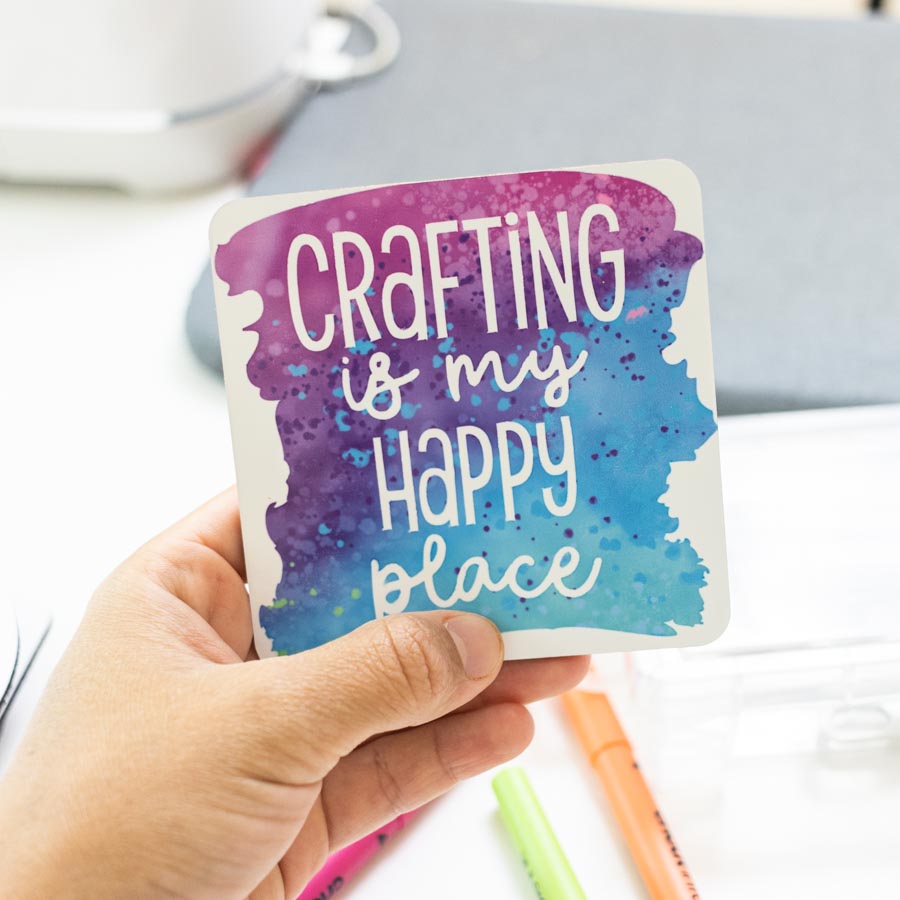
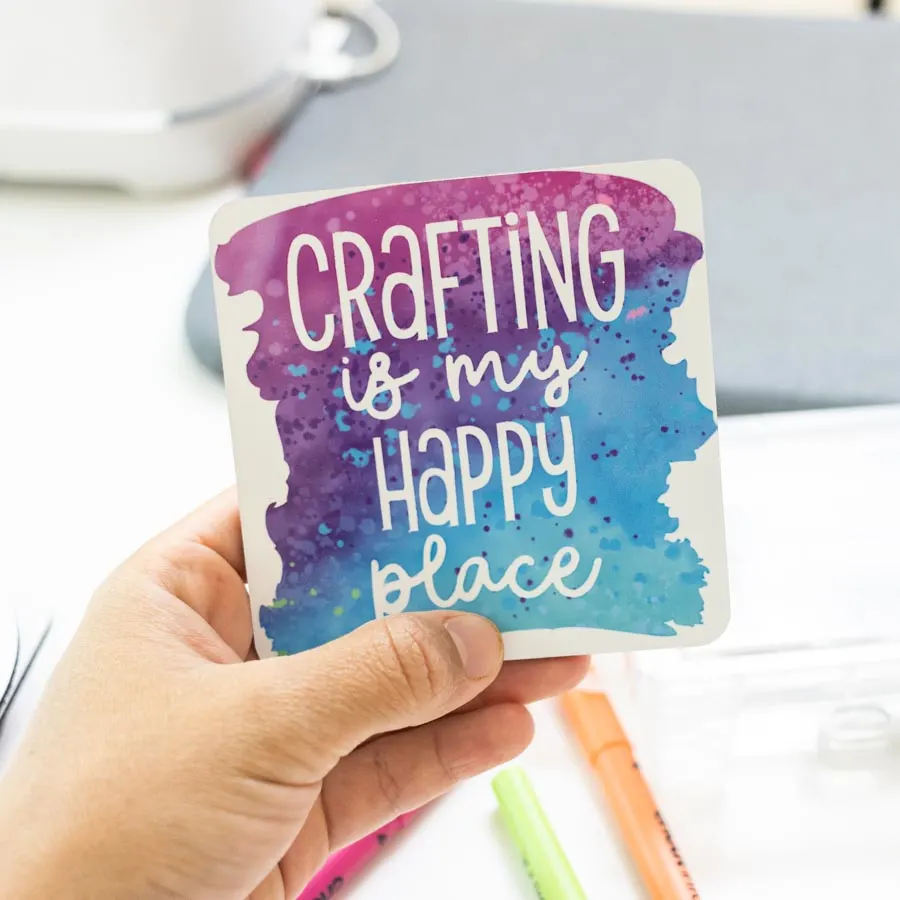
Still, the colors are vibrant and beautiful, don’t you think?
Coaster using Cricut Infusible Ink Pens/Markers
You can also make coasters with infusible ink pens and markers!
In my opinion, they aren’t as smooth and perfect as the other ones, but you may like that!
My job is to teach you the ways, and your job is to have fun creating projects.
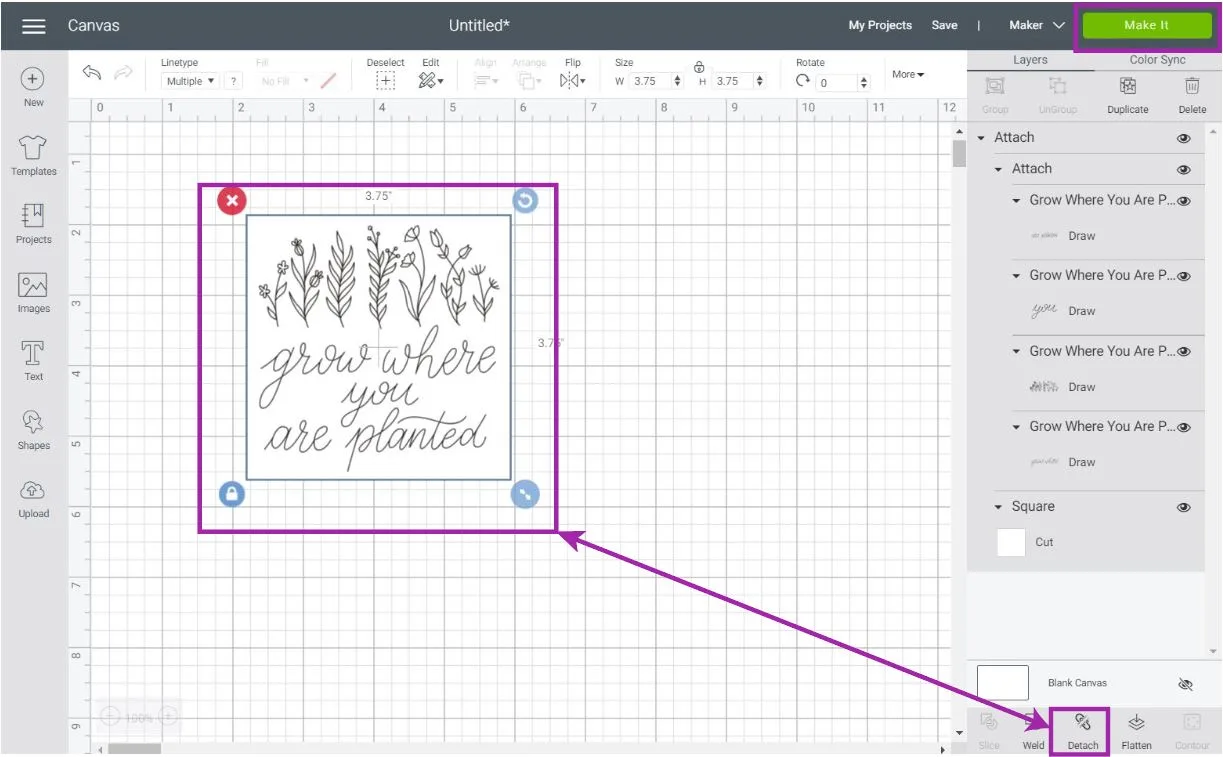
To make a design with infusible ink pens, let’s create a guideline for our coaster.
Click on “Shapes” and select the square shape, then on linetype, change the color white. Since this design doesn’t touch the edge of the coaster, resize it to 3.75″ x 3.75.”

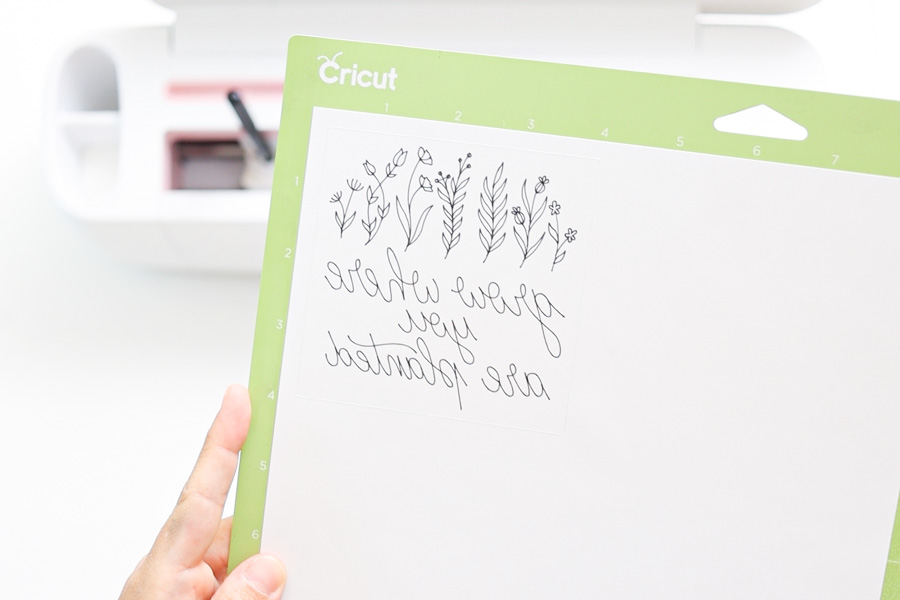
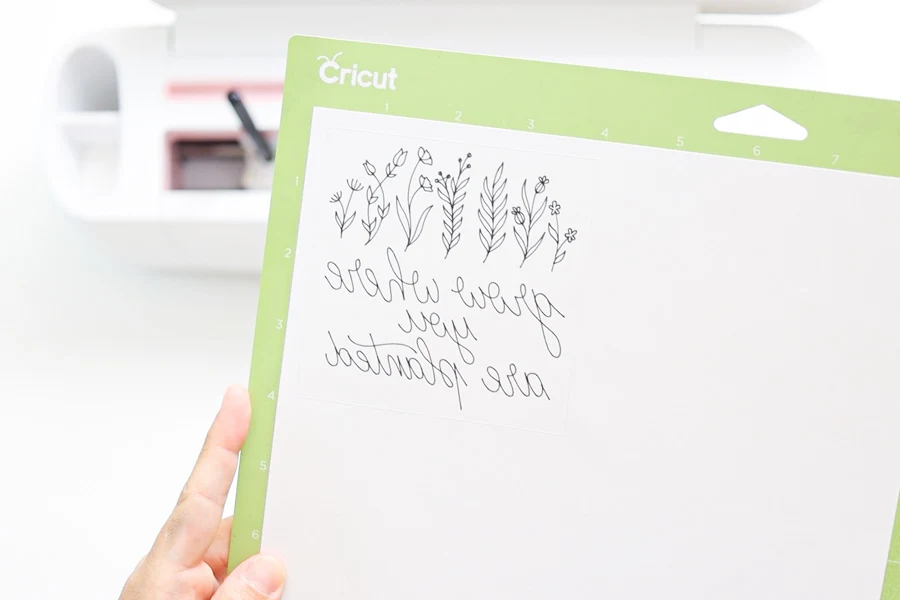
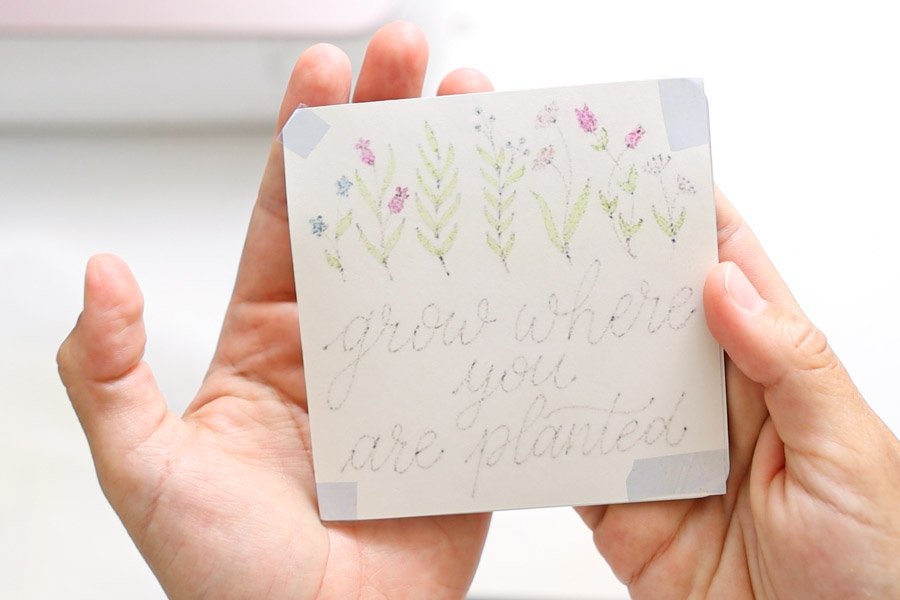
Now, let’s find something cool to draw on the coaster!
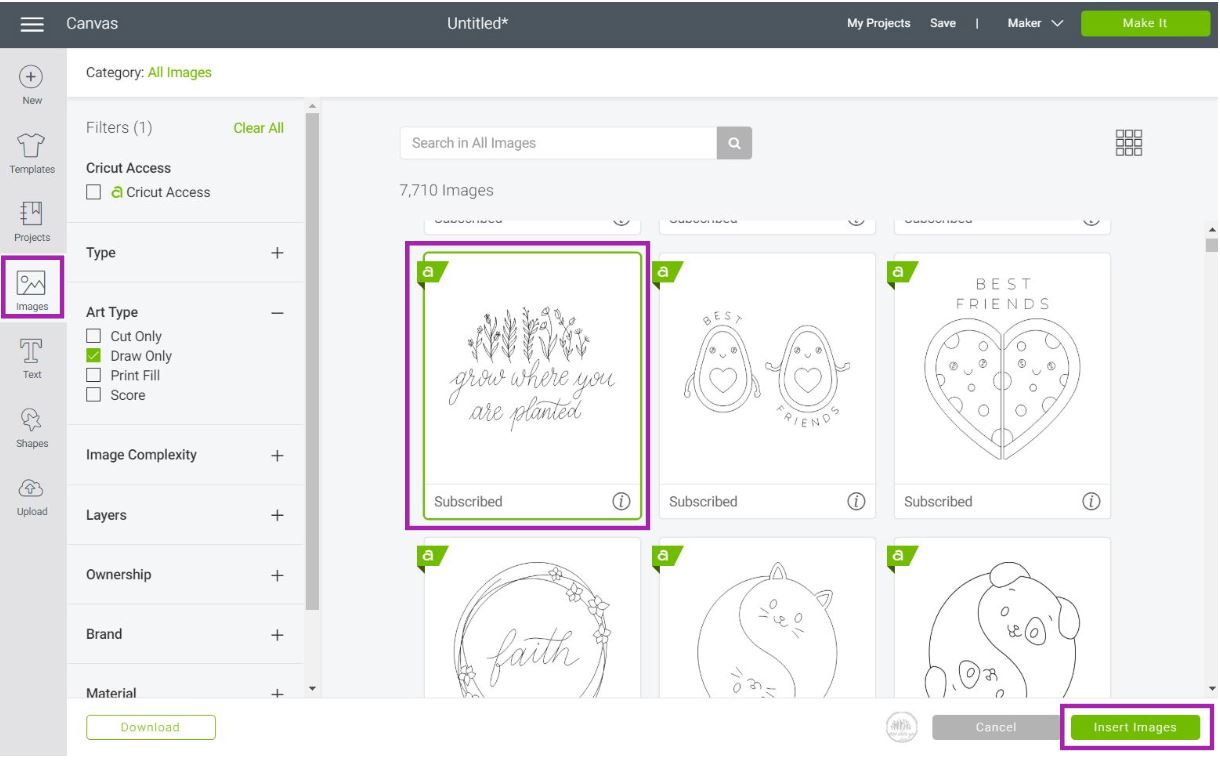
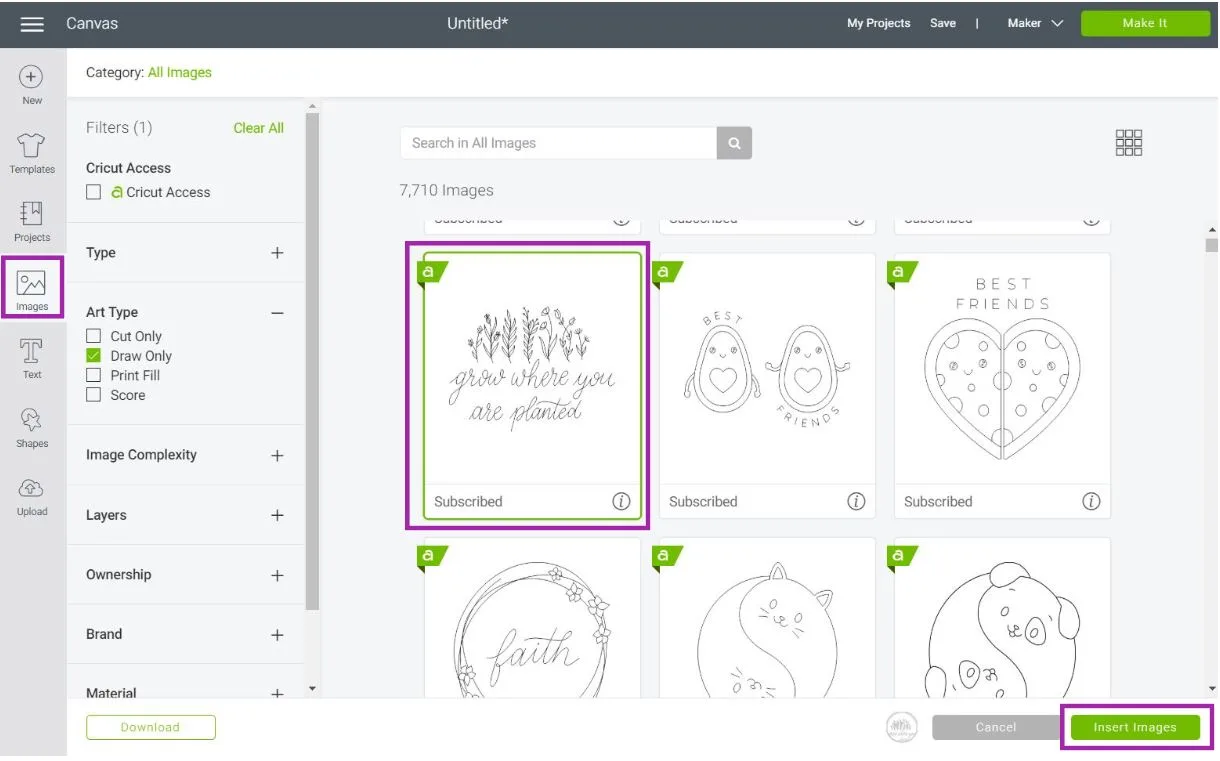
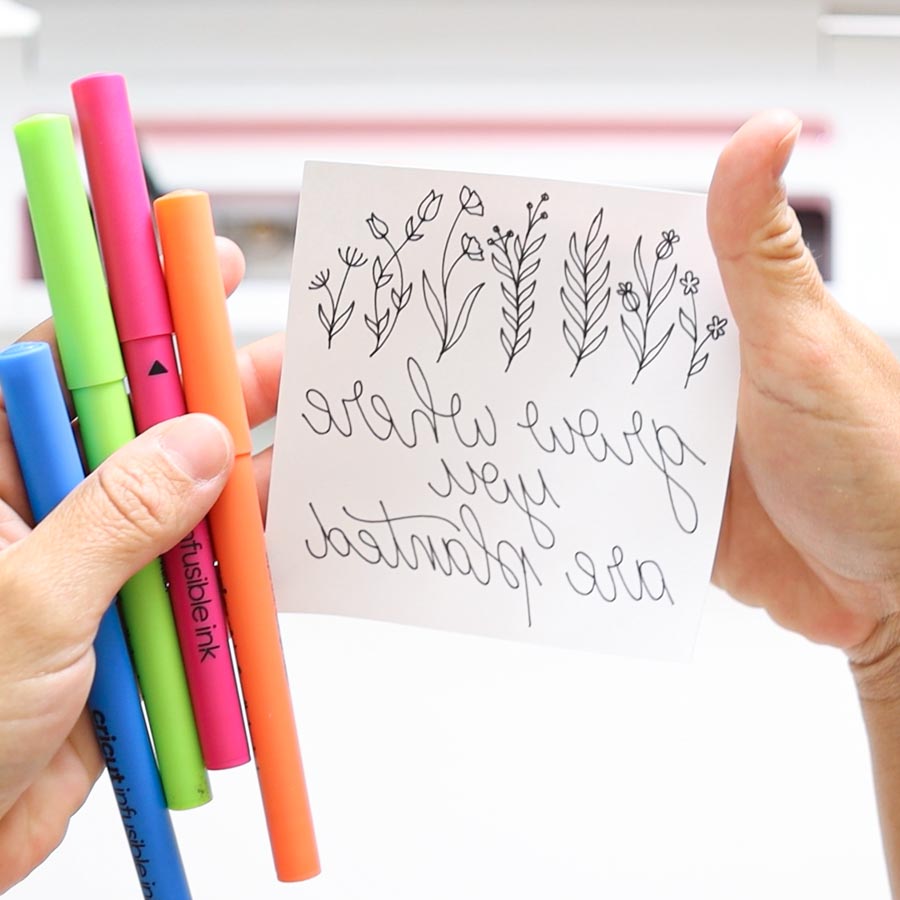
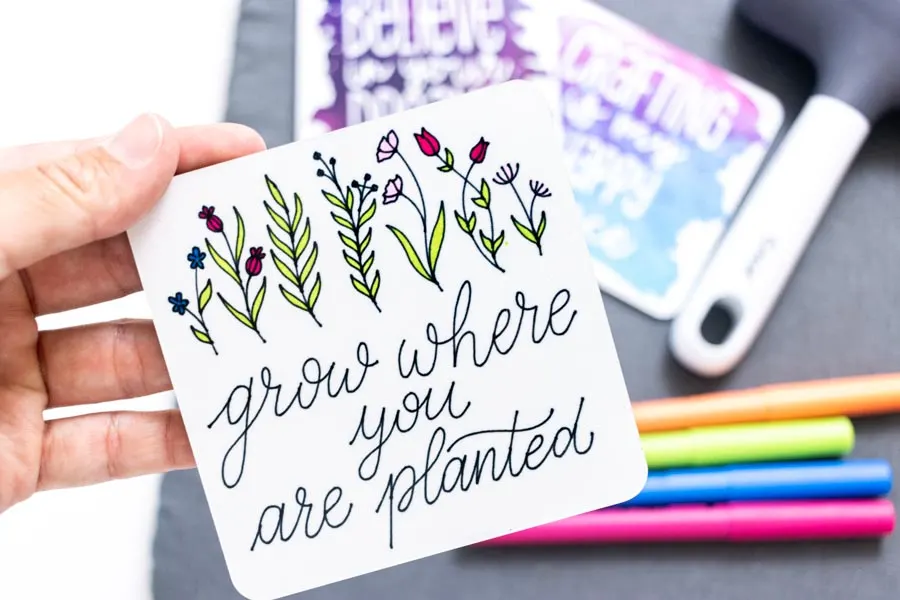
Click on “Images” on the left panel and filter them by “Draw.” I loved the “grow where you are planted” design but feel free to choose something else.
The image itself fits more in a rectangle than in a square.
Don’t you think?
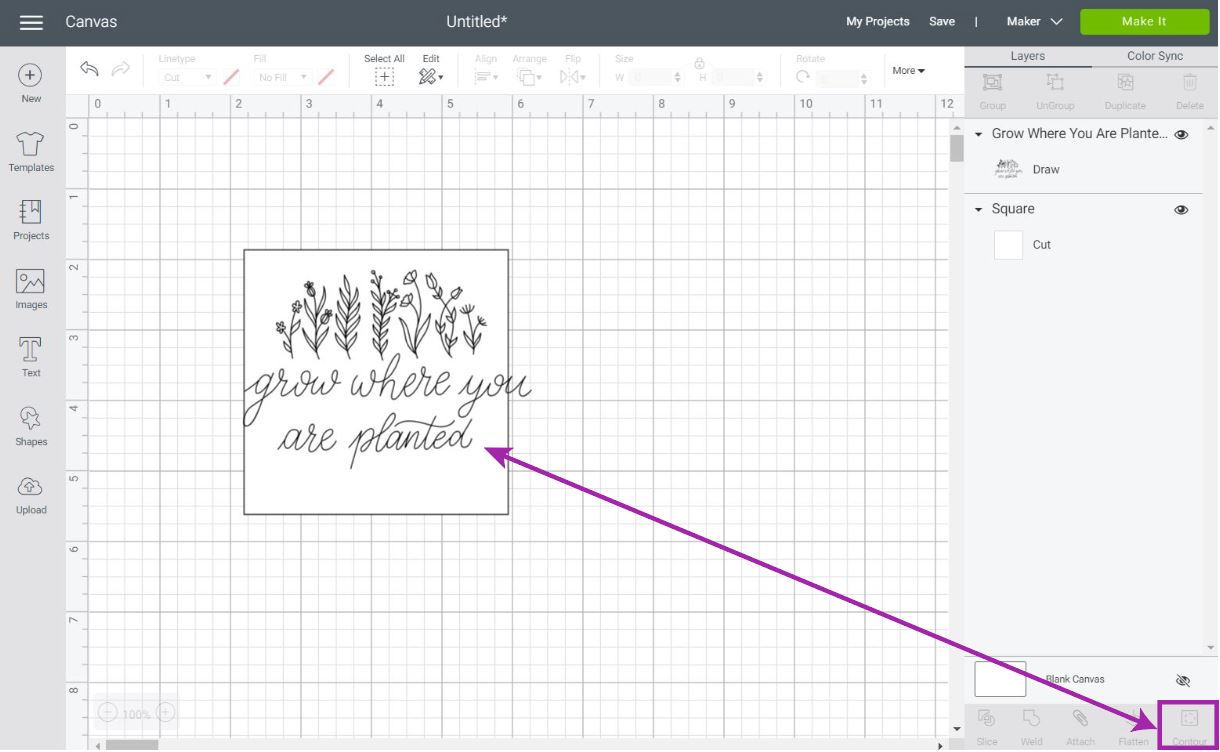

Tip: If you’re lost on this step, check out my how-to Contour tutorial.
To modify this image, I made a total of four identical copies, and with the “Contour” tool located at the bottom of the Layers panel, I divided each copy into four parts.
“The flowers”, “grow where,” “you,” and “are planted.”
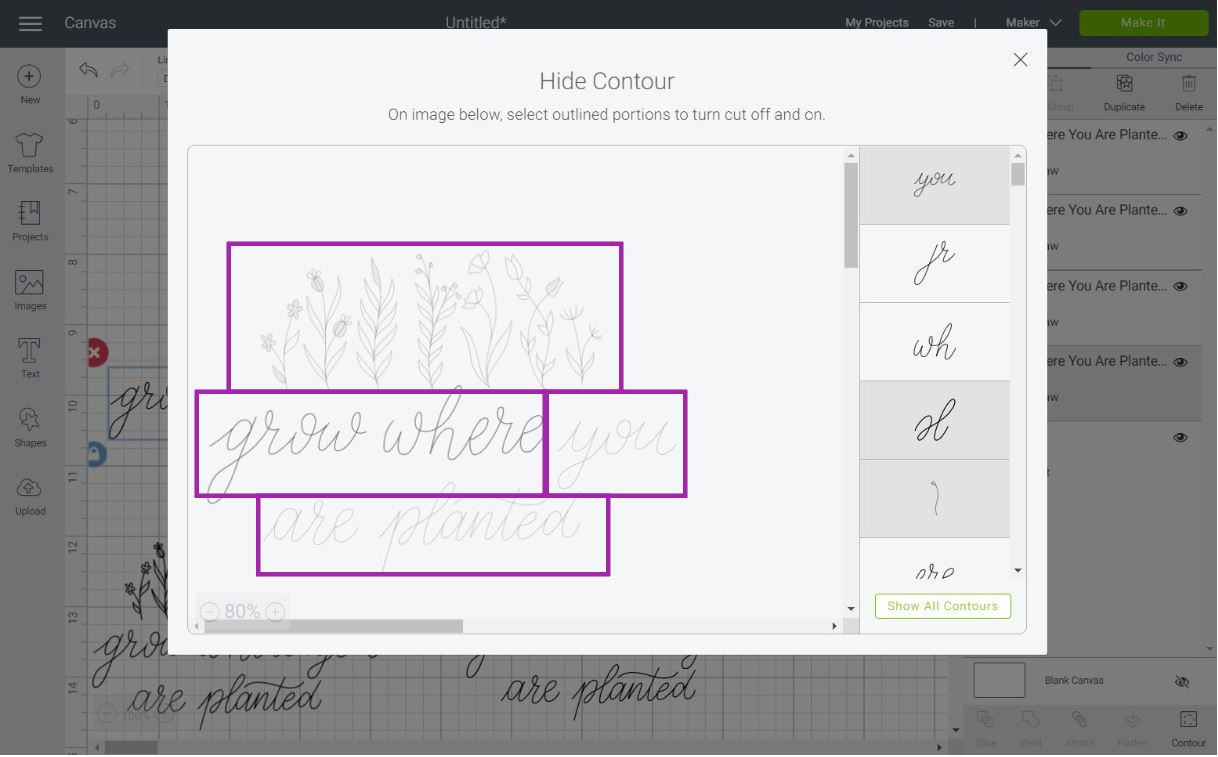
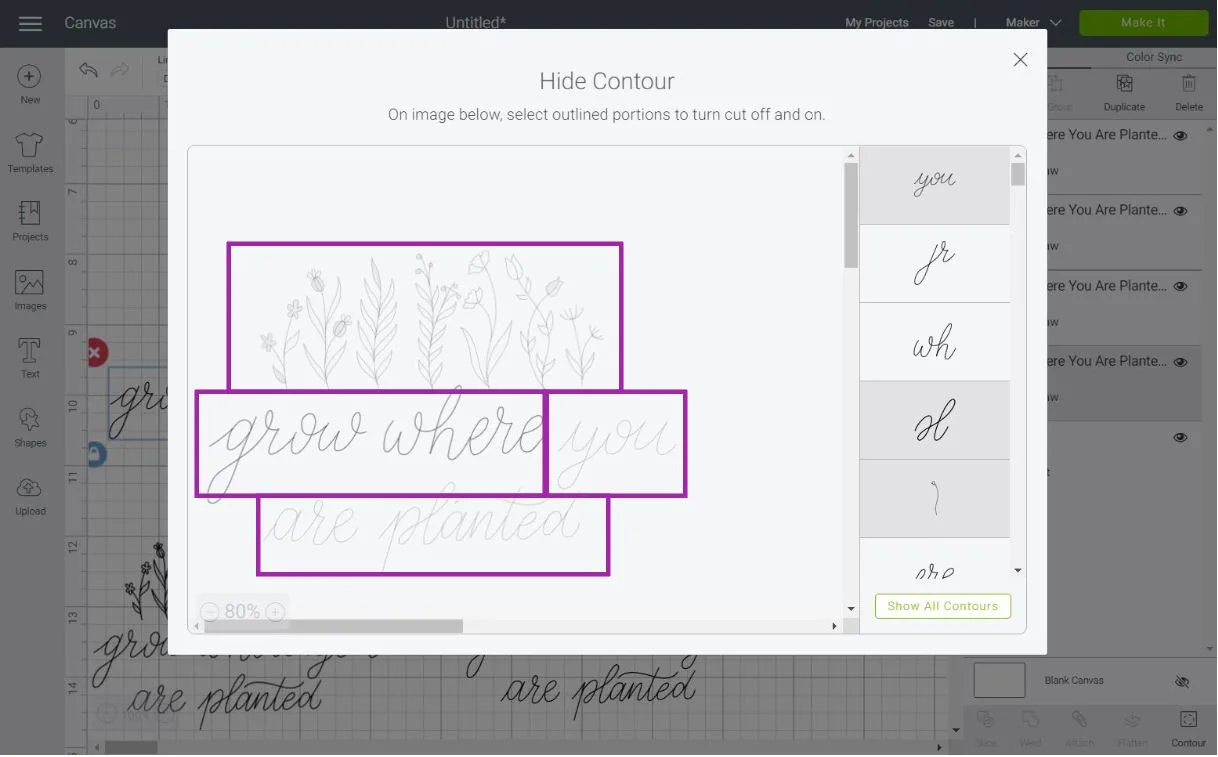
Then I arranged each on top of the guideline.
Easy, right?
The image itself already has “Draw” as Linetype; however, it’s always a good idea to select the type of pen you will use.
In this case, I used the “Fine Point, Black Infusible Ink” pen.
You can also use different colors as well, check out my Cricut Pen tutorial for an overview on how to use Cricut pens & markers.
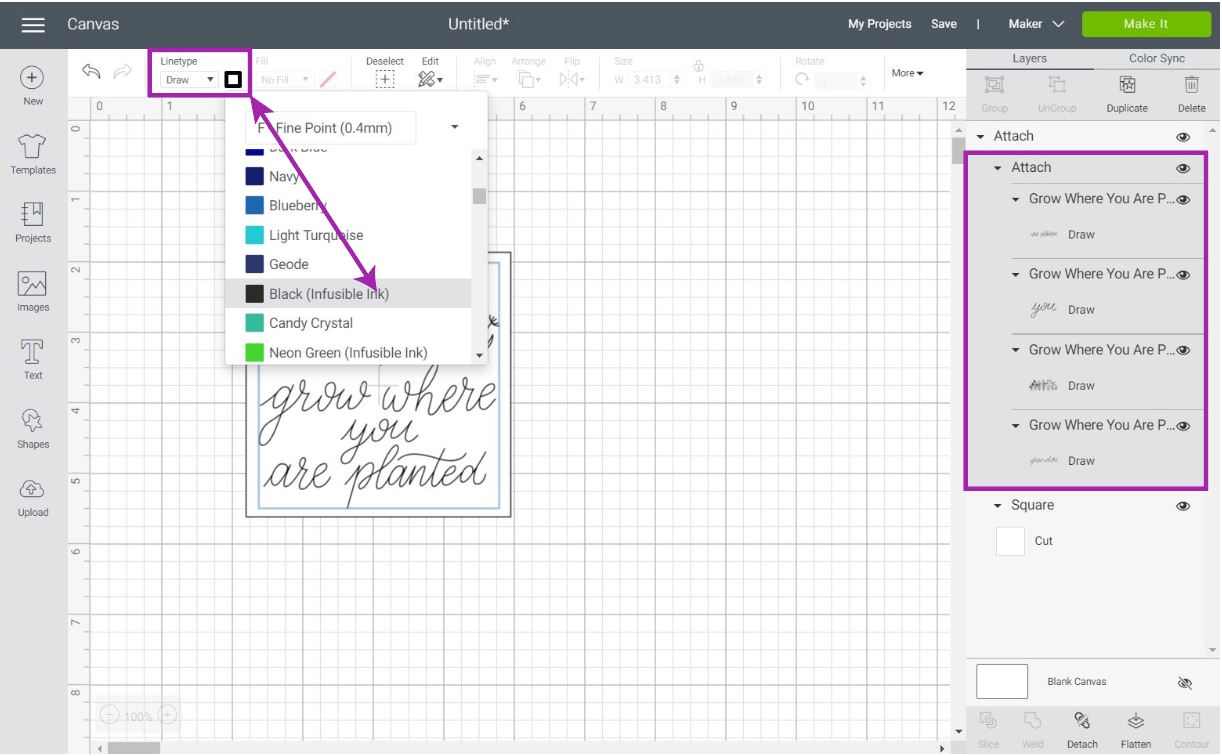
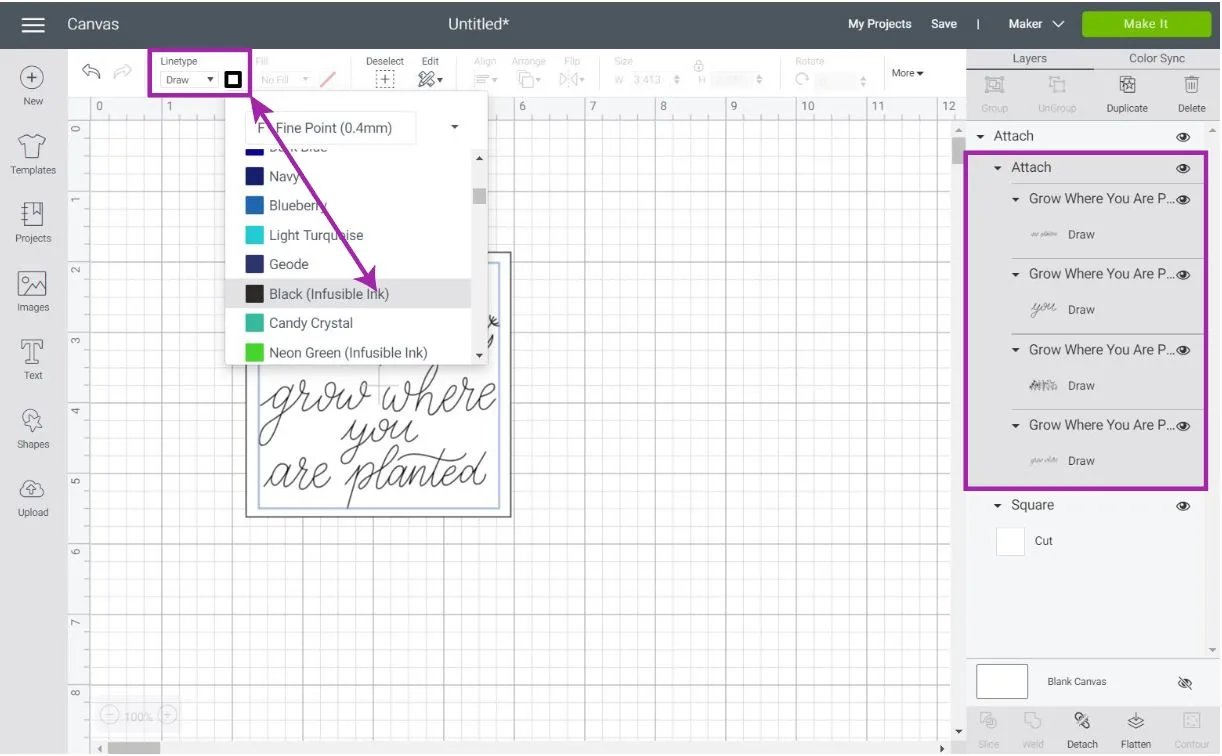
Once you place text on the guideline, select everything on the canvas and click on “Attach” at the bottom of the Layers panel.

After attaching, click on “Make it.”

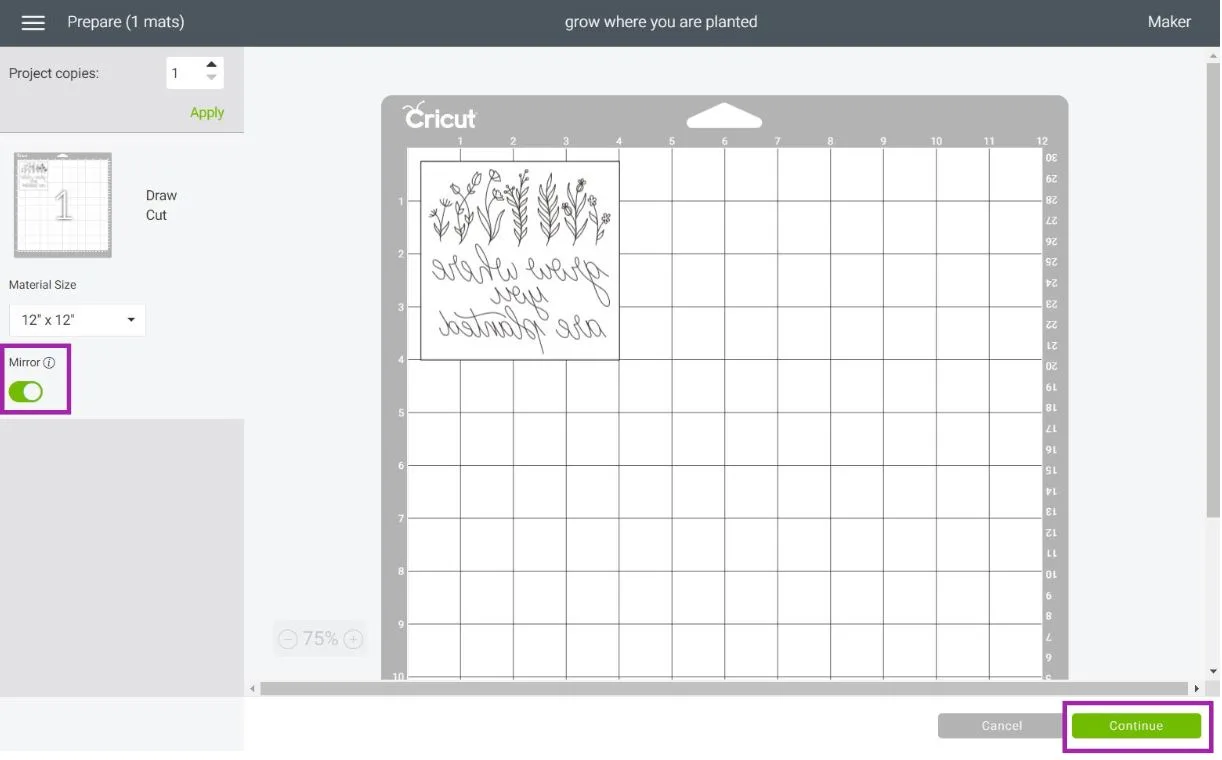
On the preview mat, make sure to turn-on mirror, then click on continue.
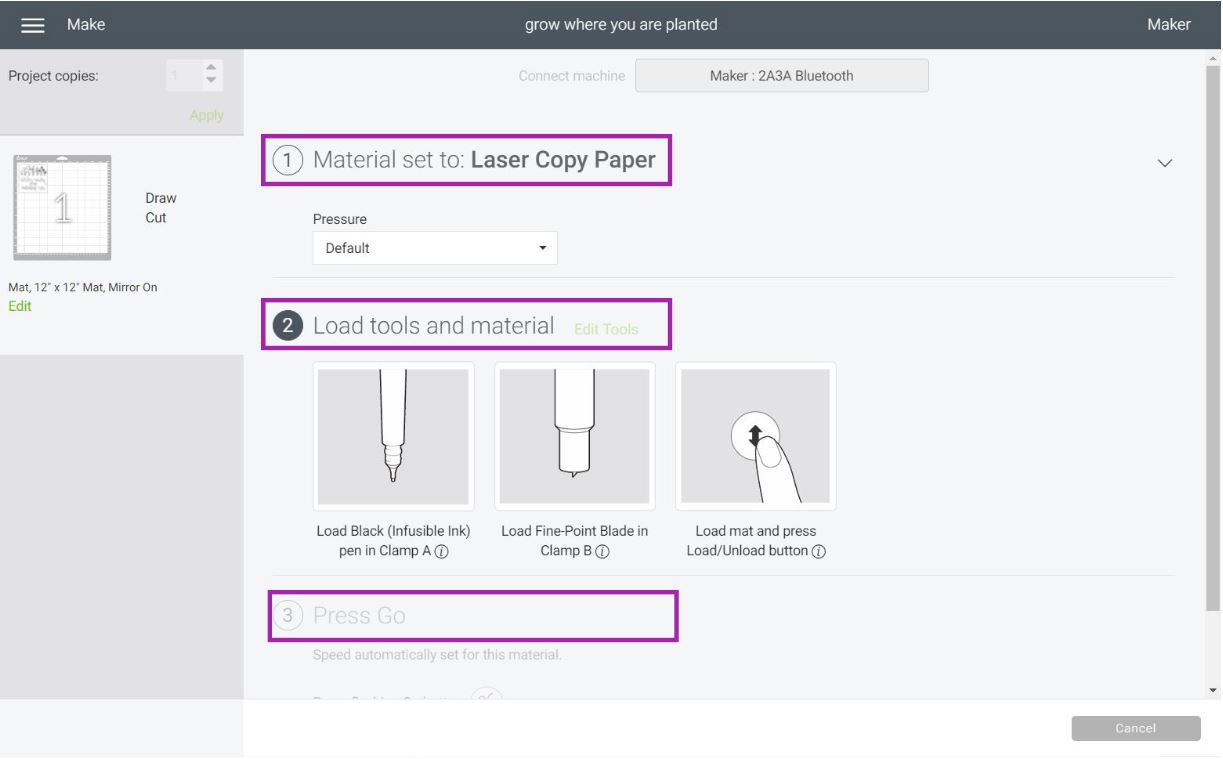
Cricut recommends writing on laser copy paper. You can find this paper on Amazon, Walmart, or any other craft store. Some of them will also work with an inkjet printer.
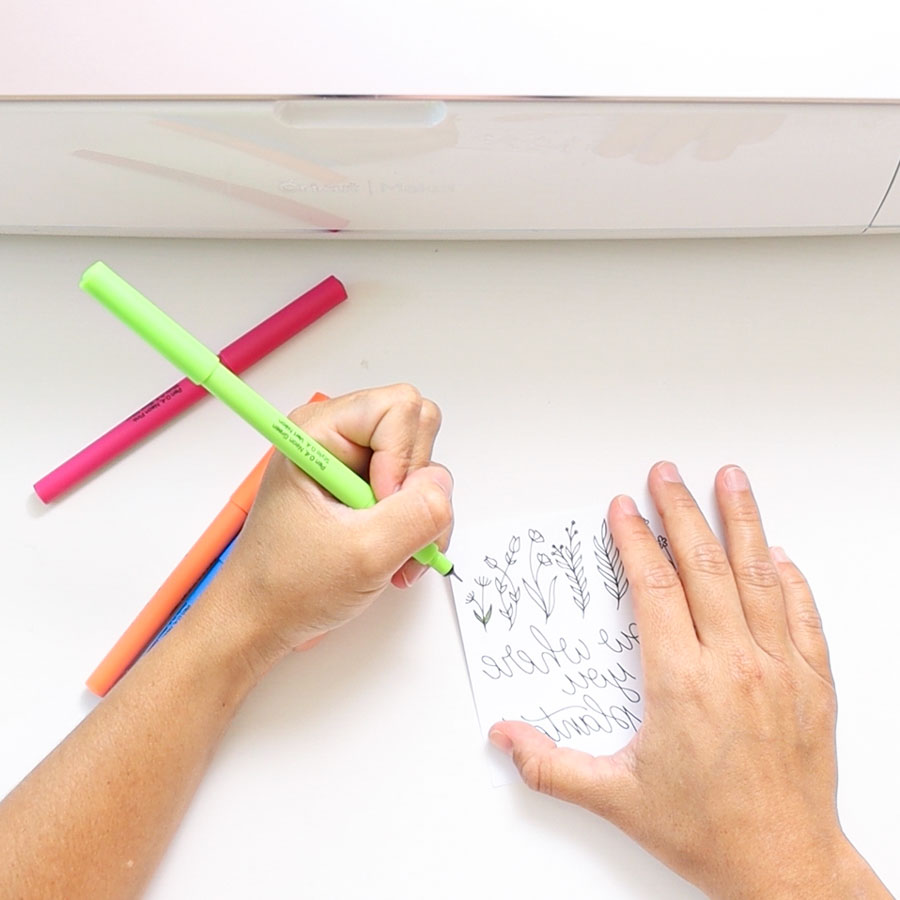
Install fine point blade and pen.
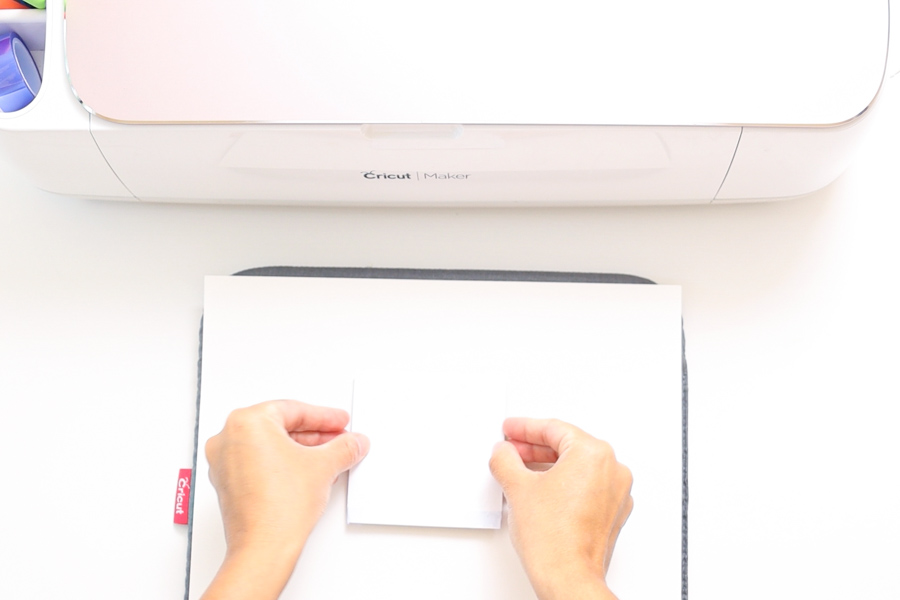
Then on a heavily used green mat or blue mat, place paper, load it to your machine, and tap on the flashing go button to cut and draw the design for the coaster.


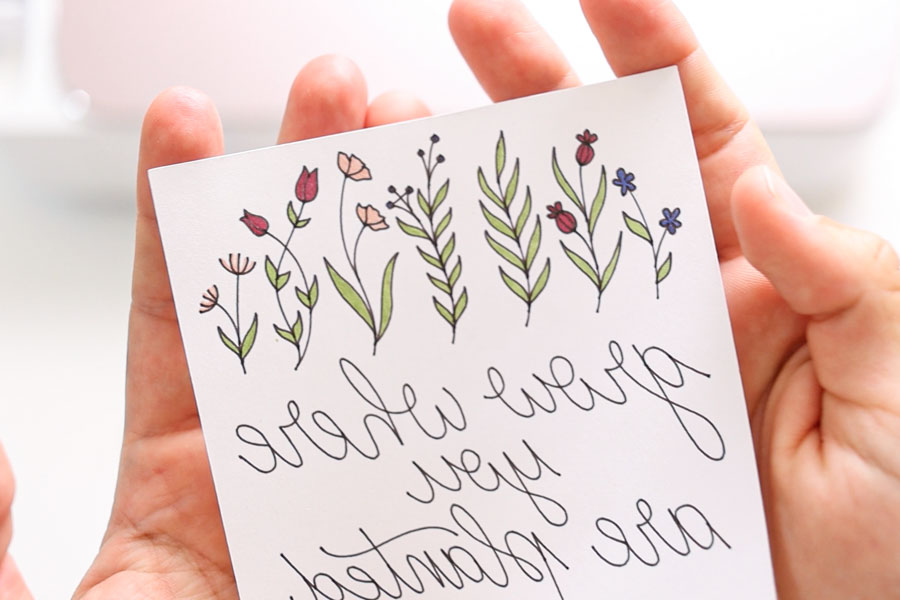
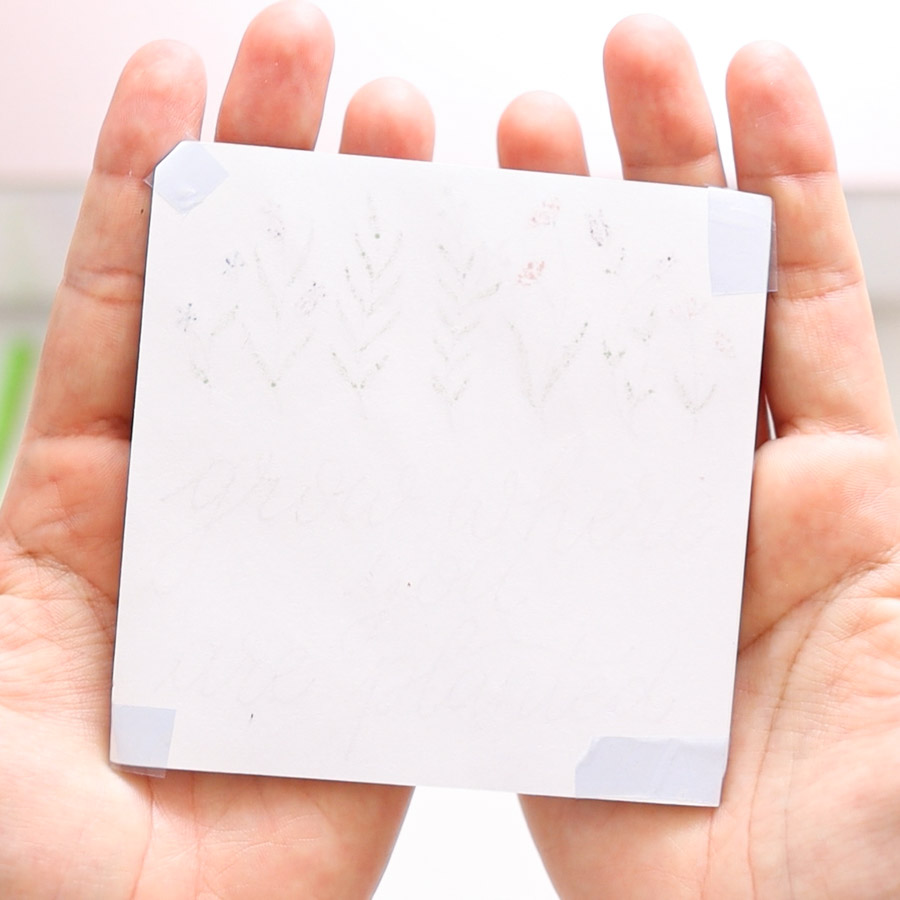
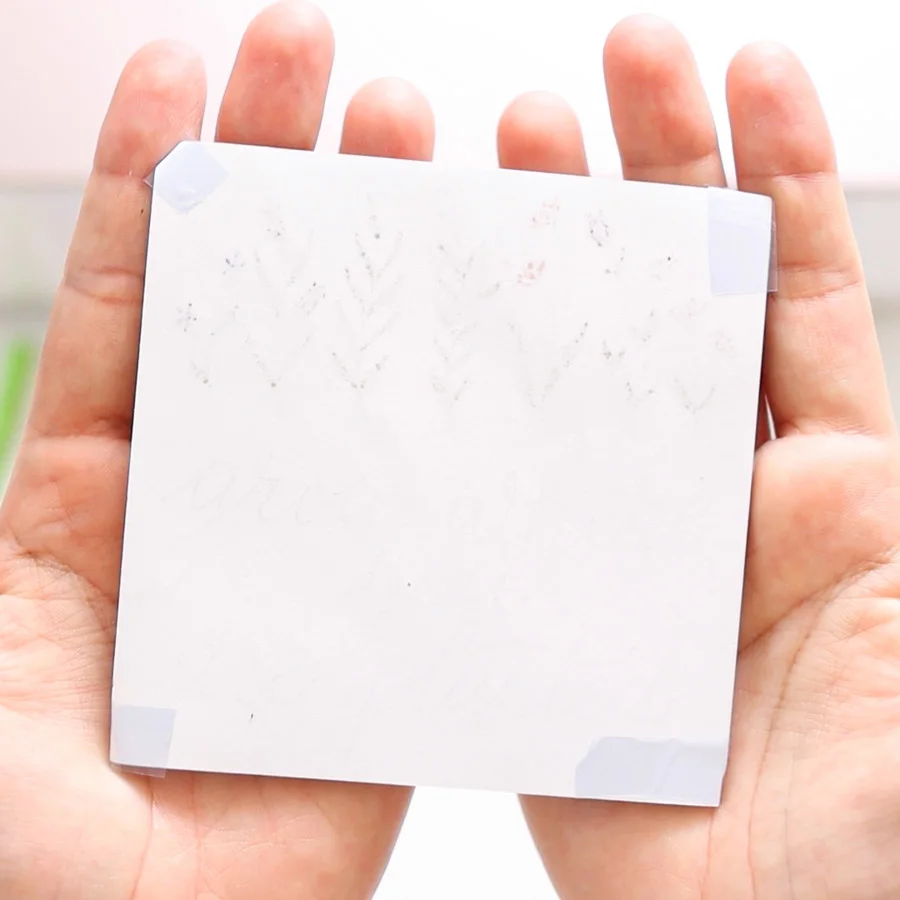
When your Cricut is done cutting and drawing, remove the design from the mat and color it with infusible ink pens. (Make sure your hands are clean and free from moisture).
Believe it or not, this is the part I don’t like.
Usually, I love coloring, but whenever I use infusible ink pens, I feel I can’t breathe.
You see, any mistake you make on the paper will be reflected on the coaster. For me, that’s a little bit stressful.


Once you color, repeat the same steps you did when using Infusible Ink Transfer Sheets.
Preheat your Easypress 2 to 400°F (set timer for 60 s) or your Easypress to 360° F (set timer to 120 s). Clean coaster with a microfiber cloth, tape design on it, and form sandwich.
- Easypress Mat (Bigger that the heat place)
- White Cardstock – 80 lbs (bigger than heat plate).
- Square coaster white side up with design facing down
- Butcher Paper


Place Easypress gently, and once the timer is up, lift very carefully.


Wait until the coaster is cold to the touch before removing your design.

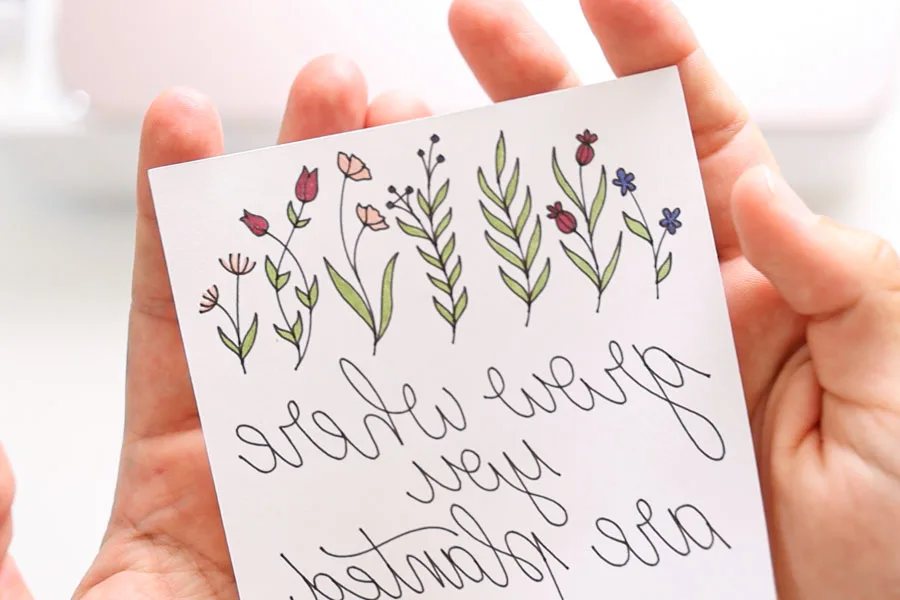
Now, can we address the elephant in the room?
Let’s zoom in!
From far away, you can’t appreciate all the details from the coaster. But when you see it carefully, you can see all the little imperfections.
Like where the machine stopped and started drawing.
Not everything looks smooth.
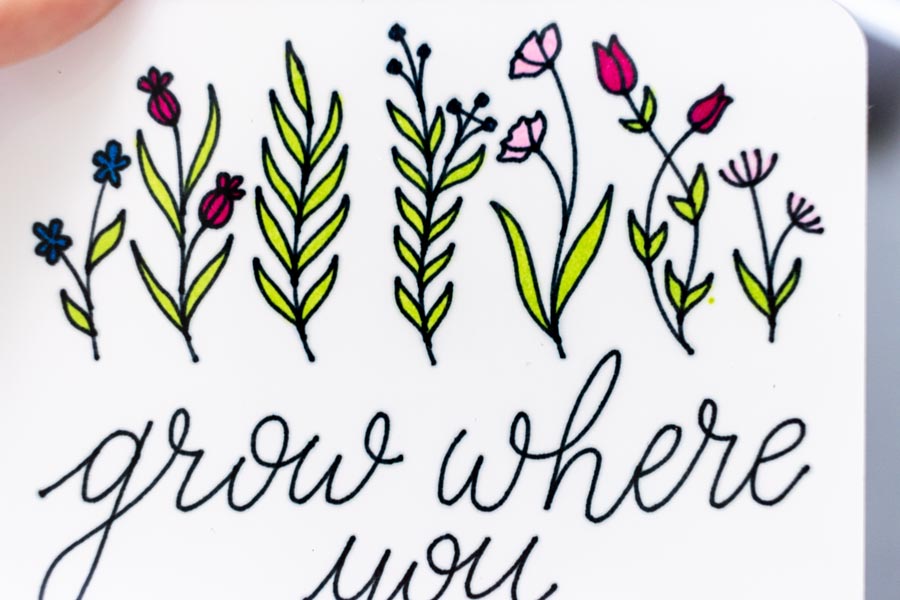
Yet, that’s the beauty of homemade!
Wouldn’t you agree?
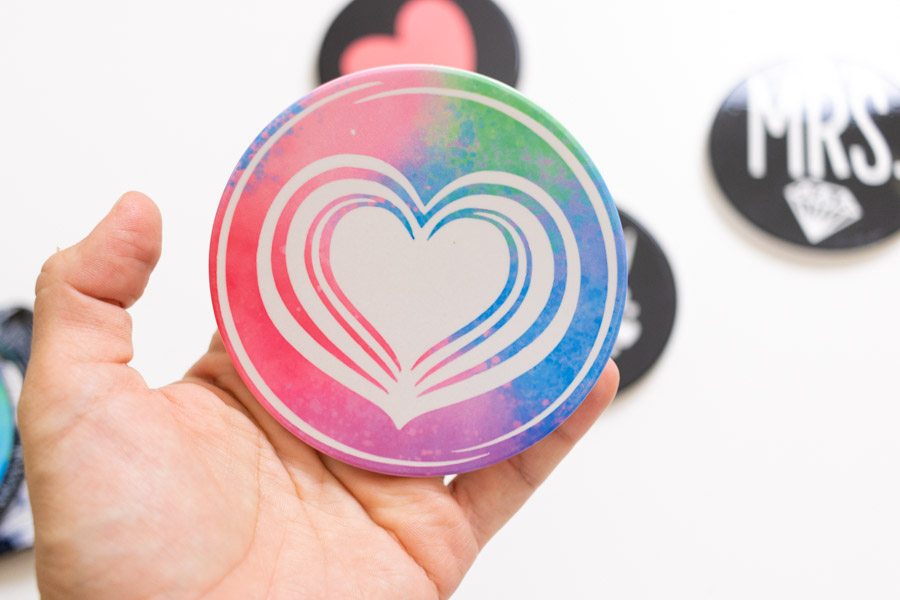
Layering Infusible Ink on Coasters
There’s a moment where you’ll want to use two different transfer sheets on a project.
Infusible ink is such a tricky material.
That if you just layer up on top of a solid shape, your project will look terrible.
If you want to use two colors, use the slice and set method!
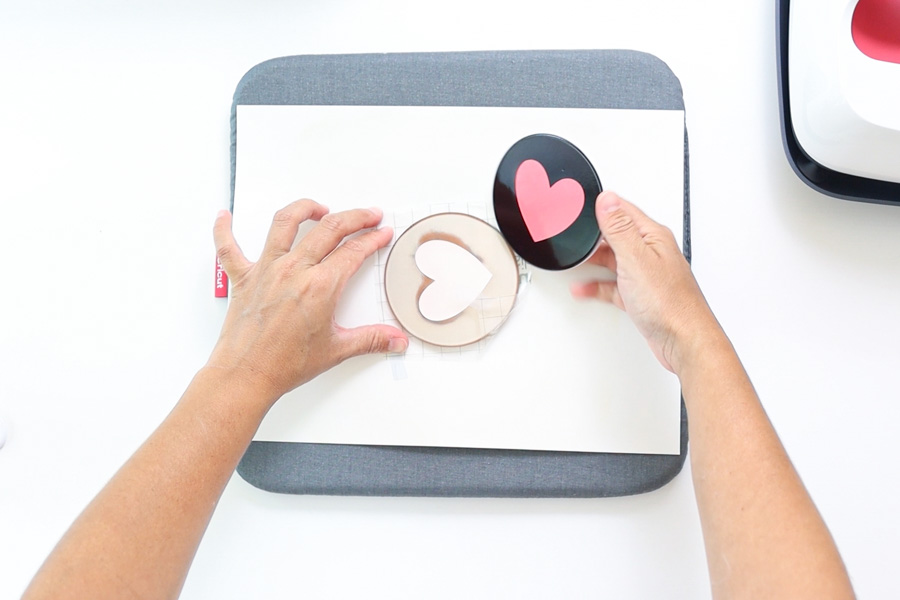
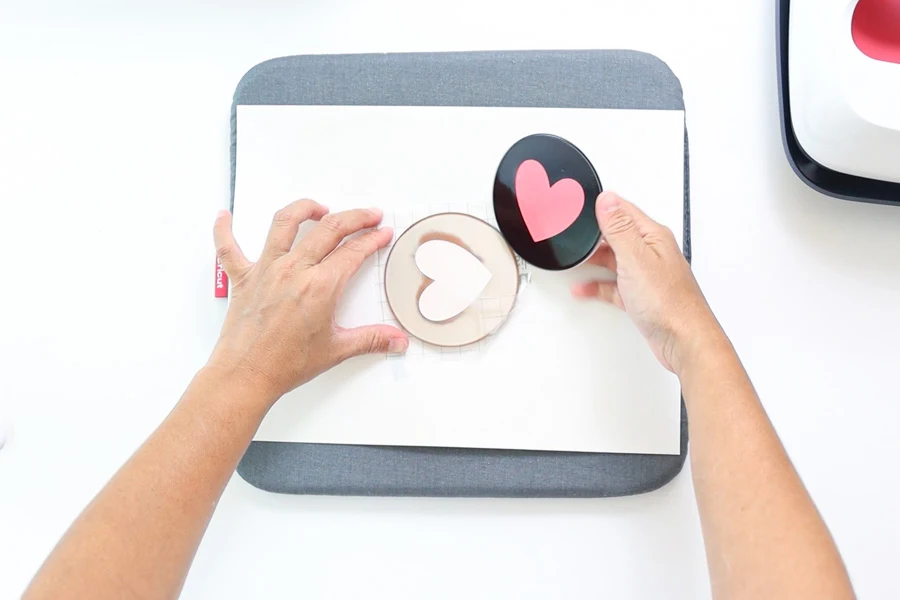
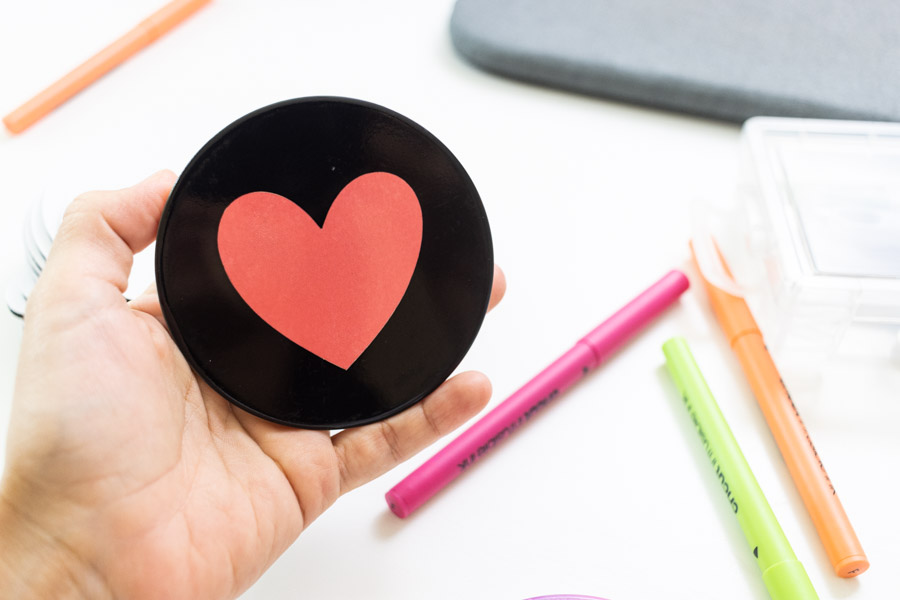
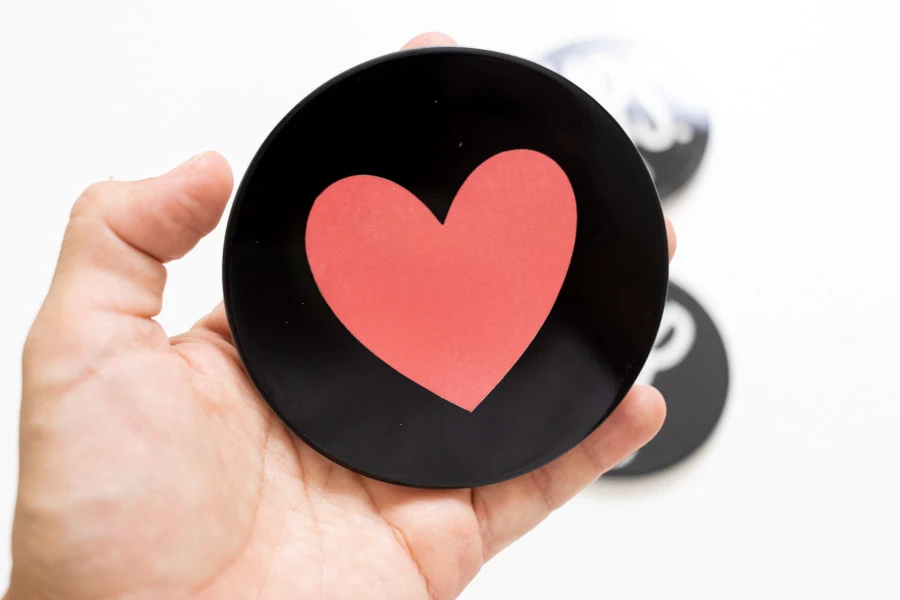
For example, I want a black coaster with a pink heart in the center.
To accomplish this, I added a circle and heart to the canvas area; then, I placed the heart where I wanted it and sliced it against the circle.
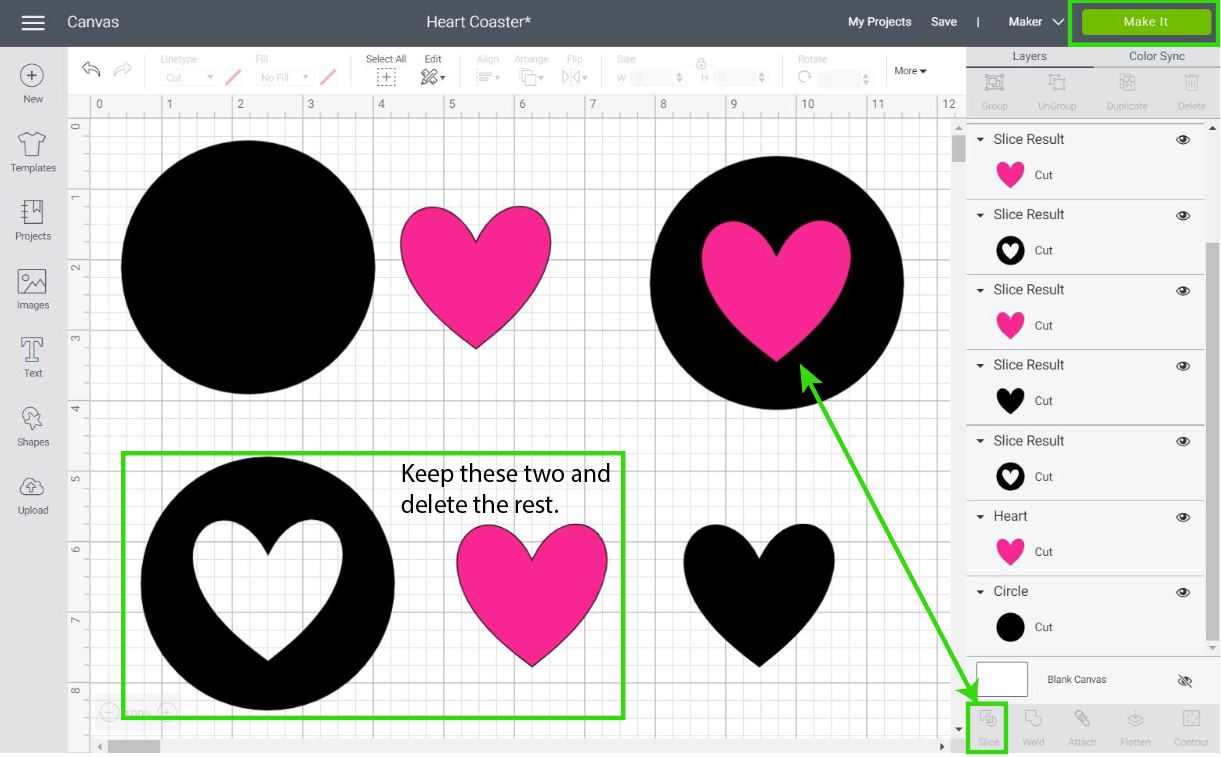
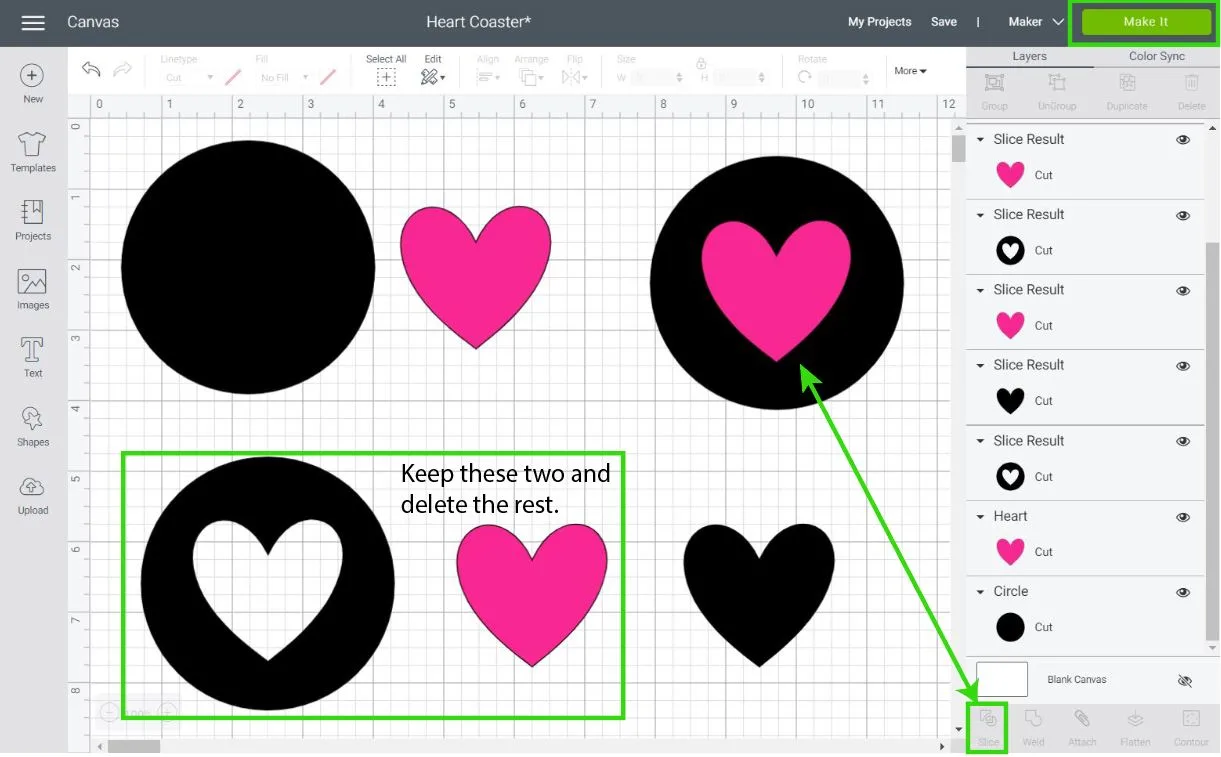
I deleted the “black heart” and then cut the project following the instructions I explained at the beginning of this tutorial.
Now, look at how to assemble both infusible ink sheets.
Remove the negative cuts from the images, and place the heart in the circle making sure there are no gaps.
Seriously, take your time!
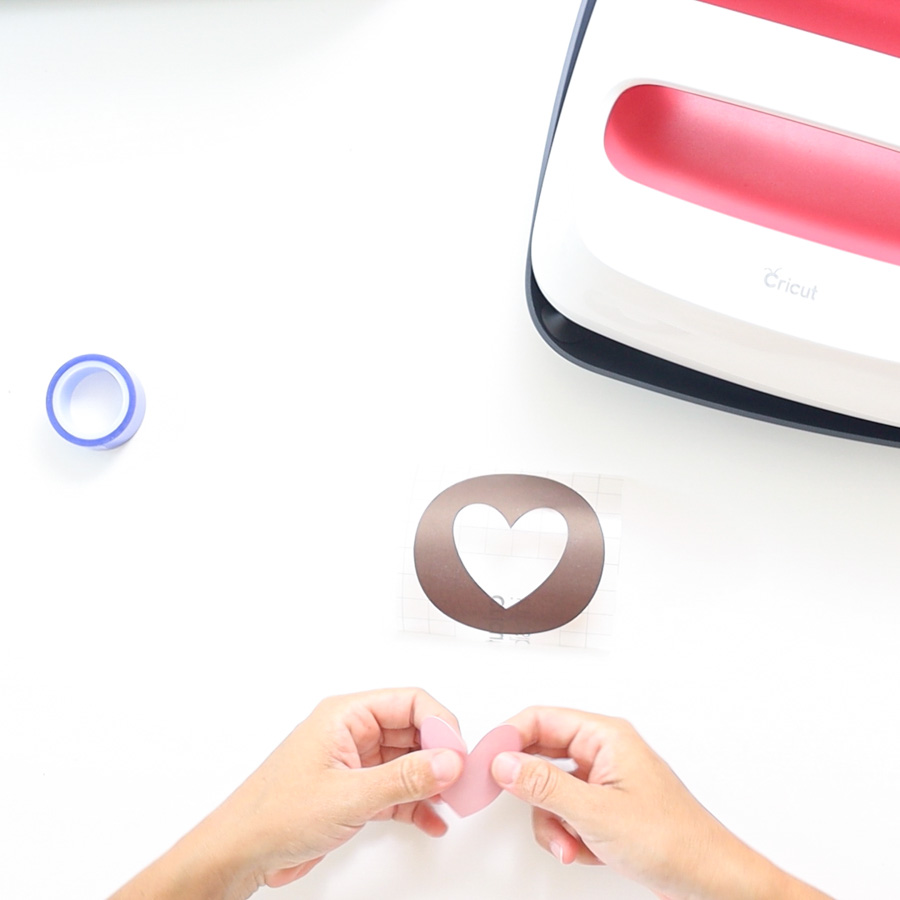
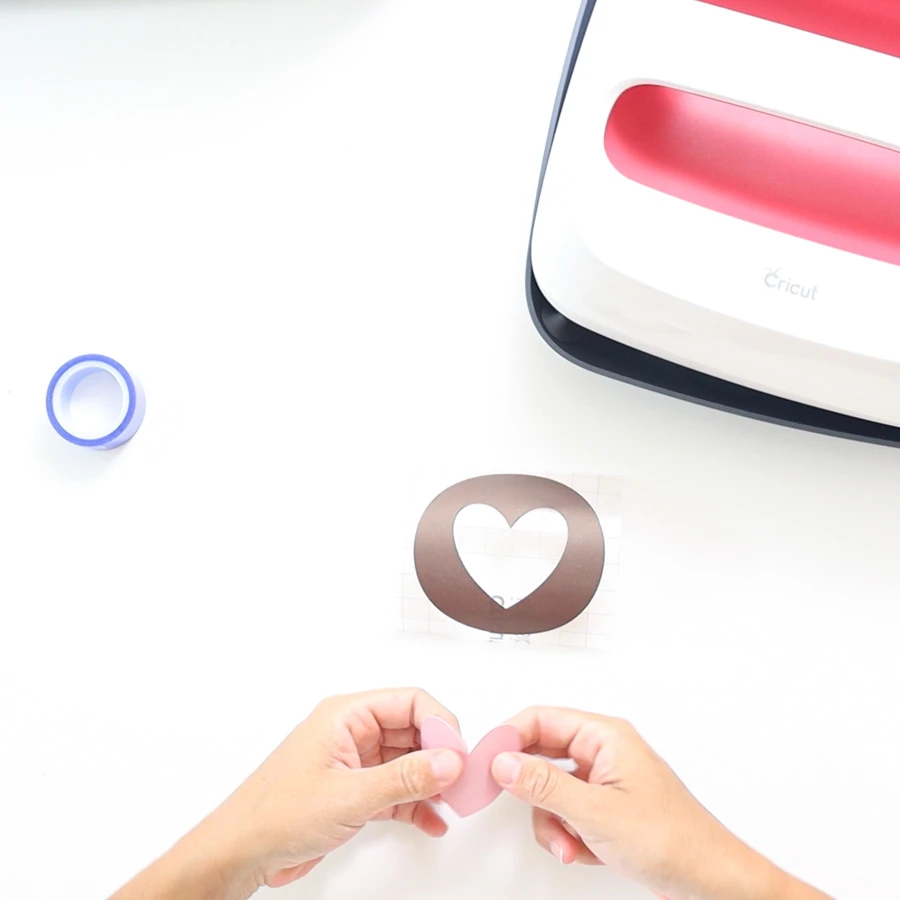

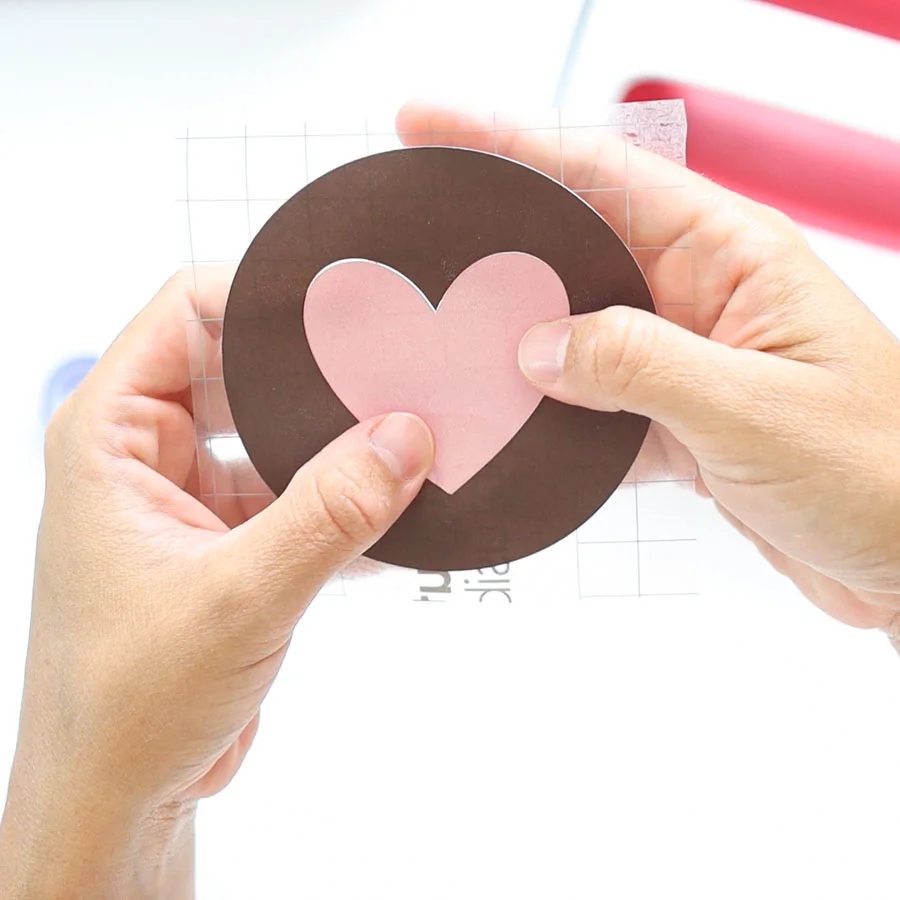

Wipe coaster with a microfiber cloth and tape carrier sheet to the back of the coaster, so everything stays still.
The sandwich when using ceramic coasters and the amount of time you need when pressing it’s quite different than when using cork coasters.
Preheat your Easypress 2 to 400°F (set timer for 240 s) or your Easypress to 360° F (set timer to 300 s).
- Easypress Mat (Bigger that the heat plate)
- White Cardstock – 80 lbs (bigger than heat plate).
- Ceramic coaster shiny side down with design facing up (in other words, place the press on the back of the coaster).
- Butcher Paper


Place Easypress 2 on top of the “sandwich” very gently.
Let go of the press and let it sit for 240 seconds (300 seconds if using the Easypress 1).
When the timer is up, very carefully lift the press and let your project cool off completely.
In my experience, ceramic coasters take about two hours to cool off. However, it’s your responsibility to be careful and make sure you don’t burn your hands.
Doesn’t it look lovely?

Infusible Ink Transfer Cheat Guide for Coasters
I like to shower my readers or what I call daydreamers with fun resources!
Here’s a quick guide for temperature and “sandwich” when using infusible ink on coasters.

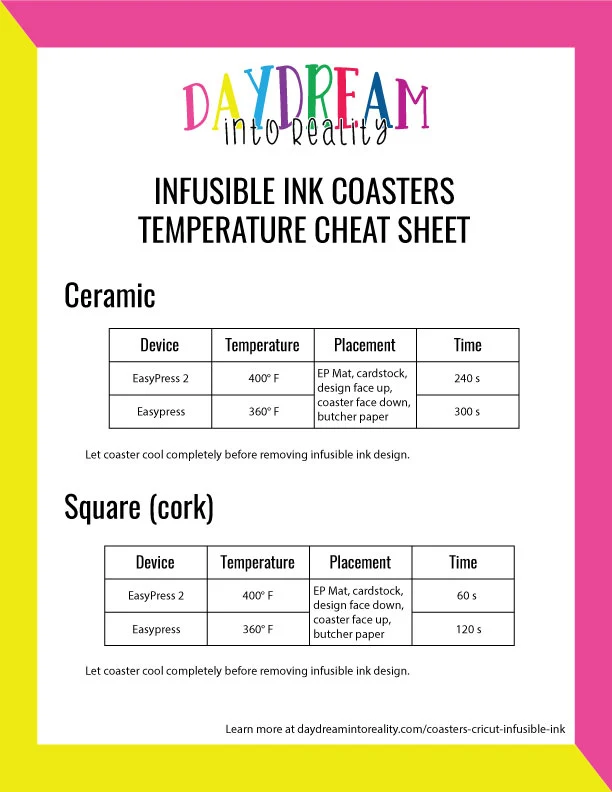
If you still have doubts, make sure to visit Cricut’s heat guide for a step-by-step process.
Using Off-Brand Coasters with Infusible Ink
I was surprised to see that you can have beautiful coasters using off-brand coasters!
I purchased square and circle coasters, and they are shiny and sort of glittery on the white side, this “glitter” infuses with the transfer sheet and the result is vibrant and shimmery at the same time.
Each coaster you buy online will require testing on your part. But if the coaster is thin, and/or made out of cork or rubber, used the same settings that you would with “square cork” Cricut coasters.
Make sure the coasters you buy say they are for “sublimation” don’t buy regular blank coasters, because they will not work!
Look how vibrant they look!
They are so much affordable as well.


Although I loved the result, I have to admit that Cricut’s coasters look more elegant.
Free SVG Templates for Coasters
Just as I promise, here are some FREE SVG coaster templates you can use for your personal projects.
They are all so beautiful, simply click on the download buttons on each image. At this time, they only work when working from desktop or laptop computers.
Oh!
Just so you know, I also have a library full of free SVG files and Printables for all my subscribers, a.k.a. Daydreamers. You can see a preview right here or get access by filling out this form.


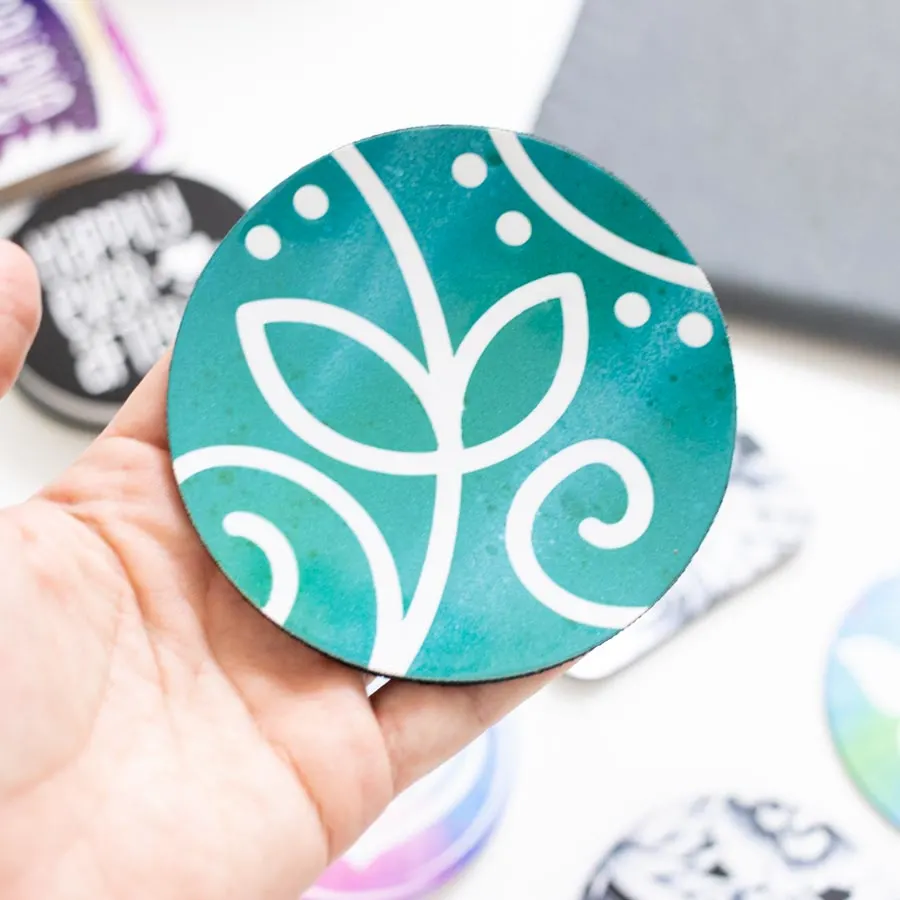
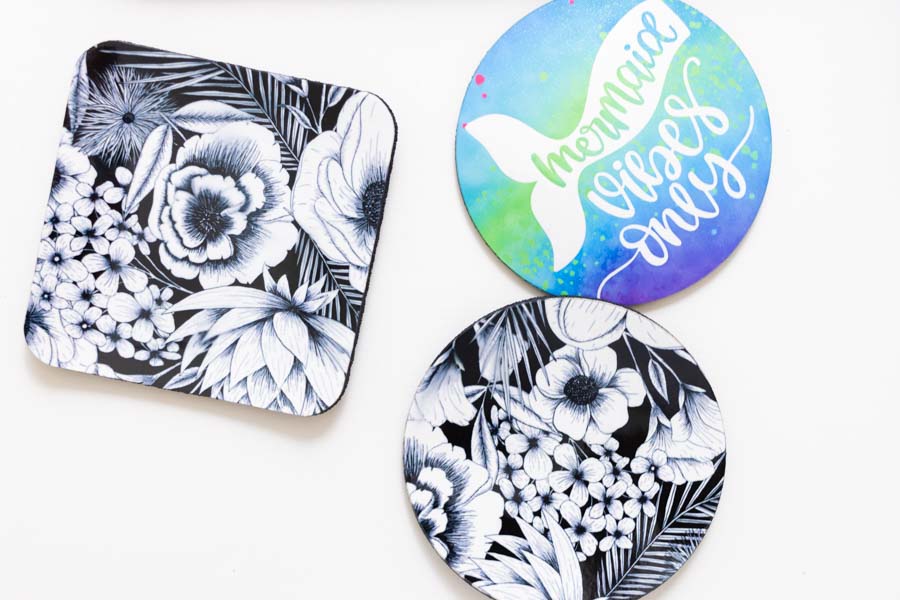
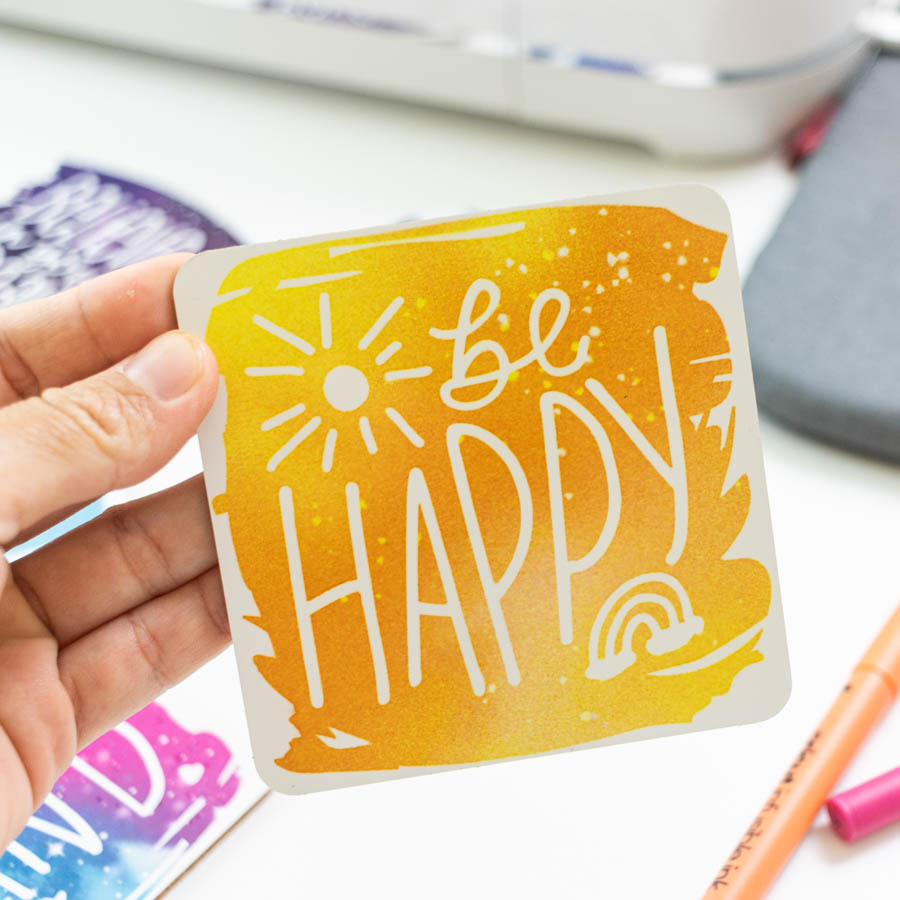
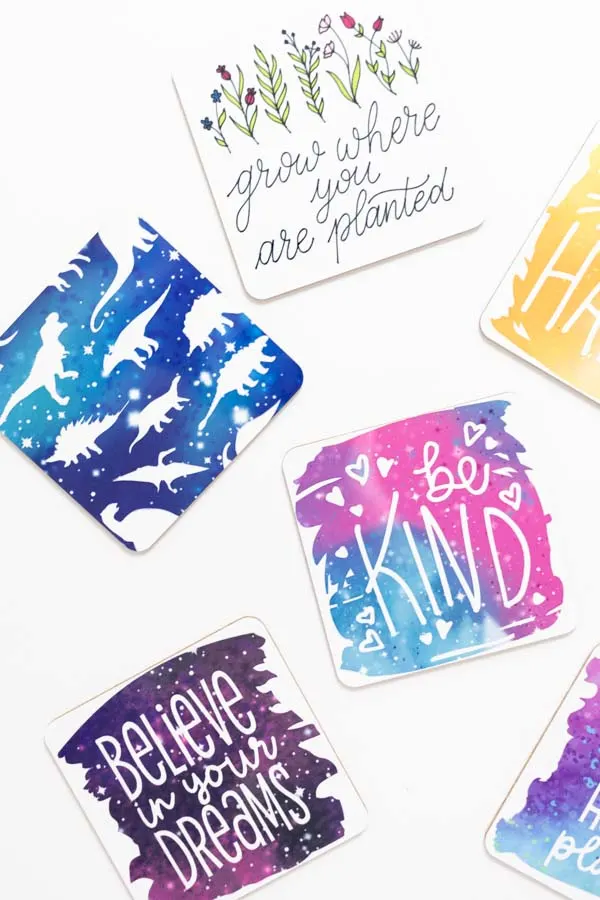
More Coasters made with Infusible Ink!
Just to give you more ideas, here are more coasters you can make.
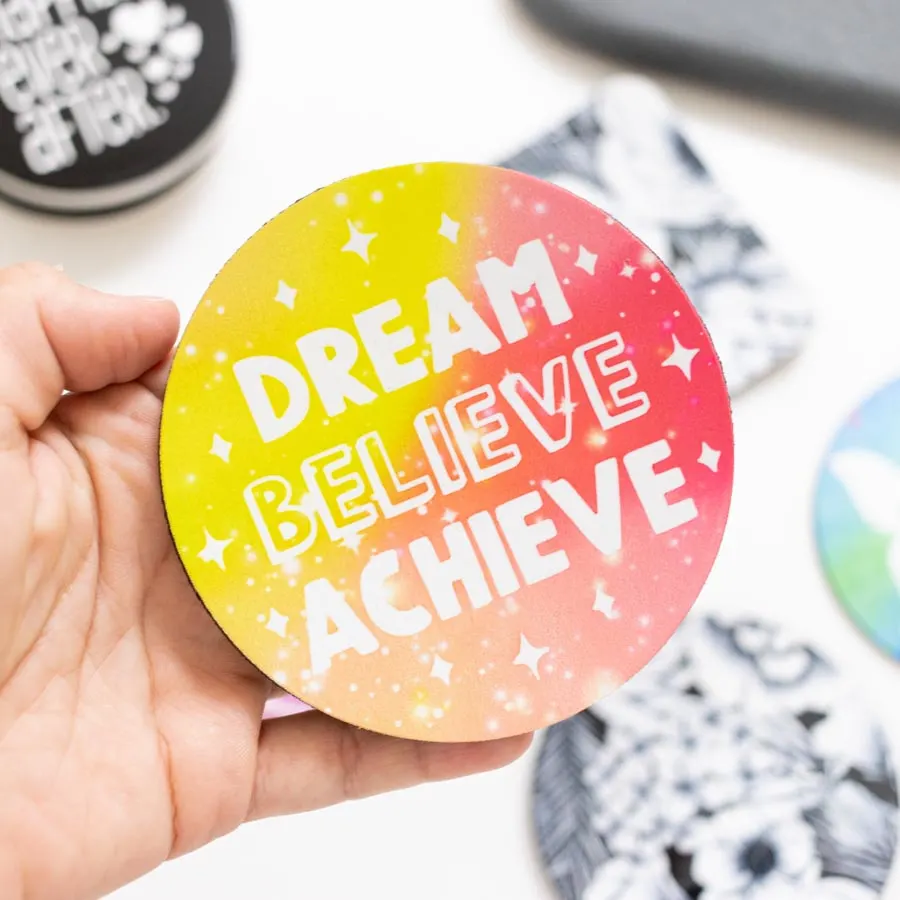
If you know anything about me, you know that yellow is my favorite color ever, so this is one of my favorite coasters.
This “Believe in your dreams” coasters can be recreated with the images I provided you with.


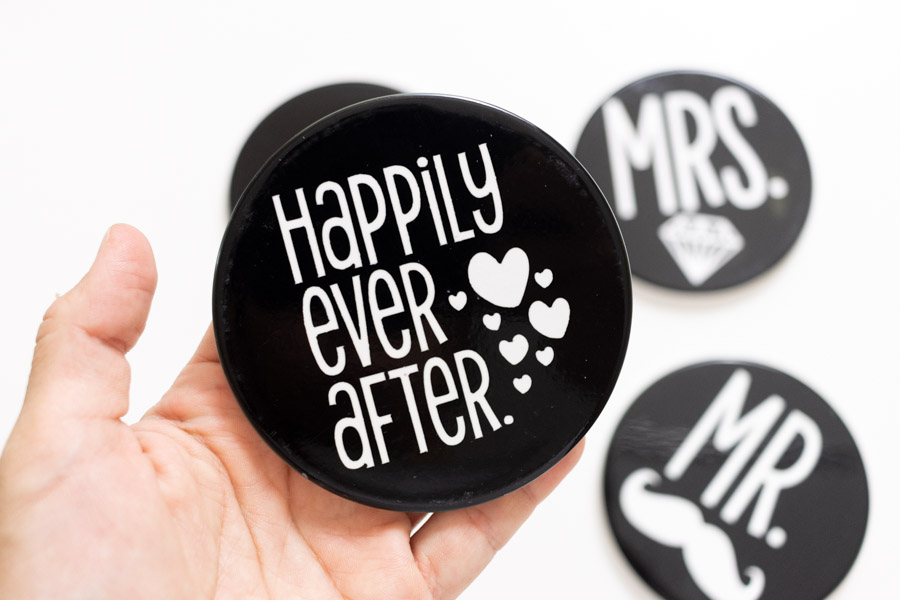
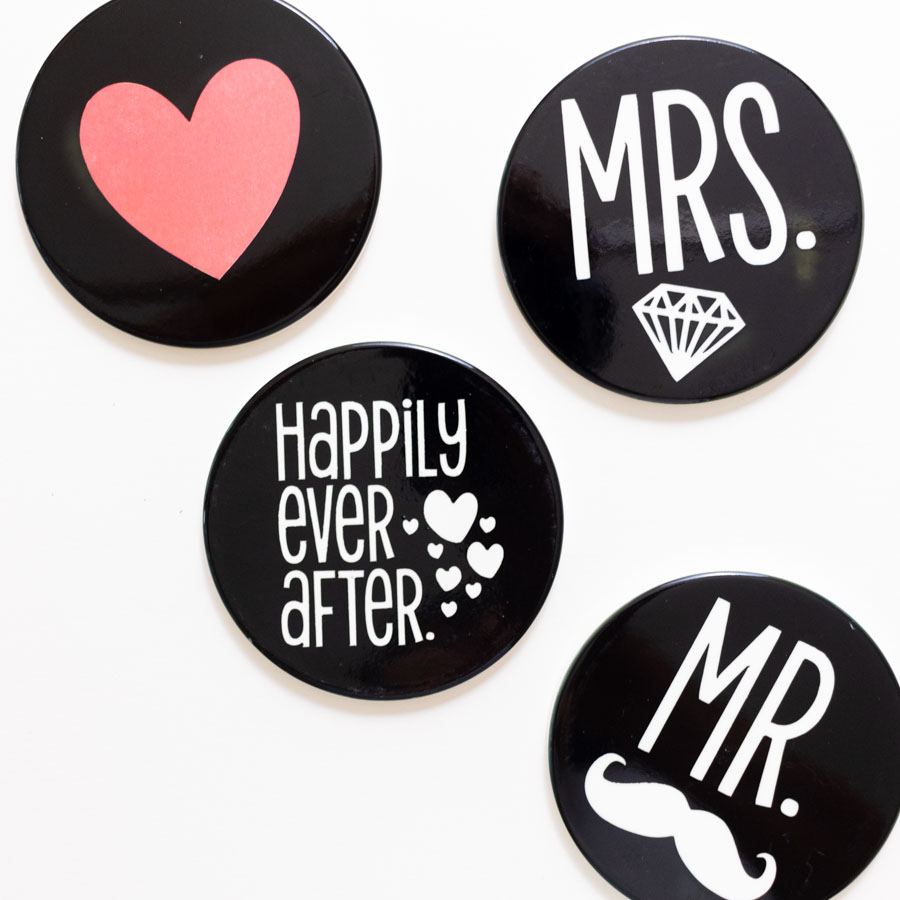
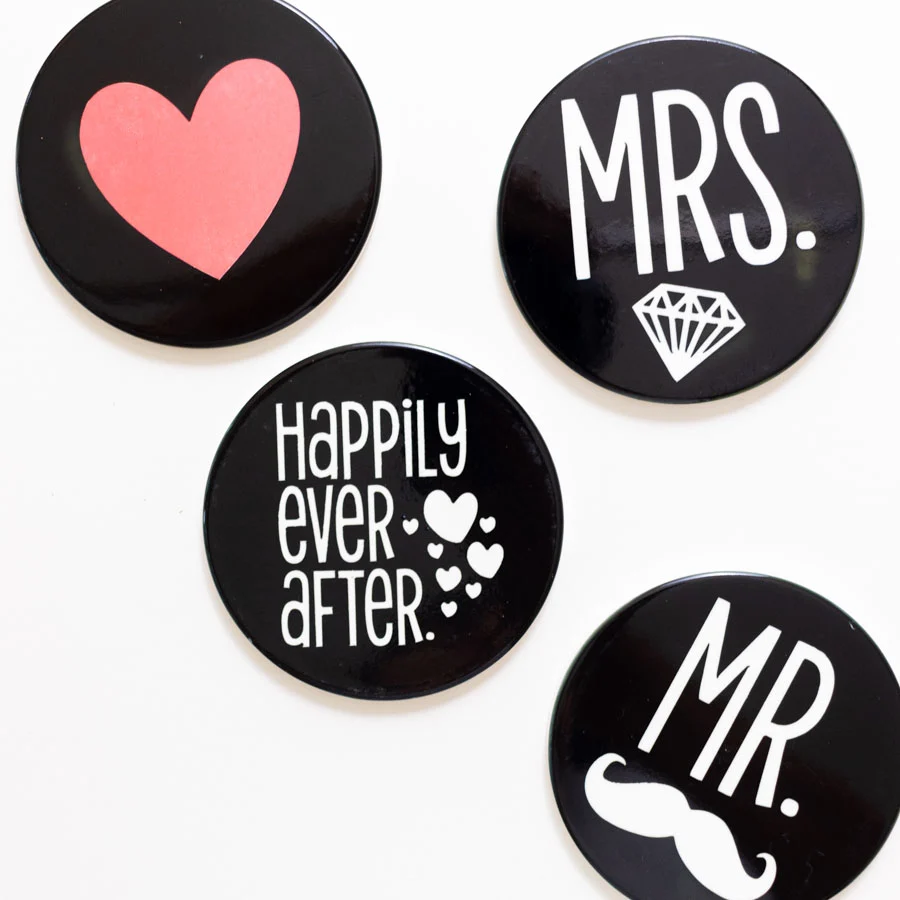
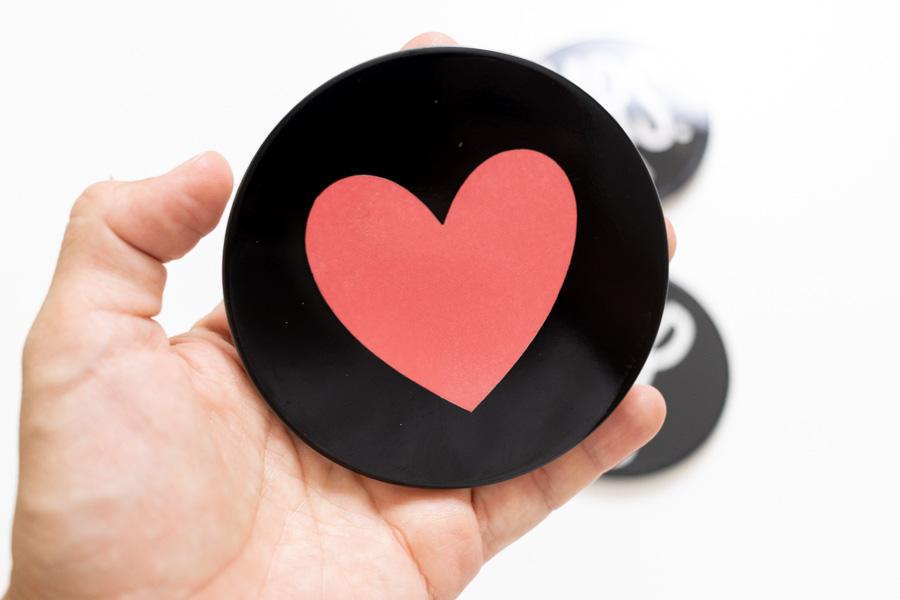
And can we talk about this cute set of ceramic coasters?
They are perfect for a wedding gift!

This is another coaster made with Cricut’s images!

Which one is your favorite one?

I love them all!
Sharing is Caring!
Do you know it takes me over 25 hours to complete a single Cricut article? I know it’s wild! But I like to make sure that you understand EVERYTHING!
I would appreciate your support on Instagram / Pinterest / YouTube / as I am trying to grow my audience to keep producing great content!
Donna
Sunday 13th of March 2022
Thank you, I’ve been trying to start infusible ink. You gave me a push!
Franne Henry
Saturday 5th of March 2022
Thank you for taking the time to teach newbies like myself to the world of Cricut! You gave me inspiration! Good luck with the new baby! (I shared on a couple of forums)
Judy
Saturday 5th of March 2022
I have not tried infusible products, but after reading this I am going to give it a try. I want to make a set of coasters for a wedding gift, something personal for the bride a groom. I know I need to practice first. What type of coasters should I try this on first. Your instructions are so complete, thank you for doing all this!! Wish me luck!!
Catalina
Tuesday 17th of May 2022
I like the cork ones better because they are faster and also easier to manage!
Kay
Saturday 26th of February 2022
Thank you for all the work that you put into these tutorials. I have used several and I just have to say they as so easy to understand.
Lorrene
Thursday 1st of July 2021
Just wondering why you stopped YouTube, seems everytime I find someone I like to watch they quit.
Catalina
Thursday 1st of July 2021
I am getting started soon. I had a baby and it’s been so busy. This is just what I needed to keep filming, a little push!